Managing Canvases, Layers, and Objects in the Sidebar
Most of the work you do in OmniGraffle is on the canvas. That’s where you draw things, but managing your OmniGraffle project happens mostly in the Sidebar. Positioned to the left of the canvas, the Sidebar serves many purposes.
The Sidebar is divided into four different tabs, with the Layers tab being the primary view. You use the Layers tab to keep track of the canvases, layers, and objects in your project, but there’s lots more you can do here; for example:
- You can use the Guides tab to add, position, and change the colors of ruler guides.
- You can use the Outline tab to enter structured, hierarchical outlines to create diagrams and flowcharts.
- You can use the Selection tab to view the objects in your project by a variety of styles, making it easier for you to mass-select objects and work on them independently from everything else on the canvas.
This chapter provides you with a thorough look at OmniGraffle’s new Unified Sidebar.
Meet the (New) Sidebar
One of the big UI refinements you’ll discover is the new Sidebar. The sidebar helps you manage your work, providing you with quick access to the canvases, layers, and objects in your project in one convenient location.
Along the top of the Sidebar, you’ll see four tabs for getting at every aspect of your project. By default, new projects expose the Layers tab in the Sidebar.
To switch between the different tabs, you can either click the buttons along the top of the Sidebar, or you can use the following keyboard shortcuts:
- Layers (Option-Command-2)
- Guides (Option-Command-3)
- Outline (Option-Command-4)
- Selection (Option-Command-5)
You have many options for hiding and showing the Sidebar:
- Click the Hide/Show Sidebar button in the toolbar
- Choose View ▸ Hide/Show Sidebar in the menu bar
- Use the Option-Command–1 keyboard shortcut
Similarly, you can hide and show the Inspector bar on the other side of the canvas by pressing Shift-Command-I. These two keyboard shortcuts come in handy when you want to hide everything while working on the canvas.
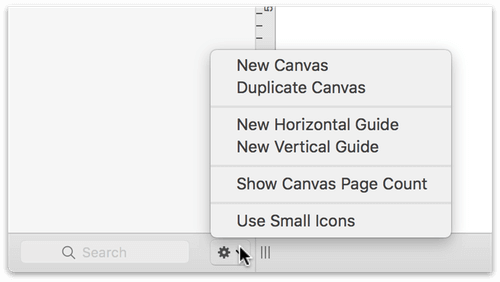
You can also choose to have more of a compact view in the Sidebar, which is particularly helpful when you have a project with a lot of canvases or layers. Control-/Right-click in the Sidebar, and choose Use small icons from the contextual menu that appears:
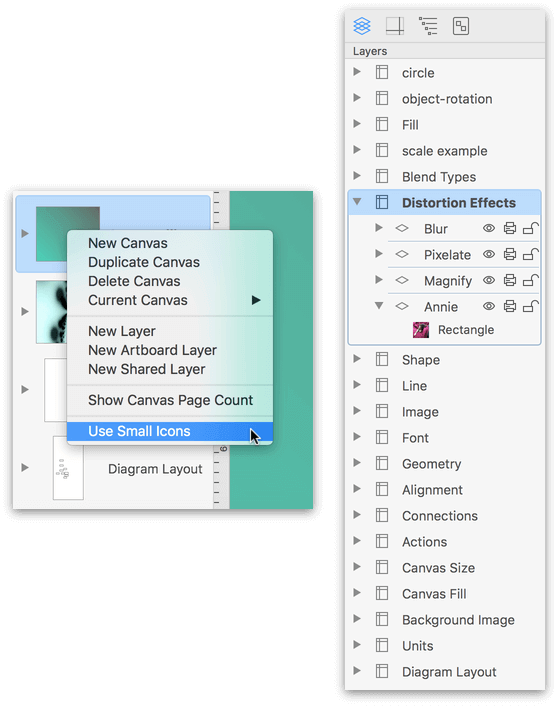
The Sidebar's contextual menu also contains the handy Show Canvas Page Count option, which toggles display of the number of printed pages each canvas requires. This number is based on page dimensions set in Page Setup, Canvas Size and Units set in the Canvas Inspector, and Margins set in the Document Inspector.
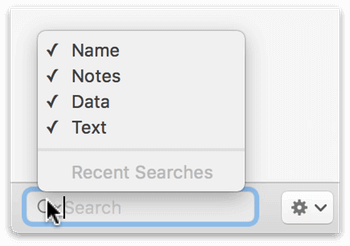
Use the Search field at the bottom of the Sidebar to isolate objects by a specific string of text. As you enter characters, OmniGraffle starts narrowing down the selection so you can find what you need, when you need it. Click the Search field’s magnifying glass to isolate the search criteria to text found in the object’s Name, Notes, Data, or Text, and to examine any recent searches you have conducted.
The following sections provide you with an overview of the four Sidebar tabs.
The Layers Tab 
The Layers tab is likely where you will conduct most of your Sidebar-related work. The Layers tab lists everything in your OmniGraffle project: canvases, layers, and everything you’ve drawn on those layers.
Differentiating Between Layer Types in the Sidebar
Depending on which version of OmniGraffle you have—Standard or Pro—there are three different types of layers that you can add to your project:
- Standard Layer — The most basic form of Layer; every canvas you create has at least one standard layer. Standard layers are unique to each canvas in your project; meaning, their contents cannot be shared with other canvases.
-
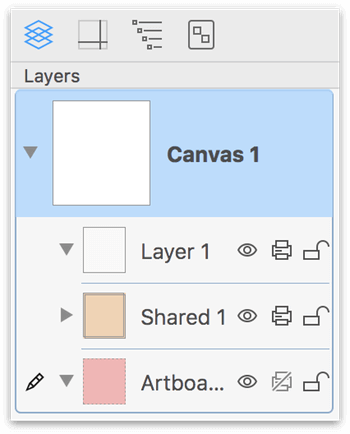
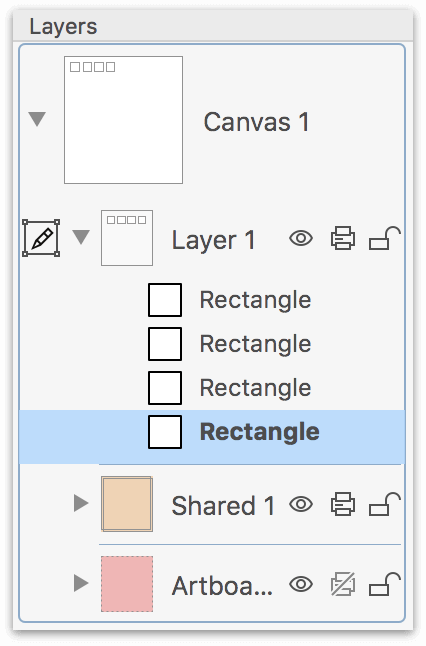
Shared Layer (PRO) — Shared Layers are layers that you can share across all of the canvases in your project. Shared Layers, when empty, have an orangish-brown background color in the sidebar. Similarly, the objects on a Shared Layer take on the same orangish-brown color as a highlight. Use a Shared Layer in projects where you need a repeating element across the different canvases, such as adding a header or footer, or adding printers’ crop marks to your design.
-
Artboard Layer (PRO) — Artboard Layers have many different uses (as you’ll see in Using Artboards (PRO)), but the key thing to know is that they affect objects on layers above the Artboard Layer. Artboard Layers, when empty, have a red background color in the sidebar. Similarly, the objects on an Artboard Layer take on the same red color as a highlight color.
A Guide to the Layer Icons
When you look at the Layers tab in the Sidebar, you’ll notice a series of icons next to each layer. These icons provide you with a quick visual reference as to that layer’s current state.
Let’s take a closer look.
-
Immediately to the left of the Canvas and Layer name is a square preview image. The Canvas Preview shows everything that’s on all visible layers in that canvas; the Layer Preview shows the objects on that particular layer.
-
Each layer has a three icons to the right of the layer name:
-
Visible or Hidden:
 means that the layer is visible; a layer is hidden (not visible) when its icon is . Objects on Hidden layers are not visible in the Canvas Preview, but they are, however, visible on the Layer Preview. Additionally, hidden layers are not exported or printed.
 -
Printable or Not-Printable:
 means that the objects on this layer are printable; or, not printable if you see this icon
  . In the Export panel, you can opt to allow non-printing layers to be included as part of the export.
 -
Unlocked or Locked:
 indicates that the layer is unlocked and objects on that layer can be moved around. When the layer is locked
  , the objects on that layer cannot be moved and you cannot add anything else to that layer until the layer is unlocked.
-
-
When you are working on a layer, the layer will have a
 to the left of its disclosure triangle. If the layer is locked and you select the layer, you’ll see
  , which indicates that you cannot add to or change anything on that layer until it is unlocked .
 -
If you have an object selected on an editable layer, the pencil gets a little object box around it
 .
.
For more information about Shared and Artboard Layers, see Sharing Layers with Multiple Canvases (PRO) or Using Artboards (PRO).
Adding a New Layer to a Canvas
There are many options for adding a new layer to a Canvas:
- Click the New Layer button in the toolbar
- Choose Edit ▸ Layers ▸ New Layer from the menu bar
- In the Layers sidebar, right-click on the Canvas and choose New Layer from the contextual menu that appears
- Right-click on the Canvas and choose Layers ▸ New Layer from the contextual menu that appears
- Click
 at the bottom of the Sidebar and choose New Layer from the Action menu
Before adding a new layer to your project, you may wish to switch to the Layers tab in the Sidebar, by either choosing View ▸ Show Contents ▸ Layers, or by pressing Option-Command-2.
Moving and Duplicating Layers
To move a layer from one canvas to another, simply click-and-drag the layer from one canvas to the next.
If what you want is a duplicate of the layer, do one of the following:
- Select the layer in question and choose Edit ▸ Layers ▸ Duplicate Layer
- Control-/Right-click on the layer and choose Duplicate Layer from the contextual menu that appears
- Control-/Right-click on the canvas and choose Layers ▸ Duplicate Layer from the contextual menu that appears
- Click at the bottom of the Sidebar and choose Duplicate Layer from the Action menu
Merging Layers
If your project has multiple layers and you’d like to combine the shapes and objects on two layers onto a single layer, you can do that by selecting the layers and choosing Edit ▸ Layers ▸ Merge Layer Down.
As the menu option implies, OmniGraffle relies on the layer stacking order when merging layers. The layers must be on top of each other in the Layers sidebar; you cannot merge non-contiguous layers.
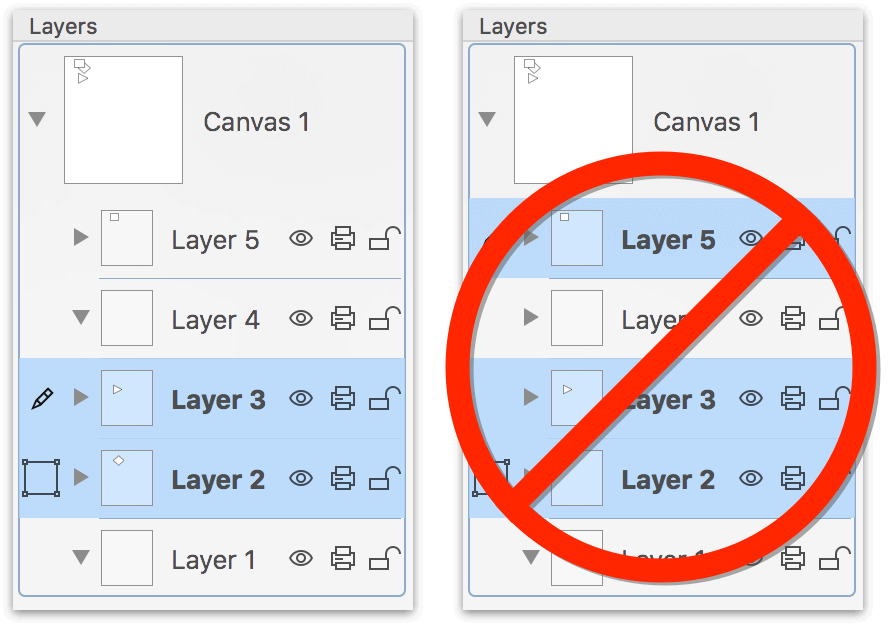
At left in the previous image, the objects on Layer 3 would merge down into Layer 2. However, if you were to choose Merge Layer Down with the selection shown on the right, Layer 5 would merge into Layer 4—and Layers 3 and 2 would remain unchanged.
Deleting a Layer
To delete a layer from a Canvas:
- Select the layer in question and press the Delete key
- Select the layer in question and choose Edit ▸ Layers ▸ Delete Layer
- Control-/Right-click on the layer and choose Delete Layer from the contextual menu that appears
- Control-/Right-click on the canvas and choose Layers ▸ Delete Layer from the contextual menu that appears
- Click at the bottom of the Sidebar and choose Delete Layer from the Action menu
And remember, if you delete a layer by accident, you can always hit Command-Z to restore the layer.
A Canvas must have at least one layer, so you can never delete every single layer in a project.
Changing Canvas, Layer, and Object Names in the Sidebar
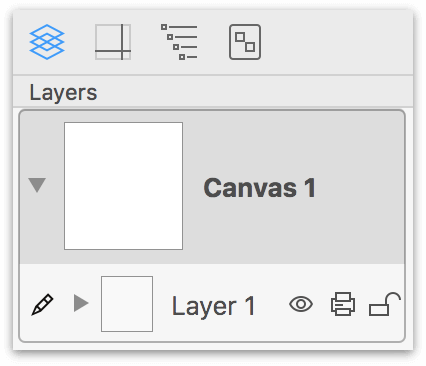
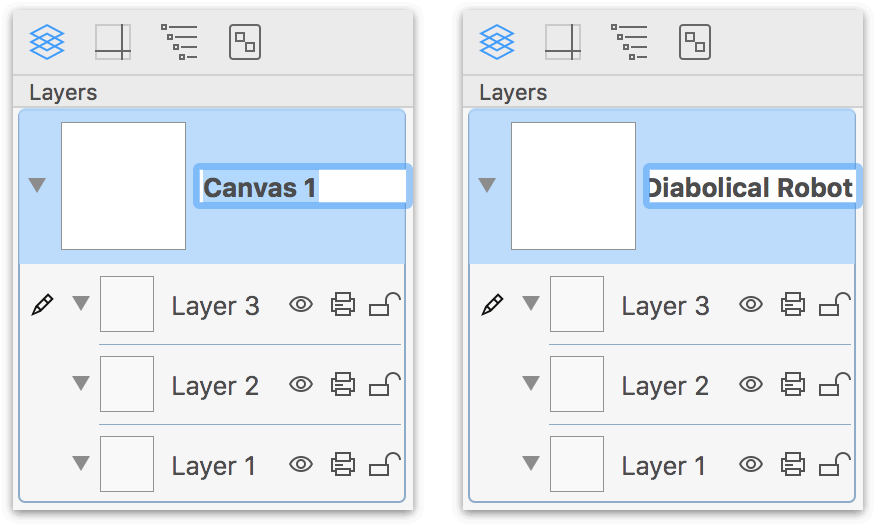
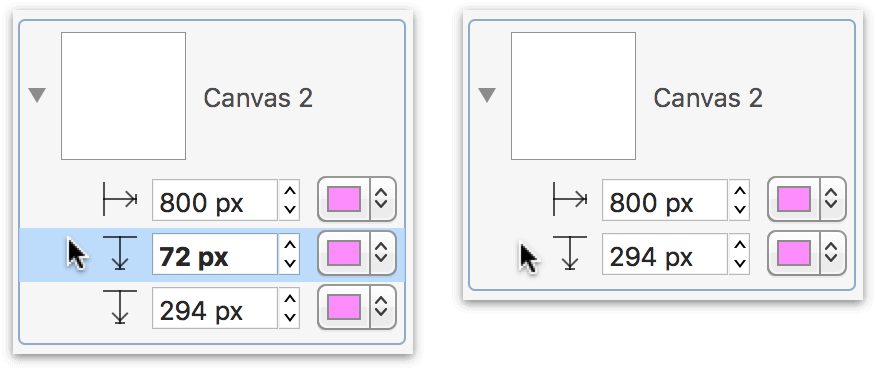
As you add new objects, layers, and canvases to your projects, you’ll notice that their names in the sidebar aren’t all that informative. For example, new projects start with Canvas 1 as the canvas name, or Layer 1 as that canvas’s first layer. Create a new layer for that canvas, and it’s name is Layer 2 and so on. Add a new canvas to the project, and it gets named Canvas 2.
These names are just placeholders, and they await your thing-labeling skills to assign them names that make sense for the project in which you are working. For example, to change the name of Canvas 1 to something else, double-click on the Canvas Name to make the name editable, and then enter something logical, such as Project Workflow or My Diabolical Robot.
The same theory applies to Layer Names; you’ll want to change the names of individual layers so that each one denotes its purpose in the project. For example, to change the name of Layer 1, double-click on the Layer Name to make the name editable, and then enter something logical, such as Basic Shapes or Left Foot.
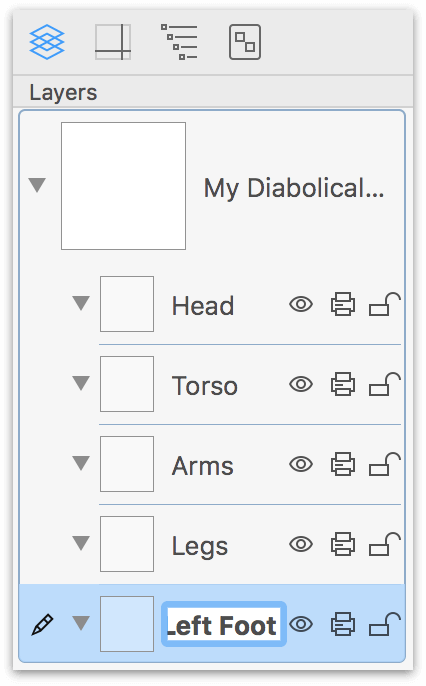
And using a similar process, you can change the name of the shapes or objects on the layers of your project. No longer are you stuck with a project full of Rectangles; you can change those to Squares or Robot’s Big Toe, if you’d like.
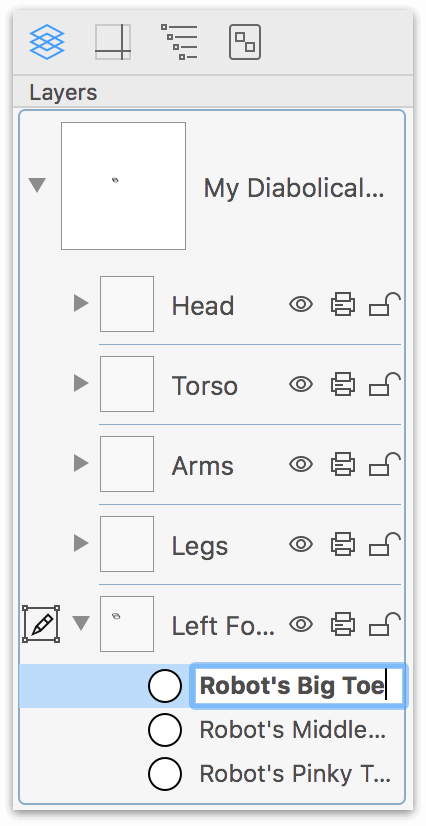
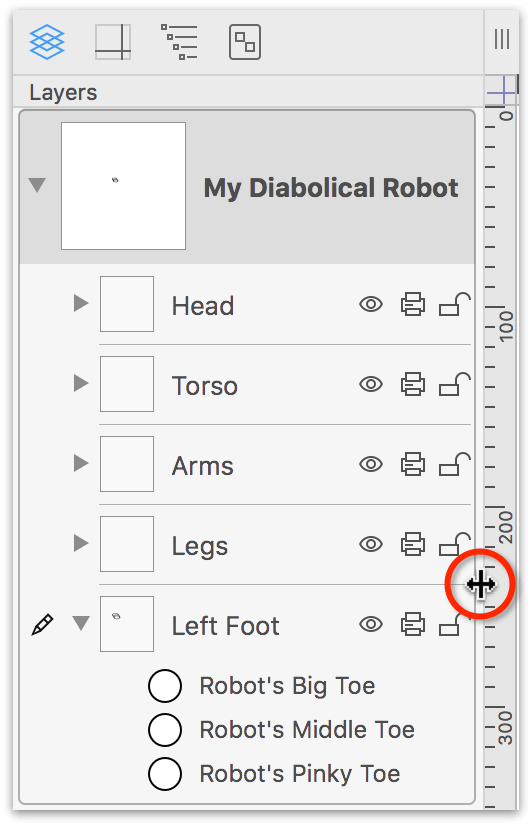
If you enter a long name for something, as shown in the previous image, that’s okay. OmniGraffle truncates the name for display purposes only; however, the width of the sidebar is expandable. Click in the space between the sidebar and the canvas’s vertical ruler, and then drag left or right as needed.
Naming the canvases, layers, and objects helps you to quickly identify where things are in your project.
The Guides Tab 
OmniGraffle comes with a full complement of guides that you can use to perfectly align objects on the canvas. There are Ruler Guides, Smart Alignment Guides, and Smart Distance Guides; however, only the Ruler Guides—the guides which you can drag onto the canvas from the left and top ruler bars—can be managed from the Sidebar.
To learn more about Smart Alignment Guides and Smart Distance Guides, see Basic Concepts, earlier in this guide.
You can use a combination of Ruler Guides and OmniGraffle’s Smart Guides to position and perfectly align objects on the canvas. To add a Ruler Guide to your canvas, click and hold on either the top or left ruler bar and then drag a guide onto the canvas.
You can also click the Action menu at the bottom of the Sidebar, and choose New Horizontal Guide or New Vertical Guide, depending on which one you need.
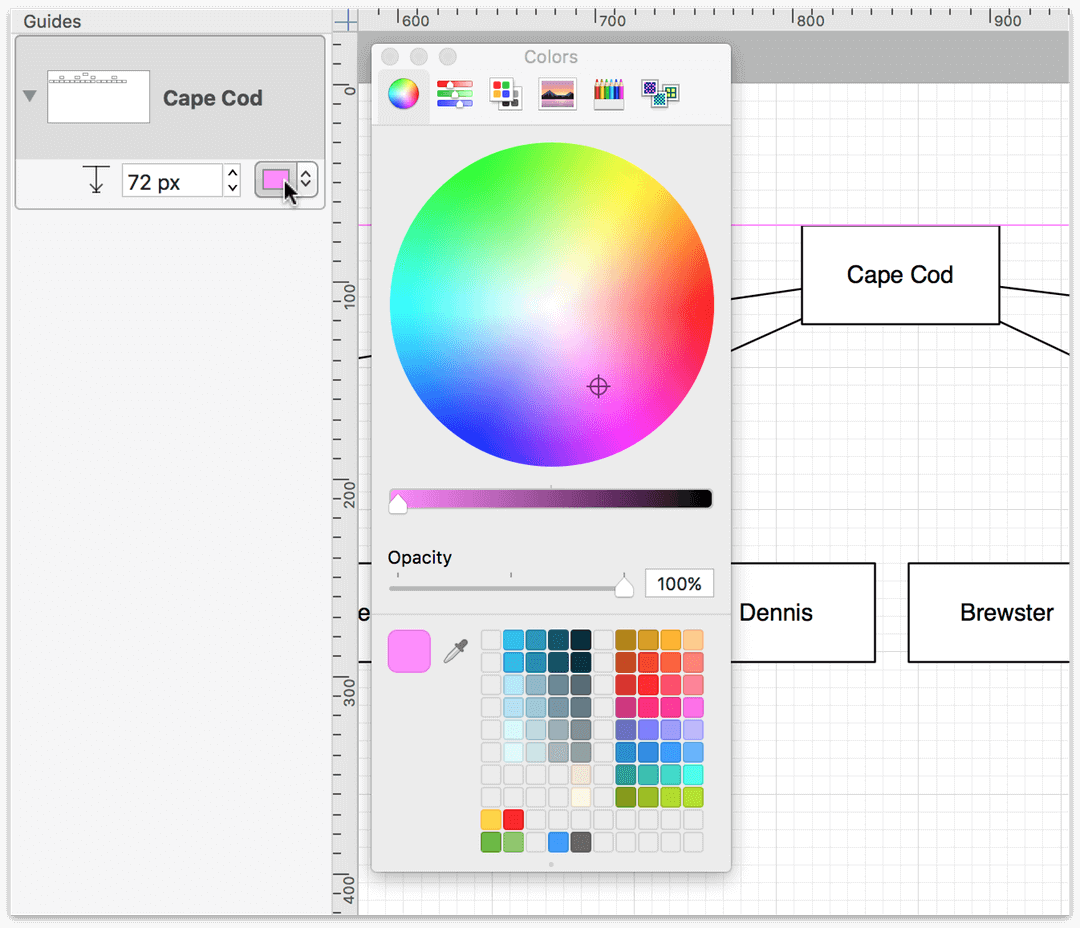
The Ruler Guides are bright pink by default, but you can change the color by clicking the pop-up menu to the right of each guide in the Sidebar. When you do, the Colors window appears, allowing you to change the color to anything you’d like.
There’s no limit to the number of Ruler Guides you can drag onto the canvas, so don’t be shy.
You can also change the guide colors using the Appearance preference pane. For more details, see Appearance, earlier in this guide.
Hiding Ruler Guides
Okay, so you took our advice and you weren’t shy about using Ruler Guides. You’ve used plenty of them...and that’s okay.
But now you need to see what your masterpiece looks like without all of the guides in the way. Easy-peasy! To hide the Ruler Guides, click one of the rulers, and to make them reappear, click the rulers again.
Duplicating Guides from an Existing Canvas to a New Canvas
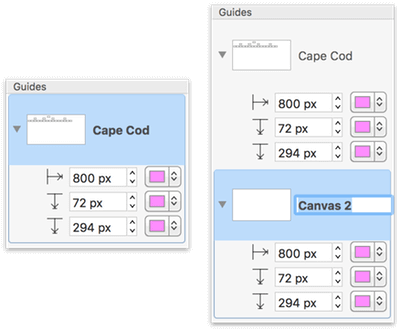
When you add a new canvas to a project, that canvas adopts the Ruler Guides of the previously selected canvas. For example, if you have Ruler Guides set up on Canvas 1 and you click New Canvas in the toolbar, Canvas 2 appears with the same Ruler Guides applied.
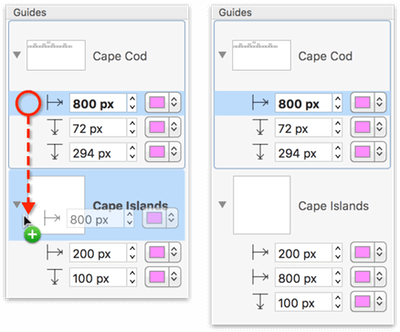
However, Ruler Guides can be canvas-independent; meaning, you can have different Ruler Guides on each canvas.
Copying Ruler Guides from One Canvas to Another
Let’s say that you’ve been working on a project with multiple canvases, each with multiple Ruler Guides. You decide to copy a newly created shape to another canvas, and there’s a Ruler Guide that you’d like to go along with it. You could always drag out a new Ruler Guide on that canvas, but then you need to move it into position. Instead, you can select a Ruler Guide that exists on one canvas and drag it into the canvas that you’d like it on.
Deleting a Ruler Guide
To delete a Ruler Guide, you can drag the guide back toward the ruler and it disappears. If you are using an Infinite Canvas, be sure to drag the guide to the ruler, since there are no bounds for the canvas itself. You can also delete Ruler Guides from the Guides tab by clicking to select the guide you want to delete from the canvas, and then press the Delete key.
The Outline Tab 
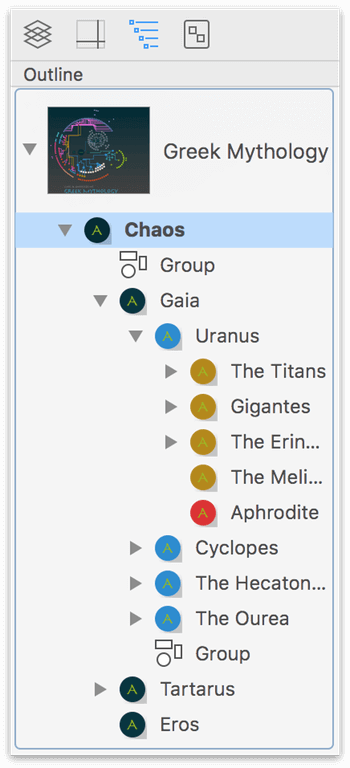 The Outline tab gives you a quick way to enter structured data to create hierarchical diagrams. The Outline shows any shapes you’ve created on the canvas, arranged hierarchically according to the lines that connect them.
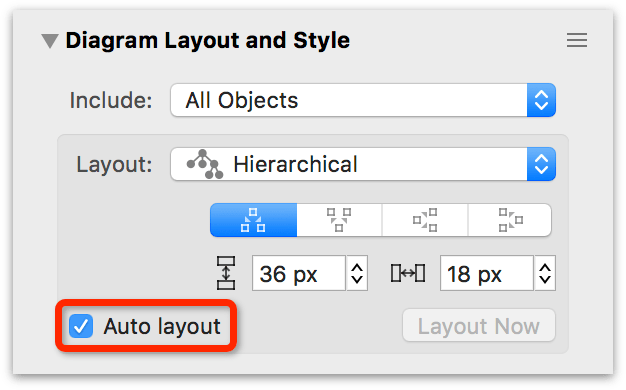
Likewise, as you enter text into an Outline, shapes are automatically created and connected on the canvas with a corresponding text label. To help facilitate the flow of creating an outline, however, you should turn on Auto layout in the Diagram Layout and Style inspector.
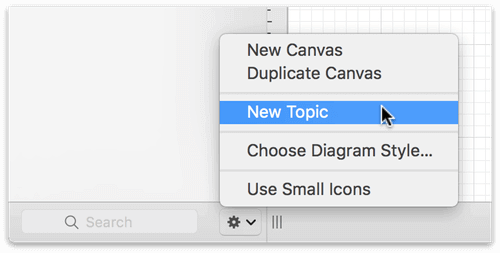
To create an entirely new outline, click the Action menu at the bottom of the Sidebar and choose New Topic.
While you work in the Outline tab, the following keys can be used to create and arrange items:
- Return — creates a “peer” of the currently selected item. Peers appear on the same indentation level in the outline, and, if they are beyond the top level, have connections from the same parent object in the diagram.
- Tab — indents the currently selected item, making it a “child” of the item above it in the outline. A connection line is drawn in the diagram from the parent object to the child object.
- Shift-Tab — outdents the currently selected item, making it a peer of what used to be its parent.
- Escape (esc) — switches between selecting an item and editing the item’s text.
Additional options and keyboard shortcuts for quickly building outlines can be found in Edit ▸ Outlining.
You can rearrange items in the Outline tab by selecting and dragging the item to another location in the Outline. Dragging an item with children brings its children along for the ride. While you drag an item, a blue line shows the location and indentation level at which the item will be dropped when you let go of the mouse button.
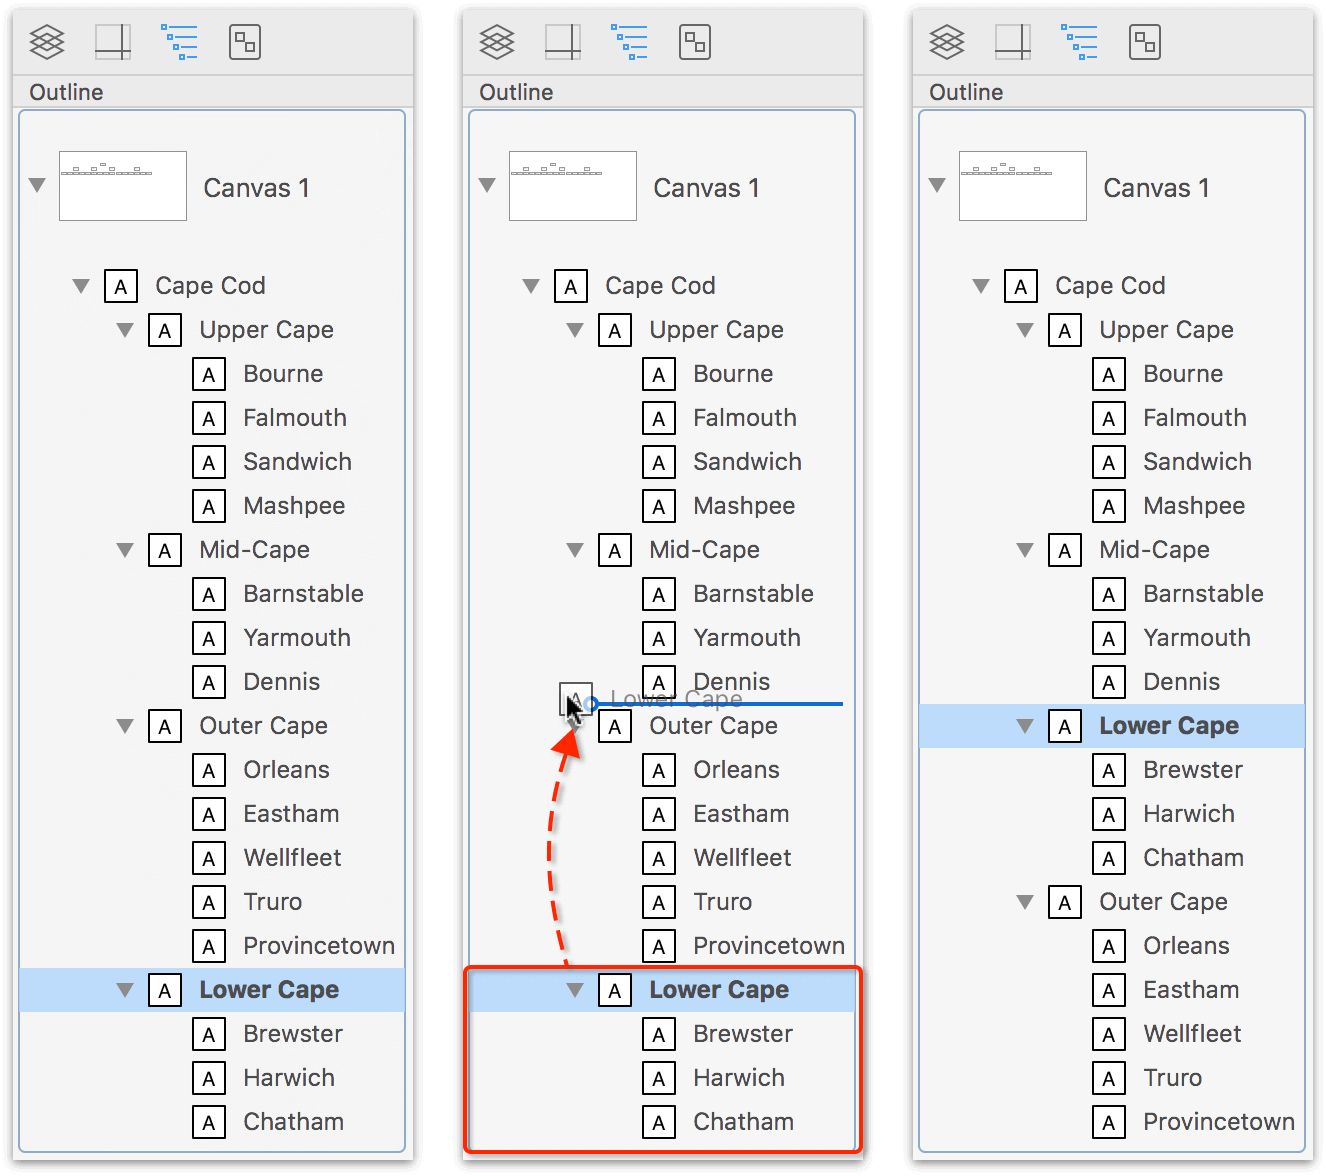
A group, table, or subgraph on the canvas is shown as a single item in the Outline. To view the contents of the group, table, or subgraph in the Outline, you will need to ungroup those objects first.
While the Outline Editor is handy for quickly entering lots of information, an outline cannot always perfectly represent the relationships in a complicated diagram. Objects with more than one parent, lines connected to other lines, and circular ancestry are all examples of the kinds of things a simple outline can’t properly show. In these cases, the Outline tab tries its best to be accurate. If your diagram is not strictly tree-like, you probably shouldn’t rely too much on the Outline if what you need is a quick representation of the objects’ relationships.
The Selection Tab 
The Selection tab gives you the ability to cloak or reveal the different elements in your project, making it easy for you to examine and apply styles to the objects in your project.

Along the top of the Selection tab, you will see a row of tiny Style Selection buttons that look oddly familiar. Each button corresponds to the styles you can set for the shapes on the Canvas.
All of these are on by default, and this gives you the finest level of granularity when evaluating your objects. But as you turn one—or all—of them off, you’ll notice that the previews in the Selection tab become more compact.
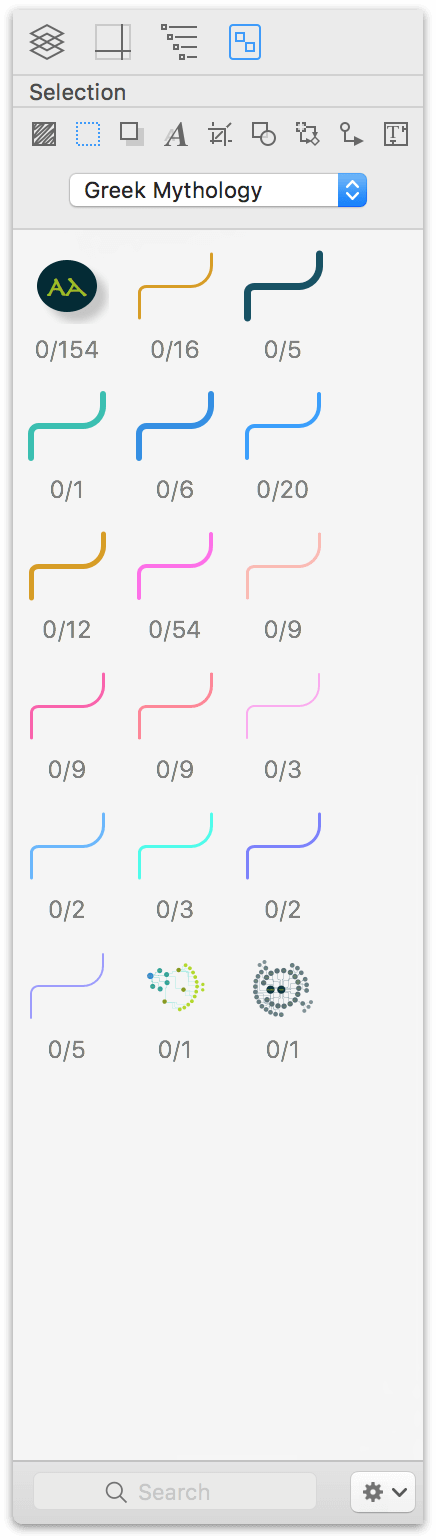
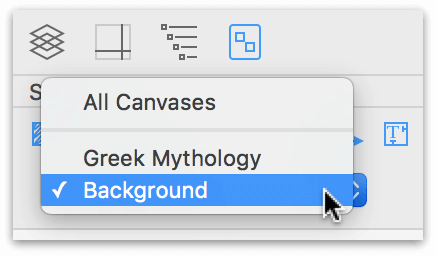
Beneath that row of tiny buttons, you’ll also find a pop-up menu, which lets you select individual canvases in your project, or All Canvases for getting the full scope of your project.
Sharing Layers with Multiple Canvases (PRO)
You can share a layer between multiple canvases. That way, whenever you change the layer, it affects every canvas that uses that layer.
To create a new Shared Layer, do one of the following:
- Choose Edit ▸ Layers ▸ New Shared Layer
- In the Layers sidebar, Control-/Right-click on the desired canvas and choose New Shared Layer from the contextual menu that appears
- Control-/Right-click on the canvas and choose Layers ▸ New Shared Layer from the contextual menu that appears
These methods create a Shared Layer on the current canvas only. To apply the new Shared Layer to other canvases, click to select it in the Layers sidebar and drag it to the other canvases where you want it to show up.
To convert an existing layer to a Shared Layer:
- Choose Edit ▸ Layers ▸ Layer Settings ▸ Shared Layer
- In the Layers sidebar, Control-/Right-click on an existing layer and choose Layer Settings > Shared Layer from the contextual menu that appears
These methods convert the selected layer to a Shared Layer and apply it to all canvases in the project immediately.
Shared Layers have an orange tint added to the Layer Preview, and the objects on the Shared Layer also gain an orange highlight color when selected on the canvas.
After adding a new Shared Layer:
- Add and edit objects on the layer normally.
- Any further changes you make to any copy of the layer are also applied to all other copies of it.
To delete a Shared Layer, do one of the following:
- Select the Shared Layer and press the Delete key
- Choose Edit ▸ Delete from the menu Bar
- Control-/Right-click on the Shared Layer and select Delete Layer in the contextual menu
- Click the and select Delete Layer from the Action menu at the bottom of the sidebar
Deleting a Shared Layer in this way only removes the currently selected instance of the layer.
To remove all instances of the layer from the document, Control-/Right-click on one of them in the Layer sidebar and choose Delete (layer name) from All Canvases, or choose Delete (layer name) from All Canvases from the Action menu at the bottom of the sidebar.