Using the Resource Browser
The Resource Browser is your headquarters for creating and accessing documents in OmniOutliner. It provides an interface for easily finding your recent work, or getting a jump start on a new outline by starting out with a Template.
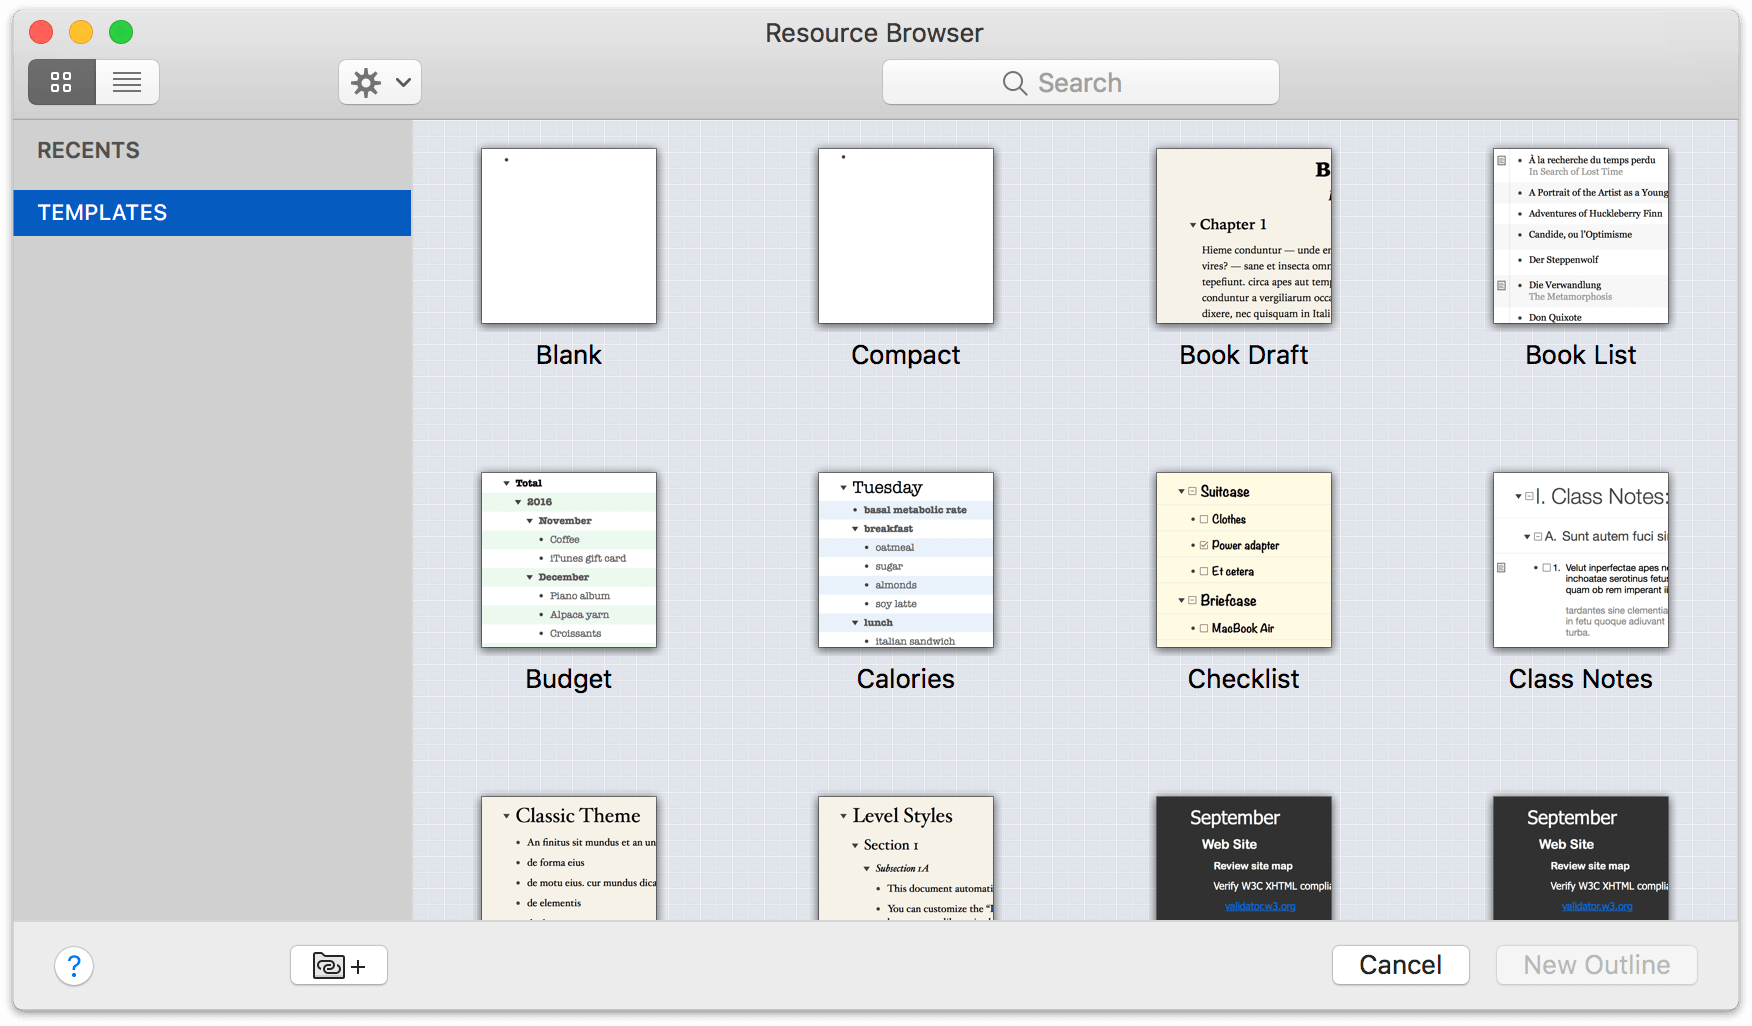
By default the Resource Browser is what you see when you go to create a new document. If you’ve set it otherwise in Preferences, you can still open the Resource Browser with File ▸ Resource Browser (Shift-Command-N).
The sidebar on the left of the browser contains two sections:
-
The Recents section is similar to choosing File ▸ Open Recent from the menu bar. You’ll find a list of recently-opened files which you can select and open quickly. Mouse over Recents in the sidebar to reveal a control for showing or hiding subfolders for recent Documents and Templates, respectively.
Click a recently opened file and then click Open to view and resume editing the file.
-
The Templates section offers an easy way to create a new document from one of the pre-styled templates included with OmniOutliner. Mouse over Templates in the sidebar to reveal a control for showing or hiding subfolders grouped by template style.
To create a new document from a template, select it in the Resource Browser and then click New Outline. A new file is created, pre-populated with styles (and often some placeholder row content).
For a detailed preview of a recently opened document or template, choose it in the browser and tap the Spacebar to open a QuickLook view. (To close the QuickLook view, just tap the Spacebar again and the preview window goes away.)
The Resource Browser Toolbar
The Resource Browser’s toolbar has several useful controls:

-
On the left is a toggle that switches between a Thumbnail view and a List view of the browser window contents (either Recents or Templates). The list view holds an alphabetized summary of the available documents, including Name, Date Last Modified, and Date Created.
-
The Resource Browser’s Action menu
 sits above the sidebar, and contains several useful items for interacting with the browser.
 Here you can open or create new templates, reveal where a particular resource lives on your Mac, move an object to Trash, or set a particular template that you’re fond of as the default.
If you would like to import templates you’ve saved elsewhere, choose Add Resources to Library to select a file or template you’d like to add to OmniOutliner’s locally stored collection (see Managing and Working with Templates for details).
Use the Restore option in the Action menu to restore any of the default templates that you might have discarded earlier.
-
Finally, a Search field quickly filters the available templates or recent documents to find a favorite among a long list of options.
Managing and Working with Templates
If you have a document styled just so and would like to preserve its style setup for future use, you can save it as a template (File ▸ Save As Template). This creates an .otemplate file version of the document, and makes it available as a template from the Resource Browser in the Templates section.
By default, templates live in a folder nestled deep in OmniOutliner’s app directory on your Mac. This doesn’t mean you can’t use Finder to get at them, though.
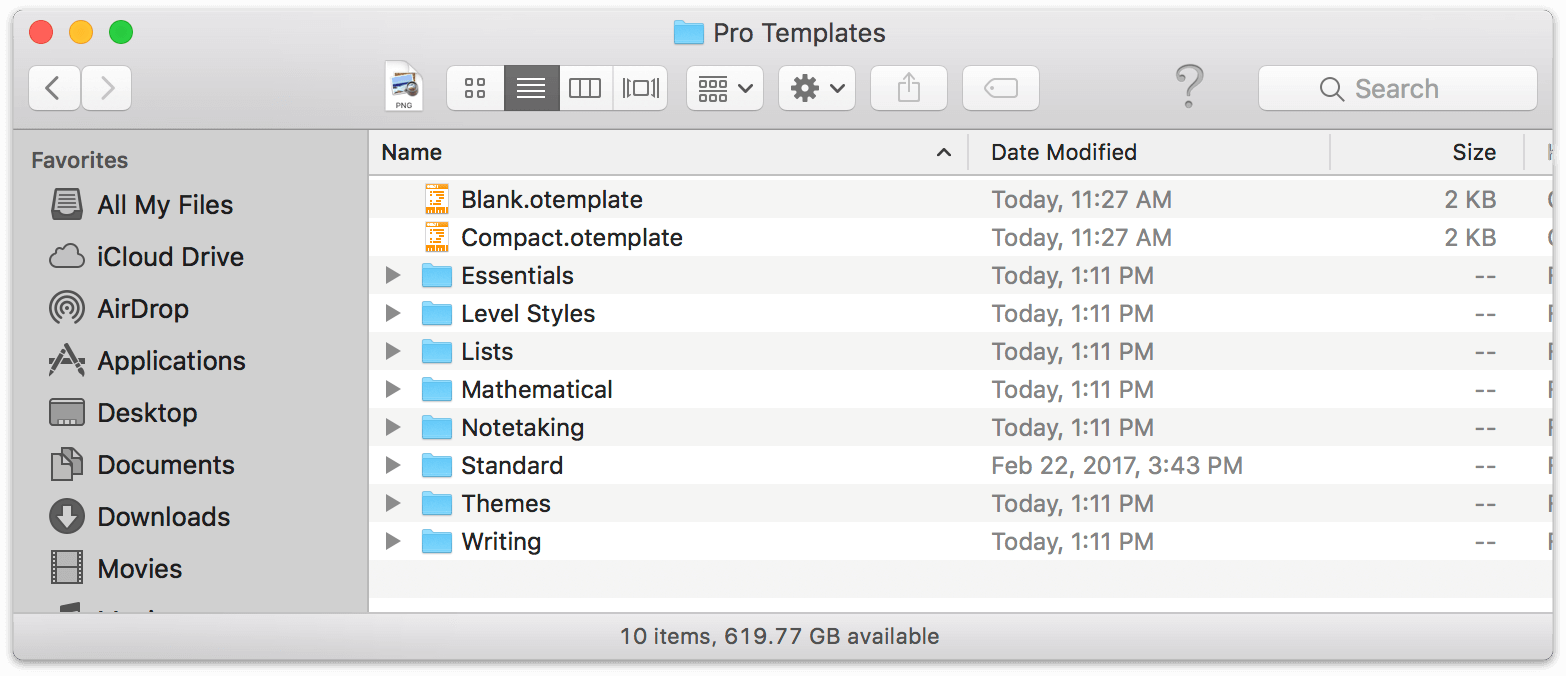
To access your templates in Finder, select one, click the Action menu  and choose Show in Finder. A new Finder window pops open and places you inside the template’s folder. Once here, you can perform any action you’d normally use Finder for. Change template names, move the ones you don’t want to the trash, or add subfolders so you can categorize themes for certain tasks.
If you have a template saved somewhere outside OmniOutliner’s internal Template folder that you would like add, use the Action menu’s Add Resources to Library command to bring them in from the cold. Select a .otemplate file and it is added to your local collection. (If you would like to add that template straight to a specific subfolder, select it in the Resource Browser’s sidebar first—otherwise it will be added to the Miscellaneous subfolder. You can always choose Show in Finder and reorganize your templates later, of course.)
Linking Template Folders on your Mac to OmniOutliner
If you would prefer to keep your templates stored outside of OmniOutliner’s internal folder, you can do it by adding a Linked Folder to the Templates section of the Resource Browser sidebar. Start by clicking the Linked Folder button ![]() . Next, choose a folder in the sheet that appears and click Open to add the folder to the Resource Browser’s sidebar.
. Next, choose a folder in the sheet that appears and click Open to add the folder to the Resource Browser’s sidebar.
Any .otemplate files in the folder will automatically be displayed in the Resource Browser when the folder is selected in the sidebar.
To remove a Linked Folder from the Resource Browser’s sidebar, select the folder in question, click  , and then choose Remove Linked Folder.
One reason to use a linked folder rather than relying on OmniOutliner’s internal Templates folder is that you can use OmniPresence to sync that folder between your Macs and iOS devices with OmniOutliner installed. That way, your custom templates are accessible anywhere!