Using the Toolbar
Along the top of OmniOutliner’s window is the Toolbar. Packed with buttons and fully customizable, the Toolbar puts many useful controls just a click away.

Above you’ll see the Toolbar in its default layout. At opposing ends you’ll find buttons for hiding and showing the Sidebar (on the left) and the Inspectors (on the right, next to the Search field). Above those, you’ll find the standard macOS window controls for Closing or Hiding the window or zooming to Full Screen mode.
At the center of the Toolbar along the top, you’ll see a Document Icon. If you hold down the Command key (⌘) and click that icon, you’ll get a menu that shows you where the file is stored on your Mac.
Next to the Document Icon is the Filename, with a small chevron to its right. Clicking this chevron opens a popup window in which you can change the name of the file, add keyword/metadata tags to help make the file easier to find using Spotlight, or move the file to another location on your Mac.
Below the filename, a variety of controls are laid out as buttons you can click to add to or modify the contents of your outline. The default set is designed to be useful for many common applications, but there are many more options available depending on your needs.
Customizing the Toolbar
You can customize the Toolbar by adding additional buttons or rearranging their order to suit your needs.
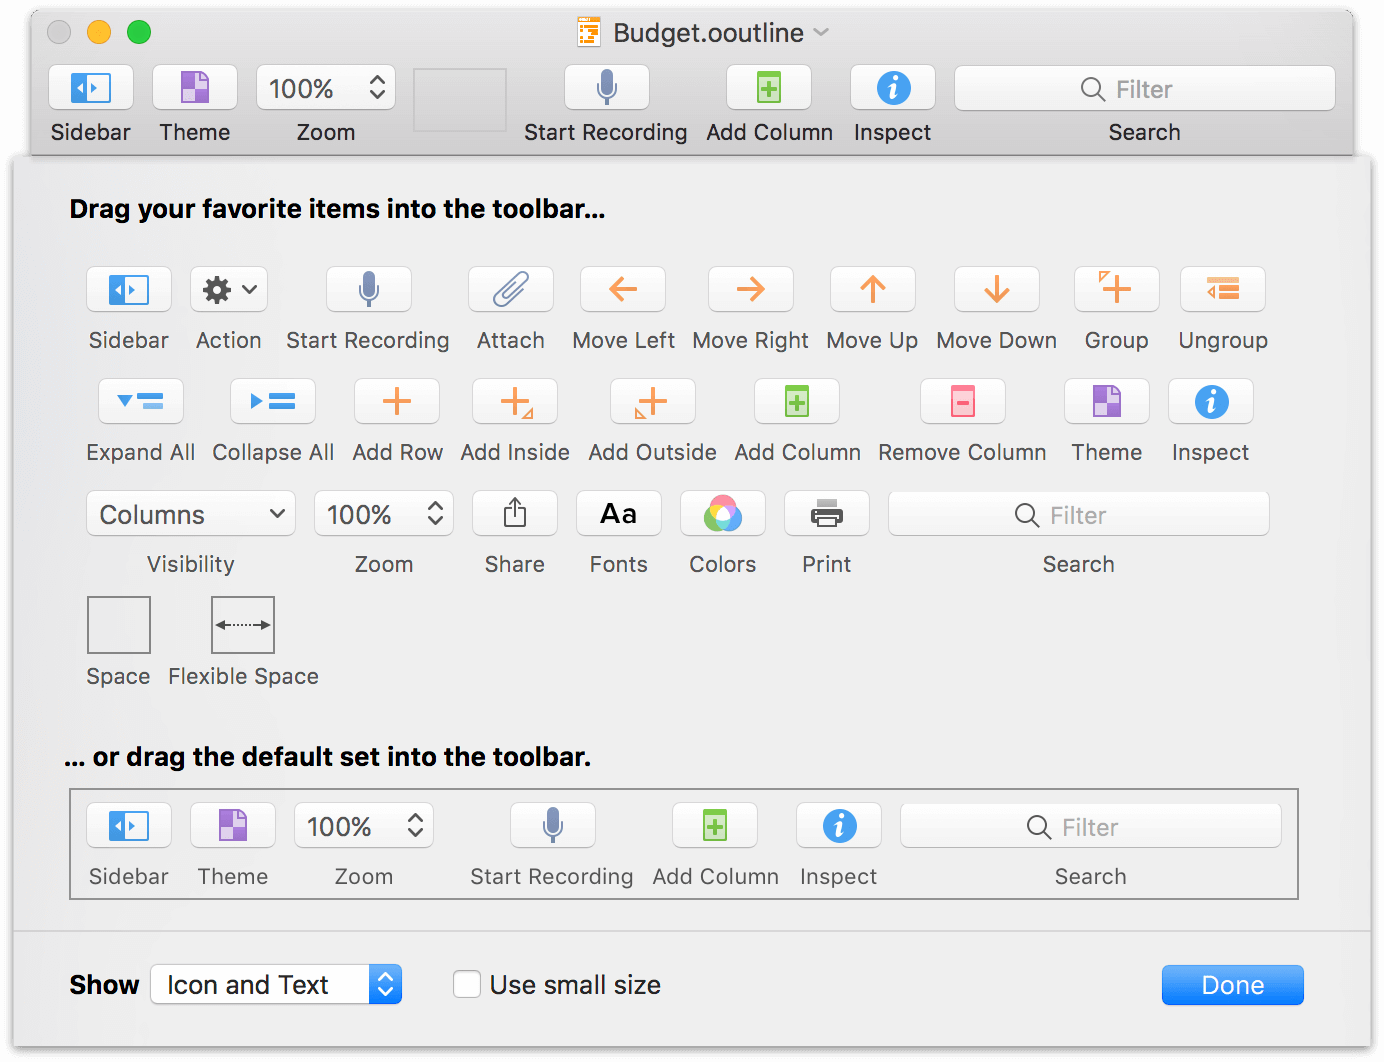
To customize the Toolbar, choose View ▸ Customize Toolbar or Control-click on the Toolbar and select Customize Toolbar. When you do, a sheet slides down from under the Toolbar, revealing a slew of function-related buttons that you can drag up to the Toolbar. When you’ve finished making changes to the Toolbar, click Done.
The changes you’ve made to the Toolbar are saved along with OmniOutliner’s preferences, so that you’ll see the same Toolbar options with every document you create.
To reset the Toolbar to its default set, drag the bottom row of buttons up to the Toolbar and then click Done.
Any changes you make to the Toolbar’s tools and buttons apply to the Toolbar for all of your OmniOutliner documents. If there’s a different, unique set of tools that you use frequently with a certain outline, you can create document-specific toolbars by choosing View ▸ Create Document-Specific Toolbar.
If you decide later that you no longer want that custom Toolbar, choose View ▸ Remove Document-Specific Toolbar and the Toolbar reverts back to the default button set.
Toolbar Button Details
When customizing the Toolbar, many of the available buttons have effects that are obvious or identical to the menu commands of the same name. Some of them warrant further explanation, which follows in the sections below.
Using the Action Menu
The Toolbar’s Action menu  includes many of the commonly used options that you’ll find in the Edit, Format, View, and Organize menus. Rather than spreading these out over four different menus, we’ve placed the ones we feel you’ll use most in this compact Action menu for every document you’re working on.
The contents of the action menu change based on your selection. With nothing selected, the only item in the menu may be Paste; with one or more items selected in the outline, the menu grows contextually.
Using the Share Button
The Share button  offers a way to send content straight from OmniOutliner to other apps on your Mac.
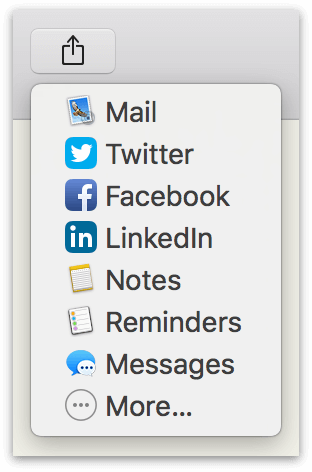
Click the button to choose from among a list of available destination applications, or click More to customize the list in macOS Settings. When you choose a destination, any rows you have currently selected in the outline, along with their children, will be sent to the destination app as plain text (styles are not preserved).
Hierarchy is shown by children being tab-indented beneath their parent rows, and if you are using status checkboxes (View ▸ Show Status Checkboxes) their state will be indicated before each row as well.
Applying Themes
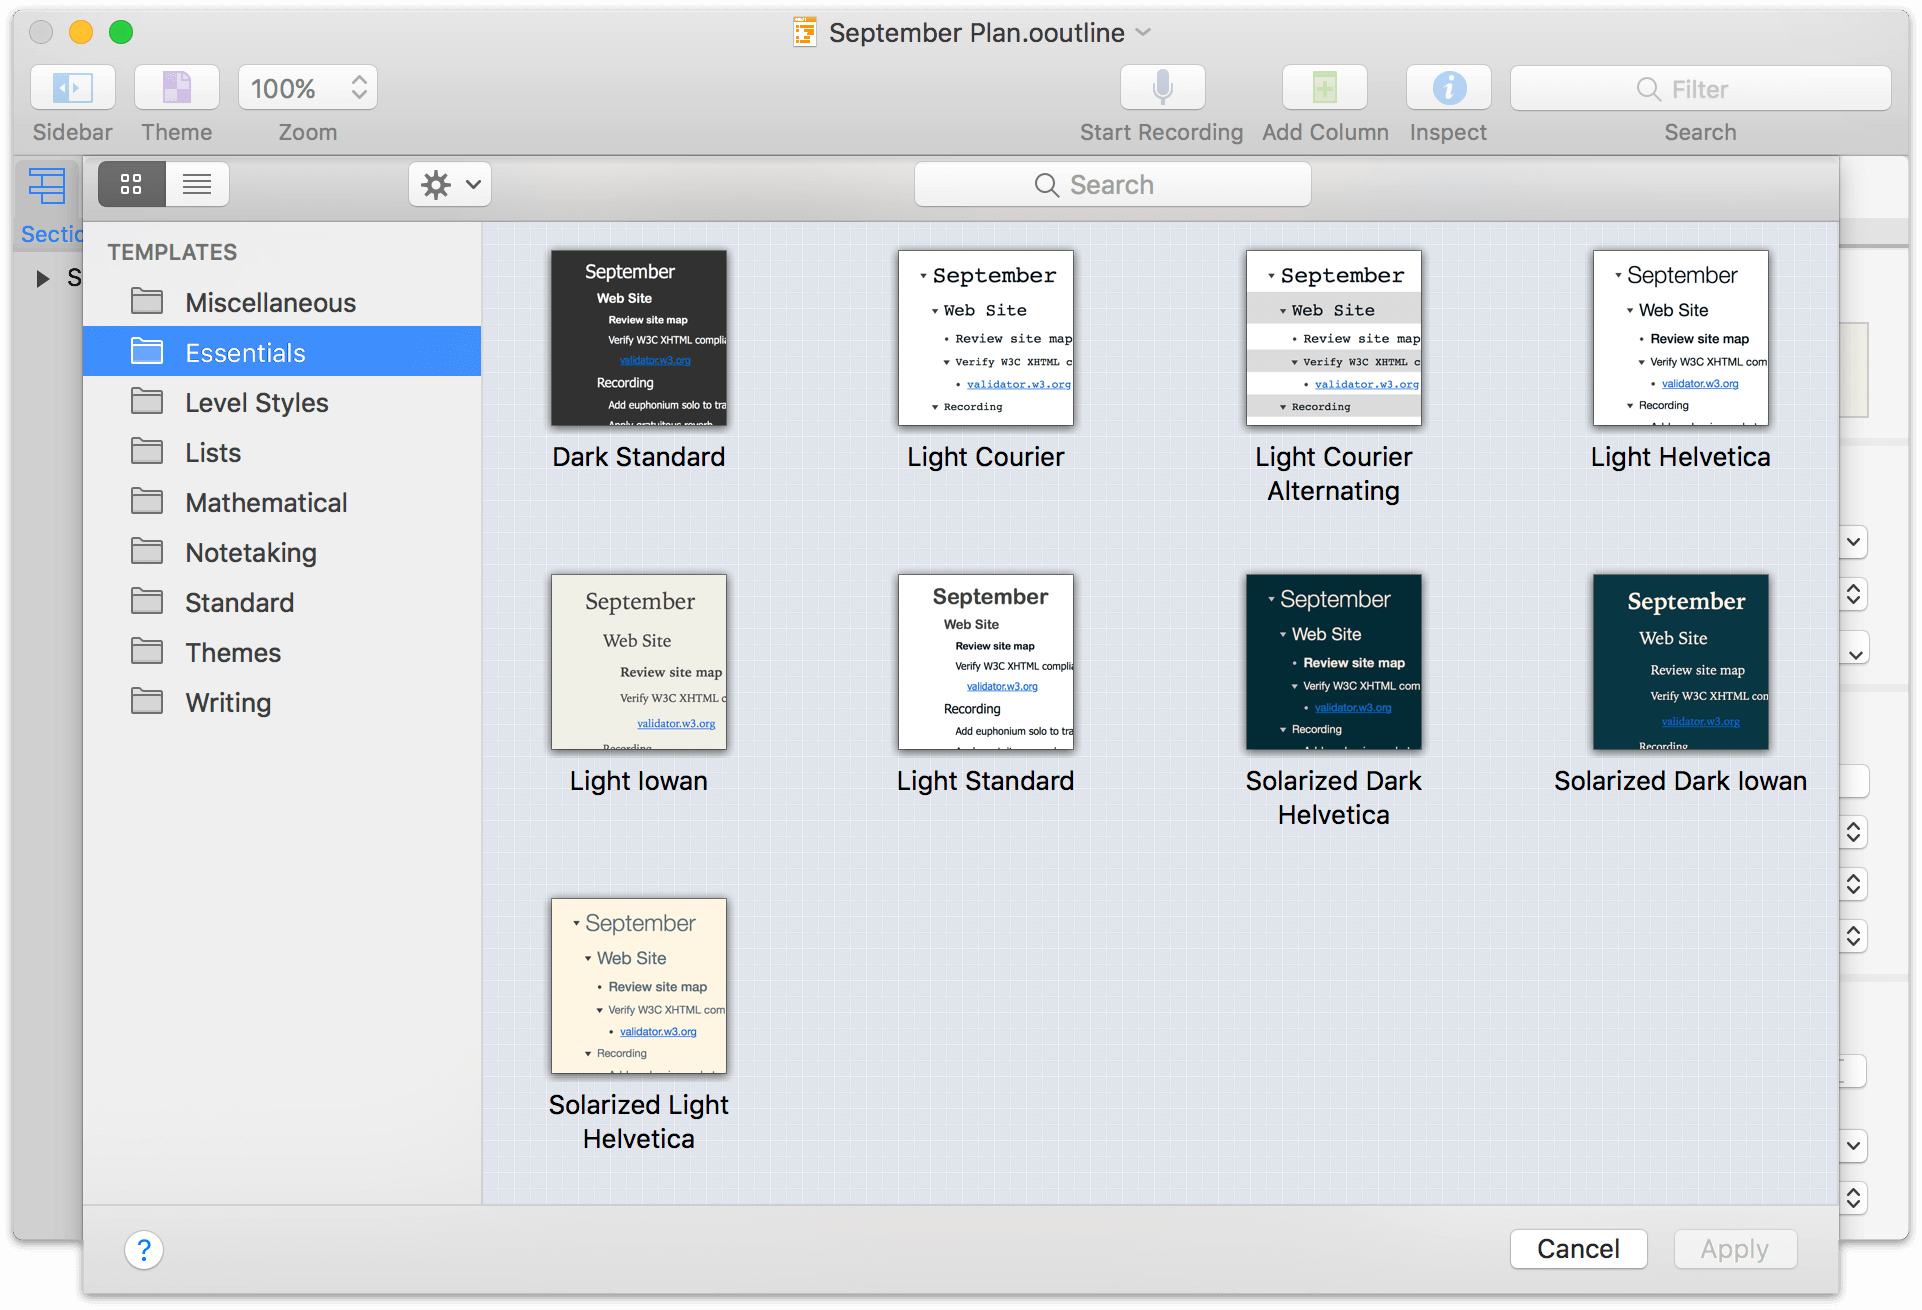
Click the Theme button  in the toolbar or choose Format ▸ Apply Template Theme to open the theme picker and choose a theme to apply to your document.
To theme an outline is to take the set of styles stored in an OmniOutliner .otemplate file and apply them to the current document. This overwrites any existing saved styles in the document’s Styles Sidebar tab (but leaves styles directly applied to text intact).
To access additional themes beyond those included with OmniOutliner by default, you must import the template files that contain those themes into the the app’s Resource Browser. See Managing and Working with Templates for an explanation of this process.
If you would prefer to use a particular template’s theme as the default for future documents, you can choose it in the General pane of OmniOutliner ▸ Preferences (Command-,).
Attaching Files
While OmniOutliner outlines are primarily focused on text, if you have a file that’s relevant to your document (such as an image, a video clip, a PDF file, or even another OmniOutliner document) you can attach it with the Attach button  in the Toolbar.
You can also attach files in other ways:
- Drag anything in from anywhere, including files from a Finder window or images from a webpage. Alternatively, press Control while dragging to add a link to the file instead.
- Choose Edit ▸ Attach File.
- Click the Toolbar’s Action menu and choose Attach File.
When attaching files by any method other than dragging and dropping things into OmniOutliner, you are presented with a file chooser that looks very much like a Finder window. Use the file chooser to navigate through your Mac’s hard drive until you locate the file you’d like to attach.
In the chooser, you’ll notice two options that affect how the file is attached to your OmniOutliner document:
- Embed the file in the document—The default. A copy of the file you’ve attached is embedded within the OmniOutliner file you’re presently working on.
- Create a link to the file—Rather than embedding an exact duplicate of the file, as with the previous option, this copies the file’s location on your Mac’s hard drive into the OmniOutliner document.
The difference between the two options is relevant when sharing or syncing the document beyond your current Mac. For that, you’ll want to go with the default option (Embed the file in the document) so the destination will also receive the attachment. If you choose the other option, all that appears is the icon and the filename of the file you linked from your Mac.
When you attach an image or PDF file, a preview automatically scales to the width of the column in which it appears. Other types of files appear as an icon with their filename.
If you click an image or PDF file you’ve attached, the following popover menu appears:
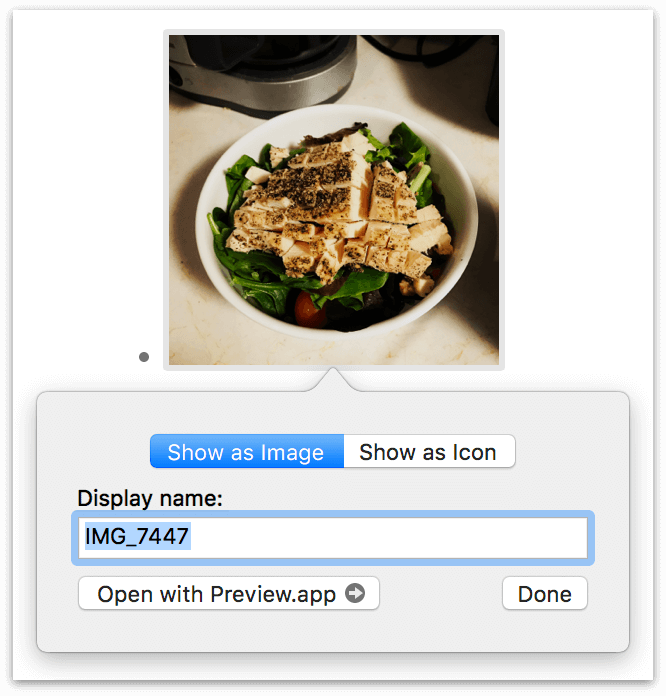
You can choose to have the attachment Show as Image or Show as Icon, and you can change the Display name for the attached file from its filename (the default) to something more descriptive. (Non-image files won’t have the Show as Image and Show as Icon buttons along the top.) To open the file, click the Open with button, which recommends an app to use based on the kind of file you’ve attached.
Recording Audio
You can add recorded audio file attachments to your OmniOutliner document right from within the app. To record something, click the Start Recording button  in the Toolbar; it’s the one that looks like an old-timey microphone. OmniOutliner starts recording the instant you click that button. When you press that button, you’ll also notice a couple changes in the user interface.
First, the text for the microphone button in the Toolbar changes from Start Recording to End Recording. The button also has a small Stop button applied to it. The other change you’ll notice is a red Recording bar appears just beneath the Toolbar.

In the center of the Recording bar, you’ll see a button to Pause recording, which changes the Recording bar’s color to gray, and a checkmark button (Save) to stop recording. In the gray bar, you’ll notice that Recording has changed to Paused, and the Pause button has been replaced with a Resume button.
Click the Resume button to continue recording where you left off, or click the checkmark (Save) button to stop recording. When you stop recording, an audio player clip shows up in your Outline.
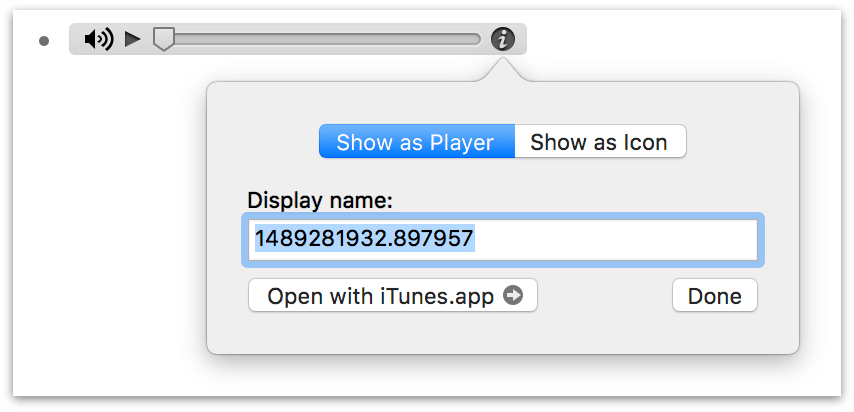
Much like attachments, if you click an audio clip’s Info button (the little i icon at its right edge), a display options popover appears. Here you can opt to have the audio clip show up as a player (the default) or as an icon. More importantly, you can change the audio clip’s Display name from a random number string to something more descriptive. This is particularly important if you choose Show as Icon at the top of the popover.
Check out the Audio Recording Preferences section later in this guide for more information about audio recording options in OmniOutliner.
Using the Search Field
If you have a long document, OmniOutliner’s integrated search field can save the day when you need to find something that’s buried many levels deep in your outline.
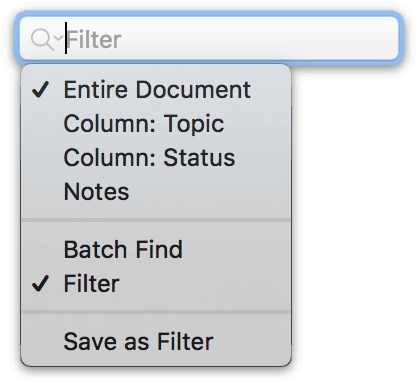
By default, the search field is set to filter your document based on what you enter. Rows in the document that contain matching text are displayed in the outline, while all others are hidden. Click the downward-facing arrow next to the magnifying glass icon to access other options:
-
The first section of the dropdown menu defines the area of the search, from the widest scope (the entire document) to individual columns and notes.
-
The second section toggles between using the search field for filtering or batch finding in the document. Choose Batch Find to display a list of rows matching the search criteria in the Sections tab of the Sidebar. Unlike filtering, the entire outline remains visible when batch finding.
-
Save as Filter, the last option in the menu, creates a new saved filter based on the term entered in the search field. Saved filters can subsequently be re-applied via the View ▸ Row Filters submenu or the Sidebar’s Filters tab, and can be enriched with sophisticated filtering criteria.
Learn more about setting up saved filters in the Filters tab section.
To clear the search field, press Escape or click the icon  at its right edge. If you were previously focused on a particular row or section of your document, OmniOutliner restores the outline to where you were when you cancelled the search.
Customizing the Touch Bar
If your Mac supports it, OmniOutliner uses the Touch Bar to bring the most useful tools and controls to your fingertips.

The Touch Bar adapts based on what is selected in the outline, displaying different controls if you have:
- A row or rows selected
- Text selected
- A column selected
In each instance, a separate palette of contextually relevant controls appears in the Touch Bar. You can further customize each palette by choosing View ▸ Customize Touch Bar and dragging controls to and from the Touch Bar interface.
Any changes you make are saved separately along with each palette, so you’ll always have the most relevant controls available.