Managing a Project
Once work on a project begins, the steps to keep it running aren’t quite as predictably sequential as the ones used to set it up beforehand. The first few steps presented in this chapter are things to keep an eye on regularly, but some of the other tools are more specialized—they aren’t always needed, but when they are, they can be a huge help for keeping work progressing smoothly or correcting the course when unexpected situations arise.
The previous chapter, Building Your First Project, ended after setting the project’s baseline and looking at the Total Cost for the project. The first baseline creates a snapshot of the project in its initial, pre-work, phase, and acts as a point of reference for the original plan when you need one.
Updating Task Completion
As work begins on the project, you can track progress against the baseline by tapping a task currently in progress and moving the slider along to the task’s completion percentage (this can be edited in the Task inspector as well).

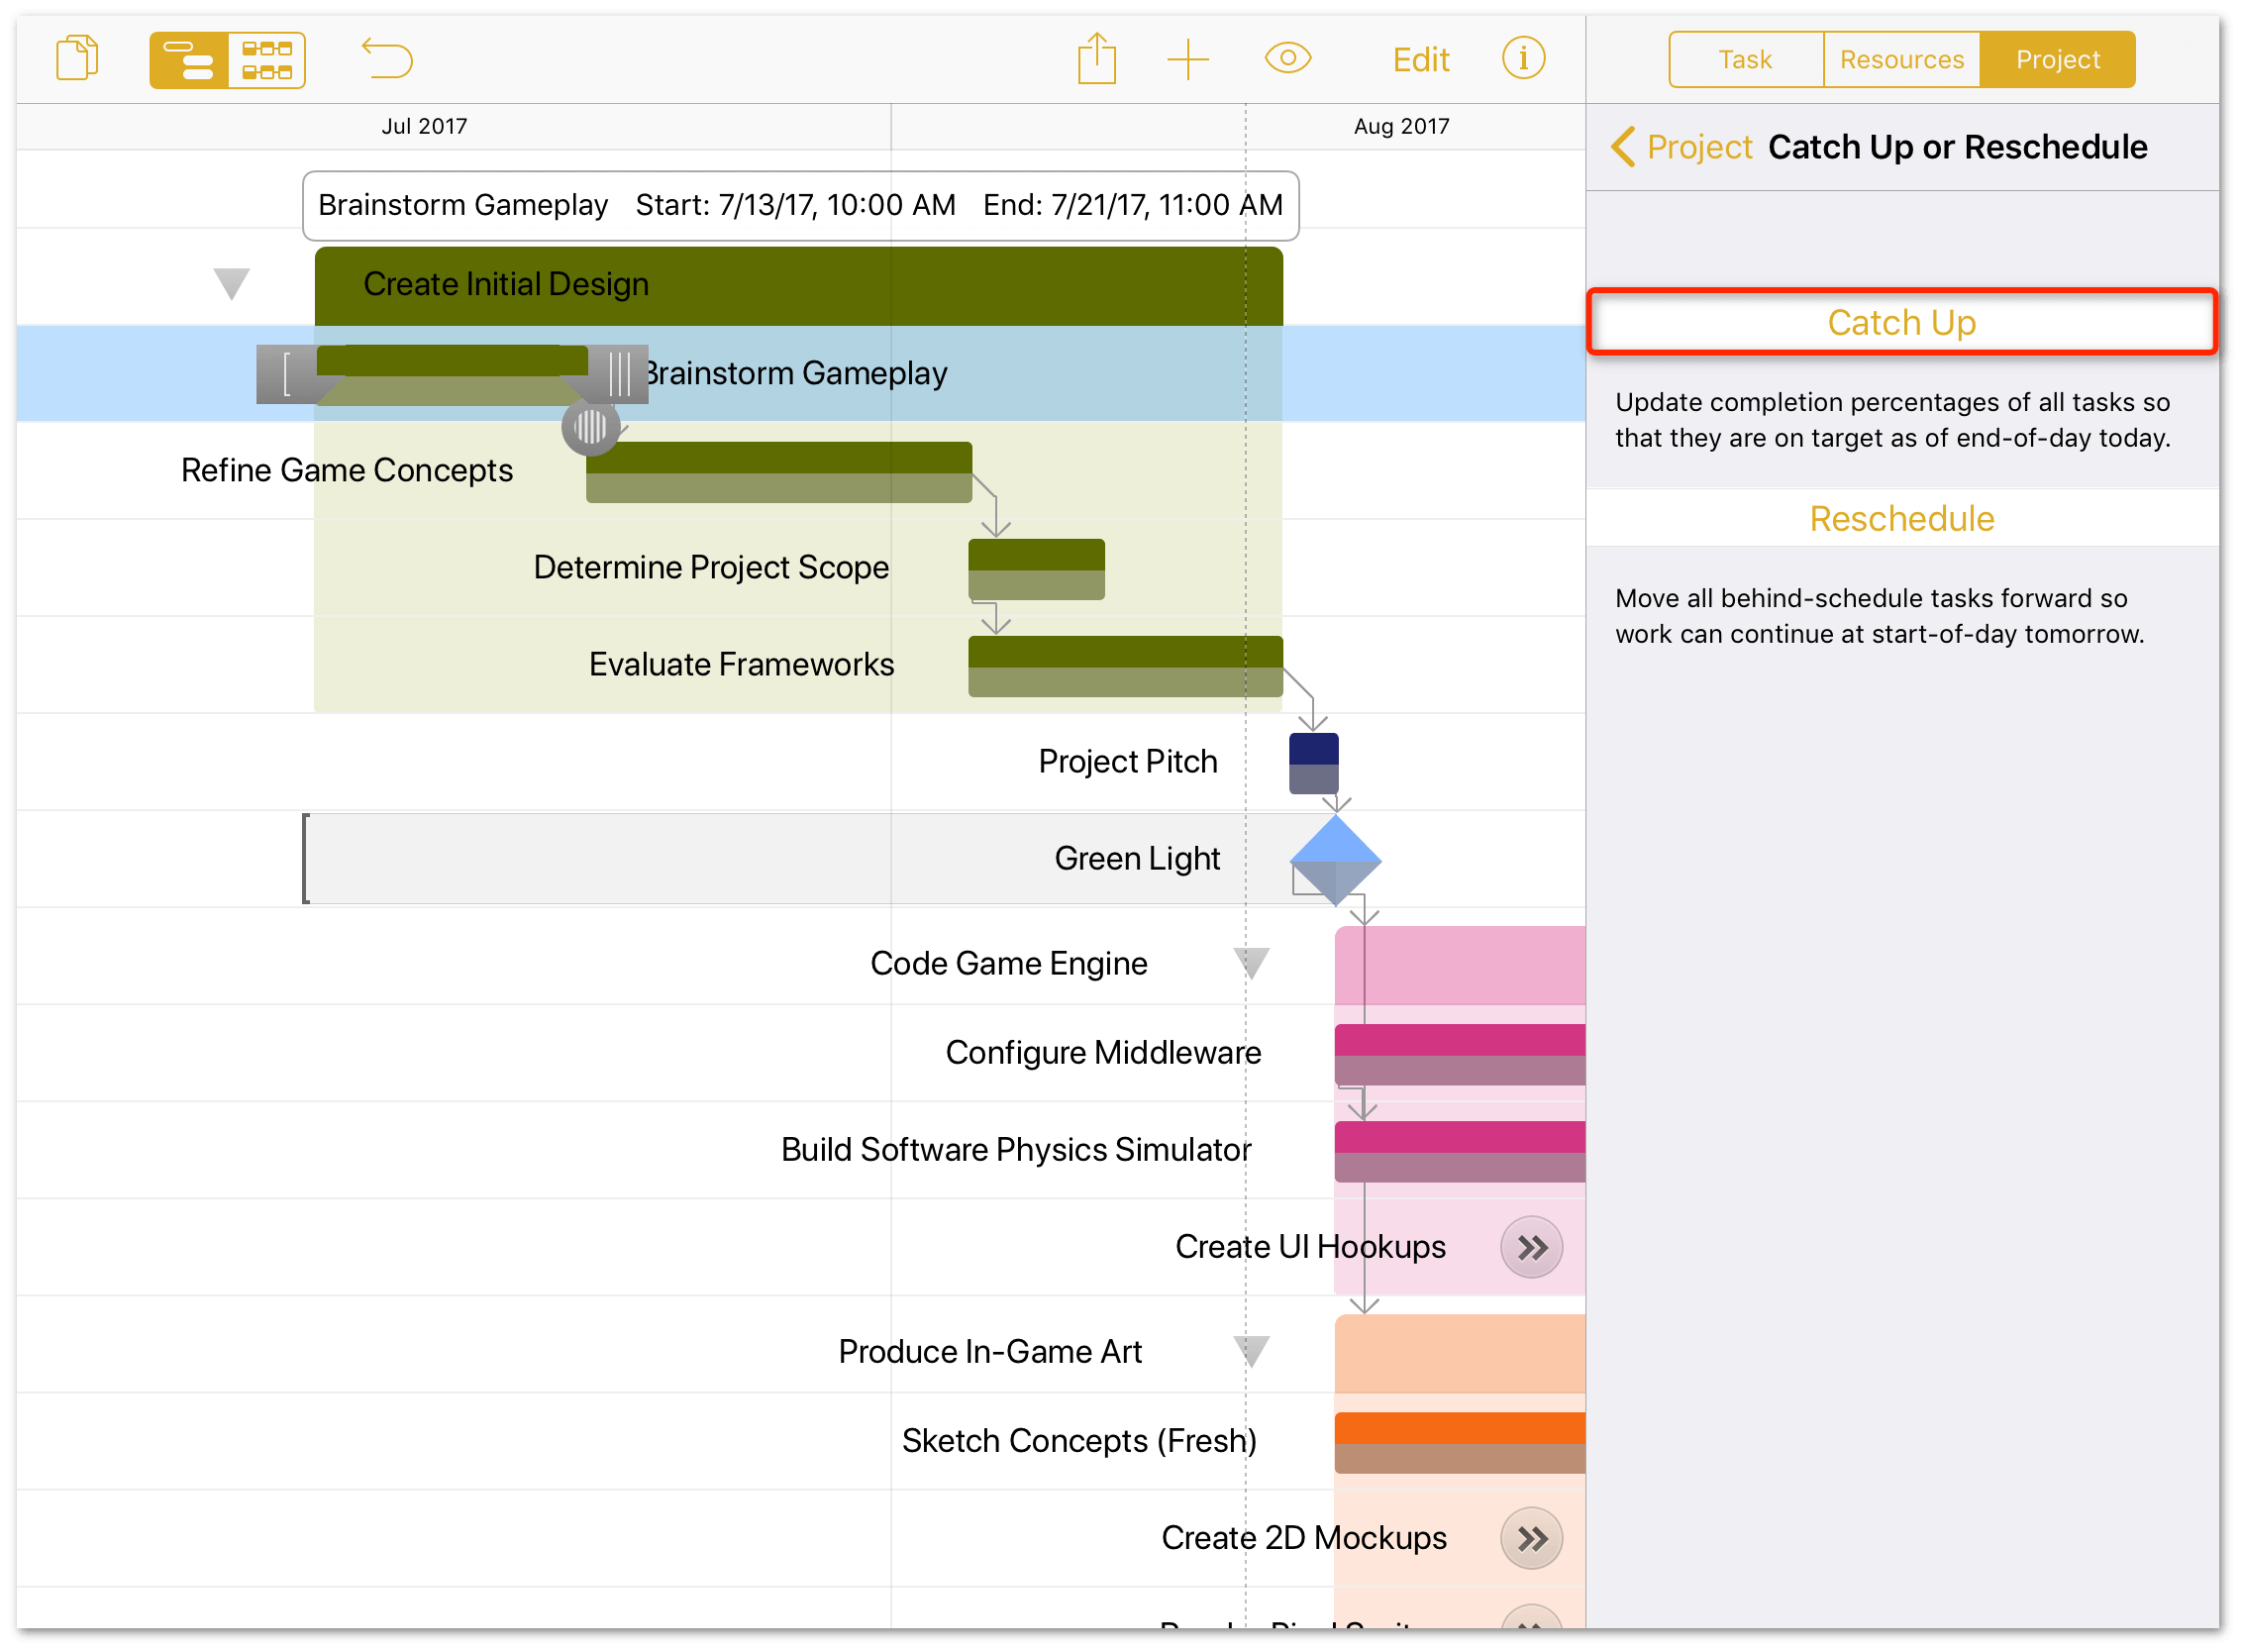
If everything is proceeding according to plan, you can use the Catch Up tool in the Project inspector to advance the completion percentage of all tasks to where they should be as of the end of today’s workday.
Extending a Task’s Duration
If you discover that a task requires more time than originally estimated, you can track this in your project. Doing so also reschedules subsequent tasks that are dependent on the updated task, or that are assigned to the same resource.
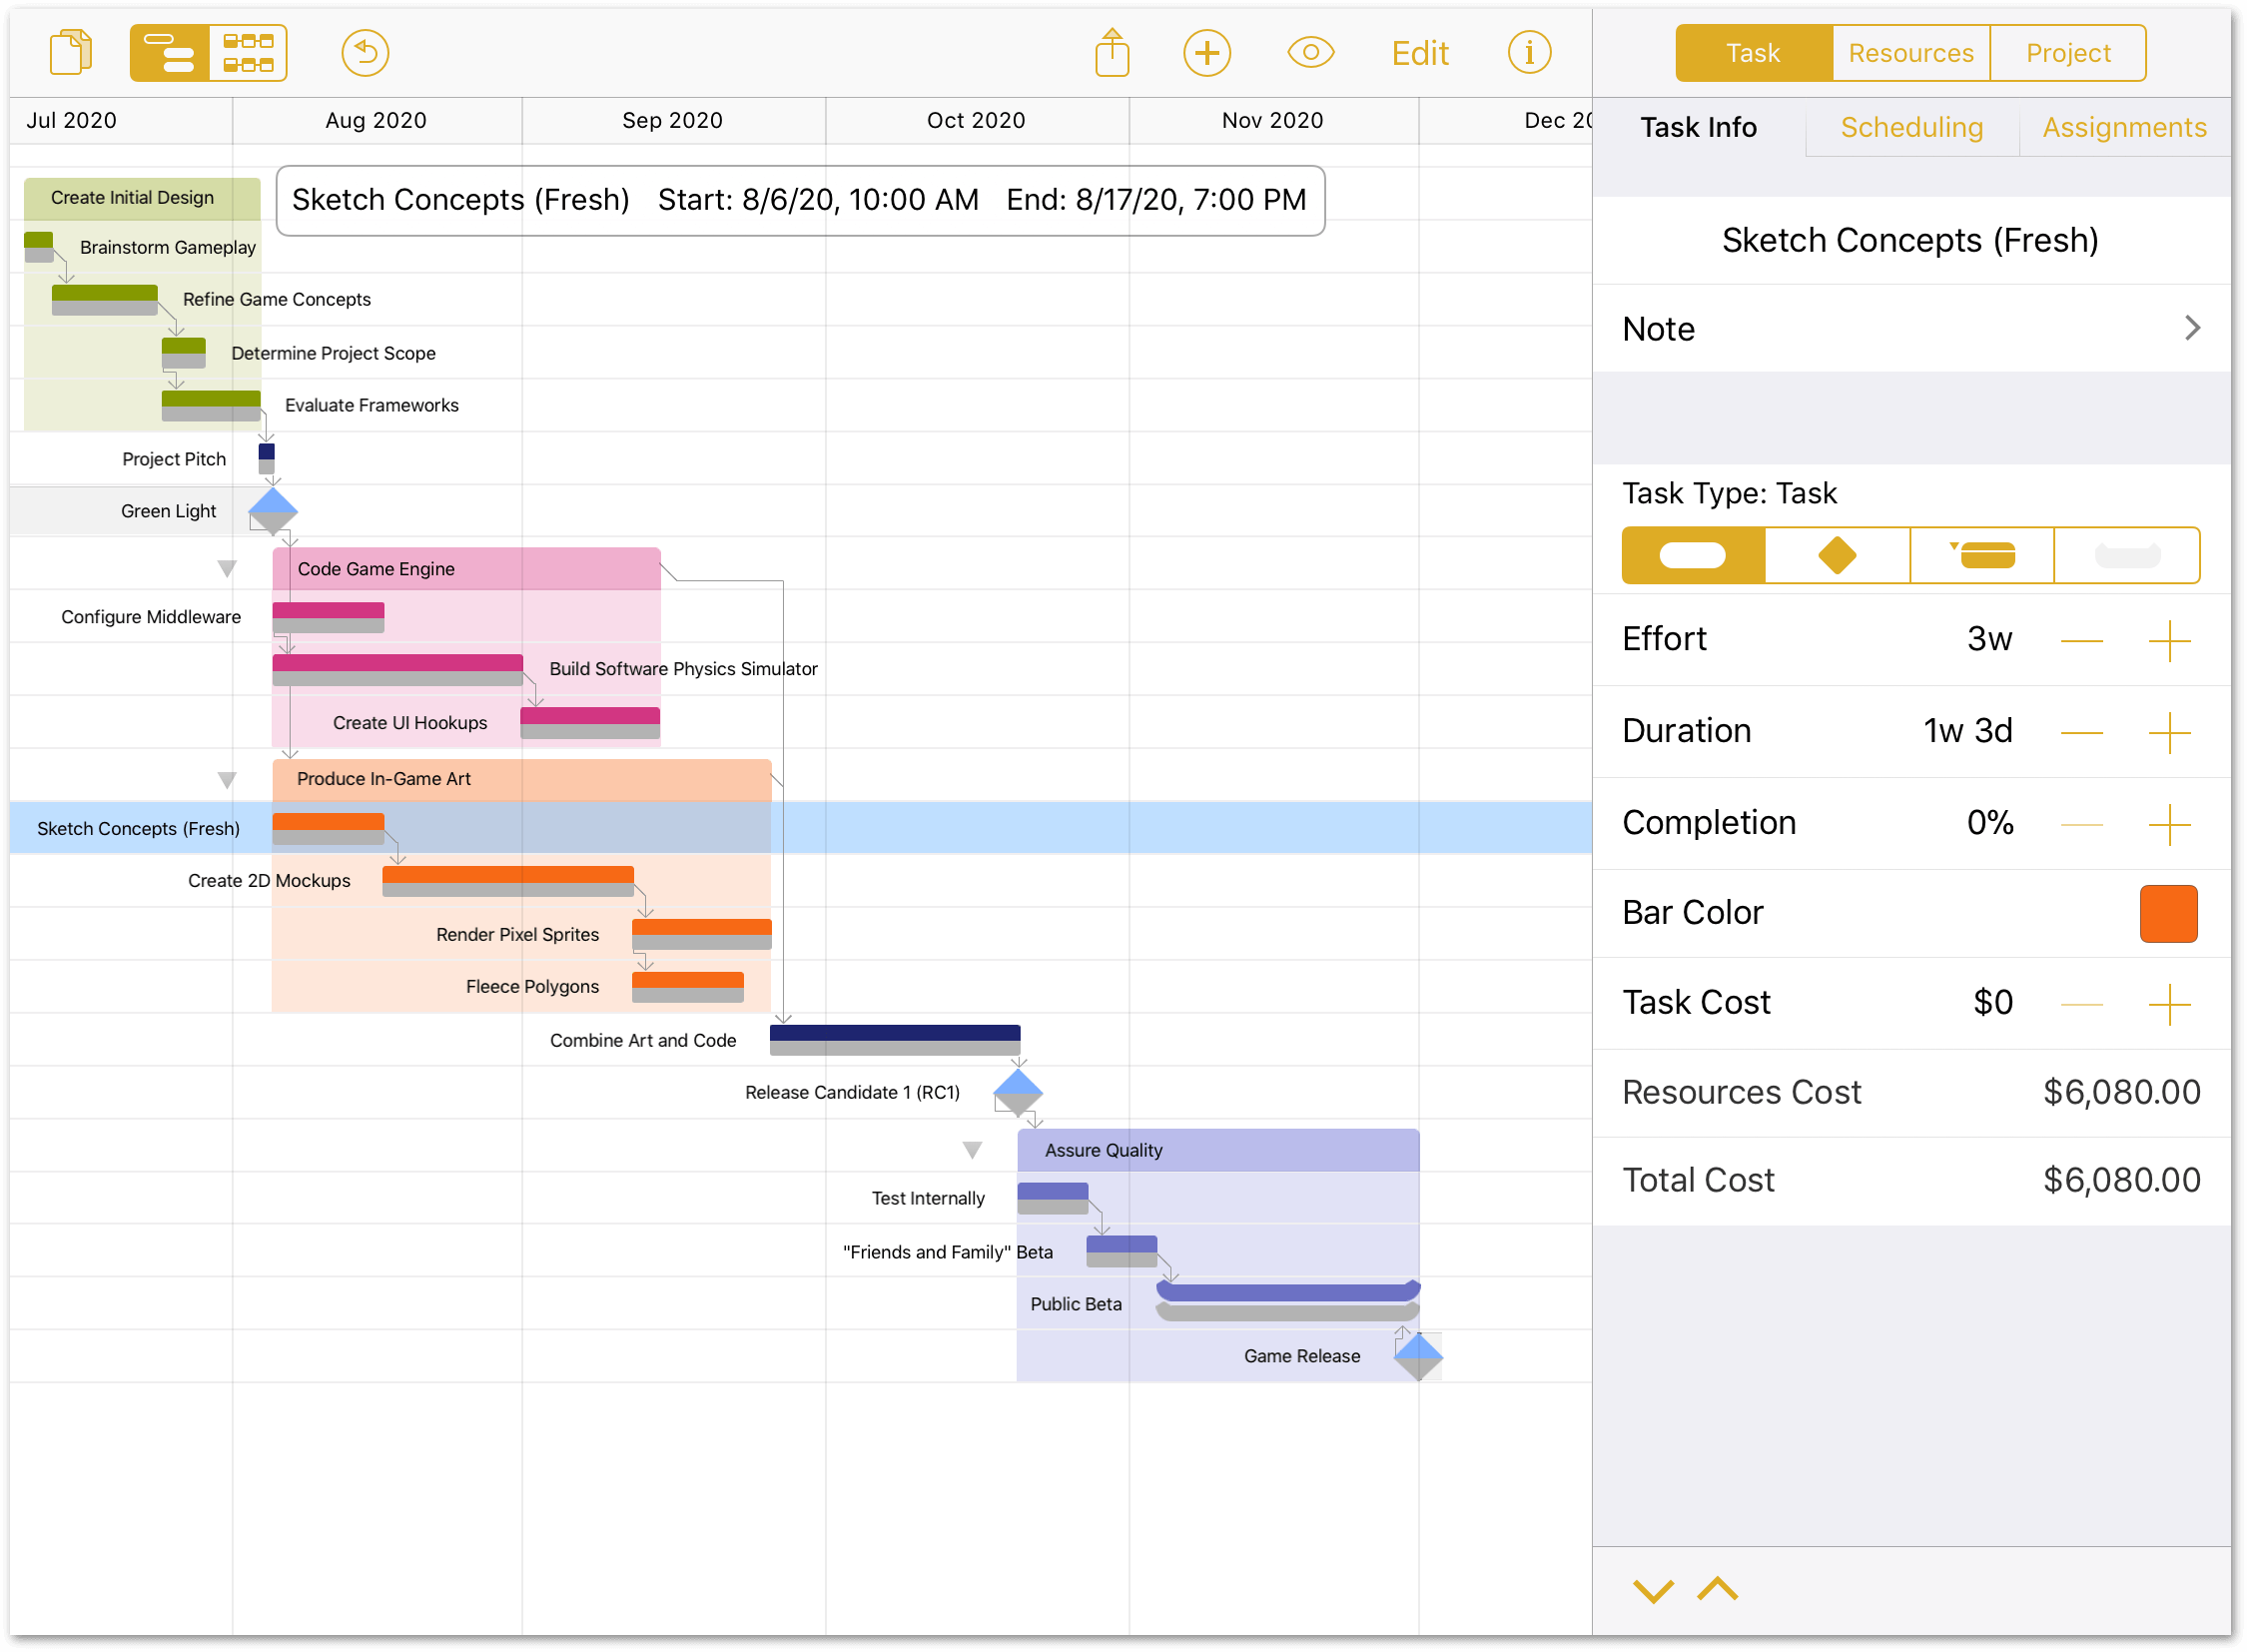
For example, the artists have come to you and say that they need two additional days to work on the Sketch Concepts before they can create the 2D mockups:
- Tap to select the Sketch Concepts (Fresh) task.
-
Select the Task inspector, and choose the Task Info tab:
-
Change the Duration from 1w 3d to 2w:

After changing the task’s Duration, notice how the remaining tasks and milestones have moved forward in the timeline, and are split from their respective Baselines. This allows you to monitor the project status against the original projections, and—if necessary—look for ways to tighten the schedule later.
Remember, your projects can have multiple Baselines, which is helpful for evaluating different stages of a project’s progression. For example, you could always set another Baseline here and give it a name such as Sketch Concepts Extended.
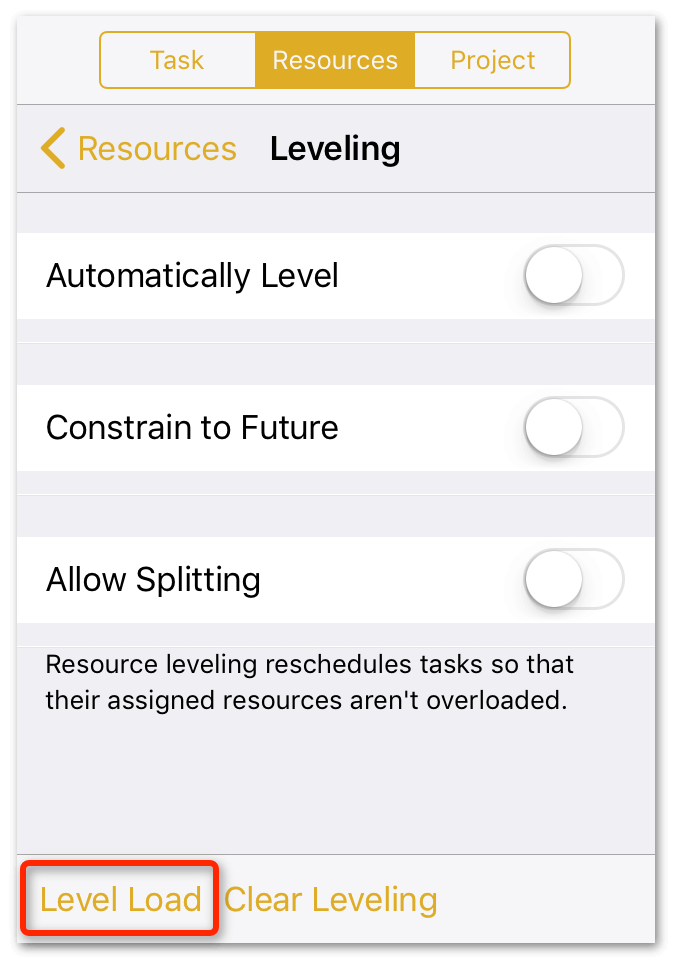
If you set up Automatic Leveling in the previous chapter, your project should level automatically when you adjust the duration. If you didn’t, go to the Resources inspector, tap Leveling, and then tap Level Load at the bottom of the inspector.
Rescheduling Tasks
If a task falls behind schedule, and all other work has been accounted for manually, you can use the Reschedule tool to advance tasks with incomplete work to the beginning of the next workday:
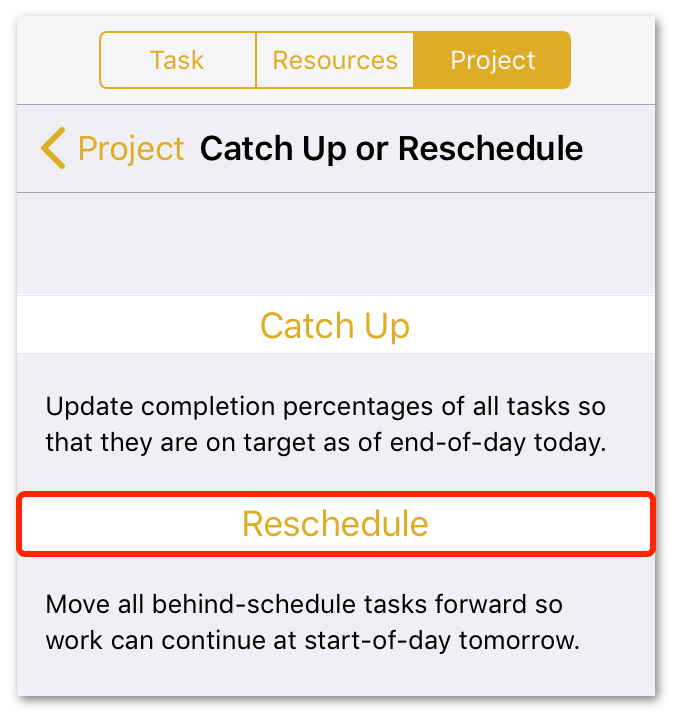
If a task is partially complete, rescheduling splits the task and leaves the completed portion in its original position, advancing only the incomplete work.
Adding Schedule Constraints
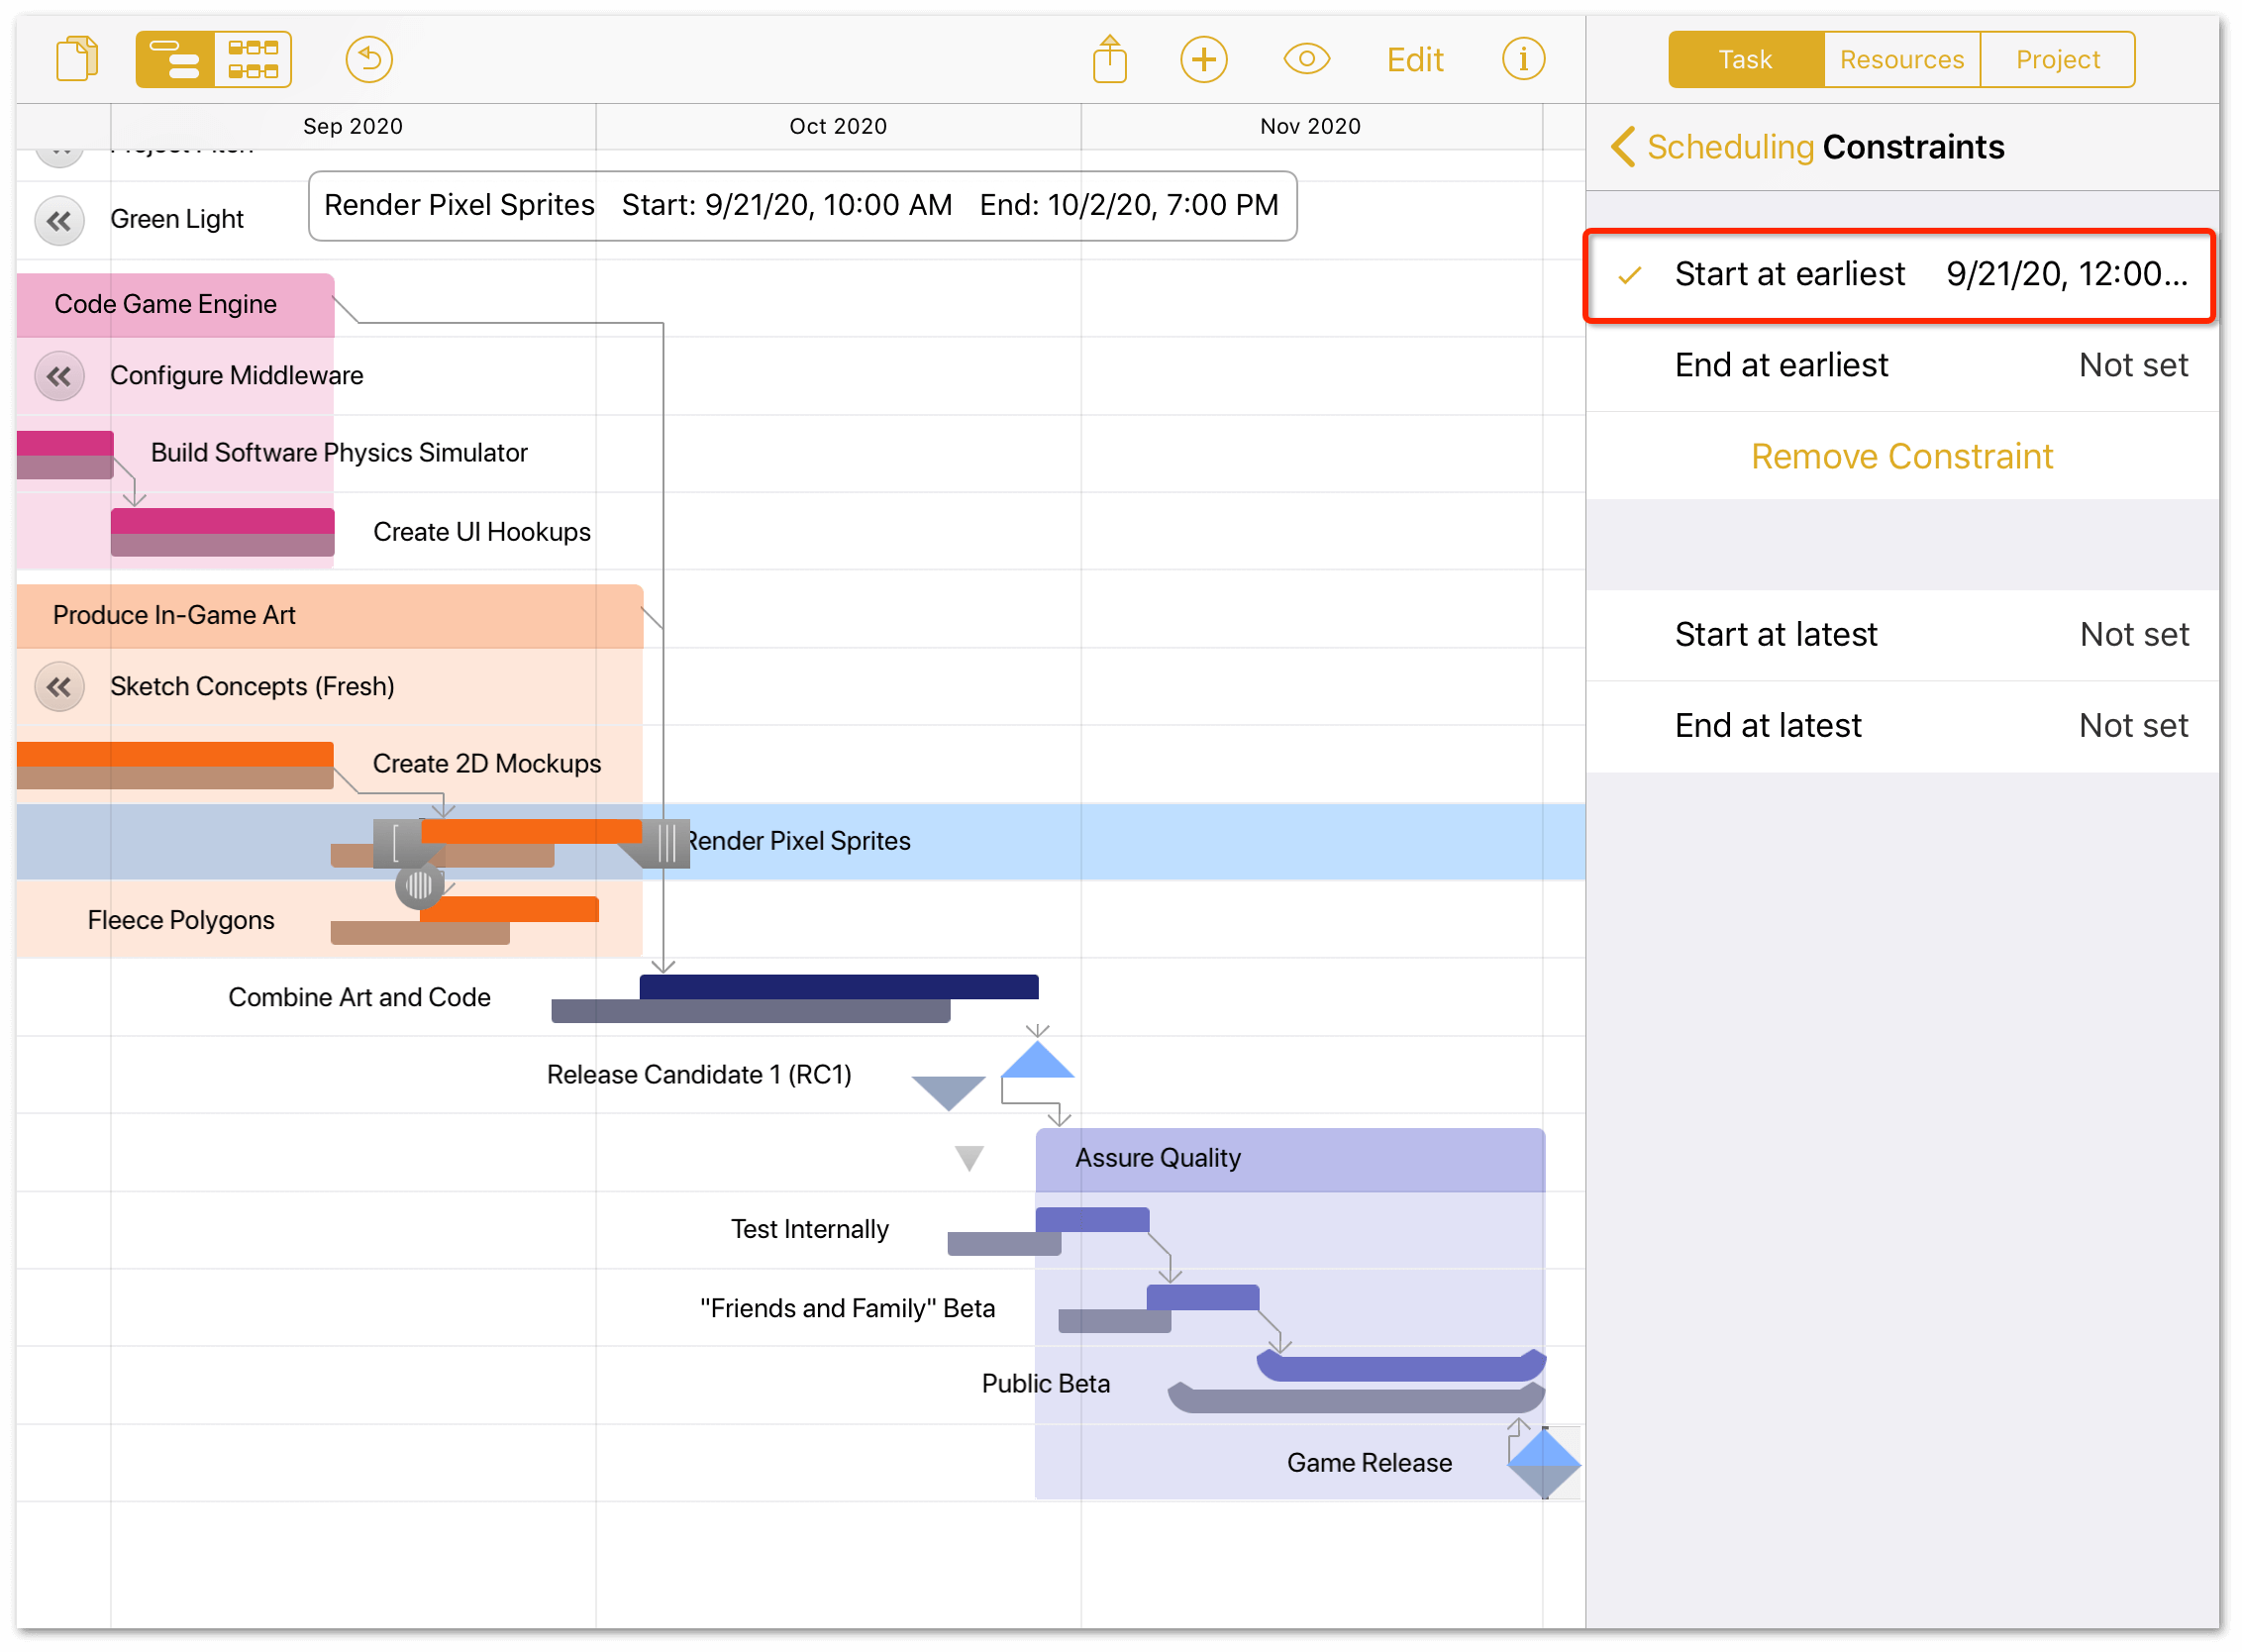
There are four different scheduling Constraints that allow for flexibility in the schedule. In the Scheduling tab of the Task inspector, tap Constraints to see the following options:
- Start at earliest: Work on this task may start on or after the date specified.
- End at earliest: Work on this task may end on or after the date specified.
- Start at latest: Work on this task may start on—but not after—the date specified.
- End at latest: Work on this task may end on—but not after—the date specified.
For example:
- Tap to select the Render Pixel Sprites task.
- In the Task inspector, tap the Scheduling tab.
- Tap Constraints.
-
Tap Start at earliest and change the task’s start date to the following Monday.
Changing this task’s start constraint causes a ripple effect through the remainder of the project, adjusting the timelines of future tasks, and possibly affecting resource assignments. Adjustments like this can cause violations (see the next section to appear in the timeline, which you’ll need to resolve to get your project back on track.
Resolving Violations
Occasionally situations will emerge that break the rules of logic you’ve set up for your project. When one of these occurs, OmniPlan flags the offending task with a warning symbol: ![]() .
.
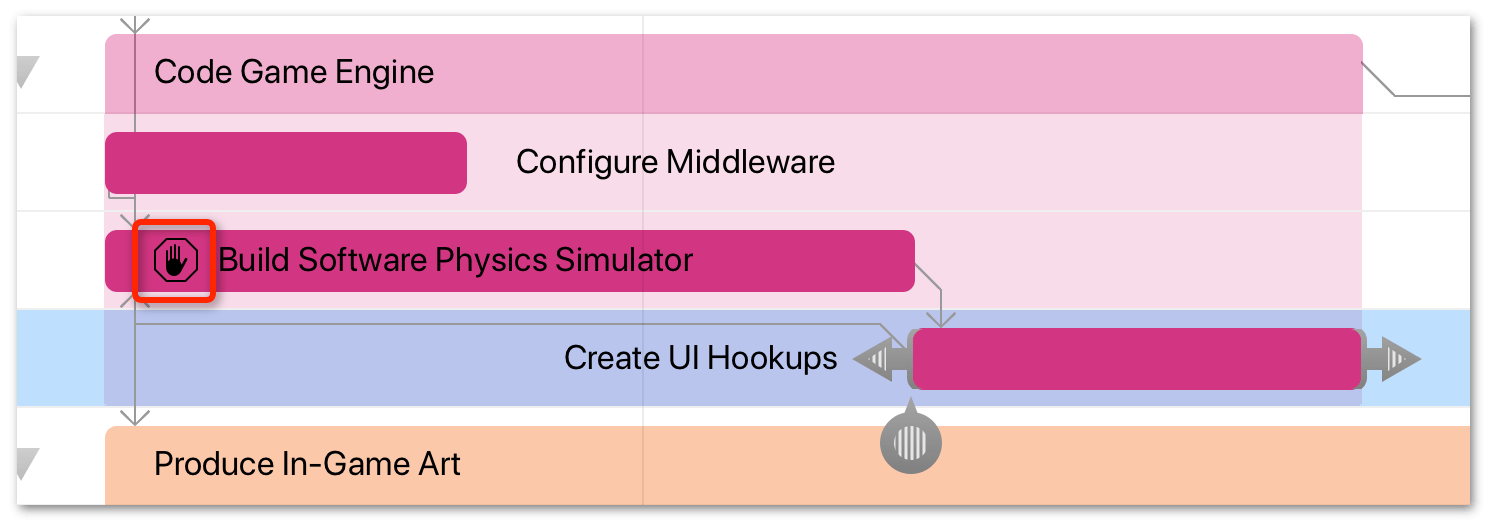
You’ll also notice that the button for the View menu in the toolbar takes on the warning symbol as well:  .
.
To see what’s causing the problem, do the following:
-
In the toolbar, tap
: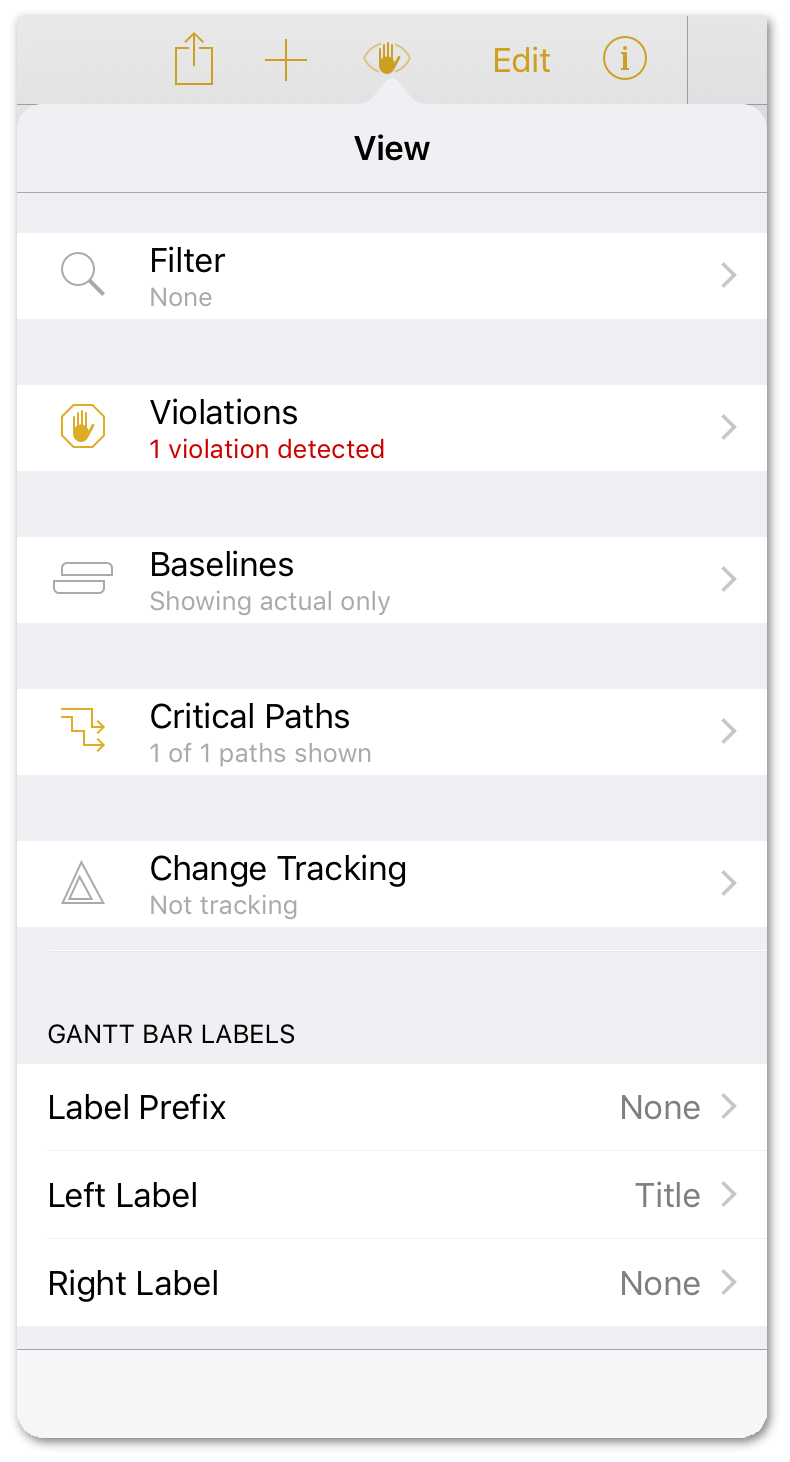
Notice that the Violations option is highlighted, showing you the number of violations detected.
-
Tap Violations in the View menu to see what’s causing the problem:

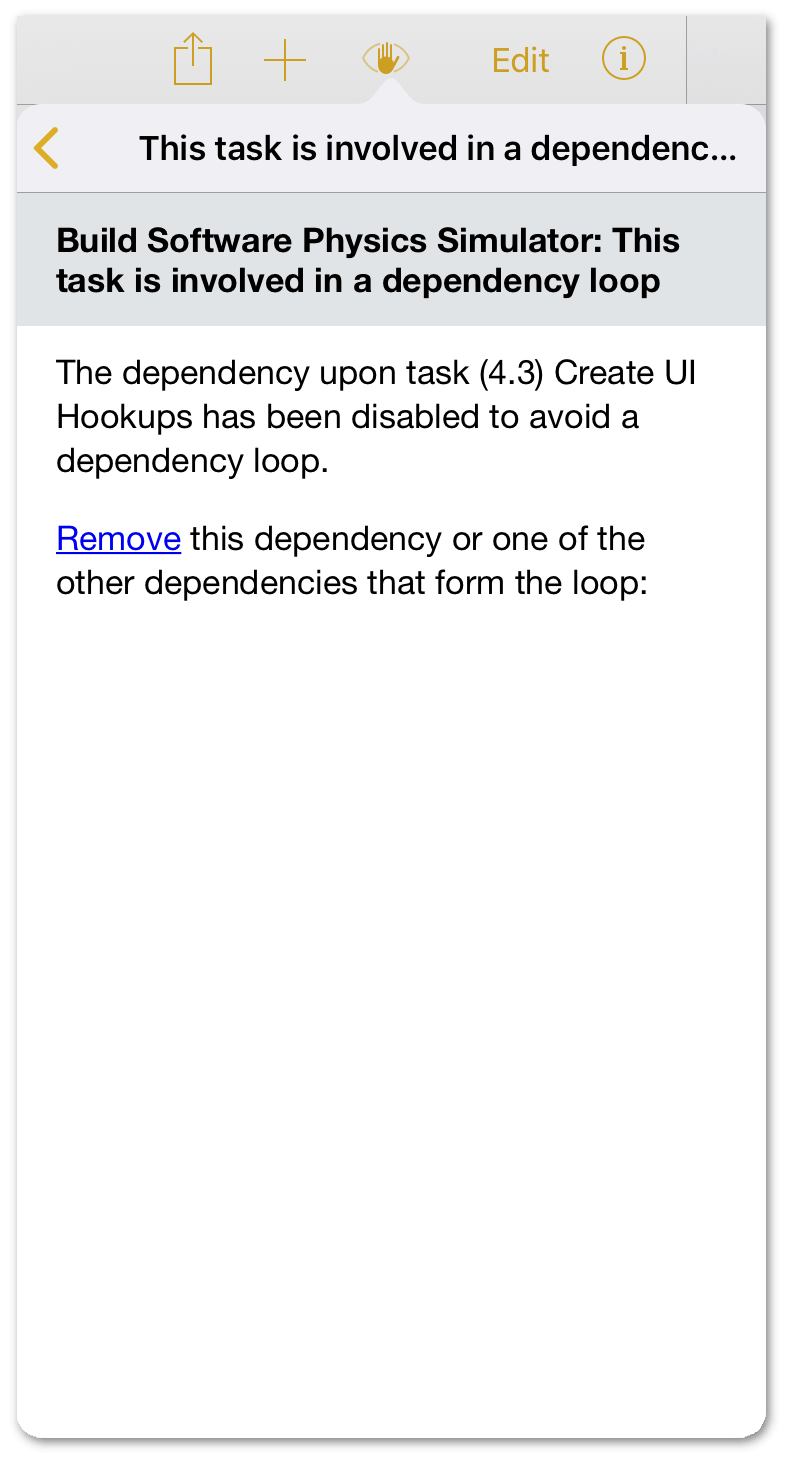
Here, you can see that there’s a task dependency that’s causing a loop. Let’s correct that.
-
Tap the violating task to see more details about, and how to resolve, the problem:
-
In the explanation for the problem, tap Remove to remove the dependency that’s causing the loop.
You can also tap ![]() next to the task to be taken right to the problem in the View menu.
next to the task to be taken right to the problem in the View menu.
Splitting Tasks
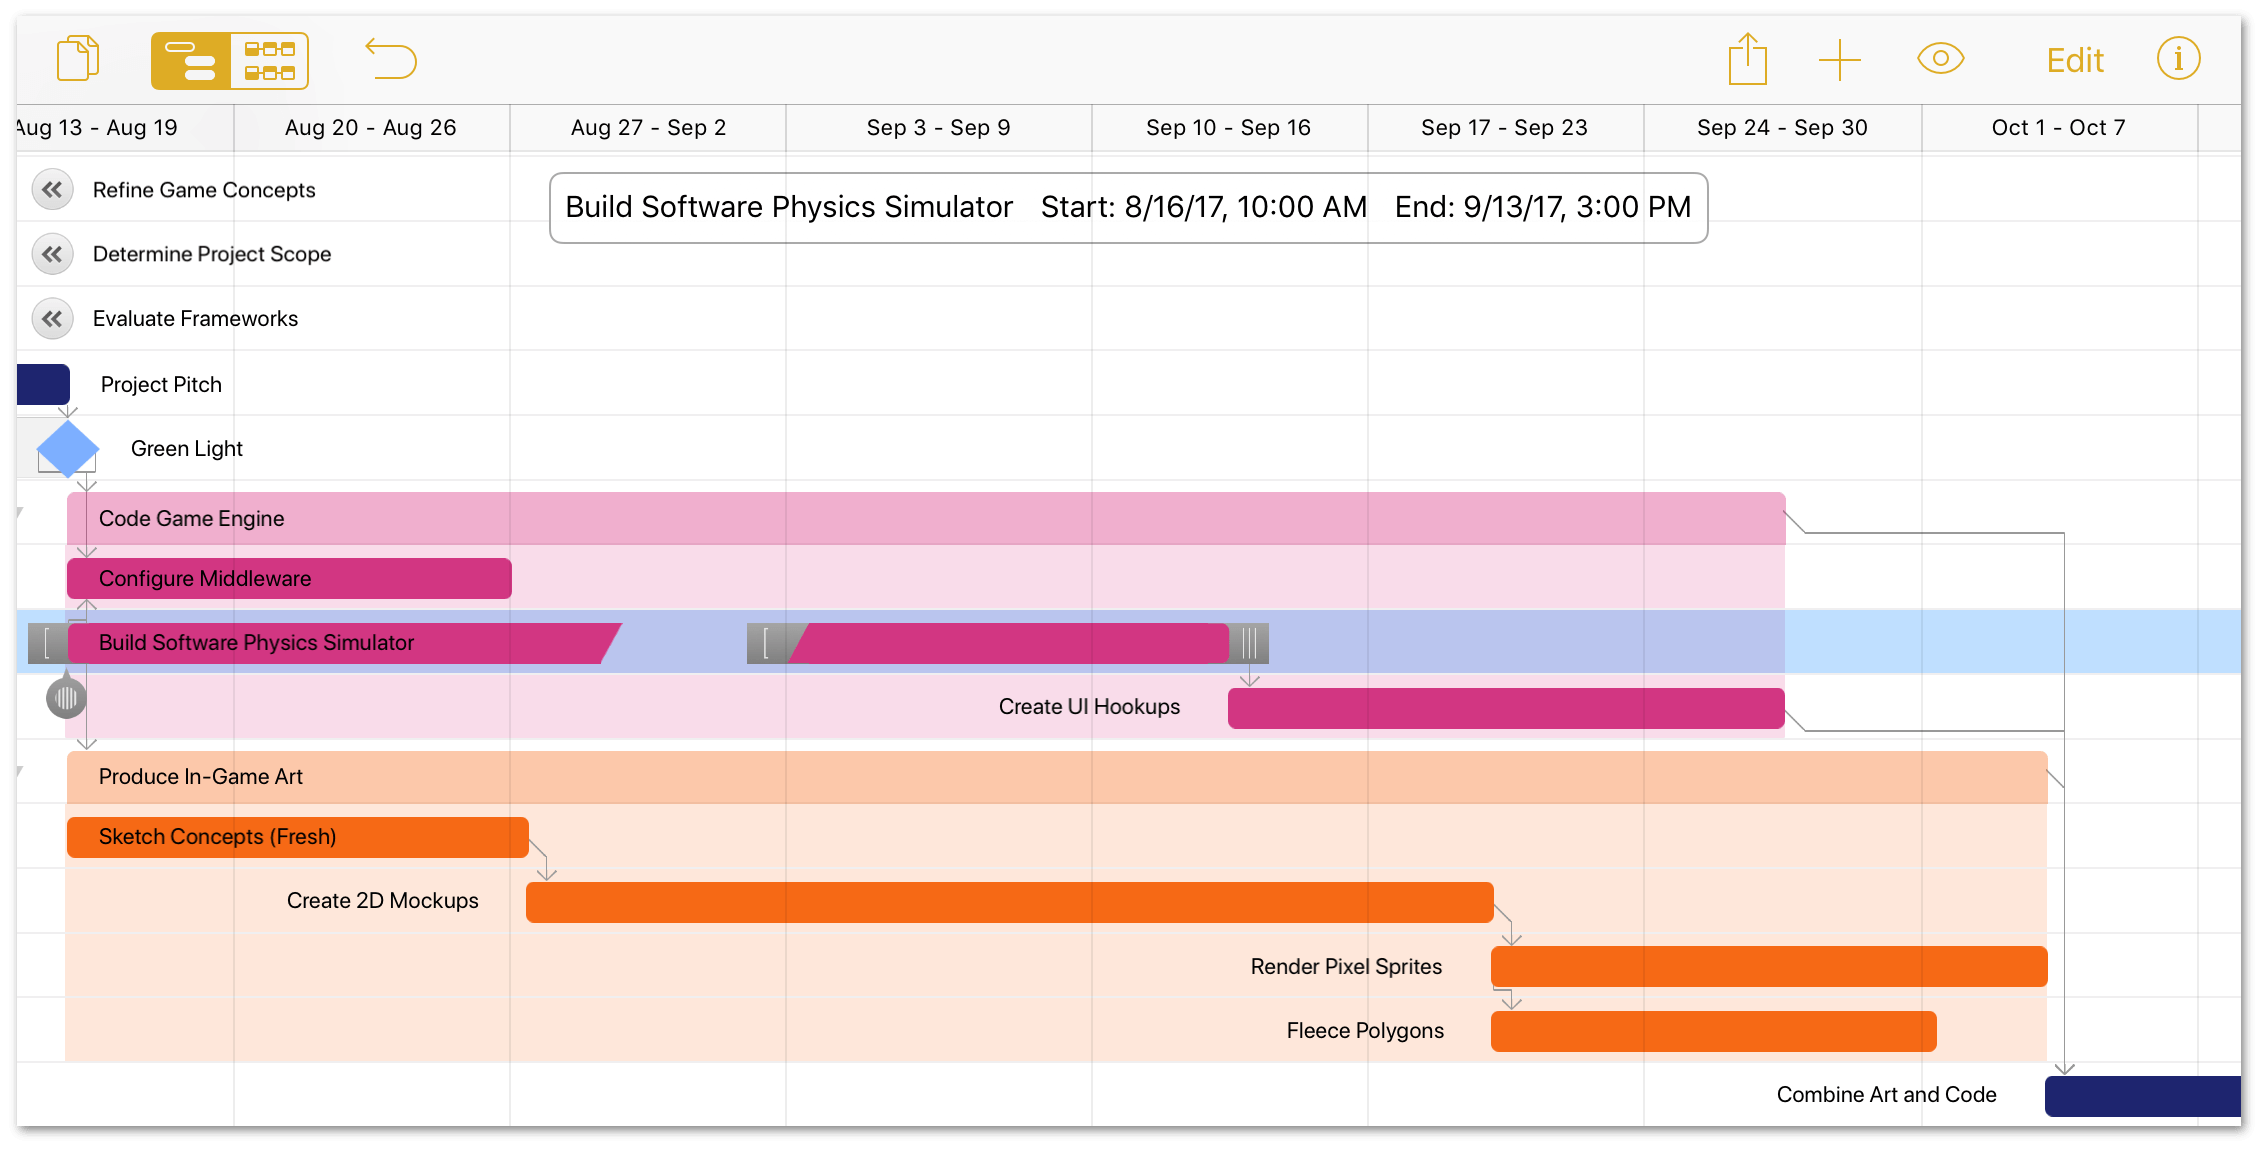
If you want a resource or team member to devote time to something other than the task they’re currently assigned to, splitting the task into parts around the “time out” period is a possible solution.
When you split a task, the task duration remains the same (in this case, 3w 3d), however, additional time is inserted to allow the Physics Simulator to be properly tested for bugs.
To split the Build Software Physics Simulator task, do the following:
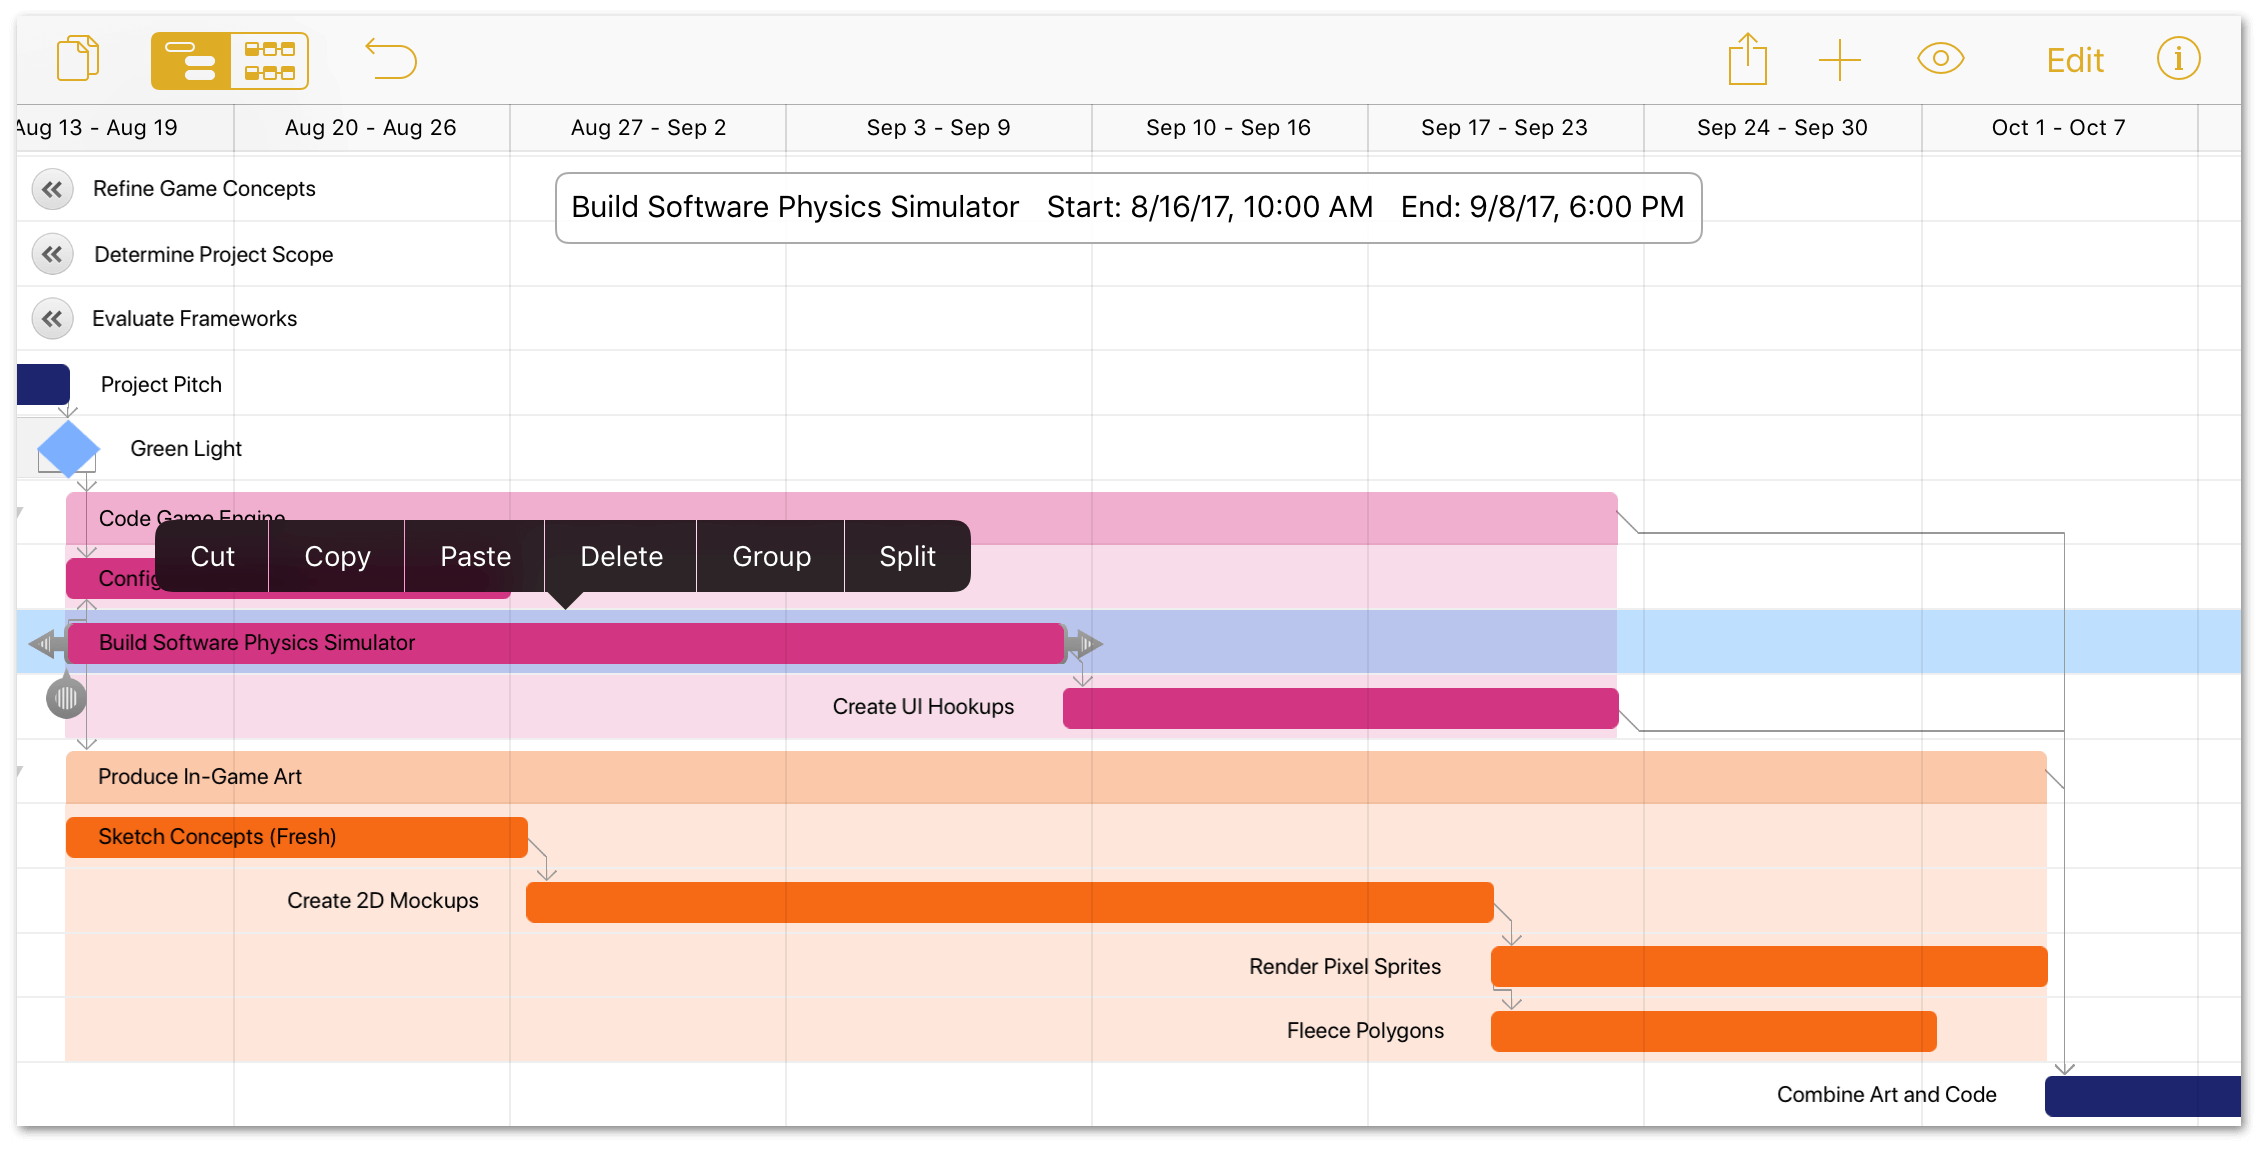
- Tap to select the Build Software Physics Simulator task, and then tap the task a second time to reveal its contextual menu.
-
In the contextual menu, tap Split:
-
After tapping Split in the contextual menu, the Split Task menu appears:
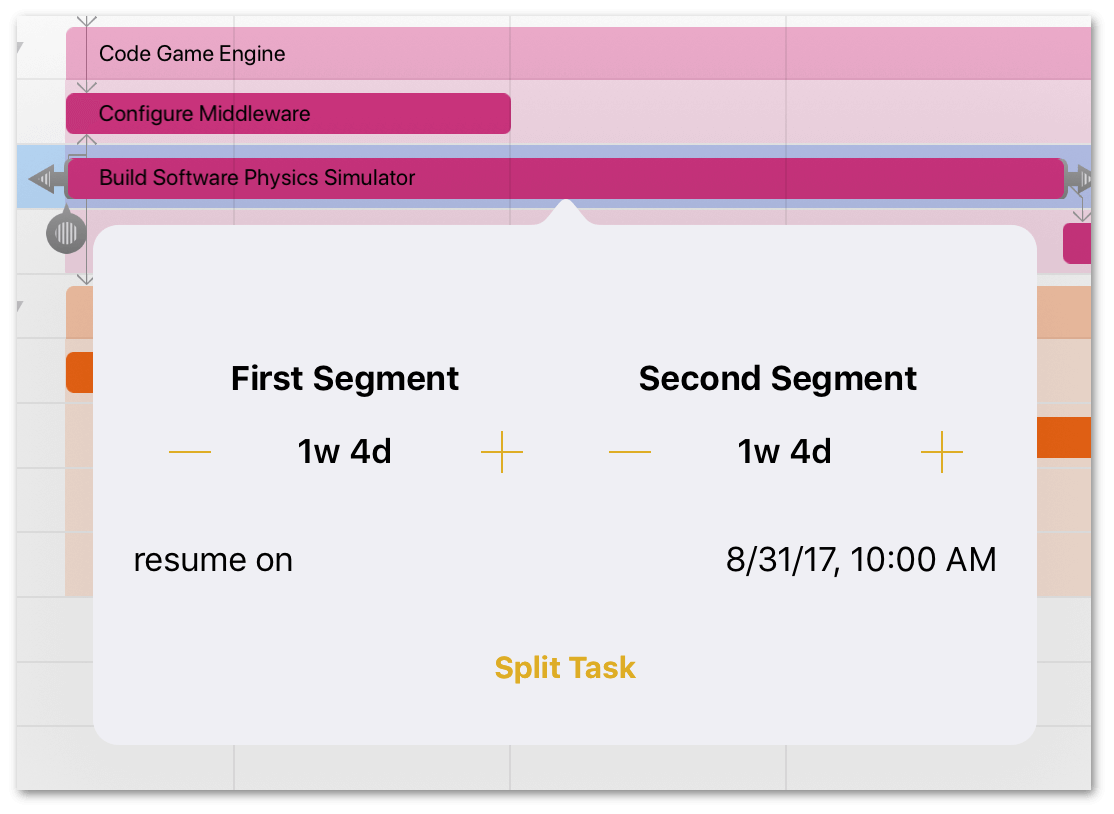
The selected task's duration is split into equal parts; however, you can change the duration for each segment:
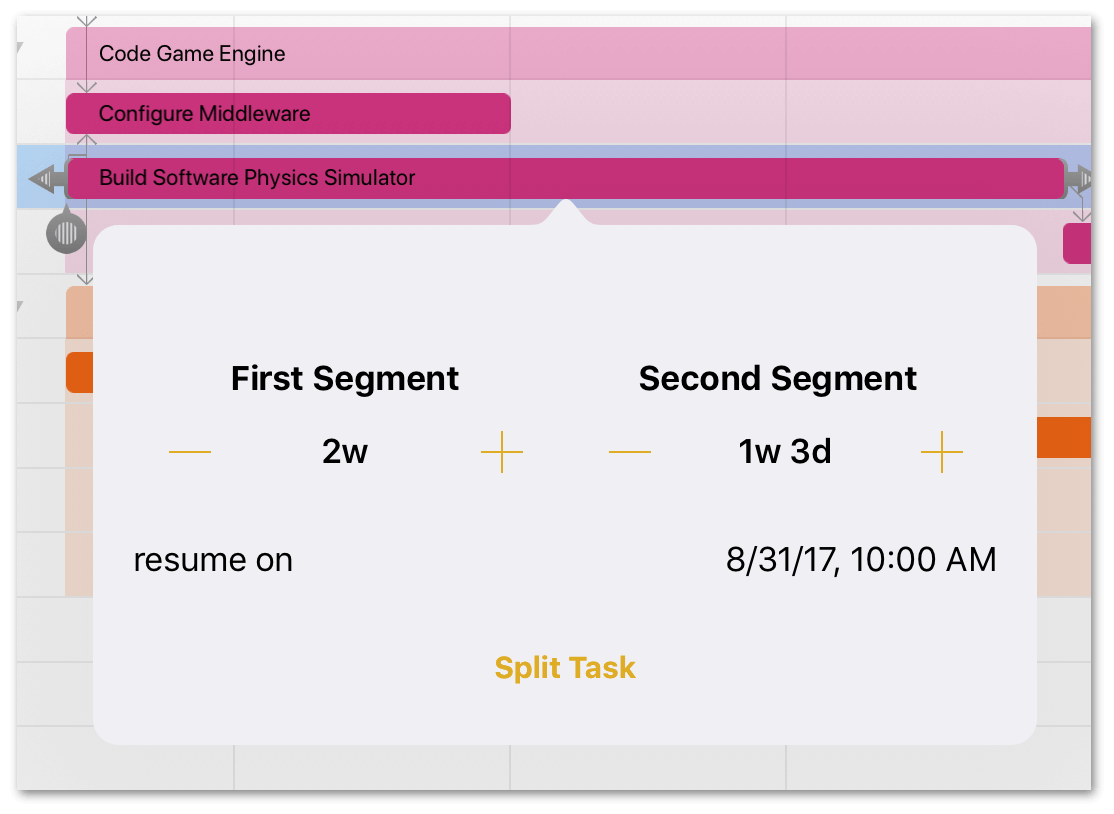
as well as specify a date when work on the second segment resumes:

-
When you’ve set the durations for each segment, tap Split Task in the menu to split the task in two.
If you have Automatically Level turned on in the Resources inspector, the project should level on its own. If not, it's wise to level your project after splitting a task. Also, you may want to add another Baseline to the project here:

A split task may mysteriously re-merge after leveling. If this isn’t what you want, make sure that Allow Splitting is turned on in the Resources inspector’s Leveling submenu.
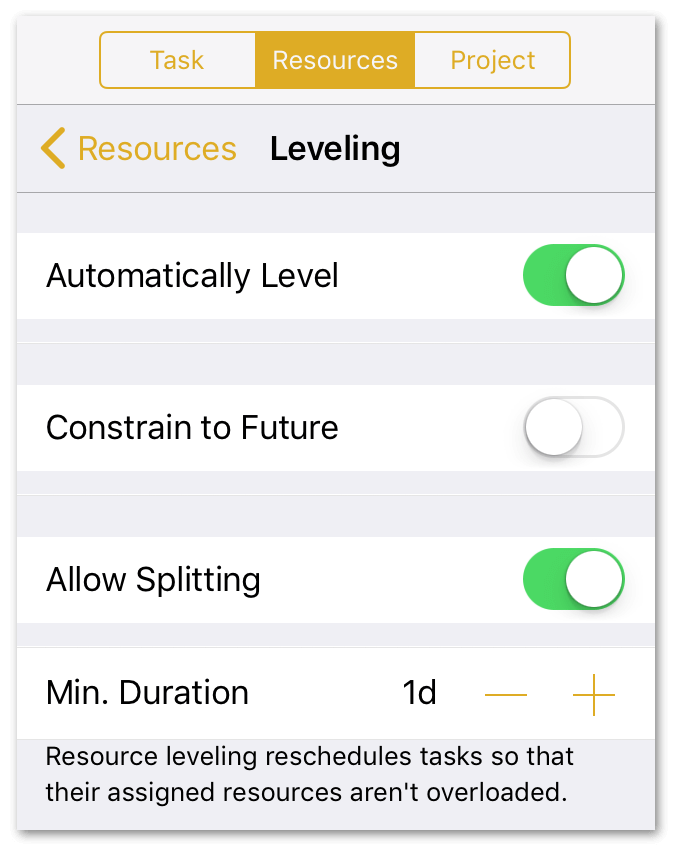
When you turn on Allow Splitting, you can also specify a minimum duration for the period of the split. The default is set to one day (1d); however, you can set this to a value that suits your projects’ needs.
Simulating Milestone Completion Estimates (PRO)
OmniPlan Pro includes tools for calculating the degree of certainty that a milestone will be complete by a given deadline, using Monte Carlo simulations based on estimations of the effort required to reach the goal. The results of these simulations can help identify where things might fall behind—or even be ahead of schedule.
To run a Monte Carlo simulation on your project, do the following:
- Open the Project inspector.
-
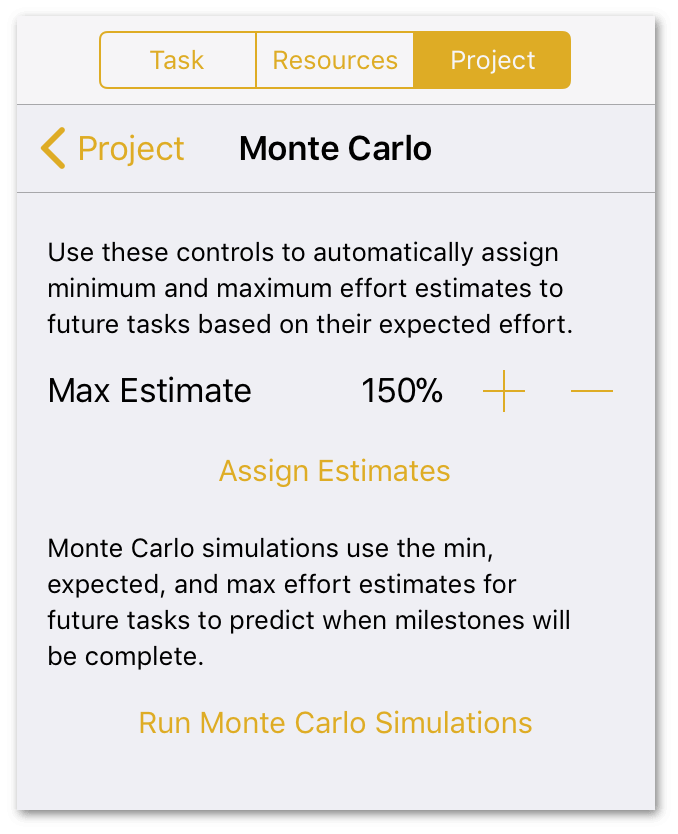
Tap Monte Carlo:
The level of certainty the simulation provides is determined by the amount of effort estimated as required for completion of the tasks within each milestone.
The Max Estimate percentage represents the expected range of deviation for the amount of effort that tasks within your project require. The default is 150%, indicating that a typical task in your project can be expected to require anywhere between 50% and 150% of its expected effort to complete. The average for that range is 100% effort.
You can raise or lower the Max Estimate percentage to 190% and 110%, respectively, depending on your level of confidence in your initial time estimates. Use a lower percentage if your confidence level is high; use a higher percentage if your initial time estimates were mere shots in the dark.
-
Tap Assign Estimates. OmniPlan quickly generates hundreds of random effort values for each task within the percentile range indicated. OmniPlan then takes the average result and applies it to each task to determine the likelihood that a given milestone will be completed on time.
-
Tap Run Monte Carlo Simulations. When the simulation is complete, each day that the milestone could be completed on is indicated by a striped vertical bar:
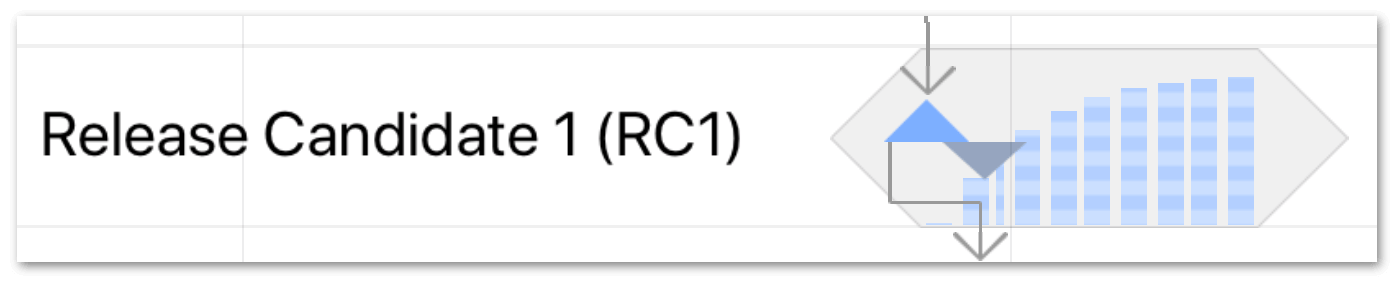
Each stripe in the bar represents 10% confidence that the milestone will be complete on that day. For example, 10 bars on a day means that, according to the simulation, a milestone is 100% likely to be completed on that day.
If you want to experiment with different Max Estimate values, tap Clear Previous Simulations, adjust the percentage value, and repeat Steps 3 and 4.