Working in Calendar View
With tasks and resources in place, the project begins to take shape; the calendar is what anchors the project in real time. OmniPlan’s calendar view helps ensure that your project is finished on time with an array of customizable scheduling controls.
Whether establishing the calendar for an individual resource or for the project as a whole, you will switch between two modes while working in this view: Normal Hours (for the regular weekly schedule) and Extra & Off Hours (for exceptions to the regular week). Switch between these modes using the toggle beneath the resource list in the lower-left of the window.

Setting Up Working Hours for a Project
The Normal Hours are a general set of working hours to be followed in a typical week. This set of hours is applied to every week in the project, thus determining how many hours of effort can be completed in each day. Resources inherit their work week schedules from the project, but you can customize them individually if they work different hours. To set up exceptions to the work week for events such as half-days, holidays, and overtime, see Editing Exceptions later in this chapter.
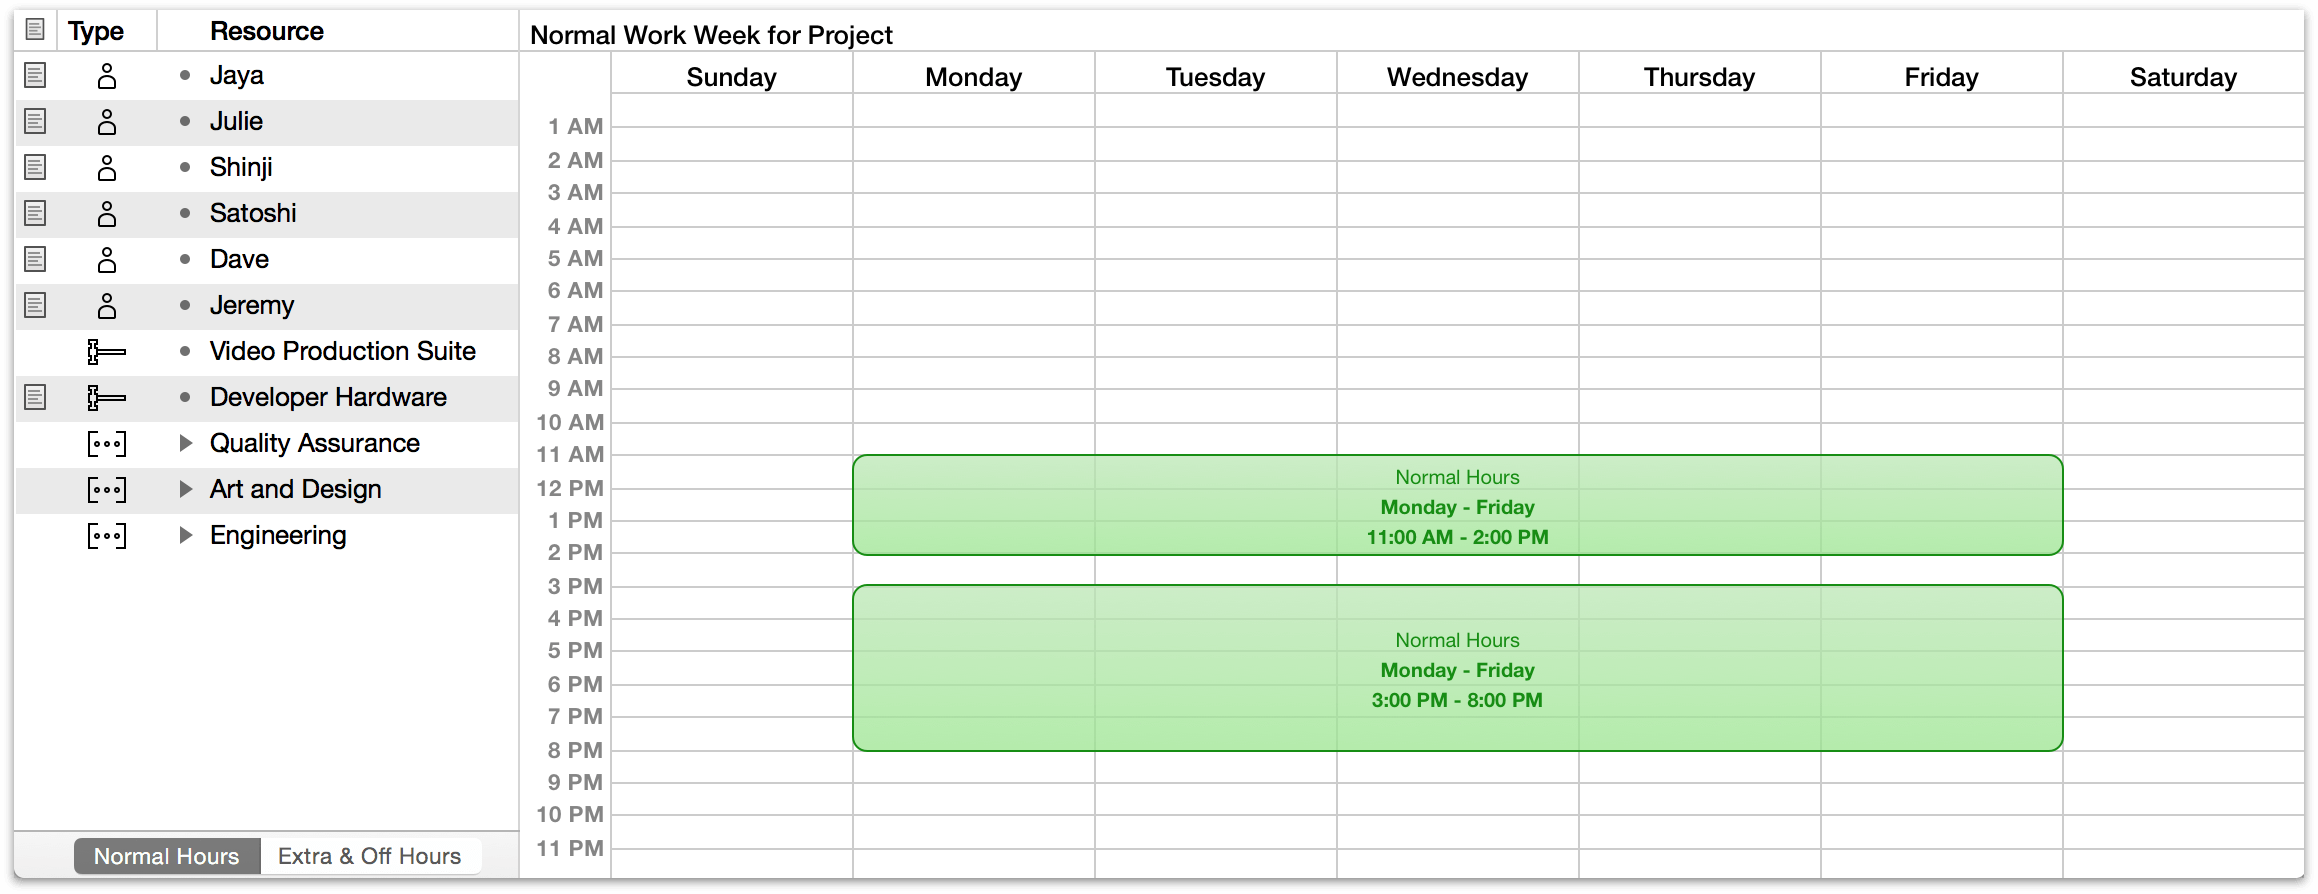
The green blocks represent segments of working time. You can drag the edges of a block to set a day and time range; in the above case, the project is set up with eight hours of working time per day, Monday through Friday, from 11:00 AM to 8:00 PM with a break in the middle for lunch.
Click a block to select it; you can then press the arrow keys to move it, or press Delete to remove it.
Drag or double-click in an empty area to create a new time block, and Shift-drag anywhere to draw a red block that erases working hours. These techniques are useful for breaking up blocks that span several days, so that you can adjust them individually.
When you create normal working hours for a project in calendar view, you are describing the calendar of work time that happens in a typical week for purposes of resource assignment.
However, when times are displayed throughout OmniPlan (the amount of effort remaining on a task, for example), they are calculated based on the the week length established in the Effort Unit Conversions section of the Project inspector.
For example, if your work week is six days of seven hours each, tasks displayed in the Gantt chart will appear to register inaccurate times unless you change the value of a work day to 7 hours and a work week to 42 hours.
Setting Up Working Hours for a Resource
When you select a resource in the outline, you can edit that resource’s working hours. (If nothing is selected, you will edit the working hours for the whole project instead.)
If a resource’s work week is (#editingexceptions)[customized] from the whole project’s normal work week, the Custom Work Week icon ![]() appears in the Custom Work Week column.
appears in the Custom Work Week column.
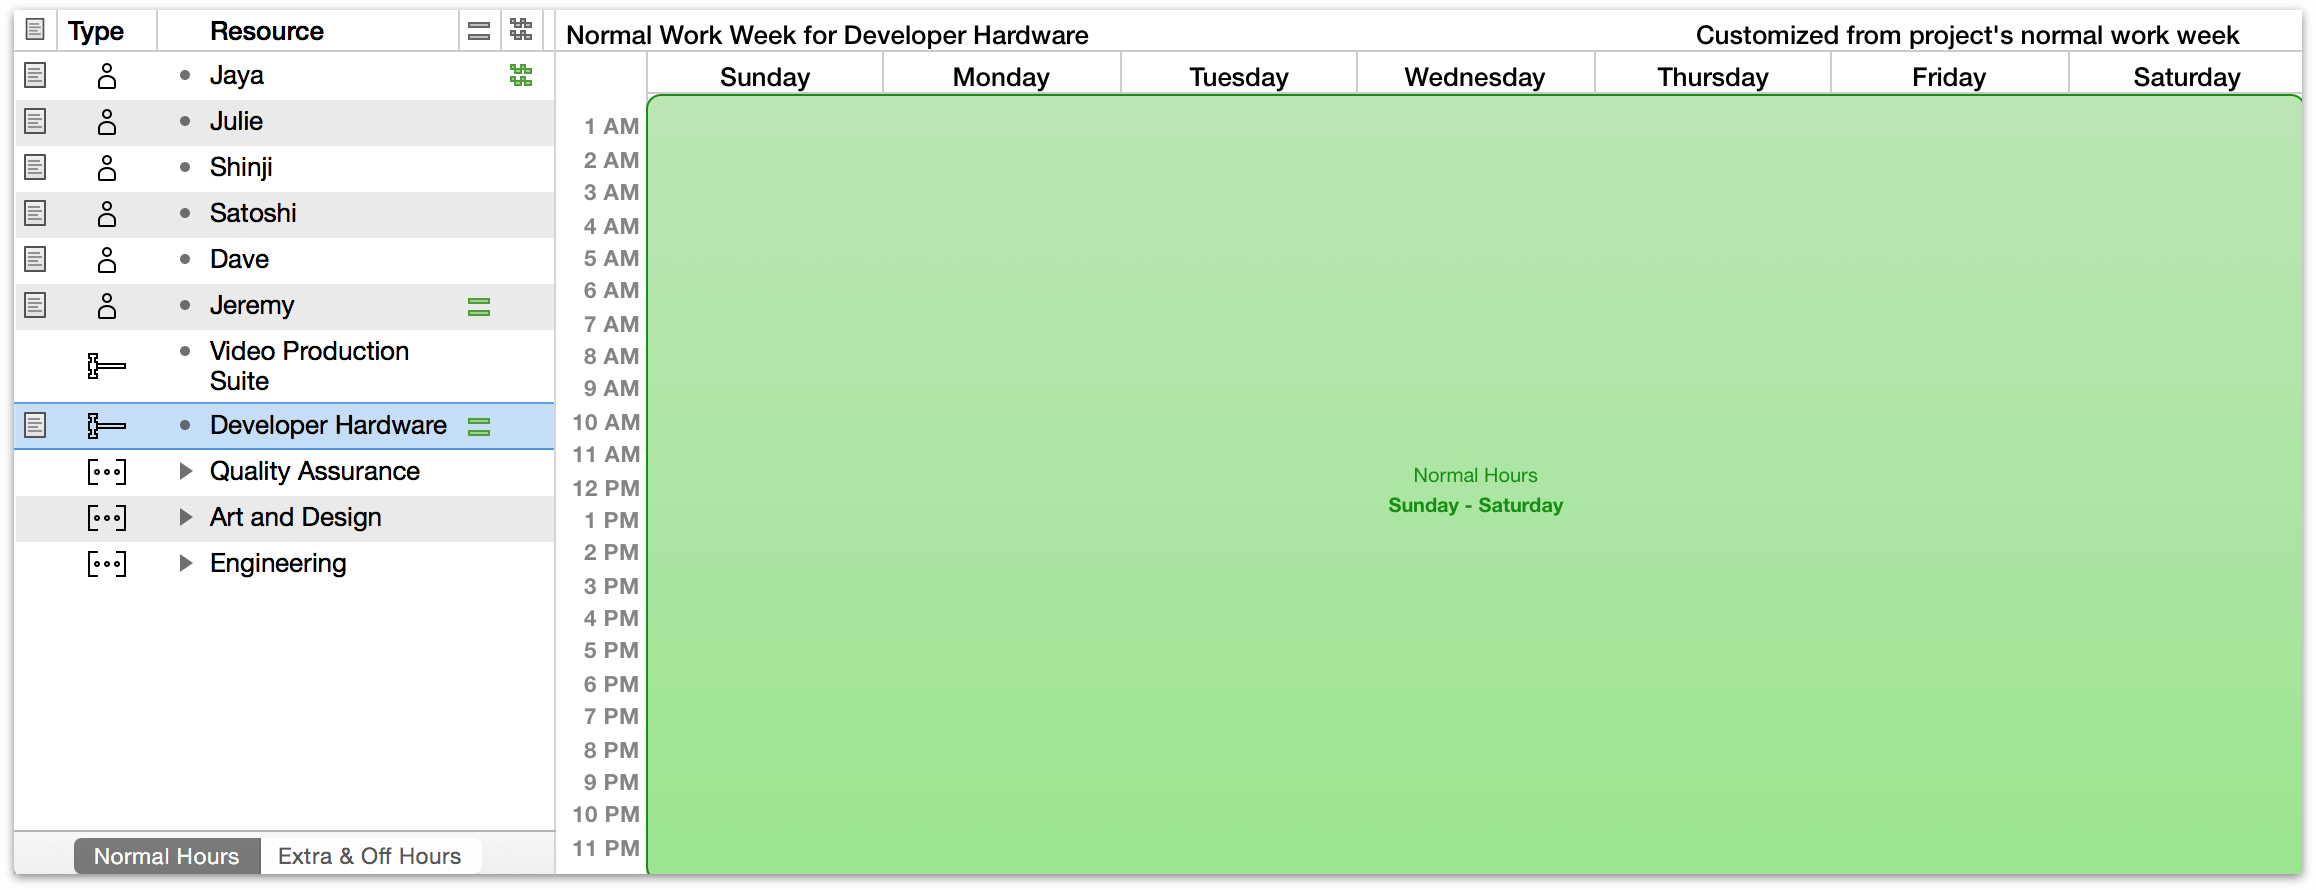
As with the project as a whole, the working hours for an individual resource are represented by green blocks in the calendar. You can drag the edges of the block to set a day and time range; in the above case, the resource is a piece of developer hardware that can be left running 24 hours a day.
Click a block to select it; you can then press the arrow keys to move it, or press the Delete key to remove it.
Drag or double-click in an empty area to create a new time block, and Shift-drag anywhere to draw a red block that erases working hours. These techniques are useful for breaking up blocks that span several days, so that you can adjust them individually.
Editing Exceptions
The Extra & Off Hours are a calendar of the working hours for specific days. You can set up holidays, half-days, overtime, and other such exceptions to the normal work week. Just like the normal work week, there is a work schedule for the whole project, which the resources follow, but you can also customize resources individually.
Select a resource in the outline to edit its work schedule, or select nothing to edit the work schedule for the whole project.
Choose a week to edit from the mini calendar. Days which differ from the standard work week are blue. Click the arrows to move between months; Option-click to move a year at a time.
If a resource has any exceptions to its normal work week, the Schedule Exception icon ![]() appears in the Schedule Exception column.
appears in the Schedule Exception column.

The normal work week appears with a green dotted border, so you can see how this week’s schedule differs as you begin to make changes.
As when editing the work week for the project as a whole, drag or double-click in an empty area to create a new block of working time. Shift-drag anywhere to draw a red block that represents time that is unavailable for work.
View Options in Calendar View
Calendar View has a minimal set of view options that offer additional columns for display in the specialized resource outline that accompanies the calendar. Resource is the only one that is required; the resource’s Type, Notes, and calendar-specific Custom Work Week and Schedule Exception columns are the other defaults for a new project. The latter two are particularly useful for spotting at a glance when a resource’s schedule differs from the norm.
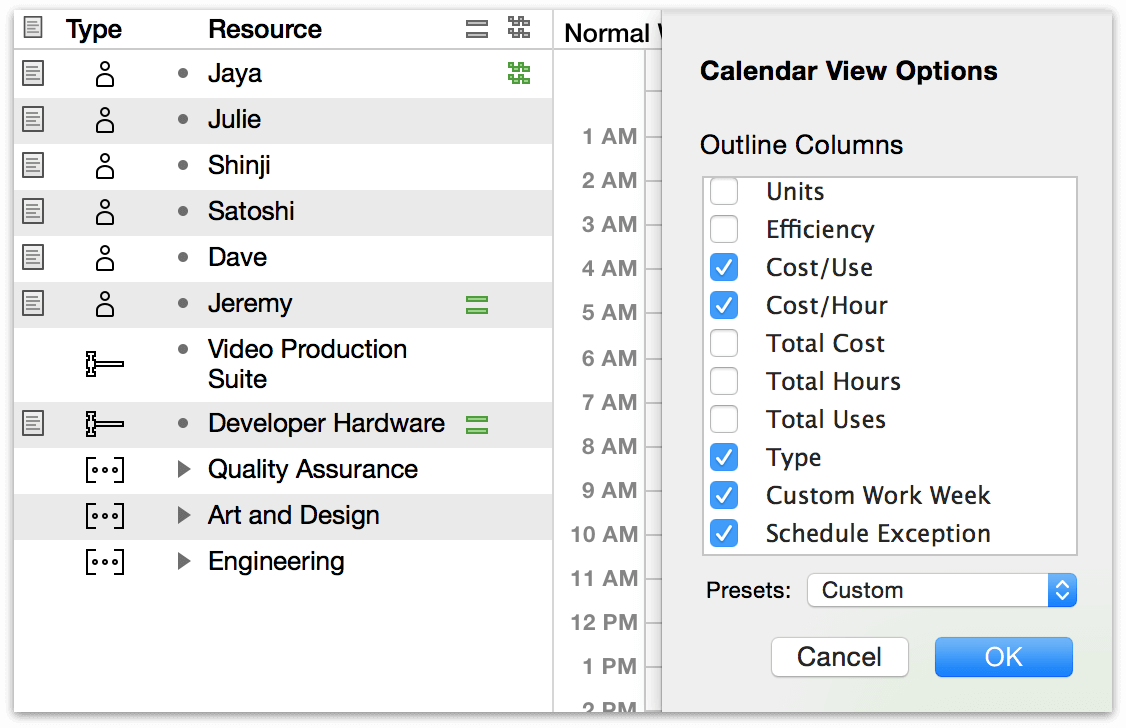
An altered normal hours schedule is represented by a green “equals sign” in the Custom Work Week column; click it to view the customized work week of the selected resource. A resource with an upcoming schedule exception is flagged with a staggered pair of zigzag lines in the Schedule Exception column; clicking the icon will likewise bring you to the schedule change in question.