Using OmniPresence on Your Mac
OmniPresence opens up a world of possibilities for syncing—and sharing—files between your Mac and iOS devices. On iOS, you access your synced folders from the Document Browser in OmniGraffle, OmniOutliner, or OmniPlan. On the Mac, however, you use the Finder for file management.
This final section discusses ways to use OmniPresence on your Mac, and from within OmniGraffle, OmniOutliner, and OmniPlan to help streamline your workflow. You’ll also learn some valuable tips about how to deal with conflict files that might occur when the same synced file is accessed on two different Macs or devices.
How Much Data Can I Store on Omni Sync Server?
While we don’t have a hard limit, we ask that you limit your data usage to 1 GB or less. This ensures that all our customers are able to get the best performance from their free Omni Sync Server account.
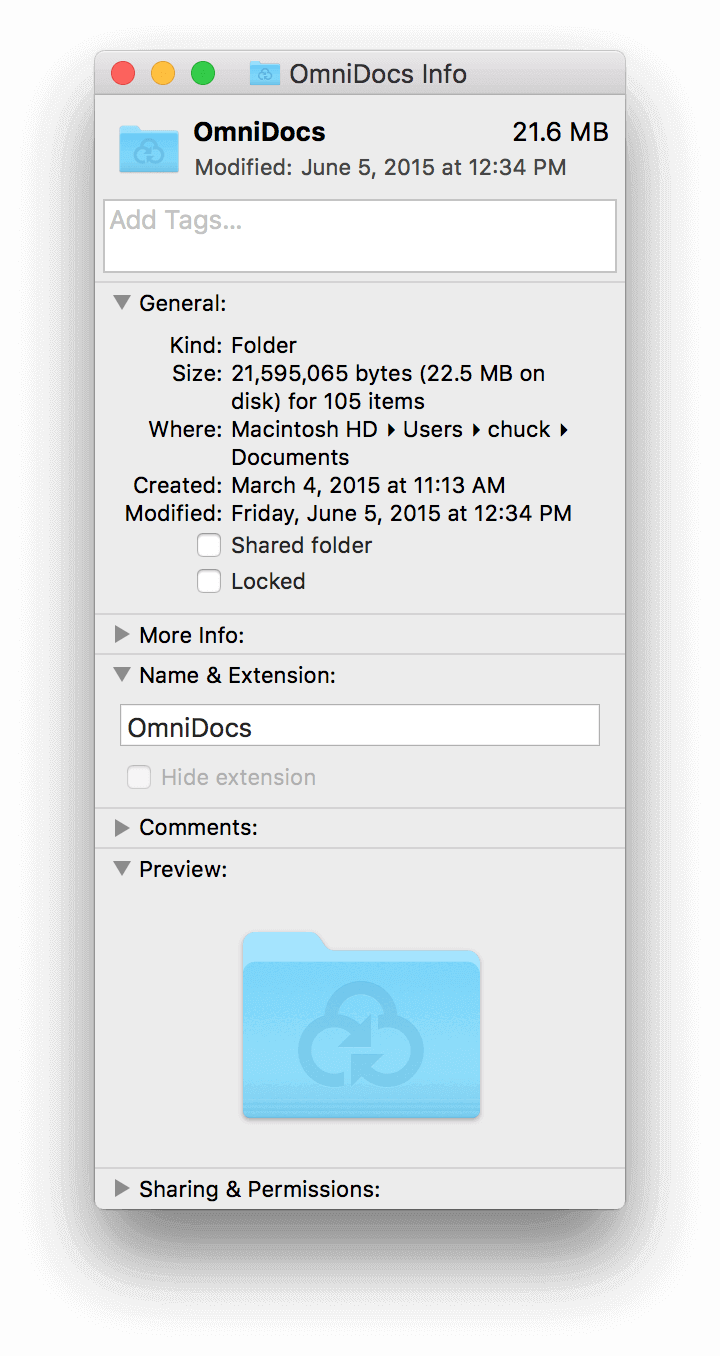
To determine how much data is stored in your OmniPresence folder, select the folder in the Finder and press Command-I. This opens the Get Info window, which not only displays how much data is stored in the folder, but also the number of files within, too.
If you are using more than 1 GB, we may ask you to reduce the amount of data you are storing. It is possible that we will implement a limit in the future, so it’s a good idea to keep your usage of the Omni Sync Server to a reasonable size.
If your workflow requires more storage than 1 GB, you may want to either host your own server, or use a third-party paid WebDAV host. In that case, the only limits are the ones you set for yourself.
If you are interesting in hosting your own server, instructions can be found on our support site, in Configure WebDAV for OmniPresence.
Getting to Know the Menu Bar Status Icons
As noted earlier, the way you interact with OmniPresence as an app is not by clicking an app icon in the Dock, but by clicking its icon in the menu bar.

- In its most basic state, OmniPresence is online and ready to sync files.

- Whenever OmniPresence notices a change to the files in the sync folder, the icon appears to be lifting a barbell.

- If you lose your Internet connection (which is required for syncing), the icon turns gray to denote that you are offline.

- If you see a gray sync icon with an exclamation mark, it means that OmniPresence failed to connect to the sync server. This could be the result of an invalid Account Name or Password, or something as simple as an intermittent Internet connection that drops while OmniPresence is trying to connect to the sync server.
If the icon remains in this state, here are some things you could try:
- Double-check your Account Name and Password.
- Check your network connection in System Preferences ▸ Network.
- Try quitting and restarting OmniPresence.
If that doesn’t help, contact our Support Humans for assistance.

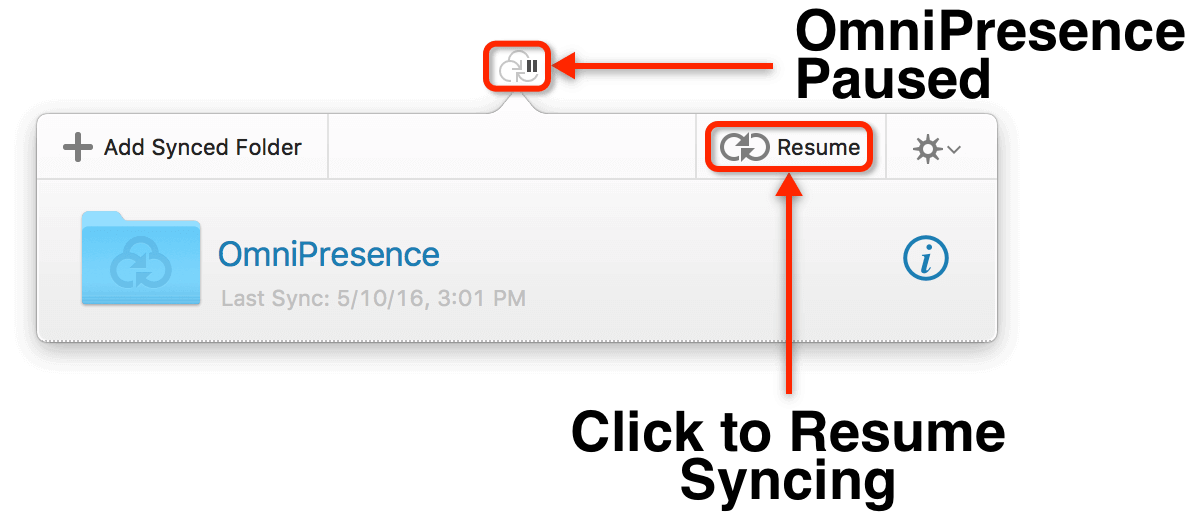
- If you pause syncing by clicking the Pause button in the popover menu, the icon turns gray and gains a pause symbol. To resume syncing, click the icon to open the popover menu, and then click
 . If you are connected to the Internet, OmniPresence springs back to life and syncs with the server.
Creating Subfolders in Your Sync Folder
After creating your OmniPresence sync folder, there’s nothing that’s stopping you from just dumping all of your OmniGraffle, OmniOutliner, or OmniPlan files in there and calling it a day. But why be so cavalier when you can create subfolders for organizing your files?
Follow along...
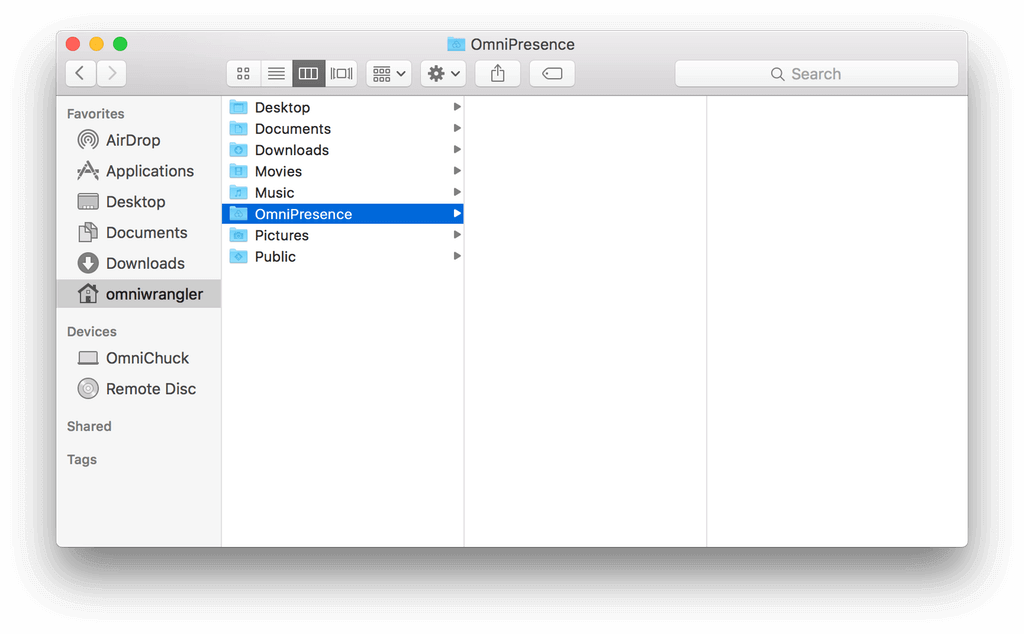
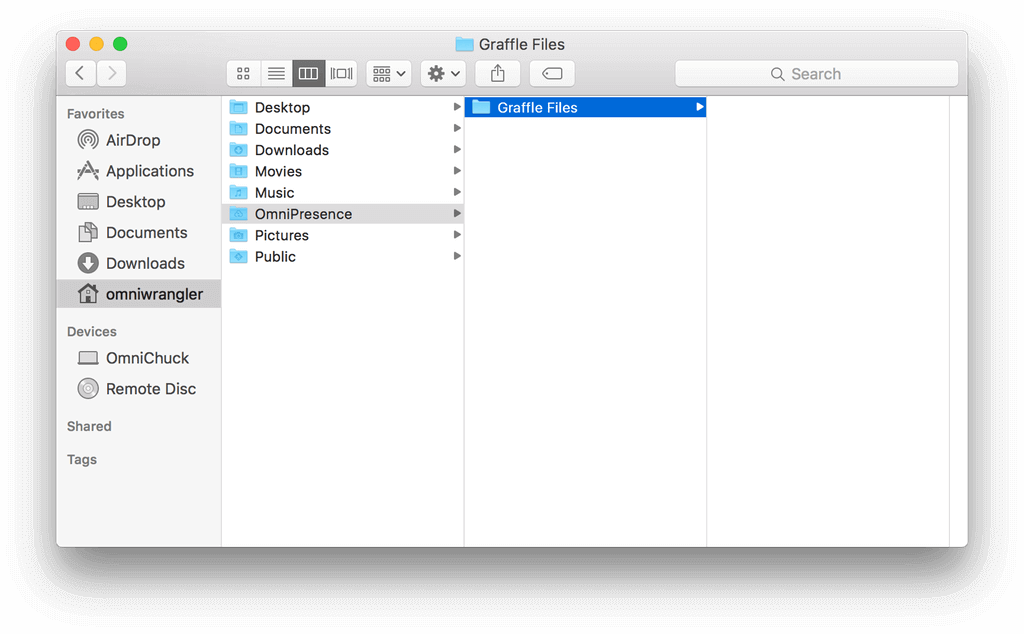
- Open a Finder window and select your OmniPresence folder:
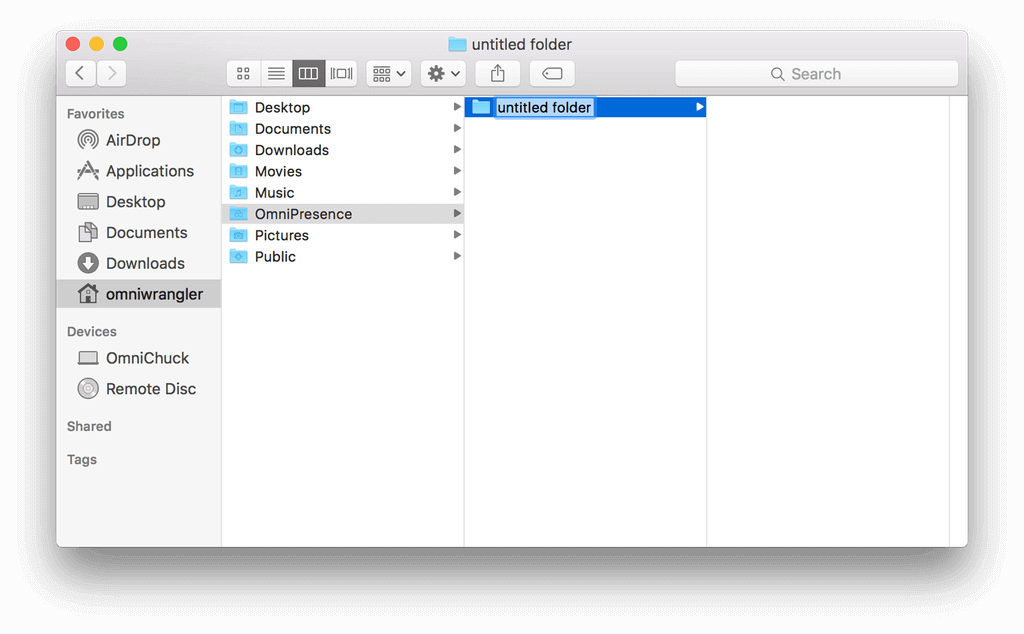
- Choose File ▸ New Folder, or use the keyboard shortcut, Shift-Command-N to add an untitled folder inside the OmniPresence folder:
- Enter a new name for the folder, such as Graffle Files, or Outlines, or Science Project—whatever the case may be:
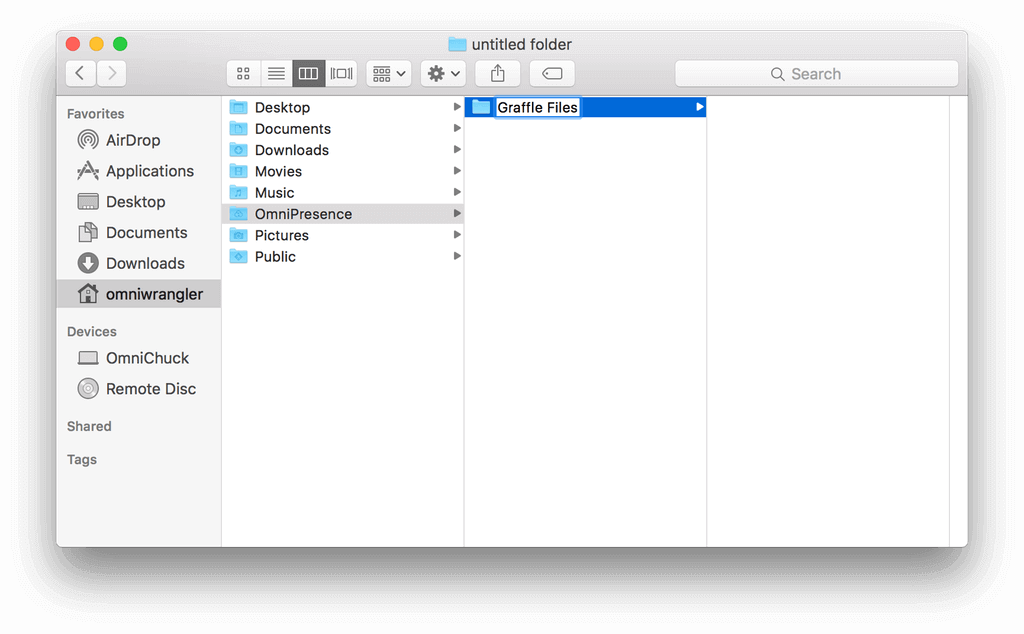
- After renaming the folder, press Return to accept the name:
OmniPresence does not sync empty folders. Instead, OmniPresence waits until something is stored in the folder before the file and the folder are synced to the server.
There is no limit (except for the 1 GB storage limit) to the number of subfolders and sub-subfolders your OmniPresence folder can contain. If you delete a folder, OmniPresence recognizes that, too, and will remove that folder (and any files it contains) from Omni Sync Server.
Sharing an OmniPresence Account
Unlike iCloud Drive, which is a single-user system, OmniPresence offers the ability for multiple users to connect to the same Omni Sync Server account. This is particularly helpful for teams of individuals who need to share files; for example, if your design team needs to access to the same set of OmniGraffle stencils or templates.
All you need to do is share the Omni Sync Server Account Name and Password with the trusted individuals. Each person on the team then installs and configures OmniPresence so that it connects to the same account.
Bear in mind, however, that once you share the credentials for the Omni Sync Server account with the team, it is your responsibility to “police” their activity. If someone leaves the team, for example, you might consider changing the password for the Omni Sync Server account. Similarly, if someone is storing files in a shared folder that aren’t useful for your team, you might suggest that they set up another Omni Sync Server account for managing those files.
It’s also worth noting that you may run into more instances of Conflict files if people are accessing the same file in the OmniPresence folder. See the next section for more details about Conflict files.
Resolving OmniPresence Conflict Files
If you are syncing files with OmniPresence and sharing those files across devices, Macs, or with other people accessing the same Omni Sync Server account, there’s a good chance that you will eventually encounter a conflict file.
Conflict files are created whenever OmniPresence detects changes to the same file on more than one system. For example, if you have the same file open on your Mac and iPad, and you’ve made edits on each device before they’ve had a chance to sync, OmniPresence detects and preserves those edits in the files it syncs. And—ike other sync solutions—OmniPresence does not attempt to resolve conflicts.
To help you recognize and review the conflicting files, OmniPresence updates the filename of your syncing document to include the following:
(conflict from [name of the device that made this particular change] on [name of the device or hard drive])
After reviewing the changes, if you delete one of these files or rename it altogether, the other version of the file automatically reverts to the non-conflict name.
OmniPresence looks for any saved changes to your files as you work on them. When OmniPresence detects a saved change—whether that’s a manual save using Command-S, or OS X’s Auto Save and Versions features for apps that support file coordination—it syncs with the server to communicate those changes to your other devices. OmniPresence also broadcasts a notification on the local network, so that any other local devices will see those changes and refresh any open documents.
Connecting OmniPresence to Two or More Omni Sync Server Accounts
As noted earlier, it is possible for you to connect to two or more Omni Sync Server accounts using OmniPresence on your Mac. For example, you might want to keep your work and personal files separate, or you might be on two different teams at work, each with their own Omni Sync Server accounts.
To add access to another Omni Sync Server account in OmniPresence, follow these steps:
- In the menu bar, click
 .
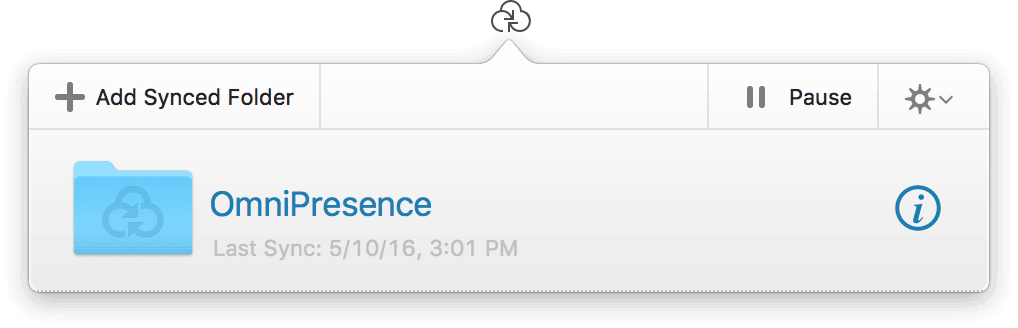
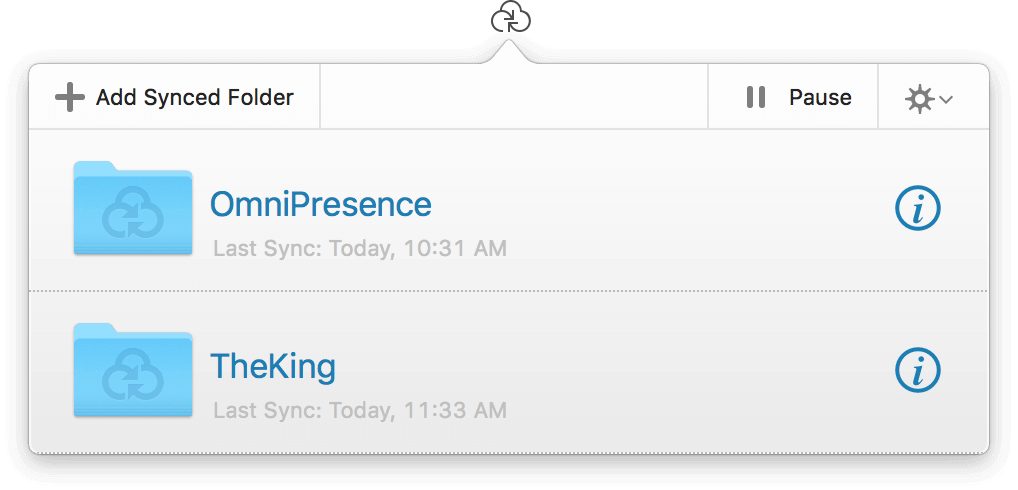
. - Click Add Synced Folder:
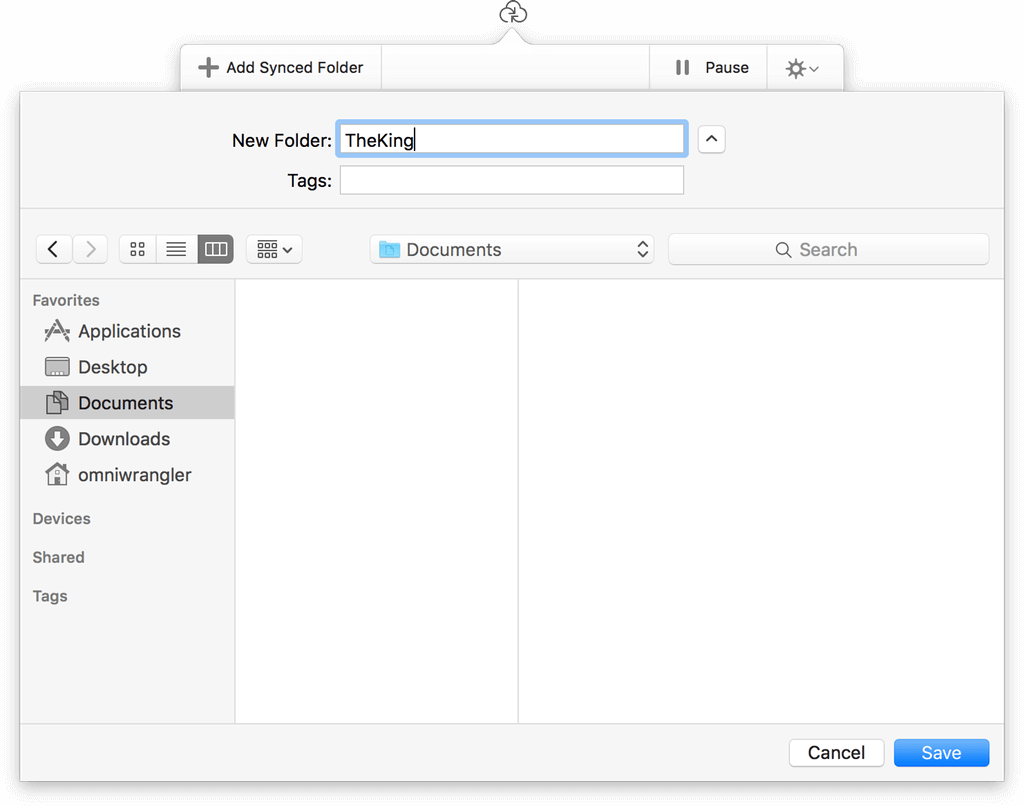
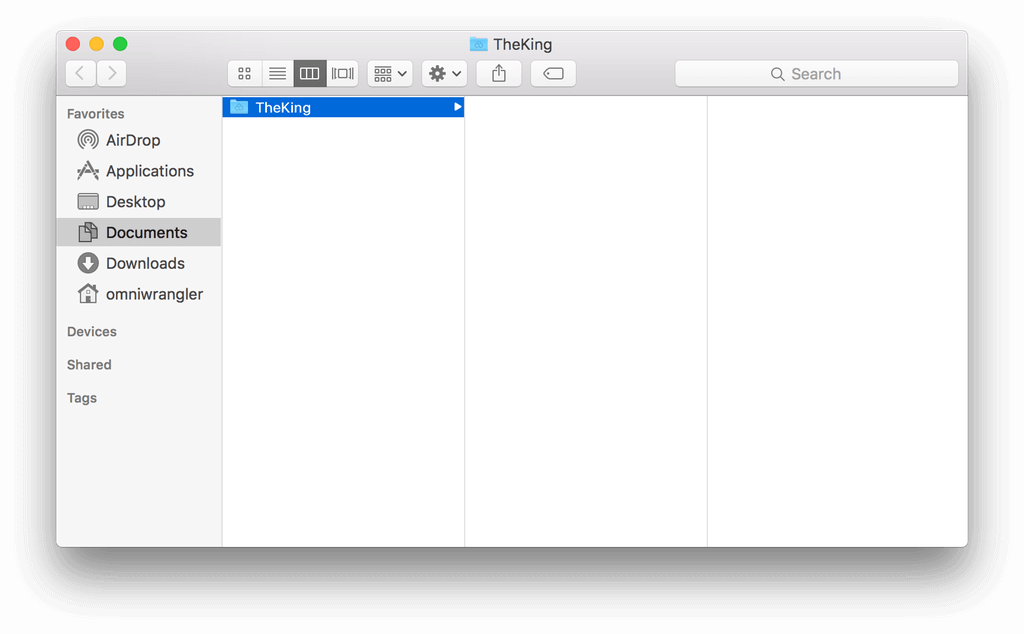
- Enter a name for the new synced folder, choose a location in the filesystem, such as the Documents folder, and then click Save to create the folder:
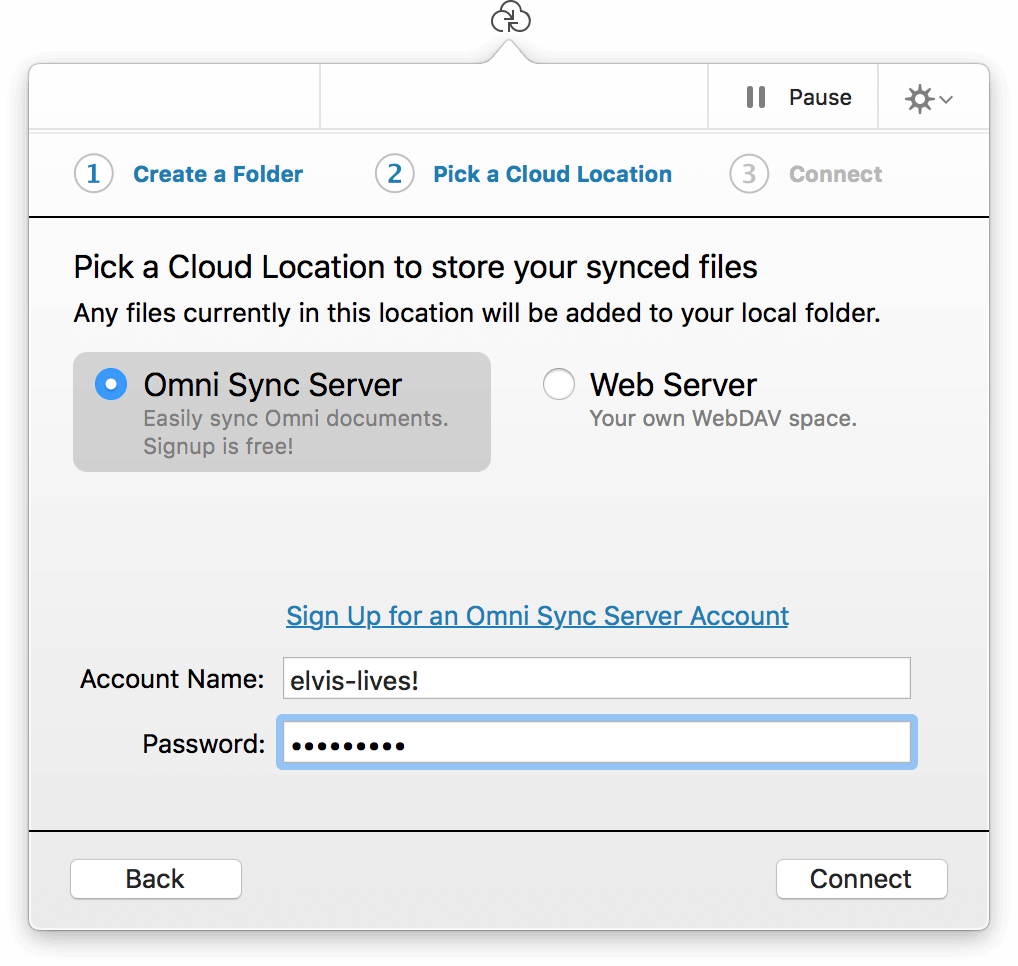
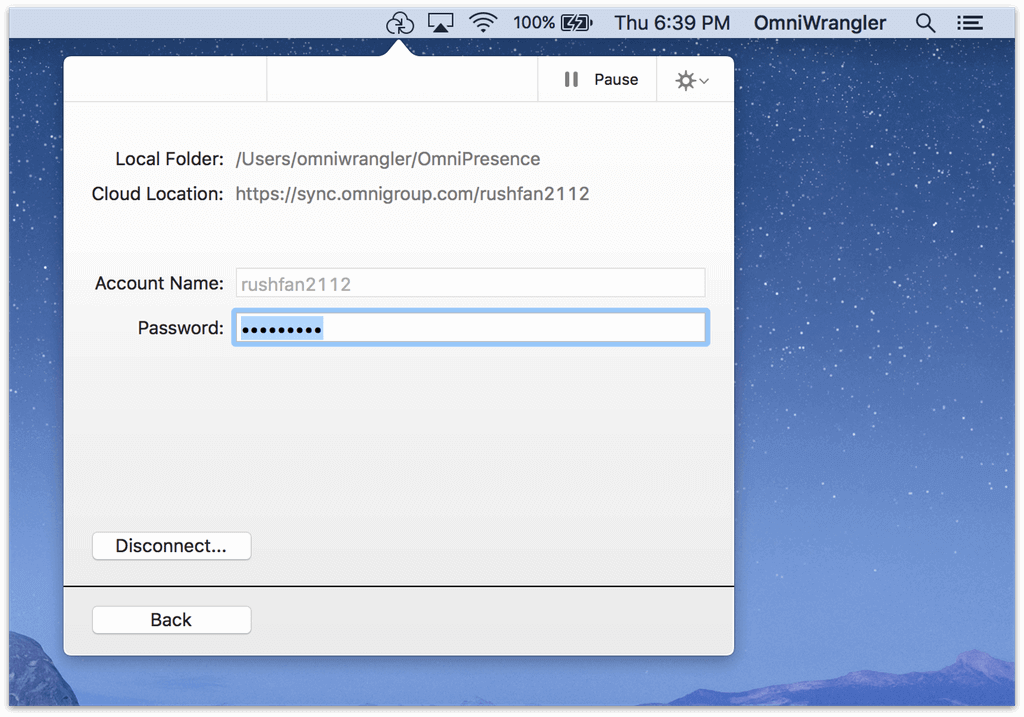
- Enter the Account Name and Password for the Omni Sync Server account, and then click Connect:
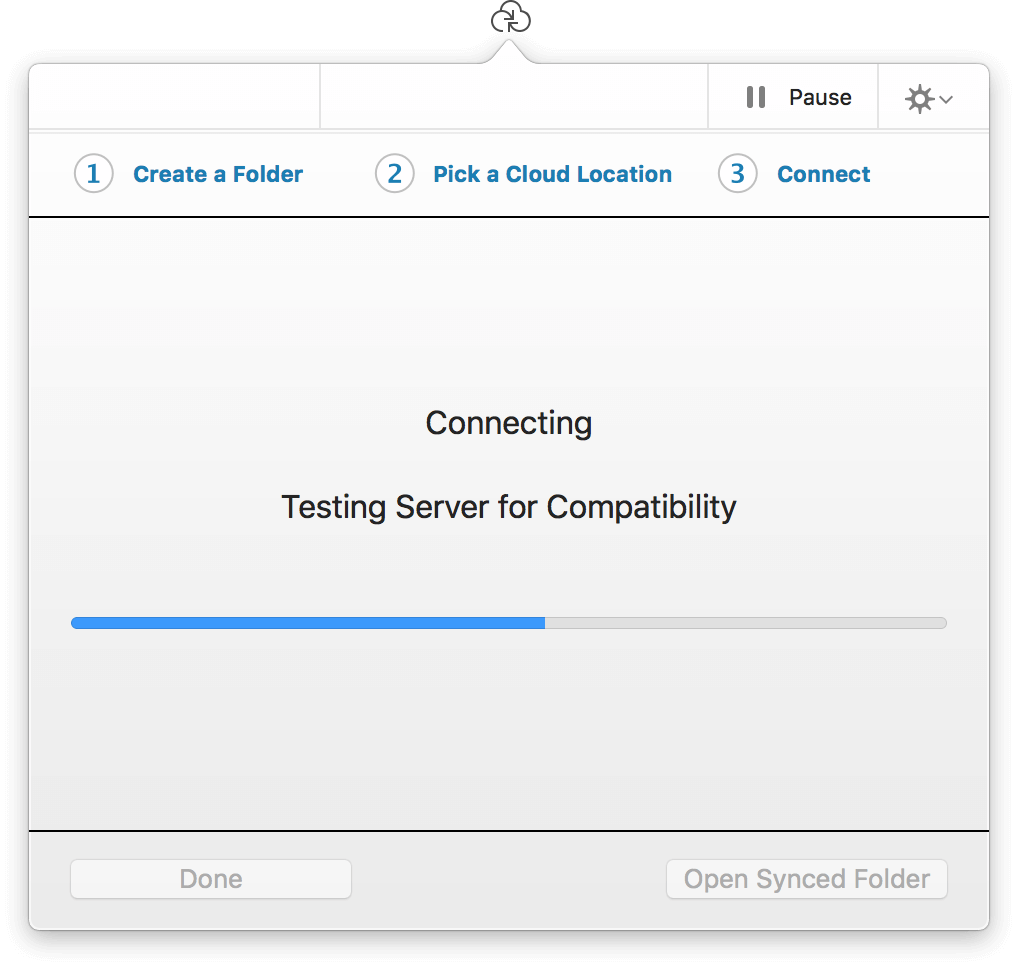
- Wait a few seconds while OmniPresence connects with the Omni Sync Server account:
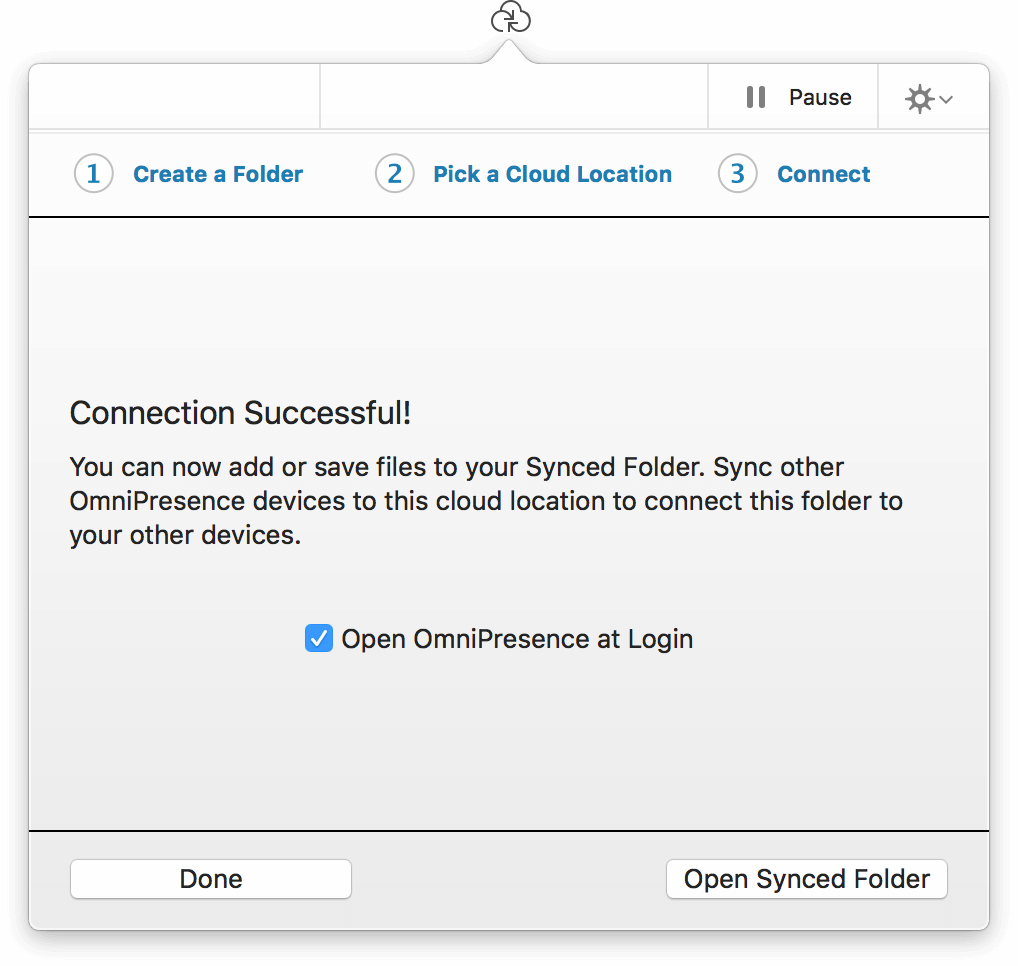
- After OmniPresence connects to the synced folder, you can opt to Open OmniPresence at Login, if you’d like. Otherwise, click Done to close the menu, or click Open Synced Folder to open the newly synced folder in a Finder window.
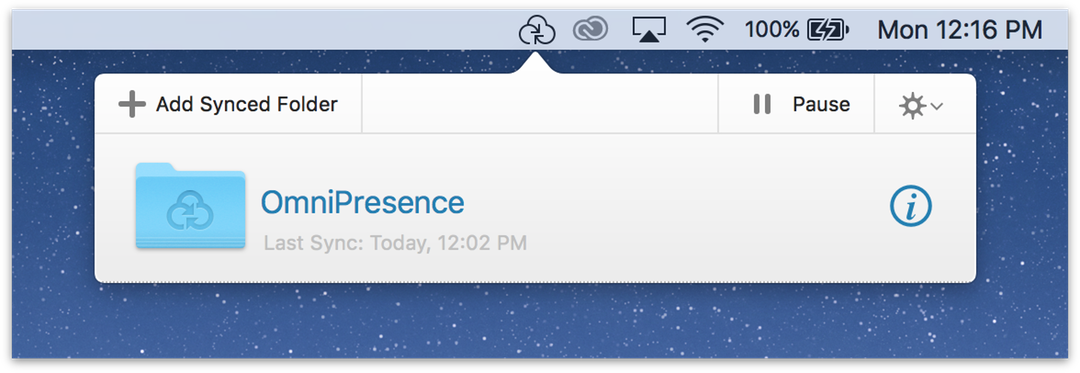
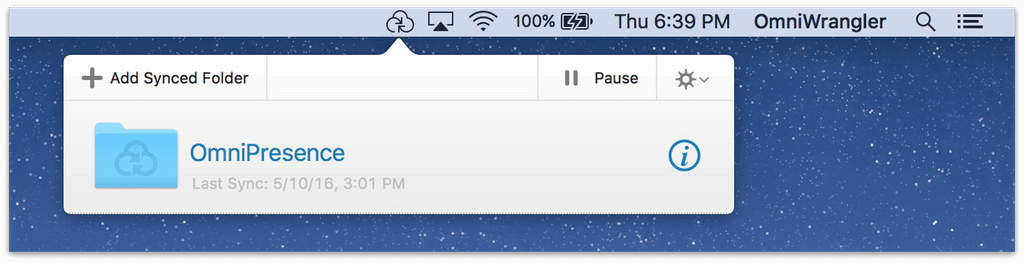
You can access and control your synced folders from the OmniPresence popover in the menubar:
More Tips for Using OmniPresence
Here are some helpful tips for enhancing your OmniPresence experience:
- You can Pause and Resume syncing by clicking the OmniPresence icon in the menu bar.
For example, you might want to pause OmniPresence sync while on a flight, and then resume syncing once you have reached your destination. Another example of when you probably want to pause syncing is if you are tethering your iOS device’s cellular connection to provide Internet access to your Mac.
Click the Action menu (the gear next to the Pause/Resume button) for a host of OmniPresence options, including:
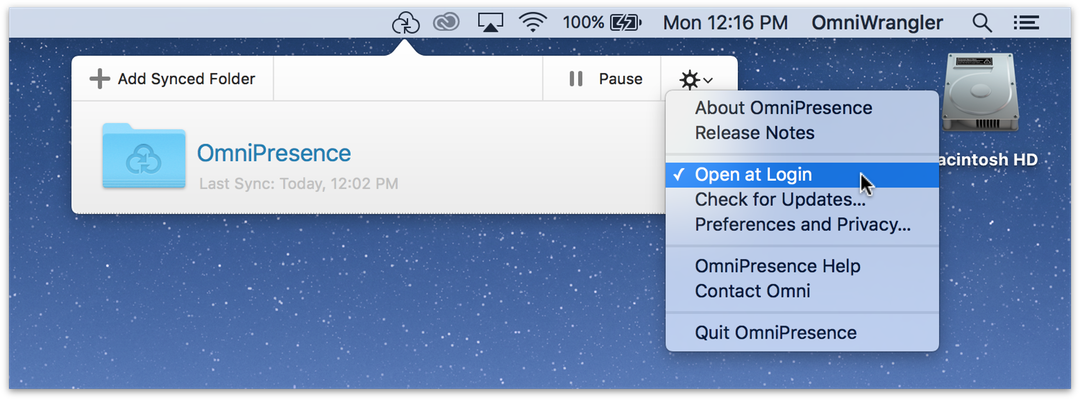
- About OmniPresence — Check here to find out which version of OmniPresence you are using, and to contact Omni for Support.
- Release Notes — Find out what’s new in the version of OmniPresence on your Mac.
- Open at Login — This item should be checked if you opted during the installation process to have OmniPresence automatically start when you login to your Mac.
- Check for Updates — Contact our servers to see if there is a new release of OmniPresence.
- Preferences and Privacy — Specify the frequency of when OmniPresence will check for updates. You can also opt to send us anonymous data about your Mac.
- OmniPresence Help — This opens the in-app Help for OmniPresence.
- Contact Omni — This queues up an email message to us. Please don’t change the subject line as this contains valuable information for our Support Humans.
- Quit OmniPresence — Unlike other Mac apps that run in a window and which let you quit them from the File ▸ New menu option (or Command-Q), you need to explicitly choose this menu option to quit OmniPresence. Doing so, however, also removes the menu bar extra. To start OmniPresence again, press Command-Space, type in OmniPresence, choose the app, and then press Return.
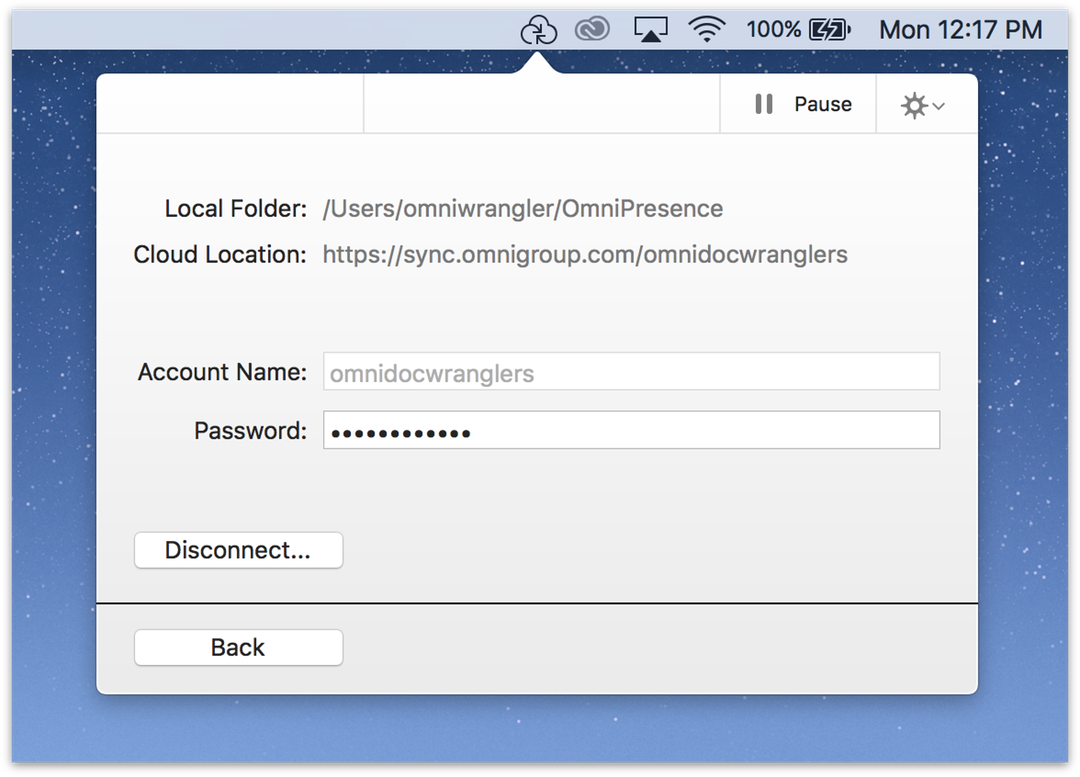
To stop syncing a folder you’ve connected, click its Info button and choose Disconnect. The folder on your Mac will be moved to the Trash and the files inside will no longer be synced. Any files left in the folder before disconnecting will stay safe and sound at the cloud server location you’ve specified. To reconnect and start syncing with those files again, just create a new folder connected to that cloud location.
Unsure of when OmniPresence last synced? Click the OmniPresence icon in the menubar and then look beneath each folder name to see the date and time that folder last synced.
Resolving Omni Sync Server Password Issues
Having trouble logging in with your sync credentials? Here are the answers to our most common sync issues:
I know my Account Name, but my credentials aren’t being accepted in the app.
First, double-check you’ve entered everything properly. The Account Name field must be all lowercase. If you specify capital letters in your Account Name when creating your account, these are automatically converted to lowercase letters. The password field can contain capital letters and numbers, and is CaSe-SenSiTiVe.
While you can log in to the account management website with your Account Name or the email address on-file with that account, only the Account Name is accepted within the app for sync.
If you’ve lost or forgotten your Omni Sync Server password, use this form to request a new password. Enter your Account Name or email address; we will send a message to the email address associated with your account containing a link for resetting your password.
I’m setting up sync on a new device, but I forgot the Account Name for my Omni Sync Server account. Where can I find it?
If you already have one or more devices set up for sync, check the sync preferences on those devices to confirm your Account Name. Here are the paths to your Account Name field in all our apps:
- In OmniFocus 2, choose OmniFocus ▸ Preferences ▸ Synchronization ▸ Account Name
- In OmniPlan 3 Pro, choose OmniPlan ▸ Preferences ▸ Accounts
- In OmniPresence, click the menu bar icon ▸ Inspect icon
 ▸ Account Name
 - OmniOutliner, OmniGraffle and OmniPlan 3 Standard sync through the OmniPresence for Mac client
If you currently don’t have sync set up, start by resetting your password. Enter your email address; we will send a message to the email address associated with your account containing a link for resetting your password. The beginning of this email addresses you by the Account Name associated with your Omni Sync Server account. You can also check your Account Name after resetting the password by logging in to your Account Management page.
I already have an account, but I forgot my password.
If you’ve lost or forgotten your Omni Sync Server password, use this form to request a new password. Enter your email address; we will send a message to the email address associated with your account containing a link for resetting your password.
If you no longer have access to the email address on-file with your account—and never updated your email information from your Account Management page, please contact us.
Stop Syncing an OmniPresence Folder
To stop syncing a folder:
- In the menu bar, click the OmniPresence icon to open the popover:
- Click
 next to the folder that you no longer want to sync with OmniPresence.
 - In the dialog that appears, click Disconnect.
The folder on your Mac is moved to the trash and the files inside are no longer be synced. Any files left in the folder before disconnecting remain safe and sound at the cloud server location you specified. To reconnect and start syncing with those files again, create a new folder connected to that cloud location.