This article is written for OmniPlan 3.7 for Mac and OmniPlan 3.6 for iOS. Older and newer versions may need slightly different steps.*
You’ll also need OmniPlan Pro on every device to collaborate using Multiuser Project Sync (also called Publishing and Subscriptions).
If no one else needs access to your OmniPlan files you can use OmniPresence Sync.
Controlling access
There are no permissions in OmniPlan. All collaborators use the same username and password to connect to the same sync account. You control who has access by who has the username and password.
Anyone with the username and password will have access to anything in the account. Teams that need privacy from each other should store their documents in separate team accounts. You’ll also want to keep your personal files in a private sync account. (Omni Sync Server accounts are free!)
You can change the account password to revoke access.
Getting a team connected
These are the steps for syncing with the Omni Sync Server. (But they should be the same for any WebDAV server.)
-
Create an Omni Sync Server account (if one does not already exist).
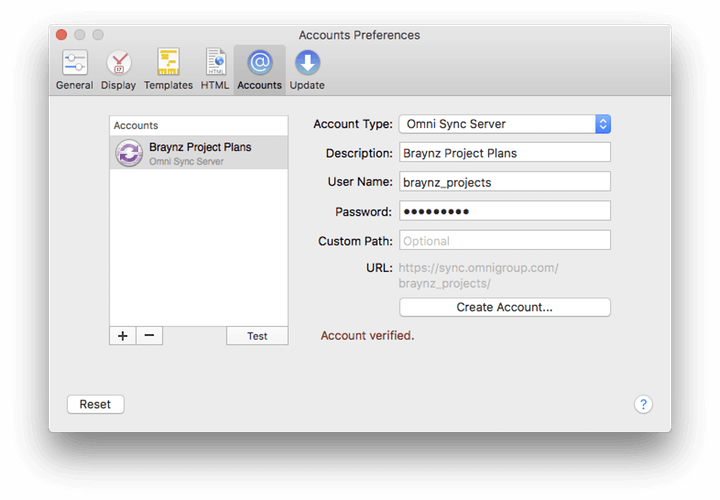
- In OmniPlan for Mac, choose OmniPlan > Preferences > Accounts > Create Account.
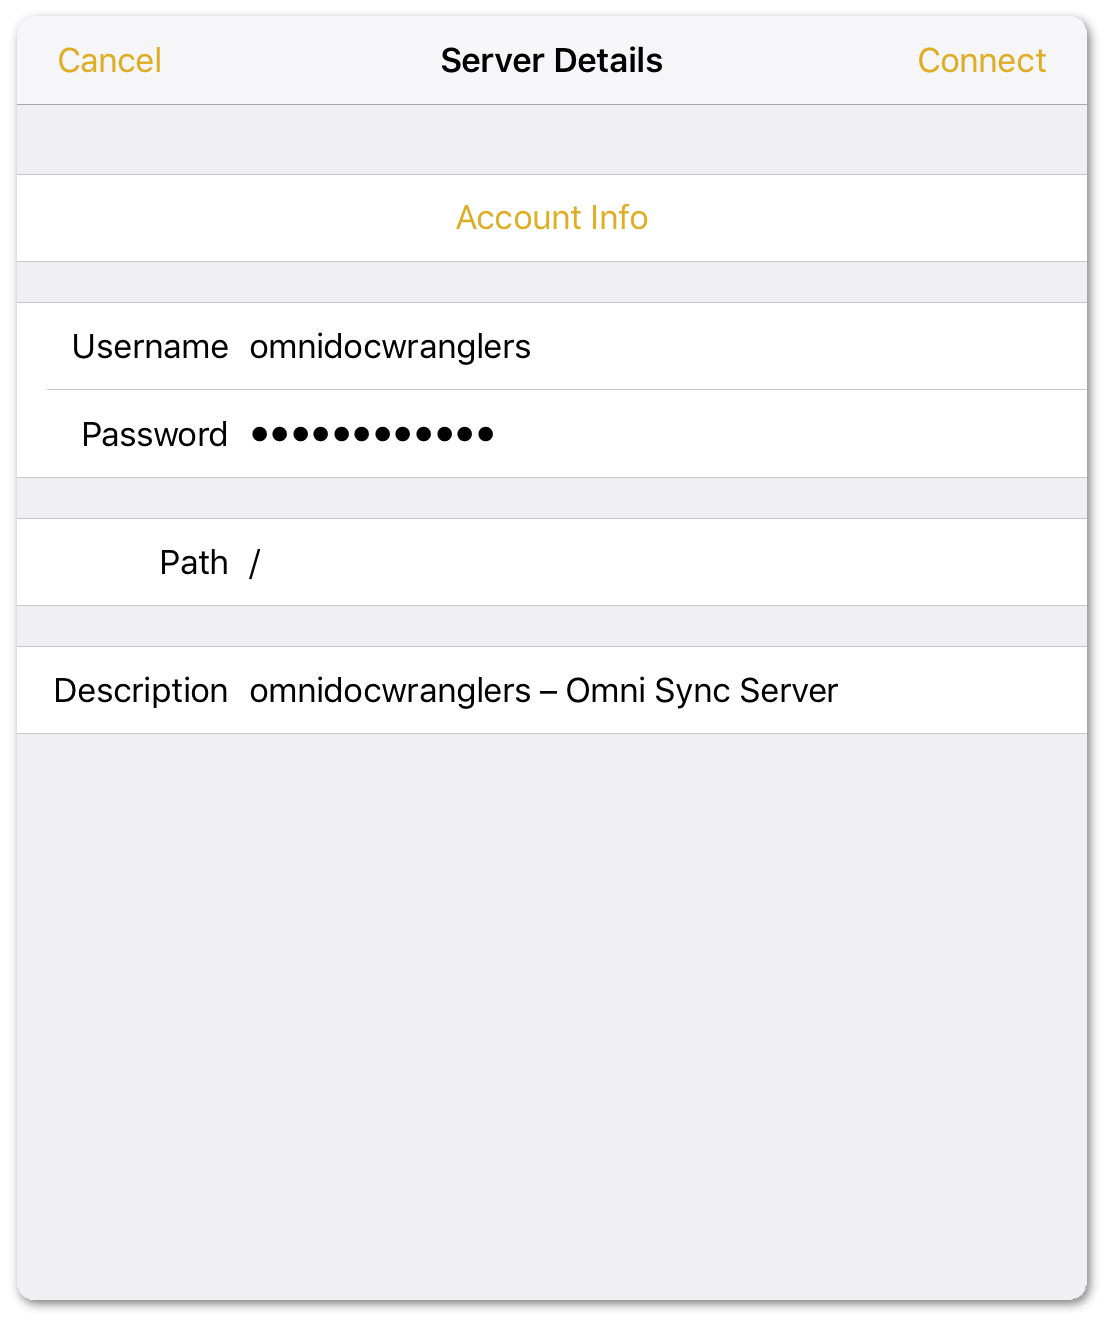
- In OmniPlan for iOS, scroll to the bottom of the Locations screen and tap Server Repositories > Add Omni Sync Server Account > Sign Up.
-
Connect each installation of OmniPlan to the sync account.
- In OmniPlan for Mac, choose OmniPlan > Preferences > Accounts.
- In OmniPlan for iOS, tap Server Repositories > Add Omni Sync Server Account.
(OmniPlan can connect to multiple sync accounts. Each team member can use the Description field [on macOS and iOS] to identify the purpose of each account they use. The description does not sync.)
Sharing a project
Sync a project up to a repository to make it available to the team for collaboration. Only do this once per project from either a Mac or an iOS device (not both).
-
Open the project and choose the sync options.
-
If using OmniPlan for Mac:
- Choose Project > Configure Publishing & Subscriptions.
- Use the plus button (+) to add Sync: entire plan with OmniPlan server repository to the list of publishing actions.
- Choose the Server Account.
- (Optional) Enable Perform publishing actions automatically when saving to publish every time you save (using File > Save or ⌘S) or close the document.
- Click OK.
-
If using OmniPlan for iOS:
- Open the Project Editor.
- Tap Publish & Subscribe > Repository.
- Tap the desired repository. (Make sure you’ve chosen the intended repository before publishing.)
-
-
Publish the project to the repository.
- If using OmniPlan for Mac, choose Project > Publish.
- If using OmniPlan for iOS, tap the back arrow (<) twice to back out to the main project editor and tap Publish.
Subscribing to a project
Team members access a project by syncing it down from the repository and saving a local copy. You should only need to do this once per project per device.
(You can do it again if you lose your local copy. But opening from the server repository shouldn’t be part of your day-to-day workflow.)
- In OmniPlan for Mac:
- Choose File > Open From Server Repository.
- Choose the repository from the pull-down menu.
- Open the project.
- Use File > Save (⌘S) and save a copy anywhere on your local drive.
- In OmniPlan for iOS:
- Tap Server Repositories.
- Tap the repository.
- Tap the project. (This saves a syncing copy to the Local Documents location.)
Workflow
Once synced, team members work only with their local syncing copy of the project. Change Tracking can show you changes since the last time you published. Each collaborator can accept or reject any changes and republish.
-
Open the local copy of the project and Update to pull changes down from the server. (Opening a project from the repository is only done when accessing a project for the first time.)
- In OmniPlan for Mac, choose Project > Update.
- In OmniPlan for iOS, open the Project Editor and tap Update.
-
Use Change Tracking to accept or reject changes.
- In OmniPlan for Mac, choose Project > Show Changes.
- In OmniPlan for iOS, tap View > Change Tracking.
-
Edit the project then Publish those edits up to the server.
- In OmniPlan for Mac, choose Project > Publish.
- In OmniPlan for iOS, open the Project Editor and tap Publish.
(OmniPlan can be used as its own free viewer for team members that don’t need to edit. But read-only mode doesn’t support any Pro features.)
Editing from a synced calendar
With OmniPlan Pro for Mac team members can edit their own tasks from a calendar.
- In OmniPlan for Mac:
- Open the local copy of the project.
- Choose Project > Configure Publishing & Subscriptions.
- Use the plus button (+) to add Sync: tasks to/from iCal (or Calendar Server) events to the list of publishing actions.
- Choose the team member’s calendar.
- Change Filter to Custom and adjust the filter settings to include:
Resource is [resource name].
Once that is set up, each Publish will send edits to the calendar. And each Update will receive edits from the calendar.
(Team members may need to refresh their calendar to see recent changes.)
Using the free trial
During the 2-week free trial you can try every feature.
- In OmniPlan for Mac, choose OmniPlan > Free Trial Mode > Try Standard/Pro Edition.
- In OmniPlan for iOS, after the intro video tap Unlock OmniPlan > Free Trial > Start Trial.
(When the trial expires Pro features will no longer be accessible. And edits made using standard features won’t be saved.)
Read-only mode
After the free trial ends OmniPlan can still be used unlicensed to open and view local documents. Buy OmniPlan—or restore a previous purchase—to resume editing.
Learning how to use OmniPlan with the tutorials
For a quick introduction to how OmniPlan handles task scheduling check out the OmniPlan for Mac tutorial and OmniPlan for iOS tutorial in each user manual.
Getting support
If you run into any trouble please use the contact info at the bottom of this page to get in touch with our Support team. Including your document (or the anonymized version of it) and/or your Omni Sync Server account name (if you’re syncing with our server) can help us get you up and running more quickly.
When sending your document, please compress it before attaching it to the email. If it contains confidential information, send an anonymized version by choosing Help > Contact Omni > Include [filename].oplx. That will replace all the text (including task and resource names) in your project with Xxxx. (You can open the resulting file and examine it prior to sending it in.)
Please be sure to point out the specific area where you’re having trouble, so we’ll know exactly where to look in the file.