Introduction
Welcome to the OmniFocus 2.16 for iOS User Manual!
Note
If you are updating from OmniFocus for iOS version 2.14 or earlier, you will be prompted to migrate your database to an updated format capable of supporting many new and upcoming OmniFocus features. For details on this process, see Migrating Your Database in the Getting Synced chapter.
If you're installing OmniFocus for the first time, your database is in the newest format and you're all set!
OmniFocus is the personal task management tool that helps you keep track of all the goals, plans, errands, and aspirations that come up in your life. Now in a universal version you can use on any device with iOS 9, OmniFocus 2 for iOS is even better at helping keep you on top of everything you need to do throughout your day.
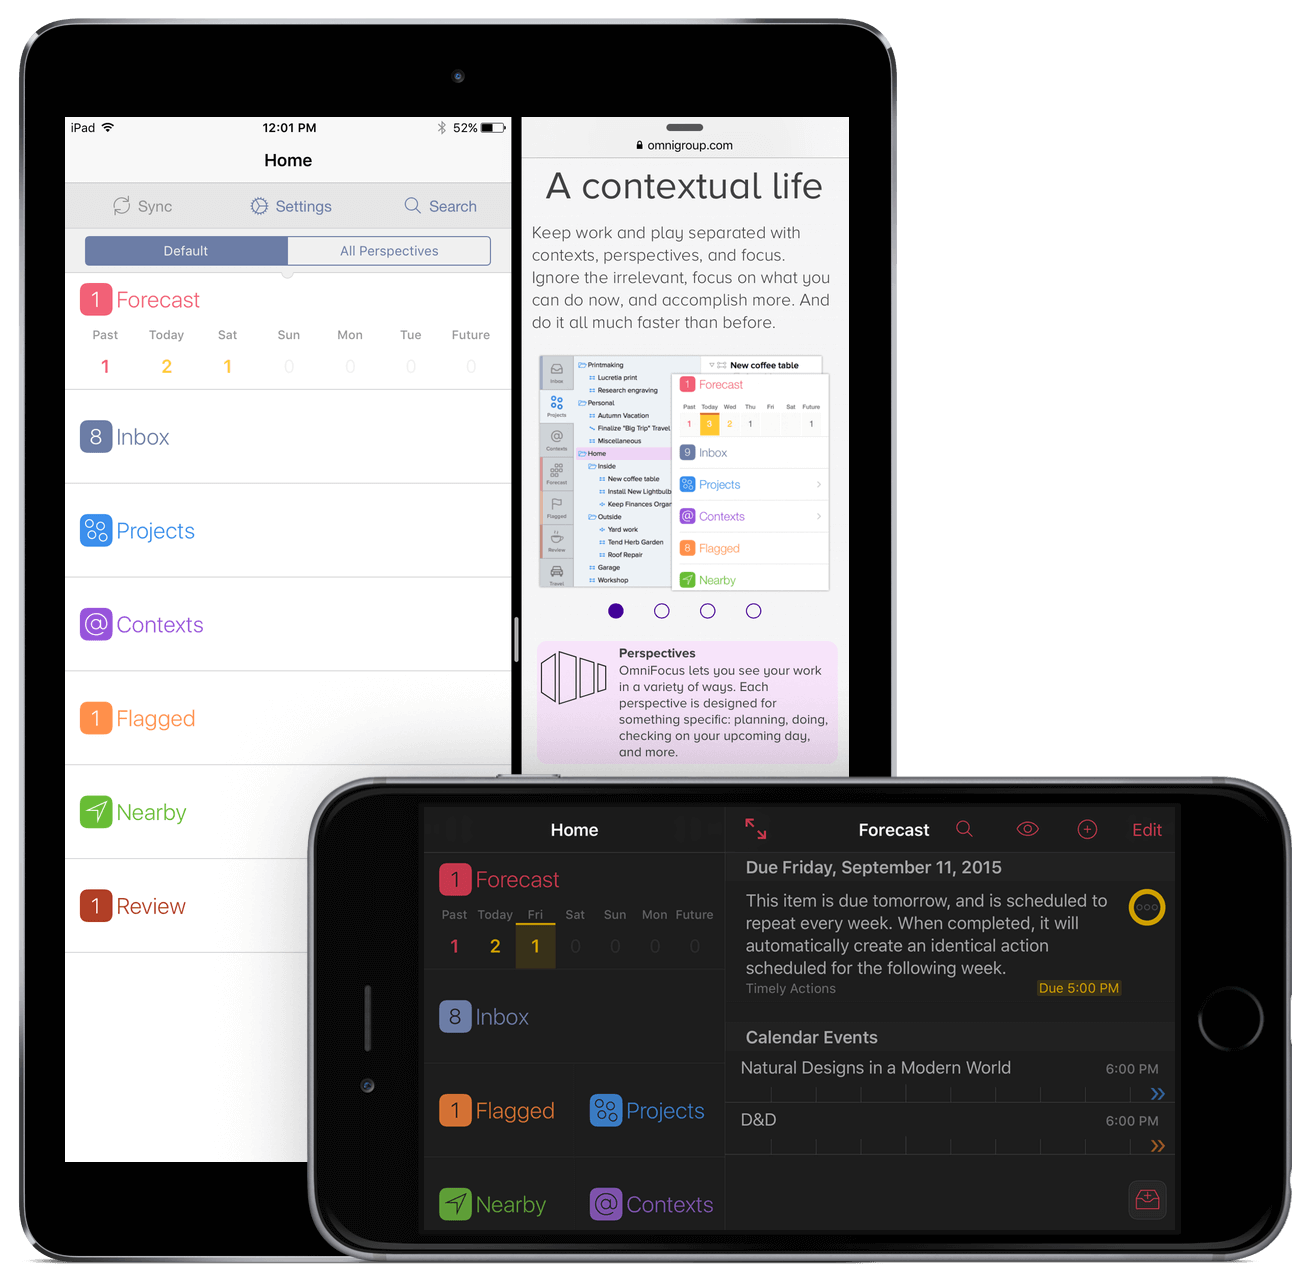
Available on your iPad, iPhone, and Apple Watch (through the OmniFocus for Apple Watch extension), OmniFocus for iOS is packed full of tools to help you prioritize steps within complex projects or simply jot a quick to-do list for a weekly meeting. OmniFocus works great as a standalone productivity aid or in conjunction with whatever time and task-management scheme suits your personal style.
Note
OmniFocus for iOS (the subject of this manual) is available on the App Store, and works on all of your iOS devices as well as your Apple Watch (through the OmniFocus for Apple Watch extension).
OmniFocus for Mac is available both on the Mac App Store and directly from The Omni Group.
OmniFocus for iOS is the mobile counterpart to OmniFocus for Mac, and works seamlessly to bring all the power and versatility of the OmniFocus system to your fingertips. It uses the newest iOS and Apple hardware updates to help you get things done when it's most sensible, convenient, and efficient to do them.
For a video tour of the features of OmniFocus 2, check out:
https://www.omnigroup.com/video/omnifocus/#omnifocus-2-for-ios
For a list of the latest updates to OmniFocus 2 for iOS, see the Release Notes in OmniFocus Settings.
If you're upgrading from OmniFocus 1, changes to the interface and terminology are summarized in the Appendices.
How This Documentation is Organized
This manual that you have before you (online, in iBooks on your Mac or iOS device, or both) has been assembled in such a way that you’re provided with a complete tour of OmniFocus.
We designed this book to help both new and experienced OmniFocus users hit the ground running with the latest version of OmniFocus for your mobile devices. The chapters that follow explain the layout of the app, and then delve into the various perspectives that help you get a handle on the panorama of tasks that fill your day. The manual finishes with ways you can get even more out of OmniFocus, diving inward to the details of scheduling and enriching your tasks, and branching outward to the wide world of interactions OmniFocus has with other apps and platforms you use.
To help guide you through the documentation and better learn all the things you need to know about OmniFocus, here’s a list of all of the chapters in this book:
- Chapter 1, Getting Synced
- Before you start using OmniFocus in earnest it's a good idea to set up a sync account, and this chapter explains how. Even if you only have OmniFocus on one iOS device, syncing is a great way to keep a second copy of your data handy — and if you're running OmniFocus in multiple places, syncing keeps you up to date no matter where you are.
- Chapters 2-4, Guided Tour (iPad, iPhone, iPhone 6/6s Plus)
- After you're all synced up, it's time to start exploring OmniFocus. The Guided Tour chapter for your particular device is the place to earn your OmniFocus navigator's license, acting as your guide from the home screen to the contextual menus throughout the app — a great jumping-off point for further adventures in productivity.
- Chapter 5, Collecting with the Inbox
- The Inbox is the indispensable first point of entry for notes, goals, tasks, and aspirations that come up throughout your day. Whether you're just starting with OmniFocus or a seasoned veteran, adding to, then working through the items in your Inbox is a great way to get started.
- Chapter 6, Planning with Projects
- When a task has multiple moving parts, steps that need completing, or a scope more complex than a one-off shopping trip, organizing multiple simple actions into a project can help you handle even the most daunting of challenges. This chapter covers the various types of projects and how they can be used to most effectively aid your productivity.
- Chapter 7, Organizing with Contexts
- Setting a context for a person, place, or thing needed to move a task along helps you track and complete otherwise unrelated actions when it's most convenient. This chapter delves into the concept of contexts, and shows how OmniFocus can be location-aware with alerts to remind you when you're near a nexus of potential activity.
- Chapter 8, Looking Ahead with Forecast
- If you use OmniFocus for time-sensitive projects, the Forecast perspective is your friend. This chapter helps you ground your OmniFocus experience among everything else happening in a busy week, and guides you through integration of your external Calendars with OmniFocus.
- Chapter 9, Prioritizing with Flags
- The Flagged perspective offers another way to mark important projects and actions. By design the exact meaning of "flagged" isn't defined, so you can use it for whatever you like — and this chapter explains how flagging items works.
- Chapter 10, Taking Action Nearby
- If you've set up location information for a context, the Nearby perspective provides a look at the context — and its associated actions — based on physical proximity. This chapter describes how to use the Map and List views to get stuff done, geographically.
- Chapter 11, Updating Project Status with Review
- After you've been using OmniFocus for awhile you may find that you've accumulated a daunting list of tasks. This chapter helps you set up regular reviews of your work in progress to keep the most important projects on track.
- Chapter 12, Working with Perspectives
- There's a whole lot you can do with the default perspectives included with OmniFocus. With custom perspectives, views on your projects and contexts become infinite — this chapter delves into the ways you can use the OmniFocus Pro upgrade to customize OmniFocus to suit your exact needs.
- Chapter 13, Using Notes and Attachments
- Adding custom data to actions and projects is a great way to ensure they fully and accurately describe your goals. This chapter helps make sure your vision is realized through attached images, sounds, and text.
- Chapter 14, Using Dates and Times
- OmniFocus is all about things you need to do in the gaps between events scheduled on your calendar. How you express when projects and actions become available for work, are due, and (possibly) recur is important, and this chapter dives into the details of how OmniFocus items can be grounded in time.
- Chapter 15, OmniFocus Extended
- While it works great as a standalone app on your device, OmniFocus can be so much more. This chapter describes how you can integrate OmniFocus into your broader workflow, working with email, Siri, the Calendar app, iOS 9 extensions, and more.
- Chapter 16, OmniFocus Settings
- This chapter describes the various configuration options available in OmniFocus Settings.
- Chapter 17, Glossary & Appendices
- This chapter provides an alphabetical list of terminology associated with OmniFocus. If you see a word used in this manual that you can't puzzle out, it's (hopefully) included here. It also contains appendices with information relevant to users updating from previous versions of OmniFocus.
- Chapter 18, Keyboard Shortcuts
- If you're using OmniFocus for iOS with an external keyboard connected to your device, you can take advantage of the app's built-in keyboard shortcuts. This chapter provides a list of the available shortcuts based on where you are and what you're doing in OmniFocus.
- Chapter 19, Getting Help
- Finally, if there's something OmniFocus-related you're having trouble with — anything at all — this chapter contains resources for finding a solution.
Using This Book
One of the beauties of having OmniFocus's documentation available in electronic form is that it's always available whenever you need it. We have put all of the documentation on our website where it can be searched and bookmarked. We're also continuing to create EPUB versions of the documentation that are freely available on the iBooks Store.
Tell Us What You Think
We’re constantly working on updates for our documentation. Whether it’s CSS work, correcting the occasional typo (yeah, they do sometimes slip through), or adding details or clarification for a specific feature based on something we’ve heard from a customer, we’re always trying to make our documentation better and more useful for you.
If you have any specific comments you’d like to send us about the documentation, please do. You can drop us an email message via our Support queue, or you can ping us on Twitter; we’re @OmniWranglers.
Finally, we’d like to thank you for taking the time to read the docs.
Getting Synced
When you first launch OmniFocus for iOS you’ll be asked to set up your sync settings. OmniFocus synchronizes your actions with a server so that all your iPhone, iPad, and Mac tasks and projects are always up to date.
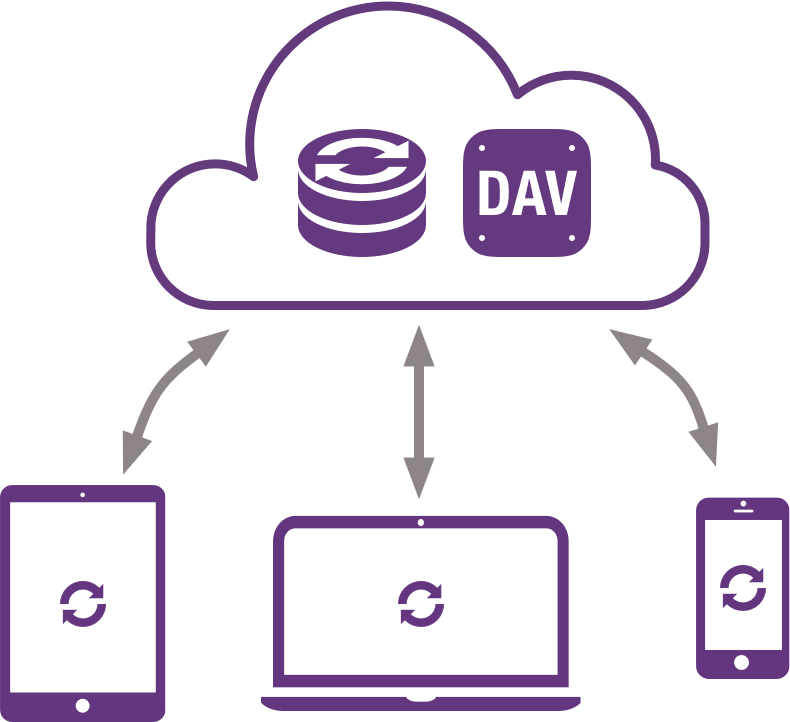
Even if you’re only using OmniFocus on a single device, syncing is recommended for the automated data backup it provides. Best of all, our Omni Sync Server is free, and we take care of managing the servers so your data is always available when you need it most.
Note
Different OmniFocus databases can't be merged, so if you use the app on multiple devices (for example, on your iPhone and iPad) and want them to communicate, you should set up sync the first time you use OmniFocus on the device to avoid any conflicts.
Omni Sync Server
Because we feel that synchronization is such a crucial part of being productive, we’ve made it part of the launch experience when you first open OmniFocus for iOS.
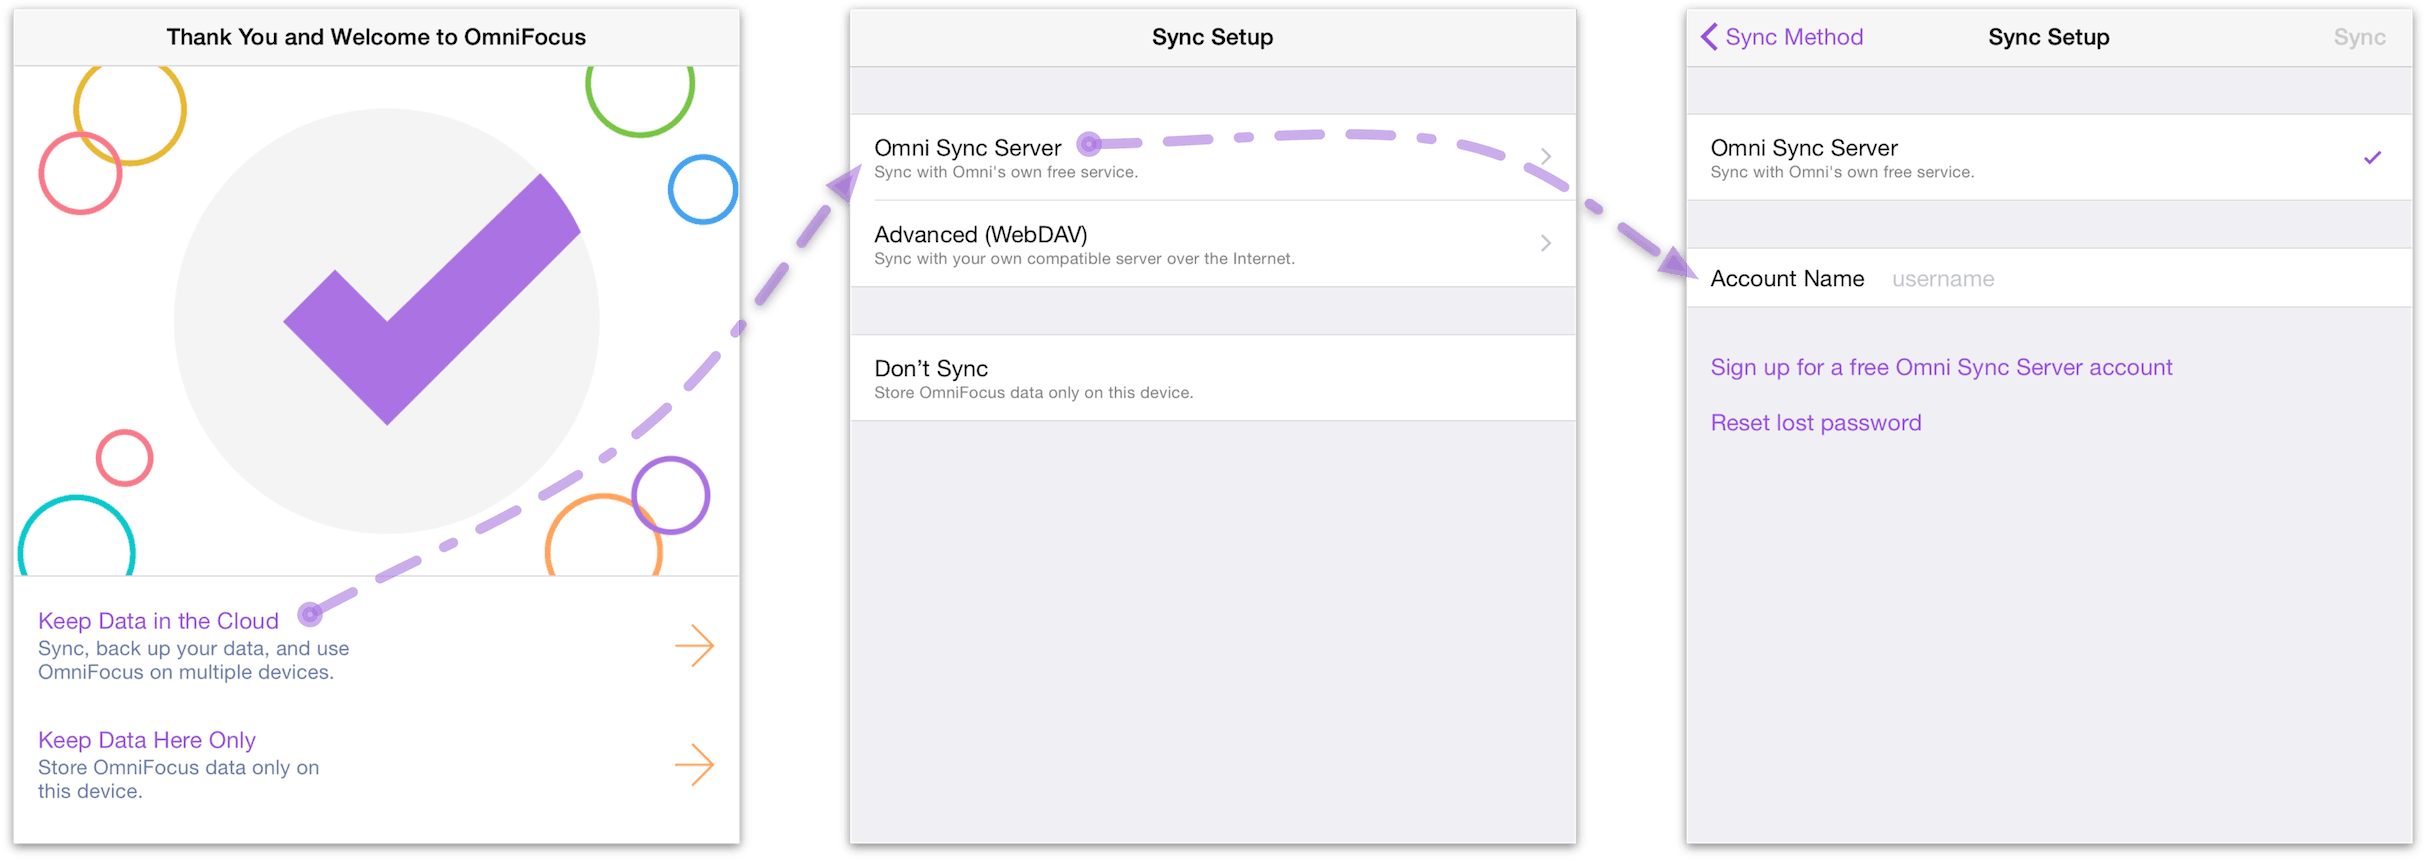
After choosing Keep Data in the Cloud, you will see that you have two methods to choose from:
Omni Sync Server
Advanced (WebDAV)
Our own Omni Sync Server is recommended for ease of use and reliability of support. Get started by creating a new Omni Sync account here:
https://manage.sync.omnigroup.com
If you don’t set up sync now, but later decide that you want to, you can always choose Sync Setup from the Settings menu (found by dragging down on the sidebar).
Note
If you have 1Password by AgileBits installed, OmniFocus can use it to store your sync and encryption database passwords. You'll have an opportunity to do this when you first set up sync on your device, or subsequently in the sync section of Settings; see 1Password Support for details on setting it up.
Other WebDAV Options
Omni Sync Server is a great syncing solution for most OmniFocus users. If your sync needs require that your data be kept completely within a system you control, you can configure a private WebDAV server to sync your OmniFocus data. This can be a third party server (there are many fine providers out there) or one that lives on your own Mac.
While we’re not able to provide comprehensive support for WebDAV servers we don’t administrate (since it isn’t our software), we’re glad to help you get started with some pointers.
See this support article for a tutorial on setting up your own OmniFocus sync server using Server.app (included with Mac OS X Server).
Another option for self-hosting your own sync server is WebDAVNav Server, a free server application (see the corresponding support article). Please recall that we can't provide troubleshooting assistance for third party apps or services, so once again we recommend Omni Sync Server unless you're running OmniFocus in extraordinary circumstances.
Warning
When you expose files and folders on your computer to the internet (even with password protection), you assume some risk. Make sure you understand this risk before setting up a server, and be sure to keep your Mac up to date with the latest security patches. If you'd prefer not to host your own server, you can sign up for an Omni Sync Server account or use another standards-compliant WebDAV host to sync OmniFocus.
How Synchronization Works
With sync turned on in OmniFocus, a server you designate keeps a copy of your database so that it’s always available wherever you are. With each subsequent sync, OmniFocus compares your local database with what’s on the server and applies any differences to the database on the server (or vice versa, bringing the latest changes from the server to your device).
We’ve also built in an automatic sync mechanism. With sync turned on, OmniFocus sends new changes to the sync server after one minute, or whenever you switch to another app. At a bare minimum, OmniFocus checks in with the sync server every hour if nothing has changed on the device. This helps ensure that your data from OmniFocus is always safe, secure, and most importantly—up to date.
OmniFocus for iOS uses Apple’s built-in background fetch to keep your database up to date even while not using the app. However, if you’ve made changes you want to view immediately on other devices, you’ll want to perform a manual sync (by tapping the Sync button in OmniFocus) before switching to OmniFocus on another iOS device or your Mac. This pushes your latest changes up to the sync server, so that when you launch OmniFocus on the other system, all you have to do is tap or click Sync to ensure that all of your changes are there.
As of OmniFocus 2.6, synchronization is even more robust with the addition of push notification-triggered sync. This feature notifies your other devices with OmniFocus to update whenever you make a change, so manual syncing should rarely—if ever—be required. See this support article for more information on just how it works. For options related to push-triggered sync, choose Push in the Sync section of OmniFocus Settings.
Note
While OmniFocus does everything it can to keep your data updated at all times across all your devices with regular sync requests, it works within the framework of the background sync process that exists in iOS 9. This support article from Apple explains one way you can help promote more frequent OmniFocus syncing on your device.
Warning
Services such as Dropbox, Google Drive, and the like are great for file sharing, but they can't handle OmniFocus data properly. Please only sync your data using the Omni Sync Server, or a fully WebDAV compliant host. If you have questions about whether or not a host is WebDAV compliant, please contact us before you begin syncing!
Encryption
OmniFocus sync has always used HTTPS to encrypt your data while in transfer to sync servers that support it (including Omni Sync Server). New with the release of OmniFocus 2.6 for Mac and 2.15 for iOS, all OmniFocus databases set up to sync with remote servers are also automatically encrypted prior to transit, and live encrypted on the server.
Note
Versions of OmniFocus with the database encryption feature also include an updated database format that requires migration from previous versions for compatibility between all your devices with OmniFocus.
After updating one device to a version that supports encryption, you'll see guidance on which other devices must be updated before the migration can take place.
For details on the migration process see Migrating Your Database below.
Encryption is done by OmniFocus on your Mac or iOS device at the time the database is transmitted to the sync server. This means that regardless of the sync destination (Omni Sync Server or another WebDAV server), encryption-based security is preserved. OmniFocus doesn't actively encrypt data while in storage on your local device, instead deferring to any system-level encryption you have in place.
Technical details of the encryption scheme for OmniFocus can be found in this forum post.
Warning
After migrating to the new database format, if you're set up to publish due items as calendar alarms, a portion of your data will remain unencrypted while stored as part of the .ics file on the sync server.
Setting a Separate Database Passphrase
By default, OmniFocus uses the password you chose when setting up your sync account to encrypt your database on the server. For an extra layer of security, you can use a distinct encryption passphrase by choosing Use Separate Passphrase from Encryption Settings.
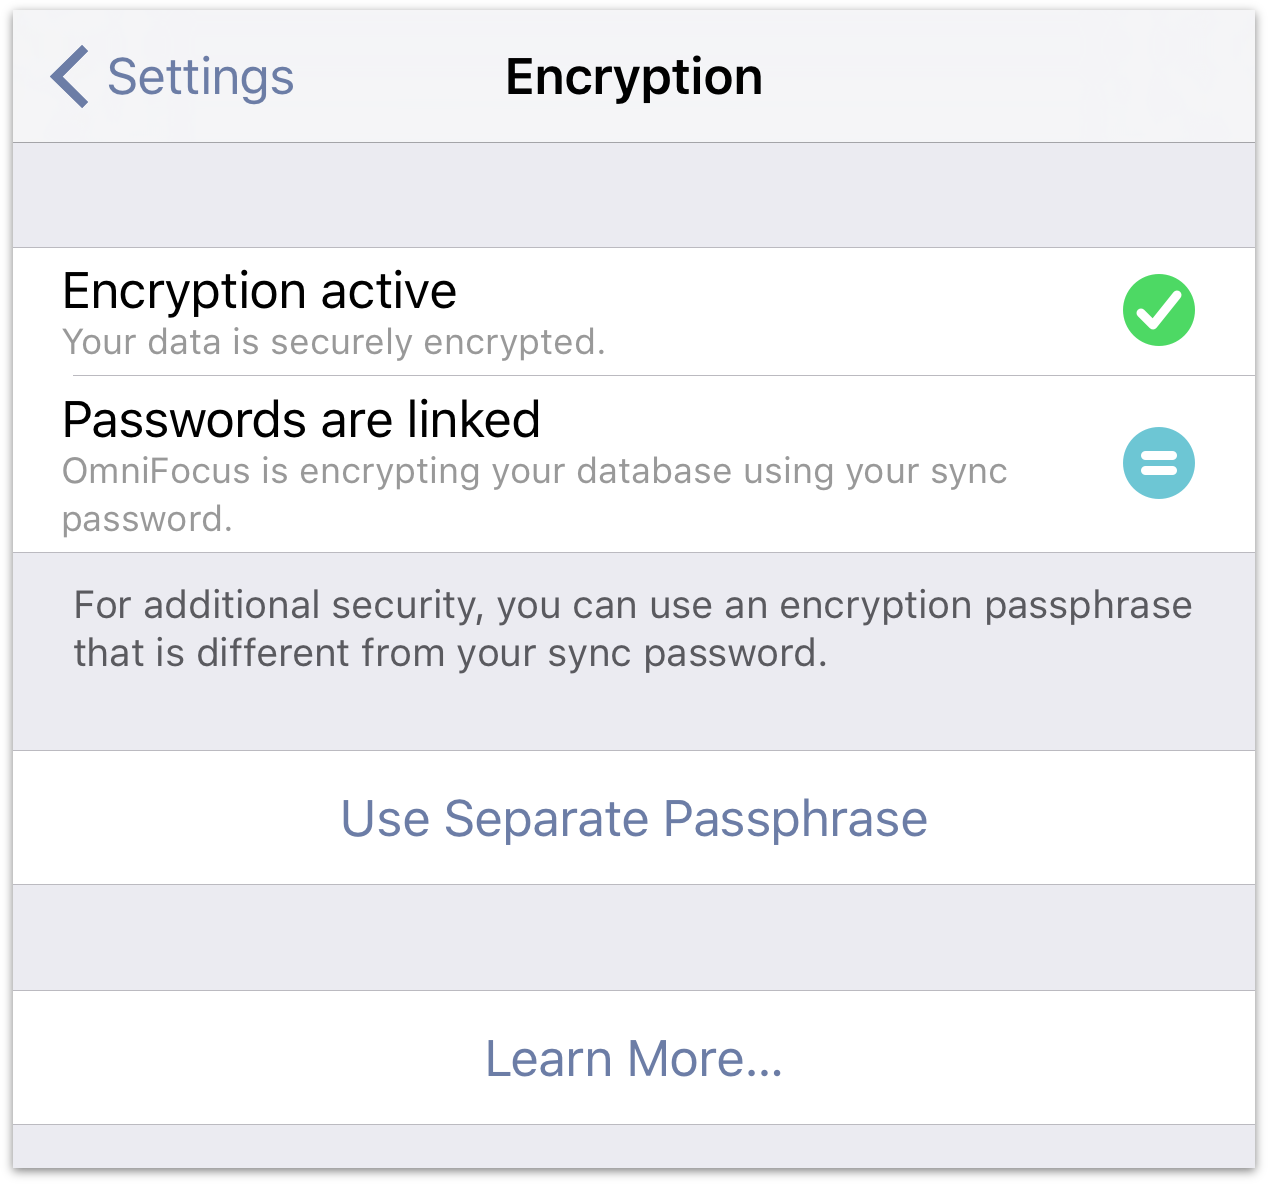
The Encryption section of OmniFocus Settings indicates whether your passwords are linked or separate. When you tap Use Separate Passphrase, you are prompted to enter your current passphrase (this is the same as your sync password). You can then set and confirm a new passphrase used to encrypt your database on the server.
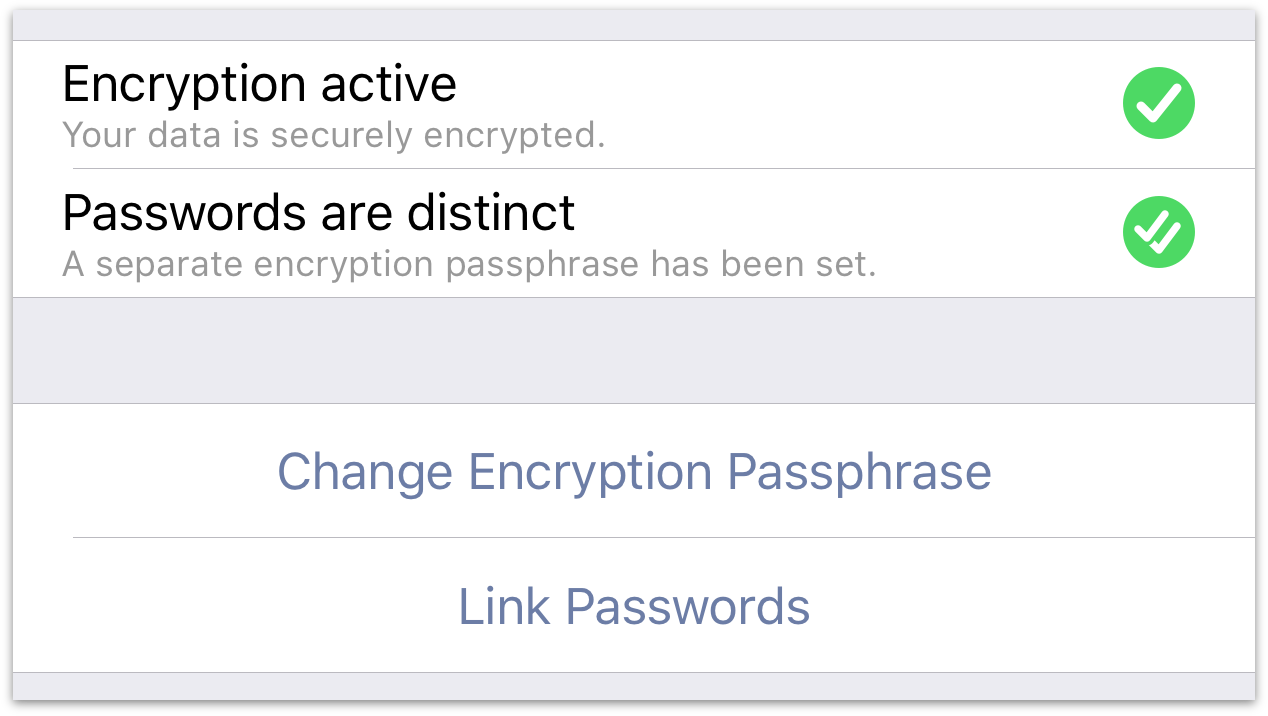
After setting a new encryption passphrase the Encryption settings indicate that your sync and encryption passwords are distinct. You can unify them again by tapping Link Passwords, or change the encryption passphrase to something new with Change Encryption Passphrase.
Note
If you're syncing with OmniFocus for Mac or other iOS devices, after changing your encryption passphrase you will be prompted to enter the new passphrase on each of those devices before you can receive updates from the server.
If you’re using a password manager like 1Password, it can track both your encryption and sync passphrases regardless of whether they're linked; see 1Password Support for details on using 1Password with OmniFocus.
Migrating Your Database
OmniFocus 2.15 for iOS and subsequent versions (along with OmniFocus 3.6 for Mac) bring an updated database format that enables faster sync and tons of upcoming features. After updating from an older version of the app, you'll be prompted to convert your database from the previous format to the new one.
To begin the migration process, choose Migrate Database from Settings or sync with a database that's migration-ready. Upon doing so you'll see the Migration screen that lists any clients that still need to be updated to the latest version to allow for the database migration to work.
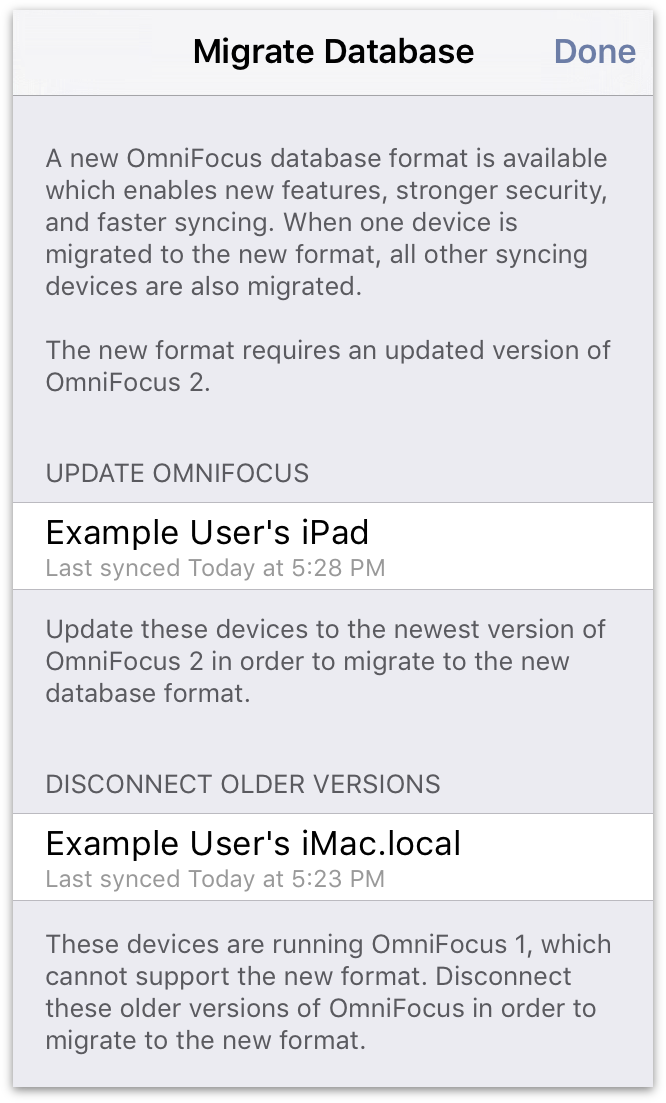
If you're running a very old version of OmniFocus on a device that syncs with your current database, it may not be eligible for migration to the new database format. If this is the case, it will be indicated in a separate section of the Migration screen. You'll be asked to disconnect any ineligible clients (choose Registered Devices from Settings and tap Edit to remove those that aren't eligible) before proceeding with the upgrade.
When all of your Macs with OmniFocus are at version 2.6 and your iOS devices are at version 2.15, the Migration window gives the green light to make the transition to the new, improved database format. Choose Migrate Database, and voila! OmniFocus syncs your database in the new format to all of your devices.
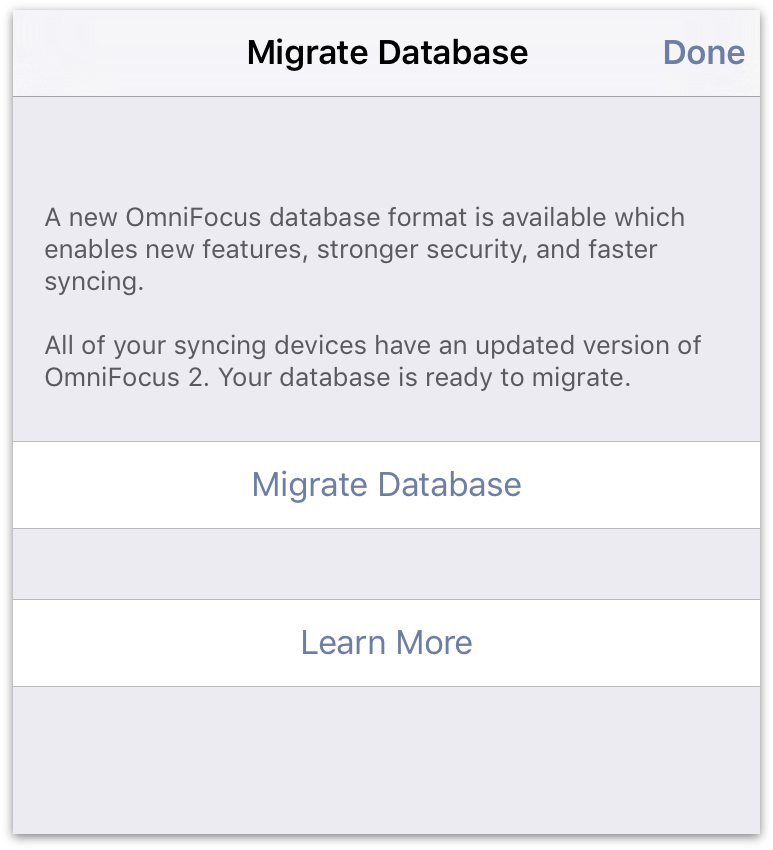
On the small chance that something goes missing during the migration process, before changing formats OmniFocus automatically makes a backup of your database that you can revert to if needed. We've prepared support articles with more detail on the migration and backup restoration process, and you can always contact us with any additional questions.
Guided Tour (iPad)
Getting to know OmniFocus by navigating through its various bits and pieces is a great way to start working with the app. This chapter takes you on a tour through OmniFocus 2 for iOS as it appears on iPad; if you're using OmniFocus on another device, your adventure begins elsewhere:
- Guided Tour (iPhone)
- Guided Tour (iPhone 6/6s Plus)
- OmniFocus for Apple Watch (online support)
The Home Screen
An exploration of OmniFocus begins at the Home Screen, which acts as the central hub of your OmniFocus activity. Navigate between perspectives by tapping their tiles here, and see what’s on your plate for the day and week ahead with badge icons showing a count of your most important actions.
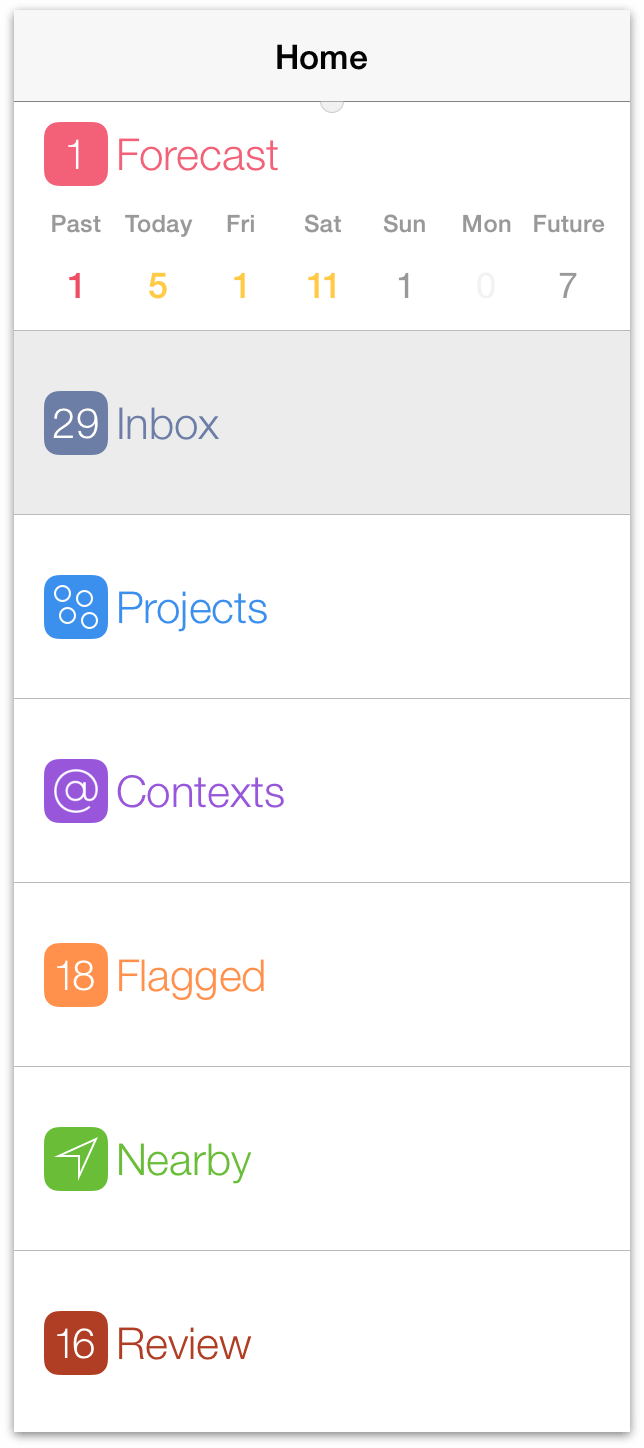
On iPad, the home screen lives in the sidebar. When in landscape mode the sidebar is always shown; when in portrait, reveal the sidebar by swiping in from the left (swipe to the right to hide it), or use the chevron ![]() in the upper left of the toolbar. When viewing a perspective in the sidebar, the chevron can also be used to return to the home screen (just touch and hold it and you'll be whisked back in an instant).
in the upper left of the toolbar. When viewing a perspective in the sidebar, the chevron can also be used to return to the home screen (just touch and hold it and you'll be whisked back in an instant).
The home screen includes the following perspective tiles by default (with OmniFocus Pro, these can be hidden, rearranged, or supplemented by your own custom perspectives):
 Forecast
- Tap Forecast to enter forecast view, where tasks for the day are shown alongside any calendars you’ve chosen to include. The badge icon counts the number of tasks currently overdue.
 Inbox
Inbox- Tap Inbox to view and process items collected in your Inbox.
 Projects
- Tap Projects to view a list of your projects, and estimate their urgency using the handy summary dots beneath each project title.
 Contexts
- Tap Contexts to view a list of your contexts, and likewise get an at-a-glance appraisal of each from the summary dots.
 Flagged
- Tap Flagged to see a list of items you’ve flagged for visibility. The number of flagged items is shown in the badge icon in the sidebar.
 Nearby
- If you’ve assigned locations to your contexts, tap Nearby to view the available actions near your location.
 Review
- Tap Review for a periodic organized check up on the progress of your projects — easily assess the status of projects one at a time, mark items complete or on hold, and adjust them as circumstances change. The badge icon shows the number of projects currently scheduled for review.
For a deeper look at how each of these perspectives work to help you accomplish your goals, see their individual chapters throughout this manual.
The Secret Bar
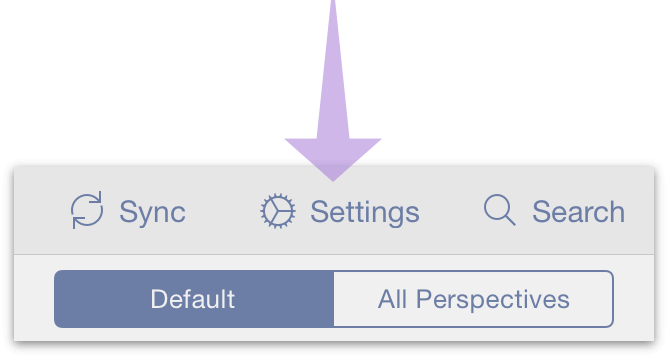
Whenever you're "home" — viewing the list of perspectives in the OmniFocus sidebar — drag down on the list to reveal the secret bar. The secret bar holds tools of great power, but relatively infrequent use; that’s why they’re safely kept out of the way for just when you need them.
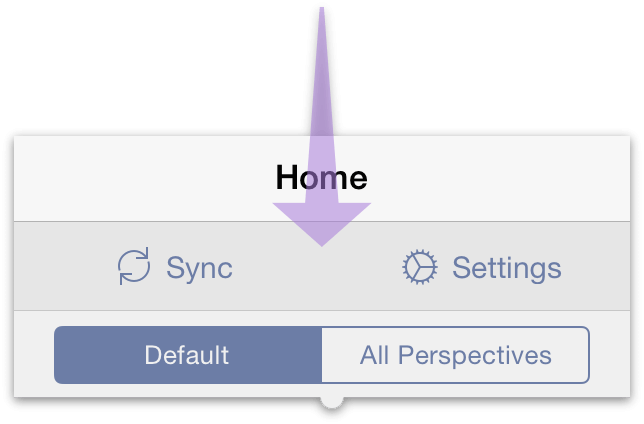
 Sync
Sync- Tap Sync to trigger a sync manually. This is useful any time you want to update OmniFocus on your other devices, or make sure your device is up to date with your remote database.
Note
OmniFocus syncs automatically whenever changes are made, so you shouldn't have to do this very often (if ever).
 Settings
- Tap Settings to customize your OmniFocus experience, contact Omni Support, find help, and more. Read about the available options in detail in the Settings chapter.
- Default and All Perspectives
- Use this switch to choose the set of perspectives that appears in the sidebar. Default shows the seven built-in perspectives, while All Perspectives reveals Completed and Changed as well. With the Pro upgrade installed Default becomes Favorites, a space that's fully customizable using the Tile Editor (see below).
The OmniFocus Pro upgrade adds two additional buttons to the secret bar that unlock some pretty powerful features: creating custom perspectives with the perspective editor, and customizing the home screen with the tile editor.
 New Perspective
Tap New Perspective to create a new custom perspective. After a new perspective is created, tap the special custom perspective view icon
 to browse and edit its settings. Learn more about custom perspectives in the Perspectives chapter.
 Tile Editor
Tap the Tile Editor button to change the position and visibility of your perspective tiles. Completely customize the appearance of your home screen by touching and dragging perspective tiles into the desired full- and half-width rows (existing perspectives will kindly get out of your way), or drag them down to the Other Perspectives section to indicate that they aren't part of your favorites.
Tap Done — or anywhere else on the screen — to confirm your layout change, or tap Cancel to exit tile editing without saving your changes. Tip: the tile editor can be summoned by touching and holding any perspective tile on the home screen, too!
The Main Outline
This is where you’ll view, add, and manipulate the tasks you’re working on at a given moment. What you see here is based on which perspective you’re viewing, where you've navigated from the home screen, and more—you can narrow your concentration on just a few things you’d like to accomplish in the near term, or get a broad overview of the tasks ahead across a number of projects.
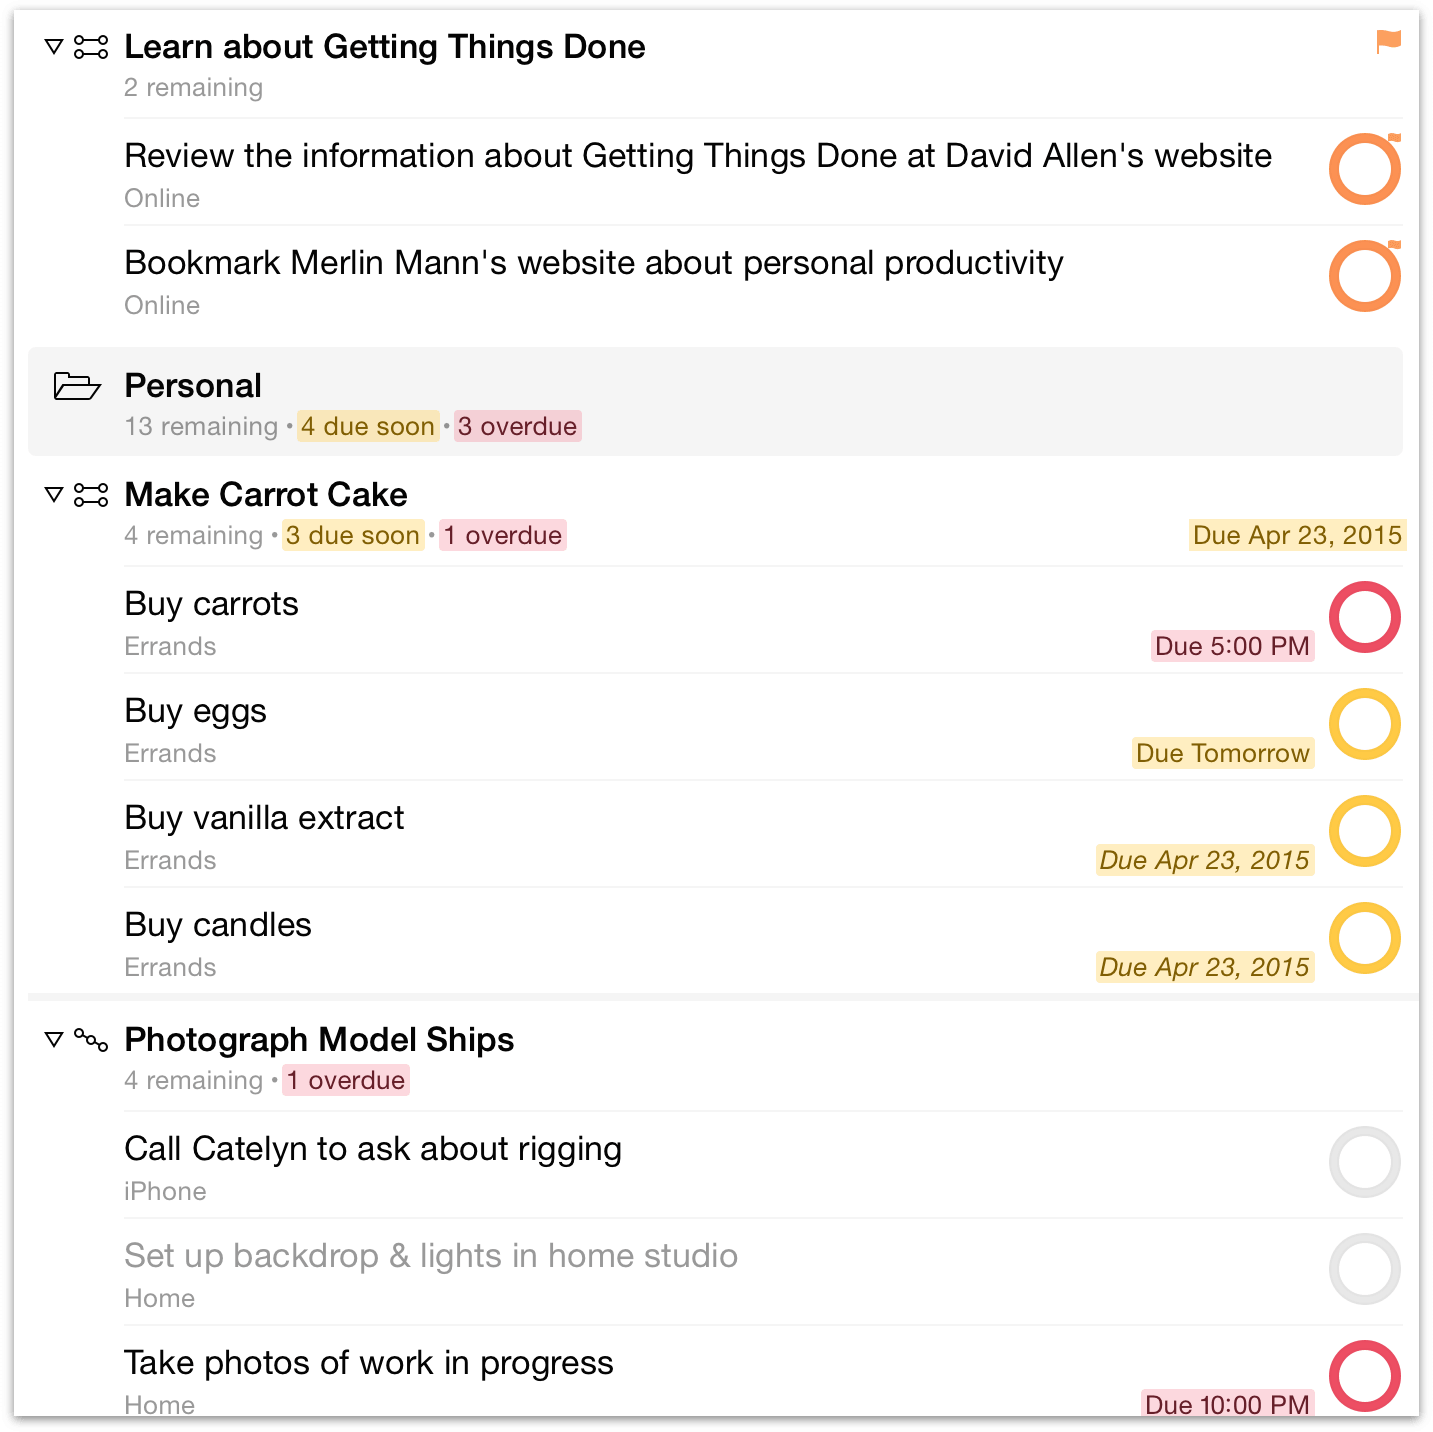
The main outline shows a list of items — inbox items, projects, actions, or groups — that fit the criteria you've established with your other view parameters. Each item shows associated information — like Project and Due Date — important to accomplishing the task.
To delete an item in the main outline, touch and drag from right to left until the Delete button appears, then tap it. This removes the item from your database entirely; to mark it complete instead, just tap its status circle.
How Items Are Ordered
Actions, projects, and other items in the main outline are ordered based on the sequence in which you entered them, or how you’ve manually arranged them in edit mode, with a couple of exceptions: when you’re in a context-based view with a different sort priority set, or in Forecast, where items are sorted by due date and time.
Other sorting parameters can also be applied with custom perspectives when the Pro upgrade is installed.
The Toolbar
When viewing the main outline with your iPad in landscape orientation, or in portrait with the sidebar hidden, the toolbar at the top of the screen is fully visible. Here you’ll find several important functions, described below:

 Edit
Edit- Tap Edit to delete and rearrange items in the main outline using the deletion switch
 and reordering handles
  that appear. On iPad, edit mode is a particularly good way to move items between projects – just drag an action’s reordering handle until it’s within the desired project, group, or folder.
  Undo
Undo- Tap Undo to revert the latest change made to your database. This is the easiest way to restore an accidentally completed or deleted item, or revert a change made while editing. To redo an undid change, just tap and hold Undo.
 Search
- Filter title text and note field contents for search terms across three useful scopes: Here, which includes everything visible in the main outline; Remaining, which includes all items not completed or dropped; or Everything, which searches your entire database.
 View
View- Choose which items are visible in the current perspective's main outline. View settings are based on item status, and include First Available, Available, Remaining, and All. In context-based perspectives, view settings also control how items are sorted: either with items shown in order of soonest Due Date & Flagged status, or grouped by Project.
 Add New…
Add a new item based on your current view in the main outline. When multiple options for new items are available (such as at the top level of a perspective), tapping Add New displays a list of available items to create.
When you're deep inside a project, looking at a specific day in Forecast, or using the Flagged perspective, this icon changes to
 to indicate that it'll create a new action there right away (the only possible option).
 New Inbox Item
- Formerly known as Quick Entry, this button lets you add a new task to your Inbox from virtually anywhere in the app.
The Editor
To delve deeper into the details of a task, just tap its name. The main outline makes way for the editor, where you can flesh out the task at hand with additional bits of info like when it’s due for completion, whether it’s part of a larger project, how long it’ll take, whether (and how) it repeats, and more. Enrich an item further with a text note and add audio and image attachments, all from tabs within the editor.
Note
The editors for inbox items, actions, and projects are pretty similar, since these all represent tasks that can be accomplished. The editor for contexts is special because it represents a person, place, or thing that you need to help accomplish a goal; importantly, the context editor is where you give a context a location so it can be tracked from the Nearby screen.
Ways that inbox items, actions, projects, and contexts can be enriched using the editor are explored in their individual chapters.
Editor Tools
When using the editor on iPad, a new set of commands becomes available at the top of the screen (replacing the toolbar that’s visible when you’re viewing the main outline).
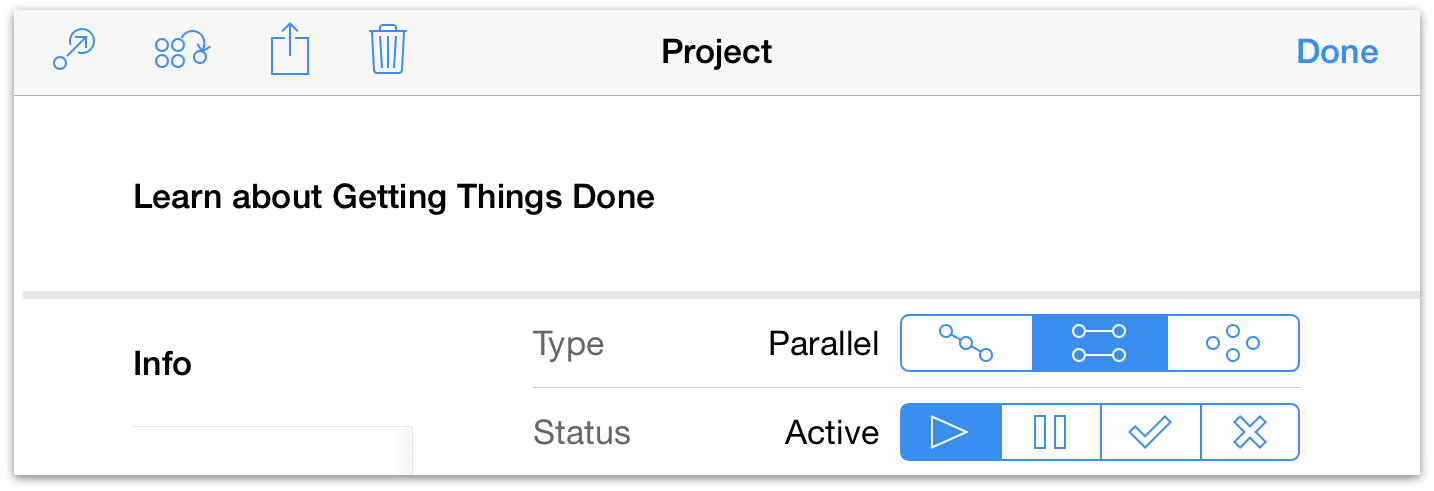
 Move
Move- Tap to create a nesting hierarchy of items within the Inbox; actions within projects; or contexts within other contexts.
 Convert
- When editing an inbox item or an action, tap to convert it to a project. When editing a project, tap to convert it to an action (the action will appear in the “Miscellaneous” project).
 Share
Share- Tap to send the current selection as a message, an email, or via any other service that shares with OmniFocus.
 Delete
- Tap to remove the edited item from your OmniFocus database entirely.
Contextual Menus
A long press on many of the items in OmniFocus reveals the contextual menu with commands relevant to that item. These commands work in ways that are specific to OmniFocus, and might not be completely obvious at first glance.

The Cut and Copy commands appear only in the contextual menus of inbox items and actions. They act as you'd expect: the selected item is either removed and copied, or simply copied.
When Pasted via the contextual menu, a copied action will appear either inside the selected item (if it's a project or context) or as a peer to it (if it's another action). Text copied from other sources can also be pasted into OmniFocus from the contextual menu; in this case, choosing Paste creates a new action with the copied text as its title.

With a project selected, choosing Paste from the contextual menu adds the copied action (or text as an action) inside the project. Choosing Review opens the project in the Review perspective, ready for perusal. This is the best way to view and edit the review settings of a project.
Choosing Go to Project hides all other projects, showing only the selected project in the main outline until you navigate away from it (this is the same as the Focus command in older versions of OmniFocus for iPad). Finally, choosing New Action with a project selected creates a new action inside that project, ready for fleshing out.

Project folders have their own slimmed-down contextual menus as well. Go to Folder displays the contents of the folder alone in the main outline, New Folder creates a new folder within the selected folder, and New Project creates a new project within the selected folder.

When selecting a context in the Contexts perspective, the contextual menu offers the Go to Context command, which narrows your view in the main outline to just the selected context until you navigate away. Paste adds a copied action inside the selected context, New Context creates a new context nested inside the selected one, and New Action creates a new action with that context assigned to it.
Now that you have an idea of the road ahead, let's start putting the pieces together with the first — and most fundamental — OmniFocus perspective: the Inbox.
Guided Tour (iPhone)
Getting to know OmniFocus by navigating through its various bits and pieces is a great way to start working with the app. This chapter takes you on a tour through OmniFocus 2 for iOS as it appears on iPhone (other than iPhone 6/6s Plus); if you're using OmniFocus on another device, your adventure begins elsewhere:
- Guided Tour (iPad)
- Guided Tour (iPhone 6/6s Plus)
- OmniFocus for Apple Watch (online support)
Home Screen
An exploration of OmniFocus begins at the Home Screen, which acts as the central hub of your OmniFocus activity. Navigate between perspectives by tapping their tiles here, and see what’s on your plate for the day and week ahead with badge icons showing a count of your most important actions.
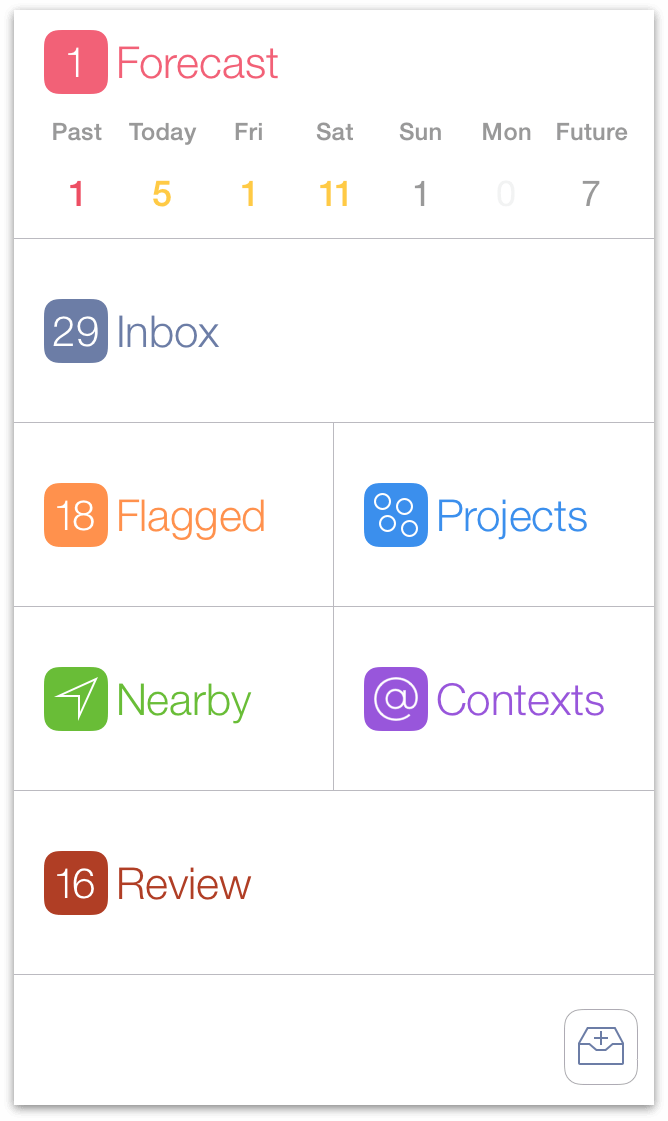
On iPhone, navigate to the home screen by following the chevron ![]() back from whatever view you're in (or touch and hold it to return home in an instant).
back from whatever view you're in (or touch and hold it to return home in an instant).
The home screen includes the following perspective tiles by default (with OmniFocus Pro, these can be hidden, rearranged, or supplemented by your own custom perspectives):
 Forecast
- Tap Forecast to enter forecast view, where tasks for the day are shown alongside any calendars you’ve chosen to include. The badge icon counts the number of tasks currently overdue.
 Inbox
Inbox- Tap Inbox to view and process items collected in your Inbox.
 Projects
- Tap Projects to view a list of your projects, and estimate their urgency using the handy summary dots beneath each project title.
 Contexts
- Tap Contexts to view a list of your contexts, and likewise get an at-a-glance appraisal of each from the summary dots.
 Flagged
- Tap Flagged to see a list of items you’ve flagged for visibility. The number of flagged items is shown in the badge icon in the sidebar.
 Nearby
- If you’ve assigned locations to your contexts, tap Nearby to view the available actions near your location.
 Review
- Tap Review for a periodic organized check up on the progress of your projects — easily assess the status of projects one at a time, mark items complete or on hold, and adjust them as circumstances change. The badge icon shows the number of projects currently scheduled for review.
For a deeper look at how each of these perspectives work to help you accomplish your goals, see their individual chapters throughout this manual.
Note
Hovering in the bottom right corner of the home screen you'll find the ![]() New Inbox Item button. Formerly known as Quick Entry, this button lets you add a new task to your Inbox from virtually anywhere in the app (you'll see it elsewhere as you explore, too — try tapping it, it won't bite!).
New Inbox Item button. Formerly known as Quick Entry, this button lets you add a new task to your Inbox from virtually anywhere in the app (you'll see it elsewhere as you explore, too — try tapping it, it won't bite!).
The Secret Bar (Home Screen)
Whenever you're "home" — viewing the list of perspectives in the OmniFocus home screen — drag down on the list to reveal the secret bar. The secret bar holds tools of great power, but relatively infrequent use; that’s why they’re safely kept out of the way for just when you need them.
 Sync
Sync- Tap Sync to trigger a sync manually. This is useful any time you want to update OmniFocus on your other devices, or make sure your device is up to date with your remote database.
Note
OmniFocus syncs automatically whenever changes are made, so you shouldn't have to do this very often (if ever).
 Settings
- Tap Settings to customize your OmniFocus experience, contact Omni Support, find help, and more. Read about the available options in detail in the Settings chapter.
- Default and All Perspectives
- Use this switch to choose the set of perspectives that appears in the sidebar. Default shows the seven built-in perspectives, while All Perspectives reveals Completed and Changed as well. With the Pro upgrade installed Default becomes Favorites, a space that's fully customizable using the Tile Editor (see below).
The OmniFocus Pro upgrade adds two additional buttons to the secret bar that unlock some pretty powerful features: creating custom perspectives with the perspective editor, and customizing the home screen with the tile editor.
 New Perspective (Pro)
With the OmniFocus Pro upgrade installed, tap New Perspective to create a new custom perspective. To change the view settings of a currently existing perspective, go to the perspective and drag down to reveal its secret bar, then tap View
 . The icon changes to
  when editing a custom perspective.
 Tile Editor (Pro)
In OmniFocus Pro, tap this button to enter tile editing mode. Completely customize the appearance of your sidebar by touching and dragging perspective tiles into the desired full- and half-width rows (existing perspectives will kindly get out of your way), or drag them down to the Other Perspectives section to indicate that they aren't part of your favorites.
Tap Done — or anywhere else on the screen — to confirm your layout change, or tap Cancel to exit tile editing without saving your changes.
The Secret Bar (Perspectives)
Drag down on the main outline in individual perspective views to reveal the secret bar there, too. Unlike the home screen's secret bar, these perspective-specific bars hold tools relevant to your location (along with the ever-present option to Sync).
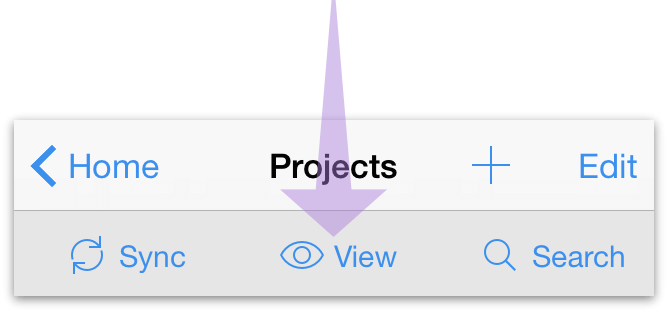
 Search
- Filter title text and note field contents for search terms across three useful scopes: Here, which includes everything visible in the main outline; Remaining, which includes all items not completed or dropped; or Everything, which searches your entire database.
 View
View- Choose which items are visible in the current perspective's main outline. View settings are based on item status, and include First Available, Available, Remaining, and All. In context-based perspectives, view settings also control how items are sorted: either with items shown in order of soonest Due Date & Flagged status, or grouped by Project.
The Toolbar
When viewing the main outline you'll also see the toolbar at the top of the screen. It contains a few helpful functions, described below:

 Add New…
Add a new item based on your current view in the main outline. When multiple options for new items are available (such as at the top level of a perspective), tapping Add New displays a list of available items to create.
When you're deep inside a project, looking at a specific day in Forecast, or using the Flagged perspective, this icon changes to
 to indicate that it'll create a new action there right away (the only possible option).
- Edit
- Tap Edit to delete and rearrange items in the main outline using the deletion switch
 and reordering handles
  that appear.
Note
While there isn't a button for it, iPhone's built-in "shake to undo" feature works to revert the latest change made to your database. This is the fastest way to restore an accidentally completed or deleted item, or revert a change made while editing.
The Main Outline
This is where you’ll view, add, and manipulate the tasks you’re working on at a given moment. What you see here is based on which perspective you’re viewing, what you have selected in the sidebar (or where you've navigated from the home screen), and more—you can narrow your concentration on just a few things you’d like to accomplish in the near term, or get a broad overview of the tasks ahead across a number of projects.
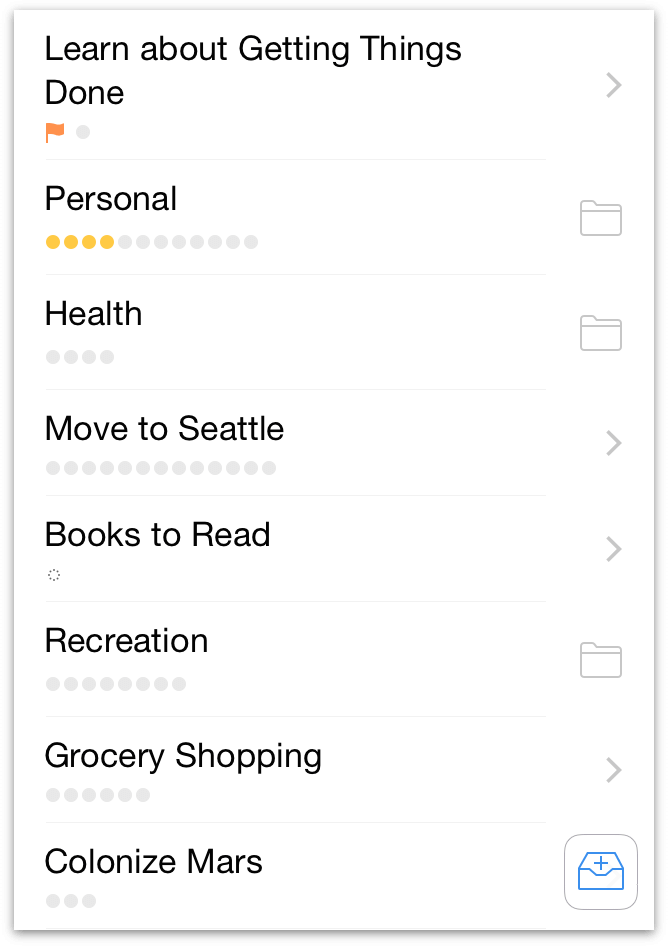
The main outline shows a list of items — inbox items, projects, actions, or groups — that fit the criteria you've established with your other view parameters. Each item shows associated information — like Project, Context, or Due Date — important to accomplishing the task.
To delete an item in the main outline, touch and drag from right to left until the Delete button appears. This removes the item from your database entirely; to mark it complete instead, just tap its status circle.
How Items Are Ordered
Actions, projects, and other items in the main outline are ordered based on the sequence in which you entered them, or how you’ve manually arranged them in edit mode, with a couple of exceptions: when you’re in a context-based view with a different sort priority set, or in Forecast, where items are sorted by due date and time.
Other sorting parameters can also be applied with custom perspectives when the Pro upgrade is installed.
The Editor
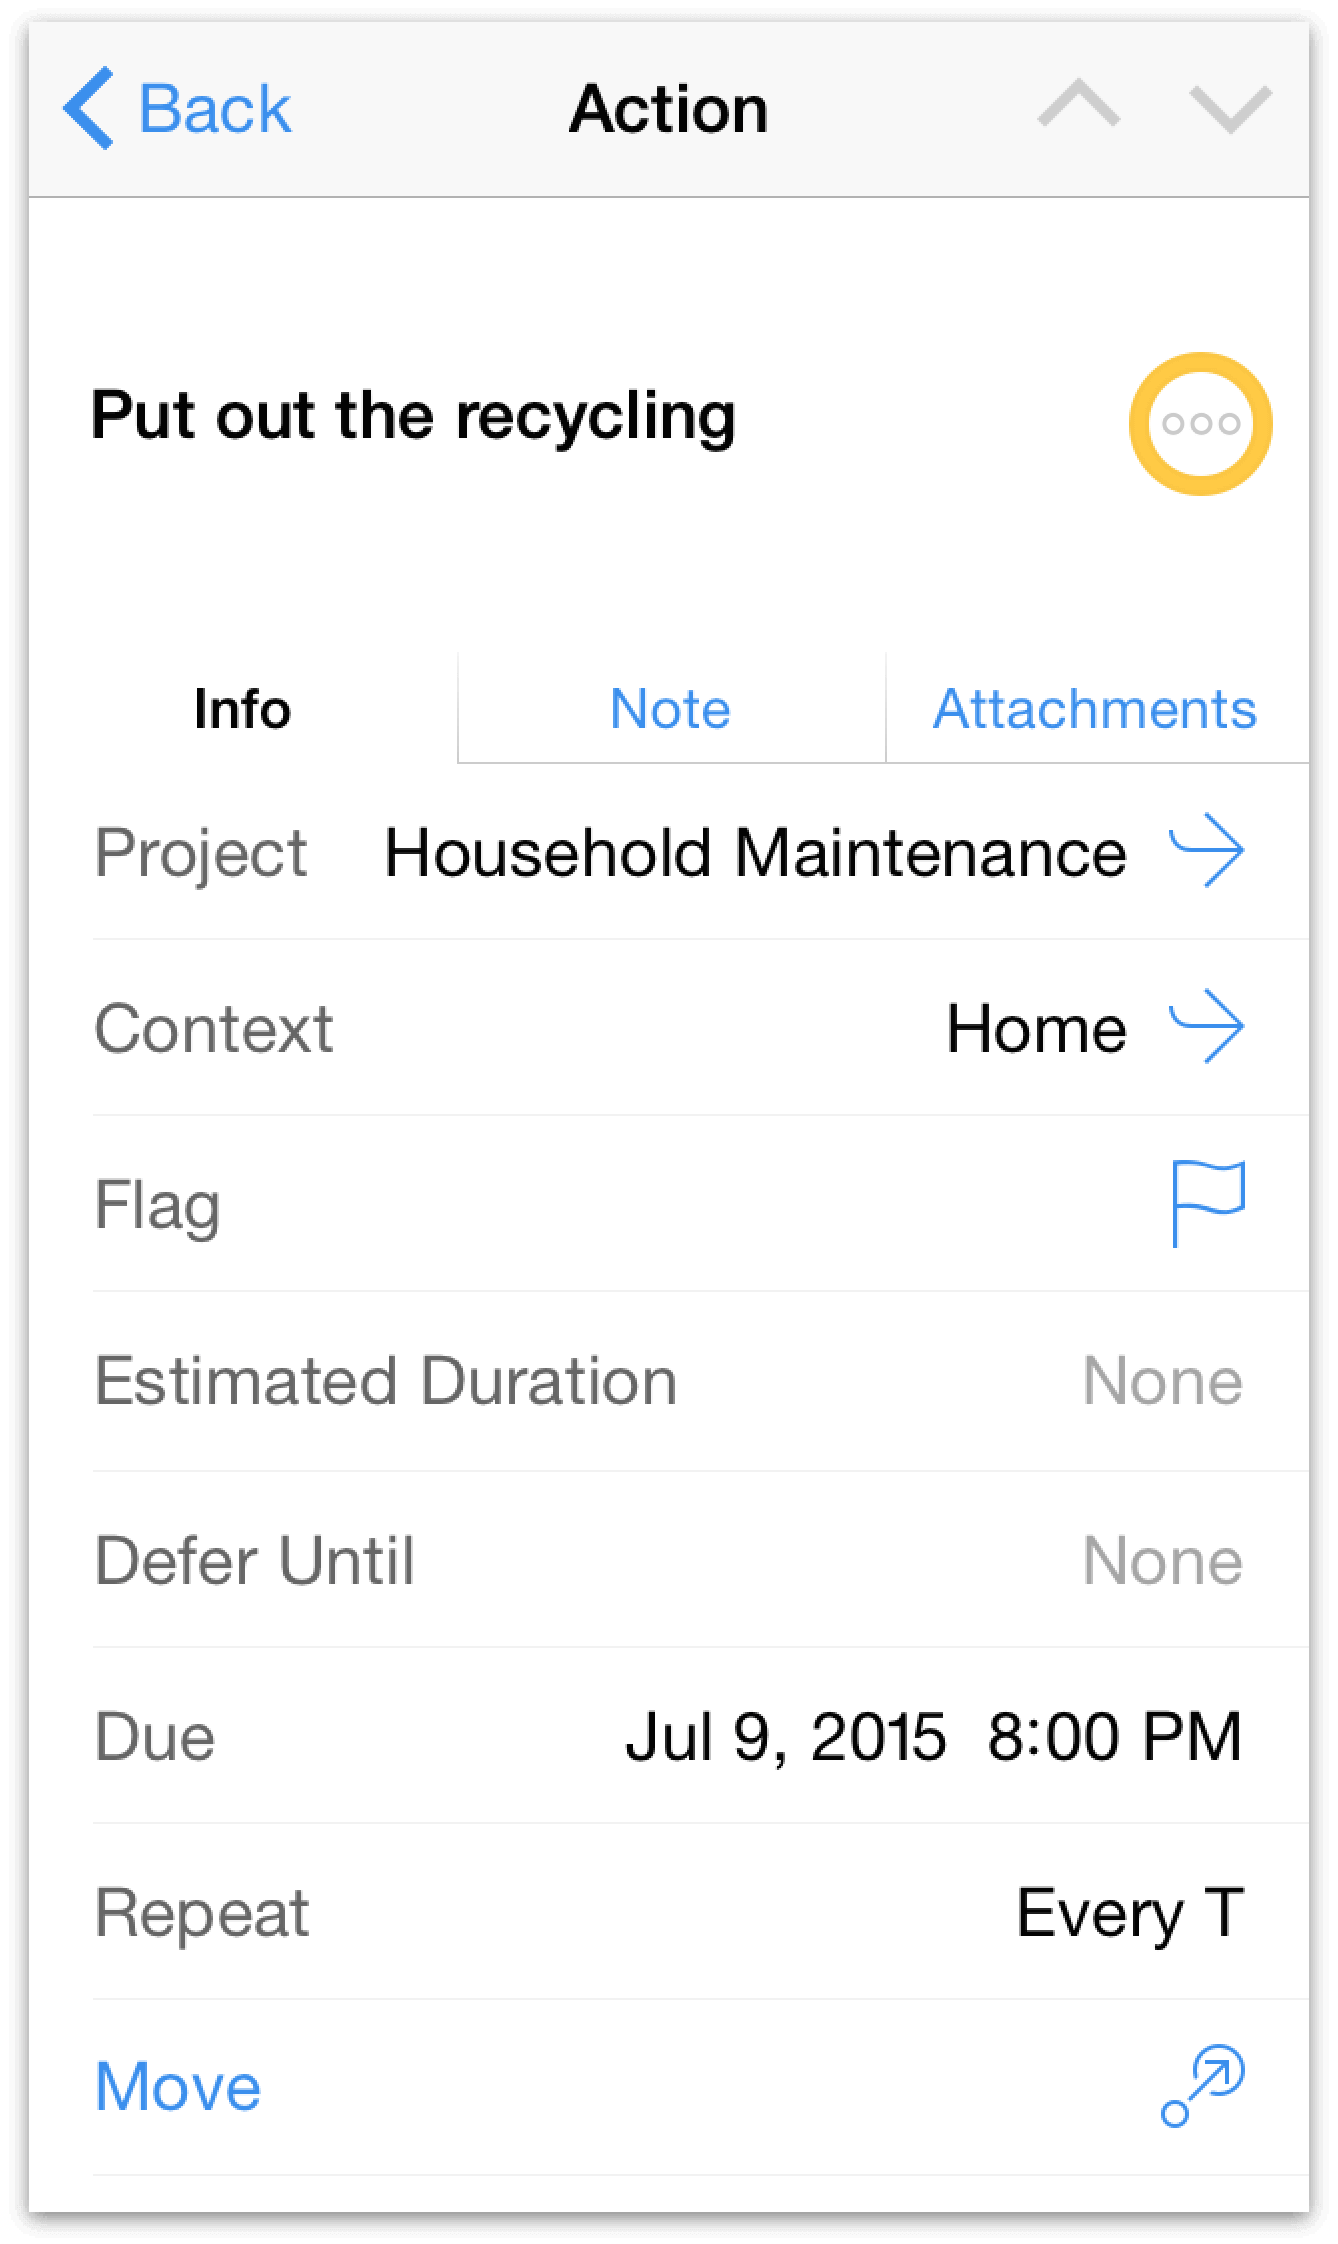
To delve deeper into the details of a task, just tap its name. The main outline makes way for the editor, where you can flesh out the task at hand with additional bits of info like when it’s due for completion, whether it’s part of a larger project, how long it’ll take, whether (and how) it repeats, and more. Enrich an item further with a text note and add audio and image attachments, all from tabs within the editor.
Note
The editors for inbox items, actions, and projects are pretty similar, since these all represent tasks that can be accomplished. The editor for contexts is special because it represents a person, place, or thing that you need to help accomplish a goal; importantly, the context editor is where you give a context a location so it can be tracked from the Nearby screen.
Ways that inbox items, actions, projects, and contexts can be enriched using the editor are explored in their individual chapters.
Editor Tools
When using the editor on iPhone, a set of useful commands becomes available in rows at the bottom of the editor's Info pane.
 Move
Move- Tap to create a nesting hierarchy of items within the Inbox; actions within projects; or contexts within other contexts.
 Convert
- When editing an inbox item or an action, tap to convert it to a project. When editing a project, tap to convert it to an action (the action will appear in the “Miscellaneous” project).
 Share
Share- Tap to send the current selection as a message, an email, or via any other service that shares with OmniFocus.
 Delete
- Tap to remove the edited item from your OmniFocus database entirely.
Contextual Menus
A long press on many of the items in OmniFocus reveals the contextual menu with commands relevant to that item. These commands work in ways that are specific to OmniFocus, and might not be completely obvious at first glance.
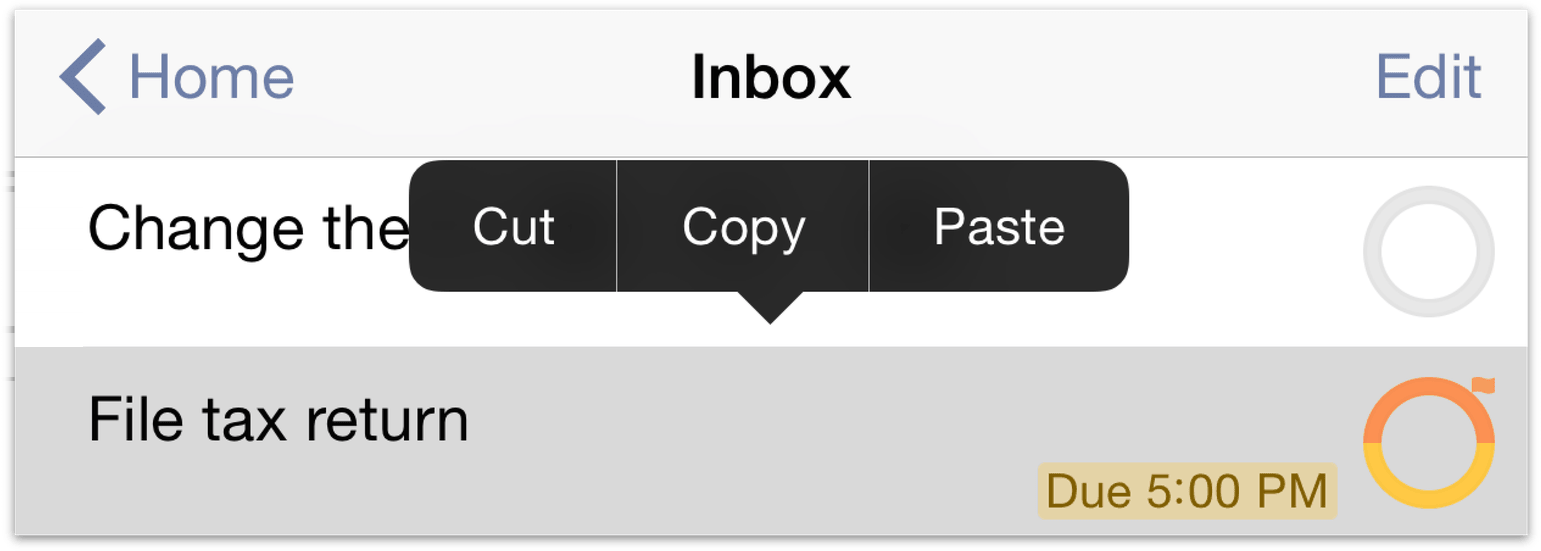
The Cut and Copy commands appear only in the contextual menus of inbox items and actions. They act as you'd expect: the selected item is either removed and copied, or simply copied.
When Pasted via the contextual menu, a copied action will appear either inside the selected item (if it's a project) or as a peer to it (if it's another action). Text copied from other sources can also be pasted into OmniFocus from the contextual menu; in this case, choosing Paste creates a new action with the copied text as its title.
Now that you have an idea of the road ahead, let's start putting the pieces together with the first — and most fundamental — OmniFocus perspective: the Inbox.
Guided Tour (iPhone 6/6s Plus)
Getting to know OmniFocus by navigating through its various bits and pieces is a great way to start working with the app. This chapter takes you on a tour through OmniFocus 2 for iOS as it appears on iPhone 6/6s Plus; if you're using OmniFocus on another device, your adventure begins elsewhere:
- Guided Tour (iPad)
- Guided Tour (iPhone)
- OmniFocus for Apple Watch (online support)
The Home Screen
An exploration of OmniFocus begins at the Home Screen, which acts as the central hub of your OmniFocus activity. Navigate between perspectives by tapping their tiles here, and see what’s on your plate for the day and week ahead with badge icons showing a count of your most important actions.
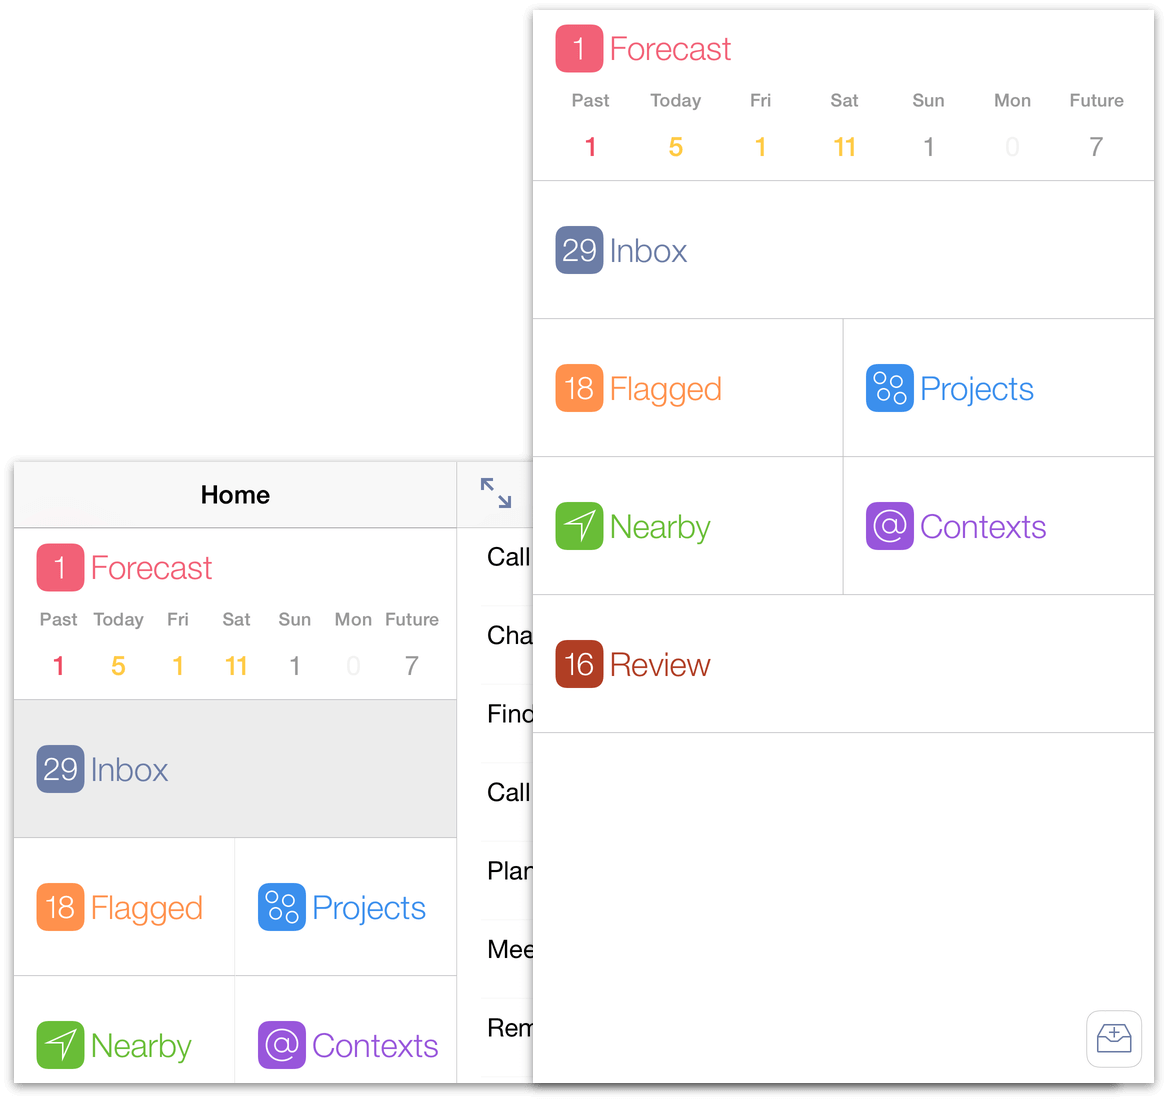
On iPhone 6/6s Plus, the home screen lives either in a full-screen view (in portrait orientation) or in the sidebar (in landscape orientation). When in landscape, show the sidebar by tapping the chevron ![]() in the upper left of the toolbar, or tap Expand
in the upper left of the toolbar, or tap Expand ![]() to hide it.
to hide it.
Note
If you have your display zoom view settings set to Zoomed in Display & Brightness settings in the iOS Settings app, the home screen (and other screens throughout the app) show up the way they would on other iPhones.
The home screen includes the following perspective tiles by default (with OmniFocus Pro, these can be hidden, rearranged, or supplemented by your own custom perspectives):
 Forecast
- Tap Forecast to enter forecast view, where tasks for the day are shown alongside any calendars you’ve chosen to include. The badge icon counts the number of tasks currently overdue.
 Inbox
Inbox- Tap Inbox to view and process items collected in your Inbox.
 Projects
- Tap Projects to view a list of your projects, and estimate their urgency using the handy summary dots beneath each project title.
 Contexts
- Tap Contexts to view a list of your contexts, and likewise get an at-a-glance appraisal of each from the summary dots.
 Flagged
- Tap Flagged to see a list of items you’ve flagged for visibility. The badge icon shows a count of the items you've flagged.
 Nearby
- If you’ve assigned locations to your contexts, tap Nearby to view the available actions near your location.
 Review
- Tap Review for a periodic organized check up on the progress of your projects — easily assess the status of projects one at a time, mark items complete or on hold, and adjust them as circumstances change. The badge icon shows the number of projects currently scheduled for review.
For a deeper look at how each of these perspectives work to help you accomplish your goals, see their individual chapters throughout this manual.
Note
Hovering in the bottom right corner of the home screen you'll find the ![]() New Inbox Item button. Formerly known as Quick Entry, this button lets you add a new task to your Inbox from virtually anywhere in the app (you'll see it elsewhere as you explore, too — try tapping it, it won't bite!).
New Inbox Item button. Formerly known as Quick Entry, this button lets you add a new task to your Inbox from virtually anywhere in the app (you'll see it elsewhere as you explore, too — try tapping it, it won't bite!).
The Secret Bar (Home Screen)
Whenever you're "home" — viewing the list of perspectives in the OmniFocus home screen — drag down on the list to reveal the secret bar. The secret bar holds tools of great power, but relatively infrequent use; that’s why they’re safely kept out of the way for just when you need them.

 Sync
Sync- Tap Sync to trigger a sync manually. This is useful any time you want to update OmniFocus on your other devices, or make sure your device is up to date with your remote database.
Note
OmniFocus syncs automatically whenever changes are made, so you shouldn't have to do this very often (if ever).
 Settings
- Tap Settings to customize your OmniFocus experience, contact Omni Support, find help, and more. Read about the available options in detail in the Settings chapter.
- Default and All Perspectives
- Use this switch to choose the set of perspectives that appears in the sidebar. Default shows the seven built-in perspectives, while All Perspectives reveals Completed and Changed as well. With the Pro upgrade installed Default becomes Favorites, a space that's fully customizable using the Tile Editor (see below).
The OmniFocus Pro upgrade adds two additional buttons to the secret bar that unlock some pretty powerful features: creating custom perspectives with the perspective editor, and customizing the home screen with the tile editor.
 New Perspective
Tap New Perspective to create a new custom perspective. After a new perspective is created, tap the special custom perspective view icon
 to browse and edit its settings. Learn more about custom perspectives in the Perspectives chapter.
 Tile Editor
Tap the Tile Editor to change the position and visibility of your perspective tiles. Completely customize the appearance of your home screen by touching and dragging perspective tiles into the desired full- and half-width rows (existing perspectives will kindly get out of your way), or drag them down to the Other Perspectives section to indicate that they aren't part of your favorites.
Tap Done — or anywhere else on the screen — to confirm your layout change, or tap Cancel to exit tile editing without saving your changes. As a shortcut, the tile editor can be summoned by touching and holding any perspective tile on the home screen (much like how you'd change the location of an app on your iOS home screen).
The Secret Bar (Perspectives)
In portrait mode, drag down on the main outline to reveal the secret bar for its associated perspective. Unlike the home screen's secret bar, these perspective-specific bars hold tools relevant to your location (along with the ever-present option to Sync).

 Search
- Filter title text and note field contents for search terms across three useful scopes: Here, which includes everything visible in the main outline; Remaining, which includes all items not completed or dropped; or Everything, which searches your entire database.
 View
View- Choose which items are visible in the current perspective's main outline. View settings are based on item status, and include First Available, Available, Remaining, and All. In context-based perspectives, view settings also control how items are sorted: either with items shown in order of soonest Due Date & Flagged status, or grouped by Project.
In landscape mode, these tools move to the toolbar (as shown below).
The Toolbar
When viewing the main outline with your device in landscape orientation, the toolbar at the top of the screen is fully visible. Here you’ll find several important functions, described below:

 Search
- Filter title text and note field contents for search terms across three useful scopes: Here, which includes everything visible in the main outline; Remaining, which includes all items not completed or dropped; or Everything, which searches your entire database.
 View
View- Choose which items are visible in the current perspective's main outline. View settings are based on item status, and include First Available, Available, Remaining, and All. In context-based perspectives, view settings also control how items are sorted: either with items shown in order of soonest Due Date & Flagged status, or grouped by Project.
 Add New…
Add a new item based on your current view in the main outline. When multiple options for new items are available (such as at the top level of a perspective), tapping Add New displays a list of available items to create.
When you're deep inside a project, looking at a specific day in Forecast, or using the Flagged perspective, this icon changes to
 to indicate that it'll create a new action there right away (the only possible option).
- Edit
- Tap Edit to delete and rearrange items in the main outline using the deletion switch
 and reordering handles
  that appear.
Note
While there isn't a button for it, iPhone's built-in "shake to undo" feature works to revert the latest change made to your database. This is the fastest way to restore an accidentally completed or deleted item, or revert a change made while editing.
The Main Outline
This is where you’ll view, add, and manipulate the tasks you’re working on at a given moment. What you see here is based on which perspective you’re viewing, what you have selected in the sidebar (or where you've navigated from the home screen), and more—you can narrow your concentration on just a few things you’d like to accomplish in the near term, or get a broad overview of the tasks ahead across a number of projects.
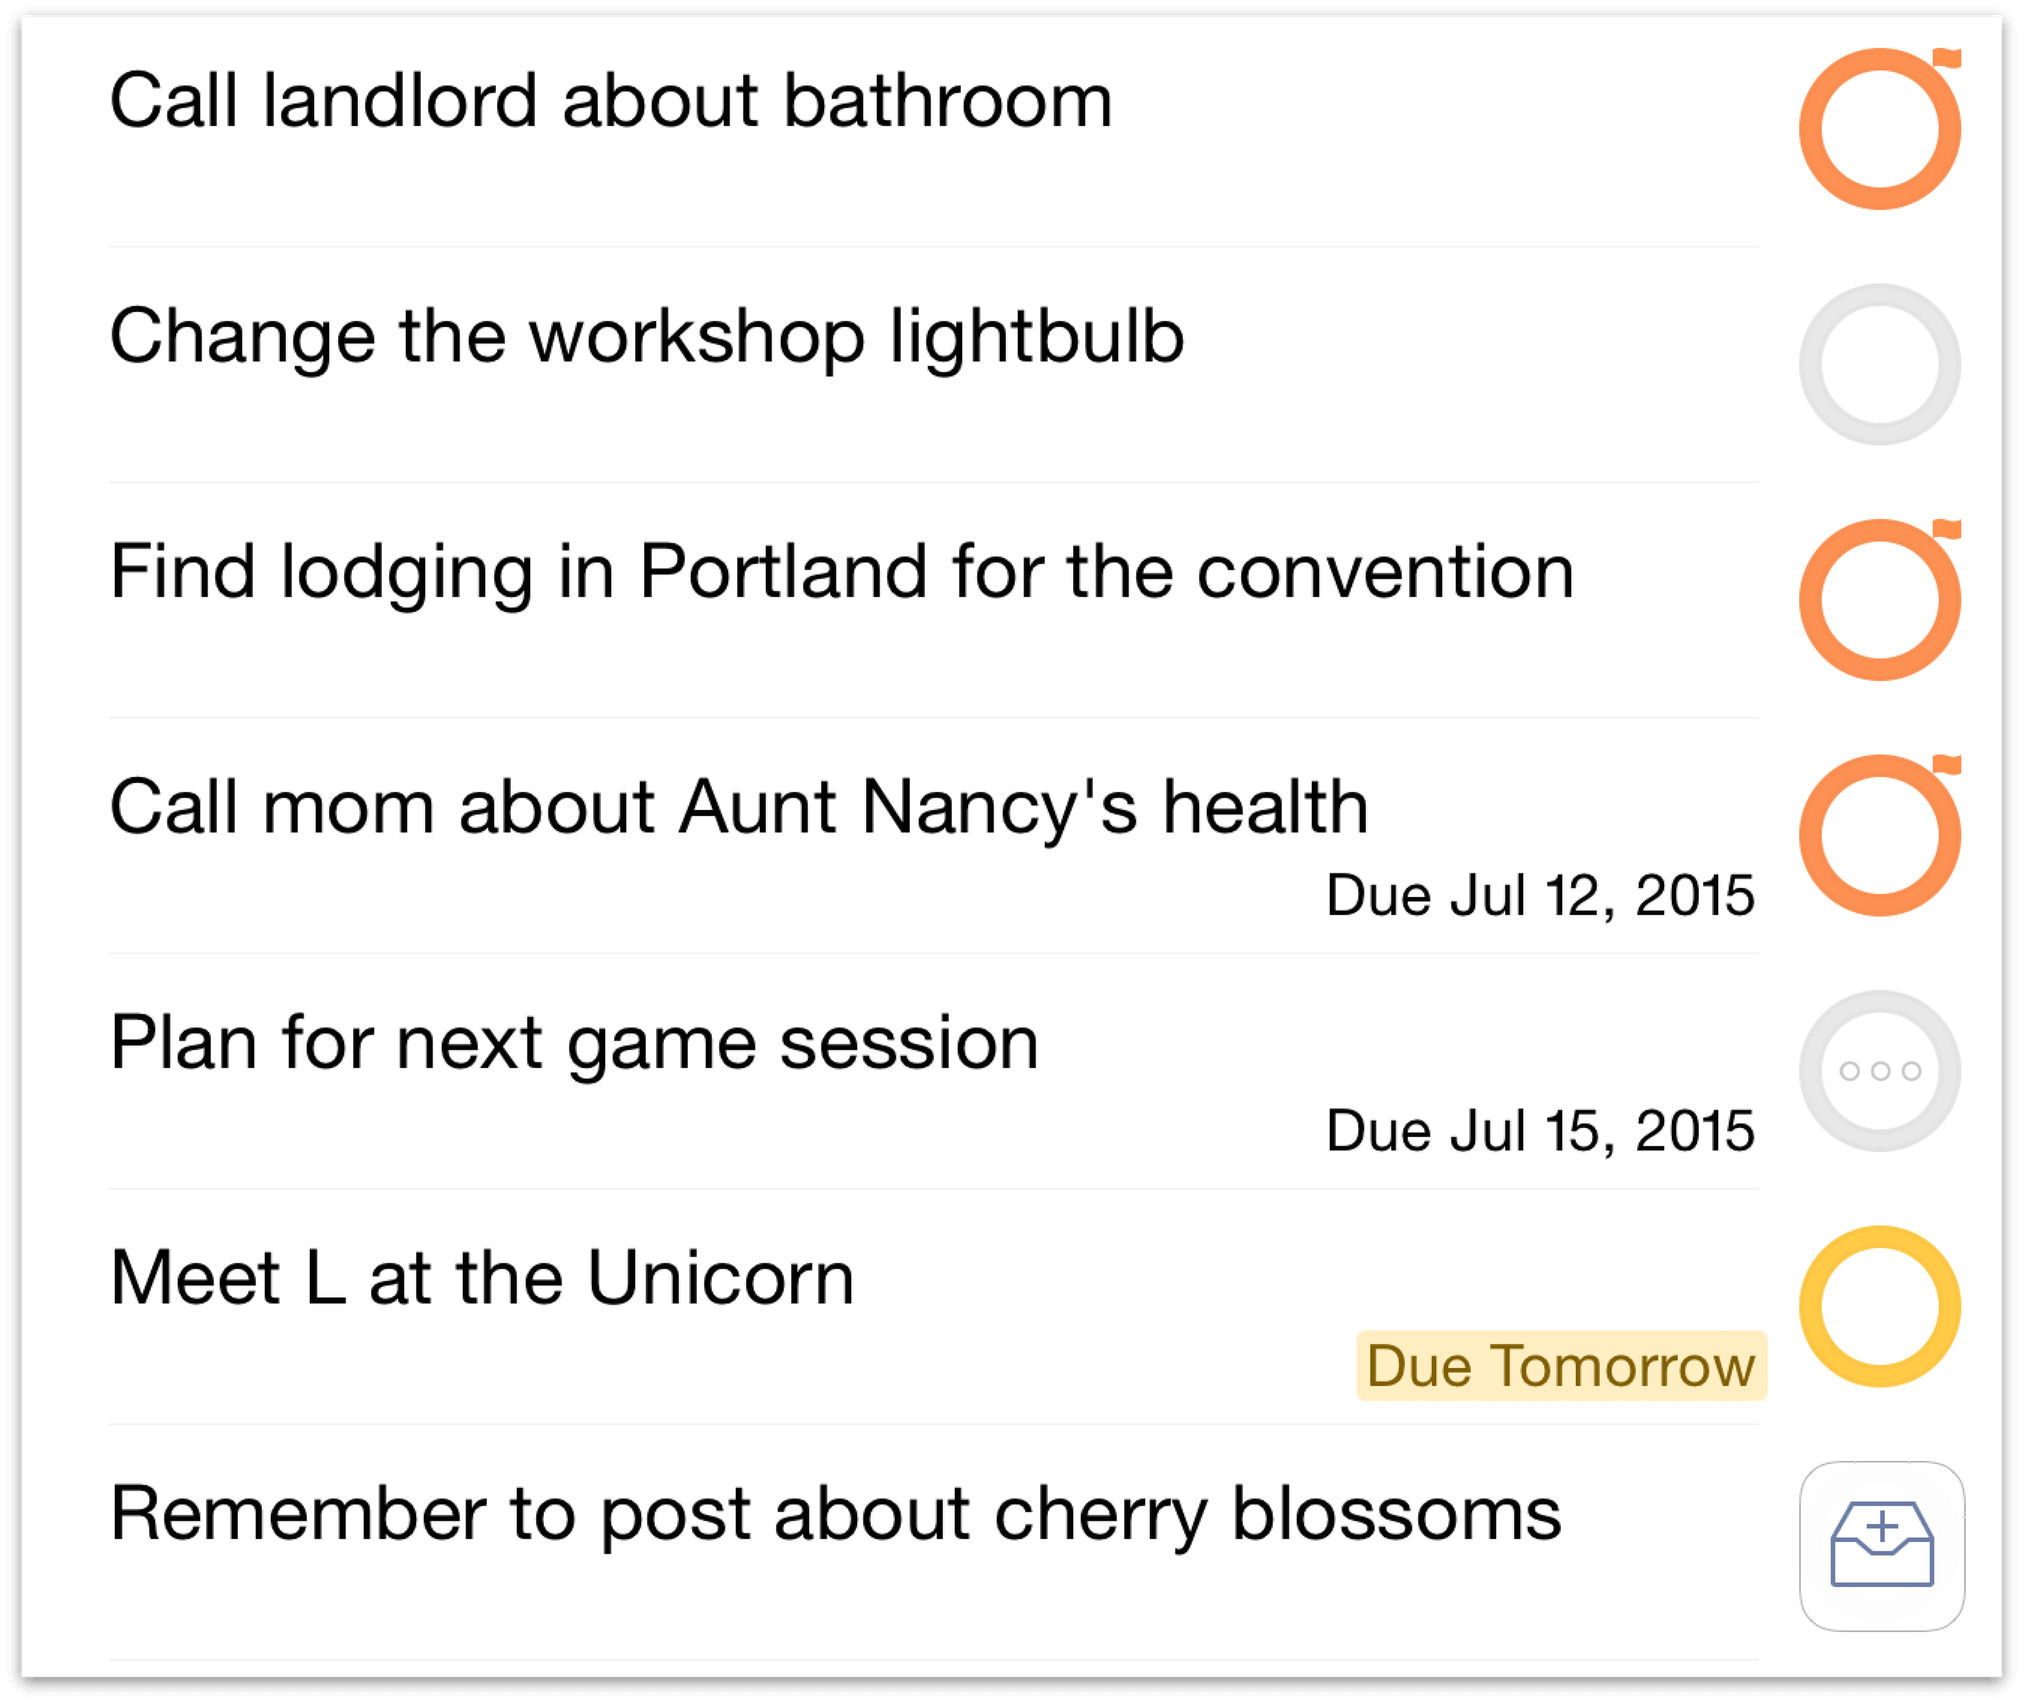
The main outline shows a list of items — inbox items, projects, actions, or groups — that fit the criteria you've established with your other view parameters. Each item shows associated information — like Project and Due Date — important to accomplishing the task.
To delete an item in the main outline, touch and drag from right to left until the Delete button appears. This removes the item from your database entirely; to mark it complete instead, just tap its status circle.
How Items Are Ordered
Actions, projects, and other items in the main outline are ordered based on the sequence in which you entered them, or how you’ve manually arranged them in edit mode, with a couple of exceptions: when you’re in a context-based view with a different sort priority set, or in Forecast, where items are sorted by due date and time.
Other sorting parameters can also be applied with custom perspectives when the Pro upgrade is installed.
The Editor
To delve deeper into the details of a task, just tap its name. The main outline makes way for the editor, where you can flesh out the task at hand with additional bits of info like when it’s due for completion, whether it’s part of a larger project, how long it’ll take, whether (and how) it repeats, and more. Enrich an item further with a text note and add audio and image attachments, all from tabs within the editor.
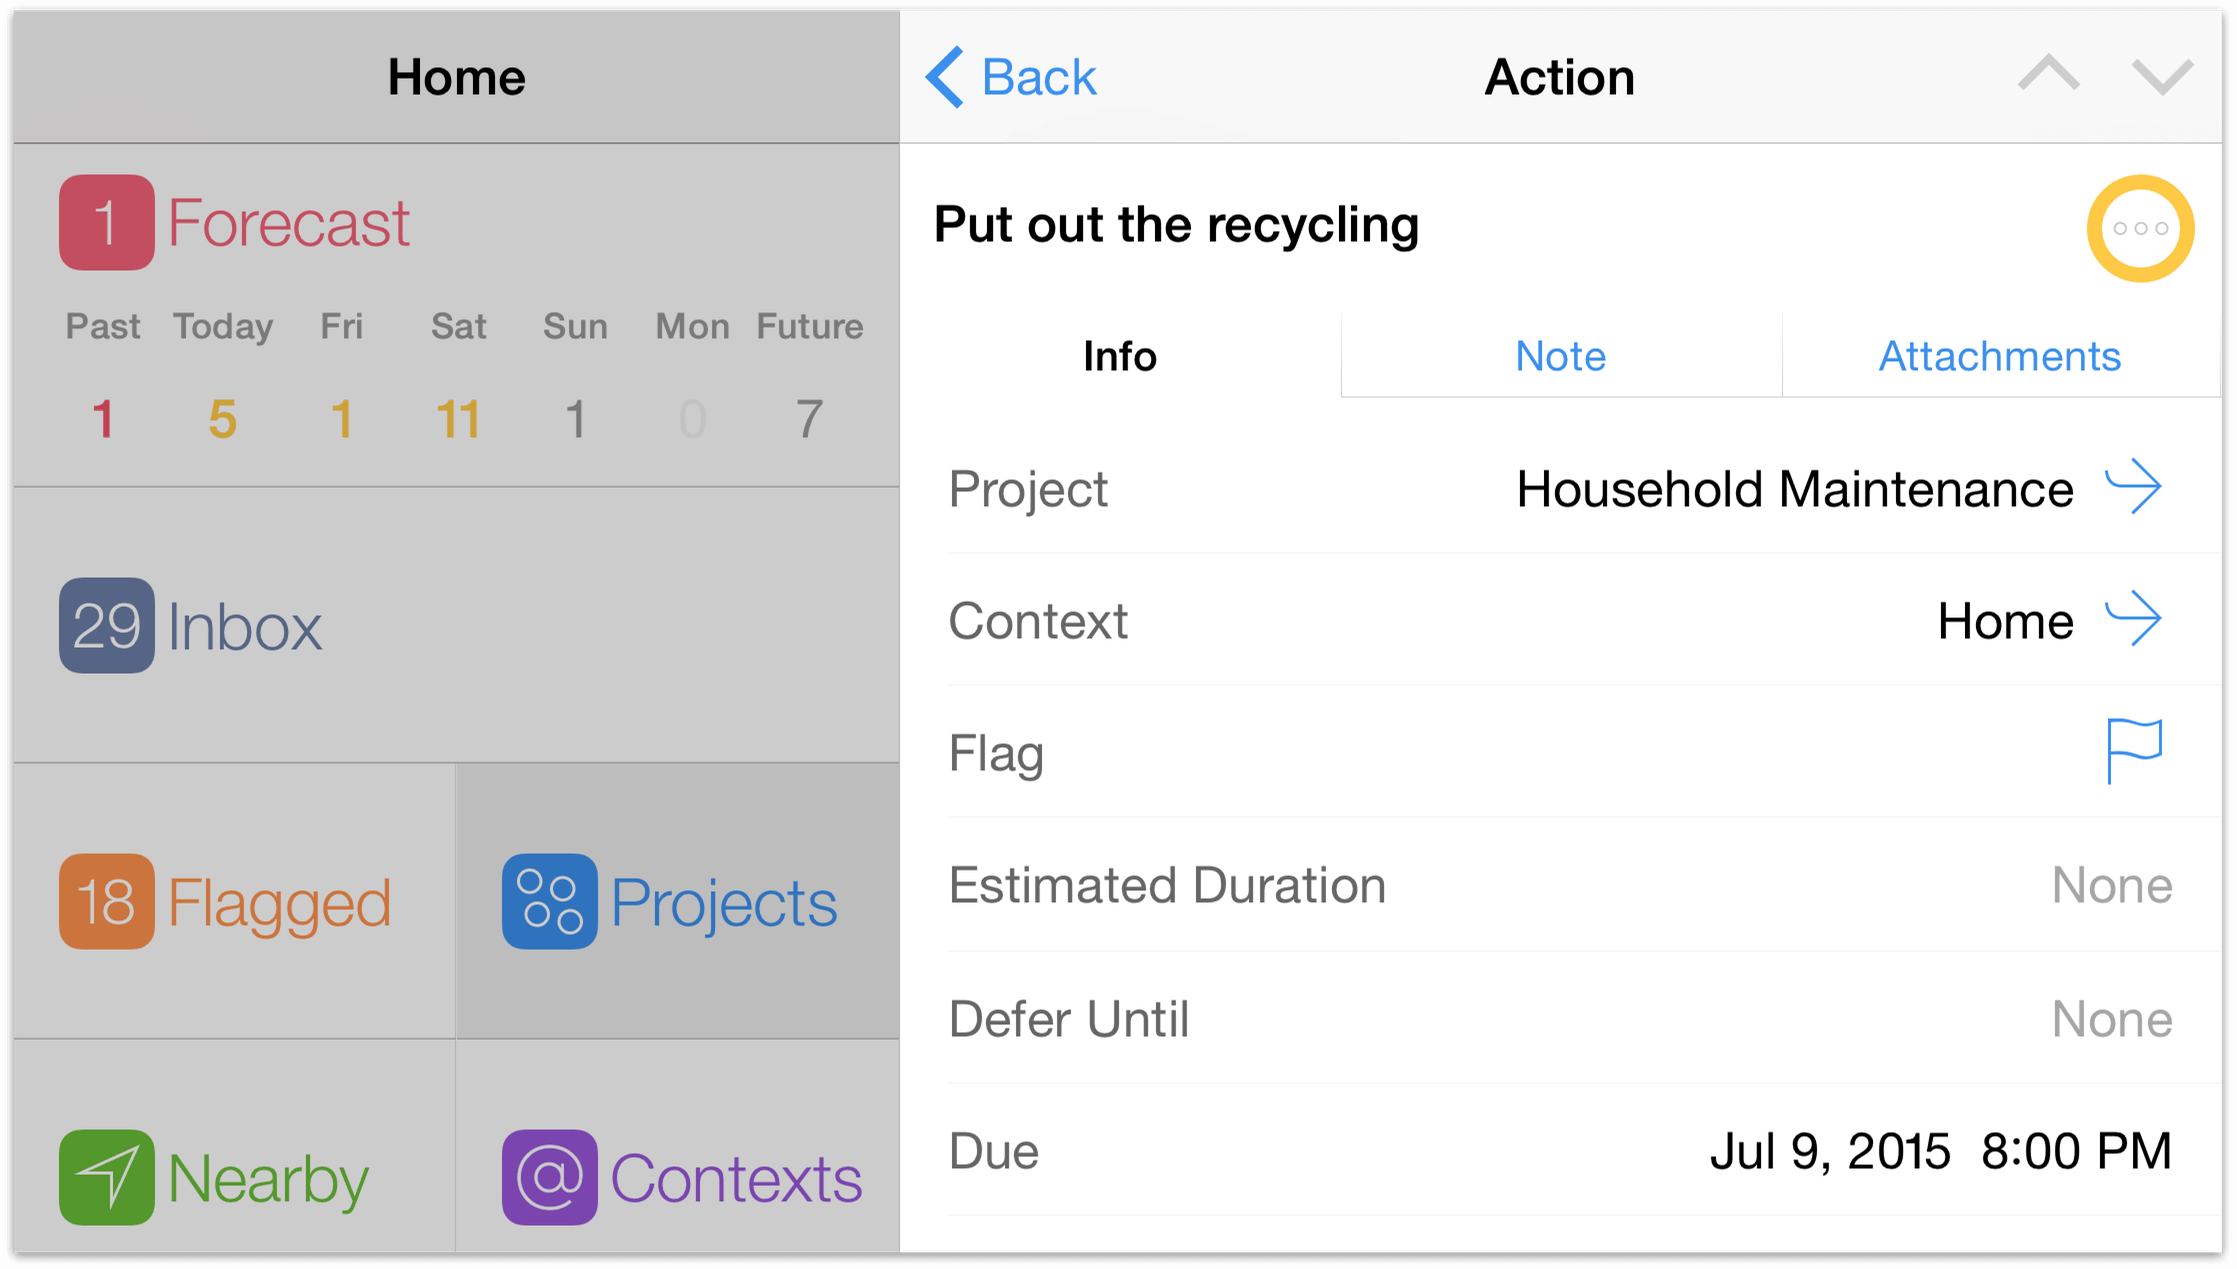
Note
The editors for inbox items, actions, and projects are pretty similar, since these all represent tasks that can be accomplished. The editor for contexts is special because it represents a person, place, or thing that you need to help accomplish a goal; importantly, the context editor is where you give a context a location so it can be tracked from the Nearby screen.
Ways that inbox items, actions, projects, and contexts can be enriched using the editor are explored in their individual chapters.
Editor Tools
When using the editor on iPhone 6/6s Plus, a set of useful commands becomes available in rows at the bottom of the editor's Info pane.
 Move
Move- Tap to create a nesting hierarchy of items within the Inbox; actions within projects; or contexts within other contexts.
 Convert
- When editing an inbox item or an action, tap to convert it to a project. When editing a project, tap to convert it to an action (the action will appear in the “Miscellaneous” project).
 Share
Share- Tap to send the current selection as a message, an email, or via any other service that shares with OmniFocus.
 Delete
- Tap to remove the edited item from your OmniFocus database entirely.
Contextual Menus
A long press on many of the items in OmniFocus reveals the contextual menu with commands relevant to that item. These commands work in ways that are specific to OmniFocus, and might not be completely obvious at first glance.

The Cut and Copy commands appear only in the contextual menus of inbox items and actions. They act as you'd expect: the selected item is either removed and copied, or simply copied.
When Pasted via the contextual menu, a copied action will appear either inside the selected item (if it's a project) or as a peer to it (if it's another action). Text copied from other sources can also be pasted into OmniFocus from the contextual menu; in this case, choosing Paste creates a new action with the copied text as its title.
Now that you have an idea of the road ahead, let's start putting the pieces together with the first — and most fundamental — OmniFocus perspective: the Inbox.
Collecting with the Inbox
When you first start using OmniFocus, you might be thinking “Where do I start?”. The best place to go is your Inbox, since this is the place where you’ll do most of your initial work in OmniFocus.
The Inbox is the hub of all activity, and is the catch-all space for depositing just about everything that’s on your mind, no matter how big or small. The things that you’d like to do—tasks, to-dos, aspirations, plans, chores, life goals—all have a home in OmniFocus. You can throw any stray thought into your Inbox.
One of the best ways to get familiar with OmniFocus is to sit down and do a brain dump into your Inbox. Let OmniFocus be your brain away from brain for when you can’t remember that really important thing you need to do by next Monday.
To add an item to the Inbox, tap the Add Inbox Item ![]() button in the toolbar (or on iPhone, in the bottom right corner of the screen).
button in the toolbar (or on iPhone, in the bottom right corner of the screen).
Tip
When adding a new item to your Inbox you can quickly create subsequent inbox items using Save + in the editor, and when you create a new action from within a project you can use it to rapidly file additional actions in the same project.
Inbox Items
The things you create are placed in your Inbox, and are known as inbox items. Some of these inbox items are so simple that you can knock them off while they still reside in your Inbox. For example, let’s say you create an inbox item to remind you to change the lightbulb in your workshop. That’s a simple enough task that you can do it at any time.
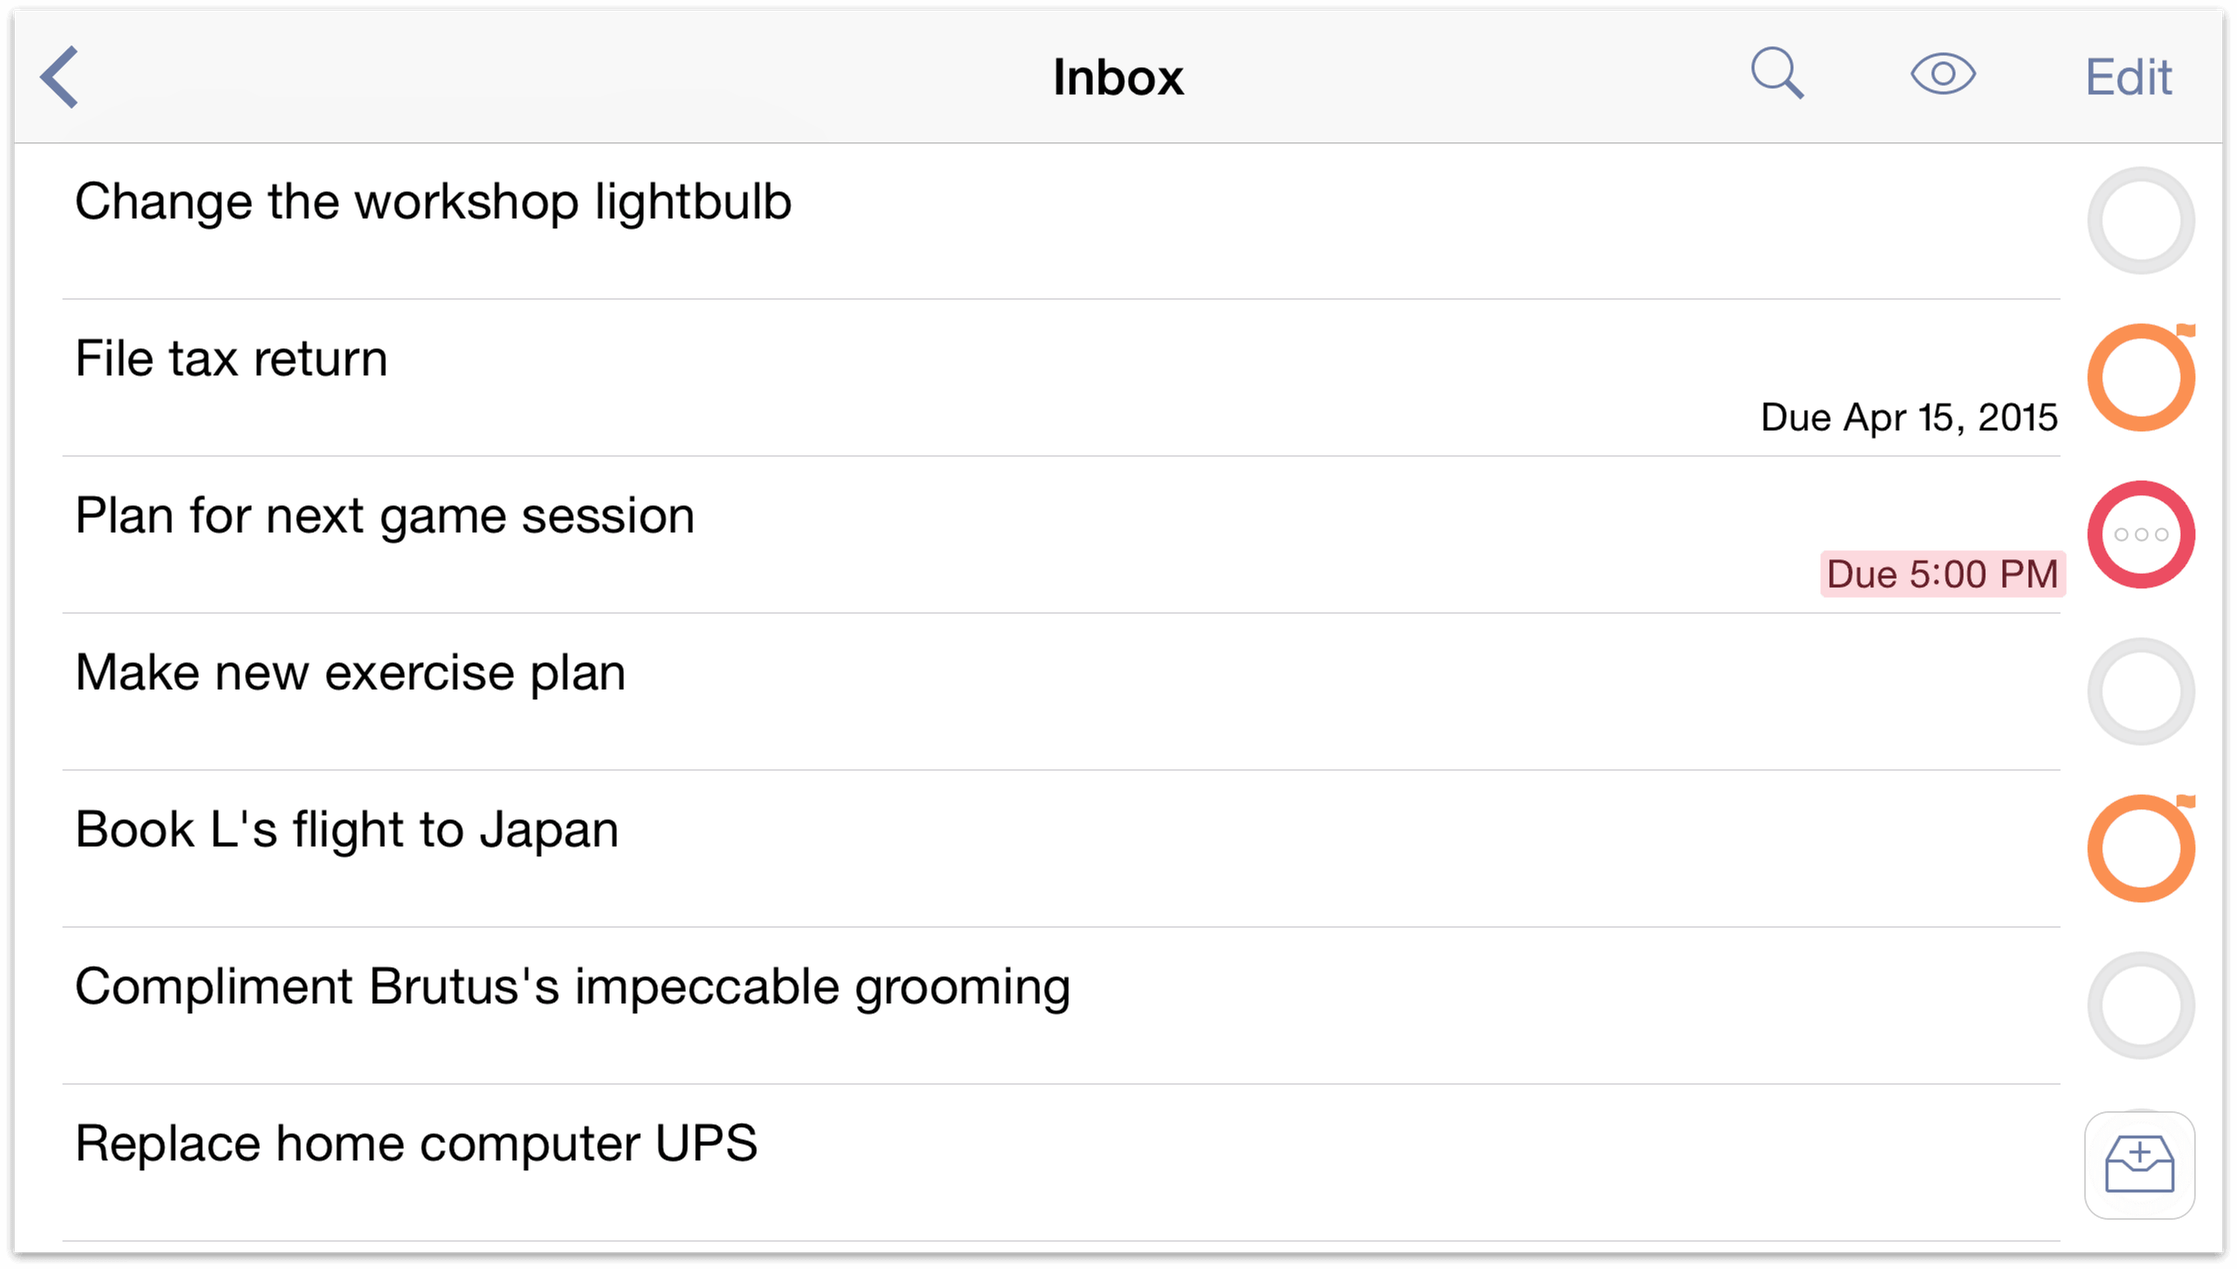
This inbox item doesn’t need to be part of a larger project, and adding a context seems like overkill. Instead, you just leave this item in your Inbox as a constant reminder to yourself that you need to change the lightbulb in your workshop, especially before you plan to use any power tools.
Some items, though, are worth categorizing and providing fine details so that you have all the information you need at hand when you’re in a particular place or focusing on completing a complex project.
Actions
Most of the inbox items you create ultimately end up as actions. This happens when you decide that an item is part of a larger goal—a Project—and you file it away with similar to-dos (more on this in the Projects and Contexts sections).
Each action has a Status Circle on its right edge for marking it complete. When you check an item as completed, it’s moved from the list of available items to the list of Completed items and becomes invisible under the default View options.
Once you’ve assigned an inbox item to a project, it becomes an action that you can see in the Projects or Contexts perspectives, or in any custom perspective you’ve assigned it to.
To edit the details of an action, tap it to open the action editor. You can enrich the information you include with an action by adding notes and attachments, such as images and audio recordings. You’ll find more information about these in Notes and Attachments. You can also set due dates, defer dates, and repeat intervals for actions—for the details, see Dates and Times.
Completing Items
When you’ve finished a task, tap on its status circle to mark it complete. The task disappears from view, but not from your database: you can change your view settings to All to view completed items in your current perspective.
If you mistakenly complete an item, tap Undo to revert the change (or shake to undo, on iPhone).
Note
For a reverse chronological list of your completed items, check out the Completed perspective. If it's not currently shown in the sidebar, drag down and choose to view All Perspectives from the secret bar.
Planning with Projects
As you work through your Inbox, some of the items will stand out as larger in scope than a simple action. Planning a vacation or move, for example, are the sort of things that could benefit from being broken down into more manageable parts. Projects to the rescue!
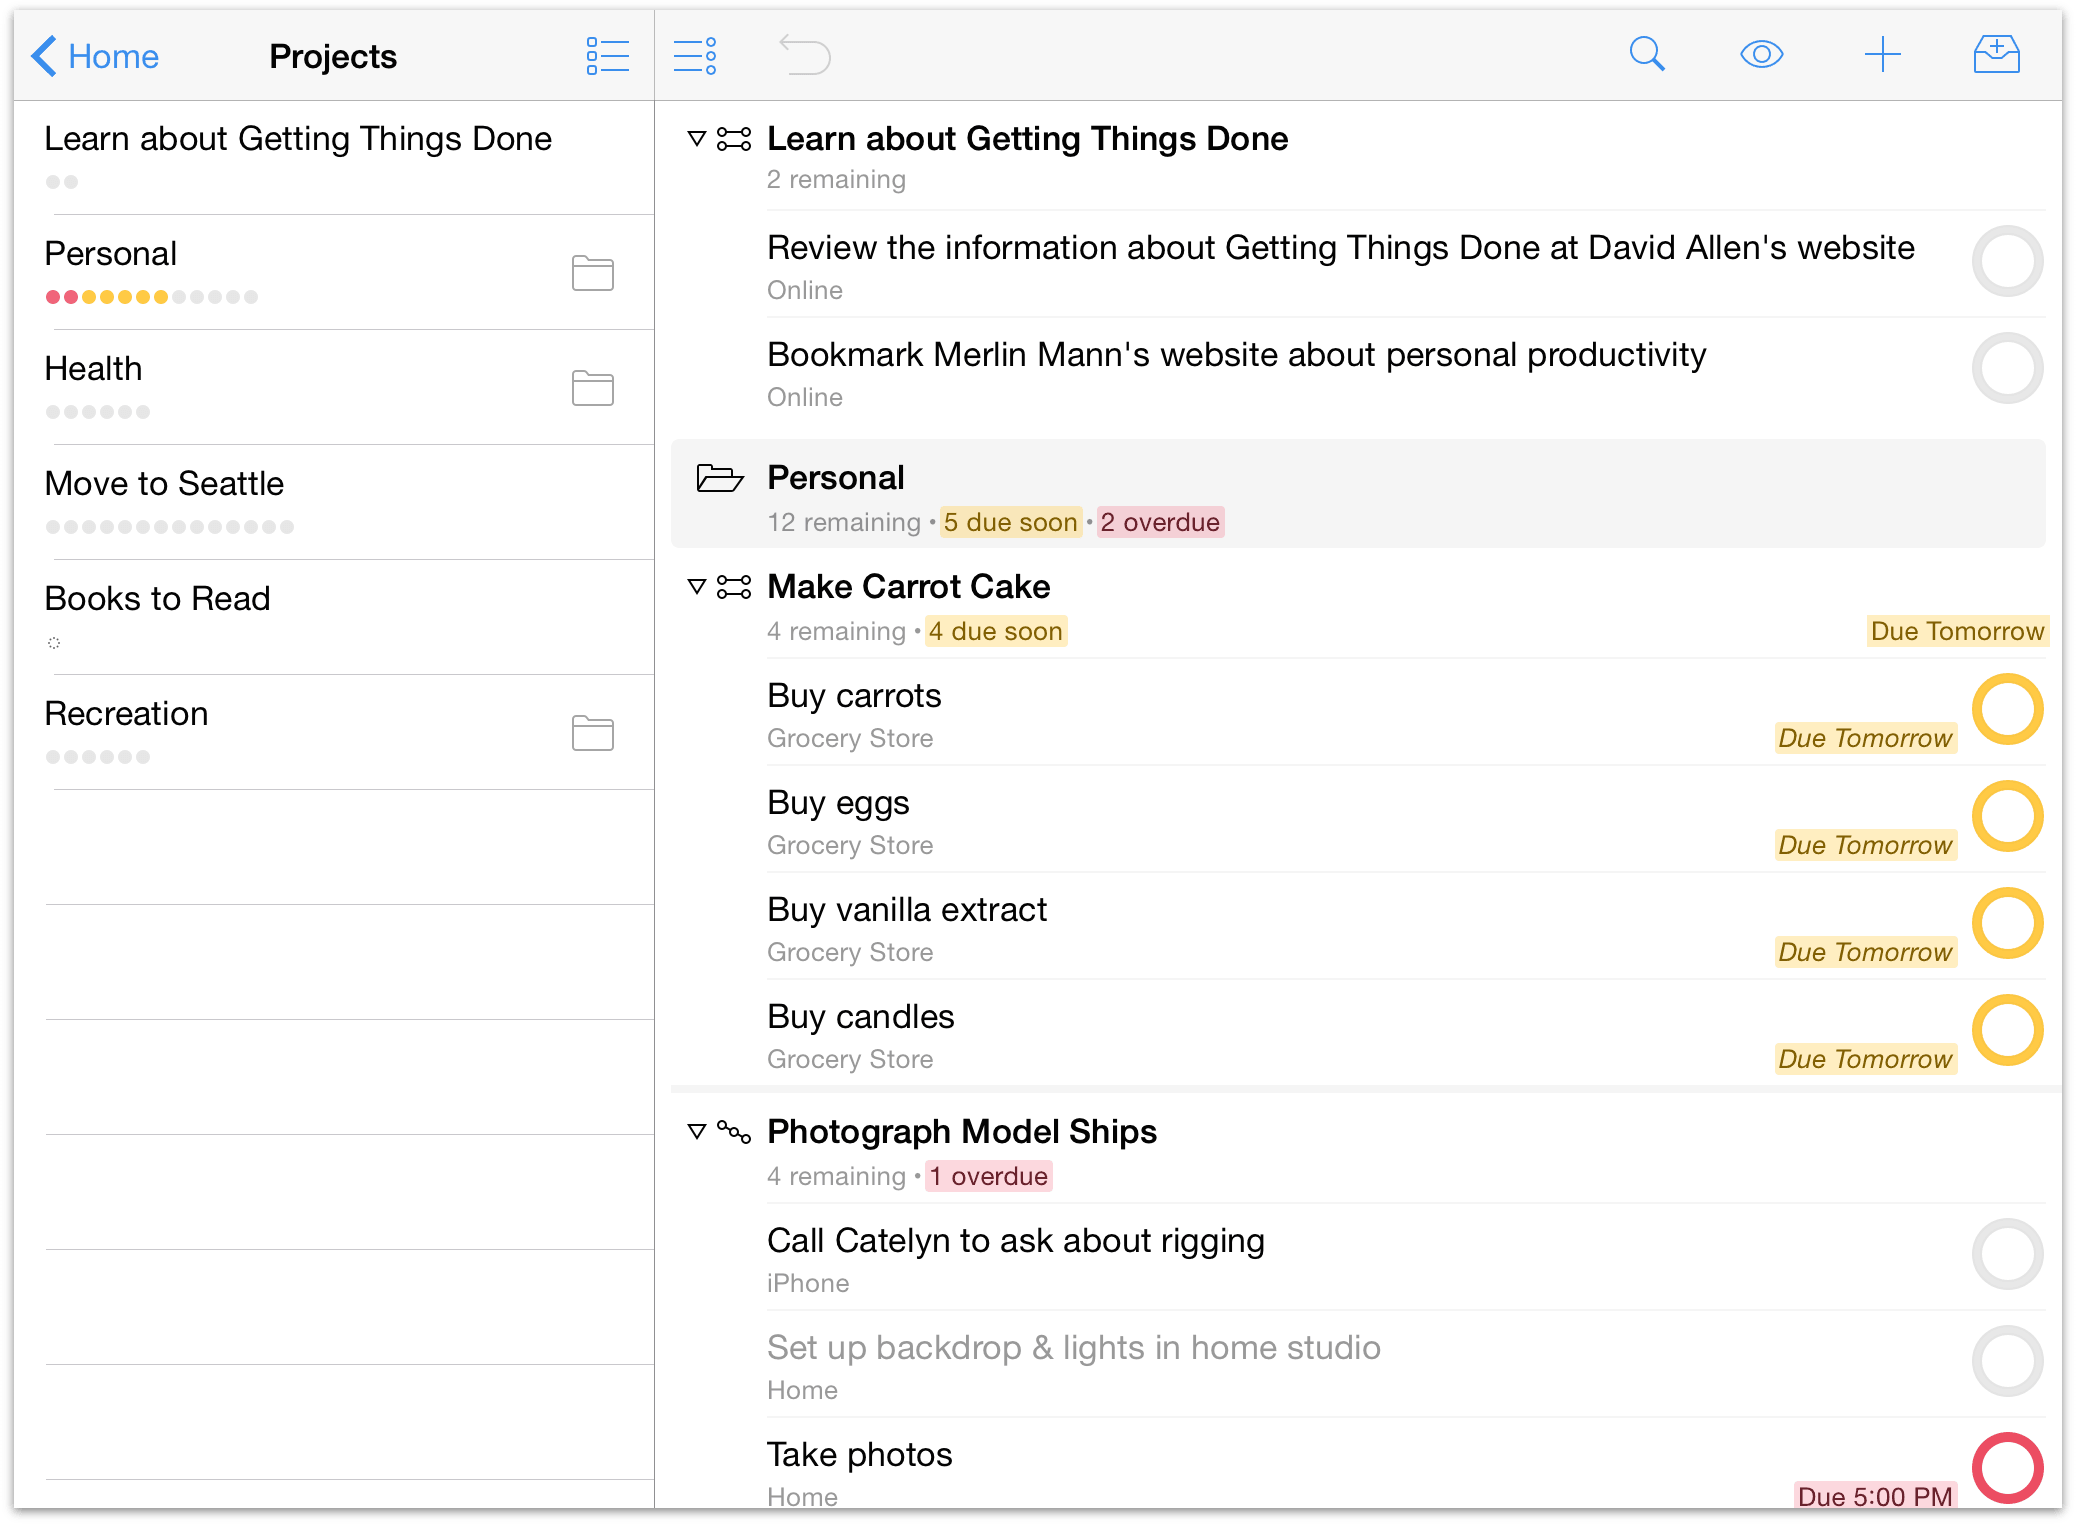
A Project is an item that's made up of multiple actions. Projects are typically more complex than actions, and can include several related actions.
Understanding Project Types
Projects can be as elaborate as necessary, and you can specify the project type to be either Sequential, Parallel, or a grouping of Single Actions.
 Sequential Projects
Some projects, such as building a papier-mâché pterodactyl, require one action to be completed before the next action starts. These are sequential projects.
Sequential projects have actions that need to be completed in a predetermined order; the first item needs to be completed before you can move on to the next. Another example of a sequential project could be a checklist that an astronaut goes through during the launch sequence. Each item in the list is dependent on the previous item's completion.
 Parallel Projects
Parallel projects consist of actions that can be completed in any order, such as picking up items at a few different locations. In a parallel project, all incomplete actions are available, and the First Available is just the first one in the list.
Note
The difference between parallel and sequential projects is most visible when the View option is set to show only Available actions. (Actions beyond the first available action in a sequential project are blocked, and therefore hidden.) In other View settings the distinction is there, but more subtle: future actions in a sequential project have their titles in gray text instead of black.
When viewing the Projects perspective on iPad, each project has an icon to its left that indicates the project type. Using these icons you can quickly scan a list of projects and tell which project is which type. On iPhone, tap the project name until the editor appears. The project type is shown in the Info tab.
Tip
For added flexibility in creating just the right dependencies for your project, consider making an action group parallel within a sequential project, or vice versa.
 Single Action Lists
A single action list isn't really a project in the traditional sense; it's a list of loosely-related actions that aren't interdependent. A Shopping List project is a good example of a single action list because it contains a list of things that you need to pick up at the grocery store. You can gather these items and check them off as completed (or acquired) as you make your way through the store. The order in which you collect them is irrelevant—it doesn't matter if you pick some of them up today or tomorrow; they're just things you know that you need to grab.
A Single Action list is often more about a state you want to generally sustain (spoiled cat, non-spoiled food, functional household), rather than a state you want to achieve (ship an app, take a vacation, find a new apartment). Another way of looking at this is that Single Action lists rarely have due dates, and they rarely get checked off as completed. The items within the Single Actions list may get checked off, but the project itself is ongoing.
Creating Action Groups
Groups can also be used to create a project within a project—an action group (also sometimes called a sub-project). If you find that you have an action that requires many steps of its own, you could split that action off as a separate project. However, a better solution could be to leave the action in its current project, and then move the related tasks underneath.
For example, when planning your move to Seattle, you realize that you need to make a house-hunting trip to find a place to live. You need to book your flights, rent a car, reserve a hotel room, and make appointments with real estate agents to find an apartment or that dream house in Alki Beach. You can create these actions within the Move to Seattle project, and then move them into the Plan a house-hunting trip action to create an action group.
Let's break it down. Here's how to add an action group to a project in OmniFocus for iOS:
Tap Projects
 in the sidebar or home screen, then open the project you want to modify.
Tap the plus button
 in the toolbar at the upper right to create a new action.
Give the new item you're creating a name that will describe all the steps it will end up containing.
Tap the Save + button in the toolbar.
Give this next item a name that represents the first action in the group, but tap the “Save” button this time.
Locate the item you just created and tap it to bring up the editor.
Next, use the Move
 button in the toolbar (on iPhone, at the bottom of the editor's Info pane) to embed the item inside the item you created in step 3.
Tap the Done button in the upper right to see the action group you've created. You can now use the plus button to create the remaining items that need to be added, and they'll be created inside the group.
Once you've created that action group, you can change the type from Parallel to Sequential so that the next task only becomes available when you tick off the previous task. And when you've completed the final action for that subproject, the parent action can be checked off, too.
Tip
An alternative way to create an action group is to initially create it as a project, populate it with actions, then convert the project to an action and move it inside the project intended to be its final home.
Grouping Projects with Folders
Occasionally, you’ll find that some of your projects are similar enough that you want to keep them together so you can look at everything in one place. These projects might have different goals, timelines, or objectives, but they contribute to the greater whole. For projects such as this, you can use Folders in OmniFocus to group multiple projects together.

From the Projects perspective (tap Projects in the sidebar or home screen), you can create a project folder by tapping the plus button in the toolbar and choosing New Folder from the popup. To move a project into a folder, tap on the project (not its actions) to bring up the project’s details, and then tap the Move button. Then all you need to do is select the folder that you want the project to be in, and the project will be moved to its new location.
You’ll also notice that folders look a little different than a regular project — they’re tagged with a folder icon ![]() in your project list. To open a folder and view the projects it contains, just tap it.
in your project list. To open a folder and view the projects it contains, just tap it.
Marking a Project Complete
Eventually you're going to reach the successful end of a project. When you're sure that you've really accomplished Move in to new house, Carve Halloween pumpkins, or Write pterodactyl novel, you can mark the project complete.
Select the project and then choose Completed ![]() in the Status section of the editor. If you'd like to revisit a completed project, change your view options to All or search for the project with the Everything filter.
in the Status section of the editor. If you'd like to revisit a completed project, change your view options to All or search for the project with the Everything filter.
Placing a Project On Hold
If you're not quite sure whether you want to start (or continue) a project, you can change the project's status from Active to On Hold ![]() . When you place a project on hold, the project and its actions are removed from the project list in the sidebar or home screen and main outline (if you've chosen to show Active projects in view options).
. When you place a project on hold, the project and its actions are removed from the project list in the sidebar or home screen and main outline (if you've chosen to show Active projects in view options).
You can switch the Project perspective's view options to Remaining so you can review on hold projects for any you'd like to make active, drop, or mark completed.
Tip
If you don't want On Hold projects cluttering your Projects list, you can leave the Projects view options set to Available, but then change the view options for the Review perspective to Remaining. This way, anything that is On Hold, Deferred, or Blocked shows up in the sidebar whenever you review all of your projects, and you can decide then whether to reactivate a project or action. See the Review chapter for details.
Dropping a Project
If you've decided not to work on a project any further, you can Drop ![]() it completely. It disappears from the list in the sidebar, and its actions likewise stay hidden. Of course, you could just delete the project, but then you wouldn't have any record of it or its actions ever having existed. Keeping them around in a dropped state means you can go back and check on how often you give up on projects, check which actions you've completed regardless of whether they're from still-relevant projects, and so on.
it completely. It disappears from the list in the sidebar, and its actions likewise stay hidden. Of course, you could just delete the project, but then you wouldn't have any record of it or its actions ever having existed. Keeping them around in a dropped state means you can go back and check on how often you give up on projects, check which actions you've completed regardless of whether they're from still-relevant projects, and so on.
To find a dropped project in your database, choose All in view options or search for it with the Everything filter.
Note
Dropped and completed items accumulate in your database over time. If you find the load of data excessive, OmniFocus for Mac offers archiving of these items according to time parameters that you control.
Organizing with Contexts
In addition to the hierarchical ways of organizing your actions, you can also assign a Context to each action, project, or group. A Context can be anything you want, such as a place (the hardware store or work), a person (you, your boss, or a coworker), or a thing (your trusty MacBook Pro or a torque wrench). Contexts indicate where you need to be or what you need to have available to complete the item.
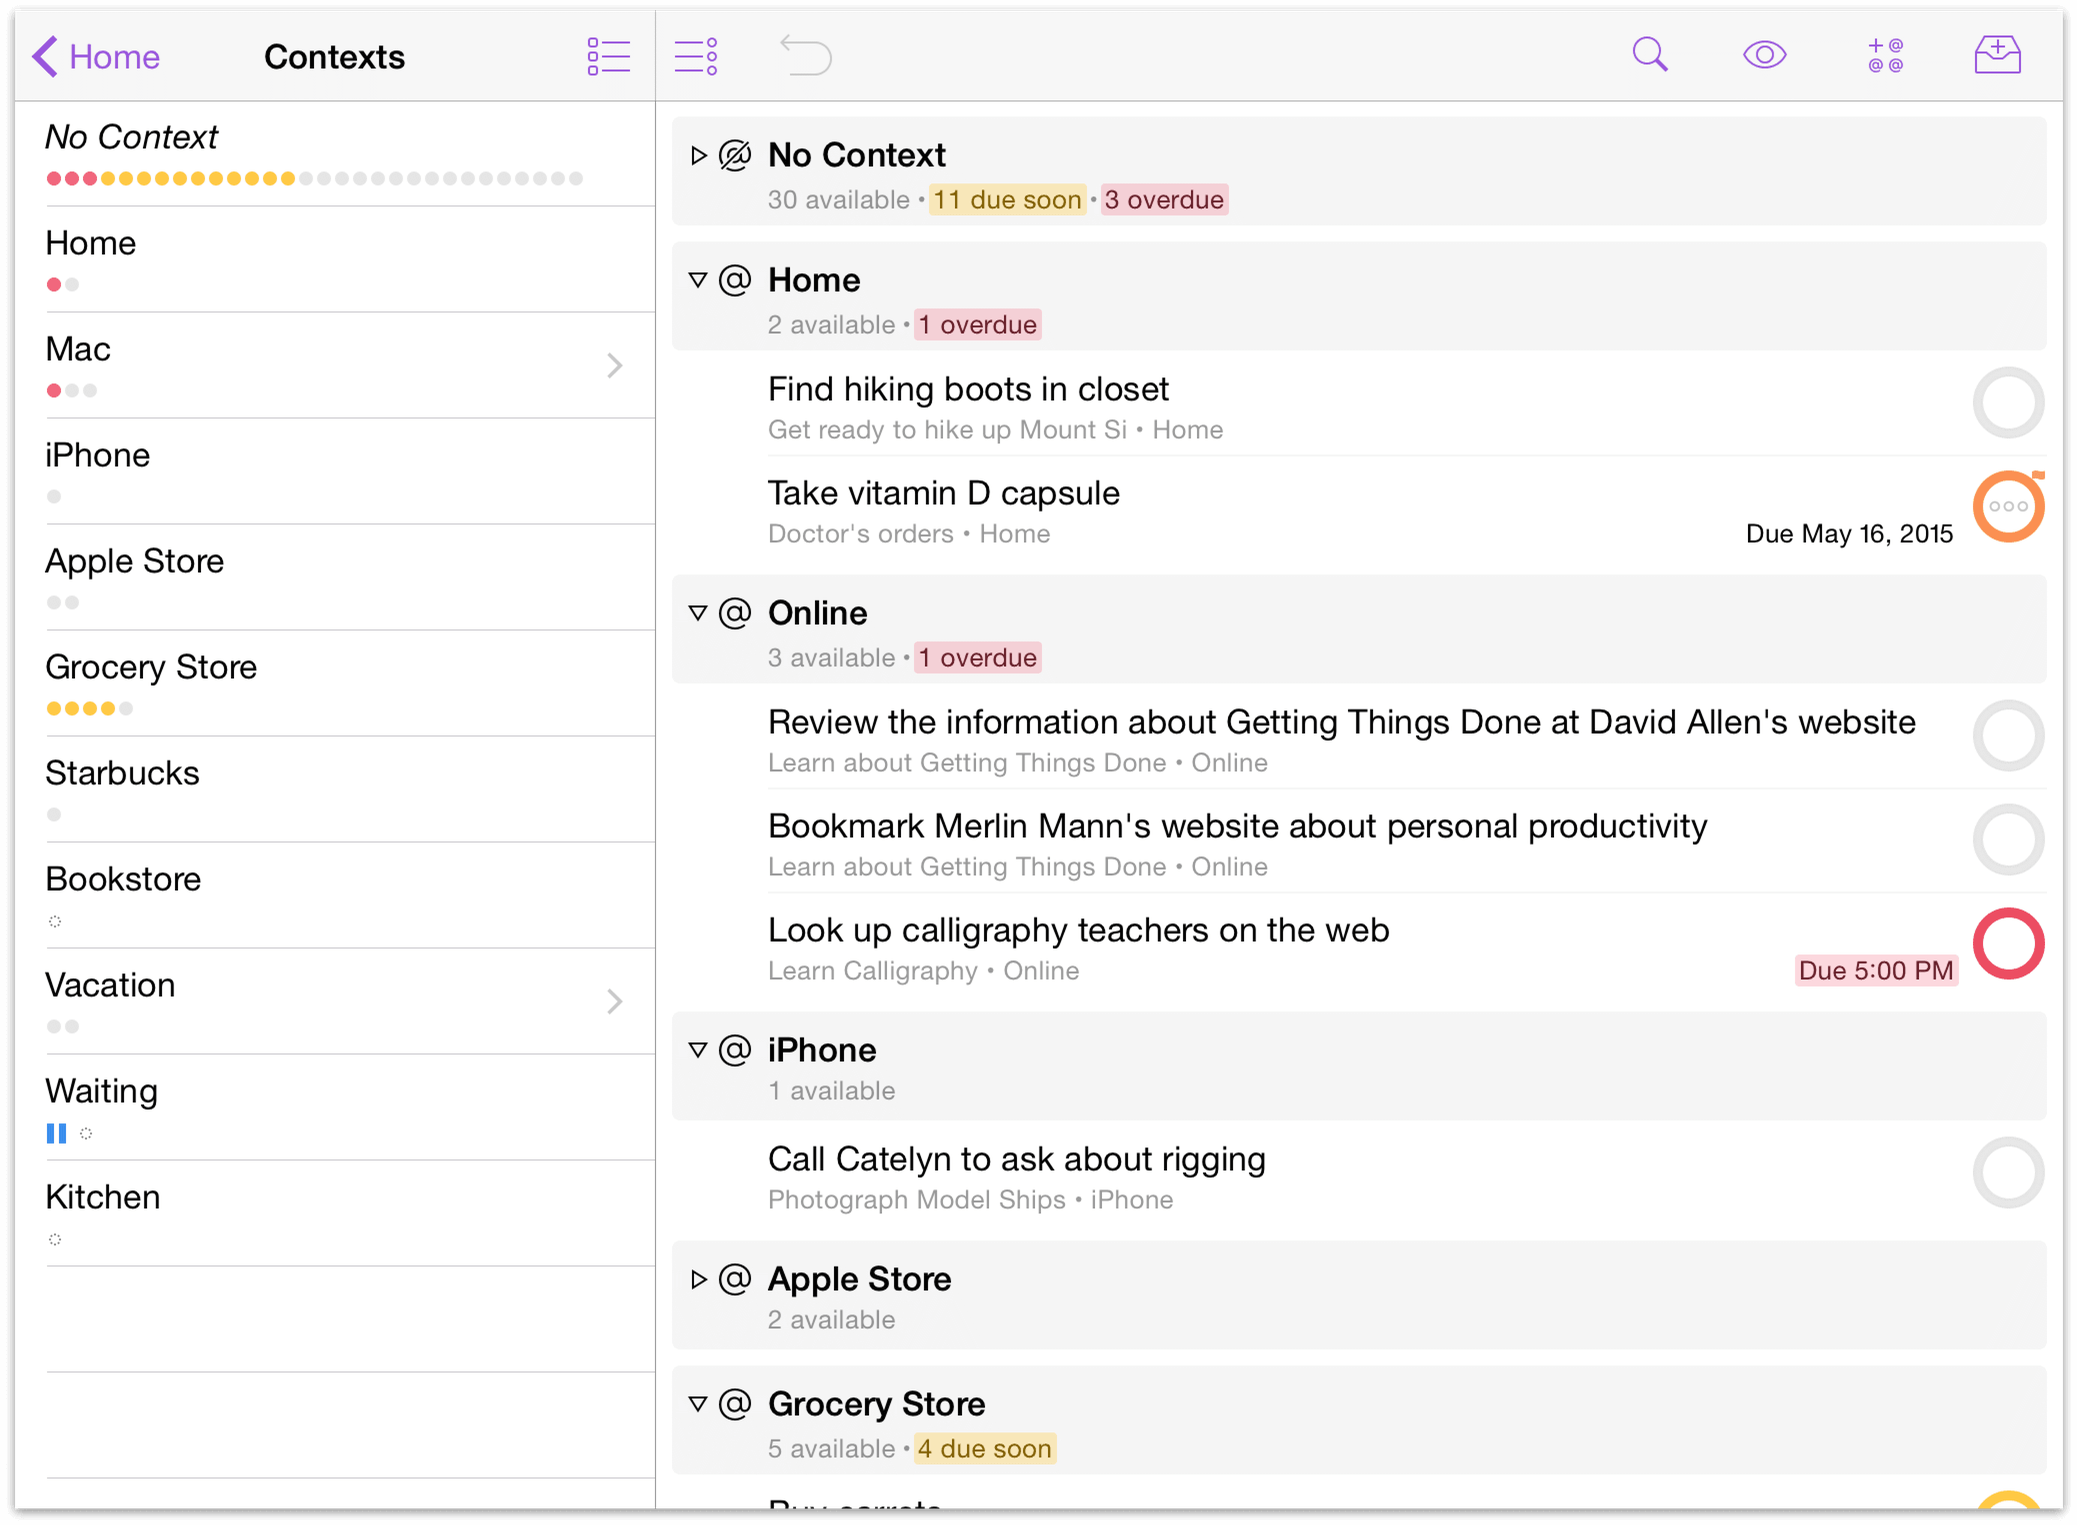
For example, let’s say you’re tweaking the rocket engine you’ve been building in the backyard, and you’re stuck because you need a specific wrench. To make matters worse, the light in your workshop went out when you went searching for that wrench. You’ve added the wrench as an action in your Colonize Mars project, and you just added the lightbulb to your Household Errands project. But what’s to keep you from forgetting one or the other the next time you go to the hardware store? The answer is that while they’re part of different projects, you can associate these items with a Context.

Note
By default, if you only assign a context to an inbox item, it remains in the Inbox with your other tasks until you assign it a project.
Contexts can be created in two ways:
From the Contexts perspective:
Tap Contexts in the sidebar or home screen, then tap the New Context button
 in the toolbar. The context editor appears, where you can assign a name to your new context, set its status (Active, On Hold, or Dropped), and choose a location (see Location Reminders below) for where you need to do that ultra-important thing.
While editing an item:
While editing an inbox item or action in one of your projects, you can choose a context for it or create a new context by entering a unique name in the text field. After entering the name for the new context, don’t forget to tap Create (context name) below the text field to add this context to your list.
Note
Changing a context's status to On Hold marks any items assigned to the context as On Hold as well, causing them to disappear from the Available view setting. If an item mysteriously disappears after you mark its context On Hold, check your view settings! It may just be hiding out of sight.
As you can see, contexts give you an amazing amount of control over the depth of information you can add to actions, inbox items, and projects. We have preloaded OmniFocus with a bunch of contexts that we think you’ll most likely need, and the new contexts you create show up at the bottom of the list. But let’s say that you don’t need some of the preset contexts, or that you want to move your new contexts to the top of the list. Alrighty, let’s do that next.
Managing Your Contexts
The contexts screen shows a list of contexts with summary dots indicating the at-a-glance status of the actions and projects within them. When you’re ready to get some work done, this is a good place to see only the things that are relevant to a particular context. Actions without a context show up at the top in a No Context group.
To delete or move contexts around, tap Edit in the toolbar (![]() in the iPad sidebar). To the left of the contexts, you’ll see a deletion switch
in the iPad sidebar). To the left of the contexts, you’ll see a deletion switch ![]() ; and on the right, you’ll see a reordering handle
; and on the right, you’ll see a reordering handle ![]() . If you tap the deletion switch, you won’t delete the item right away. Instead, a Delete button appears to the right where the reordering handle was. Tap Delete to remove the context from your list.
. If you tap the deletion switch, you won’t delete the item right away. Instead, a Delete button appears to the right where the reordering handle was. Tap Delete to remove the context from your list.
To change the order of the contexts in your sidebar, just touch and hold the reordering handle and drag the context up or down in the list. As you move that context around, you’ll notice that the other contexts move out of the way so you can drop the context where you would like it to be.
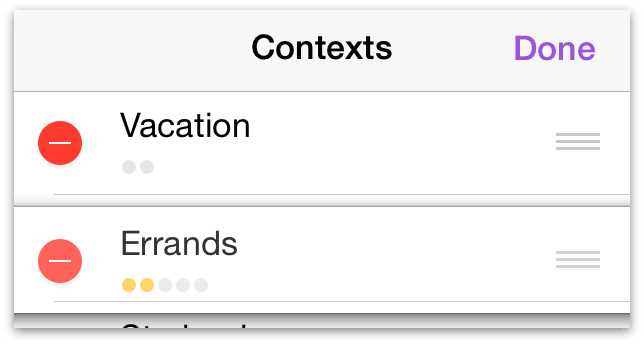
When you’ve finished making changes to your contexts list, tap Done in the upper-right corner of the sidebar to save your changes.
By default, actions in context lists appear in the same order they are listed in their projects. Tap View Options to sort by flagged items and due dates, with flagged items shown first and then items by due date from soonest to latest.
Note
Copied items can't be pasted into contexts directly. To add a context to a copied item, first paste it into an perspective that uses the project hierarchy (such as the Inbox or Projects perspectives), then tap it to edit its details.
Nesting Contexts
By default, any new contexts you create are added at the top level of the context list. However, if you tap Move ![]() when viewing a context, you can create nested contexts.
when viewing a context, you can create nested contexts.
Note
The Move button doesn't appear in the editor until after a context has been created, so to nest a new context inside another, return to the context list after creating it and choose it from there to open the editor with a refreshed view.
For example, when you have important people who are associated with important places, you could assign contexts to them independently – or, you could group them together by their common location. So if you have a Work context, you can move your boss, coworkers, and even work-related tools like your computer or drafting table into it to keep things clearly organized.
There’s no limit to the amount of context nesting you can do, which means you have the ability to give your actions fine-grained detail about where or how you need to do something.
Location Reminders
When you’re on the go with your device, context-based location reminders are handy for getting a little nudge when you are in the right area to complete an action.

Note
The underlying technology for location reminders on iOS is quirky; you can't quite count on them to occur perfectly every time you enter the specified area. (These location alerts use a less accurate and somewhat unreliable low power location monitoring, rather than the battery draining GPS services available in iOS, although accuracy is improved in all cases when both a cellular network and GPS are available.)
The range of distances at which you might get an alert is pretty wide. If you leave an area and then enter it again within a short span of time, you might not get a second alert. And if you pass through an area quickly (such as while driving on the highway), you might not get an alert at all. So for now it is best to use this feature as an extra layer of occasional helpfulness, not a crucial part of your trusted system.
Turning on Notifications
Before you can use location reminders, the first thing you’ll need to do is to turn them on in OmniFocus’s settings. Tap Settings in the secret bar to open the settings. Under Notifications, tap Sounds, Alerts, and Badges, and then tap the switch under Location Reminders to make sure Show Alerts is turned on.

With notifications turned on, you can now set up locations for the contexts you use in OmniFocus.
Note
If you don't turn on notifications in OmniFocus Settings, you won't be able to assign a notification to a context.
You'll also want to make sure that OmniFocus has permission to receive alerts on your device. You'll have been asked about this at launch, but if you refused at that time, you can open the iOS Settings app and then select Notifications to be sure that alerts are enabled (choose OmniFocus from the list of apps on the right).
If you follow the instructions in this chapter and notifications still aren't appearing, it's possible that location-based alerts have been disabled globally on your device. To check on this, take the following steps:
- Open Settings.app.
- Tap Privacy.
- Tap Location Services.
- Scroll down to the very bottom of the screen and tap System Services.
- Ensure that Location-Based Alerts is set to On.
Giving a Context a Location
Your next order of business is to assign locations to your contexts. This makes it even easier for you to accomplish your goals when you’re out running errands, or to remind yourself of where something needs to be done. With location alerts turned on, OmniFocus will ping you when you’re near that location and bring that particular action item to the front so you can check it off your list.
To set up location info on a context:
In the Contexts list, tap on a context (then tap on its bolded title again to edit it), and then tap Location. None is the default; tap it to specify a place.
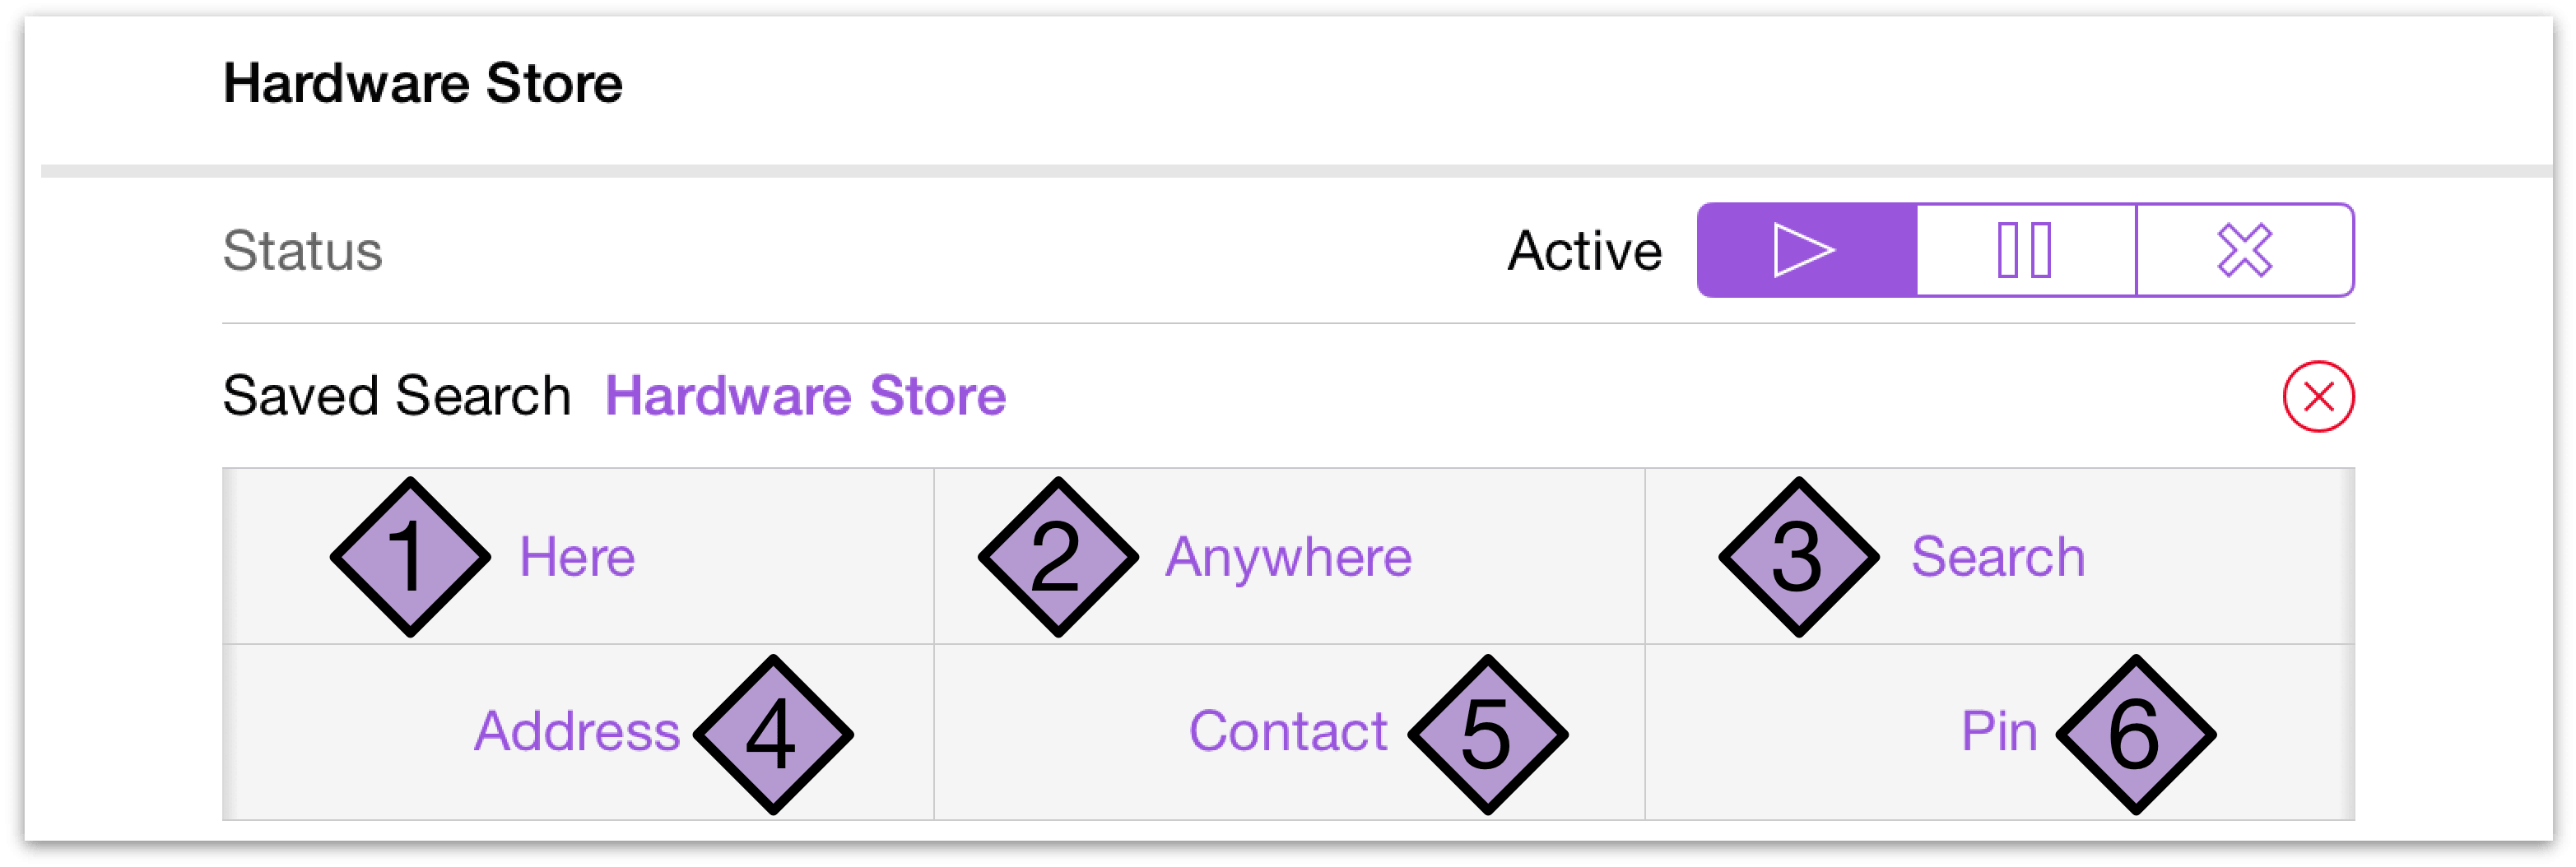
Here uses Wi-Fi or cellular triangulation to pinpoint where you are. Neither method is 100 percent accurate, but they can get pretty darn close.
Anywhere designates the context as always available, no matter where you are. It isn’t really a location—it just means that any context with this location are things that you can do anywhere, such as practicing your banjo (although, don’t try this on the bus during the morning commute).
Search lets you enter a keyword to search for. This option is particularly handy, for example, when you need to pick up something from a hardware store, but aren’t quite sure which one is closest to you. You can just type Hardware and then tap Search on the keyboard to choose a business near you. You can either assign the context an exact location that appears as a result of the search, or you can use the search itself.
Address gives you the option to enter a specific address (if known).
Contact gives you the option to choose the address for a person or place that you’ve added to your contacts. If this is the first time you’ve opted to set a location from the Contacts app, an alert will pop up asking you to authorize OmniFocus to access your contacts.
Pin lets you touch and hold a spot on the map to drop a pin at a location of your choice.
Note
If you've set up context locations on your device and you switch to OmniFocus on your Mac, the context location data won't be shown, but don't worry—it's safely preserved when you sync your OmniFocus data between devices.
Setting Notifications for a Location
After you’ve set the location, you can finally set up a notification, and provide a distance alert for the context as well.
The notification dialog appears below the location you’ve chosen on the editing screen. You can choose to be notified when arriving or when leaving your specified location.
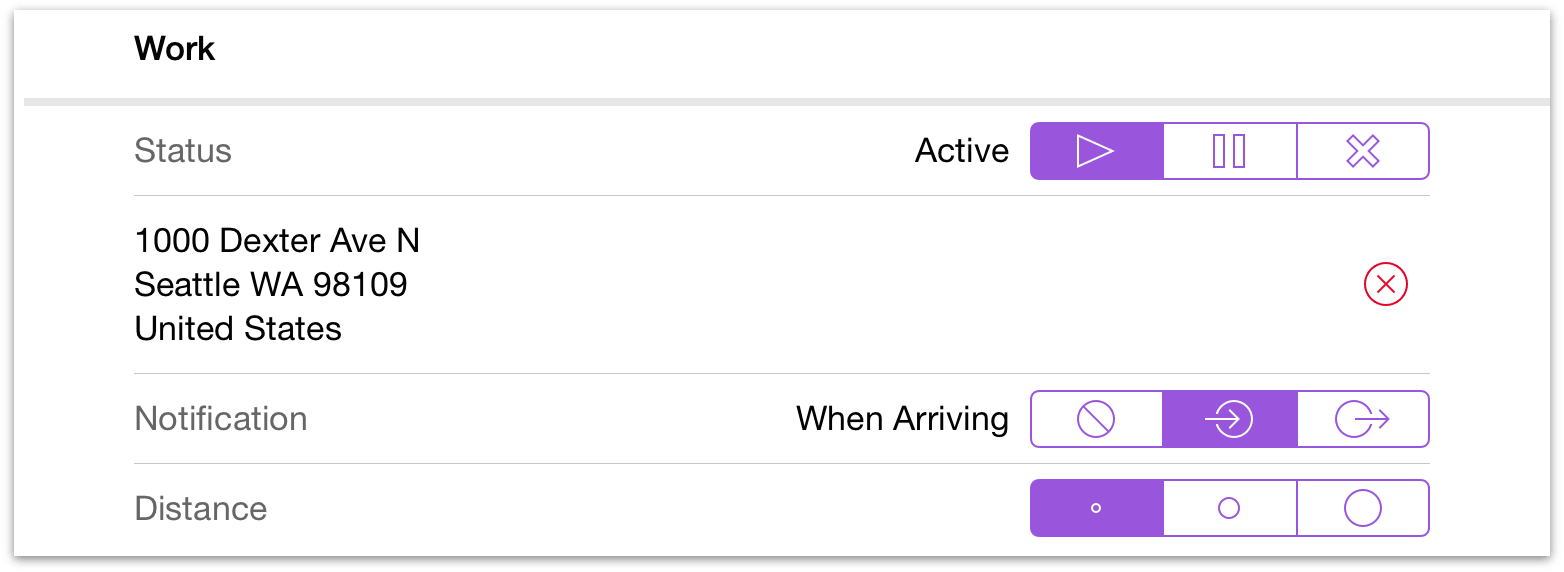
After setting your notification option, you’ll be able to choose a distance. The three distance options are very approximate. The small dot is about 200 meters or 650 feet; it covers about one city block and is useful for things such as coming home or leaving the office. The middle-sized circle is about 500 meters or about a quarter mile; it covers something such as a small neighborhood or park, and is useful for knowing when you are a few streets over from a certain store. The big circle is about 10 kilometers or 6.2 miles; it’s useful for things such as a city you occasionally visit. But remember, the actual distance where you get your notification could be quite a bit different from these rough numbers.
Putting Contexts, Locations, and Notifications to Work
Contexts with search-based locations don't offer notifications; instead, choosing Nearby from the sidebar or home screen shows the results of searches you’ve defined that are close to your current location. This is useful when the most convenient way to accomplish a task could change based on your current location and timeframe.
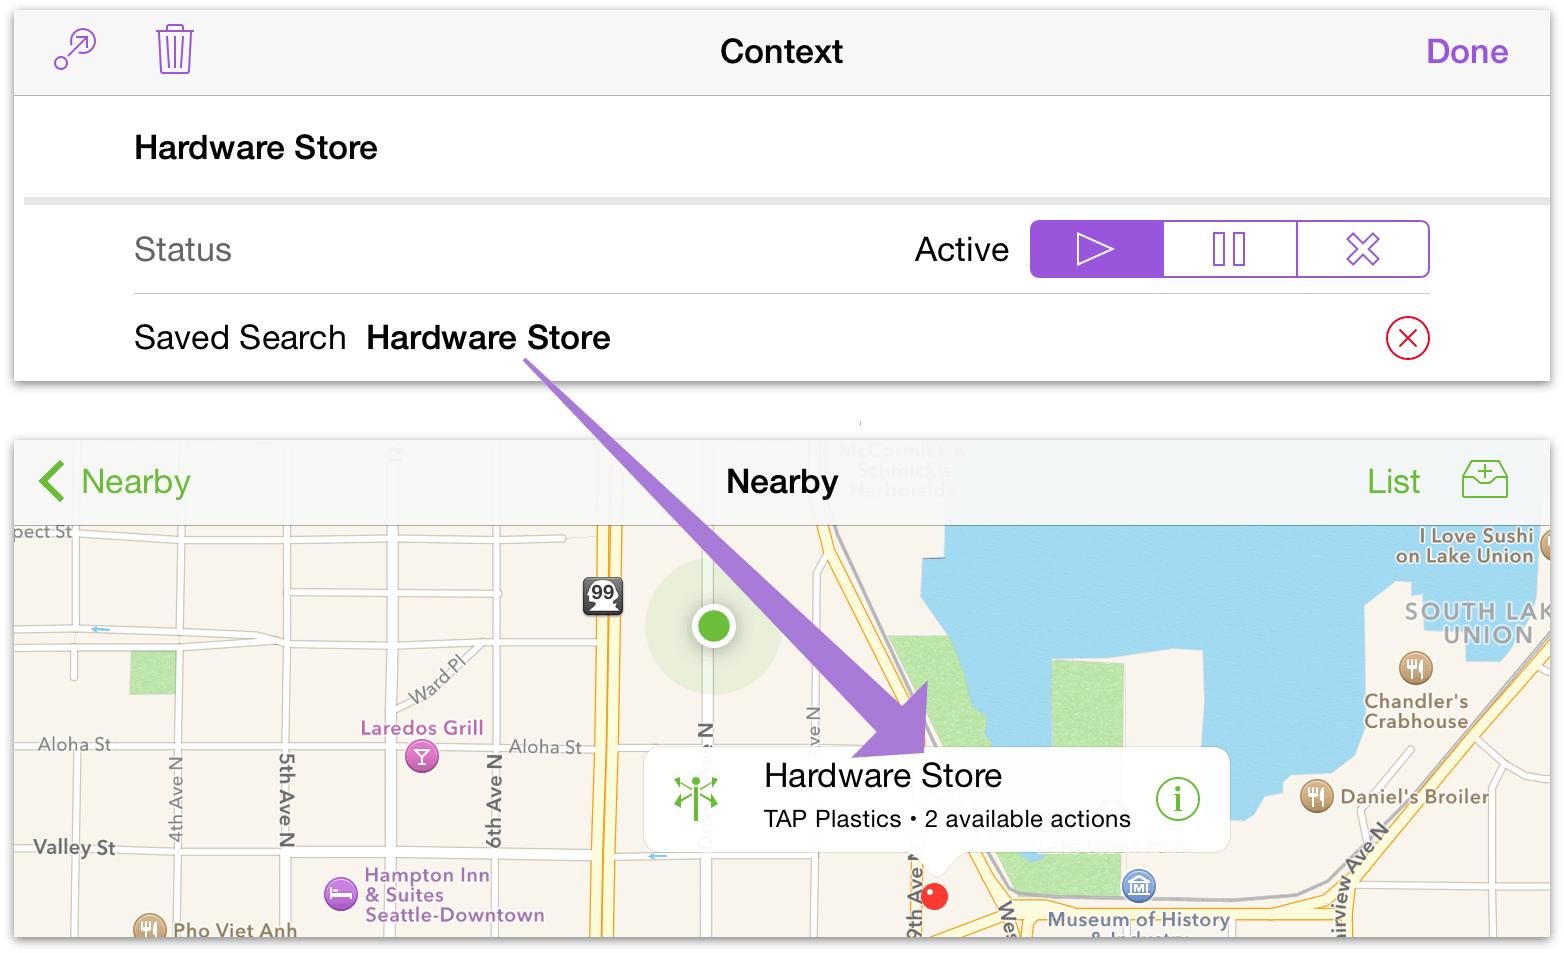
However, if you have set a location that’s far away, you can pinch on the map until you’re zoomed out enough to see a red location pin; tap the pin to see the available tasks associated with that context. Tap Info on the popover to view and edit the context and its associated tasks directly, or tap Get Directions ![]() to get directions to the location based on your current location.
to get directions to the location based on your current location.
When you tap Get Directions, the Maps app comes to the front and plots a course to the destination from your current location. To return to OmniFocus, double-tap your device’s home button and select OmniFocus from the app switcher.
Looking Ahead with Forecast
Forecast helps you keep an eye on the progress of your projects, check upcoming due dates, and schedule OmniFocus actions alongside important events in your Mac or iOS Calendar. With the ability to check for past due tasks and look ahead to the future, you’ll never miss a beat. In OmniFocus for iOS a range of dates spanning today, the next four days, the past, and the future is shown in a convenient row in the sidebar or home screen, letting you know at a glance what’s on your plate in the coming weeks.
One way to think of OmniFocus’s Forecast perspective is to think of the weather (which is something we do often here in Seattle)—you want to know what it’s going to be like outside so you can plan ahead.
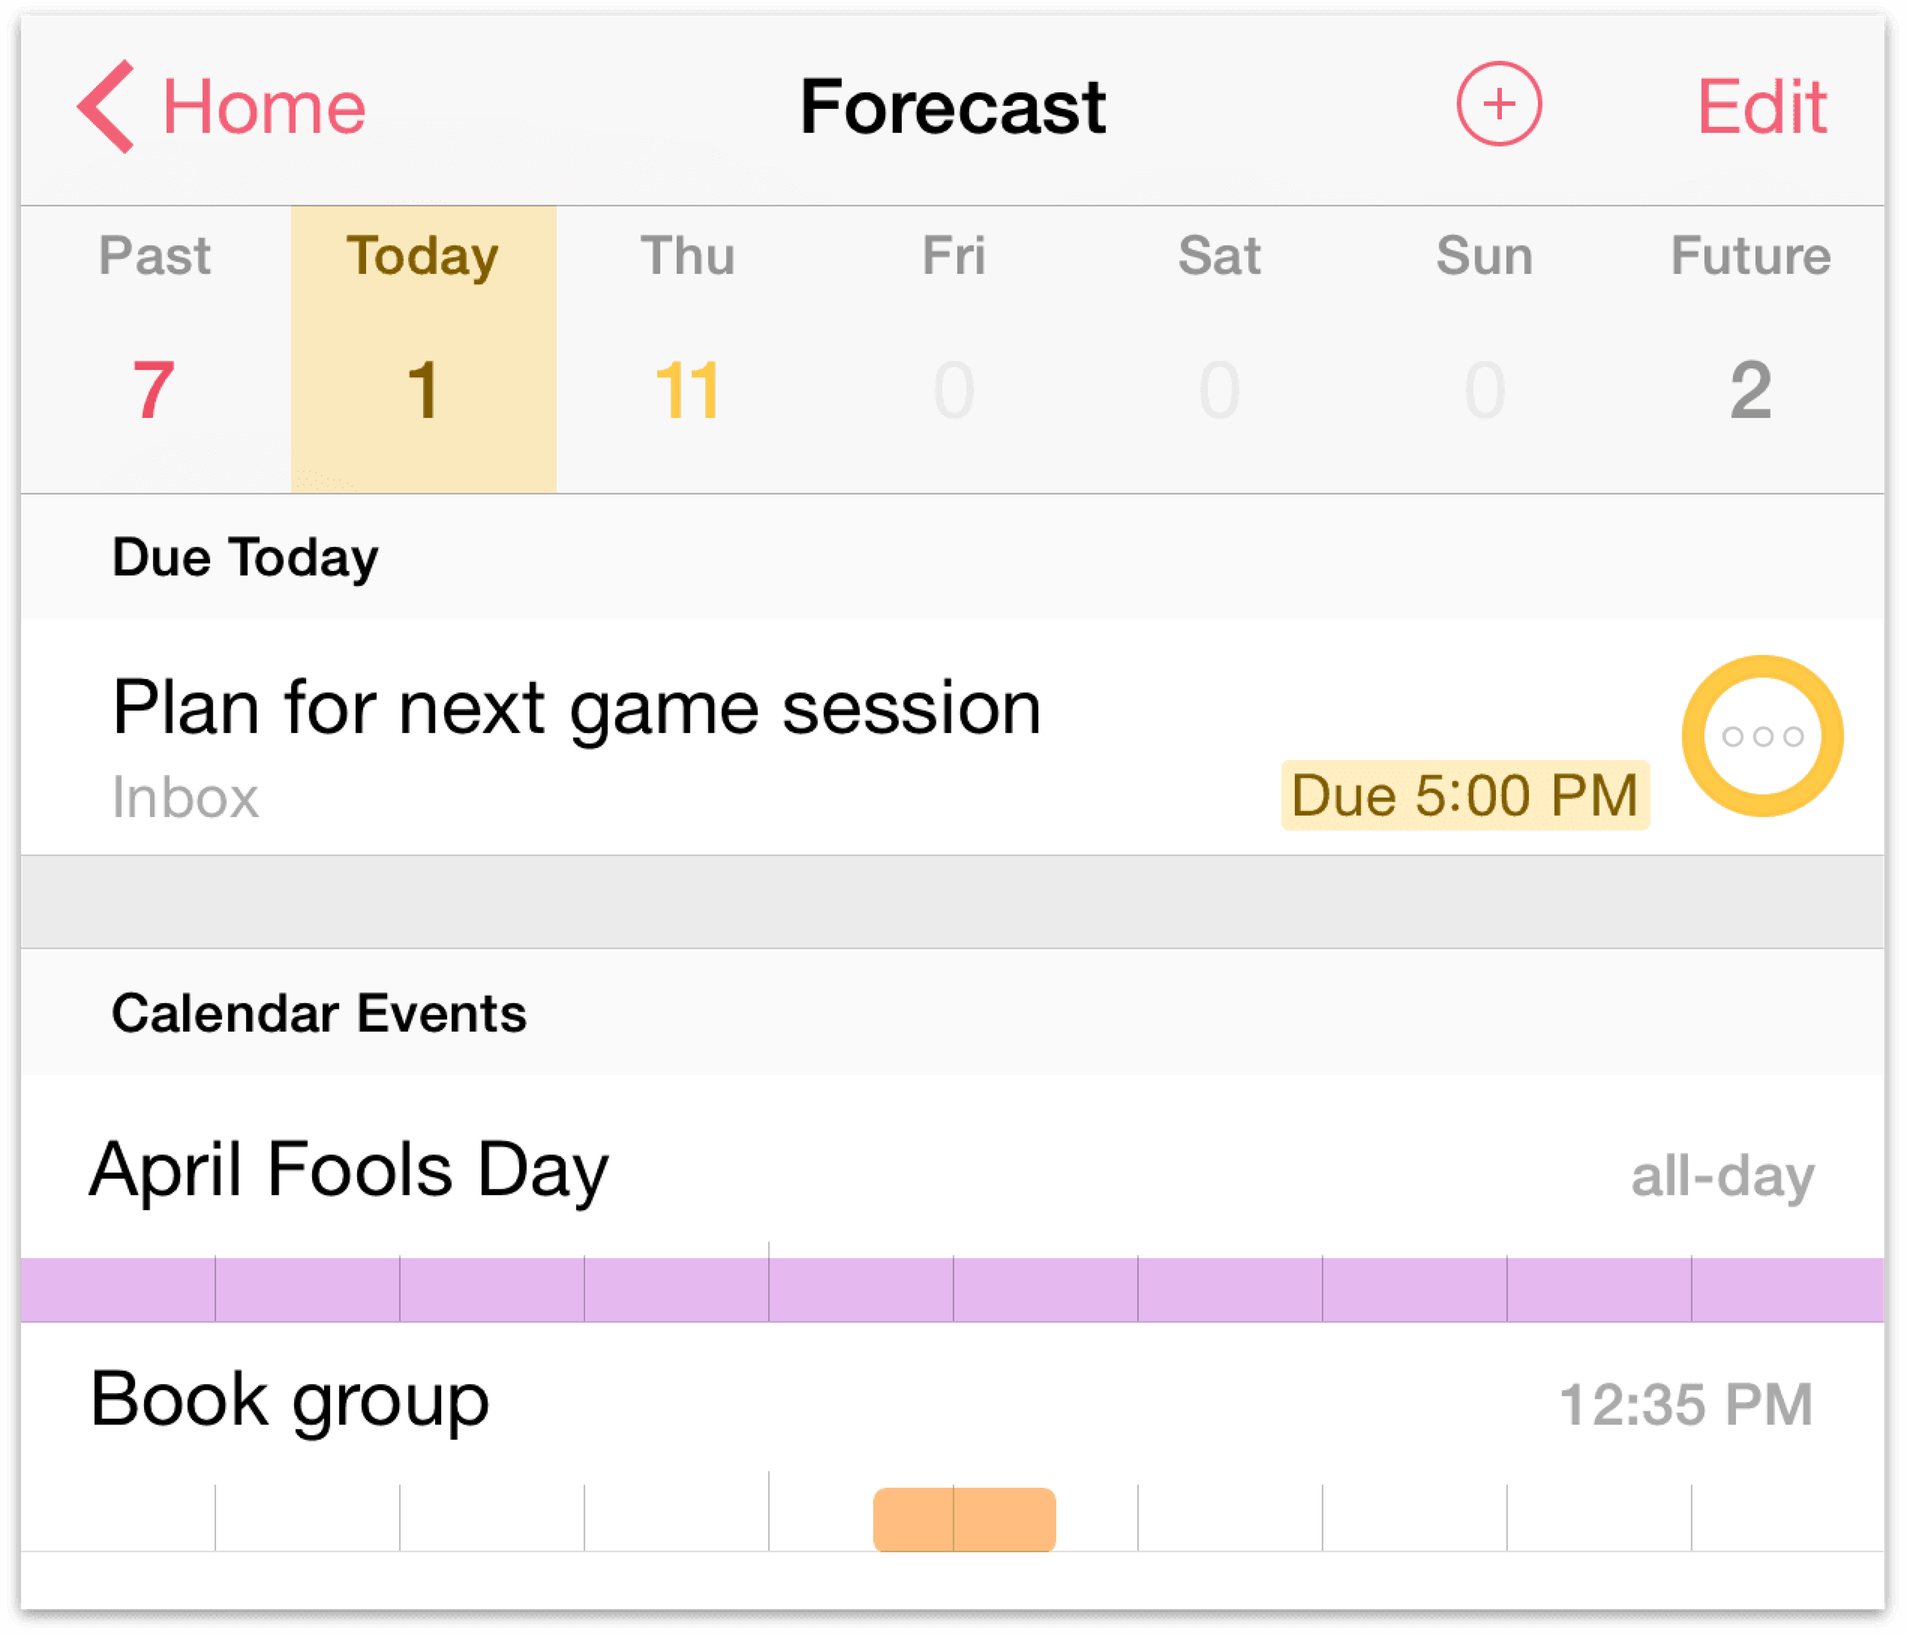
Each date button shows the number of actions associated with that date. For due items, the count is color-coded according to the most urgent item: amber indicates that an item is due soon, and red indicates an item is due or past due. To create a new action that is due on a particular day, go to the appropriate date button, followed by the new item button.
Adding your Calendars to OmniFocus
OmniFocus also plays well with your calendars, including those you might sync through Apple’s iCloud from Calendar on OS X or iOS, Google Calendar, or any CalDAV servers to which you have subscribed. The calendars which you can view in OmniFocus are based upon the calendars that the Calendar app on your device can see; to add to, remove, or modify the calendars available on your device, use the Calendar app.
Note
If you didn't allow calendar access when you first set up OmniFocus, the first time you open the Forecast perspective you'll receive a prompt informing you that the app would like to access your calendar. Choose OK to connect the app with your calendars (if you choose not to, your Forecast calendars will come up blank).
To check whether Calendar access is enabled for OmniFocus, go to the iOS Settings app, scroll down until you find OmniFocus, then tap Privacy.
Events on your calendar show up below the time-sensitive tasks you're tracking in OmniFocus. To view an event on your calendar, just tap it for a popover that contains the details of that event. In that popover, you can also tap Calendar to open the Calendar app on your device and go directly to that event.
Note
While OmniFocus is great at talking with Apple's Calendar, we can't guarantee compatibility with other calendar apps that may be on your device. When in doubt, check Calendar — if it’s there, then OmniFocus should be able to see it!
To modify what you see in the list or to adjust the time shown for the Calendar events, tap View in the toolbar. Forecast view options also include a Calendars section that lets you customize which external calendars are shown, including those stored in iCloud and more.
Prioritizing with Flags
Another great way that OmniFocus helps you accomplish things is with the option to flag important actions and projects. For example, you can use flags to highlight all of the actions you’d like to complete today, or assemble a quick set of talking points for a meeting.
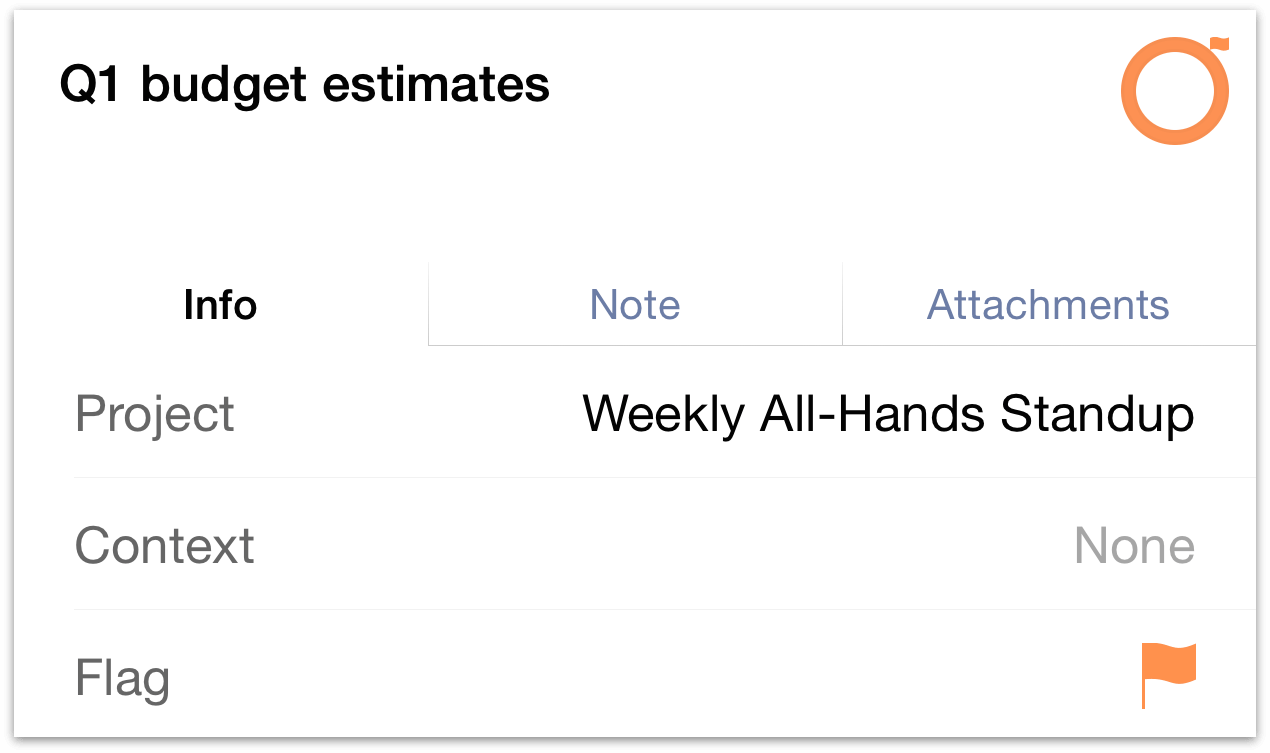
To flag a selected item, open it for editing and tap the flag icon. Another quick way to flag (or unflag) an item is to swipe it from right to left, revealing the Flag command alongside More and Delete.

When you flag an item, its status circle changes from gray to orange to help catch your eye and let you know that something important is going on. If you flag a project or an action group all of the actions within it inherit that flag, and the sense of urgency it imparts. Flags on items that are inherited rather than directly applied are noted with a hollow flag glyph ![]() attached to their status circles.
attached to their status circles.
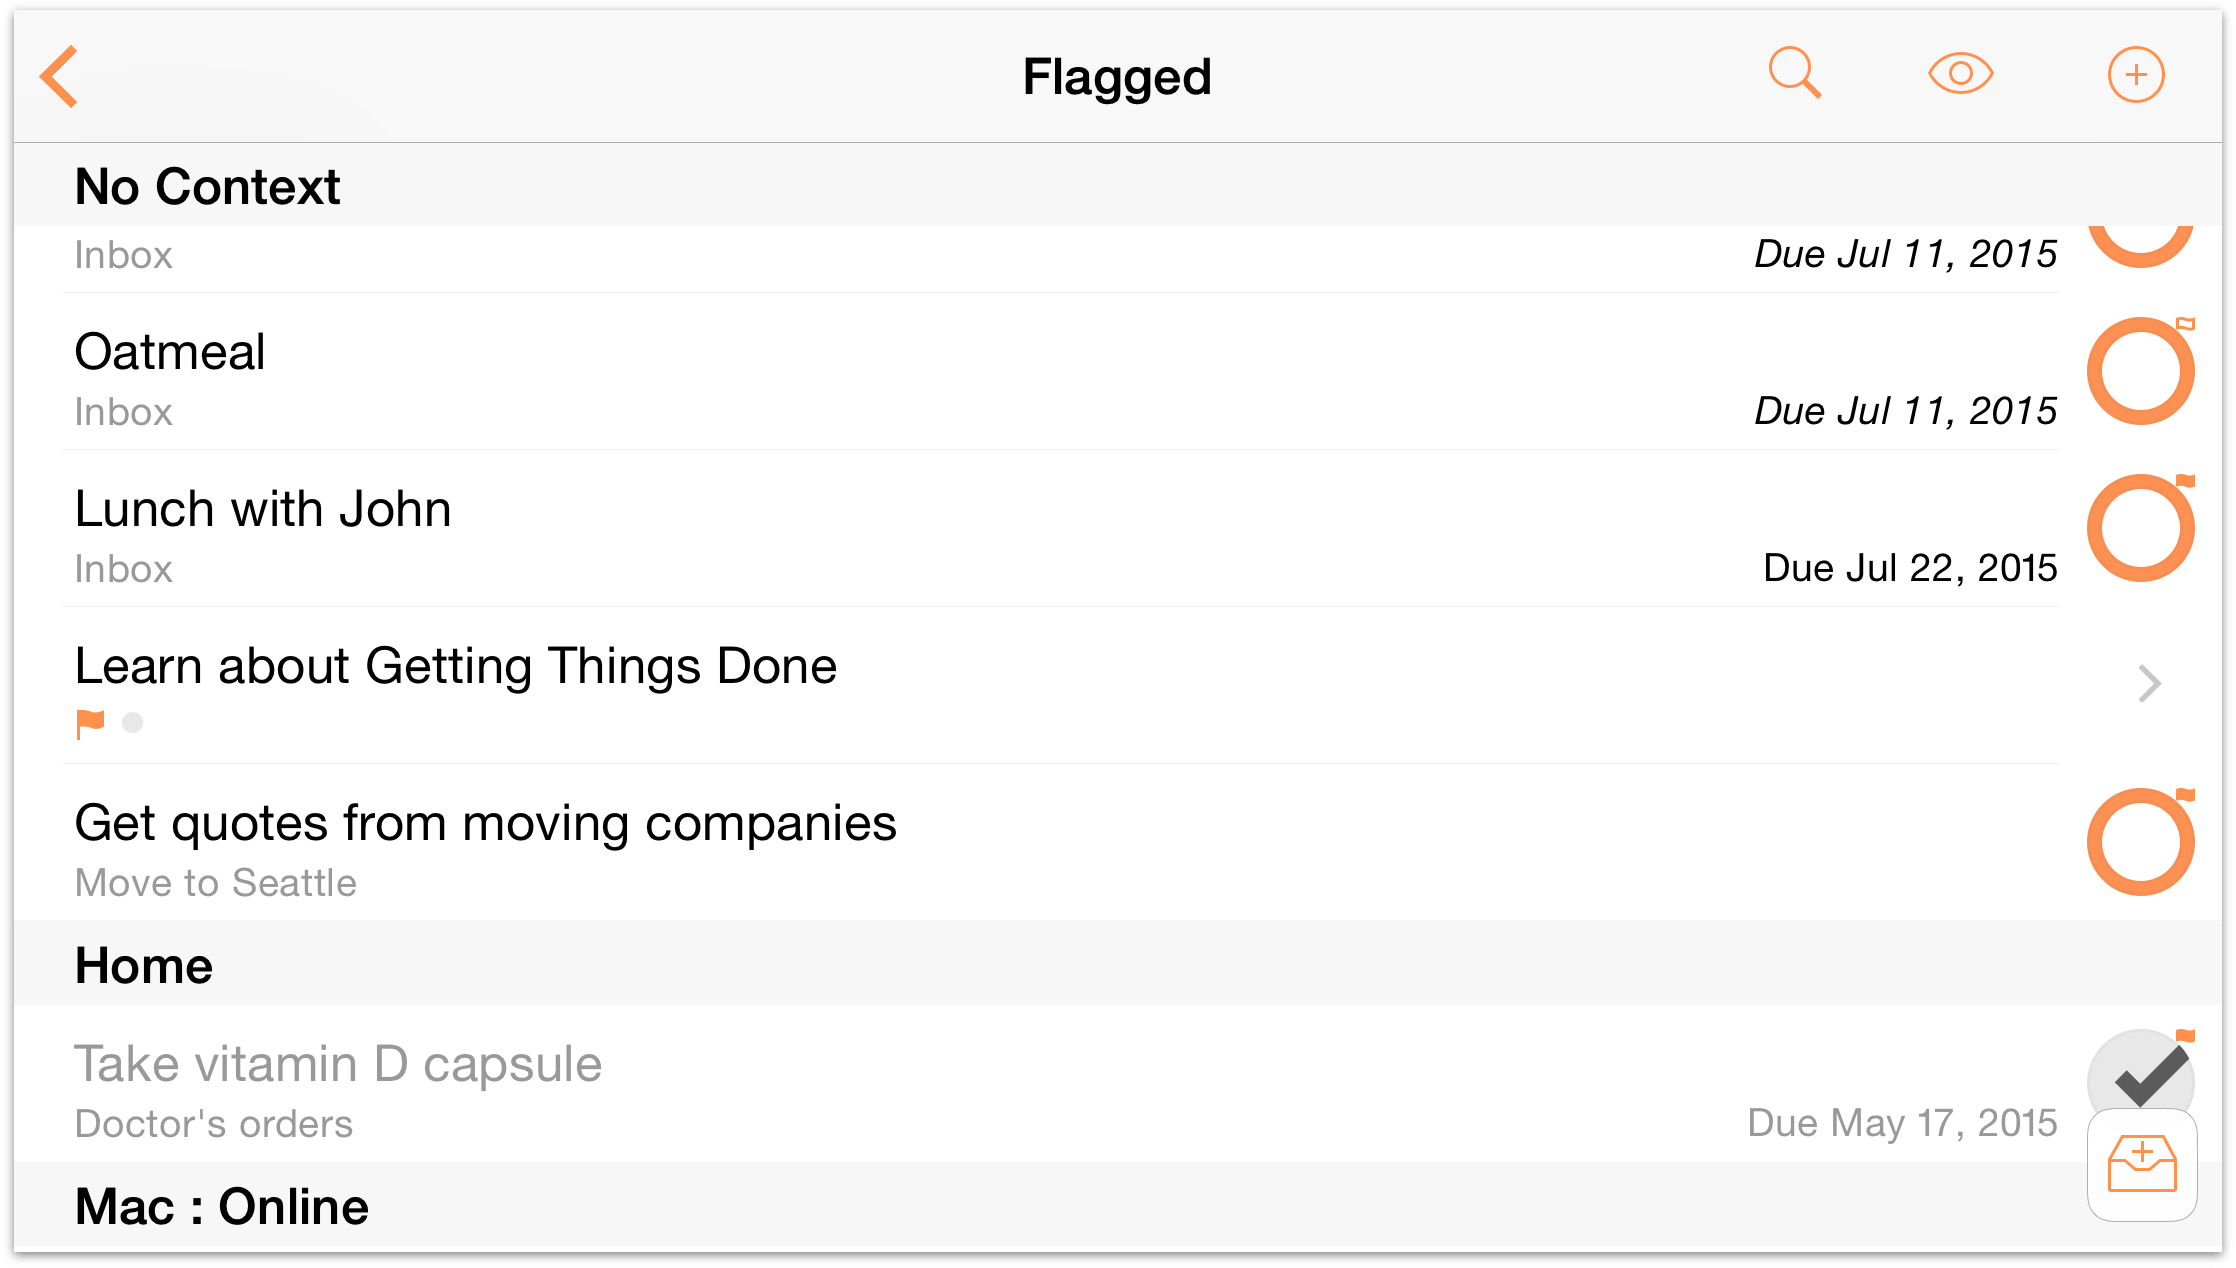
To view all of the items you’ve flagged, visit the Flagged perspective. OmniFocus conveniently brings all of your flagged items together in a nice little bundle so you can tick them off as you go.
In View Options ![]() for the Flagged perspective, you can choose whether to sort items by due date for a firm sense of chronological priority, or have them grouped by project.
for the Flagged perspective, you can choose whether to sort items by due date for a firm sense of chronological priority, or have them grouped by project.

Taking Action Nearby
When you’re out and about, the Nearby view shows you items you’ve assigned to contexts that are location aware. It’s an incredibly flexible tool – depending on how you’ve set up your contexts, you can see actions to complete somewhere nearby that matches a business search (for example), or at a specific address associated with someone on your iOS Contacts list.
Note
The Contexts chapter explains setting up locations for your contexts.
The Nearby view has two modes: Map and List. The map shows a rich visual reference of actions at nearby contexts, while the list shows the same available actions in order of their distance from your current location.

On the map, tap a pin to view a list of the actions associated with its context location. Tap Info ![]() in the popover that appears for details on the action(s), or tap Get Directions
in the popover that appears for details on the action(s), or tap Get Directions ![]() to open the location in the iOS Maps app.
to open the location in the iOS Maps app.
The list view shows actions organized by contexts in order of their proximity to your current location. This is useful to see a more comprehensive list of nearby tasks all at once, without the need to tap on individual context locations.
Note
The first time you use Nearby, if you didn't agree to let OmniFocus access your location when you launched the app for the first time, you'll be asked again. Location access is required for the Nearby feature to work.
Like other location services on your device, an active internet connection is required for Nearby to work. Also, turning on wifi in the Settings app improves the quality and accuracy of location services (regardless of whether your device is connected to an active hot spot).
Updating Project Status with Review
Reviewing is a good way to make sure all of the projects in your library are in good shape and are ready for you to take action. If you have projects that need more actions added to them, or projects that aren’t relevant anymore, or projects you don’t mean to do any time soon, following a regular review process can help you keep them from falling through the cracks.

Each project has an interval for how often you intend to review it and a date when the next review is planned. You can change the review interval on a per-project basis by tapping the interval text at the bottom of the screen for iPad, and the top of the screen for iPhone (the default review interval is every week).
To review your remaining projects:
Choose the Review perspective in the sidebar or home screen. In this view, your remaining projects are grouped in order of their next-scheduled review date.
For each project, check whether it is in the proper state (Active, On Hold, Completed, or Dropped). Do you need to revise its actions, or add new ones? Should you put the project On Hold, drop it, or mark it as Completed? Or is everything moving along just fine?
Once you’re satisfied with the state of the project, make sure it’s selected and tap Mark Reviewed in the lower right of the outline. The project’s next review date moves forward and you can go on to review another project.
Common results after reviewing your projects include:
Determining that it’s on course with no changes required; or,
Adding, removing, rearranging or completing actions within the project to adapt to changes in circumstance since the last review.
You may also find you’re able to mark a project as Completed (huzzah!), decide that now’s not the time to be working on it and put it On Hold, or realize that it’s something you won’t be acting on for the foreseeable future and mark it as Dropped. For more on changing a project’s status, see the Projects chapter.
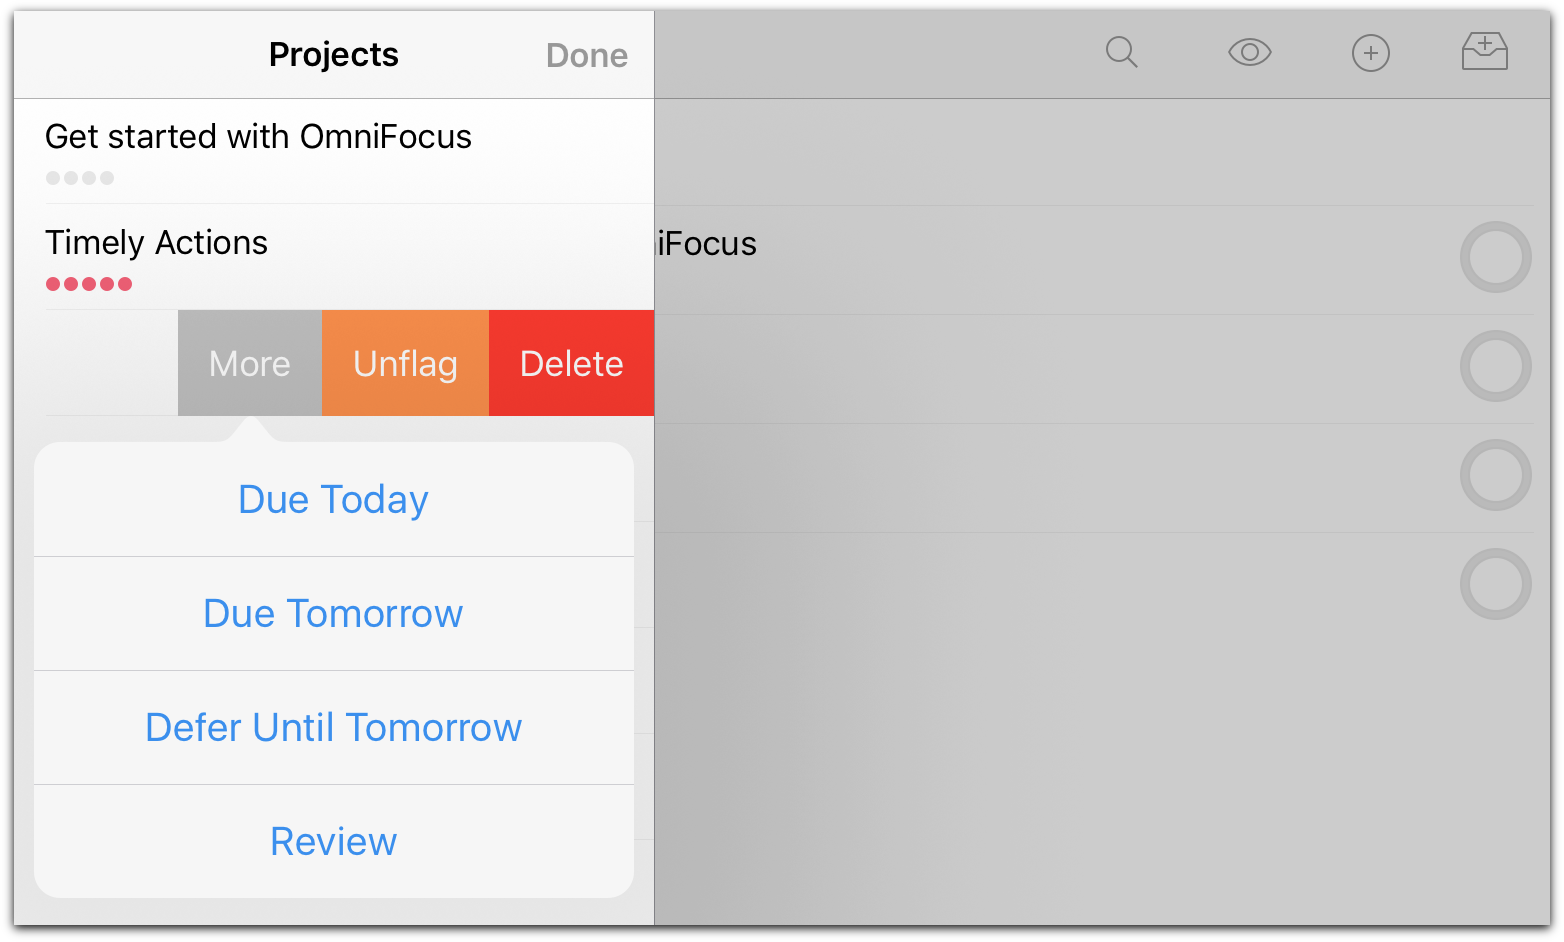
If you recently marked a project reviewed and you would like to look it over again before its next scheduled review (or you'd like to change the review interval to something else), swipe it from right to left and tap More to reveal quick commands associated with the project. Tap Review, and the project will open in the Review perspective ready for perusal.
Working with Perspectives
When you look at a representation of your collected items in the main outline, you’re looking at a perspective on your data. OmniFocus comes with a bunch of built-in perspectives that have been painstakingly designed to help you get the most out of your OmniFocus experience. These include Forecast, Inbox, Projects, Contexts, Flagged, Nearby, Review, Completed, and Changed.
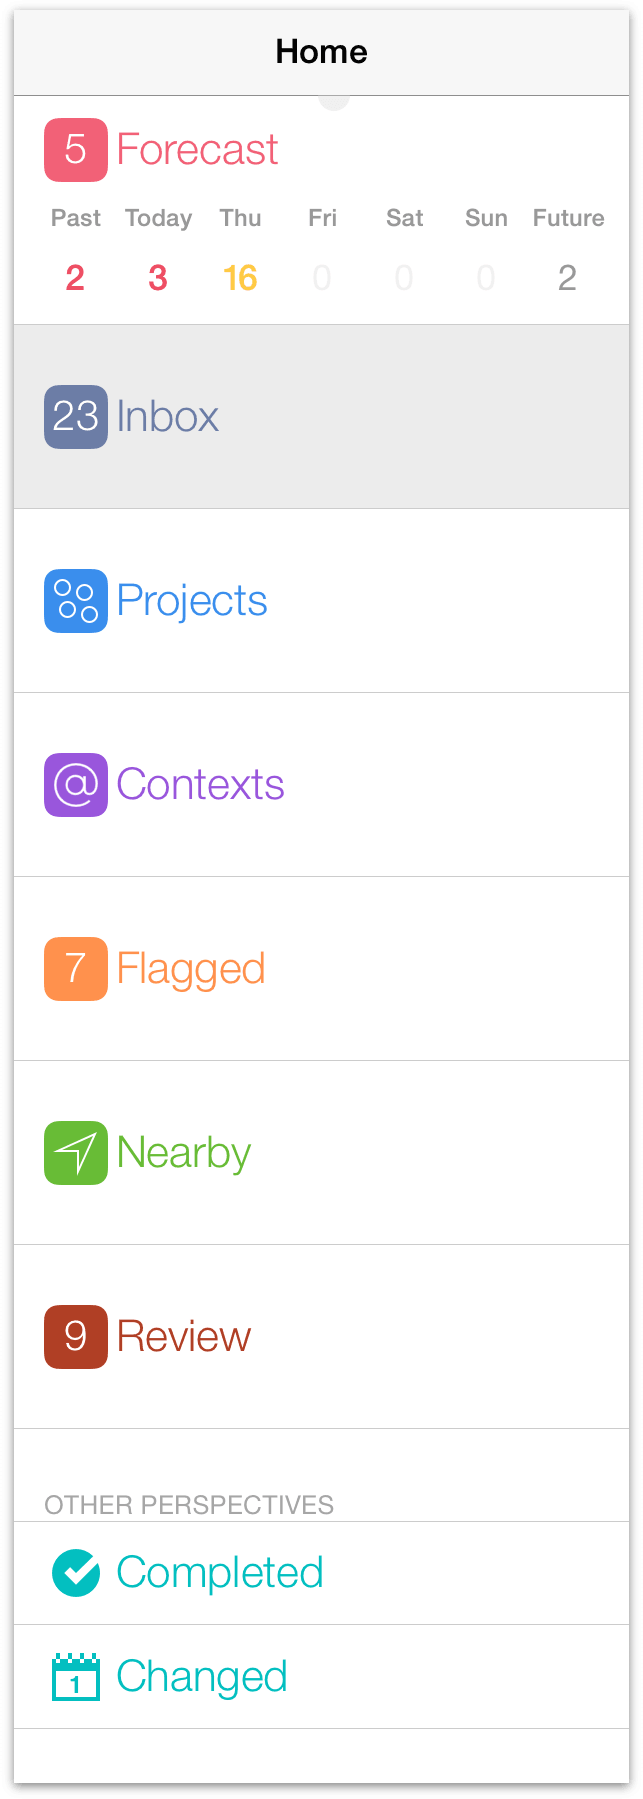
The first seven of these form the foundation of interacting with OmniFocus, and offer tons of power and flexibility for accomplishing things in ways that suit your needs.
The final two standard perspectives—Completed and Changed—are views that appear in your sidebar or home screen when you toggle to show All Perspectives from the secret bar and are a great way to find items in your database that may have been filed away by mistake or otherwise disappeared under mysterious circumstances.
Once you’ve been exploring OmniFocus for a while you may find there are even more specialized ways that you’d like to view your tasks, whether through a specific search term, a group of projects in your sidebar, or a special sort criteria you’d like to apply to actions in a single action list. Or maybe there’s a specific productivity method you’d like to try that the default perspectives don’t fully support.
Favoriting and Reordering Perspectives
With the OmniFocus Pro upgrade installed, you can hide default perspectives that you don’t use, and rearrange the sidebar list to bring others to prominence. Tap the tile editor button ![]() in the secret bar, or touch and hold a perspective tile until edit mode is engaged, to rearrange and promote perspectives to Favorites. Perspectives listed in the Other Perspectives section are still available when choosing to view All Perspectives from the secret bar.
in the secret bar, or touch and hold a perspective tile until edit mode is engaged, to rearrange and promote perspectives to Favorites. Perspectives listed in the Other Perspectives section are still available when choosing to view All Perspectives from the secret bar.
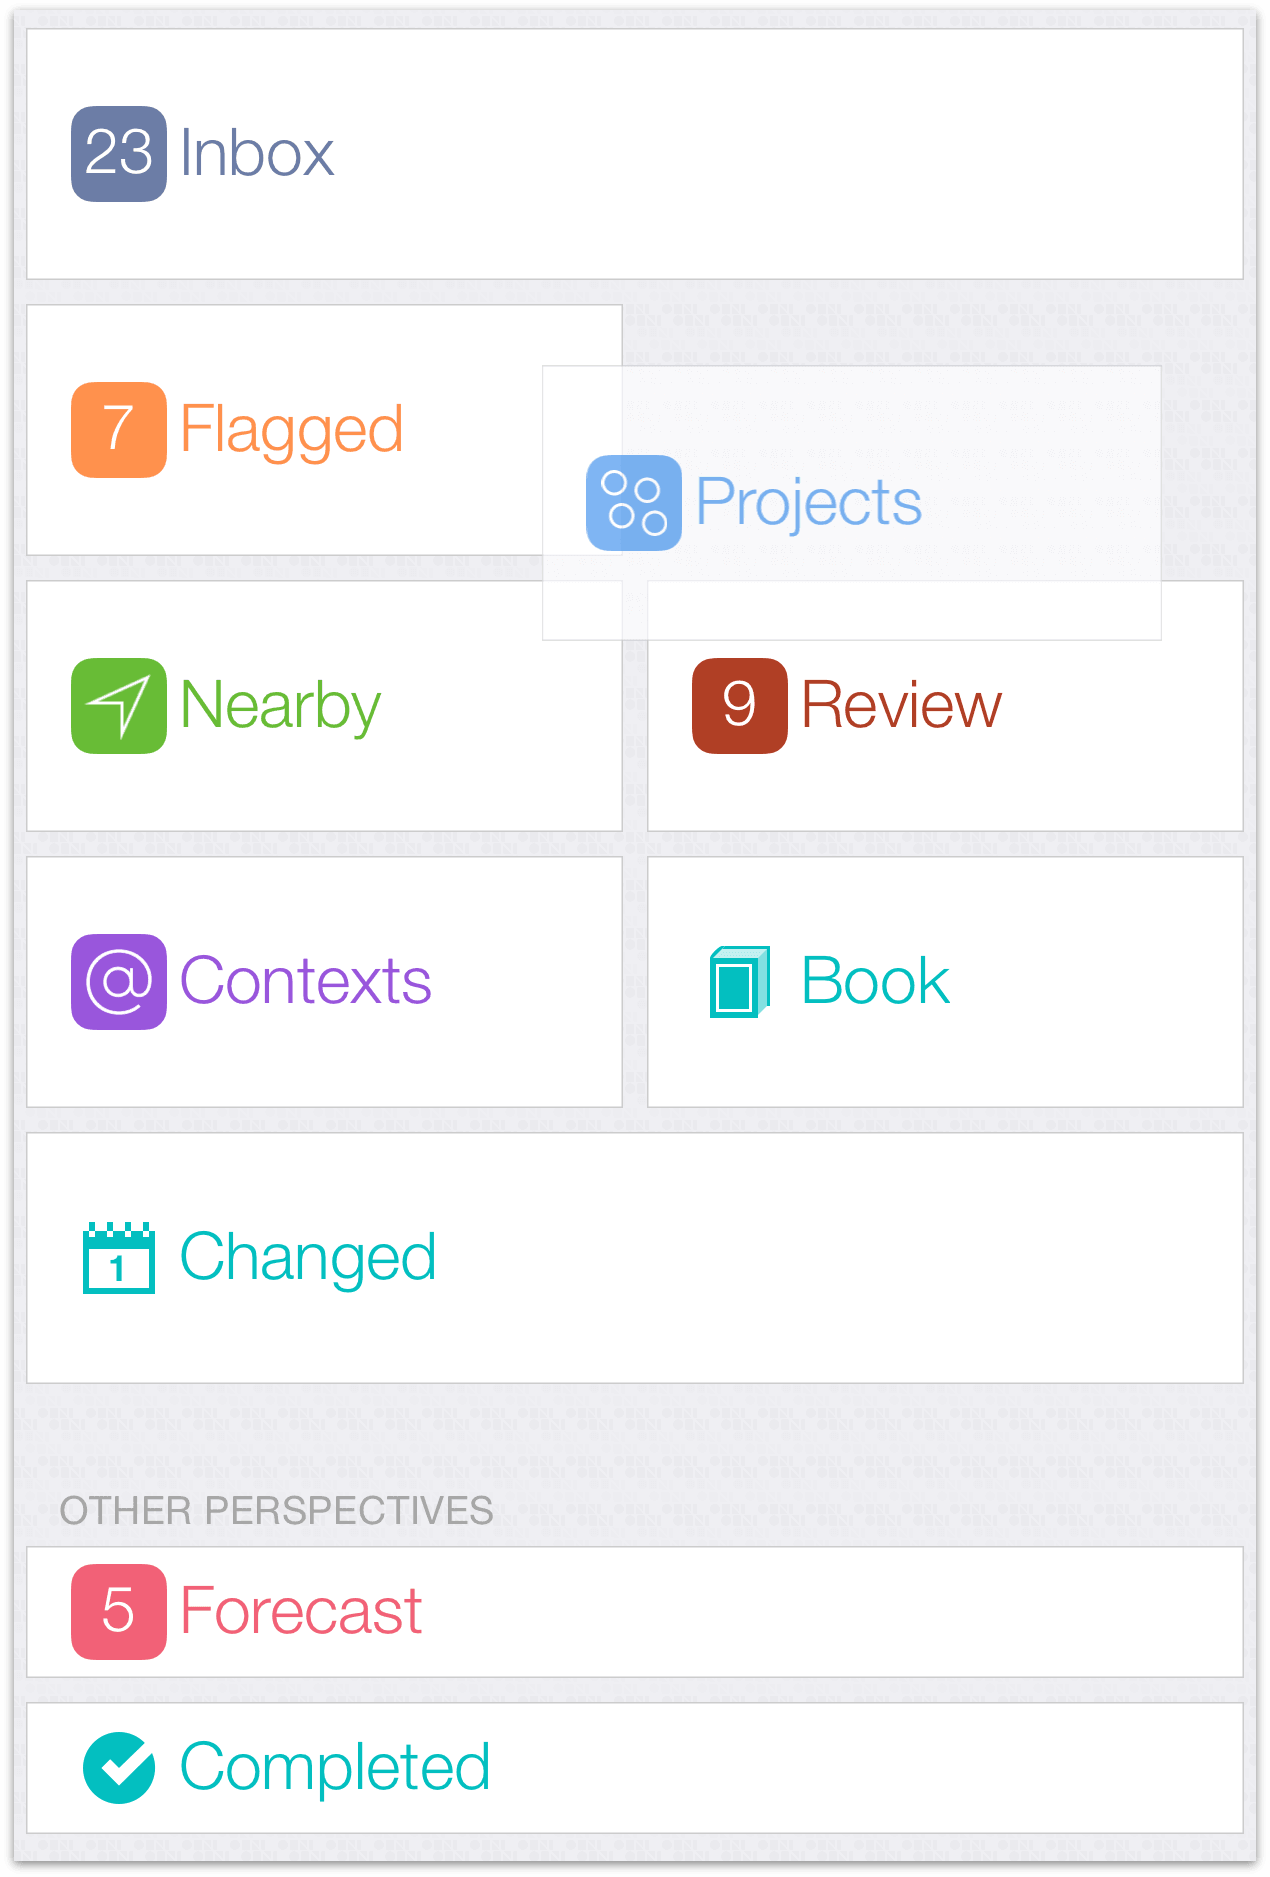
Note
If you choose to "favorite" all of your available perspectives by moving them out of the Other Perspectives section, the switch to toggle between Favorites and All Perspectives becomes greyed out in the secret bar (because at that point there's no difference between the two lists). The switch will likewise disappear if no perspectives are promoted, since the sidebar and home screen aren't allowed to show you a completely blank space.
Creating and Editing Perspectives
Along with the ability to customize your sidebar’s appearance, the OmniFocus Pro upgrade lets you create custom perspectives that reflect views on your OmniFocus data that you want to come back to again and again.
To create a new custom perspective, tap New Perspective ![]() in the secret bar. To edit an existing custom perspective, navigate to it in the outline and open the Editor via View Options
in the secret bar. To edit an existing custom perspective, navigate to it in the outline and open the Editor via View Options ![]() in the secret bar (iPhone) or toolbar (iPad). To delete a custom perspective, scroll to the bottom of the Perspective Editor and choose Delete Perspective.
in the secret bar (iPhone) or toolbar (iPad). To delete a custom perspective, scroll to the bottom of the Perspective Editor and choose Delete Perspective.
When creating or editing a custom perspective, the Perspective Editor lets you customize your perspectives’ view settings in nigh-countless ways (these are the same settings available from View Options ![]() when viewing the perspective in the main outline).
when viewing the perspective in the main outline).
Here is a rundown of the perspective editor’s features:
- Name & Icon—Tap a custom perspective’s name to edit it, and tap the icon to choose from among a selection of custom icons to represent your perspective.
Note
The built-in perspective names—Inbox, Projects, Contexts, Forecast, Flagged, Review, Completed, and Changed—cannot be edited. You can, however, choose another icon for the Completed and Changed perspectives.
Project Hierarchy—There are two fundamental types of perspectives: those that rely on the project structure to show your database hierarchically, and those that eschew hierarchy in favor of grouping by other parameters. The grouping and sorting functions in Presentation will govern projects in the former case, and actions in the latter.
Presentation—If you’d like to group or sort projects or actions based on specific criteria, select them here.
Filtering—Granular options for filtering what appears in the perspective are available here, including filtering based on flagged status, availability, duration, or project or context status (based on the mode chosen in Project Hierarchy).
Find Text—To add a text filter to the perspective, enter the text here. The filter applies to text in both item titles and notes.
Focus—To save a focus on a project or folder as part of the perspective, tap to find it using smart match.
Note
Focus is a term with special meaning in OmniFocus: a narrowed scope of view on selected items that persists as you change other view settings. By design, creating and viewing a custom perspective with a focus is the only way that the term applies in OmniFocus for iOS; in OmniFocus for Mac, Focusing is available as a separate tool that takes advantage of the Mac's window-dependent interactions.
Context Selection/Project Selection—Select contexts or projects (depending on whether the perspective uses project hierarchy or not) you’d like to add to the perspective by tapping Add Context or Add Folder or Project. You can add as many as you’d like!
Note
Custom perspectives that don't use project hierarchy (formerly known as "context-based" perspectives) and custom perspectives that do use project hierarchy (formerly known as "project-based" perspectives) are both supported by all current versions of OmniFocus, and will sync between them.
Note that older versions of OmniFocus may not support the latter type (project hierarchy-based perspectives). If syncing these custom perspectives is important to you, updating to the current versions of OmniFocus on all of your devices is recommended.
Using Notes and Attachments
Notes are a great way to enrich the actions and projects you’re working on. Instead of cluttering an action title with a list of instructions for completing it, try adding them in the note field instead—note text is fully searchable, so there’s no worry about the minutiae getting lost in a hidden field.
To add a note to an action or a project, tap it and choose the Note tab in the editor.
When a picture is worth a thousand words, try adding an attachment! Images and audio can be added to an action or project as attachments, which are located in the Attachment tab of the action or project editor.
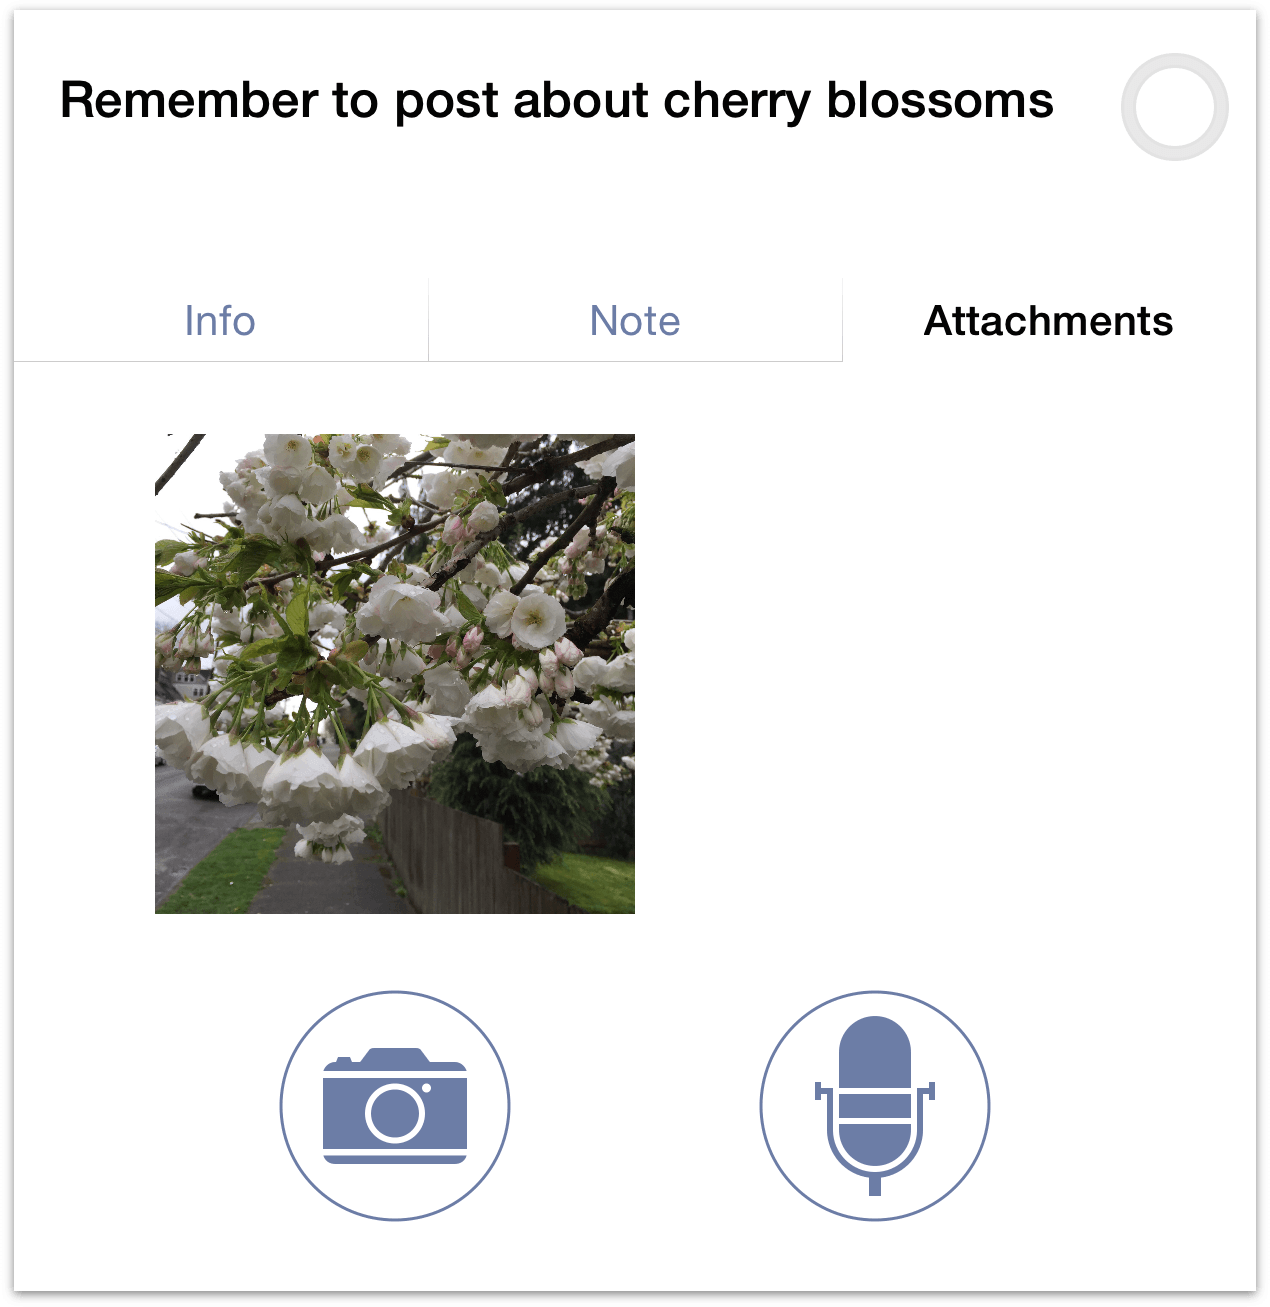
You can attach images to a project or action by tapping the camera button, which gives you the option to either take a picture or to choose an image from one of your photo albums. Audio attachments are added by tapping the microphone button. The segmented bar shows the volume level of the audio being recorded.
Attachments can be viewed (or listened to) by tapping the thumbnail associated with the audio clip or image. To delete an attachment, select it and tap Delete.
Warning
Large attachments will dramatically slow down sync times, especially if you are on a slow — or cellular — network (this might cost a lot of money, too!).
Syncing Attachments with OmniFocus for Mac
When adding attachments in OmniFocus for Mac, there are two ways to ensure the attachments make it across to your iPad or iPhone (or your other Macs with OmniFocus installed). The important theme here is to embed the attachments, as simply linking to them won’t work. Due to the file formats supported on iOS, not all attachments added in OmniFocus for Mac are viewable in OmniFocus for iOS or iPhone.
Note
The reason why linking to attached files won't work is because filesystem links on OS X are just that—they are links to files on that system. When you sync OmniFocus for Mac, those filesystem links no longer work because iOS filesystems are different from the one on your Mac.
However, when you embed an attachment and sync OmniFocus, that file is copied into your OmniFocus database and is stored on the sync server where it can easily be pulled down on either platform.
Warning
While you can sync most anything from your Mac to your iOS device as an OmniFocus attachment, OmniFocus is happiest when you only sync the things you really need. Considering which attachments need to live everywhere and pruning those that don't can save sync time and bandwidth money, and improve overall performance of the app.
Attaching Files from the Edit Menu
With OmniFocus open on your Mac, select the item to which you’d like to attach something, and then select Edit ▸ Attach File in the menu bar. In the Open sheet that slides down, select the file you would like to attach, and then make sure you select the Embed the file in the document radio button before you click Select.
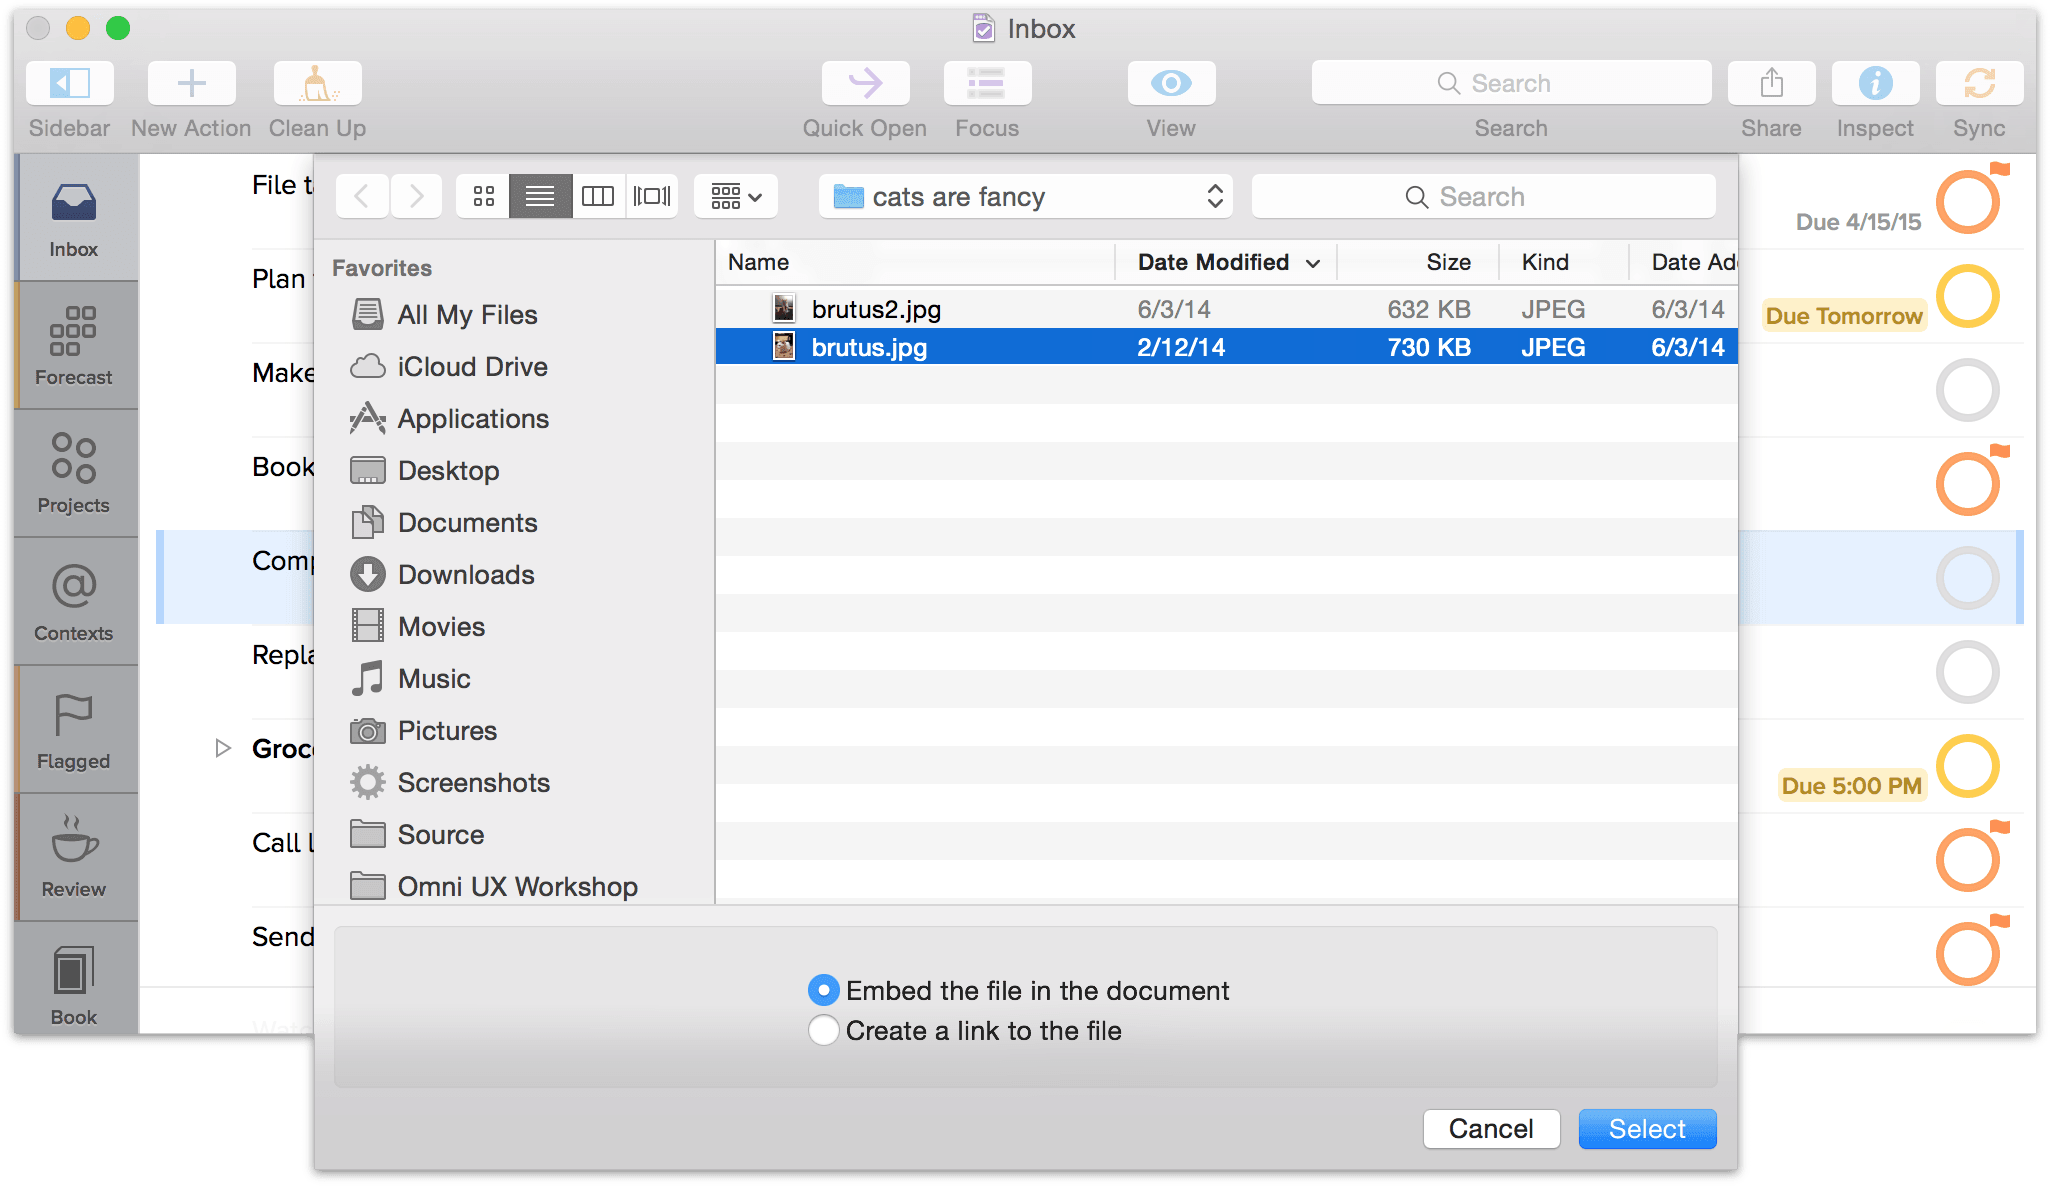
Note
The Embed the file in the document option is selected by default. This makes syncing your attachments the default state of affairs; if you'd prefer not to sync an attachment (for bandwidth or database efficiency reasons), choose Create a link to the file instead.
Attaching Files from the Finder
To attach a file from the Finder (it’s the blue smiley-faced icon on the far left edge of the Dock on your Mac) you will need to Option-drag the file from the Finder to the note field of your item in OmniFocus. Make sure the note field is open and selected, then place the Finder window next to the OmniFocus window and select the file you want to attach by clicking on it. Hold down the Option key while pressing the mouse button. You’ll notice that when you press the Option key, the mouse pointer changes to a green circle with a plus sign inside. This is exactly what you want! Now drag that file onto your OmniFocus item, let go of the mouse button, and the file is attached.
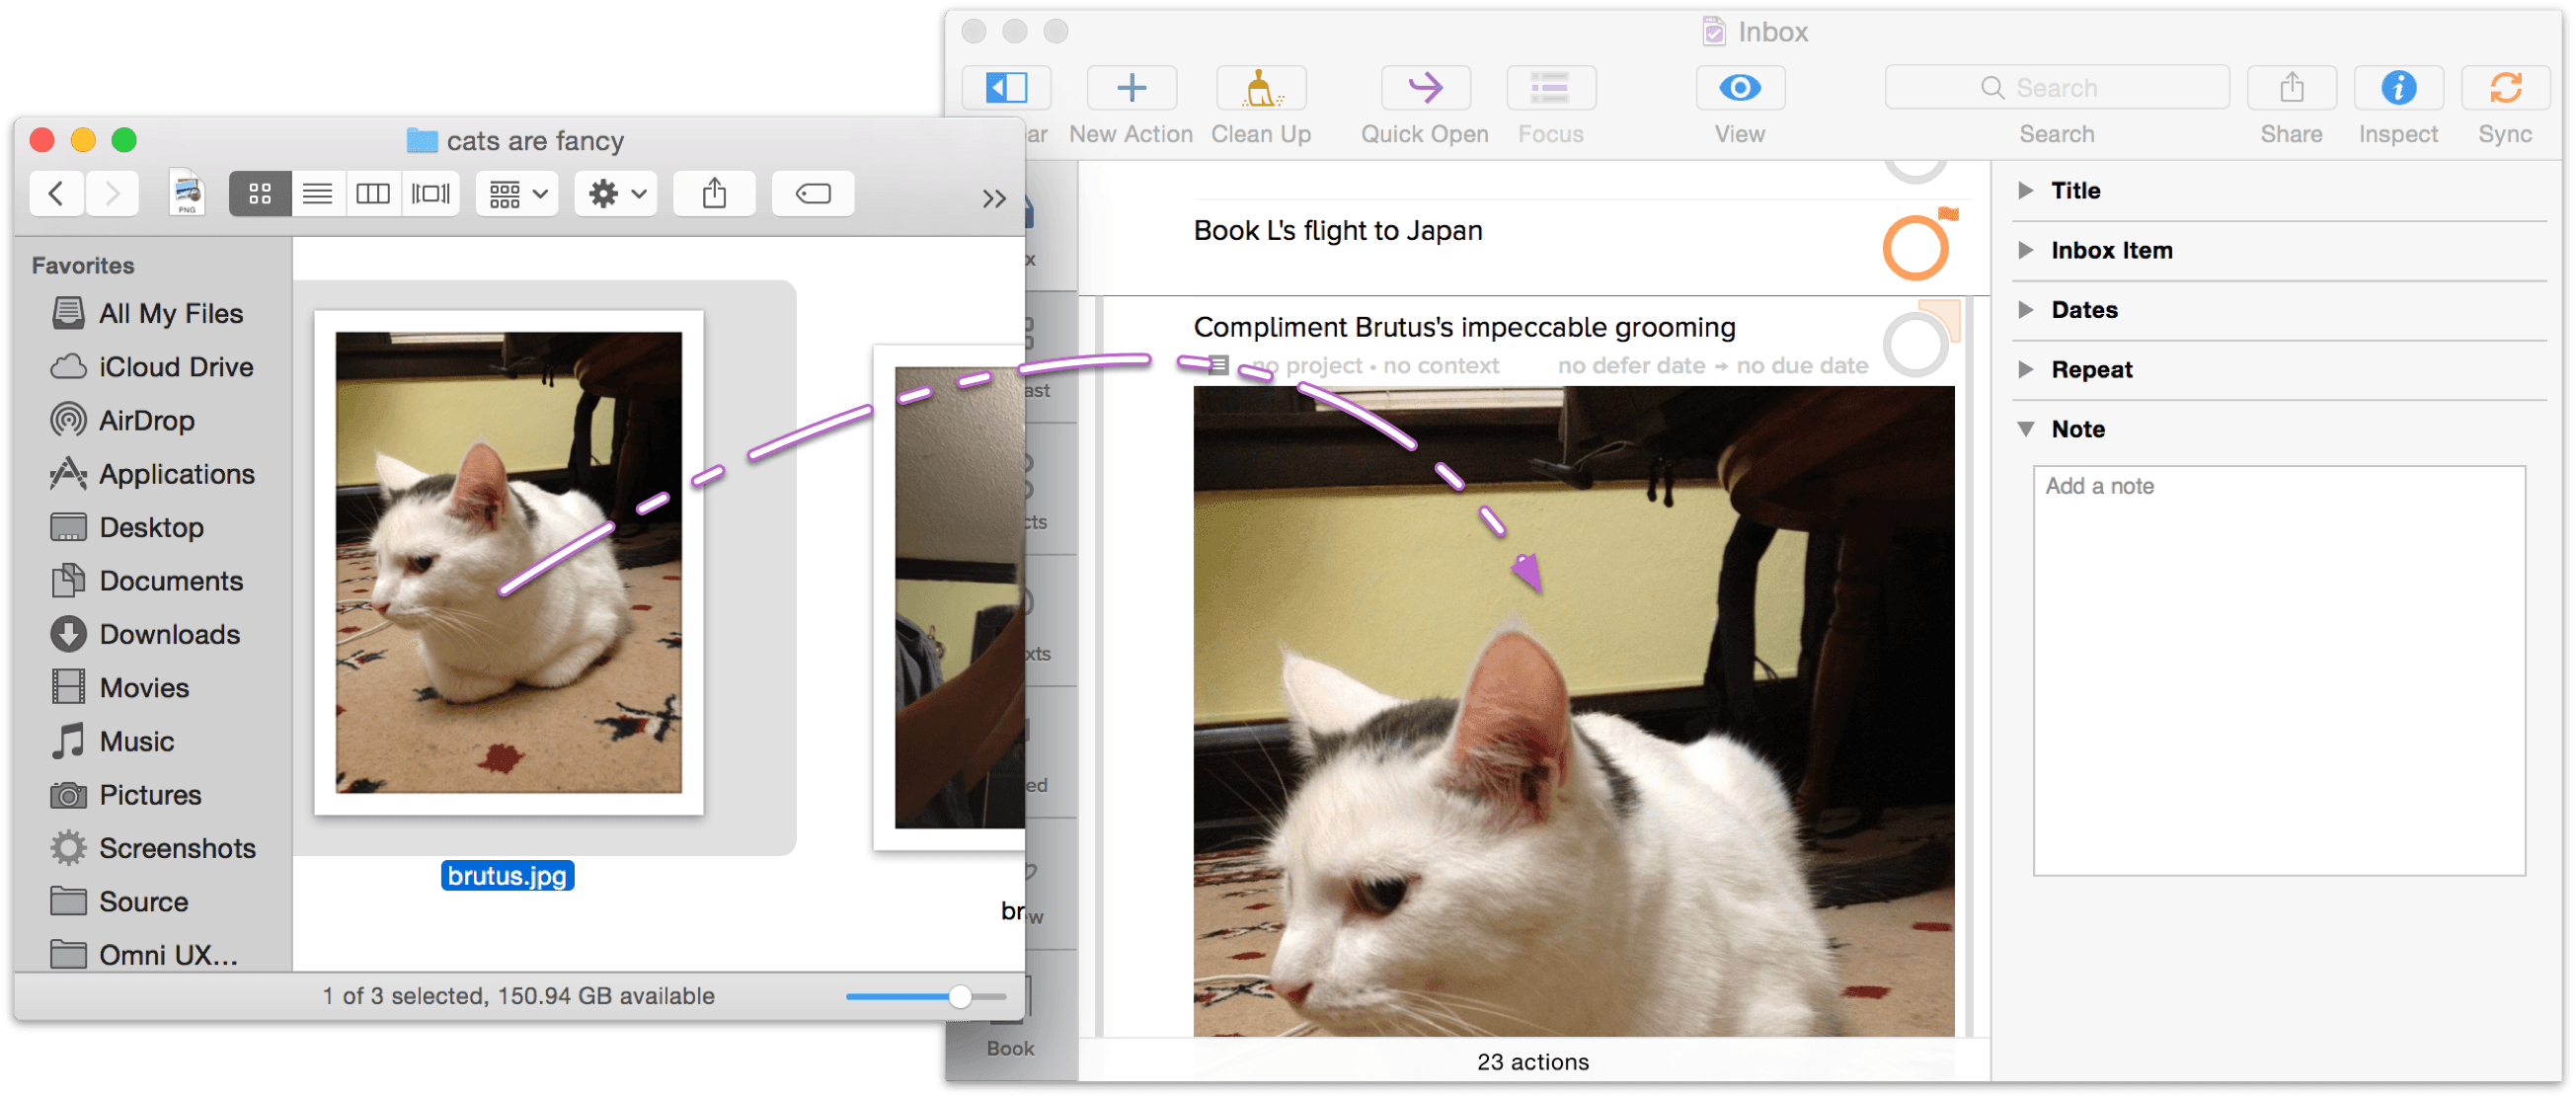
After you have attached the file in OmniFocus on your Mac, be sure to click Sync in the toolbar. Then, when you switch to OmniFocus for iOS or iPhone, tap Sync to bring the attachments over to your other device.
Note
Your Mac supports all kinds of different file types, mainly because of the wide variety of apps that can run on OS X. Conversely, iOS doesn't support nearly as many file types by default. The rule of thumb to keep in mind is that in most cases, if you have compatible versions of an app on your Mac and iOS device, you should be able to open those attachments in OmniFocus on either platform.
Using Dates and Times
When you have tasks to complete by a deadline, OmniFocus can help weave actions and projects into your day.
By design, the items you collect in OmniFocus aren’t the same sort of thing as events or agenda items you’d list on a calendar. You’d generally use a calendar for anything that takes place at a specific time: meetings, dentist appointments, and dinner reservations would do best in your calendar because you can’t act on them until that moment.
Setting Defer and Due Dates
Actions and projects can have due dates and defer until dates with a less specific notion of time constraint than items in your calendar. The defer until date is the date when an action or project can be acted upon; until that date arrives, the item remains grayed out. The due date is the date when an action or project needs to be completed.
For example, to make progress on your Colonize Mars project, you need to know when Mars is in opposition so you can schedule a date during the launch window. A quick online search shows that the next window is from January 2016 to April 2016, so you decide to launch your spacecraft on January 6 to commemorate your birthday. To keep track of this, you might create a Launch Window action with a defer until date of January 1, 2016 and a due date of April 30, 2016.
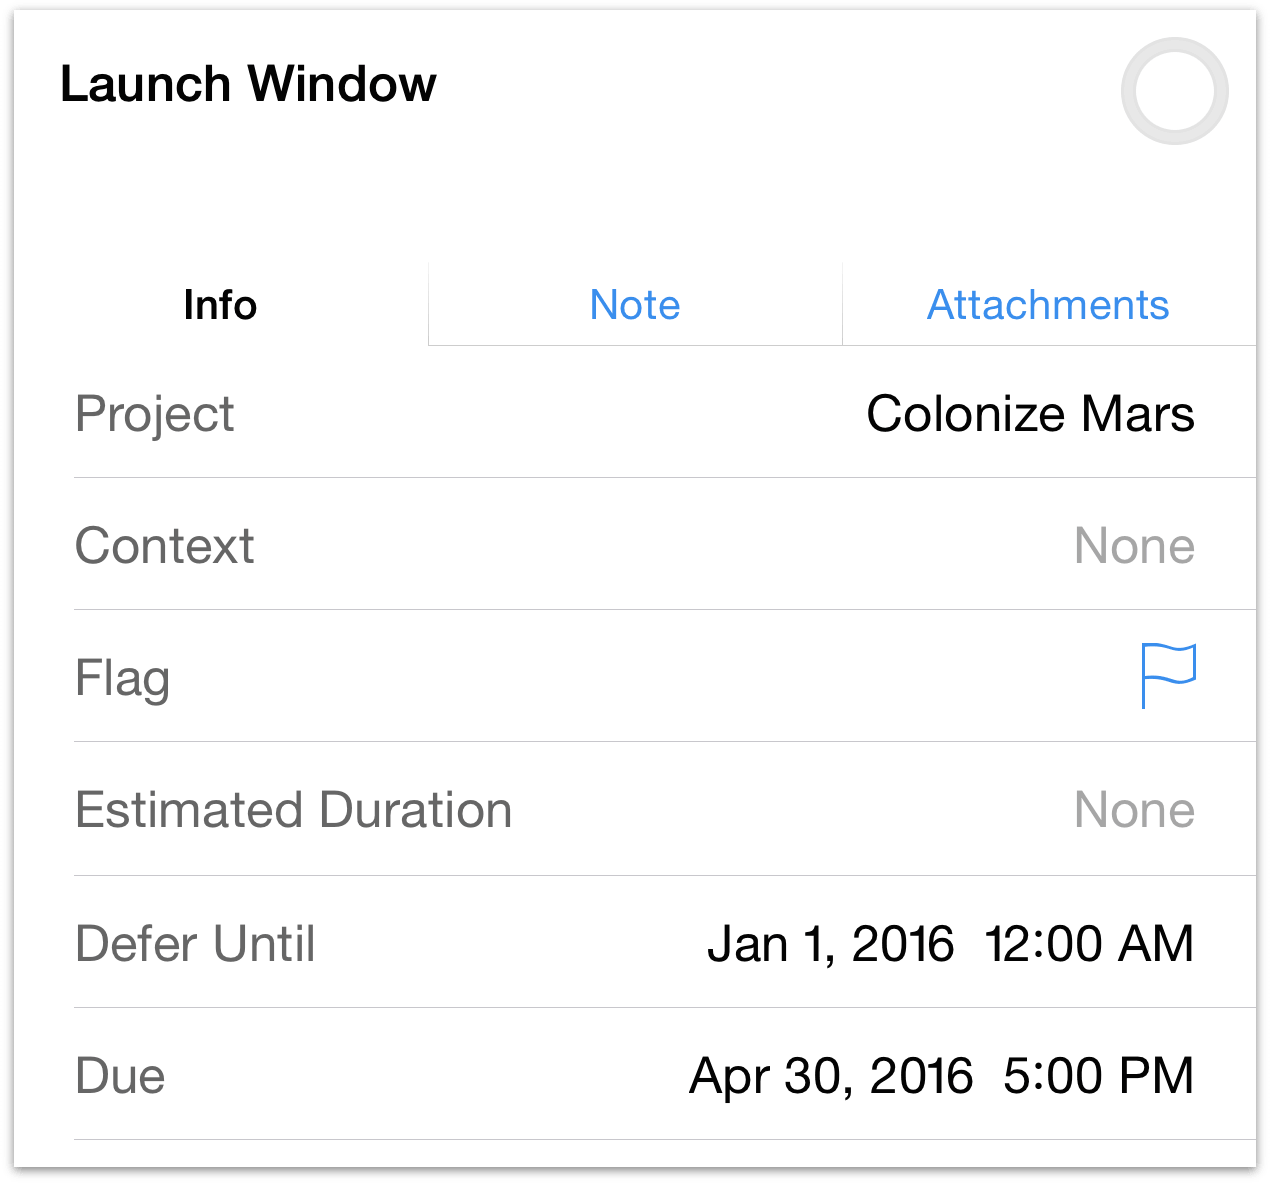
While you’re at it, you also create a Launch Spacecraft action with a defer until date of January 6, 2016 and a due date of April 30, 2016. So why not just a due date for Launch Spacecraft? Well, because weather conditions for a launch could be bad that day, or there could be some sort of mechanical failure that delays the launch. Regardless, that is the day you know you’d like to launch the rocket, and if that date passes, OmniFocus reminds you until you’re past the due date and off to explore the Red Planet.
Items that have not reached their defer until date are not considered available so they won’t clutter your view until you can work on them. To see all of the actions in your Colonize Mars project, choose Remaining in view options (All includes completed and dropped items). Actions with a future defer date are in gray. When the defer date arrives, the action’s text appears in black to let you know it is available and the clock is ticking.

When due dates are approaching, OmniFocus considers actions and projects to be Due Soon and represents them as such by changing their color from black to amber and adding them to the Forecast perspective. By default, actions become due soon two days before the specified due date. To change this, go to Settings and choose a different value for Due Soon.
Defer and due dates can be entered by tapping an item in the main outline.
Actions that have reached their due date are styled in red. This serves as a warning to you that you should either get that task done, or reschedule its due date. In the case of the Mars mission, if you miss the launch window, you’ll have to wait another 24 months for your next opportunity.
Tip
When you have a task you want off your plate for now but would like to have on the horizon again at some point, try deferring it until Later. OmniFocus will choose a random defer date within the next few weeks and make the task available to you then—or keep tapping to defer it out a few weeks more.
Repeating Items
Some tasks occur on a regular basis. Instead of creating a new item every time you need to take out the recycling, you can set that task up so that you’re reminded every Thursday night to put the recycling bins by the road for pickup Friday morning.
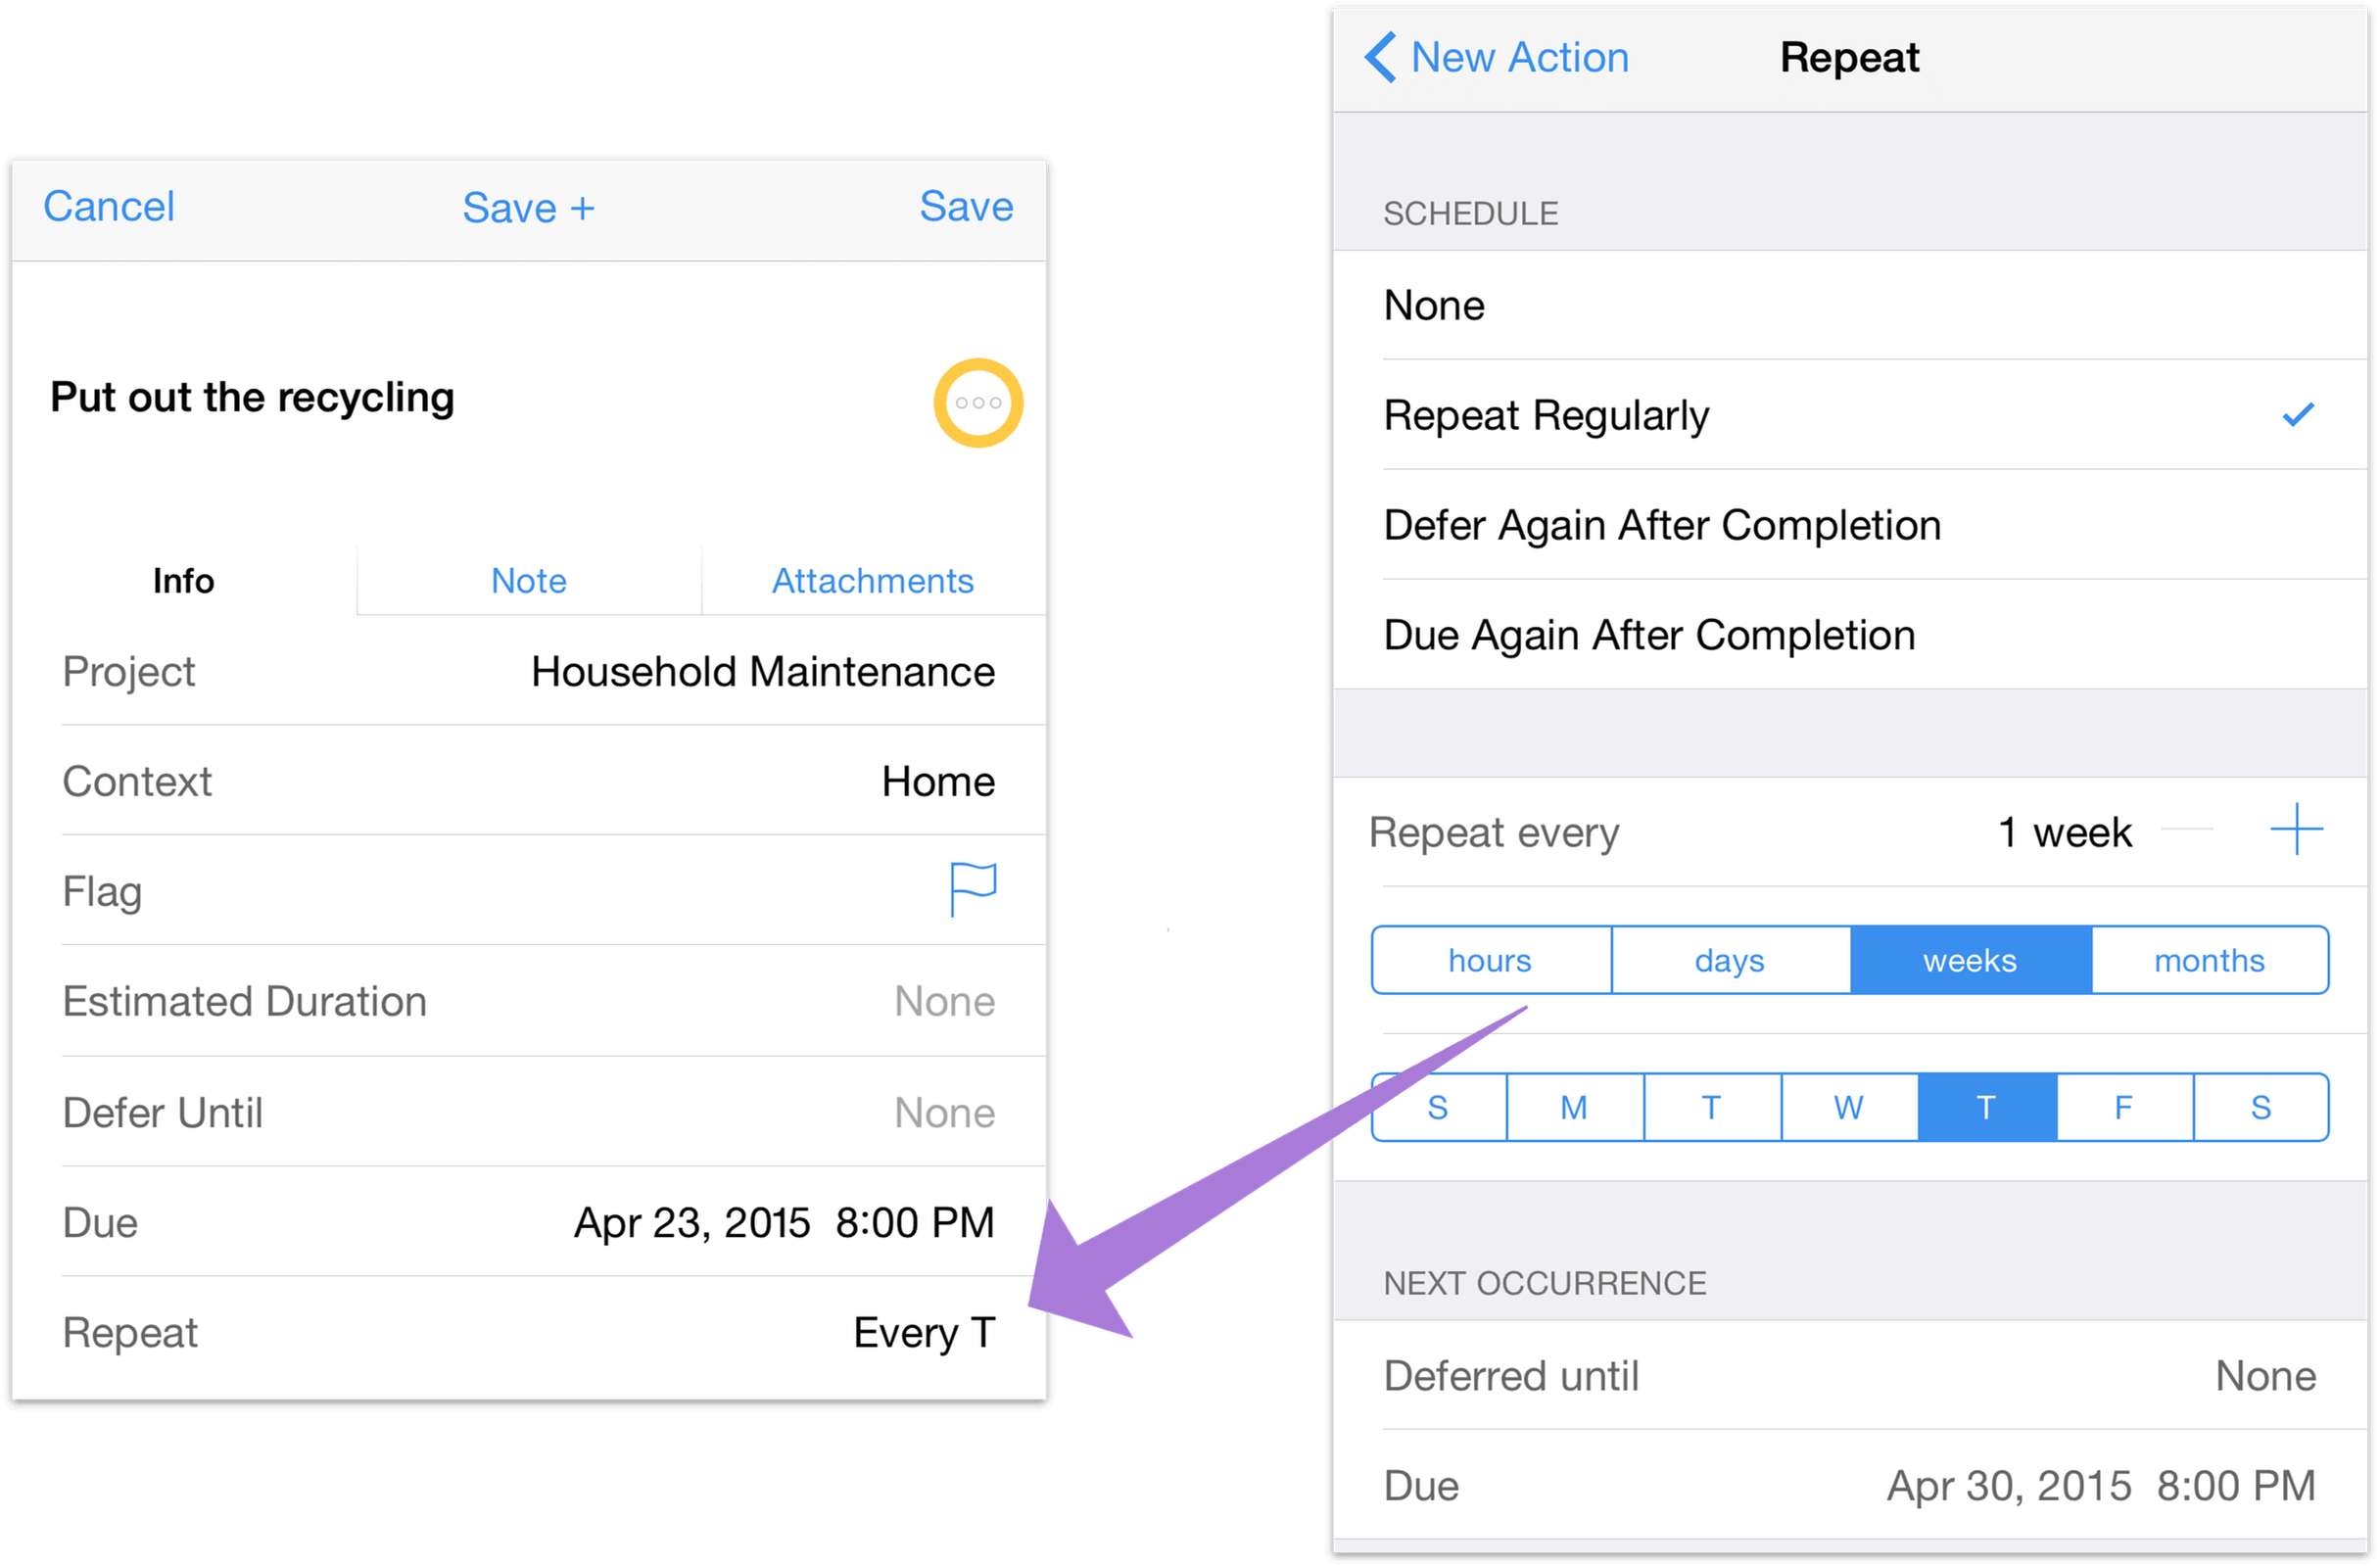
Repeating actions can occur regularly—every few hours, days, weeks, or months—based on when the item was first scheduled, or rescheduled to be deferred until (or be due again) based on a set time after you mark it completed.
To set an item up to repeat:
Select the item you want to repeat.
Tap Repeat and choose a repeat type.
Repeat Regularly—With the initial due date as its starting point, the item will come due again at the lapsing of each repeat interval, like clockwork. This is useful for repeating items that are locked to the calendar, like paying the rent. This is the repeat type for most common uses.
Defer Again After Completion—When the item is completed, it’s deferred for another instance of the repeat interval. This is useful for repeating items that can’t be considered again until a specific amount of time has passed—when your scheduling has to be flexible because it’s regulated by some external constraint. If your insurance covers dentist check-ups every six months, for example, you’ll want to make an appointment later in the year based on the date of your previous one.
Due Again After Completion—When the item is completed, it’s due again after the repeat interval has elapsed. This is most useful for items with internally set constraints based on the time they take (or require) to complete. Refilling a 30-dose medical prescription every 30 days is an example of this type of repeat.
Enter a repeat interval. This can be any number of minutes, hours, days, or months.
To schedule an action on specific weekdays, enter a Repeat Every interval in weekly increments and then select the days on which you’d like to repeat the item from the buttons below.
For example:
Defer until Tuesday 5:00 PM; due Tuesday 10:00 PM; repeat every 1 week: take out the trash. This repeats on a fixed schedule because it is necessary to do it at the same time every week, regardless of when you last did it.
Defer until today 12:00 AM; due today 6:00 PM; defer another 5 days: clean the kitchen. This is deferred from the completion date because the next time you need to do it depends on the last time you did it.
Defer until 4:00 PM; due 6:00 PM; repeat every 1 week on Monday, Tuesday, and Thursday: bring Sarah to soccer practice. This repeats on certain weekdays, available toward the end of the workday so you aren’t distracted by it until you need the reminder.
Defer until today 7:00 AM; due today 7:00 PM; due again in 10 days: water the cactus. This prickly fellow risks drowning if watered too frequently, and using due again ensures this won’t happen even if the action becomes overdue before you complete it (repeat every, by contrast, would prompt you to do it again sooner than would be safe).
When you mark a repeating item as complete, the next instance of it is created with its defer and due dates pushed forward as indicated by the repeat interval. If you want an item to stop repeating, just change the repeat type to None.
Warning
If you’ve set a project or an action group to repeat, marking individual items inside that group to repeat at different intervals from the parent can lead to some serious confusion. It’s a good idea to make sure one — and only one — repeat setting applies to each item you’d like to recur.
Quick Rescheduling with Peek and More
As an alternative to changing dates and times in the item editor, you can quickly update an action or project’s due or defer date with a set of commands accessible from the More button.

Swipe an item from right to left to reveal the More button. Tap More to bring up a set of quick scheduling commands based on the item’s due and defer dates relative to the present (on iPhone 6s and 6s Plus, press an item to Peek it and swipe up to reveal these same commands).
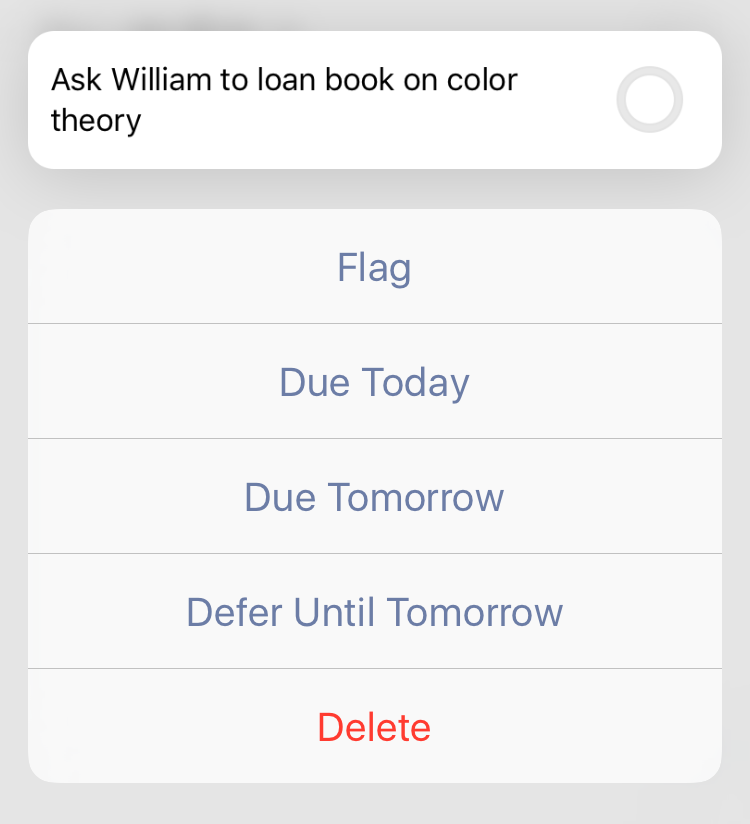
Choosing Due Today changes the due date of the selected item to the current calendar day (or adds today’s date as the due date, if none was set before). Choosing Due Tomorrow changes the due date to tomorrow; the hour is unchanged. If no hour was previously set it adds a default due time of 5:00 PM.
Note
When setting a due or defer date, the default time an item is considered due or deferred until is 5:00 PM (for the due time) and 12:00 AM (for the defer time).
On OmniFocus for Mac, these times can be customized in the Date & Time section of OmniFocus Preferences. Changes to these settings in OmniFocus for Mac will sync to OmniFocus for iOS if you share a database between them.
Choosing Defer Until Tomorrow changes the item’s defer date to tomorrow. If the item had no defer time set, the hour is 12:00 AM by default; otherwise the existing time is unchanged. If setting an item’s defer date to tomorrow in this way would cause it to pass the item’s existing due date, the due date is moved to tomorrow as well.
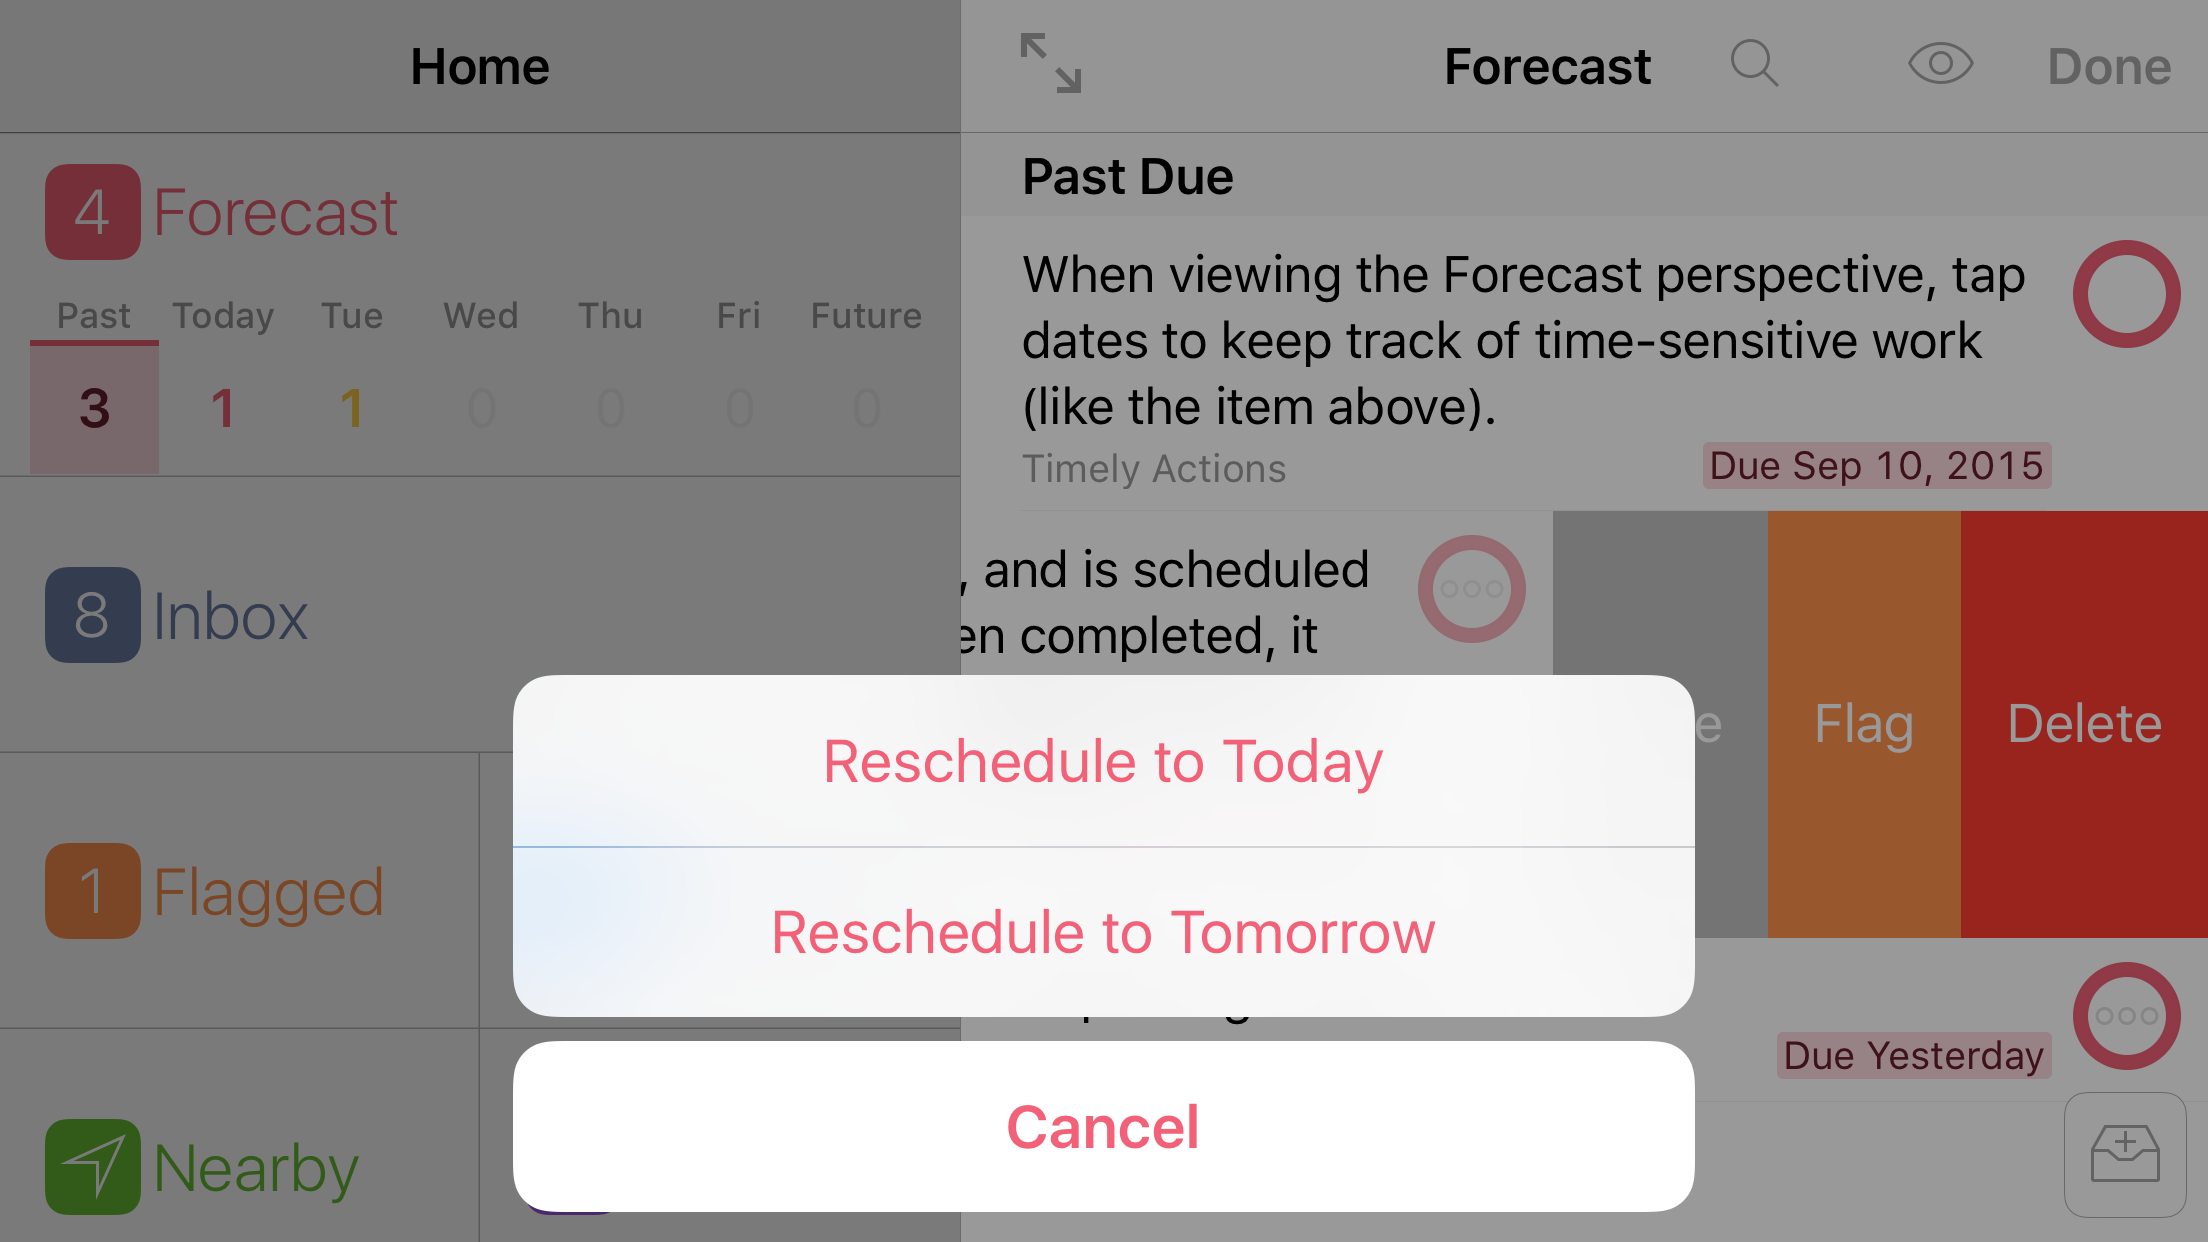
When changing dates of an item with a repeat interval set, the command names likewise change to reflect the impact the change has on the repeating item.
Reschedule to Today changes the item’s due date to today; the due time is unchanged. Importantly, if the item is set to repeat on an interval (as opposed to specific days of the week), this change is reflected in subsequent due dates as well. For example, if Take anti-gravity medication is set to repeat every three days and I forgot to take it yesterday, using Reschedule to Today moves yesterday’s missed dose to today and the next one to three days from now—the action’s “stride” is reset.
Reschedule to Tomorrow changes the item’s due date to tomorrow, and otherwise behaves similarly to Reschedule to Today (an item with a fixed repeat interval maintains that interval from the newly set due date).
There are two exceptions to this: when viewing the Forecast perspective with deferred items shown, choosing Reschedule to Tomorrow for a repeating item that appears in the Deferred Until Today section will change its defer date to tomorrow (not its due date).
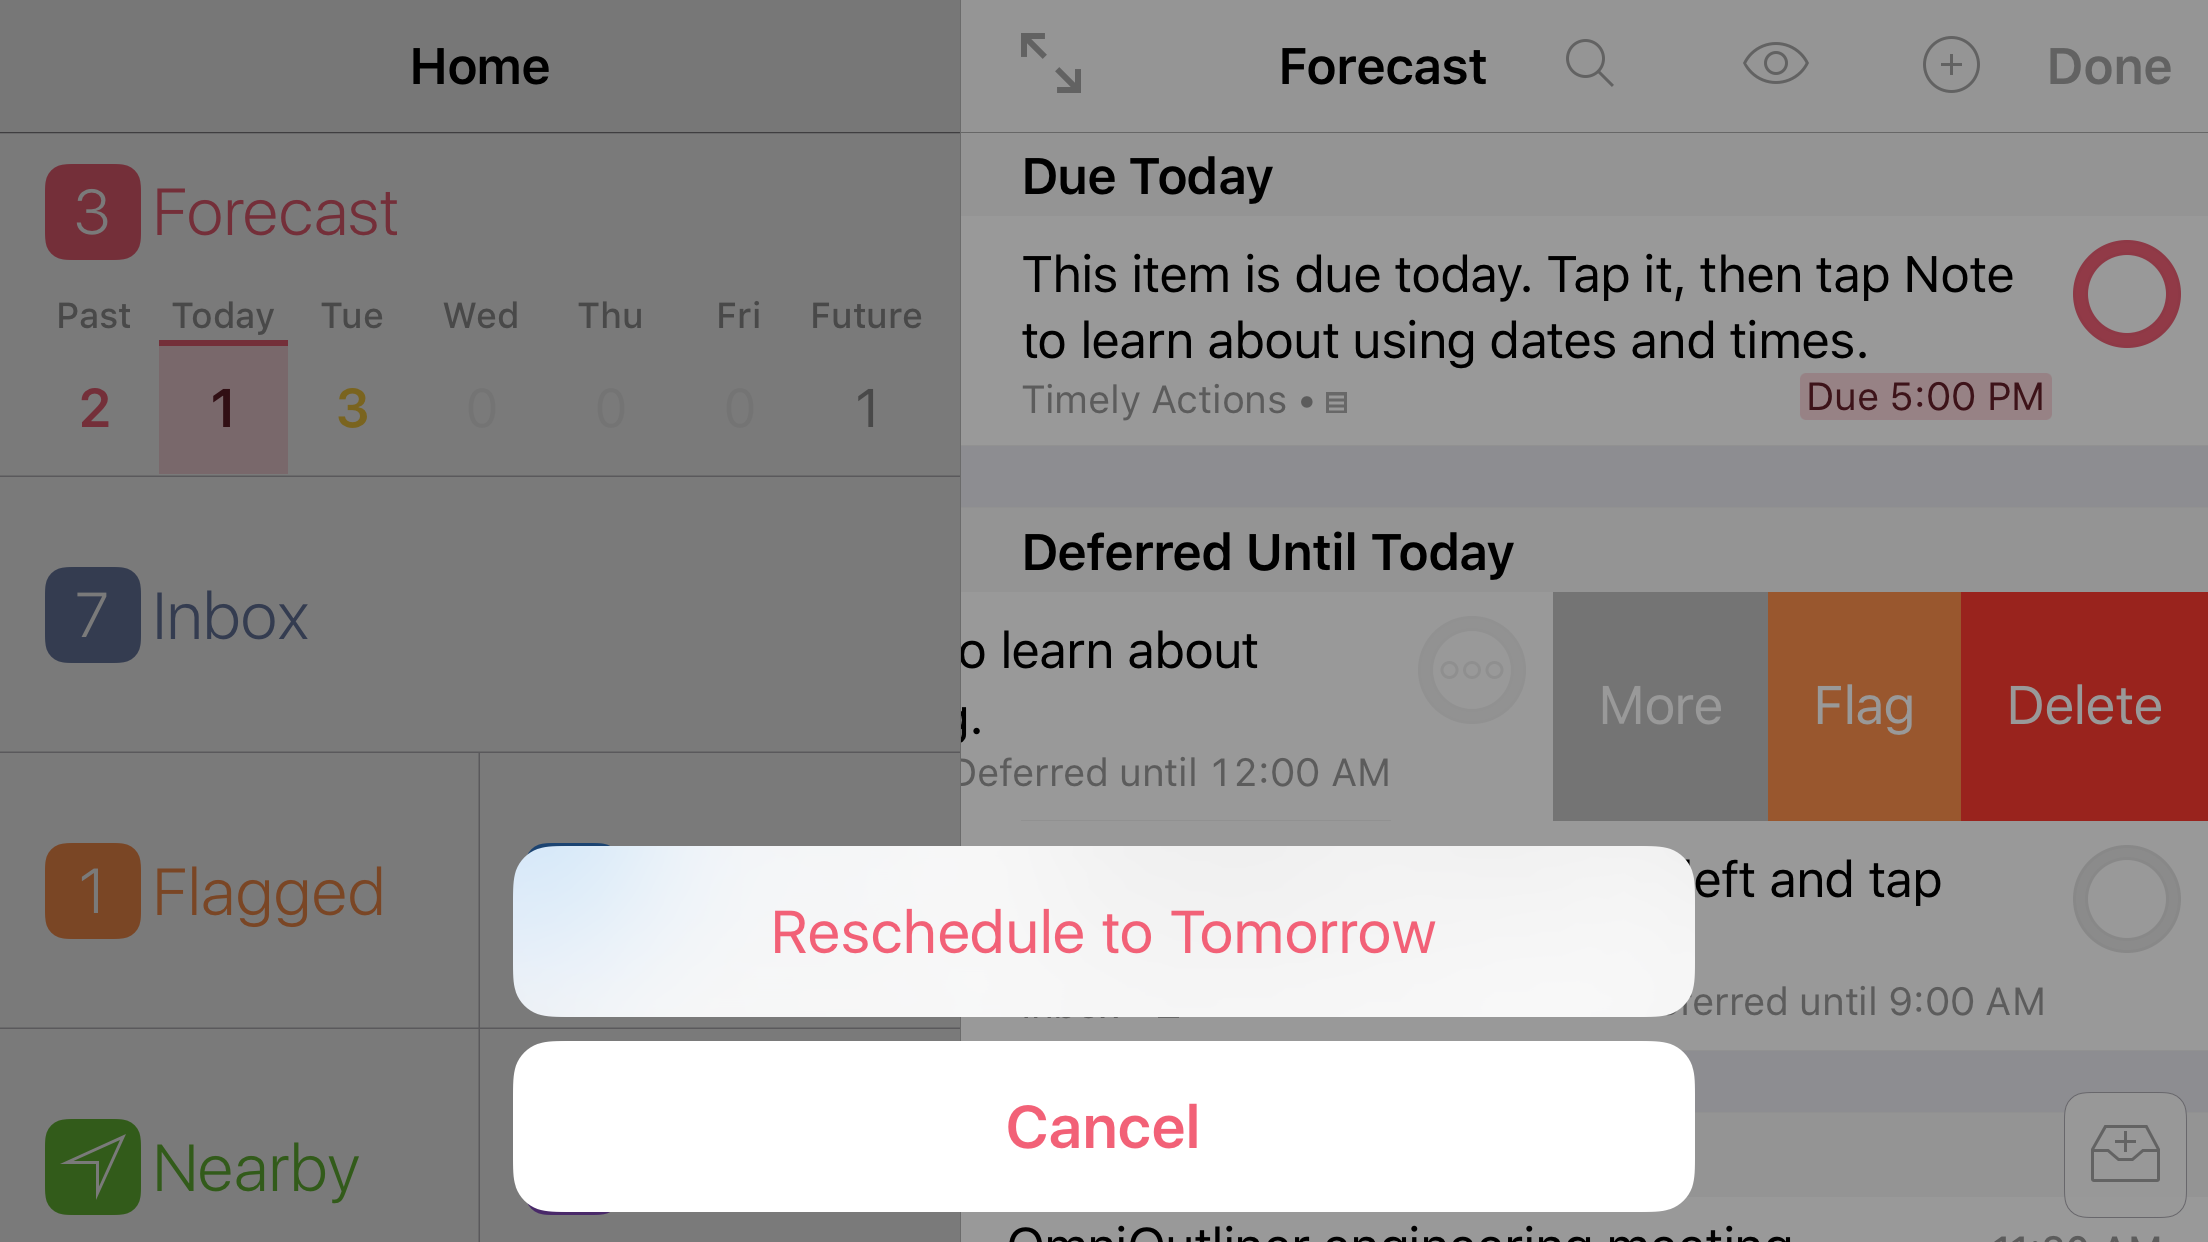
Likewise, an item with a defer date (but no due date) that is set to repeat with a Defer Again interval after completion can only have its defer date set, so that is the date that will be rescheduled to tomorrow.
Note
These Due and Defer commands are ideally suited to help get items where you need them quickly, and may not address your most complex date and time management needs.
For more fine-grained control over due and defer dates than that offered by the quick rescheduling feature described here, the full item editor is always just a tap away.
OmniFocus Extended
OmniFocus for iOS is enormously useful both as a standalone app on your iPhone and iPad and in conjunction with OmniFocus for Mac, but its power doesn’t stop there. Used along with other apps and features of your device, OmniFocus can work for you in even more exciting ways.
Email Capture (Mail Drop)
Mail Drop is a feature of Omni Sync Server which lets you send emails directly into your OmniFocus Inbox. You can create multiple private send-to addresses to give friends, family, coworkers, or classmates the ability to create actions that land in your OmniFocus Inbox. And, best of all, you can revoke those addresses at any time.
Some possible ways to use Mail Drop include:
Forwarding actionable emails from your PC at work
Processing emails on your iPhone or iPad
Using if this then that to automate all kinds of Internet-y things
Allowing a partner to delegate actions directly into your OmniFocus system
If you’re already using the Omni Sync Server to sync OmniFocus, you can log in to the Sync Server web interface and create your first Mail Drop address. After logging in, just click or tap the Create Address button to automatically generate the email address (a combination of your account name and a random string of characters, for example).
If you don’t have a Sync Server account yet, you can sign up here. The account creation process includes instructions for configuring OmniFocus to use your new account (it’s as simple as tapping or clicking a link in an email).
When you send an email message to Mail Drop, the subject line of that message becomes the name of the new inbox item. The body of the message becomes the Note, which can contain text, attachments (such as images and files), and simple HTML (more complex formatting is removed).
Note
For Mail Drop to work, you should be syncing your OmniFocus database to the same Omni Sync Server account that you've used to set up Mail Drop.
Reminders Capture (Siri)
If you’re using OmniFocus on a device with Siri, and you would like it to keep track of the reminders you give to Siri, all you need to do is check a few settings on your device and you can start adding spoken items to your Inbox in no time.
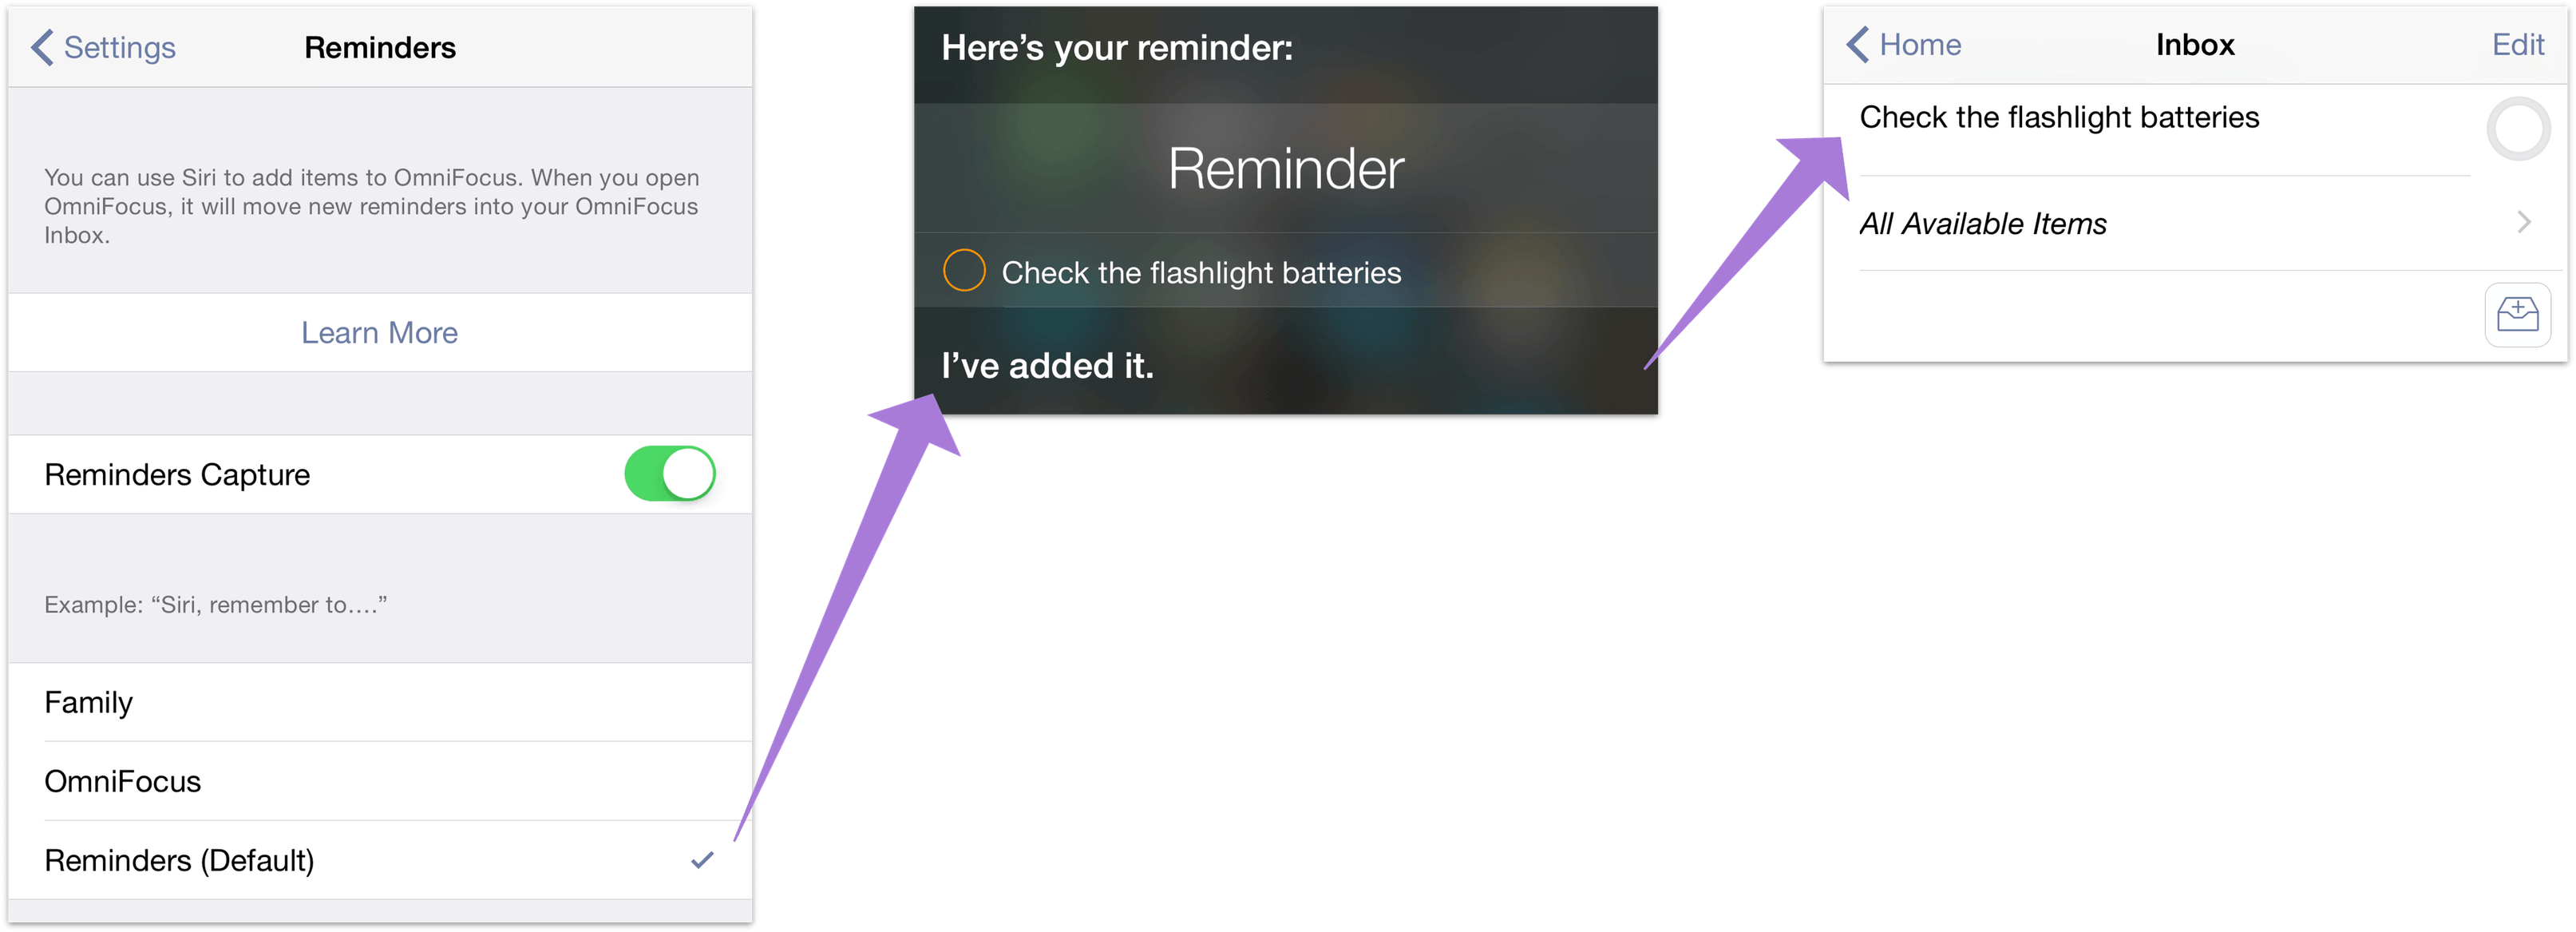
To set up OmniFocus so it captures your reminders from Siri:
Tap Settings in the secret bar.
In the Capture section, tap Reminders.
Warning
You should only configure Reminders Capture on a single iOS device. If you rely on iCloud to sync your reminders across devices and you have OmniFocus on iPad and iPhone, you could end up with duplicate entries in your Inbox.
- Finally, you'll see the Reminders screen, where you can turn on the capture option (an alert pops up asking you to let OmniFocus connect to your Reminders; tap OK) and, if you have multiple Reminders lists set up, choose the list you want OmniFocus to capture from. (If you only have one reminders list, OmniFocus assumes that's the one you want).
To record a new inbox item with Siri, try these phrases:
Siri, remember to… records a task to the system default Reminders list. OmniFocus grabs it from that list if it’s the one you have chosen to capture.
Siri, remind me to… records a task to the default list, and Siri asks for a due date.
Siri, remind me when I get to (or leave)… records a task to the default list with a contact location attached. If you choose a specific location, make sure it matches an OmniFocus context location.
Note
Use the small dot distance (200 meters/650 feet) if you would like OmniFocus to capture Siri-transcribed actions associated with that location.
- Add … to my OmniFocus list records a task to a list named OmniFocus if you have one set up in Reminders. OmniFocus captures the task if that’s the list you’ve chosen.
Replace OmniFocus with the name of whatever list you’d prefer!
To keep your data safe, there are some Reminders items that OmniFocus will not claim. (Reminders will retain ownership of the data and it will not be lost.) These are items that have data beyond what OmniFocus can track, such as contact locations outside the set of small-size OmniFocus context radii you have established.
For this reason, the location-based aspects of capture are most effective when you tailor the locations of your OmniFocus contexts as closely as possible to your location-based Reminders contacts.
Calendar Alarms
A task’s due date is approaching! By combining the powers of OmniFocus with Calendar on your device, you can set up reminders to let you know about upcoming deadlines automatically.
Note
Hooking up OmniFocus with Calendar is a slightly complex setup process. Since iOS now supports time-based notifications from OmniFocus it’s also one that is only useful in a few cases—when you want an alert before an item is due, or if you want an alert on a device that can subscribe to your calendar but doesn’t have OmniFocus.
Warning
The OmniFocus 2.6 Mac/2.15 iOS updates bring a new, more secure database format to OmniFocus. After migrating to the new format, if you're set up to publish due items as calendar alarms, a portion of your data corresponding to the two weeks noted above will be unencrypted while stored as part of the .ics file on the sync server.
If you decide to set up calendar export, you’ll first want to enable sync either via Omni Sync Server or another WebDAV server (see Getting Synced at the beginning of this manual for instructions).
Once sync is up and running, tap Settings in the secret bar, and then tap Calendar Alarms. You’ll see the option to view some important security information about the link to the Calendar app before proceeding. If you store potentially sensitive information in your OmniFocus database you’ll want to check this out.

When you’re ready, turn on Calendar Alarms. You’ll have several options for when you’d like to be reminded of your upcoming tasks. Pick the one that works best for you, and then tap Synchronize Now.
Since you're setting up the link to the Calendar app for the first time, you'll need to enter your login information next by tapping the Subscribe in Calendar button which appears in the place of Synchronize Now.
After you’ve authorized the new calendar subscription, due date reminders will appear in Calendar for all the upcoming actions and and projects you’ve scheduled.
Warning
When choosing a location to store a subscribed calendar, you may see iCloud as an available location (this is the default location in the Calendar app, for example). Storing a calendar in iCloud that syncs with your OmniFocus database can lead to some annoying and repetitive password prompts, so we recommend storing it locally on the device where you'd like to receive the alerts instead.
If you have opted to receive push notifications from Calendar on your device, these too will pop up when your to-dos are due. To see what your Calendar settings are, open the iOS Settings app, tap Notifications and then find Calendar in the Include section. You’ll want to choose the number of items to Show in Notification Center, and choose settings for your Upcoming Events alerts (the other Calendar alerts settings don't effect what OmniFocus-related alerts you'll see).
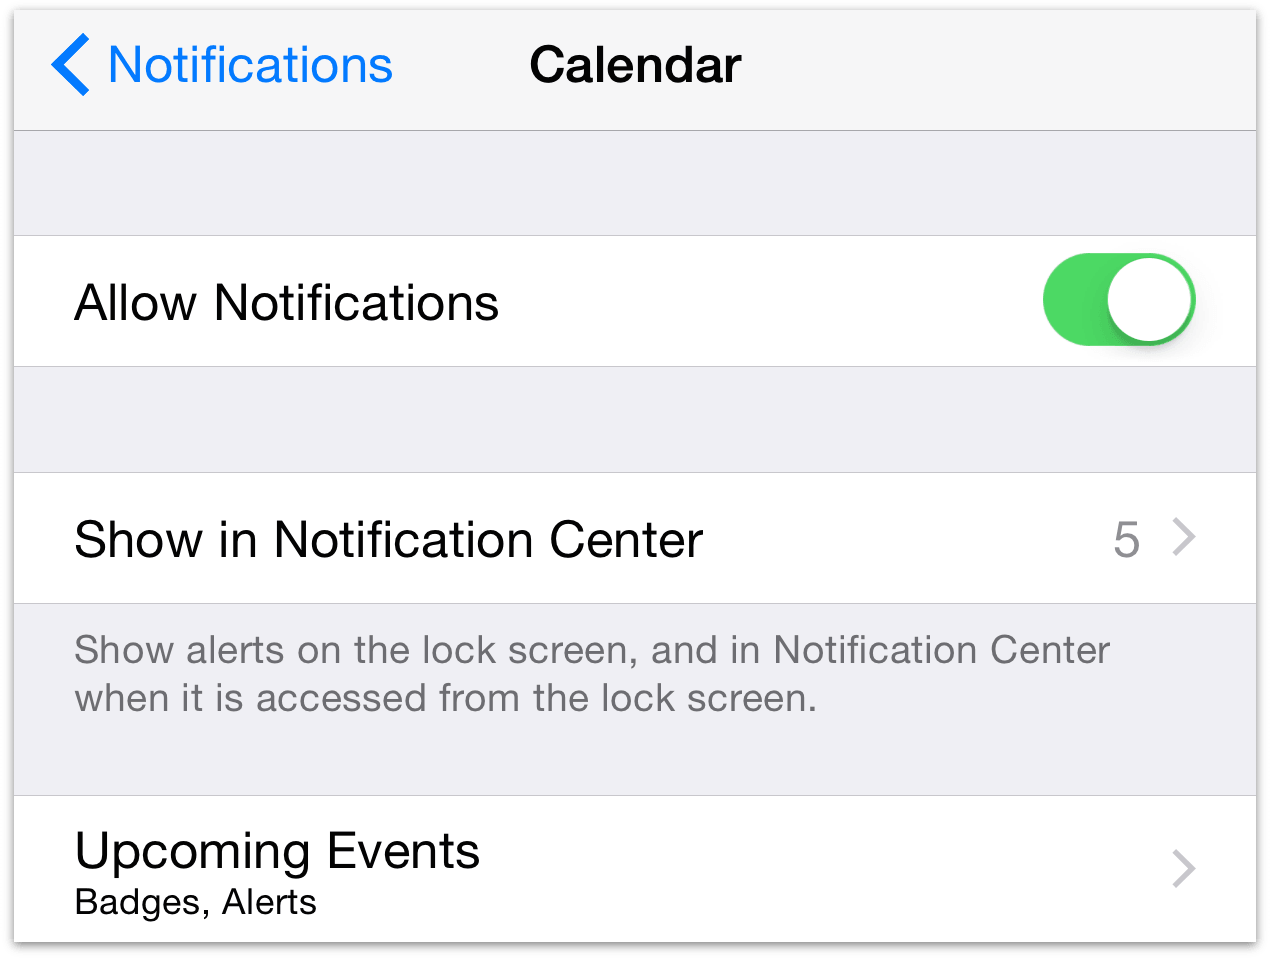
Today Extension
Drag down from the top of the screen anywhere on your device and you’ll see what’s going on today: a collection of default widgets that iOS presents as a curated set of data relevant to your current place and time.
You may see some Calendar entries, perhaps a Reminder or two, and you’ll notice that at the bottom of the screen there’s a button labeled Edit. Tap it and you’ll be brought to the edit screen, where you’ll find you can add other custom widgets to your Today screen – OmniFocus among them!
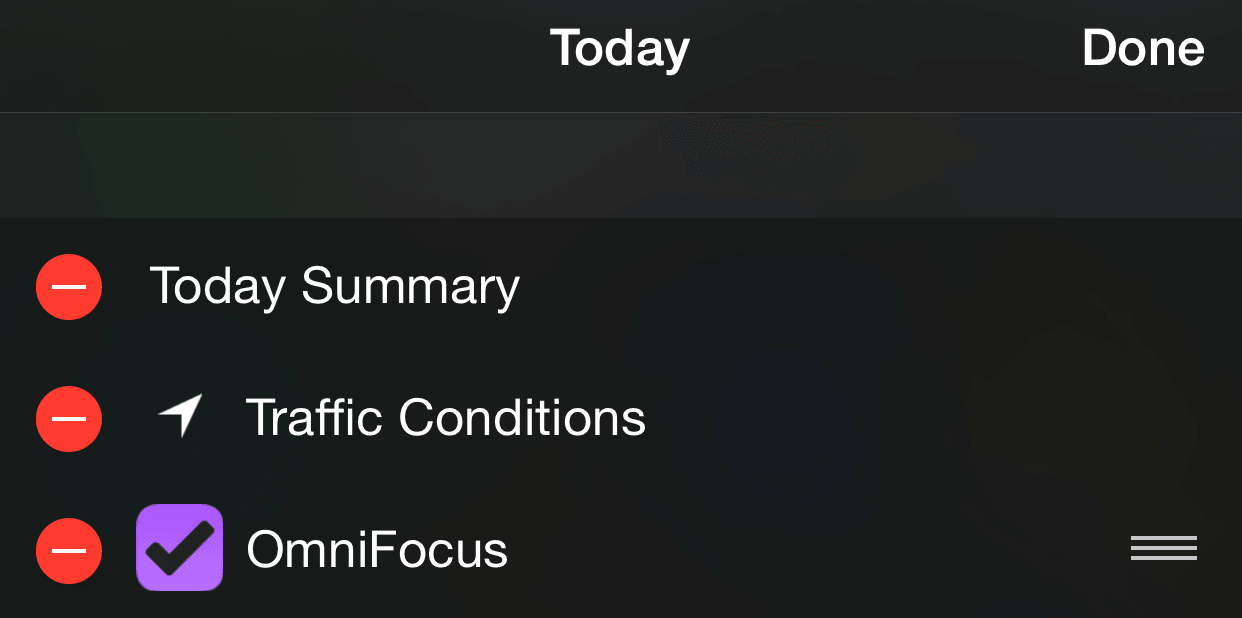
Tap the green plus icon next to OmniFocus and it’ll be added to the list of extensions shown on the Today screen. Use the reordering handles on the right to change the order of things, and when you’re happy with it, tap Done. From now on you’ll see OmniFocus items that are due today alongside events of current interest from other apps, and you can check on their status from anywhere on your device.
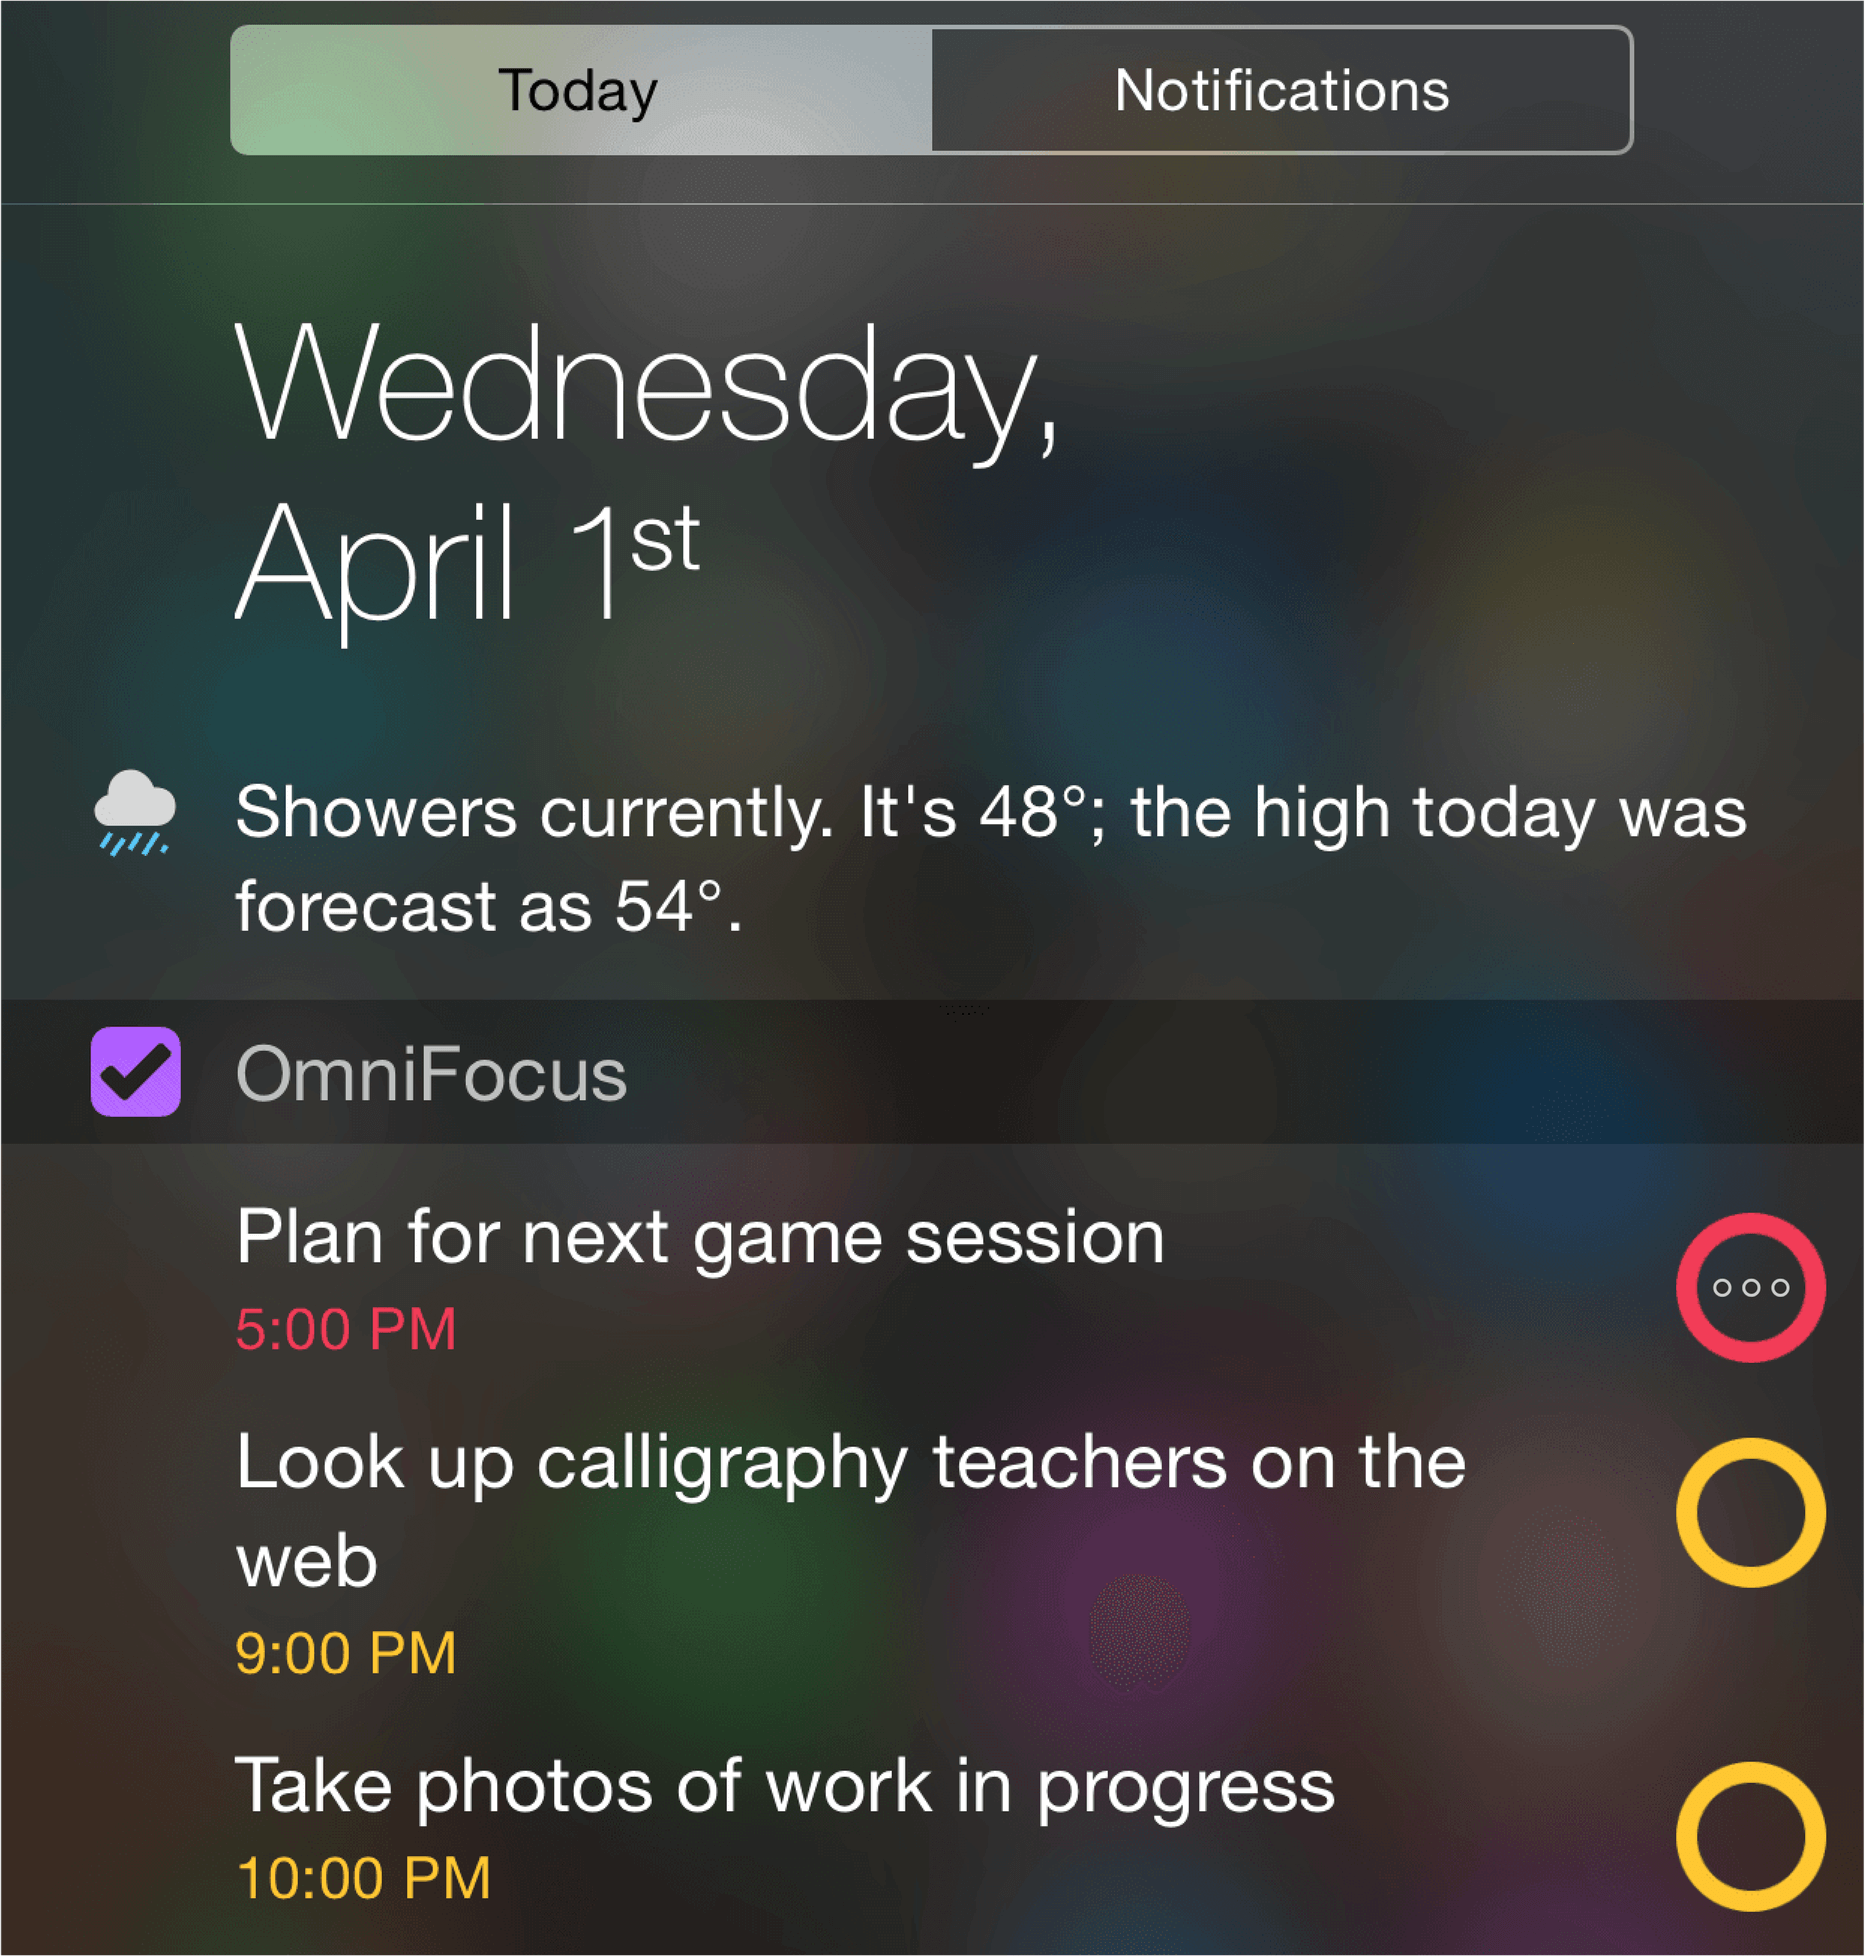
When you check the Today screen you’ll see a handy list of items due today, complete with status circles, and you’ll be able to check them off at your leisure — and with OmniFocus Pro, if you'd prefer to seean entirely different custom perspective you can choose it in OmniFocus Settings.
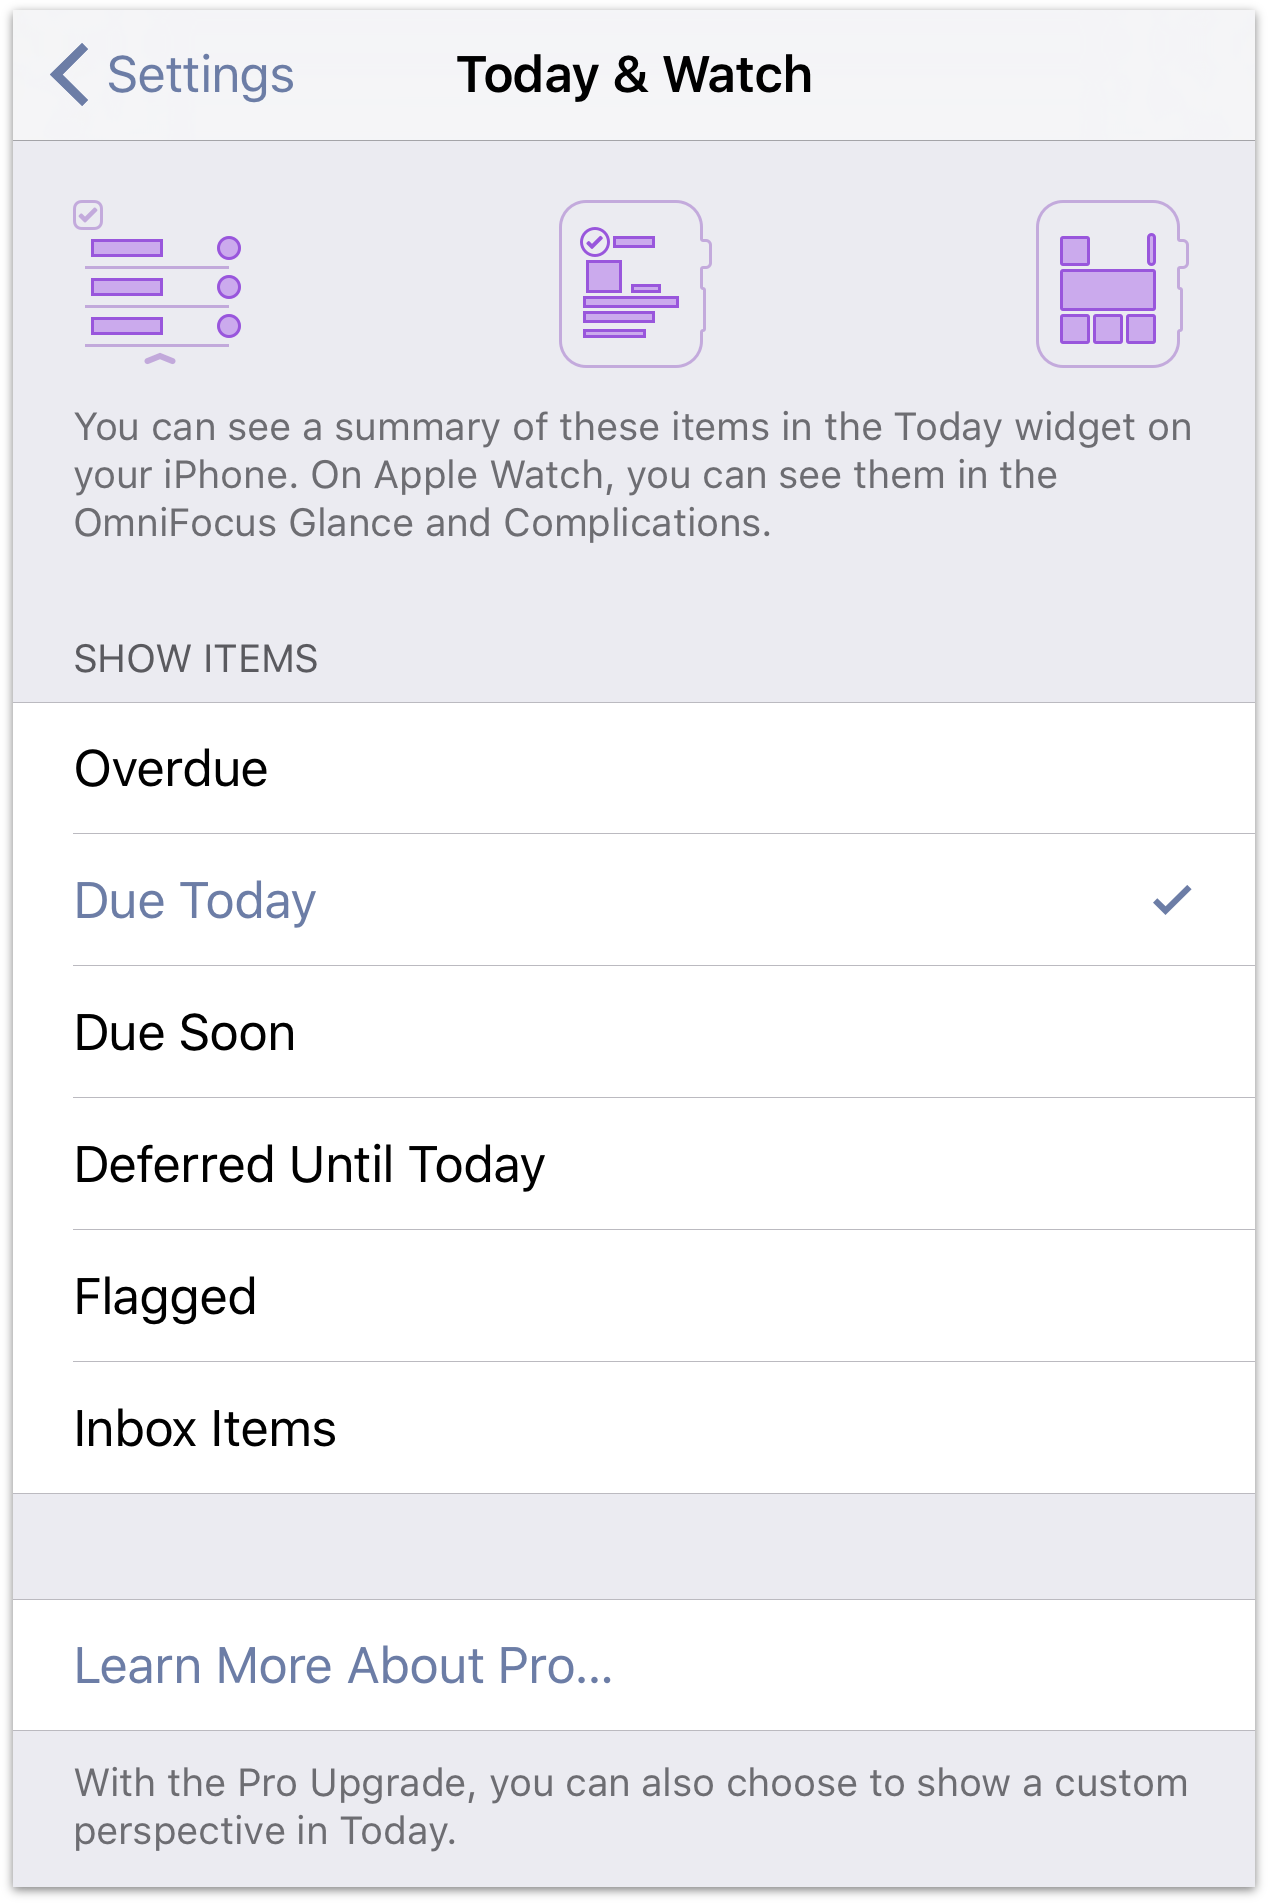
If you have an Apple Watch with OmniFocus enabled, the settings you choose for Today apply to the Glance and Complications there as well (see this support article for help setting up OmniFocus on your Apple Watch).
Interactive Notifications
With the Interactive Notifications feature available in recent versions of iOS, you can take actions on notification from OmniFocus regardless of where you are and what you’re doing on your device. Previous versions would just show you a notification, but now the notifications you see can be actionable items.
Note
To take advantage of interactive notifications, you'll need OmniFocus notifications to be set up as alerts. Check Notifications > OmniFocus in the iOS Settings app to make sure the alert style is set to Alerts or Banners.
Now, when you see a banner or an alert for an OmniFocus item you’ll have some options. For alert-style notifications, you’ll have several options:
Open
Open OmniFocus directly to the item in question to take further action on it.
Complete
Mark the item complete, effectively checking it off in your OmniFocus database. Done and done!
Note
If you receive multiple notifications from OmniFocus at the same time, the option to complete them won't be available (we don't want to trick you into completing things you can't see!). You can still "snooze" the group of actions to receive a notification again later.
Snooze
Delay consideration of the item for another 15 minutes. This doesn’t change its due date or defer date; it just reminds your device to check in with you again later.
Close
Dismiss the alert for good.
When a banner-style notification appears, swipe down on it to reveal the Complete and Snooze options.
Tip
You can also visit the Notification Center to interact with notifications from OmniFocus. Swipe an item from right to left to snooze, complete, or dismiss it.
Send to OmniFocus
When you’re in another app on your device and you’re inspired to add something to OmniFocus – whether it be a webpage in Safari, a picture in Photos, or a bit of text, image, or audio file from another app that supports sharing – all you have to do is tap Share ![]() , and choose OmniFocus from the list of apps that appears (if it's not there, swipe from right to left and tap More to add it).
, and choose OmniFocus from the list of apps that appears (if it's not there, swipe from right to left and tap More to add it).

You’ll get a simple “quick entry”-style form to create a new item, with a field for its title, notes, project, and context; it’ll be populated with some information relevant to the data you’re sharing back to OmniFocus (website URLs in the note field and title pre-filled in the title field, for example), which you can edit to your heart’s content and then hit Save when you’re ready to send it to your Inbox.
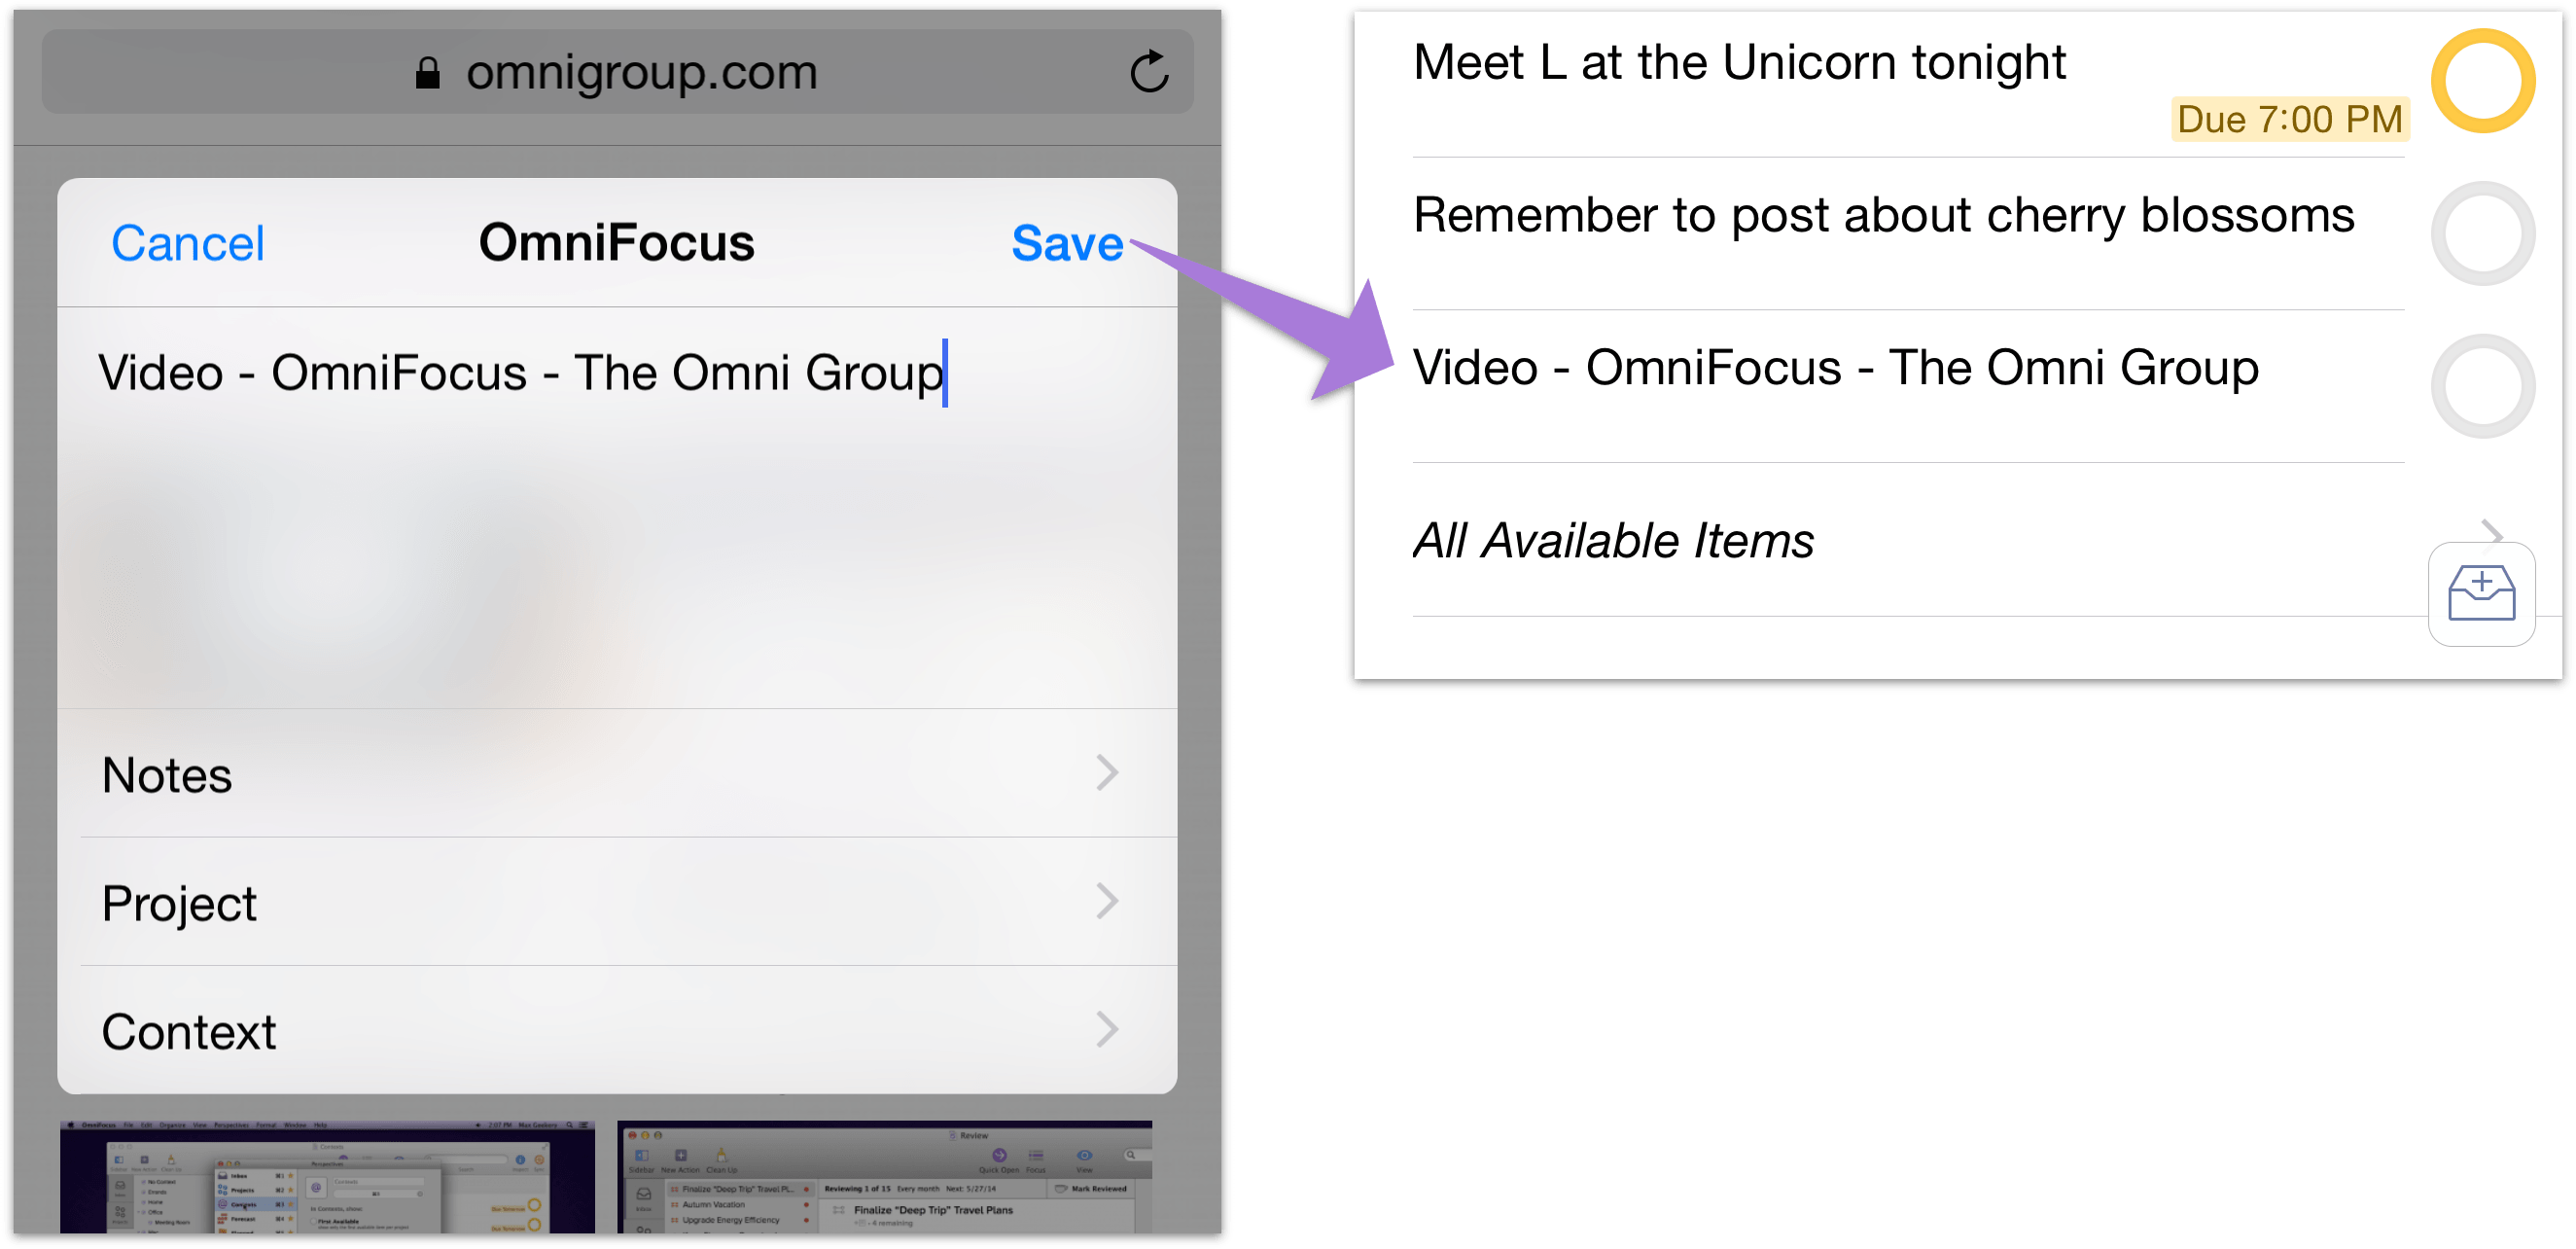
OmniFocus for Apple Watch
If you have an Apple Watch and OmniFocus for iOS on your iPhone, you can extend OmniFocus to Apple's most personal device yet. We designed the OmniFocus for Apple Watch Extension with the device's unique capabilities in mind; you'll find details about OmniFocus's full support for the Apple Watch in this support article.
Automating OmniFocus
With some knowledge of programming, you can use callback URLs to automate conversations between OmniFocus and other apps on your iOS device. This offers the ability to set up project templates with custom data fields, for example, along with many other powerful automation possibilities. This is an advanced feature that requires some tinkering under the hood; for help getting started integrating OmniFocus with the workflow app of your choice, see URL Schemes in OmniFocus on the Inside OmniFocus website.
1Password Support
If you have 1Password from AgileBits installed on your device, you can use it to store your sync account password, and store and configure your encryption passphrase if you choose to set one up separately.
With 1Password installed, OmniFocus adds a 1Password button to password fields throughout the app, as well as in the username field of the Omni Sync Server setup screen (this appears when you first install and launch the app, and also in Settings). Tapping the 1Password button presents the iOS standard share sheet, which contains 1Password as an option; tapping it pops up the 1Password extension.
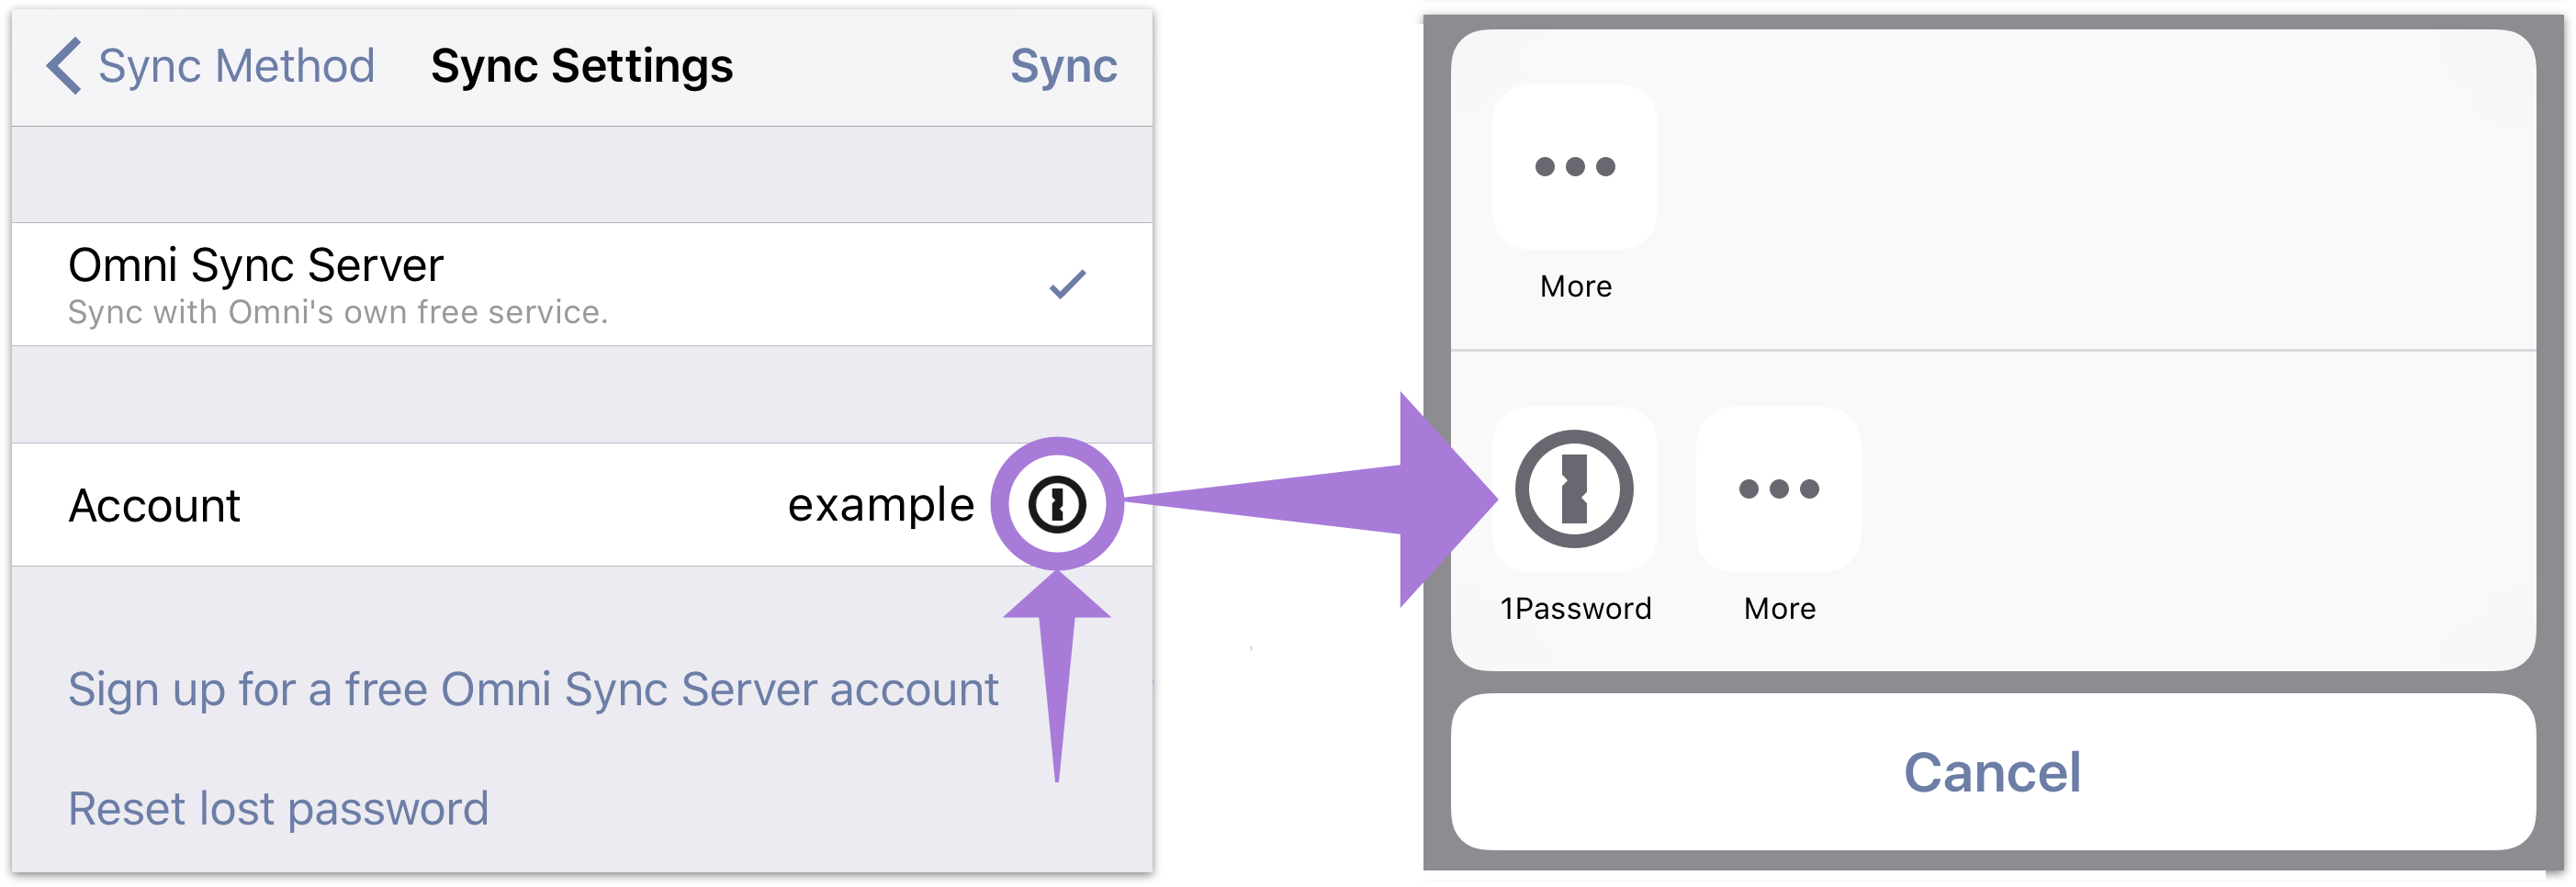
After unlocking 1Password with your Master Password or Touch ID, you’ll be shown a list of existing Login entries that match the server you’re trying to log in to (either Omni Sync Server or custom WebDAV). This list is filtered based on the hostname of the service, so if you have other entries for *.omnigroup.com and are logging in to Omni Sync Server, you may see those other entries offered alongside your sync credentials. (The same goes for multiple logins to different services on the same third-party server that provides your custom WebDAV hosting.)
When you pick an entry, the credentials are sent back to OmniFocus, and it fills out any information you haven’t already provided. Notably, this means that if you typed in a username by hand on the OSS setup screen, then picked credentials from 1Password with a different username, OmniFocus will only use the password and not the changed username. On the other hand, if you chose 1Password from the Omni Sync Server setup screen or in a prompt with both a username and password field, OmniFocus will use both the username and password provided by 1Password.
Note
If you're syncing with a custom WebDAV server, 1Password will not populate the URL of your sync directory alongside your username and password. You will have to fill out the custom WebDAV address by hand when setting up 1Password support for your account.
If you cancel at any point during password selection, OmniFocus makes no changes. You’ll need to tap the 1Password button again to start the process over, or provide credentials by hand.
You can use 1Password to store both your sync password and your encryption passphrase, if they’re different. In this situation, you’ll go through the 1Password connection process twice: once during sync setup to add your Omni Sync Server or WebDAV credentials, and again in the Encryption section of Settings or when otherwise prompted to enter your new encryption passphrase.
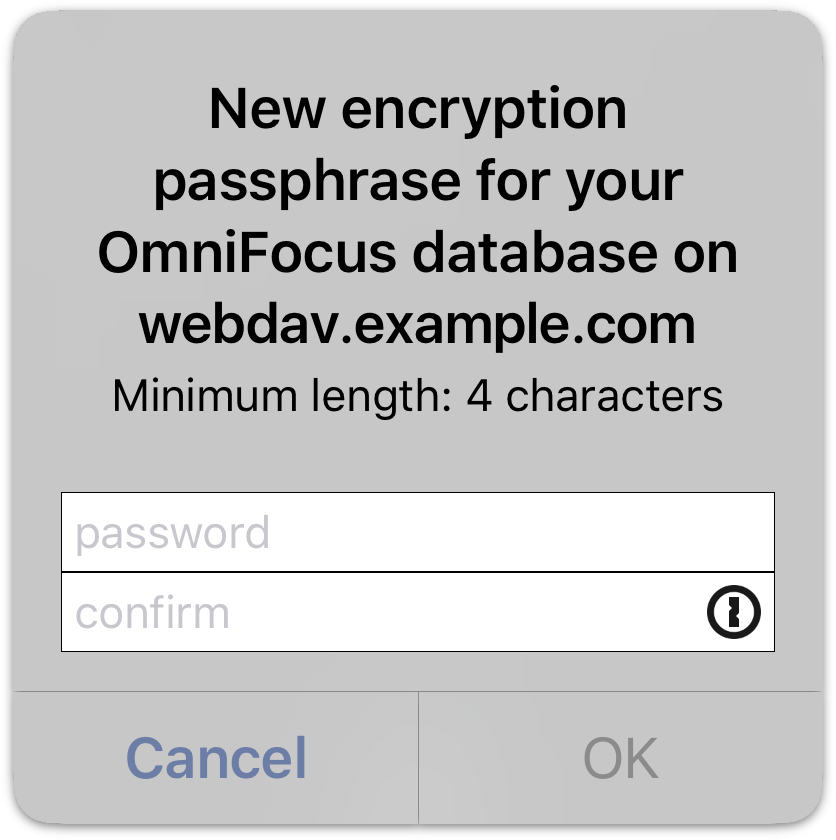
When setting up your encryption passphrase, 1Password can be used in one of two ways.
-
First, it can store a passphrase you create in OmniFocus. To do this, enter the passphrase in the password and confirm fields shown in the screenshot above, then tap the 1Password button and choose 1Password from the share sheet. This creates an entry in 1Password that is populated with the new password; assign a username to it (anything will do, since there is no username associated with the encryption password), save the entry, and you're good to go.
-
Alternatively, leave the password field blank and tap the 1Password button to open 1Password and create an empty Login entry. You can use 1Password's built-in passphrase generation tool to create your new encryption passphrase there. Follow the same steps to roundtrip back to OmniFocus, and the passphrase you created in 1Password will be pre-filled in the password and confirmation fields.
OmniFocus uses the same hostname to identify both the sync server and encryption password requests, so it’s likely that the 1Password extension will show both sync and encryption Login items on each request (assuming both items contain the sync URL). It's a good idea to use a unique Login entry title to differentiate these; for example “OmniFocus sync” and “OmniFocus encryption.”
OmniFocus Settings
To open the settings in OmniFocus for iOS, drag down on the sidebar or home screen to reveal the secret bar, then tap Settings.
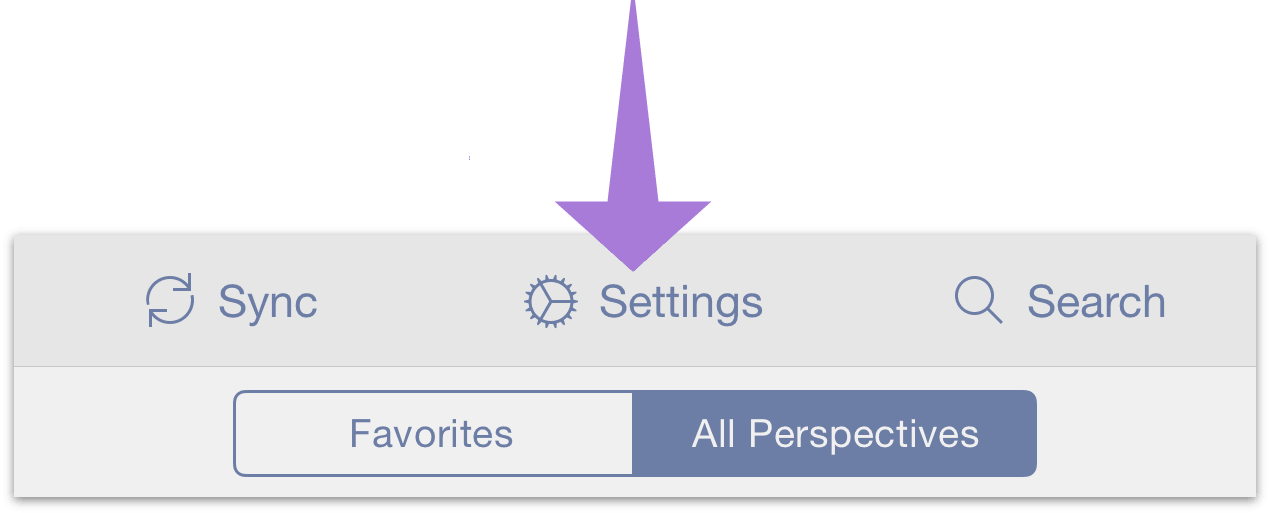
The first section contains general information about the version of OmniFocus that you're using, and links to additional resources that can enrich your OmniFocus experience.
About OmniFocus—See details about your version of OmniFocus for iOS, including version number and any in-app purchases you have unlocked.
Upgrade to Pro—Purchase and upgrade to the Pro version of OmniFocus for iOS, or restore a previously purchased upgrade.
Help—View the online help documentation and other support resources.
News—View the latest information from Omni about changes to OmniFocus or iOS that affect your use of the app.
Release Notes—Read the release notes for the current version of the app.
Contact Omni—Send us feedback about OmniFocus or request assistance.
Sync
This section contains settings for keeping your database up to date on all your devices (or backed up on a single device) by syncing it with a cloud server.
- Sync Method—Choose a Sync Method and configure the sync settings for OmniFocus. For a refresher on what to do if you haven’t already set up sync, see Getting Synced.
- Encryption—Check whether your OmniFocus database is encrypted on the server, and optionally choose a separate passphrase (distinct from your sync password) for decrypting it. Find details on this optional security feature at Setting a Separate Database Passphrase.
- Push—Check the status of push-triggered sync on your sync account (it's set to On by default). This feature offers faster, more frequent syncs; for more information, see this support article and this blog post.
- Last Synced—View the timestamp for your last database sync at a glance here, or tap to view the log of all recent syncs and the reasons for them.
Registered Devices—Tap to view a list of devices registered to sync with your cloud database.
The Registered Devices screen shows a few useful bits of information: The entry for your current device is highlighted in purple, and the day a device last synced is shown adjacent to it (if a device hasn't synced in over a week, its last sync date is highlighted in yellow).
From the Registered Devices screen, you can also Edit the list to remove any devices you no longer want to sync with.
Colors
With the addition of the optional Dark Mode color scheme, this section controls the palette of colors used throughout the app.
- Switch Automatically—If you'd like OmniFocus to switch color schemes automatically, this sets a threshold of screen brightness that the app uses as a tipoff to make the change. When the screen dims below the threshold — either automatically because your screen is set to adjust dynamically based on ambient light, or by manually changing the screen brightness — OmniFocus will switch to Dark Palette on its own. Likewise, when the screen brightens above the set threshold, OmniFocus reverts to the lighter default palette.
- Dark Palette—Choose to use the Dark Palette color scheme throughout the app persistently, regardless of your iPhone's brightness setting.
Note
To set your device to adjust its screen brightness automatically, choose Display & Brightness in the iOS Settings app and turn on Auto-Brightness.
Due Dates
This section includes options for when items should appear as Due Soon.
- “Due Soon” Means—Set the timeframe for how you would like OmniFocus to define items that are due soon. Options include 24 hours, 2 days (the default), 3 days, 4 days, 5 days, and 1 week.
Notifications
This section holds options for customizing the alerts OmniFocus displays on your iOS device, and what you'd like to see in the Today view of Notifications Center.
- Sounds, Alerts, and Badges—Choose what items are counted in the badge attached to the OmniFocus app icon (the little red circle laid over the icon's upper right corner), and set alerts and sounds for due and location-based notifications.
- Today—Customize the items you'd like to see in the Today view of iOS Notification Center via OmniFocus's Today extension.
Note
On devices that support pairing with Apple Watch, the Today setting changes to Today & Watch. If you happen to have an Apple Watch paired with your device, the option you choose here governs what's displayed in the OmniFocus for Apple Watch Glance and Complications.
Calendar Integration
Extend notifications beyond OmniFocus with the options to publish calendar alarms with the settings in this section.
- Calendar Alarms—Turn on alarms associated with events you’ve added to the Calendar app (learn more at Calendar Alarms).
Note
When OmniFocus publishes due items as calendar alarms, it looks for actions and projects that are due within the next two weeks and no further. This is to prevent inaccuracies based on predictions of future activity from creeping in to your calendars. For important occasions outside of this timeframe, scheduling regular calendar events is advised.
Capture
Use the settings in this section to have OmniFocus capture reminders you add with Siri.
- Reminders—Turn on Reminders Capture so you can use your personal assistant, Siri, to add items to OmniFocus.
TextExpander
This section only appears if you have TextExpander from Smile Software installed on your device, and governs the behavior of TextExpander snippets in OmniFocus.
TextExpander—OmniFocus supports TextExpander snippets. With TextExpander installed you’ll see this additional entry in OmniFocus Settings with a button for updating the snippets that OmniFocus recognizes based on your latest changes in TextExpander.
Device Information
Use this section to optionally contribute to future OmniFocus development efforts by sending us your anonymous usage data.
Send Anonymous Data—If you’d like to help us improve future versions of OmniFocus, you can choose to send general data about your device and OmniFocus app usage by enabling this setting. Before choosing whether to share your data anonymously, you’ll get a preview of exactly what we’ll receive (it’s technical information that helps us reproduce and fix bugs). We’d love it if you’d like to help us out!
Database
This section contains several useful tools for troubleshooting or resetting your database, exporting it for retention in the Comma Separated Values format, and checking the status of your database and OmniFocus app version.
Export to CSV—As part of our commitment to your complete ownership of your data, we offer the ability to export your OmniFocus database in the open CSV format. Your data is available this way whenever you need it, presented in a tabular format viewable in just about any text editor.
Migrate Database—This item appears if you're syncing to a database version prior to the one released with OmniFocus 2.15 for iOS and 2.6 for Mac. See Migrating Your Database for instructions on how to get your database up to date.
Backups—OmniFocus for iOS can create and store a backup of your database locally on your device. With Automatic Backups turned on, the backup is replaced every 24 hours with a new copy; otherwise, you can back up manually at any time by pressing the Back Up Now button.
Restore from your most recent backup by tapping it and choosing Revert to This Backup. Unlike a remotely synced database that's kept identical to the one on your device, this backup database is only available on the specific iPhone or iPad with OmniFocus installed. If you remove OmniFocus from your device the backup is deleted as well.
Database Info—The text beneath Backups has statistics about your OmniFocus library: the number of items in your database, and the number of zip files used to contain your data. If you are syncing, you should try to sync all of your OmniFocus databases regularly to keep the number of files down.
Reset
If you want to revert to the default OmniFocus experience, you can reset various parts of the app using the tools here. Tap Reset to choose from among the following options.
- Home Screen (Pro)—Revert the home screen or sidebar tiles to their original positions using this reset option (no other settings are affected).
- All Settings—Restore all the preferences here in Settings, as well as view options and other visual customization throughout the app.
- Database—To start over from scratch (are you sure you really want to delete everything?!), tap Reset Database to delete your entire database of OmniFocus projects, actions, and perspectives.
OmniFocus Version—Finally, the text at the bottom of the Settings screen shows the version and build of OmniFocus installed on your device (useful when contacting Support).
Glossary & Appendices
This chapter contains a list of terms particular to OmniFocus or task management systems in general that may not be familiar to all users, along with explanations of how they work in the context of OmniFocus.
It also contains appendices with information useful to new users of OmniFocus 2, or those upgrading from previous versions of the app.
- Appendix: Interface Updates—Explains the information conveyed by summary dots adjacent to projects and contexts, the color coding of status circles, and the location of the secret bar.
- Appendix: Terminology Updates—Explains the updated terms for interface elements and app functions that were different in earlier versions of OmniFocus.
Glossary
The following is an alphabetical list of terms you'll encounter throughout this manual, some of which may be unfamiliar or have special uses particular to OmniFocus.
- Action
- An item that's part of a project, or part of a group within a project.
- Action Group
- Also referred to as a sub-project, an action group is a set of actions nested hierarchically within a parent action (which itself can be part of a project).
- Active
- The status for an item that's planned for completion, or a context that's currently in use.
- Available
- A view setting that shows items that aren't blocked, deferred, or on hold.
- Blocked
- The status of an action in a sequential project that is ordered to come after the first available action.
- Complete
- The status assigned to an item when you've finished it, or finished all the actions that comprise it (in the case of a project or group).
- Context
- The person, place, thing, state of mind, or other factor most relevant to the completion of a given action or project. These exist outside the project hierarchy and represent another axis from which to view the items you've accumulated in your database.
- Defer Date
- A date and time assigned to an item that you don't want to (or can't) consider for completion until later. When the defer date is reached, the item becomes available for further execution.
- Dropped
- The status for a project or context that is no longer being considered for completion.
- Due Date
- A date and time assigned to an item by which the item must be completed.
- Due Soon
- A status for items whose due dates are approaching. Items that are due soon are styled in amber for greater visibility. The exact meaning of Due Soon is configurable in Settings.
- Editor
- The suite of tools for adding and changing the details of an action, project, or context. The editor appears when an item is tapped in the main outline.
- First Available
- A view setting that affects how actions in projects are shown. A sequential project has one available action and one first available action. A parallel project has one first available action and many available actions. A single action list potentially has many first available actions.
- Flag
- A mark of privileged, eye-catching status bestowed on an item. What this special status denotes is completely up to you, but it's a great way to keep important things from falling through the cracks. Items that are flagged are styled in orange for greater visibility.
- Group
- A collection of items nested hierarchically within another item. Groups created from inbox items are item groups, while groups created within projects are action groups (also sometimes called sub-projects).
- Hidden
- An item that exists in your database but isn't exposed by the view options of your current perspective. Relevant when the app gives notice that you might be deleting something by mistake.
- Home
- The top level of hierarchy in the sidebar or home screen, from where you can navigate to all other perspectives and views in the app. The toggle switch in the secret bar governs what home displays: either the default list of perspectives (in OmniFocus Pro, these are favorites you've specified using the tile editor), or all the perspectives that are available. To return home from another view, tap the chevron in the upper left of the view (or touch and hold it to return home immediately, without passing through each level of the view hierarchy).
- Home Screen
- On iPhone, the landing screen that provides a summary of all your OmniFocus activity. The home screen is analogous to the Sidebar on iPad and iPhone 6/6s Plus: a navigable list of the default perspectives that (with OmniFocus Pro) can be customized to show, hide, and rearrange perspectives.
- Inbox
- The built-in perspective designed to hold tasks and to-dos that you've entered into OmniFocus as items, prior to processing them into projects, actions, and groups. Once an item becomes a project or an action it's moved out of the Inbox at the next clean up.
- Item
- Items are representations of tasks and to-dos in an OmniFocus database. Types of items include: inbox items, actions, projects, and groups.
- Main Outline
- The place where you see and interact with your items in OmniFocus, usually through a hierarchical view of your database. Specific perspectives (such as Contexts and Forecast) have specialized ways of showing your data that eschew or modify the typical project hierarchy.
- On Hold
- A status for projects and contexts that aren't relevant to your plans right now, but may be in the foreseeable future.
- Overdue
- A status for items whose due dates are past. Items that are overdue are styled in red for greater visibility.
- Parallel
- A project or group that doesn’t place particular emphasis on the order in which its actions are completed. All actions are considered available, though the topmost action is still considered the first available action for the purposes of view settings.
- Pending
- A filter option for projects when creating or editing a project hierarchy-based custom perspective (Pro). Filtering projects by Pending shows projects with defer dates set to the future; deferred is another word with the same meaning.
- Perspective
- A view on your OmniFocus database, shown in the main outline. OmniFocus 2 comes with seven built-in perspectives and two transient reference perspectives (Completed and Changed), and custom perspectives can be added in OmniFocus Pro.
- Perspectives Editor
- The screen used to create new perspectives or edit existing custom perspectives when OmniFocus Pro is installed. Creating a new perspective from the secret bar or editing an existing one with View Options will reveal the Perspectives Editor.
- Project
- A to-do item that’s larger in scope or permanence than a simple action, potentially containing several actions and groups within it that must be completed before the project can be marked complete.
- Remaining
- A view setting that shows all items that haven’t been completed or dropped.
- Secret Bar
- A menu bar reached by dragging down on the sidebar or home screen that contains buttons to prompt an on-demand database sync and open the OmniFocus settings, and a switch to toggle visible perspectives between Default (or Favorites, customizable with OmniFocus Pro) and All Perspectives. The secret bar in OmniFocus Pro also provides tools for creating new perspectives and the tile editor for customizing the home screen or sidebar.
- Sequential
- A project or group whose actions must be completed in a specific order. The first action in the list is the only one available for completion.
- Sidebar
- On iPad and iPhone 6/6s Plus, a vertical pane to the left of the main outline that’s shown by default (in landscape orientation) or by tapping the chevron in the upper left (in portrait orientation on iPad only). It contains content identical to the Home Screen on iPhone: a navigable list of the default perspectives that (with OmniFocus Pro) can be customized to show, hide, and rearrange perspectives.
- Single Action List
- A project whose actions are unrelated to a sequence of any sort, or one that’s maintenance-oriented as opposed to completion-oriented. All actions in a single action list are considered equally available.
- Stalled
- A project with no remaining actions (all of its actions have been completed). This status is used primarily as a filter for custom perspectives (Pro).
- Sub-Project
- A term synonymous with action group; a group of actions nested hierarchically within a project.
- Status Circle
- A graphical depiction of an item’s status (due soon, overdue, flagged, or repeating), as well as a target to tap to mark an item completed (hooray!).
- Summary Dots
- A row of colored dots shown beneath sidebar entries in the Projects and Contexts perspectives, used for an at-a-glance view of the number and urgency of items remaining to be completed within them.
- Task
- In the context of this manual, a task is something you’d like to accomplish in the real world that you’d capture with OmniFocus (where it would then become an item). To-do is another word with the same meaning.
Appendix: Interface Updates
If you're updating to OmniFocus 2 from an earlier version, this section provides a quick primer on improvements to the interface that we've adopted across the OmniFocus family to make the apps even more powerful and easy to use.
Summary Dots — These handy bits represent an overview of the amount and priority of items within a project or context, giving you an at-a-glance estimate of the size and urgency of things relative to other things.

Status Circles — Checkboxes for marking items complete have been replaced by status circles. Still great for checking things off when they're finished, status circles also convey the status of an item at a glance: whether it's due soon (amber), overdue (red), or flagged (orange). Repeating items are also distinct by virtue of the elipses in their center – when you see them, you know they'll keep coming back for more.
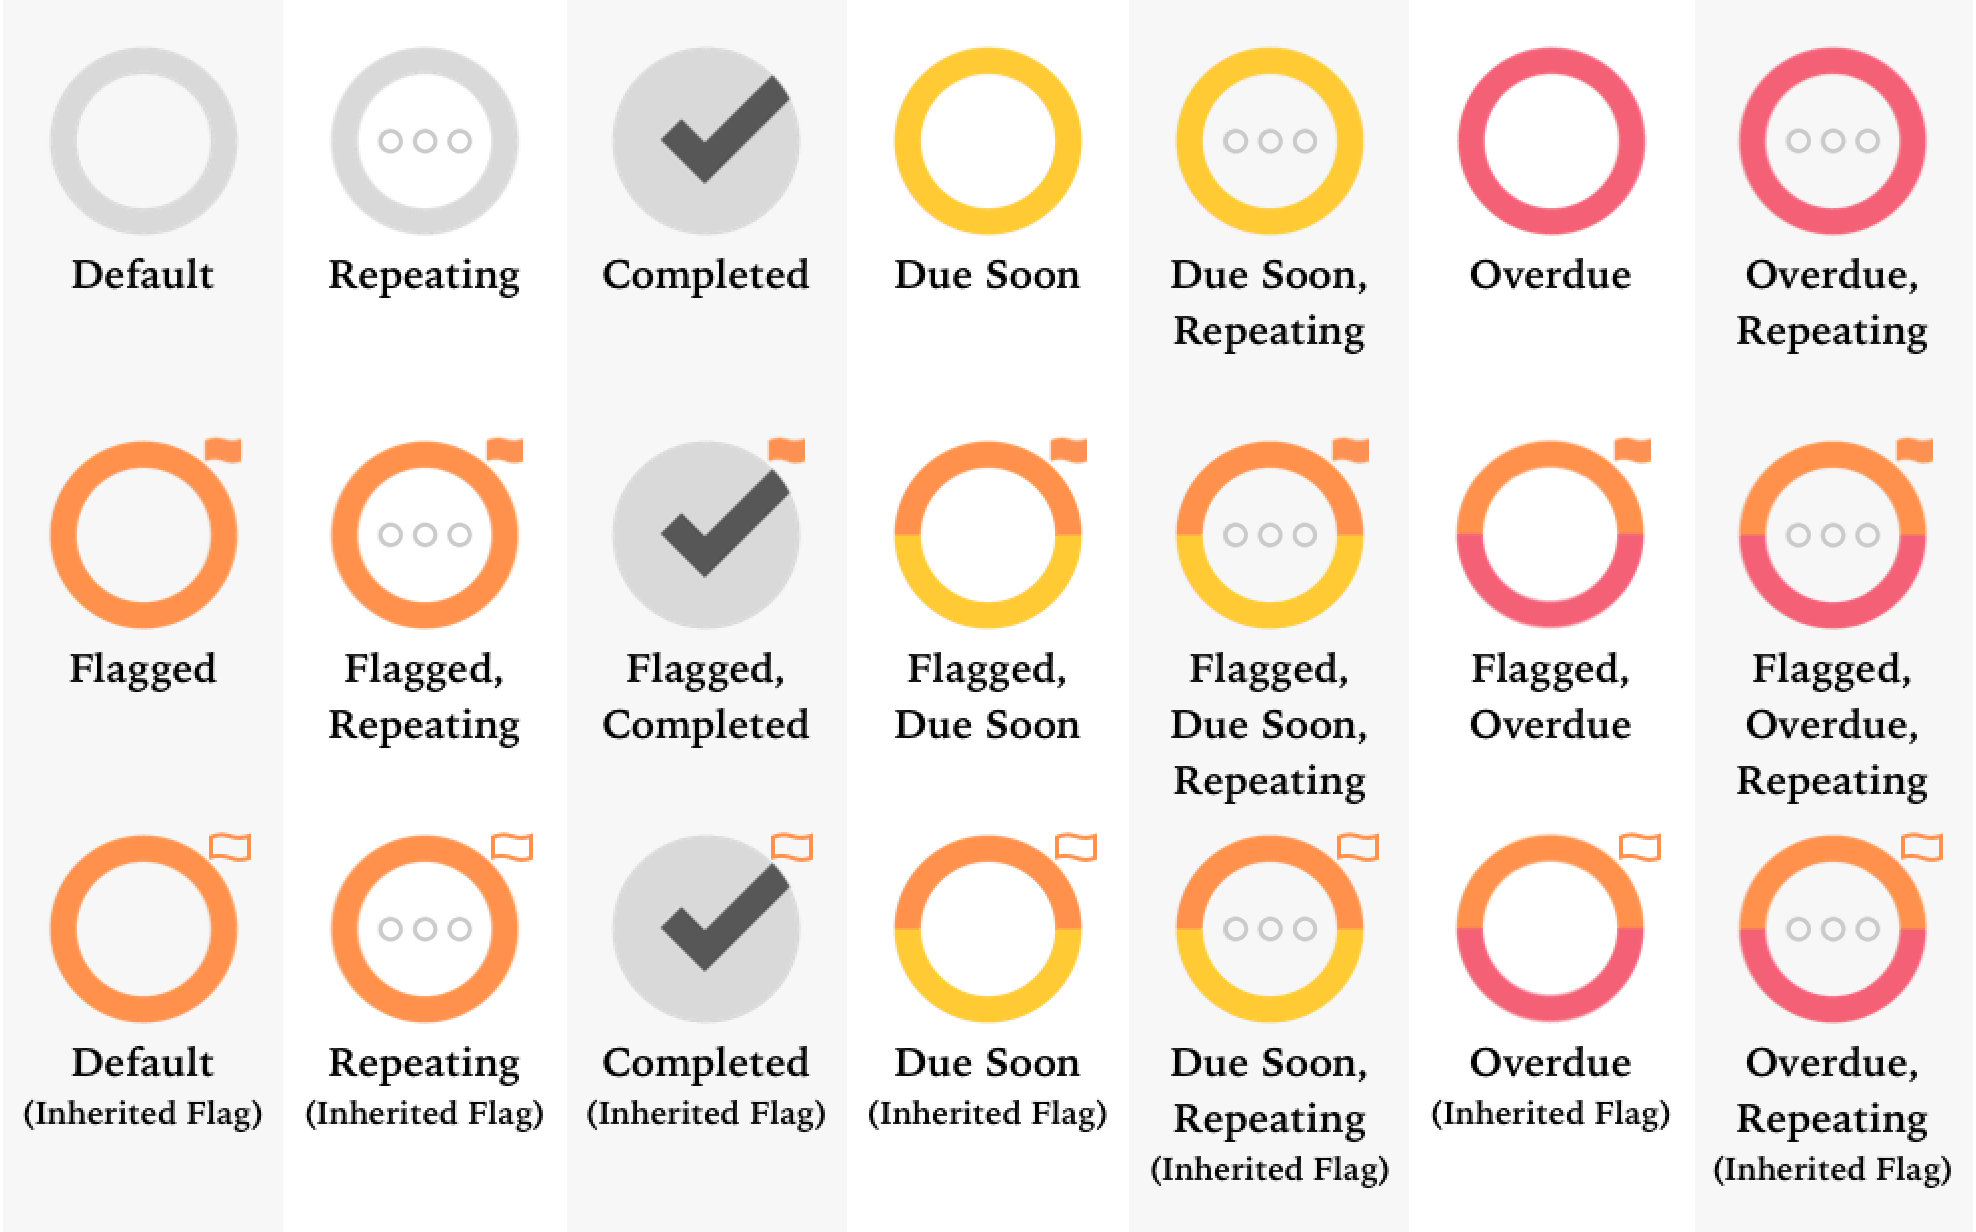
Got an action that’s more than one status, like flagged and overdue? The circle will take on multiple status colors simultaneously—half orange on top, half red on bottom—to communicate everything that's going on. Likewise, an item that's nested inside a flagged project or group will inherit the flagged property; when a flag is inherited, its icon is hollow rather than filled.
Secret Bar — Drag down on the sidebar or home screen to reveal the secret bar, where the Sync, Settings, and Search buttons are safely tucked away.
Toggle between lists of all available perspectives and just your favorite ones (and with the Pro upgrade installed, you'll create new perspectives and edit the tiled layout of your home screen here, too).
Appendix: Terminology Updates
To help better represent their function, OmniFocus 2 changes the way a few features of the app are described (versus how they appeared in earlier versions).
What were start dates in OmniFocus 1 are now defer dates. This is to more accurately capture the intent that an item shouldn't be considered until a later time—it's been deferred.
Next actions are now first available actions. This helps explain view options more clearly, and helps further disambiguate sequential projects, parallel projects, and single action lists.
Project and Context-based perspectives have become Use Project Hierarchy and Don't Use Project Hierarchy, respectively. This is to better reflect the role this choice plays in affecting other aspects of a custom perspective's view settings.
Since the act of “focusing” has such a specific meaning in OmniFocus, the Focus command in contextual menus has been replaced with the more accurate Go To Project and Go to Context. Its functionality remains the same.
Note
On iPad or iPhone 6/6s Plus (in landscape orientation), if you've delved in to view a subset of your items in the Project or Context perspectives (perhaps via Go to Project or Go to Context), you can quickly ascend to the perspective's top level by tapping its name in the toolbar or sidebar header.
Keyboard Shortcuts
If you're using OmniFocus for iOS with an external keyboard connected to your iPad, you can take advantage of the app's built in keyboard shortcuts for many common tasks.
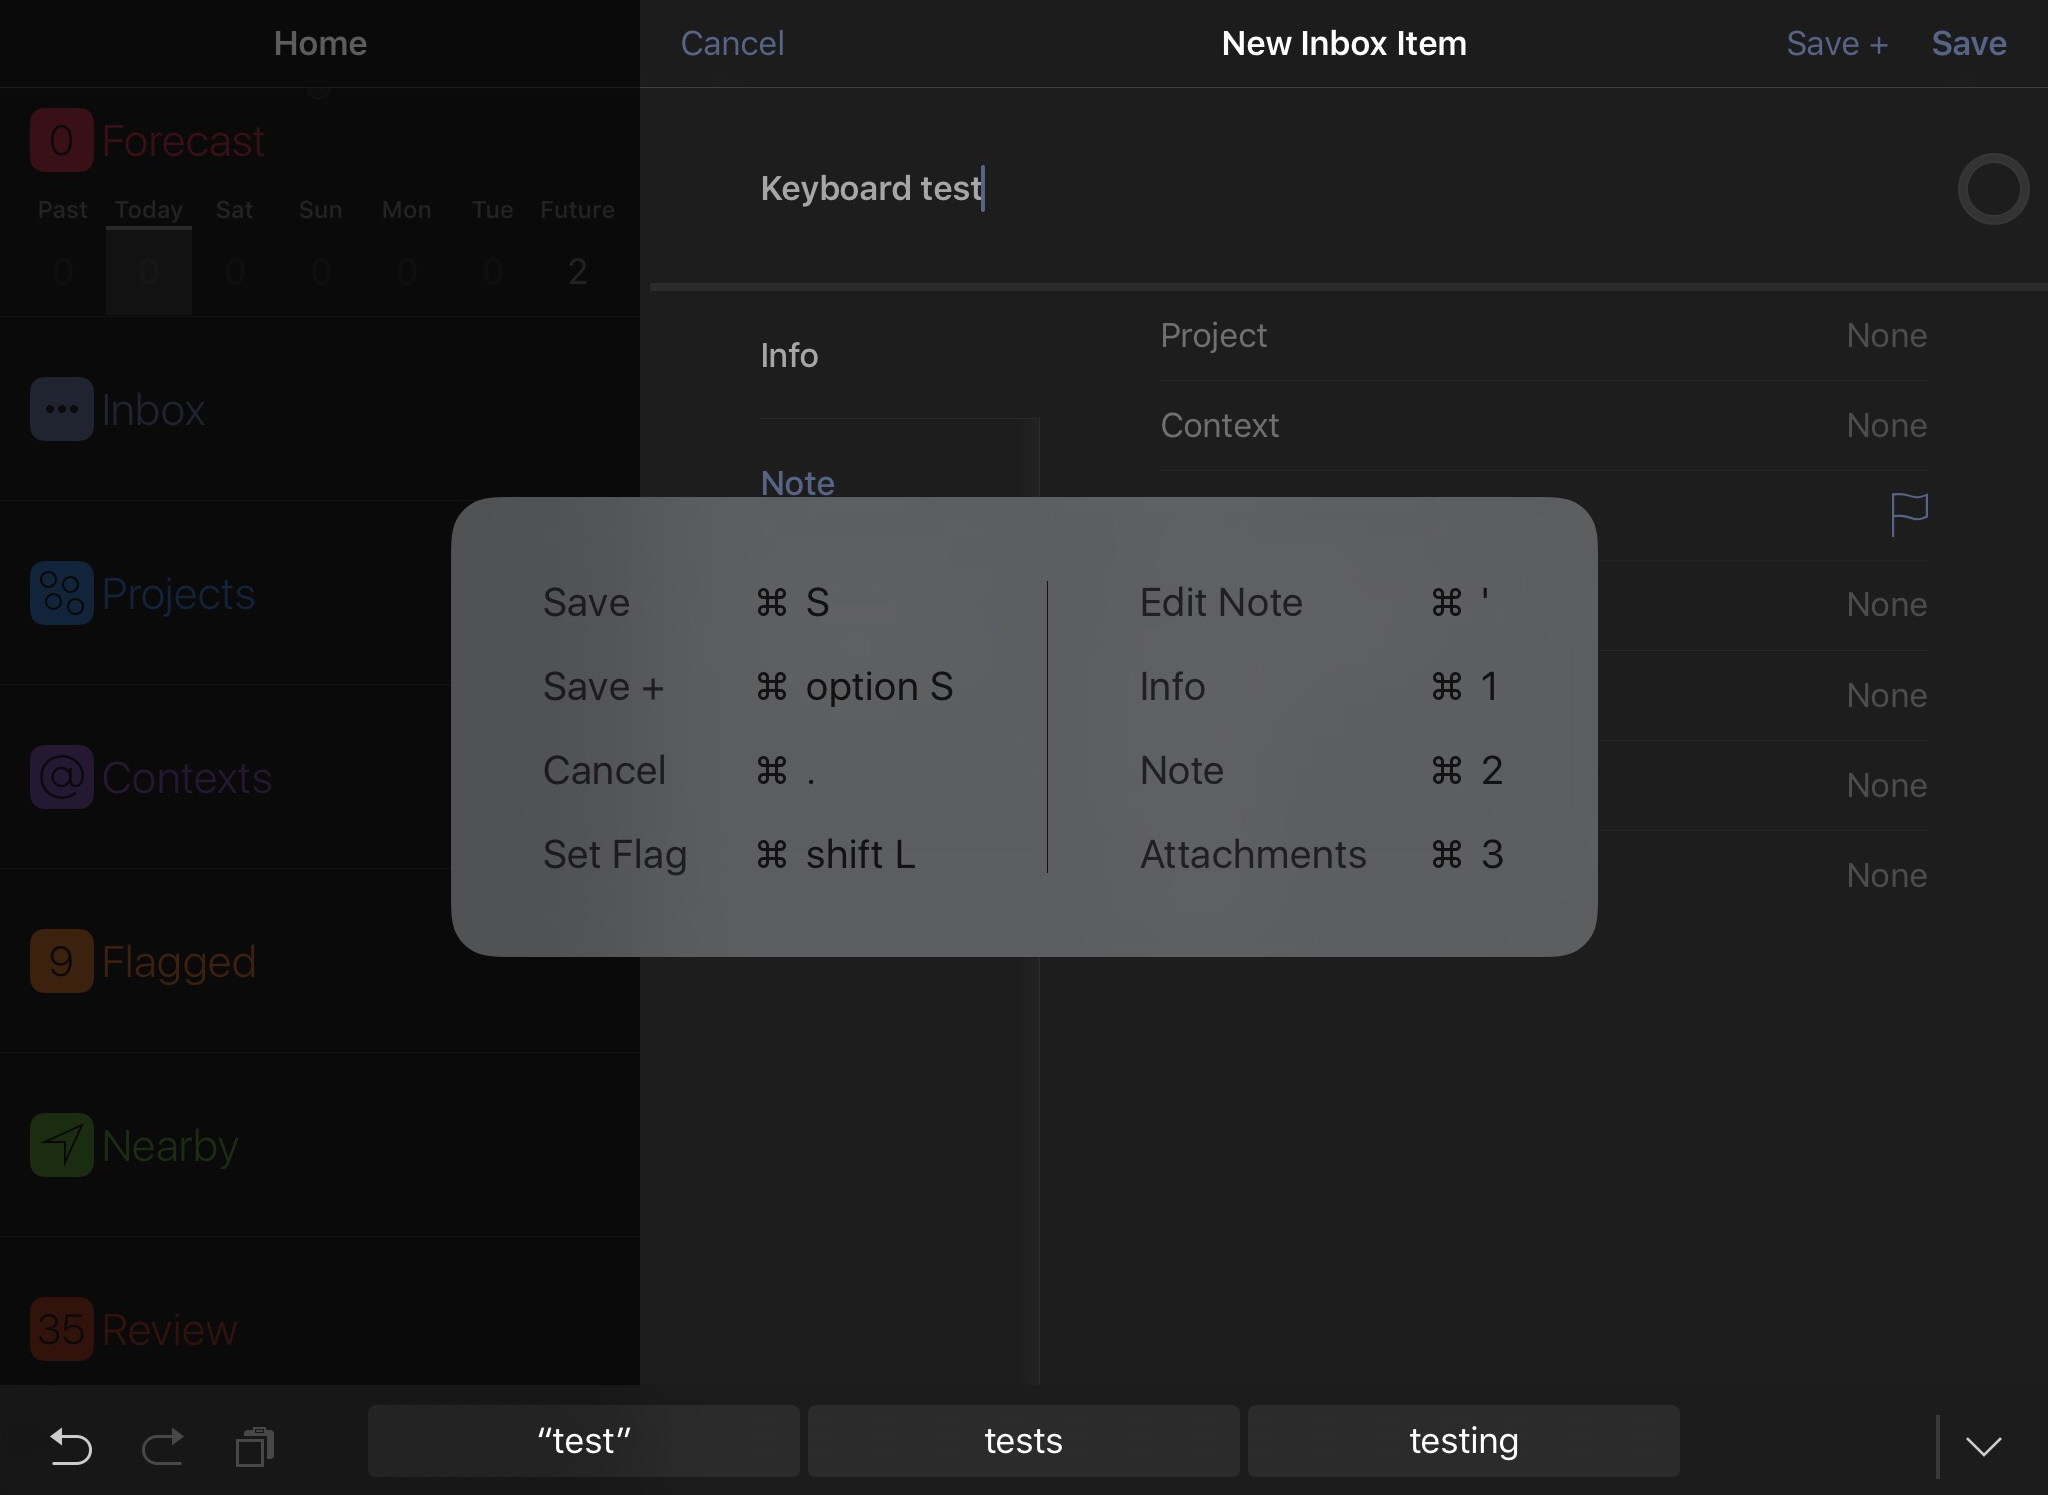
Anywhere in the app, press and hold the Command key on your connected keyboard to view a list of available shortcuts. There are some common shortcuts that work no matter where you are; others are specific to your current view.
Note
At this time, keyboard shortcuts are available in OmniFocus for iOS on iPad only.
Universal Shortcuts
The following shortcuts are available from anywhere in OmniFocus.
- Undo (Command-Z)
- Revert the most recent action taken.
- Redo (Shift-Command-Z)
- Reinstate an action that was just reverted. Note that redo works best immediately after undoing something; if you switch views or take additional actions redo may not be available.
- Cut (Command-X)
- Remove the selected text or item(s) and copy them for pasting elsewhere.
- Copy (Command-C)
- Copy the selected text or item(s) for pasting elsewhere.
- Paste (Command-V)
- Insert copied text or item(s) at the selected location.
Shortcuts in Item Editors
The following shortcuts are available when editing an inbox item, action, or project.
- Edit Note (Command-')
- Switch to the Note tab (if it's not currently selected) and start editing the note text.
- Set/Remove Flag (Shift-Command-L)
- Add or remove the flagged designation from the currently edited item.
- Info (Command-1)
- Switch to the Info tab of the editor.
- Note (Command-2)
- Switch to the Note tab of the editor.
- Attachments (Command-3)
- Switch to the Attachments tab of the editor.
- Save (Command-S)
- Save changes to the item and close the editor, returning to the current perspective view.
- Save + (Option-Command-S)
- Save changes to the item and create a new item, remaining in the editor for the new item.
- Cancel (Command-.)
- Cancel changes to the item and close the editor, returning to the current perspective view.
- Delete (Command-delete)
- Delete the item currently being edited from your OmniFocus database.
- Previous Item (Command-↑)
- Save changes and navigate to the previous item in the current project, folder, or perspective.
- Next Item (Command-↓)
- Save changes and navigate to the next item in the current project, folder, or perspective.
Perspectives Shortcuts
The shortcuts in this section are available in various individual perspectives.
Projects Shortcuts
The following shortcuts are exclusive to the Projects perspective.
- New Project (Shift-Command-N)
- Create a new project at the top level of hierarchy in the Projects perspective.
- New Folder (Option-Shift-Command-N)
- Create a new folder at the top level of hierarchy in the Projects perspective.
Contexts Shortcuts
The following shortcut is exclusive to the Contexts perspective.
- New Context (Control-Command-N)
- Create a new context at the top level of hierarchy in the Contexts perspective.
Review Shortcuts
The following shortcut is exclusive to the Review perspective.
- Mark Reviewed (Shift-Command-R)
- Mark the currently selected project as reviewed.
Navigation Shortcuts
The following shortcuts can be used anywhere outside of the item editor.
- Settings (Command-,)
- Open the OmniFocus for iOS Settings screen.
- New Inbox Item (Control-Option-space)
- Create a new item to add to your OmniFocus inbox, and open the editor to set its details.
- New Action (Command-N)
- Create a new action in the current location (inside a currently selected project, for example). Depending on where you are, this may create a new inbox item instead.
- Sync (Command-S)
- Prompt a database sync with the Omni Sync Server or another custom sync destination (as determined in OmniFocus Settings).
- Search (Command-F)
- Reveal the search dialog for the currently selected perspective (or the entire database, if chosen from the home screen).
- Favorite Perspectives (Command-1 through Command-0)
- Your favorite perspectives are automatically assigned keyboard shortcuts based on the order you choose to display them on the home screen, from Command-1 through Command-0 (if you have more than ten favorites, those beyond the tenth will not have keyboard shortcuts assigned).
- Home (Shift-Command-H)
- Return to the OmniFocus for iOS home screen.
- OmniFocus Help (Command-?)
- View the OmniFocus for iOS in-app help landing page, with links to support resources such as this user manual.
Getting Help
When you're in need of help—whether you're puzzled by perspectives, having trouble syncing, or experiencing another issue with OmniFocus—it's good to know that the Support Humans at The Omni Group are available to lend you a hand.
The OmniFocus Website
The OmniFocus website is always a good place to find the latest information about OmniFocus, complete with an ever-growing support section.
The Official Forums
The Omni Group maintains online forums for all of our products, and you're invited! Come share your questions and ideas with other users and Omni staff. This is a great place for exchanging ideas with other like-minded folk, but it isn't an official tech support channel; for help from our helpful Support Humans, see below.
Email Support
If you're stuck, if you have a good idea for the next version of OmniFocus, or if you just want to let us know how we're doing, go ahead and send us an email. Choose Send Feedback from Settings (reached from the secret bar above the sidebar or home screen) to conjure up a message addressed to us. We take support pretty seriously, so you can expect a prompt response actually typed by human hands.
Release Notes
For detailed information about what has changed in each minor version of OmniFocus, check out the release notes in Settings.
Troubleshooting
Here are a few tips you can try with OmniFocus's own built in self-help features:
Finding Misplaced Items
Try using the Completed and Changed perspectives to track down errant actions. You can find them by toggling to view All Perspectives in the secret bar (drag down in the sidebar or home screen to reveal it).
Search for text in the missing items using the Here, Remaining, and Everything filters to narrow your results.
Improving Performance
Sync all the things regularly! This reduces sync wait times and generally improves speed and performance across the board.
Delete unneeded attachments to lessen the sync load and disc space footprint of your database. If you have OmniFocus for Mac, we recommend curating your attachments using the Attachment List to help easily spot the ones you don't need.
Resolving Sync Conflicts
If you're sure what you have locally is what you want, you can Replace the Server Database when prompted (usually when you're switching server locations or you've spent a long time offline) to get everything back in sync.
This can't be reversed, so you'll want to choose carefully: if you are sure the data on your iOS device is more recent, choose to keep your device data. If you are sure the data on the server is more recent (such as that synced from a Mac or another iOS device), choose to keep the server data. If you are unsure about the best choice, please contact us before choosing!
Again, if you're unsure (about this, or anything else OmniFocus-related), please contact Omni support! We're here to help—it's what we do.

