Basic Concepts
When you first open OmniGraffle, there's a lot to absorb, but you can boil down the interface into four main areas: the Canvas, Tools, Sidebar, and the Inspectors.
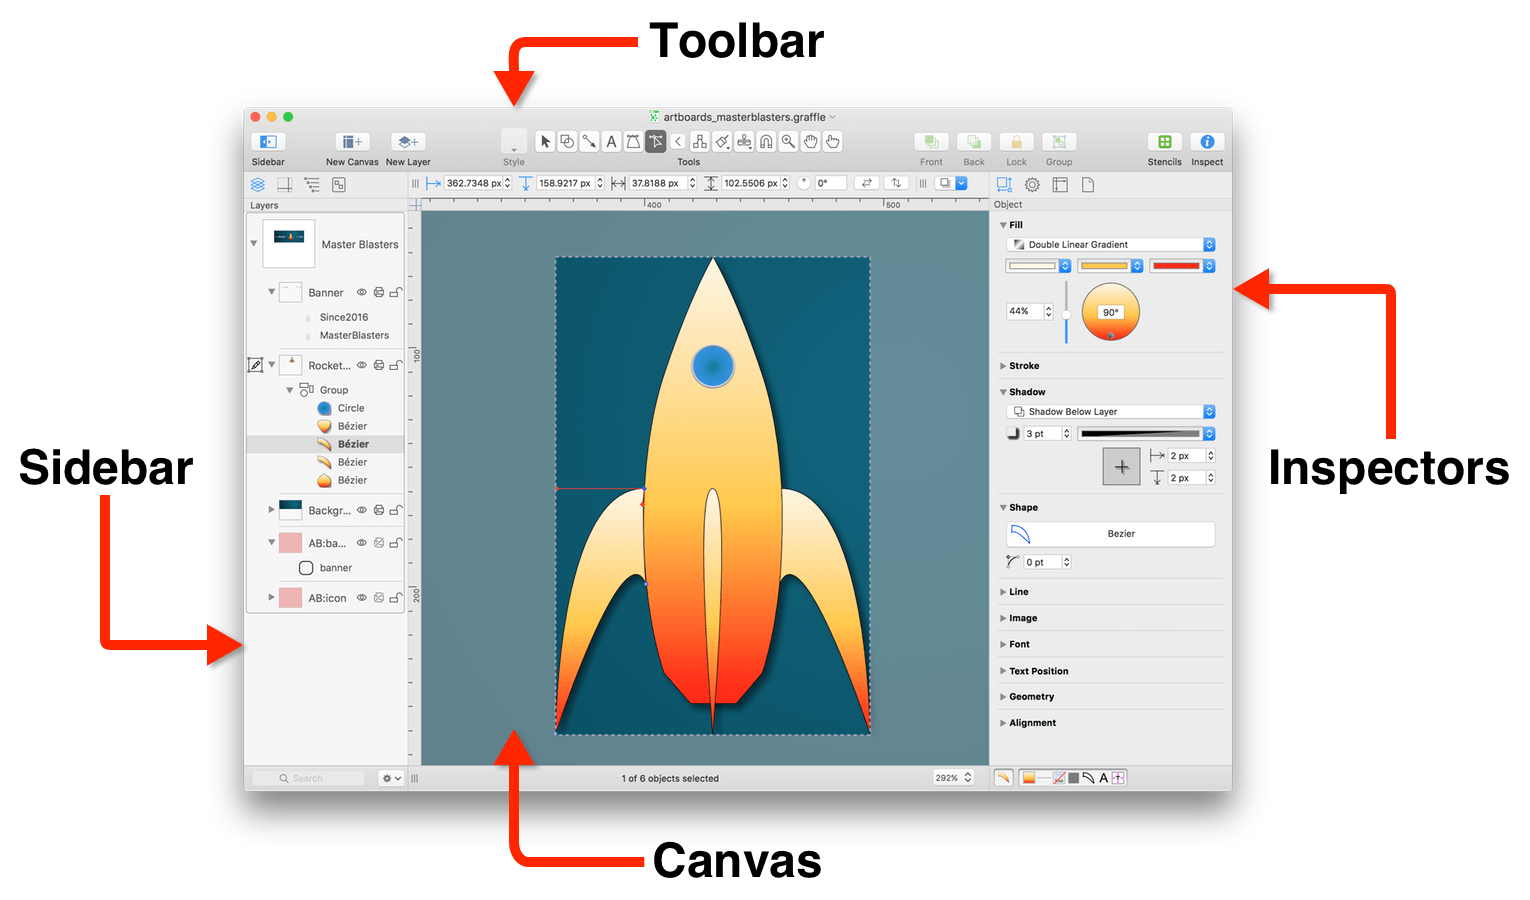
- The canvas is where you draw things
- The tools are what you use to create the things you draw
- The sidebar is where you organize the canvases, layers, and objects within your project
- And the inspectors are what you use to style the things you draw, and for setting up your project
Pretty simple, right?
Yes, there's a lot more to it than that, and that's what this chapter is for; to provide you with a gentle introduction to some of OmniGraffle's key components and concepts so you can quickly get to work.
OmniGraffle Glossary
Every piece of software you use has a core set of terminology, and like those apps, OmniGraffle has a common nomenclature. To better help you understand the terms and terminology used when describing the interface or how to work in OmniGraffle, we're providing this brief lingua franca.
- Artboard
- An artboard is a special type of layer whose objects define an export area, or act as a container, for objects on standard or shared layers higher up in the layer stack.
- Canvas
- The canvas is the big white area in the center of OmniGraffle's interface where you draw and create things. An OmniGraffle project always contains at least one canvas and one layer.
- Document/Project
- When you create a new file in OmniGraffle, the basic type of file you can create is a document. However, documents tend to be associated with wordy things, not designy things, so throughout the documentation, you'll see us reference these as OmniGraffle Projects.
- Group
- A group consists of two or more objects that are bound to each other. An object group, when selected, can be styled and moved on the canvas as a single unit; the styles you apply using the Object inspectors are assigned to each object in the group.
- Guides
- There are two types of guides that you'll see in OmniGraffle:
-
- Ruler Guides, which are pink by default, are guides that you drag out from one of the rulers and position on the canvas.
-
- Smart Guides, which are light blue by default, appear when you are aligning objects on the canvas.
-
You can change the default colors of Ruler and Smart Guides by choosing OmniGraffle ▸ Preferences ▸ Appearance.
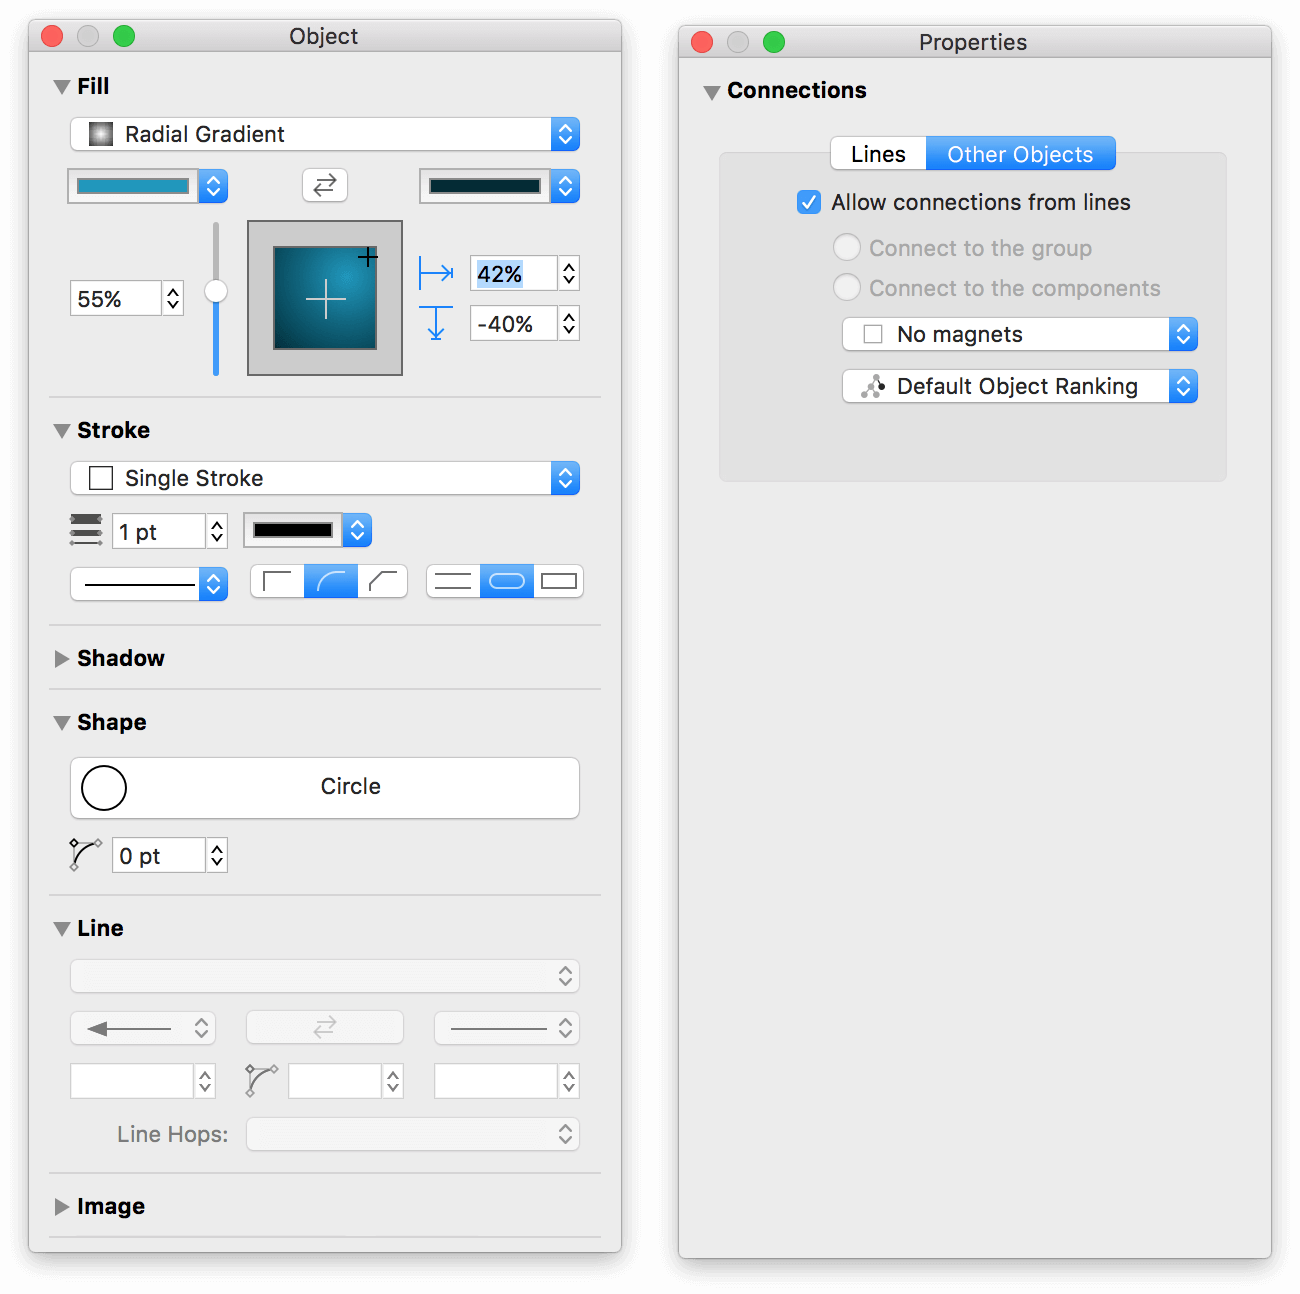
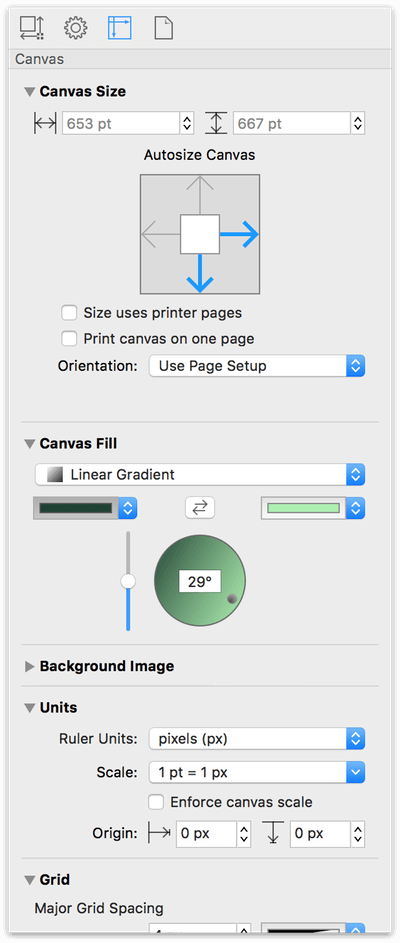
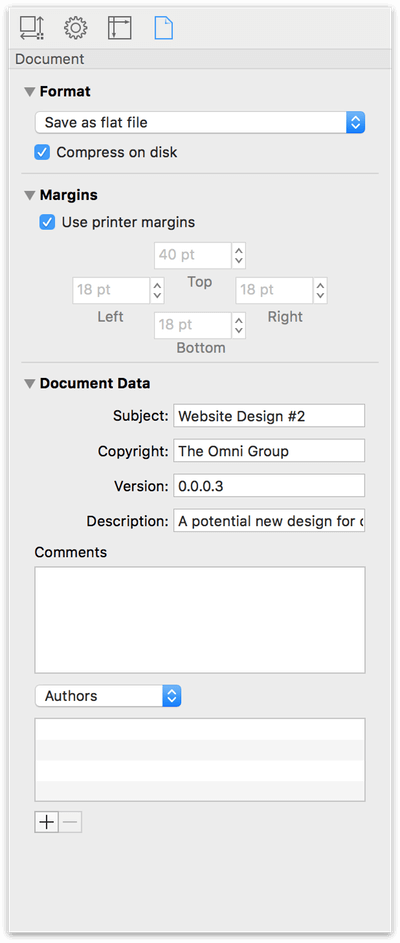
- Inspector
- You use an inspector to define the styles and properties of an object, define the canvas area and units of measurement, and set document properties for saving and printing your OmniGraffle projects. The individual inspectors are contained in four separate tabs of the Inspector Bar, located to the right of the canvas.
- Inspector Bar
- The Inspector bar is located to the right of the canvas. Similar to the Sidebar, the Inspector has four tabs which contain specific categories of inspectors:
-
- Use the Object inspectors to style, size, and arrange the objects you create.
-
- Use the Properties inspectors to define how and where lines connect to other objects. If you have OmniGraffle Pro, you can also add Notes and key-value metadata for the objects you create, and assign actions to objects.
If you have two or more objects selected on the canvas, you can use any of the Object and Properties inspectors to apply style and property changes to the selected objects.
-
- Use the Canvas inspectors to define the selected canvas. If your project has multiple canvases, you can set each canvas's properties independently. The Canvas inspectors are used to set the canvas's dimensions, choose whether the canvas automatically expands when working on the canvas, set an infinite canvas, assign a background color or image fill to the canvas, and more.
-
- Use the Document inspectors to define how your OmniGraffle project file is saved, set printer margins, and add document-wide metadata for the project. Unlike the Canvas inspectors, which can be set on a canvas-by-canvas basis, the settings you choose in the Document inspectors apply to the everything in your project.
- Keyboard Shortcut
- A set of keys you press to invoke a menu command, or a single character or number key that you press to select one of OmniGraffle's tools. You can change OmniGraffle's default keyboard shortcuts by choosing OmniGraffle ▸ Keyboard Shortcuts from the menu bar.
- Layer
- A layer contains the objects that you draw. There are three different types of layers in OmniGraffle:
-
- Standard Layer — this is the basic layer type, available in both OmniGraffle Standard and Pro.
-
- Shared Layer — shared layers are used to share objects with all of the canvases in your project. Shared layers are only available in OmniGraffle Pro.
-
- Artboard Layer — artboard layers contain a new object type in OmniGraffle Pro, the artboard.
-
Canvases can contain multiple layers of any type.
- Layer Stack
- The order in which layers appear in the sidebar. When a canvas has multiple layers, those layers are stacked on top of each other. Layers can be repositioned in the stack by dragging them up or down in the sidebar.
- Object/Shape
- The things you draw on the canvas are known as objects. An object can be a shape that you draw with the Shape or Pen tools, a line that you draw with the Line tool, or a block of text or line label that you enter using the Text tool.
- If you have OmniGraffle Pro, you can also use the Artboard tool to add an artboard to your project, or to convert text and lines to shapes.
- Ruler
- Positioned to the left and above the canvas are the rulers. The rulers reflect the units of measurement set in the Units inspector, and are initially based on the template used when creating a new OmniGraffle document. You can hide and show the rulers by pressing Command-R.
- Sidebar
- The sidebar to the left of the canvas, is used for managing everything in your project. You can organize and rename the canvases, layers, objects, and groups of objects here.
- The sidebar has four tabs which you can click to switch between different things in your project:
-
- Use the Layers tab to organize and rename the canvases, layers, objects, and groups of objects in your project.
-
- Use the Guides tab to add, position, and change the colors of the guides you drag onto the canvas from the rulers.
-
- Use the Outline tab to rapidly create and label objects for a diagram or flow chart; things of a hierarchical nature.
-
- Use the Selection tab to select, style, and interact with objects based on their properties.
- Stencil
- A stencil is a reusable shape that can be dragged to the canvas from the Stencils window. Stencils can be as simple as a square or triangle, or as complex as a multilayered and meticulously designed illustration. Each object or object group in an OmniGraffle stencil file becomes an individual stencil.
- Template
- An OmniGraffle file type that contains the base settings, such as the canvas size and units of measurement, used when creating new OmniGraffle documents (File ▸ New).
- You can also apply a template's styles to an existing diagram by choosing Format ▸ Choose Diagram Style. Use the sheet that appears to select from one of OmniGraffle's templates to apply its styles to your project.
- Toolbar, Tool Palette, and Tools
- The region along the top of OmniGraffle's window is the toolbar. The toolbar contains buttons for opening and closing the Sidebar (to the left of the canvas) and the Inspector sidebar (to the right of the canvas).
- In the middle of the toolbar, you'll find the tool palette, which contains the tools you use in OmniGraffle to select, draw, connect, create, and interact with objects.
Now that you have a better understanding of OmniGraffle's lingua franca, it's time to dive in and learn more about the basics of using OmniGraffle.
Understanding the Canvas
The canvas is where you create, edit, and move objects around in your project. By default, every OmniGraffle document contains at least one canvas with one layer, and you can add as many canvases as you’d like.
Canvases give you the flexibility to separate your work into distinct areas within the same project file. Not sure if you like how an illustration you’ve been working on is coming together? Duplicate the canvas and apply a new set of styles so you can see which one you like best.
To work on a canvas, select the canvas by either clicking its name or the preview icon in the sidebar. When you do, the preview icon takes on a light blue highlight, and any objects appear on the working canvas in the middle of OmniGraffle’s window.
To delete a canvas, select the preview image in the sidebar and then use one of the following options:
- Press the Delete key;
- Choose Edit ▸ Canvases ▸ Delete Canvas;
- Control-/Right-click on the preview icon and select Delete Canvas from the contextual menu; or,
- Choose Delete Canvas from the Action menu at the bottom of the Sidebar next to the Search field.
OmniGraffle projects need at least one Canvas; you cannot delete the last one.
Configuring the Canvas
When you create a new project in OmniGraffle, one of the first things you might consider doing is taking a pass through the Canvas Inspectors (Inspectors ▸ Canvas). These inspectors are fully defined in Working With the Inspectors, but here's a brief overview:
-
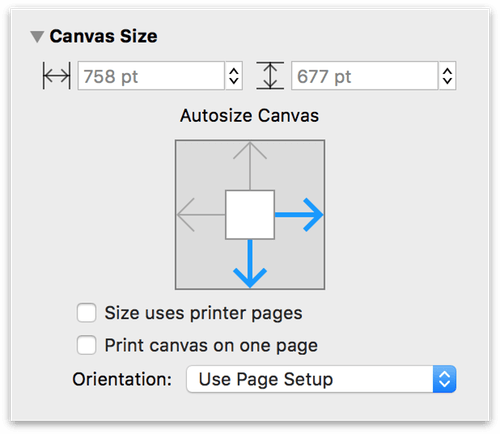
Canvas Size — Use the Canvas Size inspector to define the width and height of your canvas, convert to an Infinite Canvas, and define the printing options for this canvas.
-
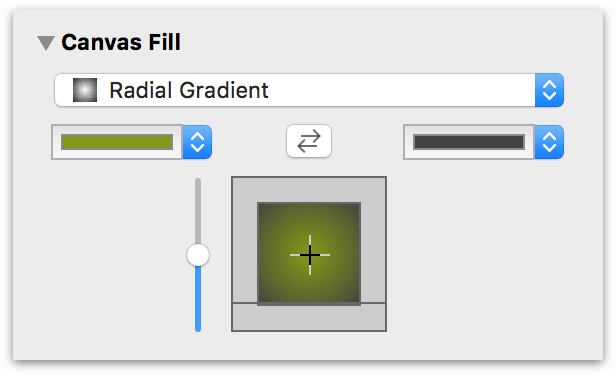
Canvas Fill — Use the Canvas Fill inspector to apply a fill color or pattern to the canvas.
-
Background Image — Use the Background Image inspector to select and use an image as the background for the canvas.
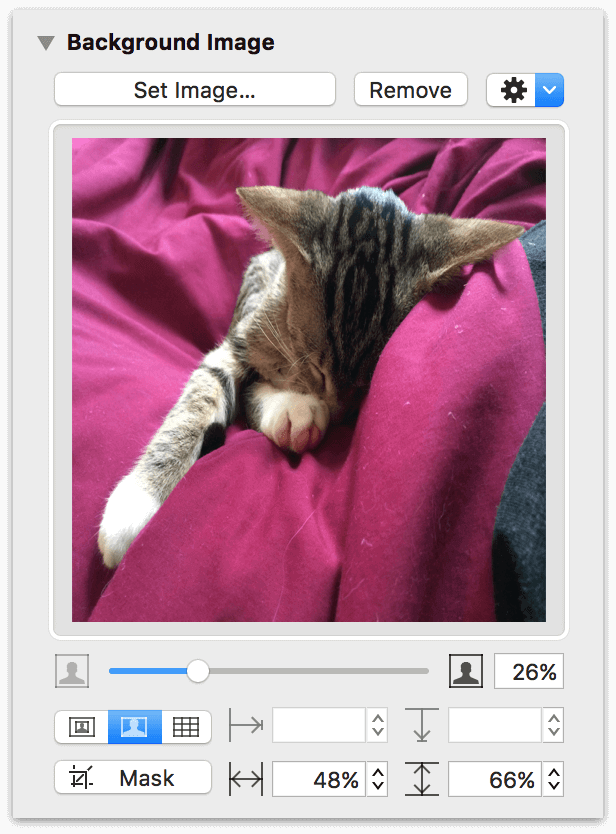
If you choose to use both a Canvas Fill and a Background Image on the canvas, note that the Background Image sits in the foreground, above the Canvas Fill.
Also, if you would like the Canvas Fill or Background Image to be included as part of any image export, be sure to uncheck Transparent background in the export panel. For more details, see Exporting Image and Graphics Files from OmniGraffle.
-
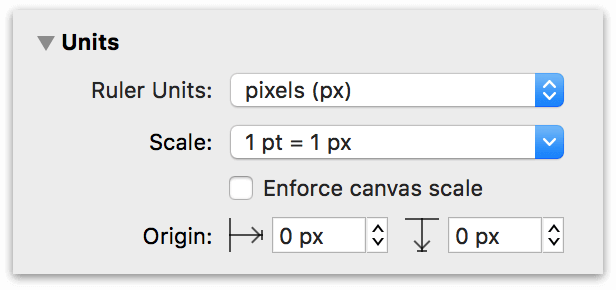
Units — Use the Units inspector to define the units of measurement and how objects scale on the canvas.
-
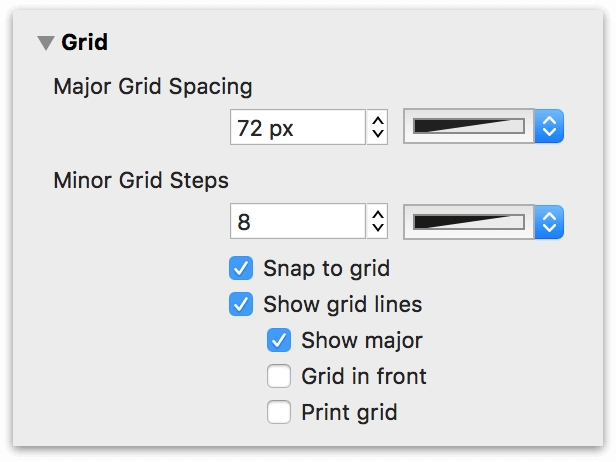
Grid — Use the Grid inspector to specify the distance between major (thicker) or minor (thinner) grid lines, their color, and whether shapes on the canvas will snap to the grid when moved into position.
-
Diagram Layout — Use the Diagram Layout inspector to turn Auto Layout on or off, and to set how connected objects flow in a diagram.
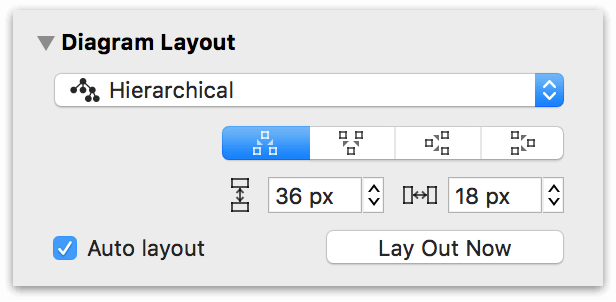
See Diagramming Basics for a quick tutorial on diagramming in OmniGraffle.
-
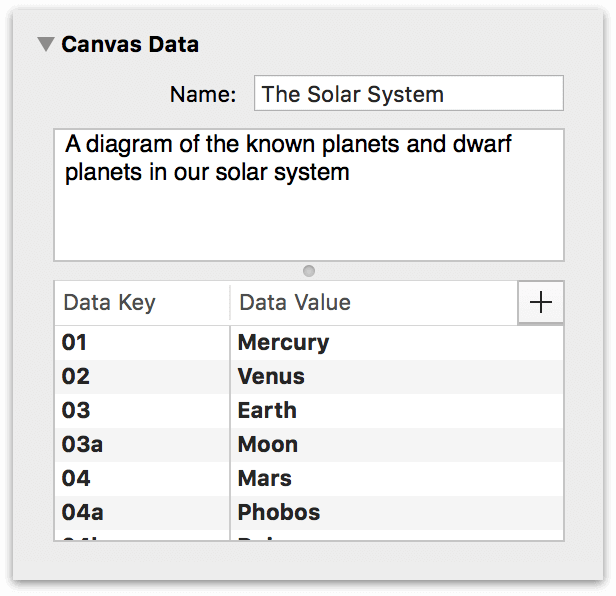
Canvas Data — Use the Canvas Data inspector to change the name of the current canvas, add a descriptive note, or to set key-value pairs of metadata to help further define your project.
Some examples of changes you might want to make to the Canvas prior to starting your work include:
- If you are creating diagrams and flowcharts, you might want to turn on Auto layout in the Diagram Layout inspector.
- If you are creating icons for use in an app you're prototyping, you might want to use the Units inspector to set the Ruler Units to pixels, and then adjust the Scale according to the assets you need to export.
- If you want pixel-perfect alignment, you could change the Major Grid Steps to 1 px; each square in the grid is now 1 px × 1 px, which is perfect for creating pixel art.
But the most interesting change you can make to the canvas comes up in the next section: Infinite Canvas!
Using the Canvas Size Inspector to Create an Infinite Canvas
Designers need space. Lots of space. And while you can get that in an OmniGraffle project by creating different canvases for your project, there just never seemed to be enough room, even when you had your canvas set to auto-size. New in OmniGraffle 7, you can now alter the canvas properties to create an Infinite Canvas—one that expands in every direction, not just to the right or down.
To create an Infinite Canvas, open the Canvas Size inspector. In the center is a widget you can use to control the directions in which the Autosize Canvas expands. If you haven't changed your default template yet, OmniGraffle uses the Blank template by default, which is set to expand in all directions.
However, to create an Infinite Canvas, you can either click the square at the center of the Autosize Canvas widget, or click on the Up and Left arrows:
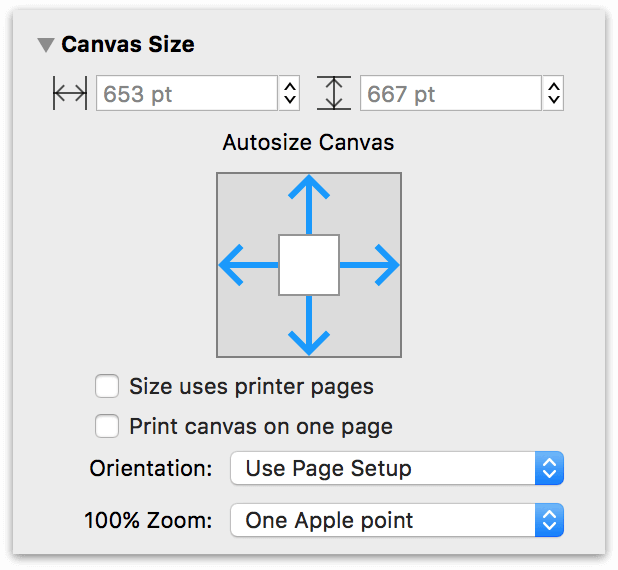
The benefit of having an Infinite Canvas is that you have more room—an infinite amount of space—to work with. You can move objects around without having to worry about running out of space.
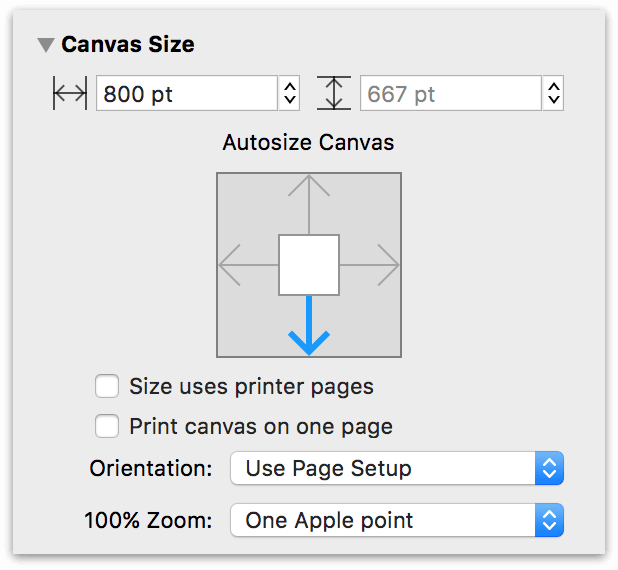
You can even set it so that the canvas expands only in one direction:
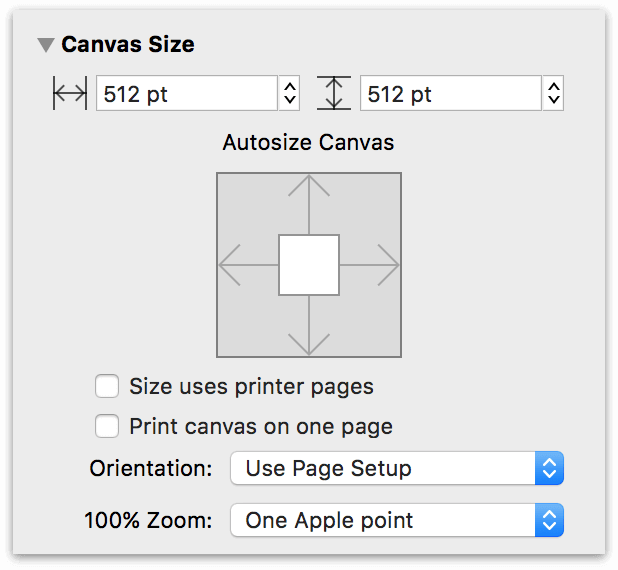
Or not at all, relying on the Canvas Width and Canvas Height settings at the top of the Canvas Size inspector:
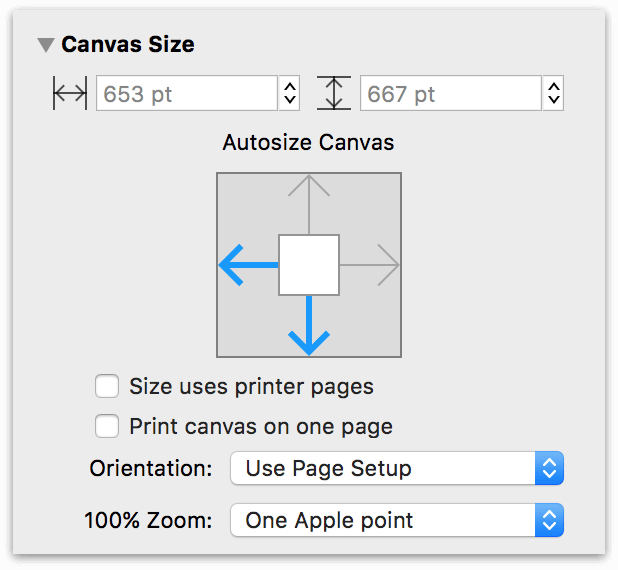
And, if you're a lefty, you could always set it so that your canvas resizes to the left rather than the right!
Rulers and Ruler Units
Bordering the Canvas—along the left and top edges—are the Rulers. You can also hide or show the rulers by choosing View ▸ Rulers (Command-R).
The point at which the rulers meet—the upper-left corner—is known as the Ruler Origin Point. This is the point from which all ruler measurements originate; its coordinates are 0,0.
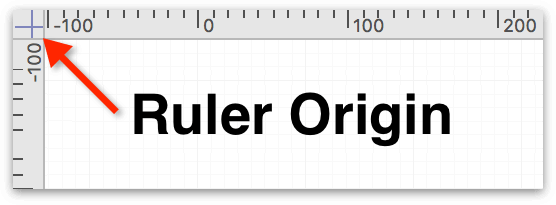
To change the origin, click and drag the origin from the corner where the rulers meet. Alternatively, you can enter Origin values in the Units inspector. To reset the origin to the 0,0 position, click on the origin point between the two rulers. Click the origin point again and the origin point changes to its previous position.
In earlier versions of OmniGraffle, the Canvas Origin—the point from which the canvas expands when autosizing—has always been designated as 0,0, the top-left corner of the canvas. But what happens to the Origin when you have an Infinite Canvas?
With an Infinite Canvas, the 0,0 Origin still exists, but if you look closely at the rulers, you’ll notice that the rulers extend into the negative space. This means that you can have an Origin of 0,-100 or -100,0, or whatever you’d like.
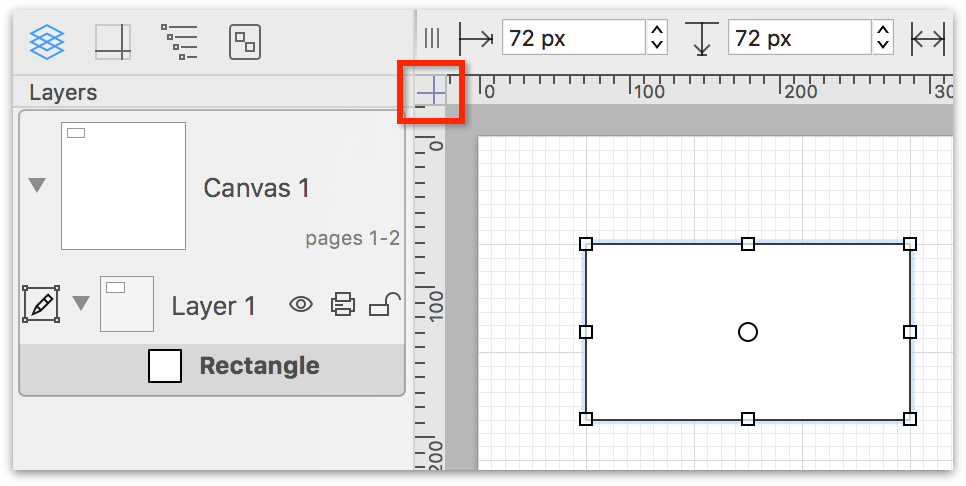
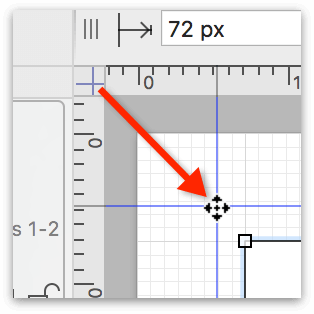
You can change the coordinates for the Origin point in the Units inspector, or you can temporarily move the Origin by clicking and dragging the Origin Guides out from the square above and to the left of the rulers:
The Origin Guides are great for helping you work in an infinite space. You can drag them out to an object and, effectively, reposition the rulers at the same time.
To reposition the Origin Guides to their previous position, just click the Origin point by the rulers again.
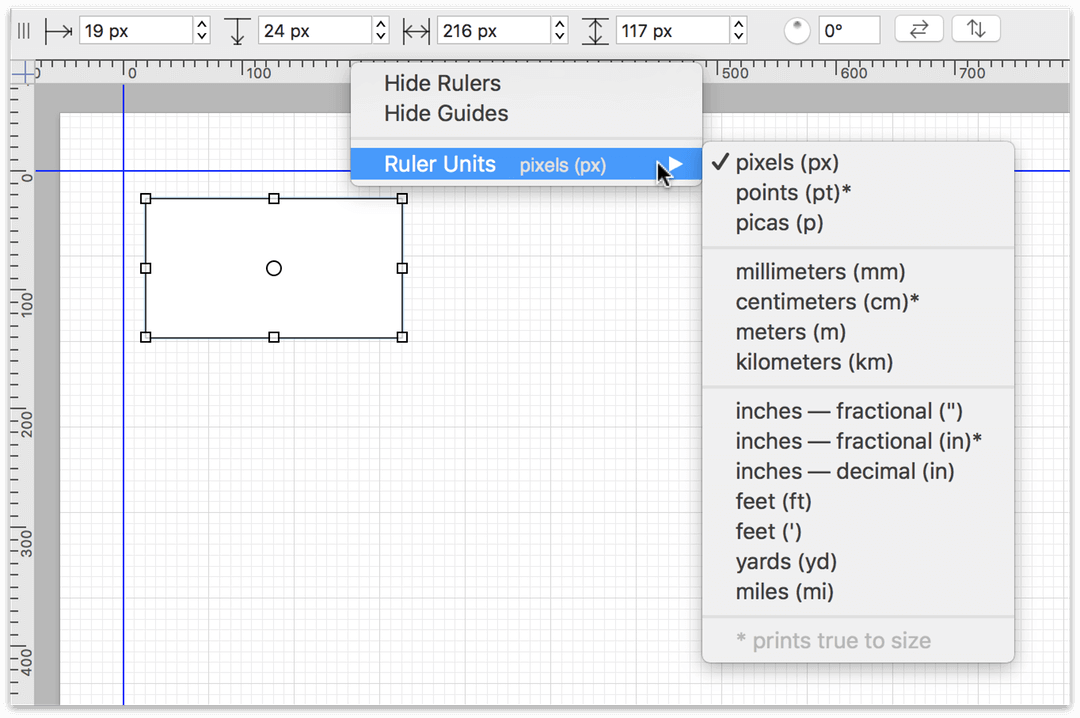
Changing Ruler Units to Suit Your Design Needs
The rulers reflect the units of measure defined in the default template, but you can also change the Ruler Units in the Units inspector (choose Inspectors ▸ Canvas).
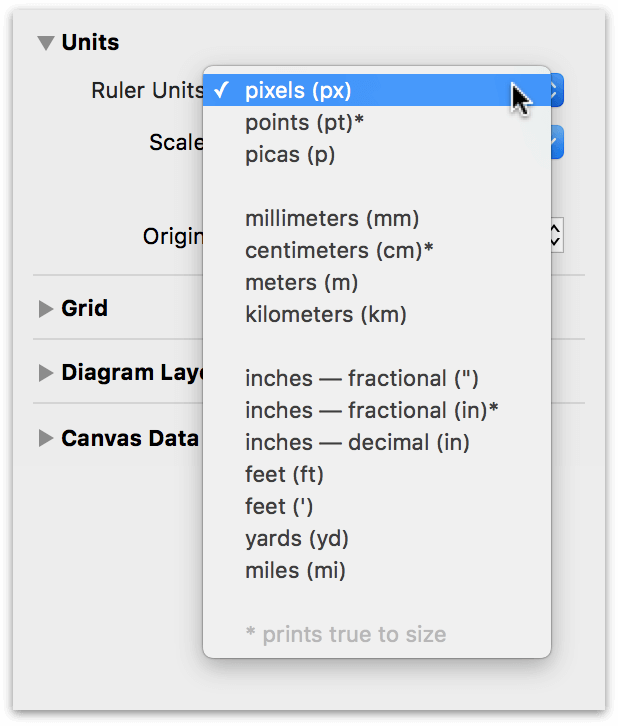
The available units of measurement include:
- Pixels (px)
- Points (pt)*
- Picas (p)
- Millimeters (mm)
- Centimeters (cm)*
- Meters (m)
- Kilometers (km)
- Inches, fractional (" or in*)
- Inches, decimal (in)
- Feet (ft or ')
- Yards (yd)
- Miles (mi)
Ruler units followed by an asterisk * in the previous list means that these measurement types will print true to size when selected.
The Units inspector also offers the option for you to set a custom Scale. For example, you could specify that 1 inch on the canvas is the equivalent to 10 feet, or for really long distances, 100 pixels could represent 93 million miles.
You can also change the ruler units by Control- or Right-clicking on the ruler or the Canvas itself. For example, Control-/Right-clicking on the Rulers provides you with options for hiding and showing the Rulers and Guides, as well as changing the Ruler Units.
While Control-/Right-clicking on the Canvas gives you quick access to other options, including the ability to add or duplicate Canvases and Layers, and for controlling the Grid and Guides.
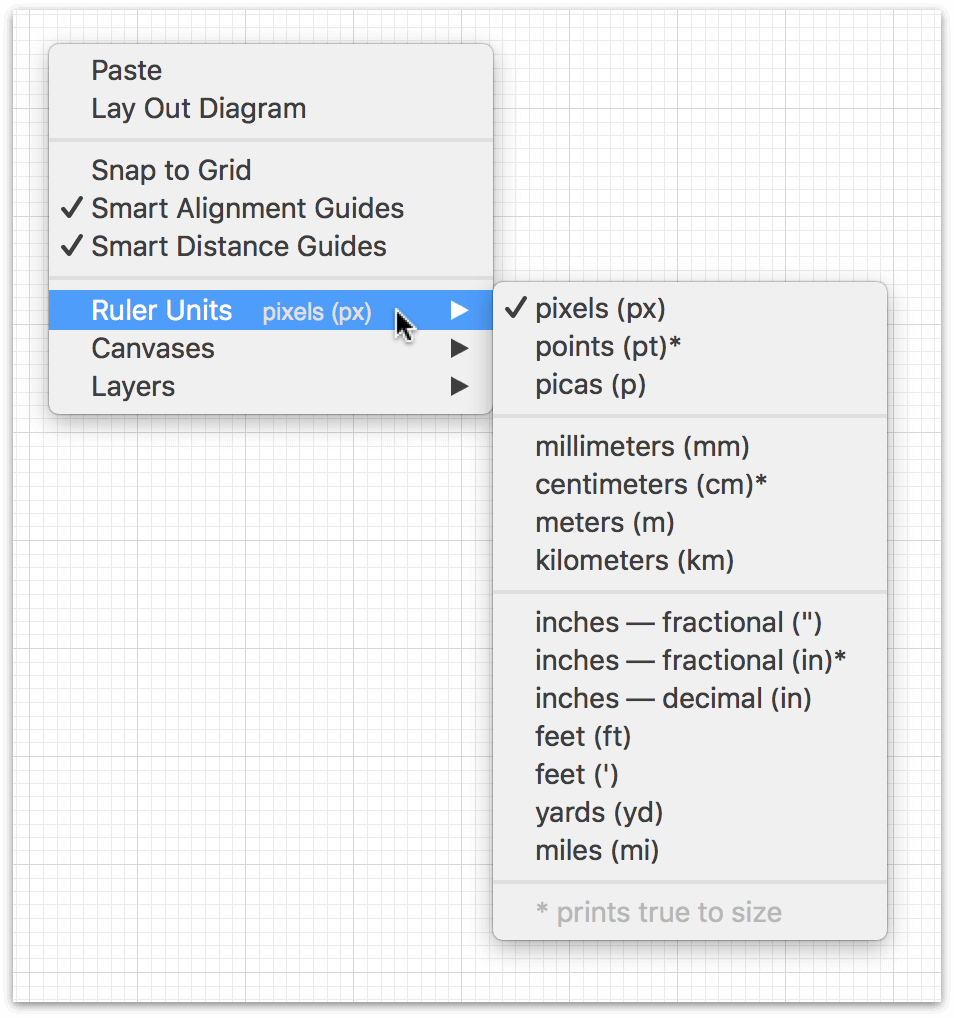
Note that in both cases, the context menu displays the current setting next to the Ruler Units menu item.
The unit type specified in the template you choose, or as set in the Units inspector, determines how other inspectors deal with units of measurement. For example, if Ruler Units are set to centimeters (cm), you will see this unit of measurement reflected in the following inspectors:
- Geometry
- Alignment
- Size
- Grid
- Diagram Layout
- Margins
The Stroke, Shadow, Shape, Line, and Font inspectors specify their units in points (pt) regardless of the Ruler Units setting.
See Working With the Inspectors later in this guide for more details about the individual inspectors.
Toolbar Basics
Along the top of OmniGraffle’s window is the Toolbar.

The toolbar has buttons for nearly every function in OmniGraffle. From buttons for opening and closing the Sidebar and the Inspector bar, to the Tool Palette at its center, everything you need to work in OmniGraffle is just one click away.
You use the tools in the Tool Palette to work on the canvas. For example, you use the Selection tool to select and move objects, the Shape or Pen tools to draw shapes, the Line tool to draw lines or to connect shapes in a diagram or flowchart together, or the new Point Editor tool to further customize the shapes you draw.
For a detailed overview of the tools in the Tool Palette, see Using the Tools, later in this guide.
Above the Tool Palette, you’ll see a document icon. Next to that is the filename, and if your OmniGraffle file has more than one Canvas, the filename is appended by a colon (:) followed by the name of the canvas you’re presently working on.
If you Command-click on the document icon, you’ll get a contextual menu that shows you where the file is stored on your Mac. This is sometimes handy for when you’re working on duplicated files and you can’t remember where you saved the last revision.
Bounding Box Basics
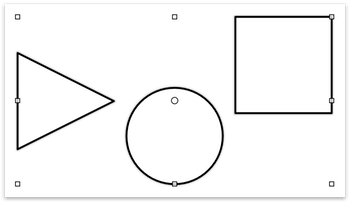
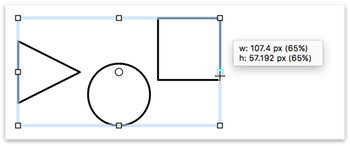
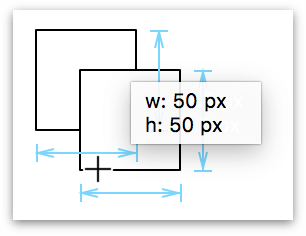
If you are new to design apps, such as OmniGraffle, you may not be familiar with what a bounding box is and how to use them. An object's bounding box appears when you select an object with the Selection tool.
Everything you add to the canvas—a shape, line, or an image—is surrounded by what's known as a bounding box. A bounding box defines an object or selection's width and height, and consists of eight selection handles which you can use to resize an object.
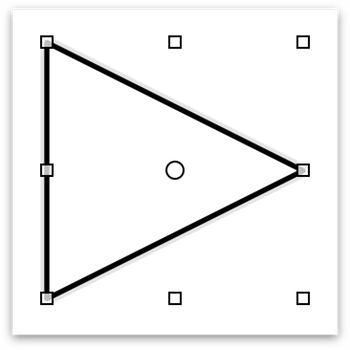
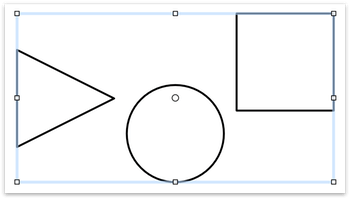
A bounding box is “drawn” around one or more selected objects:
If the selected objects are part of a group, the bounding box has a light blue highlight:
Once selected, you can click-and-drag on any one of the selection handles to resize the object:
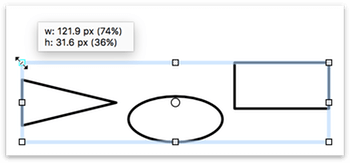
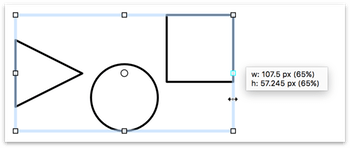
If you Shift-click-and-drag on any of the selection handles, the object (or selection or group) resizes proportionally:
Press Option-Shift and then click-and-drag on any of the selection handles to proportionally resize an object (or selection or group) based its center point:
To deselect any selected objects, press Esc on your keyboard.
The Left Sidebar
The sidebar on the left of OmniGraffle's window is where you organize your project. Each OmniGraffle project has at least one canvas with one layer, but your projects can have multiple canvases each with multiple layers, and each layer can have one or many objects. That's the beauty of OmniGraffle; your projects can be as simple or as complex as they need to be.
This section introduces you to OmniGraffle's Sidebar. You'll get to know how canvases, layers, and objects stack, how to reorder those items, and how to duplicate and share layers between canvases.
Getting to Know "The Stack"
Among design apps, layers are a ubiquitous concept. Layers hold the things you are working on and can be, well, layered upon each other to create more complex effects. This is known as the layer stack because the layers in your project stack on top of each other.
In OmniGraffle, there's also the addition of an object stack, comprised of the objects on each layer, and the canvas stack which, if you have OmniGraffle Pro, can include shared layers that appear in the other canvases of your project.
This section provides you with an overview of how layers, their objects, and canvases stack up in the Sidebar, providing you with tips for managing the pieces of your projects along the way.
Working with Just One Layer
Your projects don't need to have multiple layers—everything can exist on a single layer—but once you grasp the concept you'll discover that layers can really make a difference in your work.
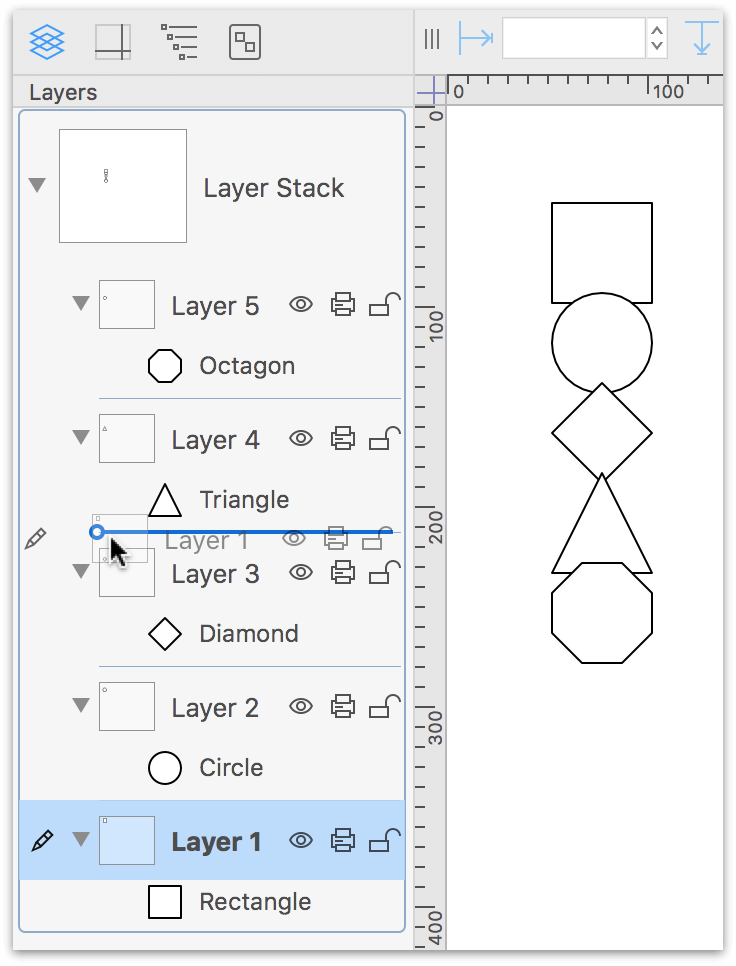
Individual layers have an object stack, made up of the objects on that particular layer. For example, if you draw a square on the canvas and then draw a second one over part of the first square, the second square is above the first square in the object stack.
When you look at the sidebar, you'll see that square 2 is above square 1 in the layer's object stack. This is because objects are stacked above each other in the order they're drawn on the canvas, regardless of their actual position on the canvas.

To get square 1 above square 2, you can do one of the following:
-
In the Sidebar, drag square 1 above square 2:
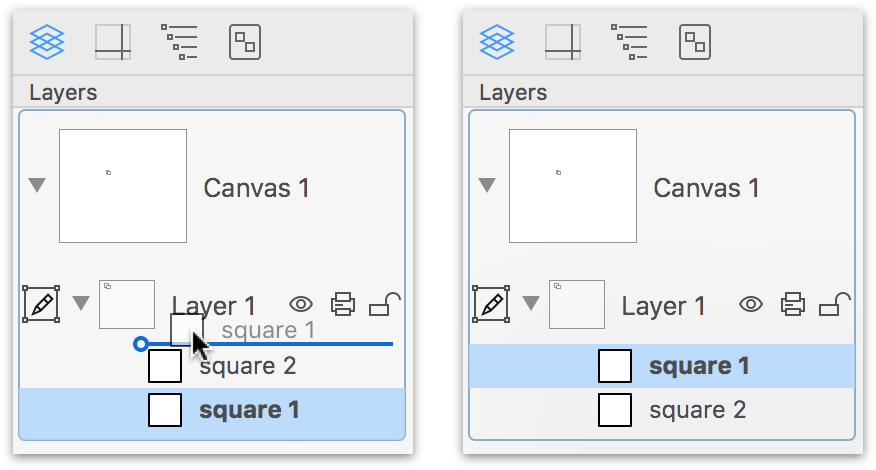
As you drag square 1 upward in the layer's object list, an insertion bar appears to help guide where you drop the object in the list.
-
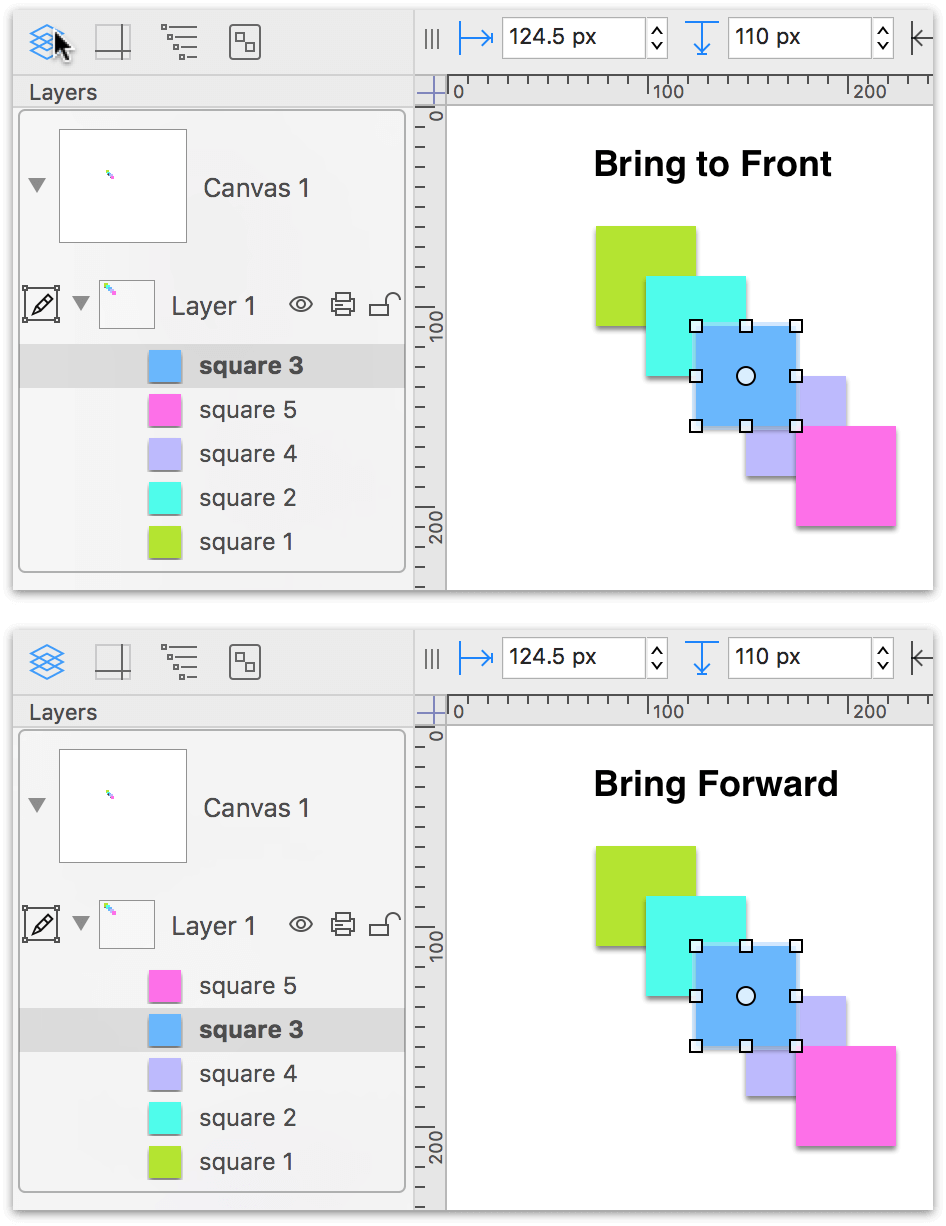
Either on the canvas or in the sidebar, select square 1 and then:
- Click Bring to Front
 in the toolbar; or,
 - Choose Arrange ▸ Bring to Front (Shift-Command-F), or Arrange ▸ Bring Forward (Option-Command-F).
- Click Bring to Front
With only two objects on the layer, there is no difference between Bring to Front and Bring Forward. However, if you have multiple objects on the layer, Bring to Front always places the selected object at the top of the object stack, while Bring Forward moves that object up one place in the stack.
The same principle applies to using Send to Back ( ) and Send Backward. Send to Back sends the selected object to the bottom of the object stack, while Send Backward moves the object one place lower in the stack.
Managing Multiple Layers
Layers provide a way for you to compartmentalize and focus on certain aspects of your design individually without splitting things out into separate projects. For example, you can turn off a layer's visibility so you can focus on something on a different layer, or lock in place a layer that's lower in the stack while you work on something higher up.
In Diagramming Basics, you will create a simple diagram, to which you will add a layer for working with the diagram's title text.
To reorganize a canvas's layers, you drag them up or down in the stack in the Sidebar. Unlike objects, there are no keyboard shortcuts or toolbar buttons for raising or lowering a layer's position in the stack.
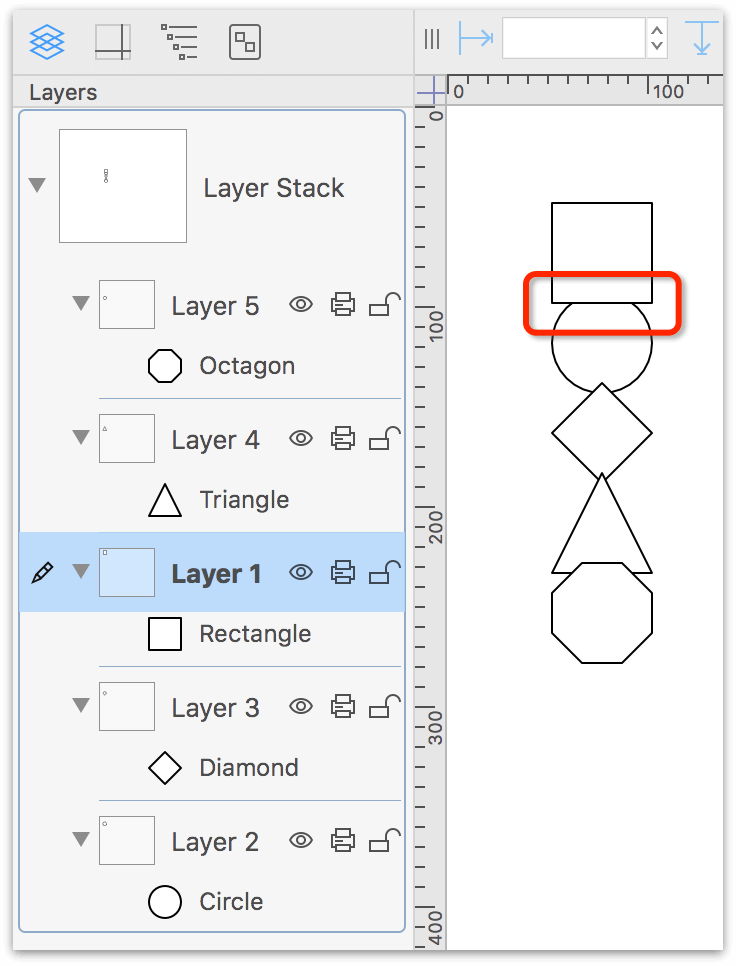
Moving Layer 1 above Layer 3 in this example simply places the square on a higher level than Layer 2, which contains the circle. The end result of raising Layer 1 in the stack is the square now overlaps the circle:
Managing Projects with Multiple Canvases
Like layers, your OmniGraffle projects can have one or many canvases. And, similar to layers, you can reorganize them in the Sidebar by dragging them up or down to a different position.
However, unlike layers, which adhere to the settings of the canvas (which you specify in the Canvas inspectors), the canvases in your project can have different properties. For example, you could have different canvases for laying out a project that needs to be printed in a range of sizes, from standard US letter size, to A4, to poster-sized.
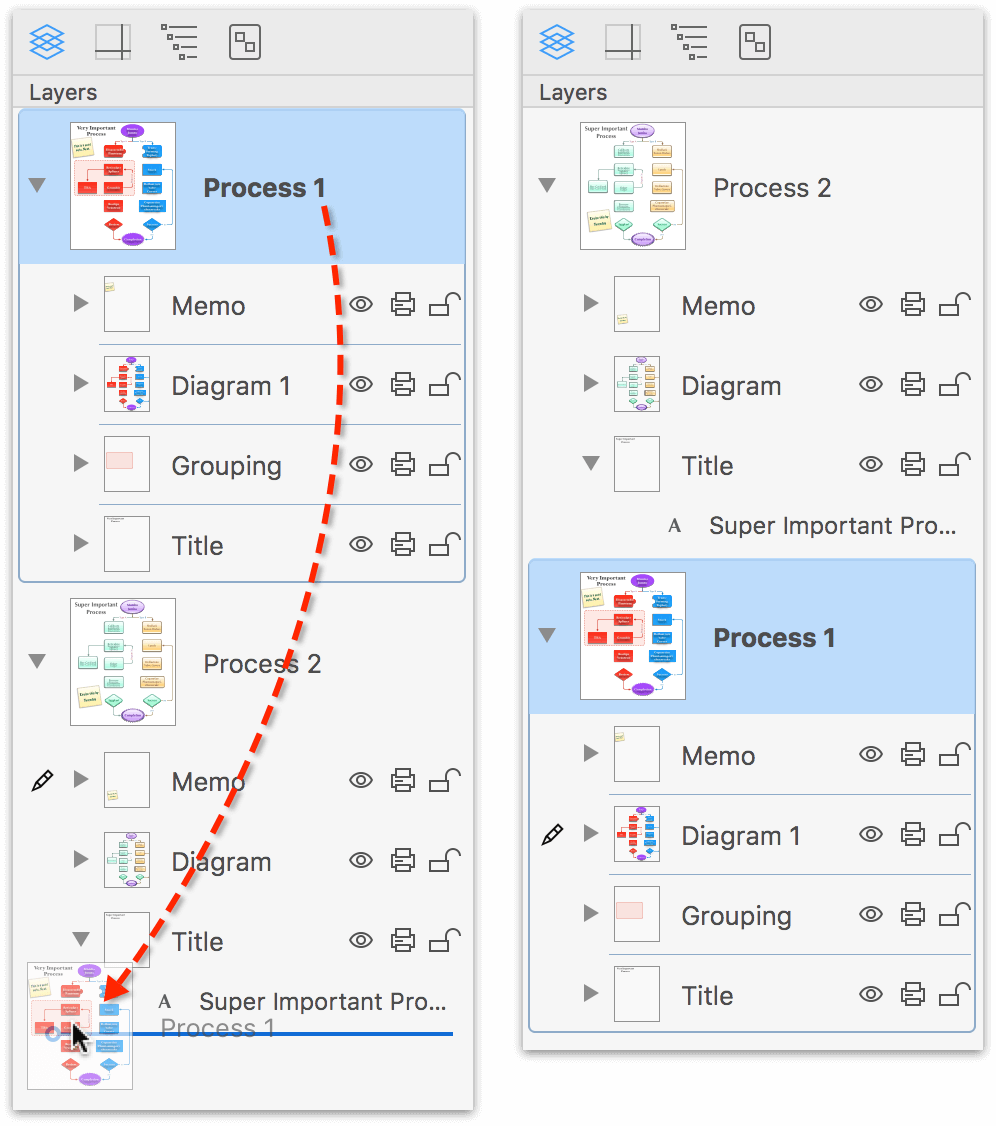
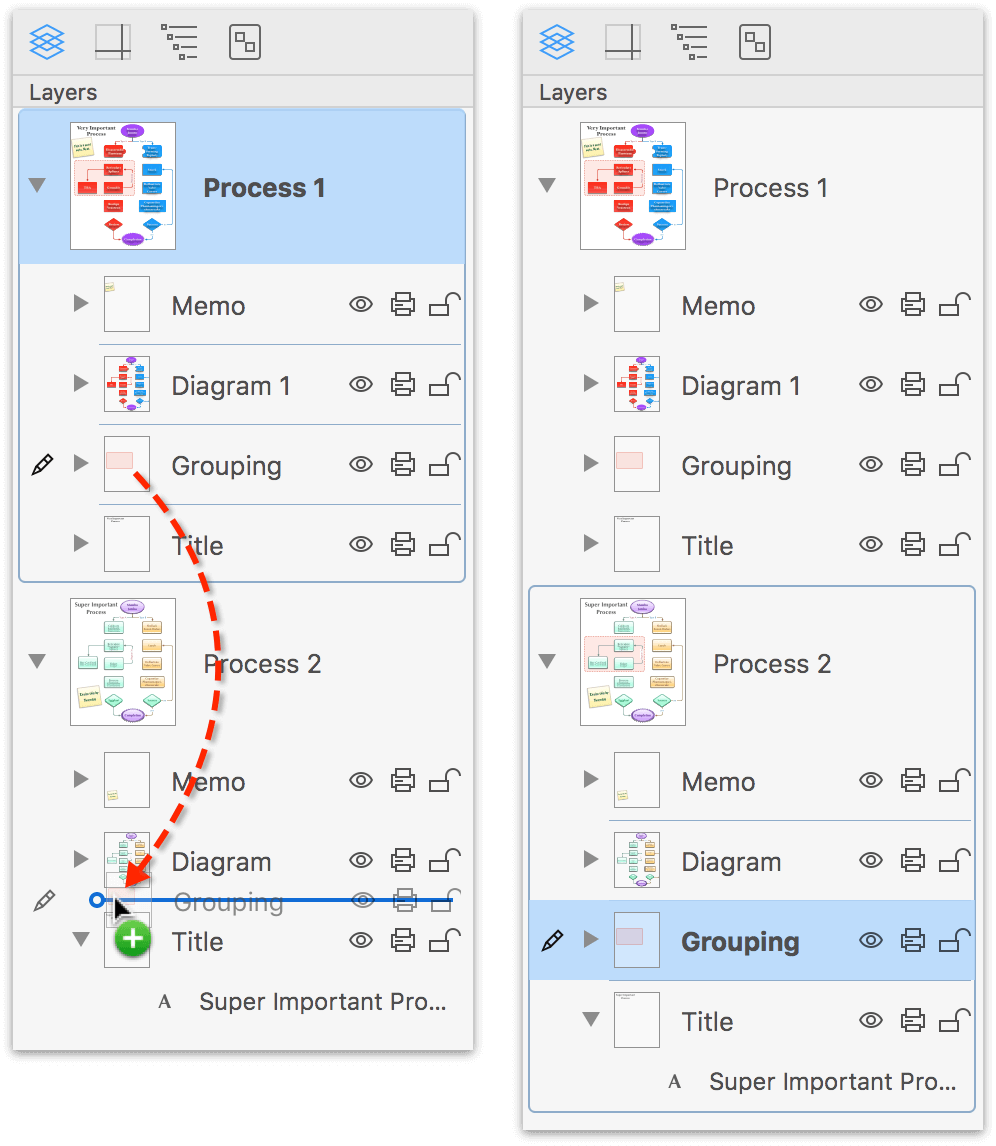
In addition to reordering canvases in the Sidebar, you can also drag layers and objects from one canvas to another. To duplicate a layer or object and add it to another canvas, hold the Option key and drag it into the canvas or layer where you'd like it.
If you have OmniGraffle Pro, you can also have Shared Layers, which appear on every canvas in your project. For more information about Shared Layers, see Sharing Layers with Multiple Canvases (PRO)
You can also use the Style Brush to copy styles applied to objects on one canvas, and apply them to objects on another canvas. Similarly, you can use the Style Tray at the bottom of the inspector sidebar to drag styles from one canvas to another. This is particularly helpful for when you've set a Canvas Fill on one canvas and want to apply that same styling to the other canvases in your project.
To learn more about the Sidebar, see Using the Tools later in this guide.
The Inspector Sidebar
Along the right side of OmniGraffle's window you'll find the Inspectors. The concept of Inspectors is fairly common among macOS apps. For example, you'll find Inspectors in Pages, Keynote, and Numbers, and a bunch of other popular Mac apps. Inspectors are used to help you style things and apply various settings to your documents and projects.
The same concept applies here with OmniGraffle. The Inspector sidebar contains four tabs which contain all of the controls you need to style objects, text, add properties to the canvas, and searchable metadata do your projects. Here's a quick rundown of what you'll find:
-
The Object and Properties inspectors let you control the appearance and properties of the objects on the canvas. First select an object on the canvas, and then, for example, use the Object inspectors to add a Fill color, or the Properties inspector to change the way objects accept line connections from other objects.
-
Use the Canvas inspectors to define the properties of the current canvas. If your OmniGraffle project has more than one canvas, you can set the canvas properties independent of each other, and if you have OmniGraffle Pro, you can use Shared Layers to share layers and objects between canvases.
-
Use the Document inspectors to choose how your OmniGraffle projects are saved, configure margins for printing, and add metadata related to the project. The information you add to the Document Data inspector is exposed to macOS's Spotlight search, so you can quickly find and open an OmniGraffle project.
There's a lot more to the Inspectors than what can be covered in this chapter. To learn more about the Inspectors, see Working With the Inspectors later in this guide.
What's Next?
After reading this chapter, follow along with the remainder of the chapters in Part I, as these go further in-depth on what you have learned here: