Using the Document Browser
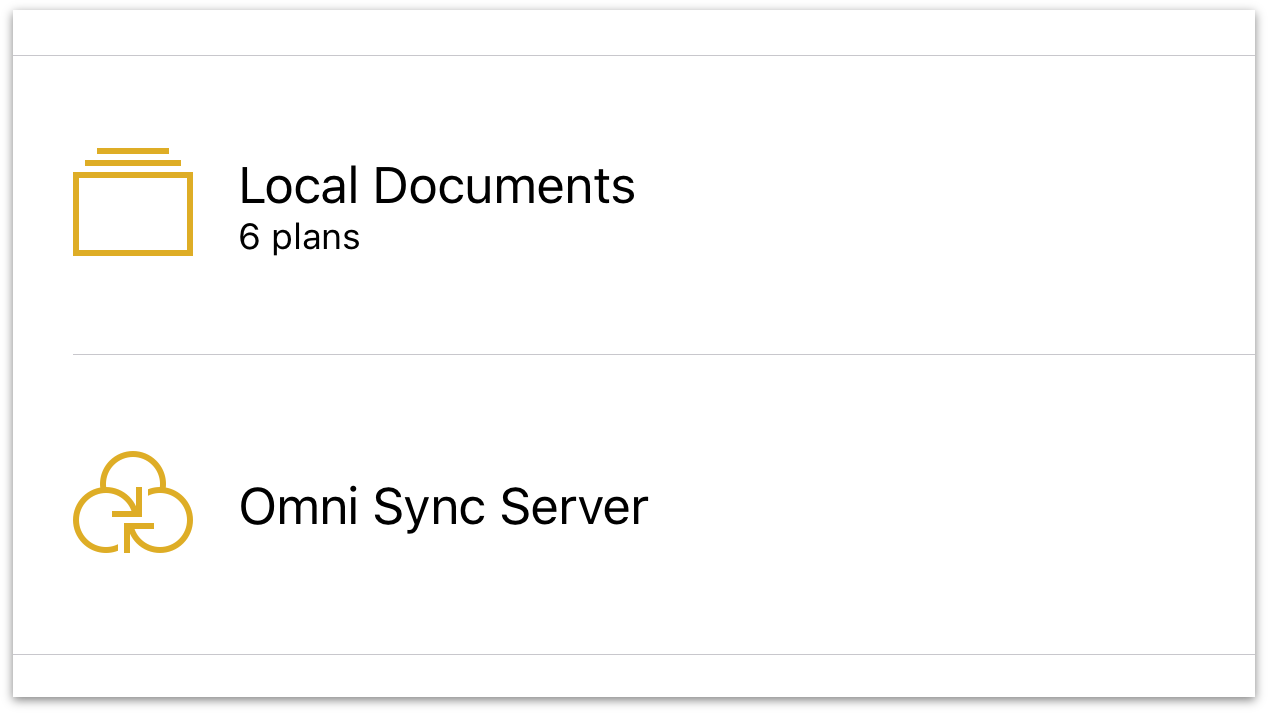
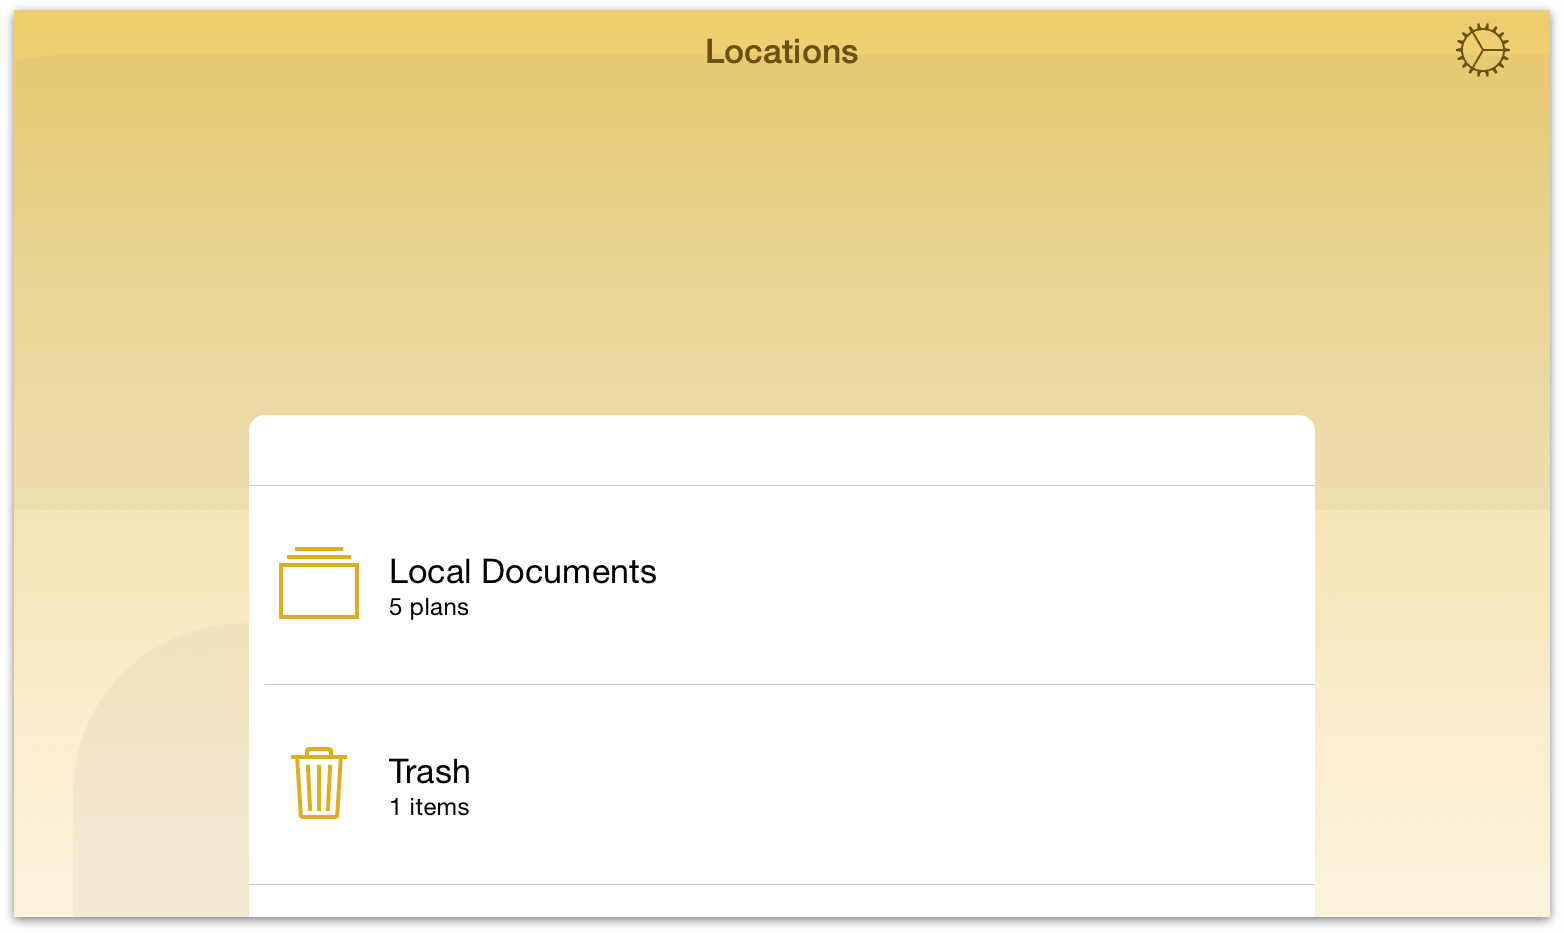
When you first open OmniPlan, you’re taken to the Locations screen which is the place you go to access all of your documents. There is a Local Documents folder, which we’ve preloaded with some sample OmniPlan files that you can use as inspiration for the projects you create.
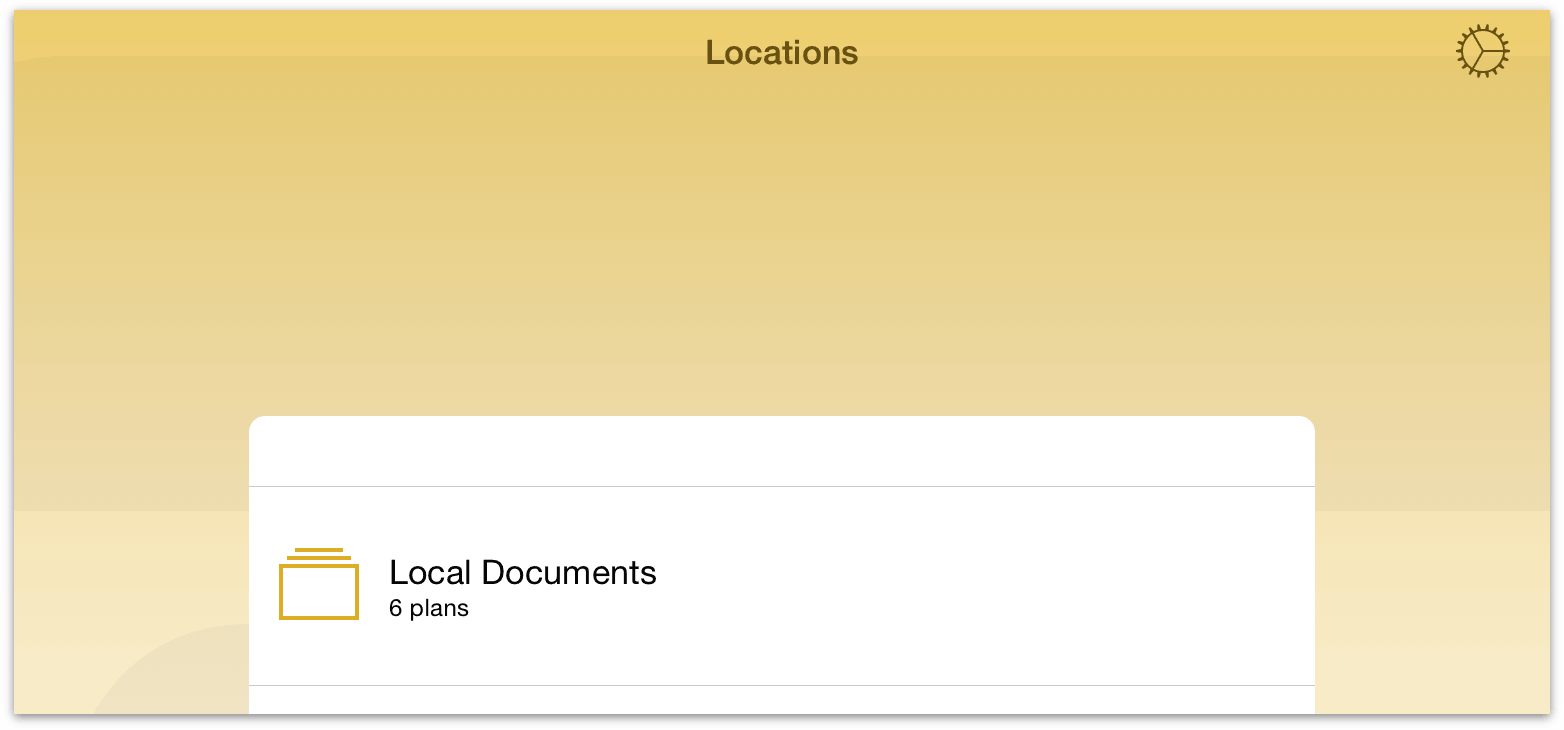
Tap the Local Documents folder to see what’s inside. This opens the Document Browser, which is the place to view, create, and manage your projects.
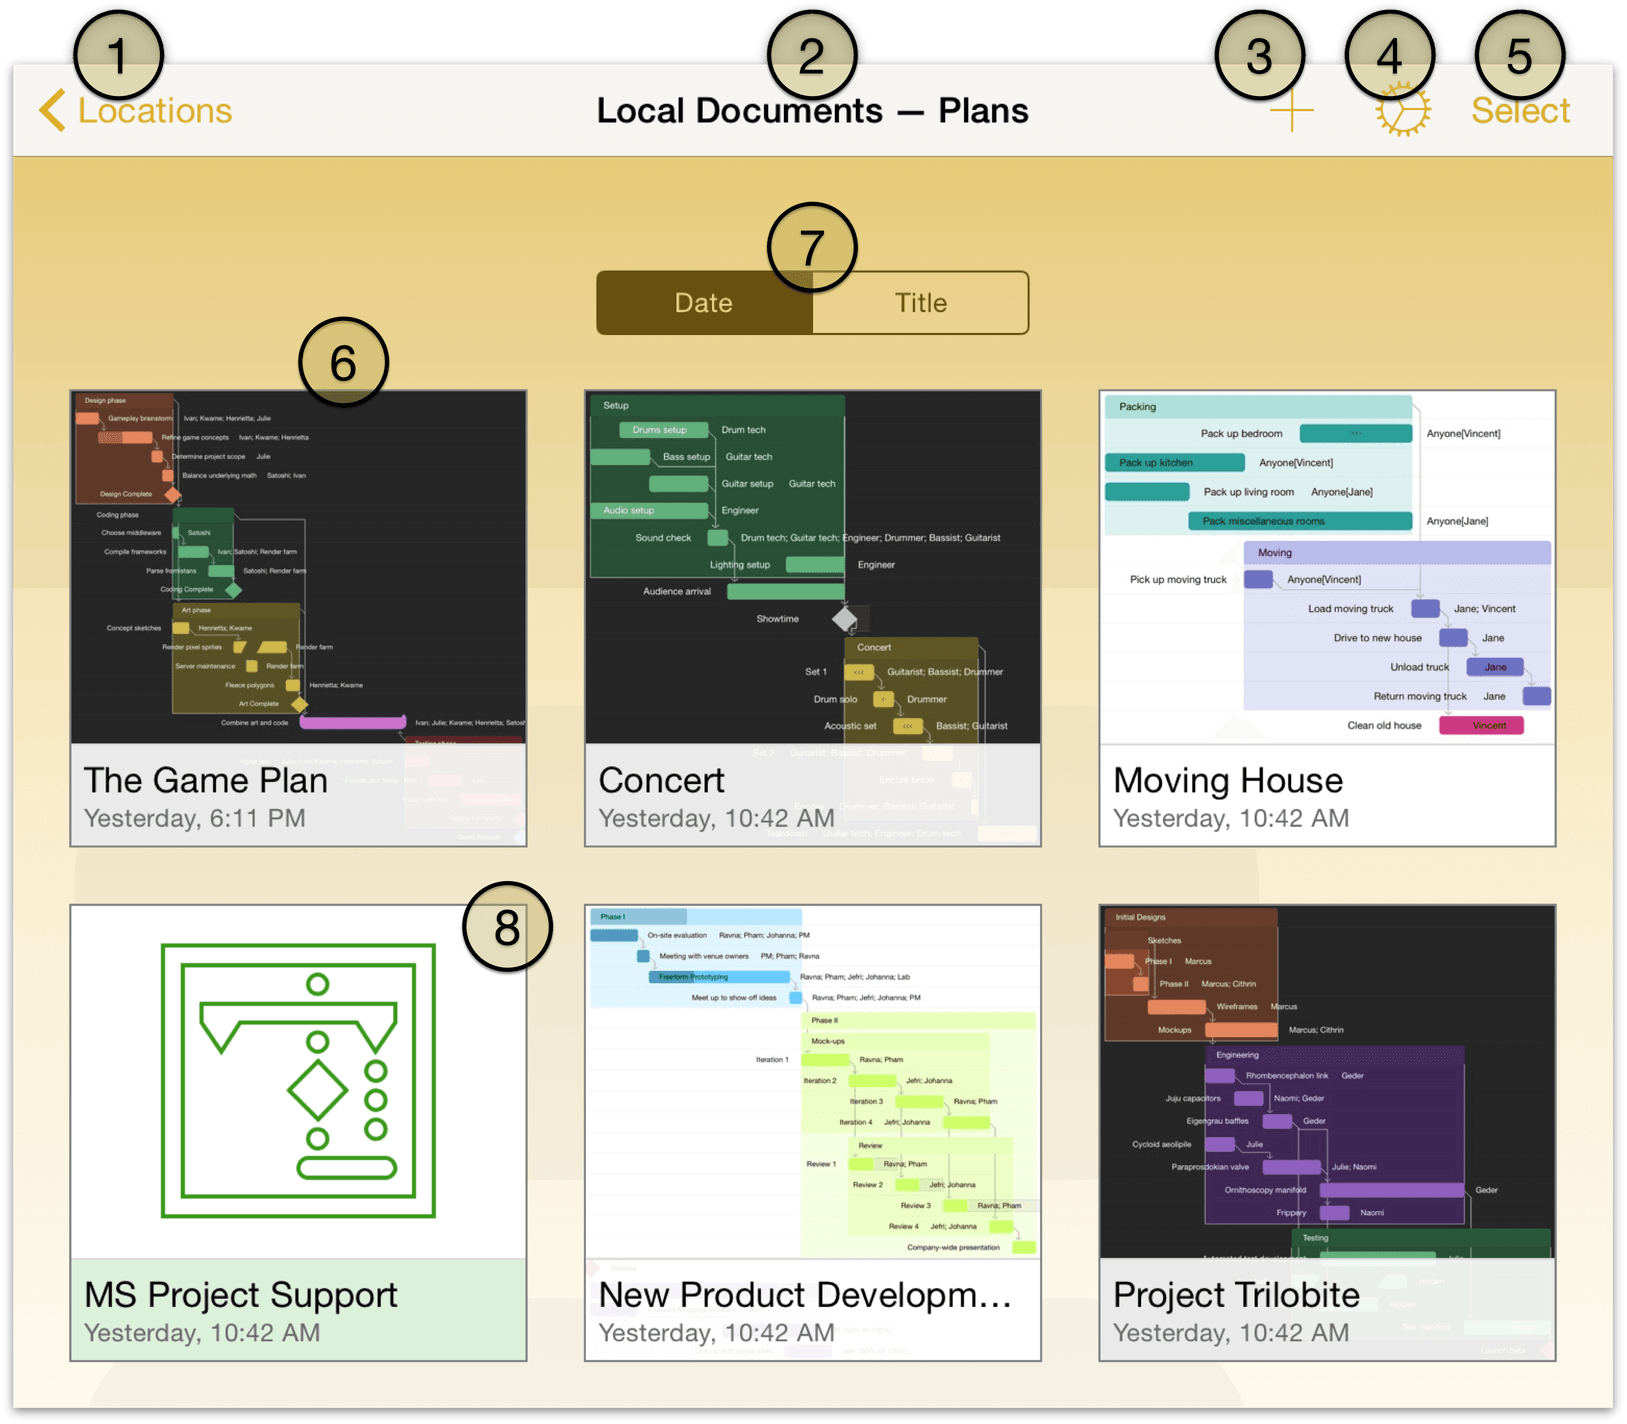
Locations — Tap here to go back to the main screen where you can view the Local Documents folder and any server repositories you’re synced with.
Folder Name and Document Type — This is the name of the current folder. Your default folder for storing files locally is titled Local Documents, and the document type is Plans (this is currently the only document type available).
Add/Plus — Creates a new project.
Settings — Tap to reveal a popover menu with the following options:
About OmniPlan — this displays a screen with information about the version of OmniPlan you have installed.
OmniPlan Help — this takes you a screen with links to support resources for OmniPlan, including web-based and eBook versions of this manual.
Contact Omni — this queues up an email message that you can send to the kind and wonderful Support Humans here at Omni. Don’t hesitate to ask us a question or send us feedback.
Release Notes — discover what’s new in the latest version of OmniPlan.
Restore Sample Documents — if you previously deleted any of the sample documents that came with OmniPlan, tap here to restore them to your device.
Upgrade to Pro — the Pro in-app purchase is an add-on for OmniPlan that provides the ability to import Microsoft Project files as OmniPlan files, and export OmniPlan files in the MPP format readable by Microsoft Project 2013.
Import — if you have files stored (not synced) on a WebDAV server or Omni Sync Server account, you can add those accounts and import OmniPlan files for local use here.
Settings — if you’d like to help Omni improve future versions of OmniPlan, you can choose to share anonymous usage data with us. The full content of the data sent is displayed on this screen.
The News menu item will appear in OmniPlan Settings if there is new information relevant to the functionality or stability of OmniPlan available for view.
Select — Tap to edit the contents of a folder. For example, you can select one or more documents and move them to another folder, to the trash, or create a subfolder within the current folder that contains the projects you’ve selected.
Projects — These are your saved projects and any subfolders you’ve created in OmniPlan.
Sort — When you pull down on the screen, the super secret Sort bar comes into view. By default, the projects you create are sorted by their creation date, or you can opt to sort them by title.
MS Project Support — A preview document for the Microsoft Project file import feature, available with the OmniPlan Pro in-app purchase.
Note
With OmniPlan Pro, you can import Project 2003, Project 2007, Project 2010, and Project 2013 MPP documents. Once imported, these documents can be managed just liked any other OmniPlan Project.
OmniPlan Pro can also export Project 2013 MPP documents. Once exported, these documents can be used in Microsoft Project 2013.
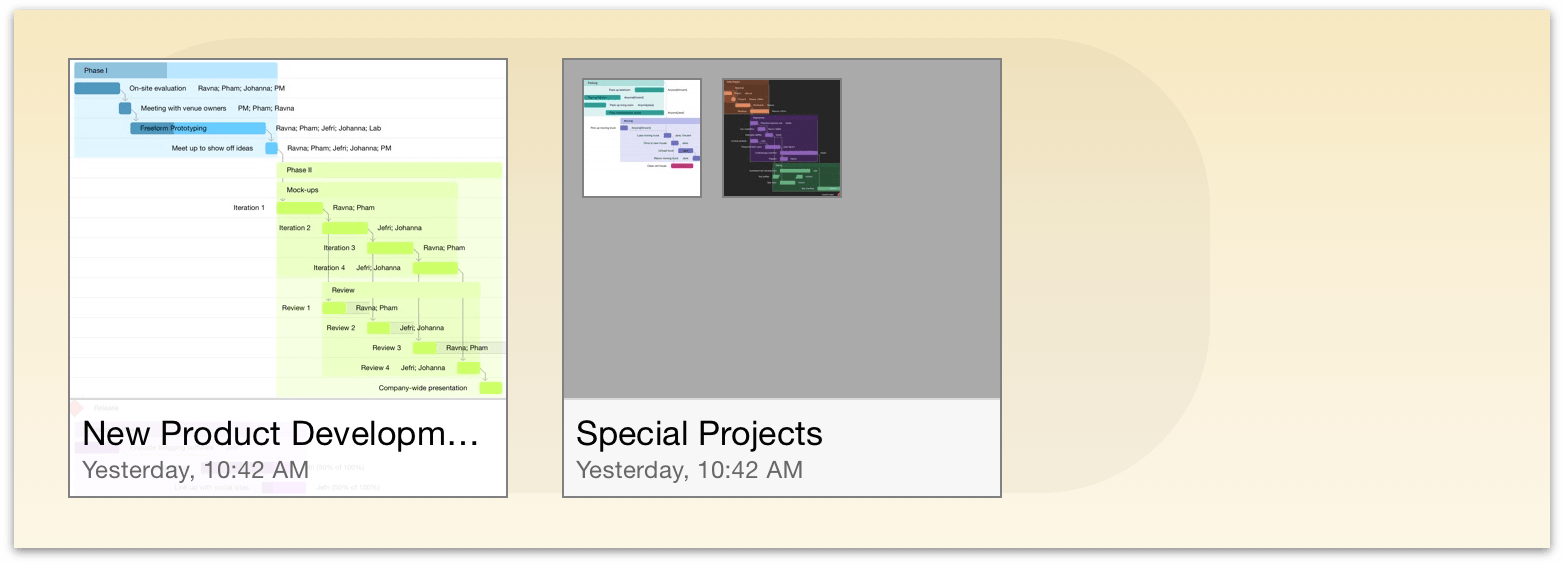
To create a subfolder, tap Select in the navigation bar, and then tap on and select one or more files in the Document Browser. Next, tap Move to in the upper-left corner and then tap New folder.

Enter a name for the folder and then tap Done. Subfolders have a dark gray background and display tiny icons for the projects they contain.
Adding Locations
You can add cloud-synced locations to the Locations screen by tapping the type of account you'd like to manage. There are two options for cloud account creation beneath the Local Documents folder on the Locations screen: Add OmniPresence Account and Server Repositories. OmniPresence is best for single-user sync among multiple devices, while server repositories are intended for multi-user collaboration; learn more about setting these up in the Getting Synced chapter.
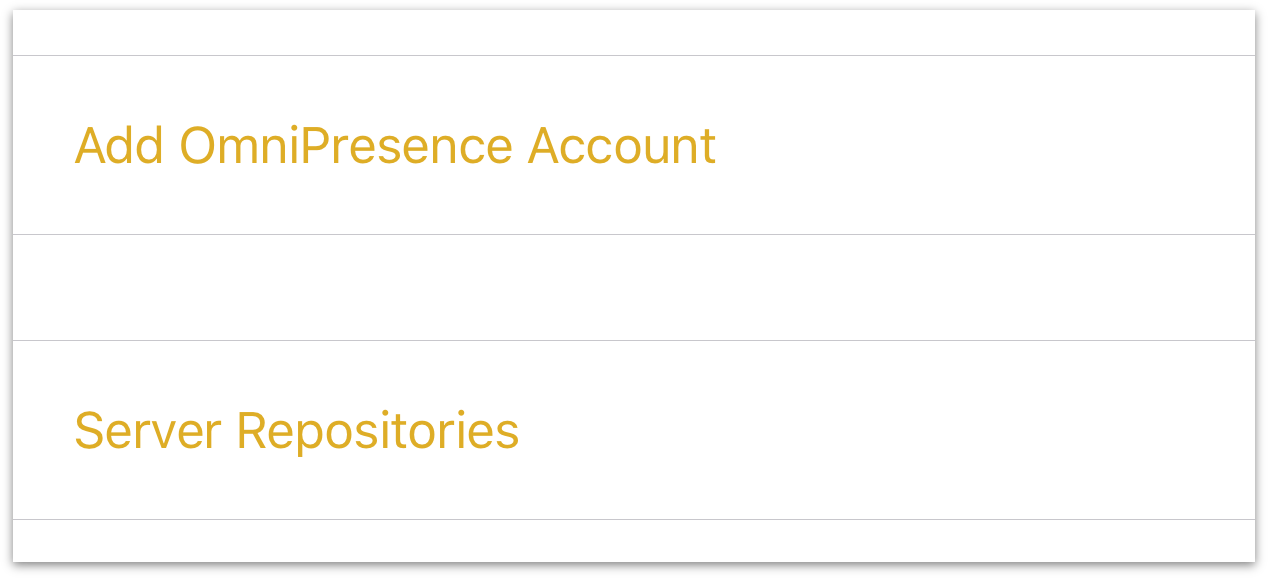
When you set up an OmniPresence account, you'll see it listed as a folder that's a peer to your Local Documents folder on the Locations screen. Any server repository accounts are listed in the Server Repositories section; to view them, tap Server Repositories.
Creating a New Project
To create a new project, go to the Locations screen, select the folder in which you’d like to store the new project file, and then tap the Add button (the + sign) in the navigation bar.

See Using the Project Editor for more details the Project Editor itself, or check out the Tutorial to get started with your own project.
Sending and Sharing Project Files
Every now and then you’ll find the need to share some document you’ve created in OmniPlan with someone else. But with files local to your device, how are you going to do this?
When you open a folder, such as your Local Documents folder, tap Select in the navigation bar, and then select the project that you’d like to share. This places a blue highlight around the file to let you know which file you have selected.
Now tap the Action button in the navigation bar and select from one of the following options:
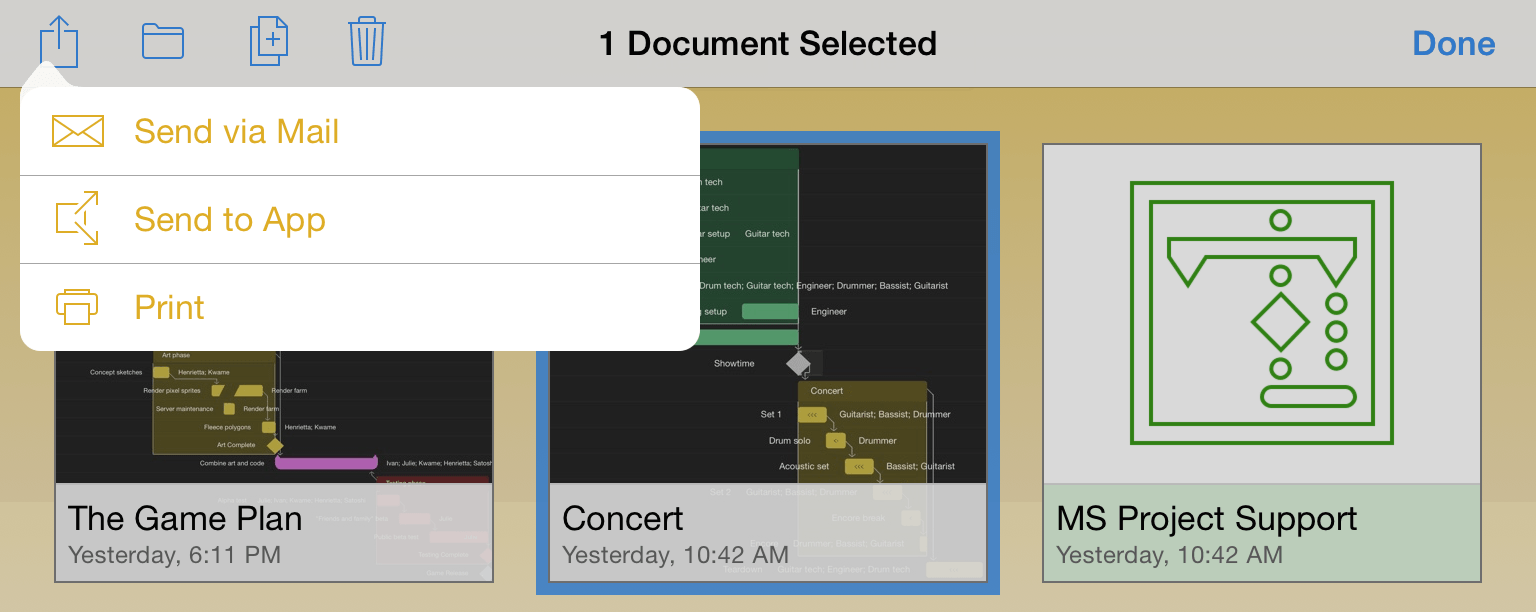
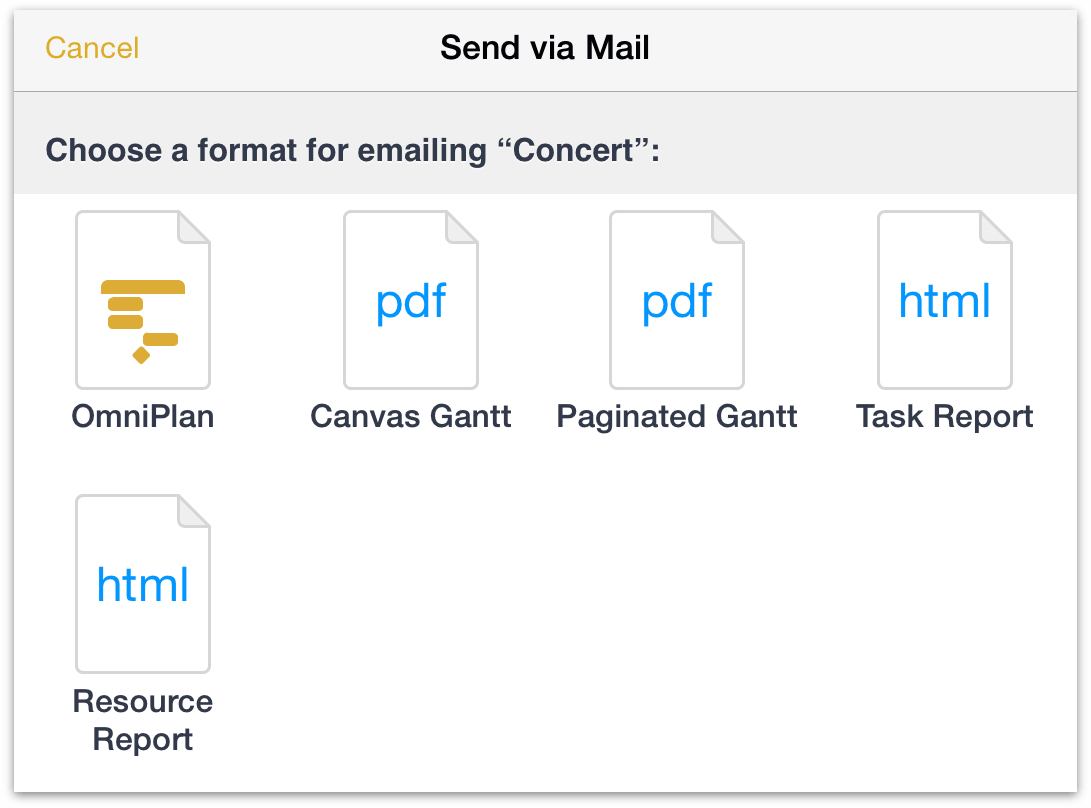
Send via Email — lets you choose a document format for the file you want to email, and then queues up an email message for your to send.
Send to App — lets you open the file in a compatible app on your device, or, if you are on a Wi-Fi network with someone you know, you can share the file with another iOS device using AirDrop. The two PDF options—Canvas Gantt and Paginated Gantt—can also be sent to iBooks or any other iOS app that can render a PDF file.
Print — lets you print the project to an AirPrint-compatible printer.
Taking Out the Trash
Every now and then, you’ll find that it’s time to do a little housecleaning in OmniPlan. Those projects for renovating the house are no longer relevant, so it’s time to dump those documents into the trash and purge them from your device (or from your synced server repository, if you have one of those configured) forever.
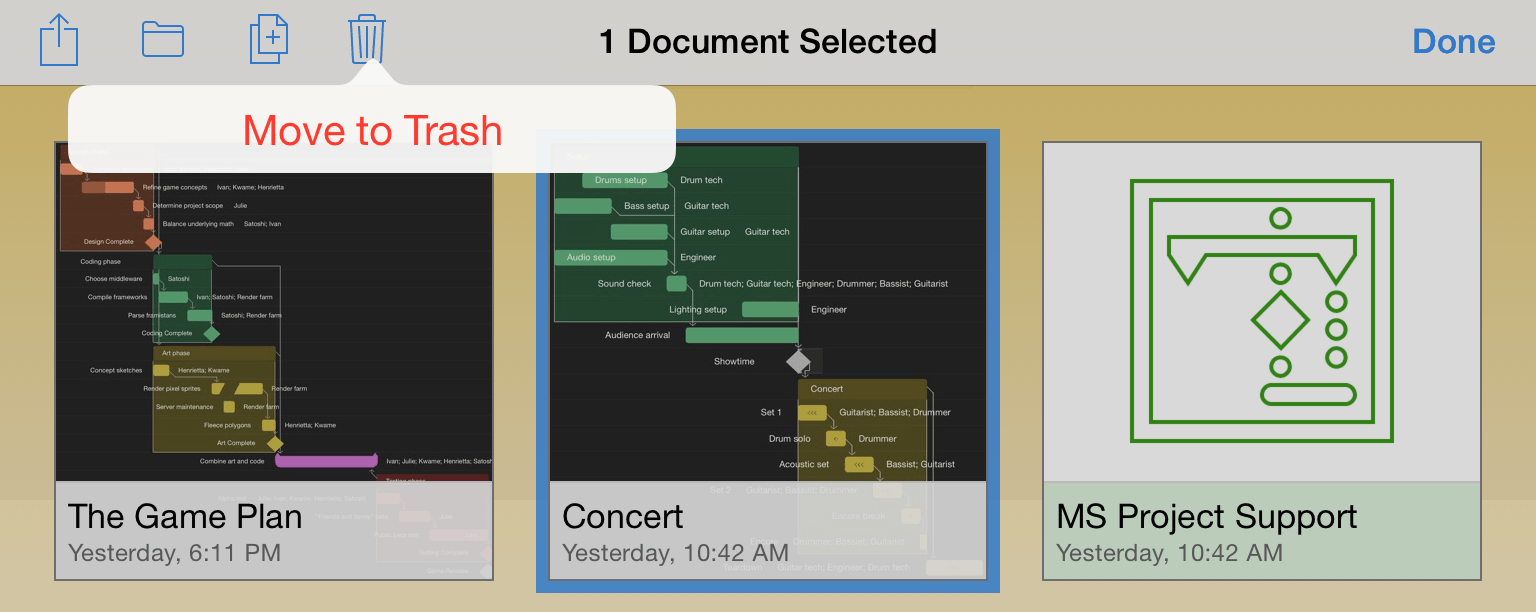
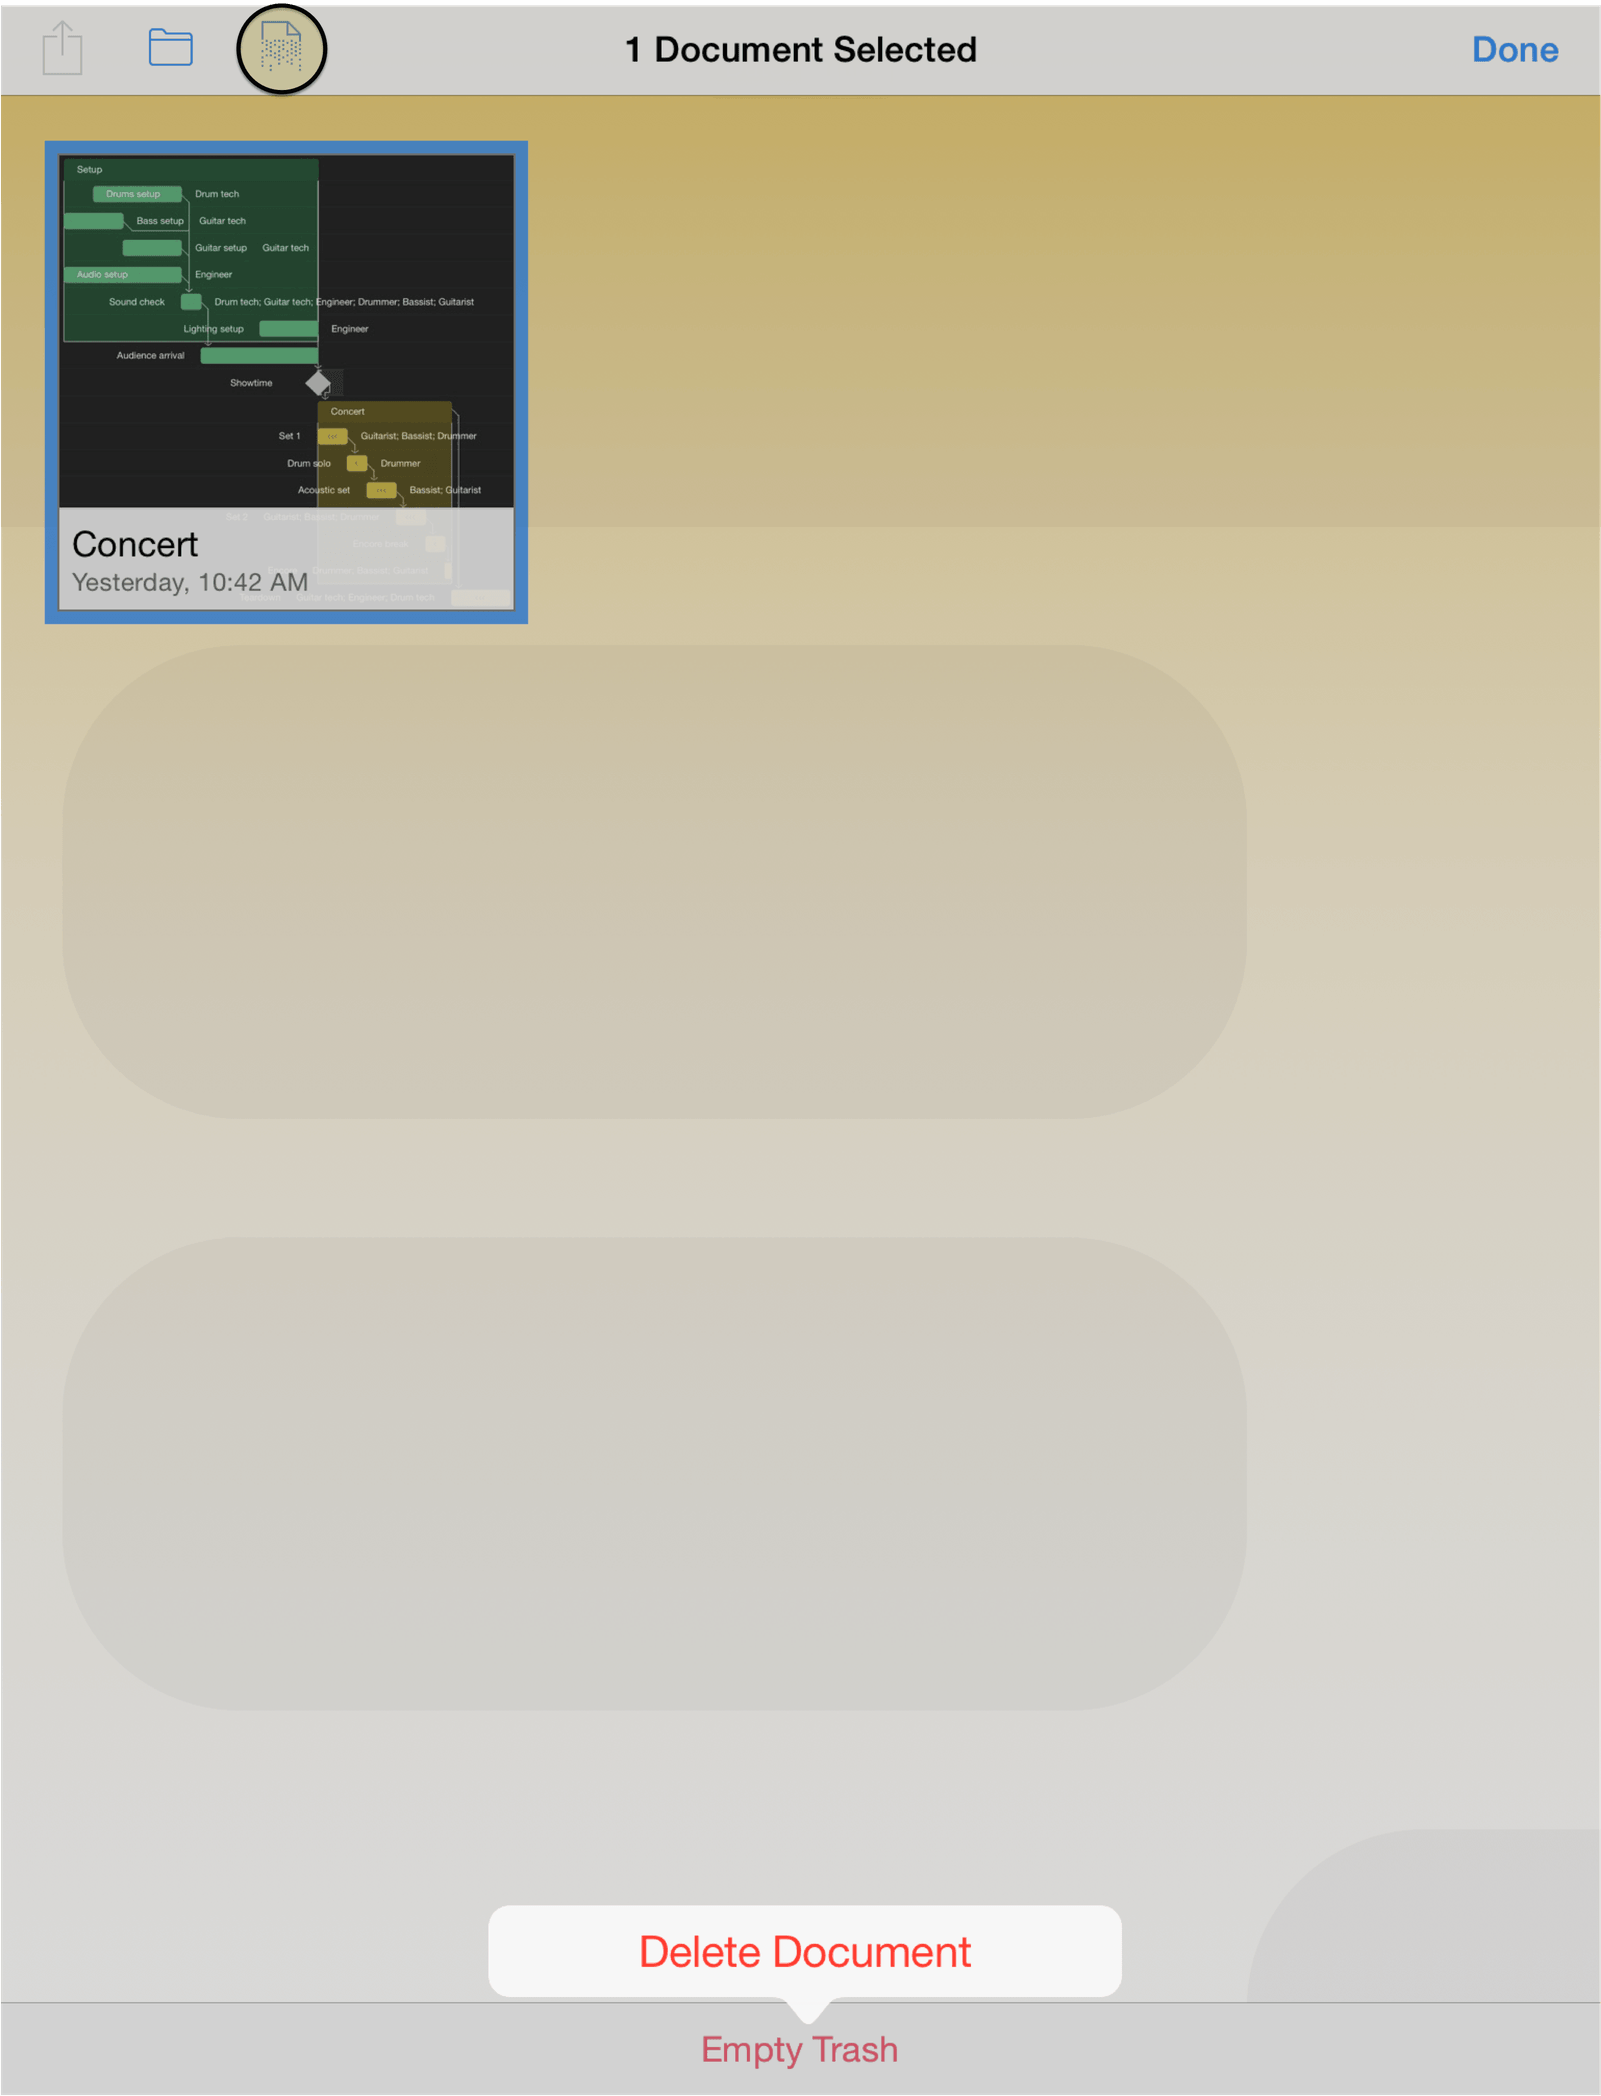
Fortunately, deleting files from OmniPlan is easy. When viewing a folder of documents, tap Select in the navigation bar at the top of the screen. Then tap on the documents you’d like to delete; you’ll see that the files now have a blue highlight.
Tap the Trashcan in the navigation bar to move the document to the Trash.
If you tap Locations in the navigation bar, you’ll see a Trash folder in your list of OmniPlan folders. Until you empty the trash, the files remain on your device.
Tap the Trash folder to open it in the Document Browser, and then tap Empty Trash to permanently delete the files from your device. The Delete button (the shredder icon, circled below) will also delete items selected normally.
After all files in the Trash folder are deleted, you’re taken back to the Locations screen in OmniPlan.