Network View
Enter Network View by clicking the third button in the view switcher in the toolbar, or choosing View > Network View (Option-Command-3).


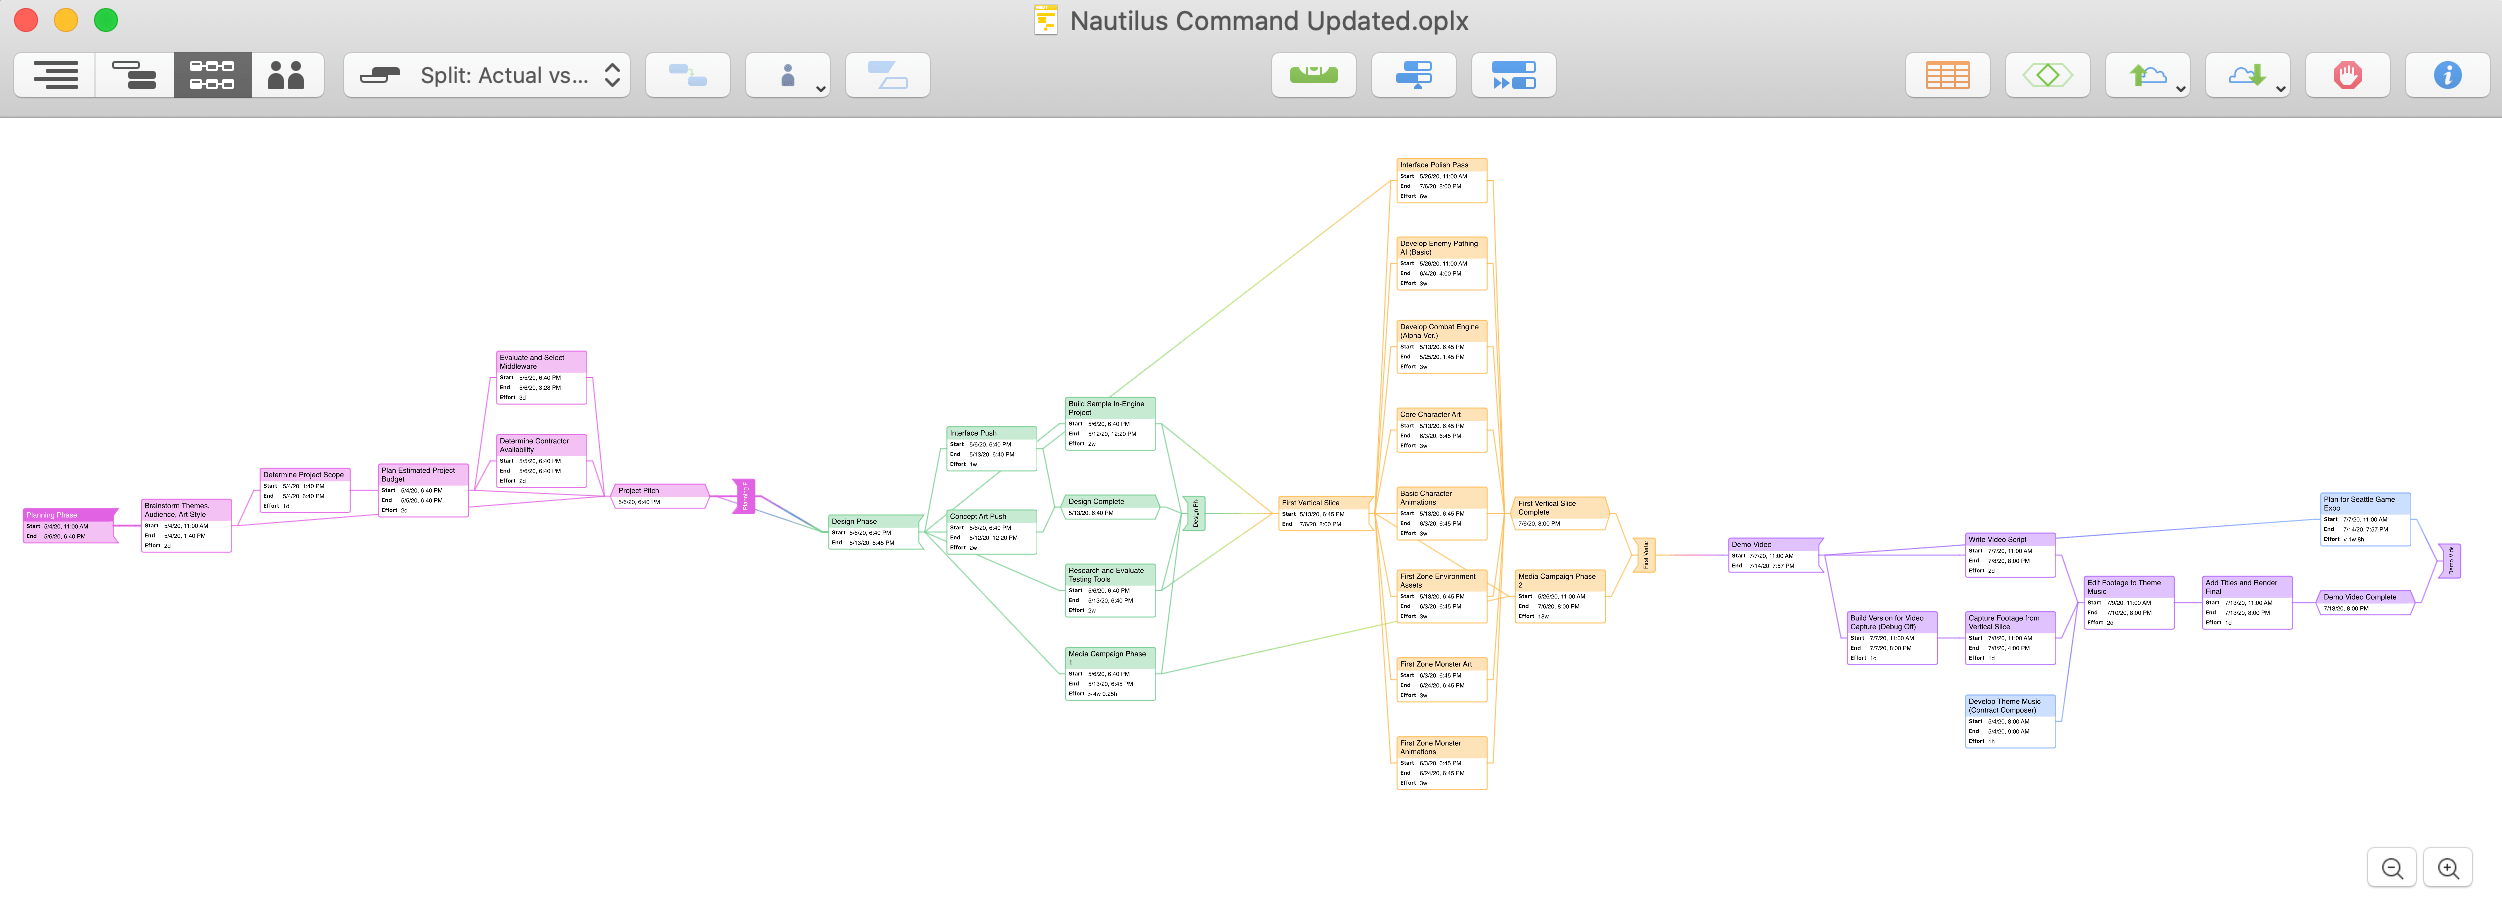
Network View provides a canvas that displays your project as a diagram of nodes (tasks) with lines (dependencies) connecting them. Evocative of charts generated with the PERT technique, Network View not only offers a new perspective on your current projects but also allows rapid development of new ones.
Charting Tasks and Dependencies
When you are ready to start building (or adding to) a project in Network View, press Option-Command-3 to switch to Network View and then press Return. That’s it! A new task is created.
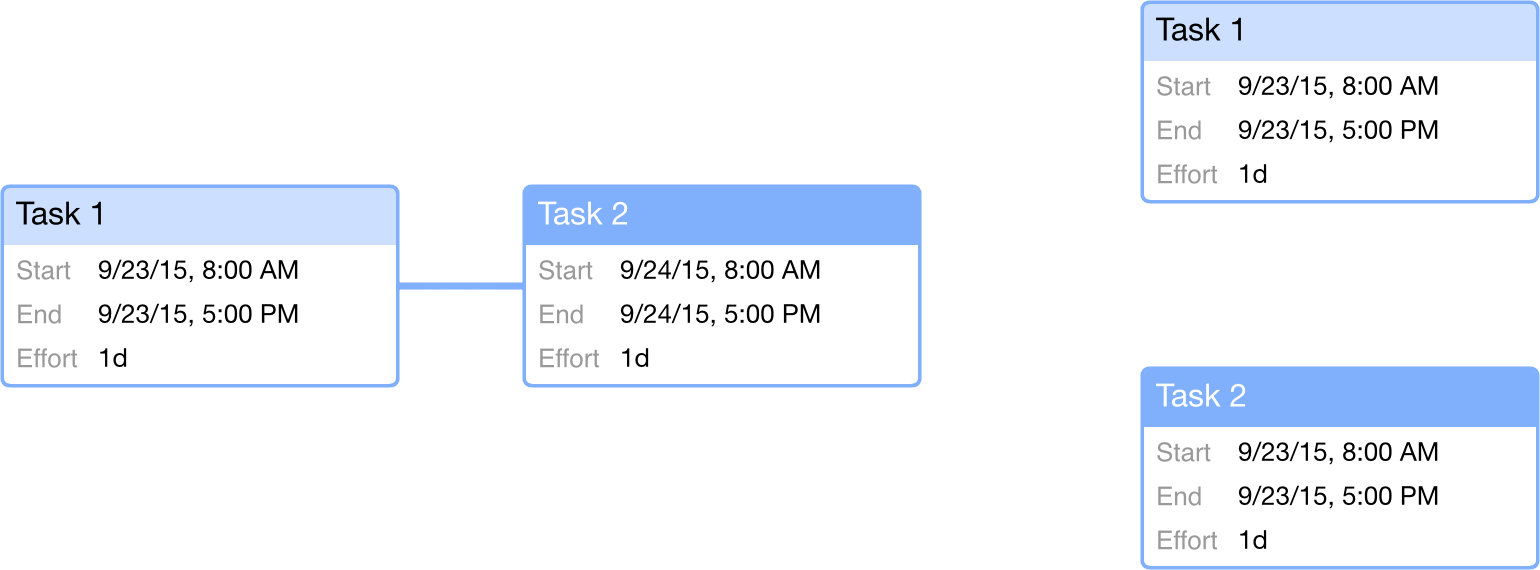
If you had a task selected previously, the new task will be connected to it by a line that represents a Finish→Start dependency. If no tasks were selected, the newly created task is independent of any others. As long as a task is selected, you can quickly create a chain of tasks connected with Finish→Start dependencies by continuing to press Return.

An unbroken chain of tasks with Finish→Start dependencies is arrayed in a straight horizontal line.
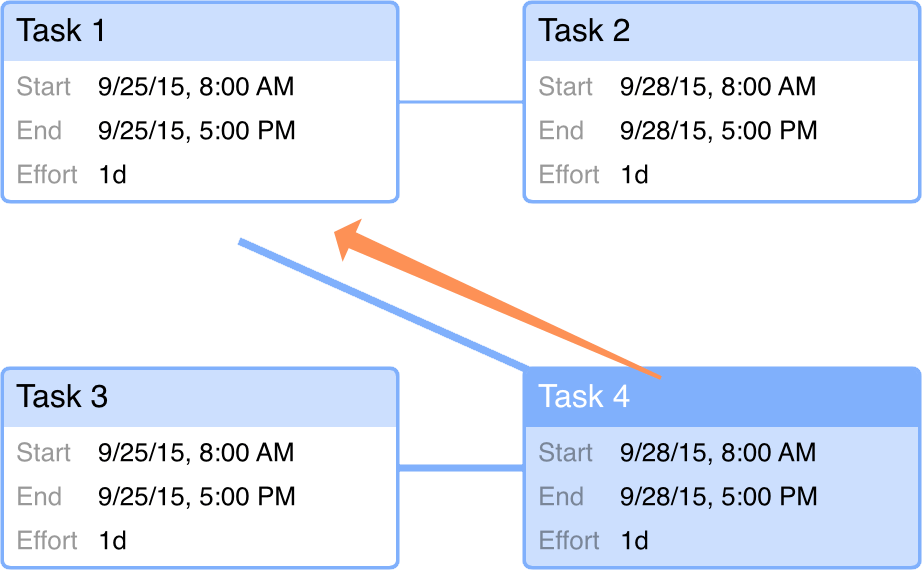
To create other dependency relationships, click a task node to select it and drag the line that appears to another task. This creates a dependency between them, and you’ll see the tasks rearrange in the diagram automatically to reflect this new relationship.
At any time while working in Network View, you can switch to Gantt View to see how your project-building exercise is looking in the Gantt chart and see how its dependencies are described there.
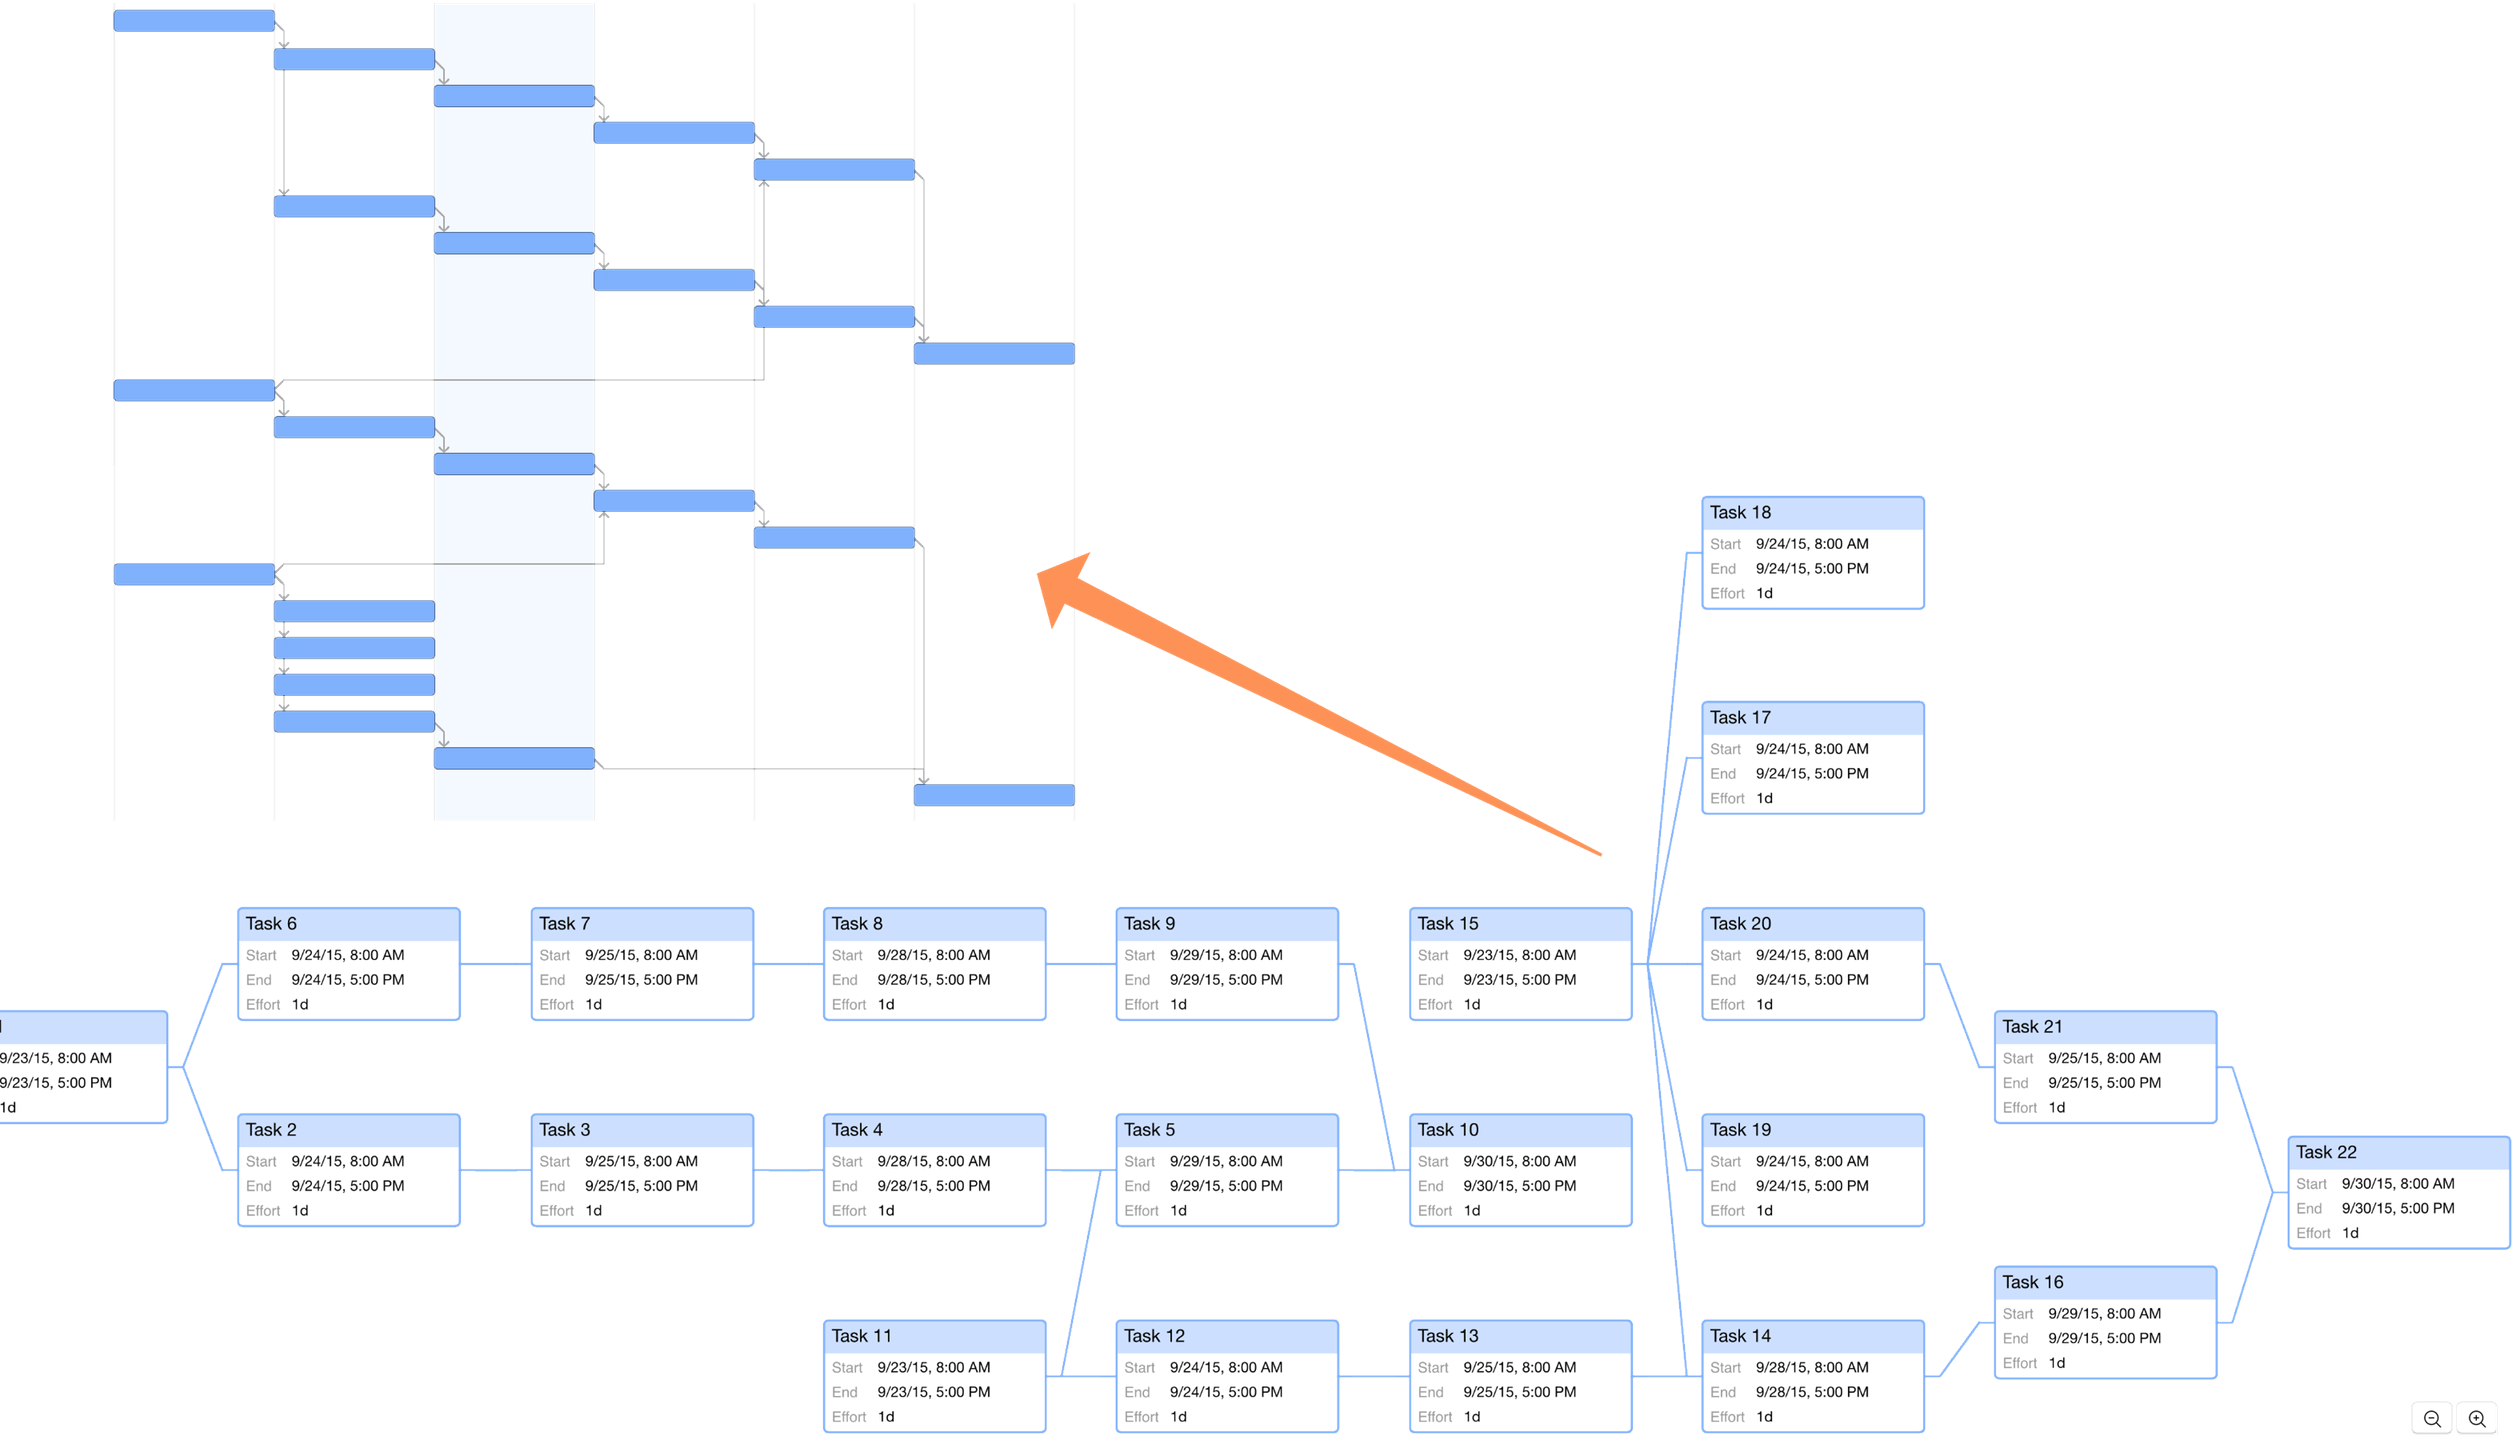
When you are working on a project of considerable size, you can zoom in and out on your network diagram using the buttons in the lower-right corner of the view, or with - and + on the keyboard.
To apply colors to items in Network View, you can set up document and Gantt styles in the Styles inspector that will carry over to tasks in the network diagram, or apply individual styles to tasks or groups in Gantt View that will likewise carry over.
Configuring Network View
Collapsing and Expanding Groups
When you have a complex network diagram with multiple task groups, it can be useful simplify the project appearance by hiding tasks within those groups.
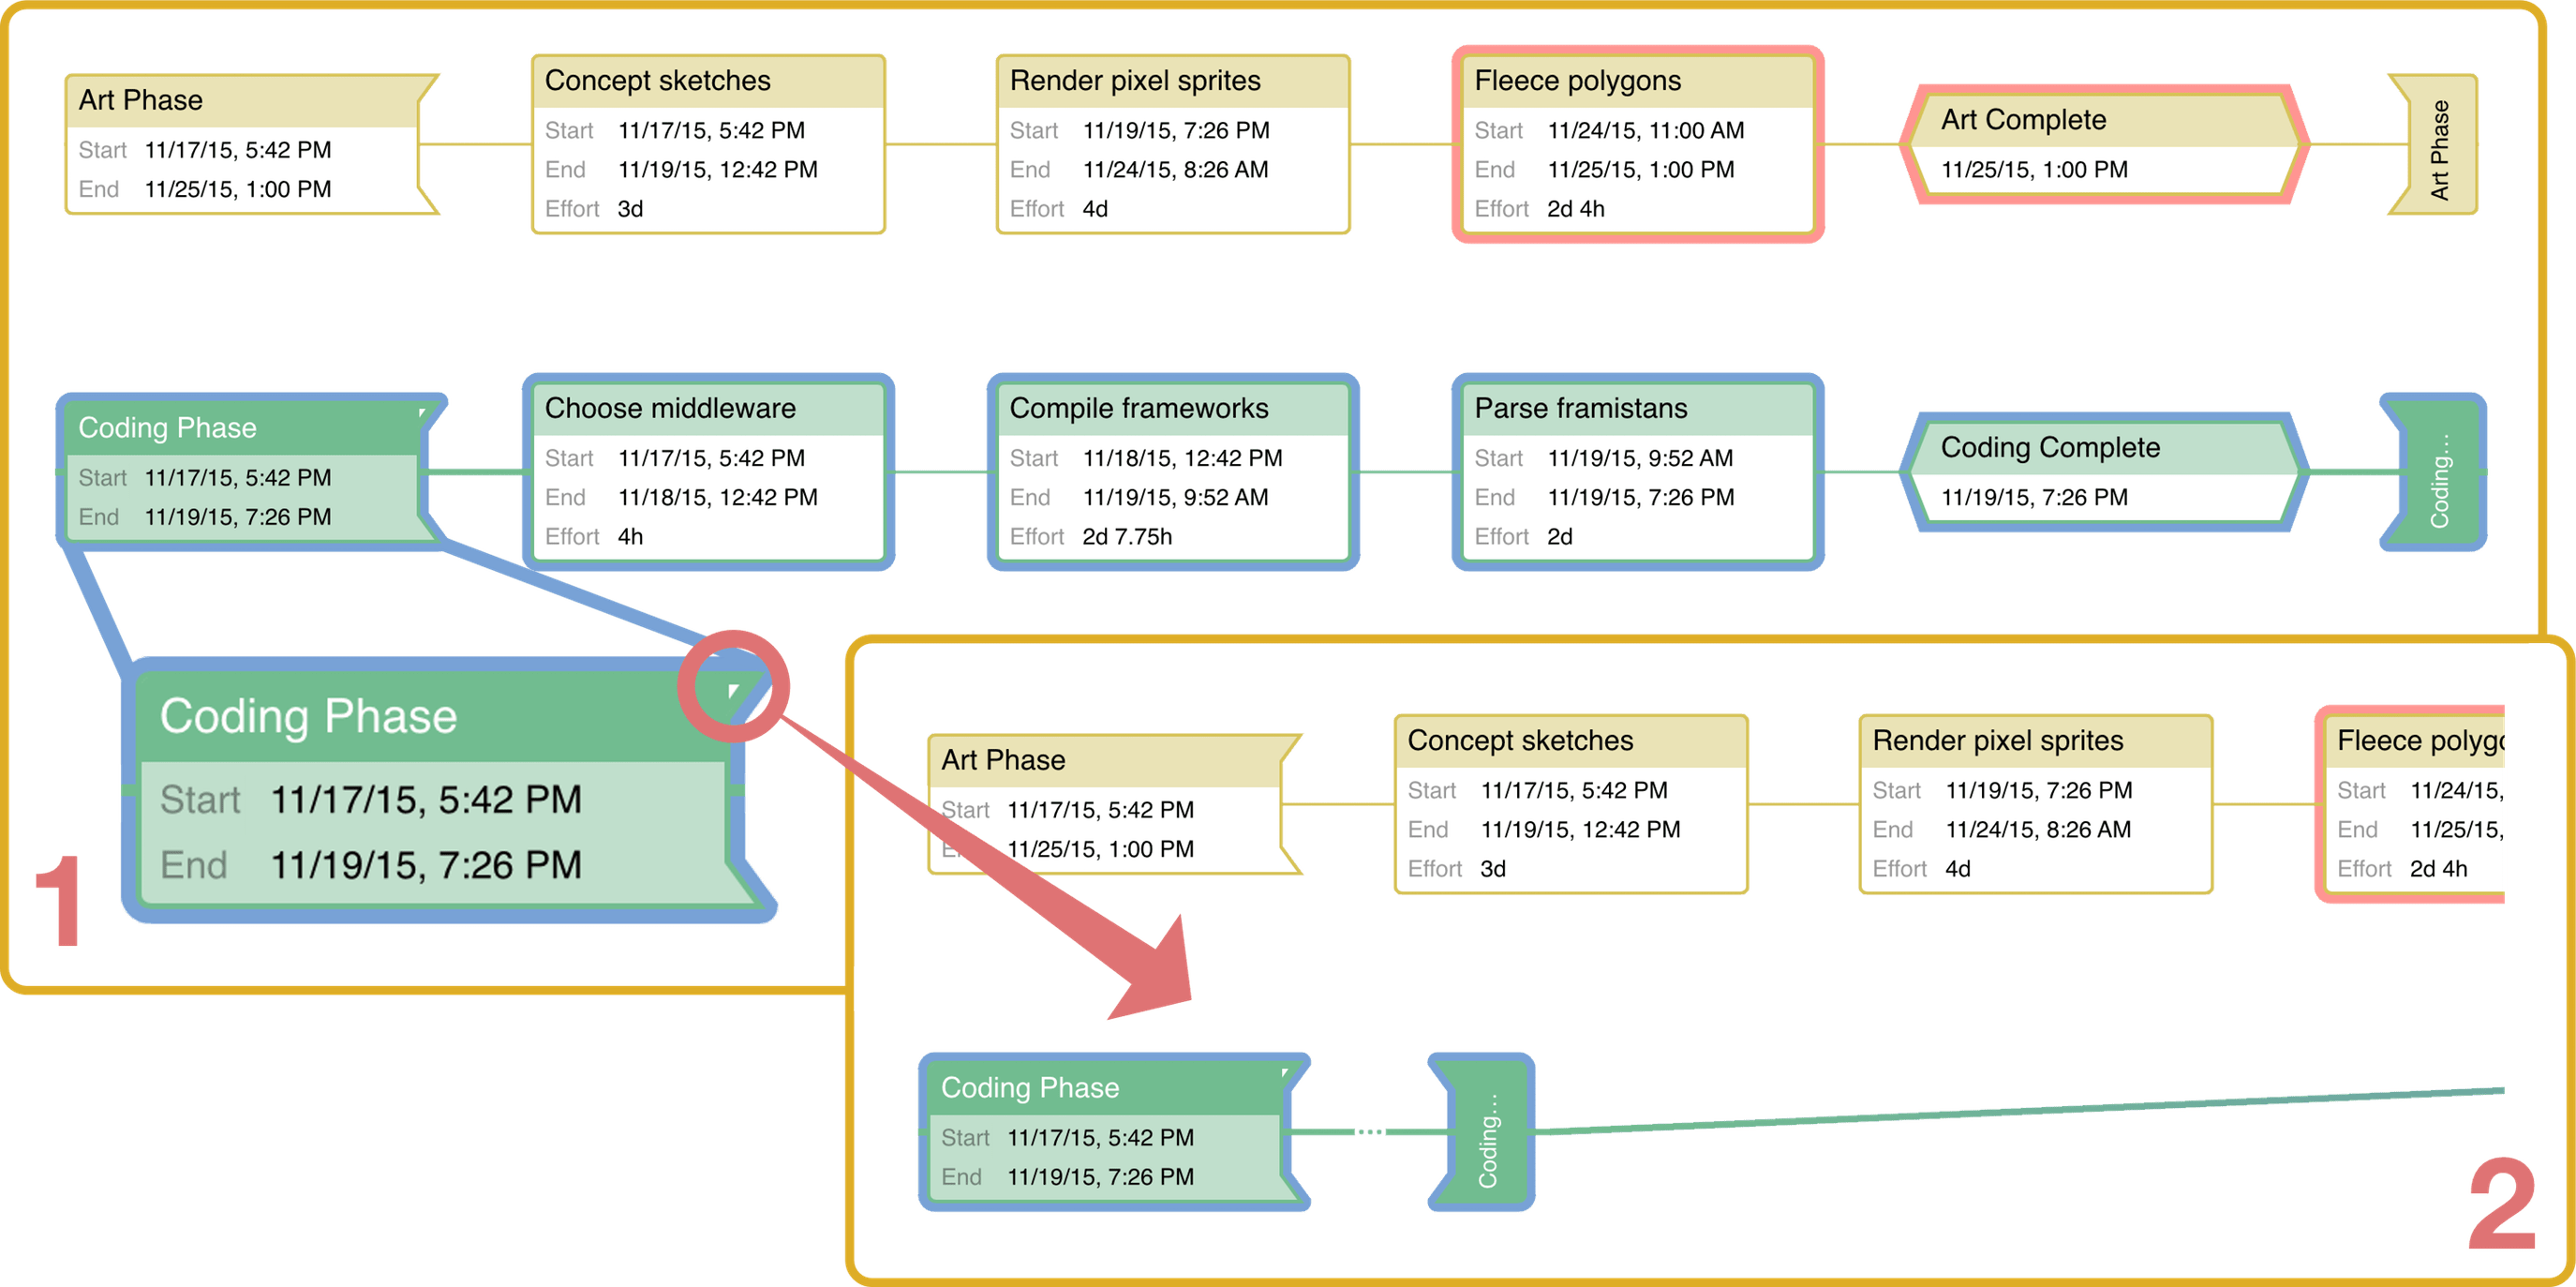
To collapse a group and hide the tasks inside:
-
Move your cursor over the group task (represented in the network diagram by a node shaped like an open bracket). A tab appears on the upper-right corner of the task.
-
Click the tab, and the group collapses. The group task is shown as a set of brackets with an ellipsis between them, indicating that the tasks within the group are hidden.
-
Click the tab at the corner of the group again to expand it, and the tasks return to view within the group brackets.
Zooming
If the size of the project diagram exceeds the viewable area on screen, or text on the nodes is too small to easily read, you can use the zoom buttons in the lower right to increase or decrease the diagram scale.
Customizing Node Metadata
If you would like to show values on task nodes other than the default, you can fully customize them using custom task labels. Choose View > Network Diagram > Customize Task Labels to open the task label editor with three primary tasks types available for editing—Tasks, Milestones, and Groups.
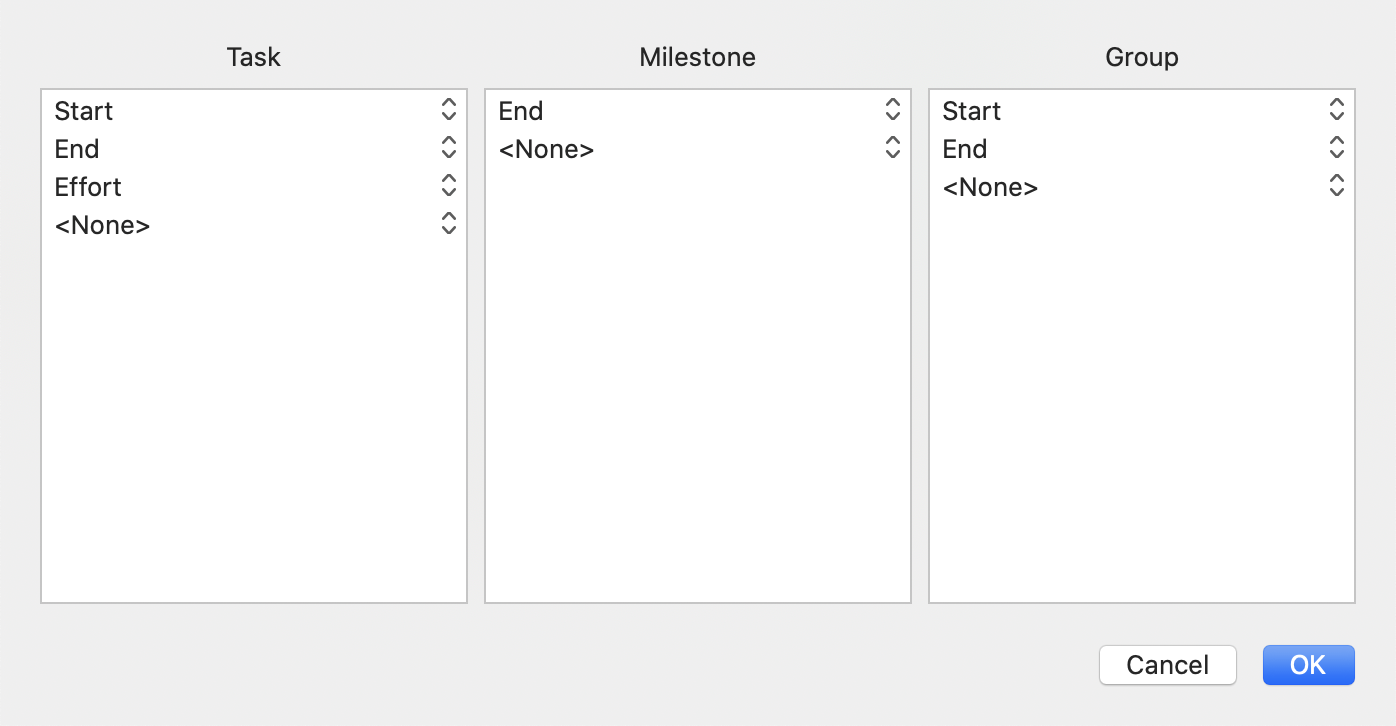
Choose a column type from the popup menu to add it to nodes of the selected task type, or choose None to remove that metadata row from display.