When you create a new document in OmniGraffle, one of the first things you might consider doing is taking a pass through the Canvas Inspectors, which you can see here with more detail found further down below:
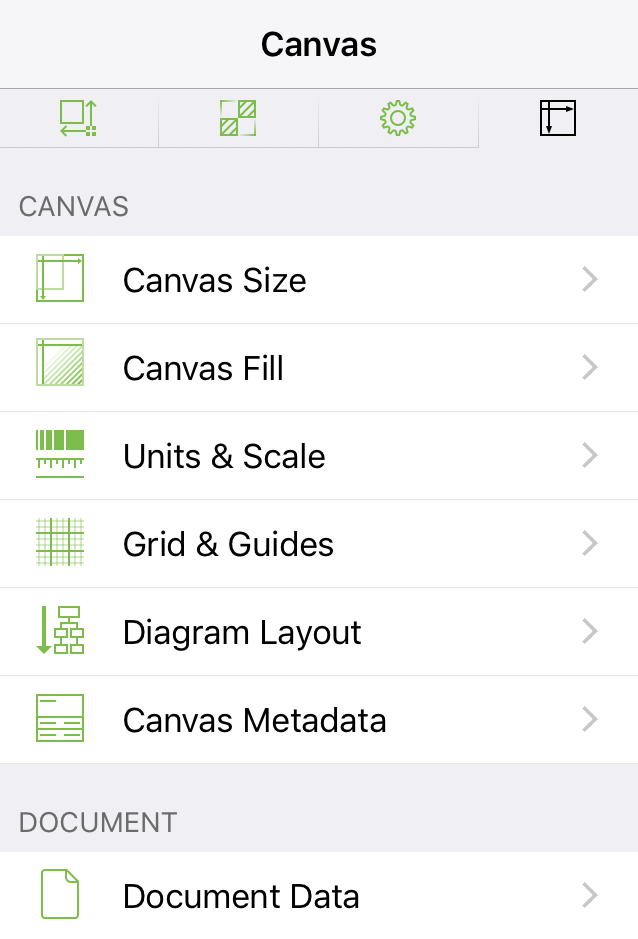
Canvas Size
Use the Canvas Size inspector to choose a Canvas Mode (Fixed, Flexible, or Infinite), and define the printing options for this canvas.
-
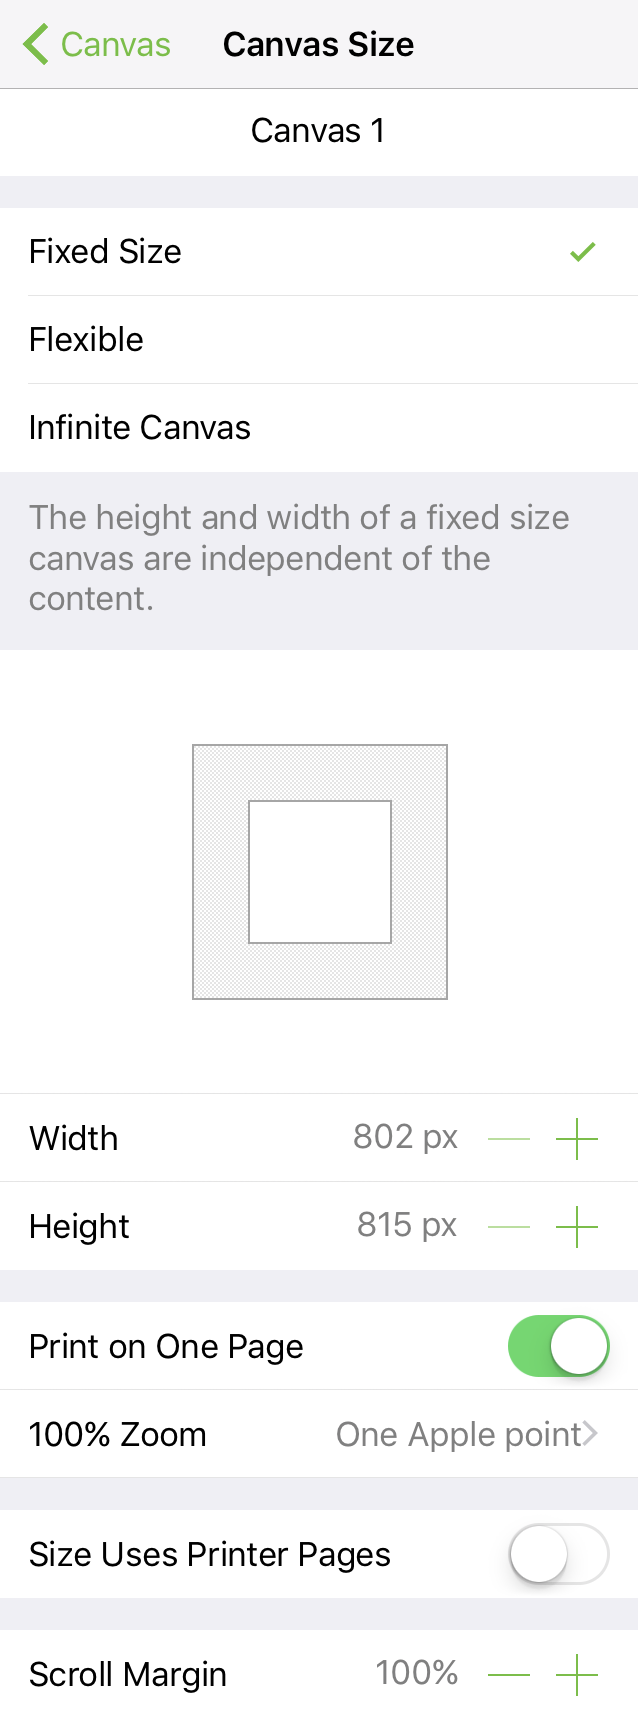
Fixed: A canvas with its width and height set to a specific size; for example, 1024 × 768 pixels.
-
Flexible: A canvas which expands in a specified direction (up, down, left, or right) to suit your needs.
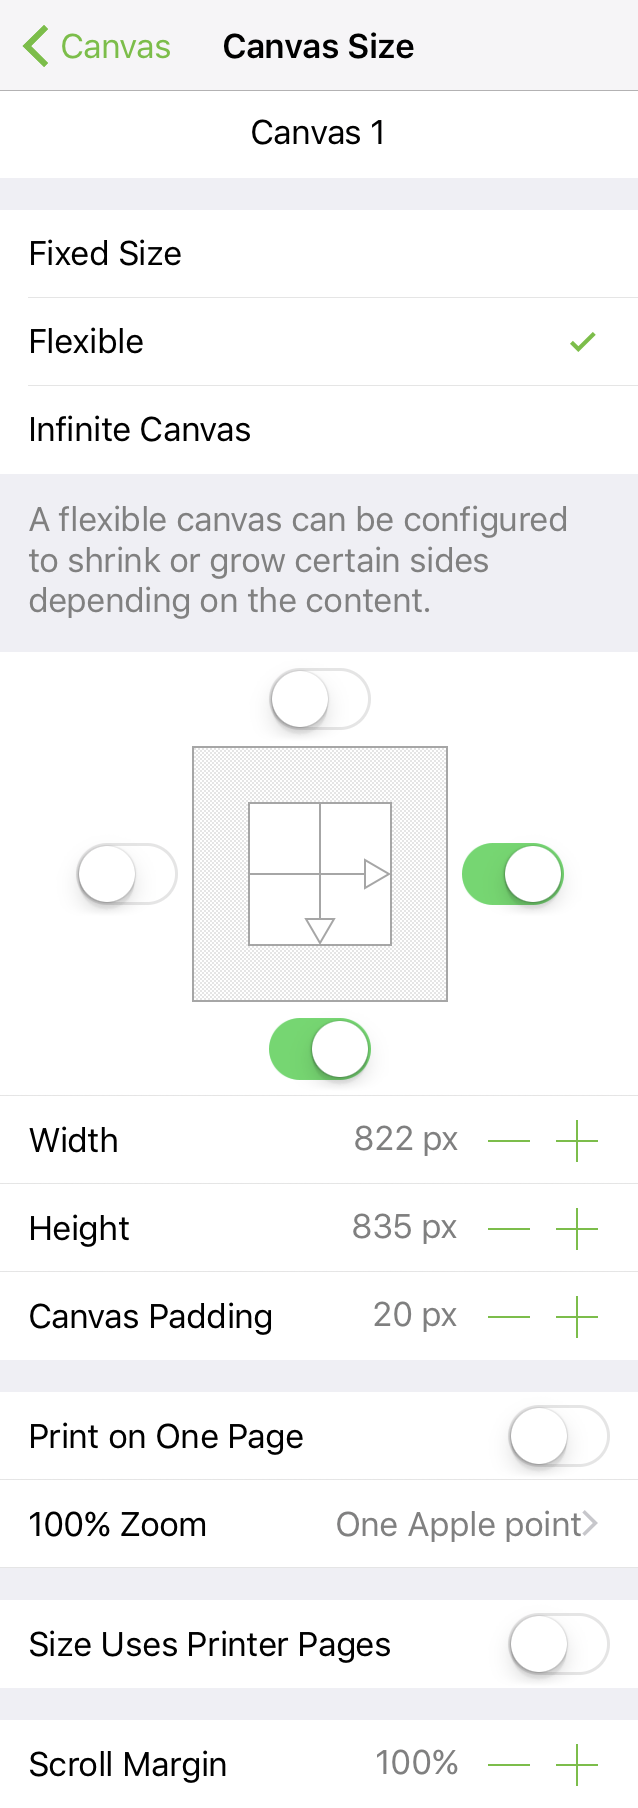
A Flexible canvas allows you to set a minimum Width and/or Height. Use the switches in the canvas expansion grid to turn on or off the direction in which the canvas will expand. With Size Uses Printer Pages turned off, you can also add Canvas Padding around the edge of your canvas.
-
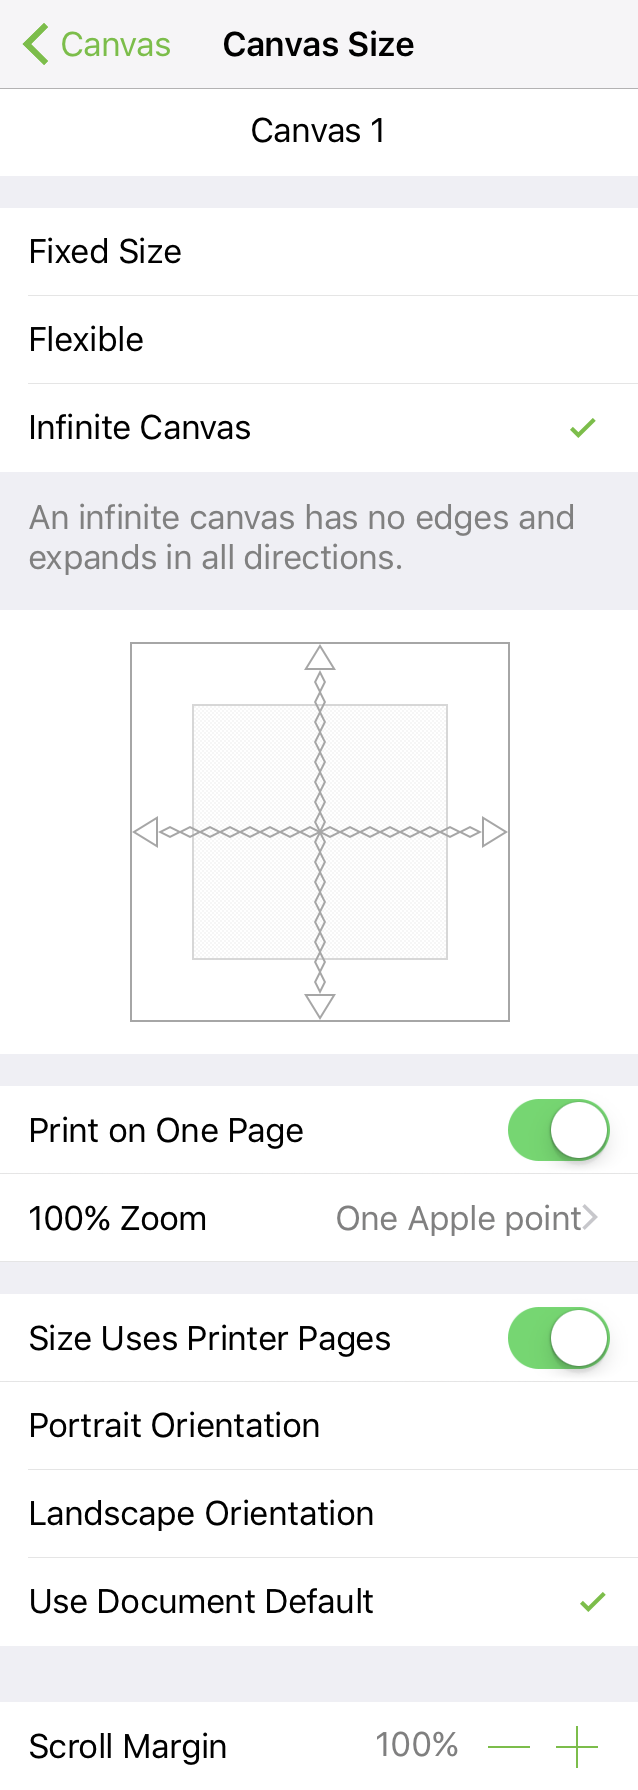
Infinite: A canvas that extends infinitely in all directions.
Additional options found in the Canvas Size inspector include:
-
Print on One Page: Switch On or Off to force your document to print on a single page.
-
100% Zoom: If you have OmniGraffle Pro, you can also specify how things look onscreen when viewing your document at 100% Zoom:
-
One Apple point (the default) relates to resolution-independent distance on the display. For example, on a standard-resolution display, 1 point equals 1 pixel; on a Retina display, 1 point equals 2 pixels. At 100% zoom, objects viewed at One Apple point only appear smaller onscreen; however, they retain their actual size (which you can verify by looking at the object’s dimensions in the Geometry inspector).
-
One PostScript point displays the contents of your document at real-world size. At 100% zoom, you can hold a ruler up to your display and the size of the object you are measuring onscreen will match the dimensions you see in the Geometry inspector.
-
One pixel matches the pixel density of your display. For example, at 100% zoom, objects viewed at One pixel only appear smaller onscreen; however, they retain their actual size (which you can verify by looking at the object’s dimensions in the Geometry inspector).
The 100% Zoom options make it possible for you to work on large-scale documents at a smaller scale onscreen.
-
-
Size Uses Printer Pages: Switch On or Off. When turned on, the canvas size is displayed in pages not the Base Units of measurement (i.e., pixels, points, centimeters, or inches). When turned on, choose how your document will print:
- Portrait Orientation
- Landscape Orientation
- Use Document Default
Canvas Padding is disabled when you turn on Size Uses Printer Pages.
-
Scroll Margin: Tap
 or
or  to adjust how much of the canvas area is added as a scrolling margin around the canvas. When set to 100%, your entire canvas can scroll out of view.
Canvas Fill
Use the Canvas Fill inspector to apply a fill color or pattern to the canvas.
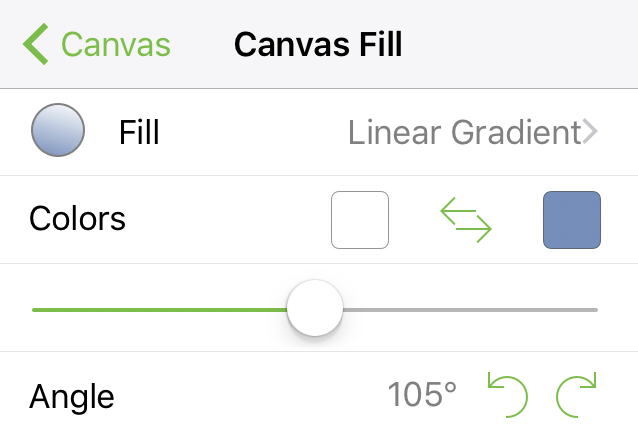
You can apply any of the standard fills to the canvas, including changing the color, adding a linear or radial gradient, and more.
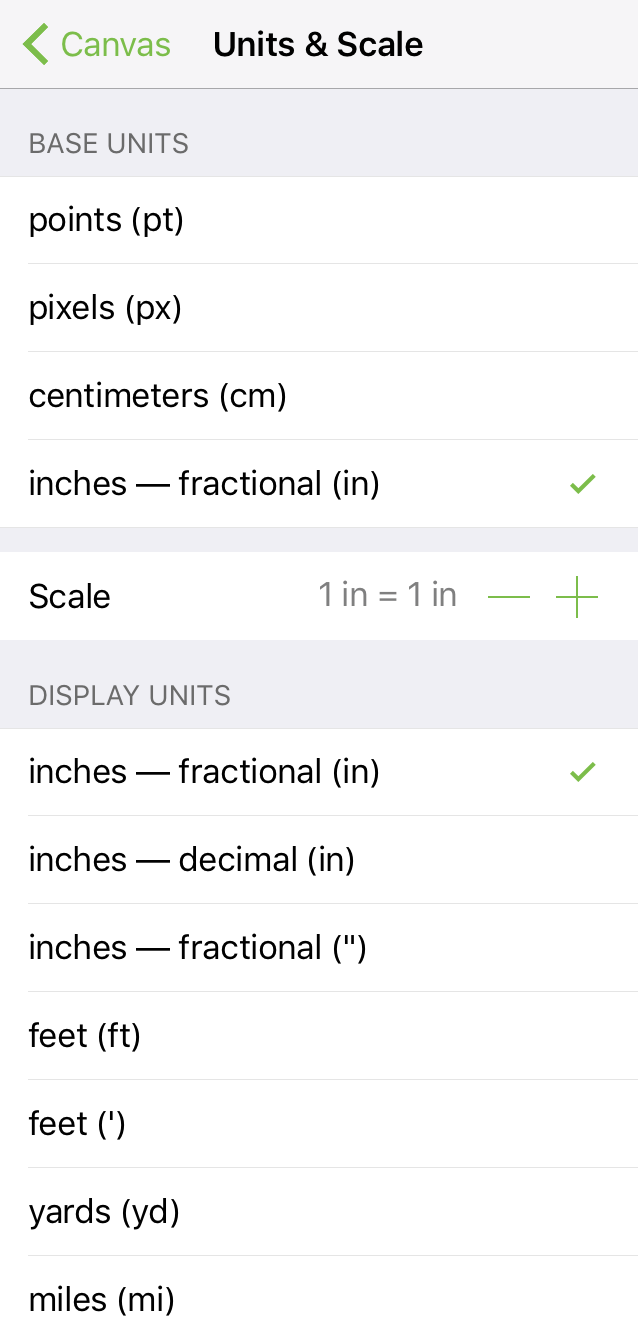
Units & Scale
Use the Units inspector to define the units of measurement and how objects scale on the canvas.
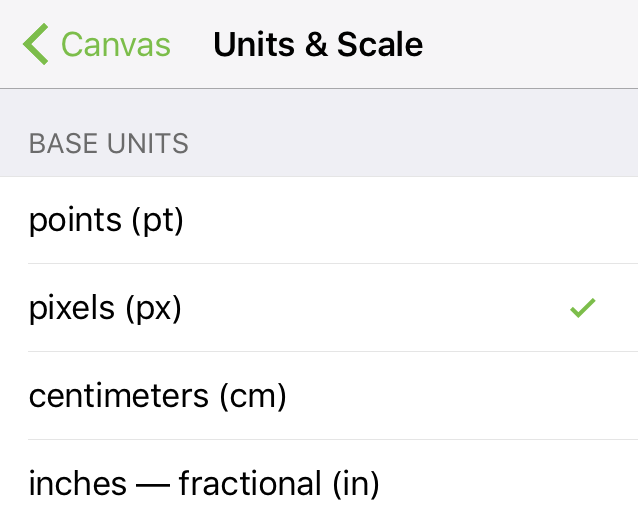
If you choose centimeters (cm) or inches fractional (in) as the unit type, you can also set the Scale and choose the Display Units to be shown with the alignment guides or in text labels.
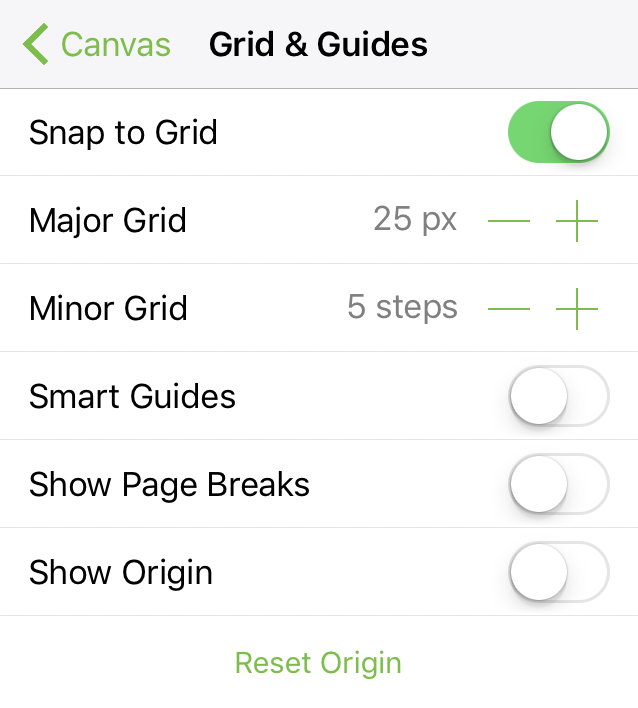
Grid & Guides
Use the Grid inspector to specify the distance between major (thicker) or minor (thinner) grid lines, their color, and whether shapes on the canvas will snap to the grid when moved into position.

-Snap to Grid and Smart Guides* are an either-or proposition; only one can be on at a time:
-
With Snap to Grid turned on, a grid that sort of looks like graph paper, appears on the canvas. As you move objects around on the canvas, those objects will snap into a grid position.
-
With Smart Guides turned on, blue lines appear whenever you select and move an object, allowing you to guide the object into alignment with other objects on the canvas. The guides also show the distance between objects as you move them into place.
-
With Show Page Breaks turned on, OmniGraffle displays on the canvas how your document will print. If you turned on Print on One Page in the Canvas Size inspector, turning on Show Page Breaks still displays the page breaks; however, OmniGraffle follows your preference to only print on one page.
-
With Show Origin turned on, a dark blue horizontal and vertical line appear to show you where the current origin point (0,0) exists. To relocate the origin point to the upper-left corner of your canvas, press Reset Origin.
Diagram Layout
Use the Diagram Layout inspector to set how connected objects flow in a diagram, and to lay out the diagram after you make changes to object spacing.
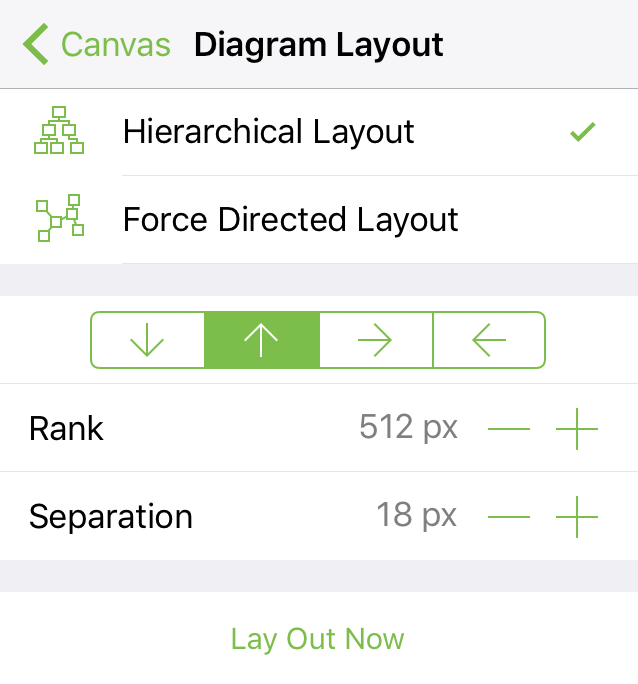
See Create a Hierarchical diagram, Create a Force-Directed diagram, and Create a Flowchart for a quick overview of diagramming in OmniGraffle on iOS.
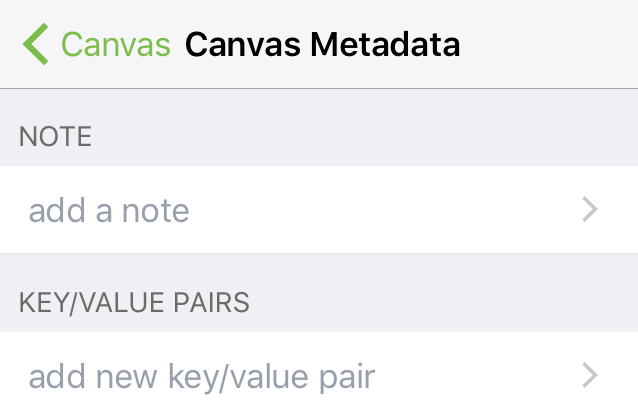
Canvas Metadata
Use the Canvas Metadata inspector to change the name of the current canvas, add a descriptive note, or to set key-value pairs of metadata to help further define your project.
Some examples of changes you might want to make to the Canvas prior to starting your work include:
-
If you are creating icons for use in an app you’re prototyping, you might want to use the Units & Scale inspector to set the Base Units to pixels, and then adjust the Scale according to the assets you need to export.
-
If you want pixel-perfect alignment, you could change the Major Grid steps to 1 px; each square in the grid is now 1 px × 1 px, which is perfect for creating pixel art.