Introduction
Welcome to OmniPlan 3 for iOS!
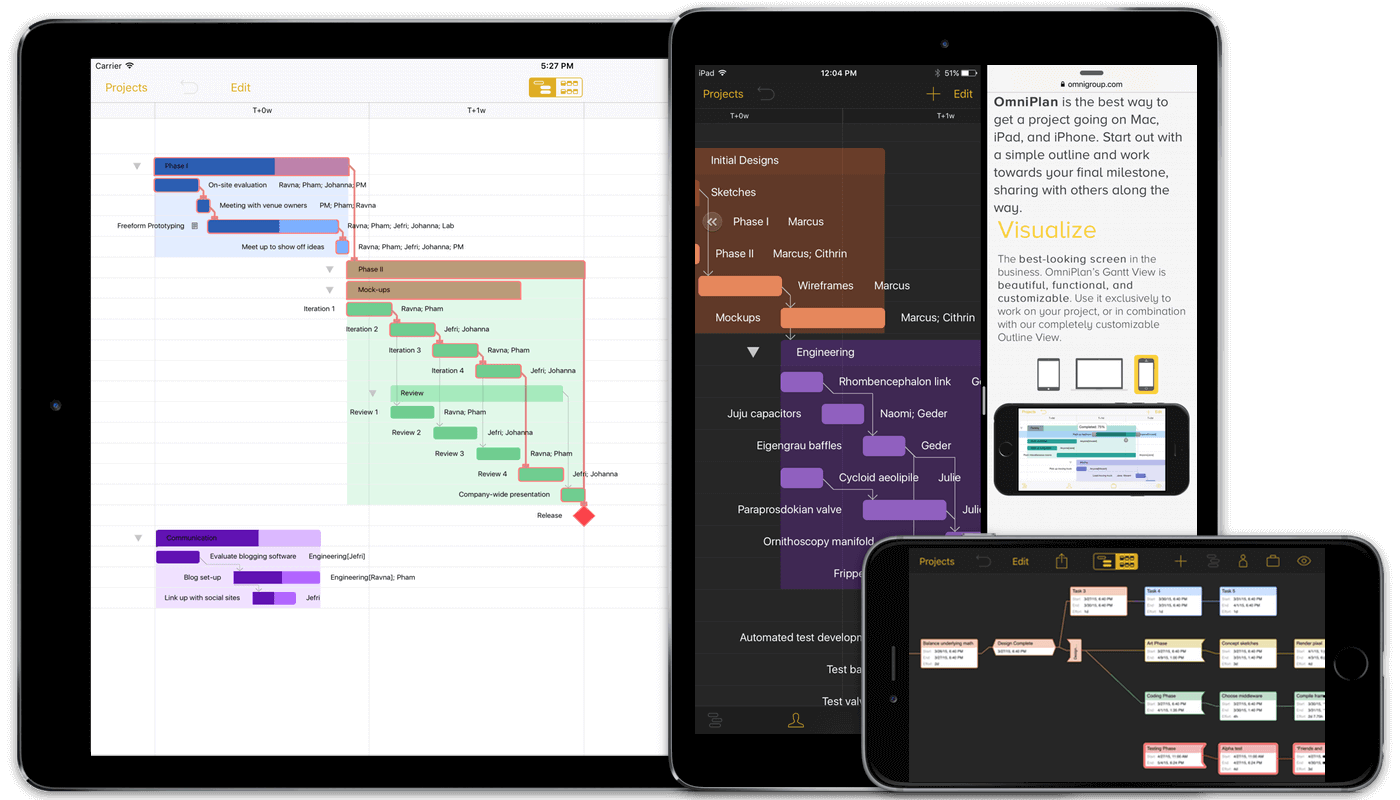
OmniPlan for iOS is designed to help you visualize, maintain, and simplify your projects. Break down tasks, optimize the required resources, control costs, and monitor your entire plan—all at a glance. Collaborate with your colleagues and share every detail, update a calendar with your days off, and process changes one-by-one or all in one go. OmniPlan provides features like Gantt charts, schedules, summaries, milestones, and critical path highlighting to let you manage all of your activities. From customizable views to fast data entry, OmniPlan helps you manage projects that are as simple or complex as you need them to be—without the complexity.
OmniPlan 3 is the most advanced desktop-class project management app you’ll find on iOS. Built to be fully compatible with OmniPlan 3 for Mac, you can seamlessly manage your projects in OmniPlan wherever you are. Whether you’re in the boardroom or in your truck on a job site, OmniPlan is there for you.
How This Documentation is Organized
This manual that you have before you (either online or in iBooks on your Mac or iOS device—or both) has been assembled in such a way that you’re provided with a complete tour of OmniPlan.
This introductory chapter provides an overview of the new features in OmniPlan 3, and explains just what this manual is all about. The few chapters following are a great introduction to the app, so if you’re new to OmniPlan proceeding through from the start isn’t a bad idea.
If you just need a quick update on what’s new in the current release, see the Release Notes in OmniPlan Settings for a list of recent changes.
To help guide you through the documentation and better learn everything there is to know about OmniPlan, a list of the chapters in this book follows.
- Chapter 1, Introduction
- The chapter you are currently reading provides an introduction to OmniPlan and describes the contents of this book.
- Chapter 2, Managing Your Project Files
- This chapter describes managing your project files using OmniPlan’s built in document browser. Beyond creating, organizing, and sharing your documents, the document browser also holds tools for getting help and customizing your OmniPlan experience at a high level—you’ll learn all about those tools here.
- Chapter 3, Working in the Project Editor
- The Project Editor is the area in which you create and manage your projects. This chapter provides an overview of the tools available for creating, customizing, and curating even the most complex projects using the editing tools available in the Gantt chart and its associated inspectors.
- Chapter 4, Building Your First Project
- Once you are familiar with the tools in the Project Editor you are ready to get your first project up and running. The tutorial in this chapter guides you through the preliminary phase of effective OmniPlan use: building a model simulation-style description of your project inside OmniPlan. When completed, you’ll have the first baseline picture of a plan from which your project can begin in earnest.
Revised for OmniPlan 3, this tutorial offers fresh insight into OmniPlan for new and experienced users alike. It’s worth a look even if you’re familiar with a previous version of the app.
- Chapter 5, Managing a Project
- This chapter introduces you to OmniPlan’s tools for monitoring, updating, and revising your project as work proceeds.
- Chapter 6, Collaborating on Projects with Publish Subscribe (PRO) (PRO)
- If you are working on a project with multiple contributors, the publication and subscription features of OmniPlan Pro can be invaluable. This chapter introduces OmniPlan’s multiuser collaboration features, and guides you through setting up an account and syncing your files with a shared server repository. Balancing resource loads across projects that share a common resource pool and tracking changes to the project made by other users are also covered here.
- Chapter 7, Keyboard Shortcuts
- If you are using OmniPlan for iOS with an external keyboard connected to your device, you can take advantage of OmniPlan’s built-in keyboard shortcuts. This chapter provides a list of the available shortcuts based on where you are and what you’re doing in the app.
- Chapter 8, Getting Help
- If you ever get stuck when working on something in OmniPlan, if you have a problem installing the app, or you just want to tell our Support Humans or DocWranglers what an awesome job they’re doing, feel free to get in touch. This chapter points you to all of the help resources we have available: Support Humans, Support Articles, Videos, and Documentation.
- Glossary
- The glossary contains an alphabetical list of special terms you will encounter throughout the app, this documentation, and other project management resources you might be familiar with. If you are just starting out in project management or you are curious about how OmniPlan implements certain concepts, this is a great place to check.
Features of OmniPlan 3
With OmniPlan 3 for iOS, our vision is simple: to bring OmniPlan on your iOS device to the position of a true peer of OmniPlan for Mac. We’ve brought several previously Mac-only features to this release, including the new Network Diagram view in the project editor, the Meeting task type for work that requires all assigned resources to be available, expanded leveling options for adjusting task duration, effort, or assigned amounts, and much more.
New standard features in OmniPlan 3 include:
-
Network View—An elegant and easy way to rapidly prototype and visualize your project’s flow as a network diagram of nodes connected by dependencies.
-
Meeting Task Type—A new resource allocation option that allows you to specify if multiple resources need to work on a task independently or simultaneously.
-
Catch-Up—If everything is going as planned, bring the completion percentage of every task (or just the selected tasks) in your project up to today’s date.
-
Reschedule—If you have tasks which were planned to be complete by now, but aren’t, reschedule them with the tap of a button.
-
Leveling Priority—Define leveling priority for tasks in your project.
-
Display Off-Hours—Display all off-hours, holidays, and weekends as shaded vertical bars in the Gantt chart.
-
Unlinked Duration and Effort—Set different values for a task’s effort and duration, then let OmniPlan crunch the numbers for your resource assignment percentage.
These features are on top of a list of returning features that make OmniPlan for iOS the leader in its class, including:
-
Meticulously Designed Gantt Chart Interface—Rapidly build and easily maintain a project with this scalable, flexible view.
-
Smart Scheduling and Automatic Leveling—Once your project is set up, OmniPlan’s automated scheduling and leveling tools help optimize your resource use every step of the way.
-
Multiple Baselines and Critical Path Display—See your project’s priorities clearly with critical paths, and reposition to address challenges that arise with as many baselines as you need.
-
Printing and Export Options—Print over the air, send OmniPlan files via email, or export to common formats such as PDF and HTML.
-
The Latest iOS Technologies—On devices that support them, OmniPlan includes Spotlight search, multitasking, 3D Touch controls from the app icon, and hardware keyboard shortcuts.
-
OmniPresence File Sync—Sync and store your OmniPlan projects in the cloud with a free Omni Sync Server account.
Introducing OmniPlan Pro
Many OmniPlan users find that the tools to create, maintain, monitor, and complete a project—all features of the base app—fully encompass their needs. If your project management requirements are more complex, we offer a package of additional tools designed to extend OmniPlan to unprecedented levels of flexibility, extensibility, and power.
The suite of new OmniPlan Pro features includes:
-
Monte Carlo Simulations and Effort Estimation — OmniPlan 3 Pro brings the ability to estimate on-time project and milestone completion using Monte Carlo simulations. These are a great aid for planning ahead, providing tip-offs for when resources should be shifted to ensure on-time project completion. The simulation package also provides a handy Auto-Estimate Effort tool for tasks where effort isn’t already assigned, making completion forecasts quick and easy.

Upon running a simulation, a set of horizontal bars appears on days surrounding each milestone (represented as a small diamond); one bar equals 10 percent confidence that the milestone will be complete on that day (10 bars on a day means that according to the simulation, a milestone is 100% likely to be completed on that day).
-
Omni Automation — Starting with version 3.11, OmniPlan Pro supports the Omni Automation JavaScript scripting implementation for automating many common tasks and enabling new workflows, including Plug-In support and an in-app automation console. Learn more at the Omni Automation website.
The following features also return to Pro in OmniPlan 3:
- Microsoft Project Import and Export—Consistently updated interoperability with Microsoft’s project management software, including Microsoft Project 2016.
- Publishing, Subscribing, and Change Tracking—Multiuser sync and collaboration across one or many projects via shared server repository.
The OmniPlan Pro upgrade is available as an in-app purchase from the Settings menu in the document browser. To preview OmniPlan’s support for Microsoft Project files, see the MS Project Support example document in the On My [device] folder (if it’s missing, choose Restore Sample Documents from the Settings menu to create a new copy). You can also import your own Microsoft Project documents to preview them in OmniPlan before purchasing.
Throughout this manual, Pro features are denoted by a box with a border color distinct from other text (just like the one here) to indicate that the content within applies to features present when the OmniPlan Pro upgrade is installed.
To verify whether you have OmniPlan Pro installed on your device, do the following:
- From the Locations screen, tap
 .
. - Tap About OmniPlan, and then tap About OmniPlan; the following appears:
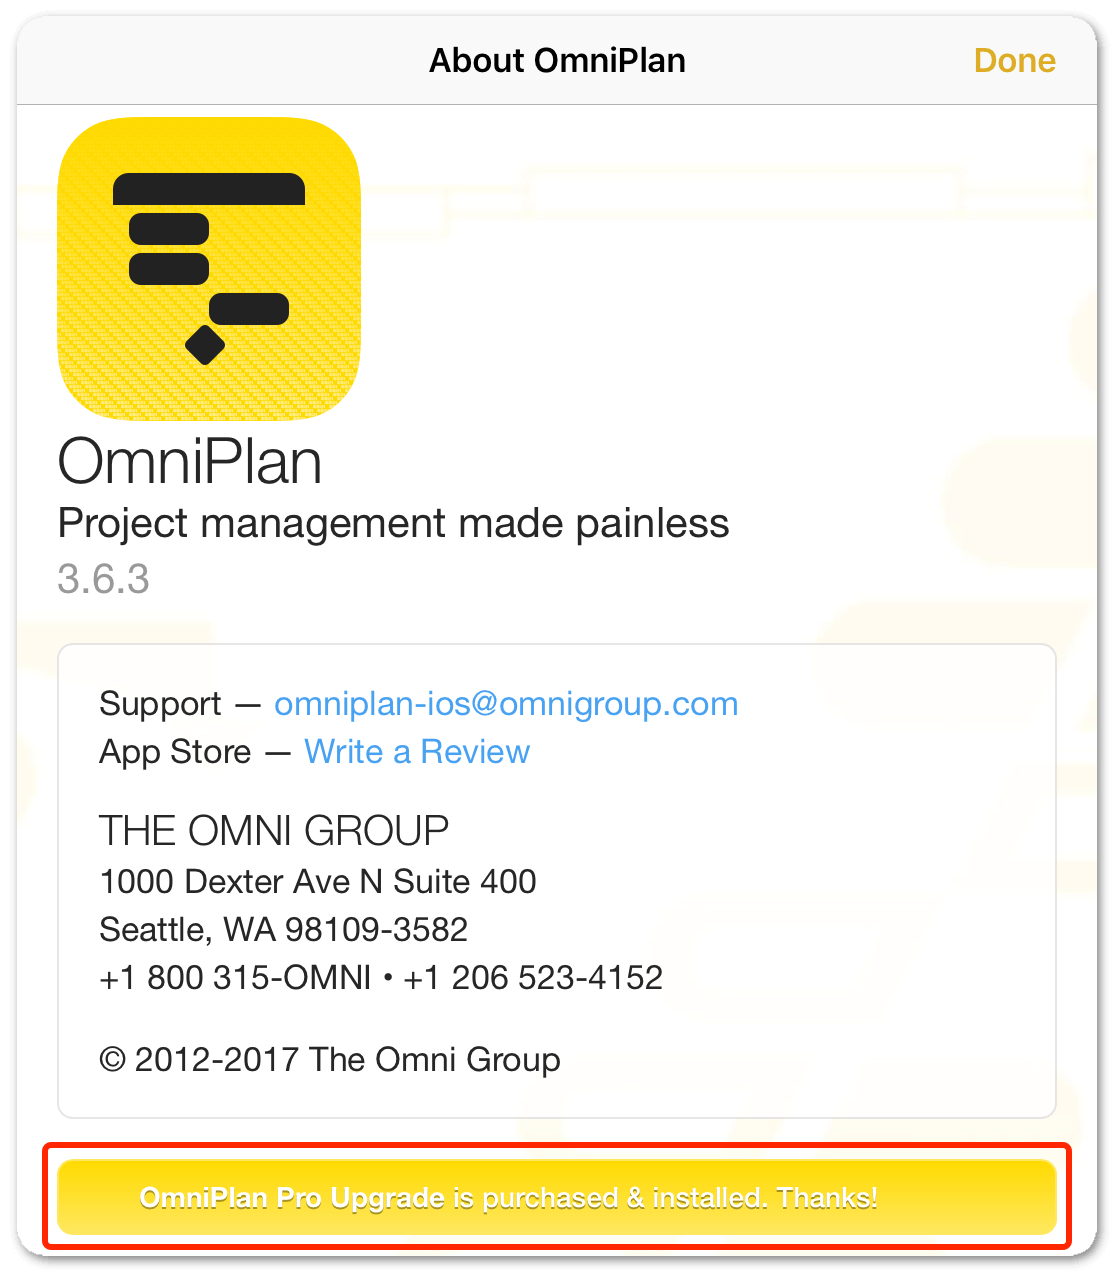
Look to the bottom of the About box for a message that you have OmniPlan Pro installed. If you do not have OmniPlan Pro installed, you can purchase the upgrade to Pro:
- From the document browser, tap
 .
. - Tap In-App Purchases.
- Tap Unlock Pro.
-
Tap Buy Now:
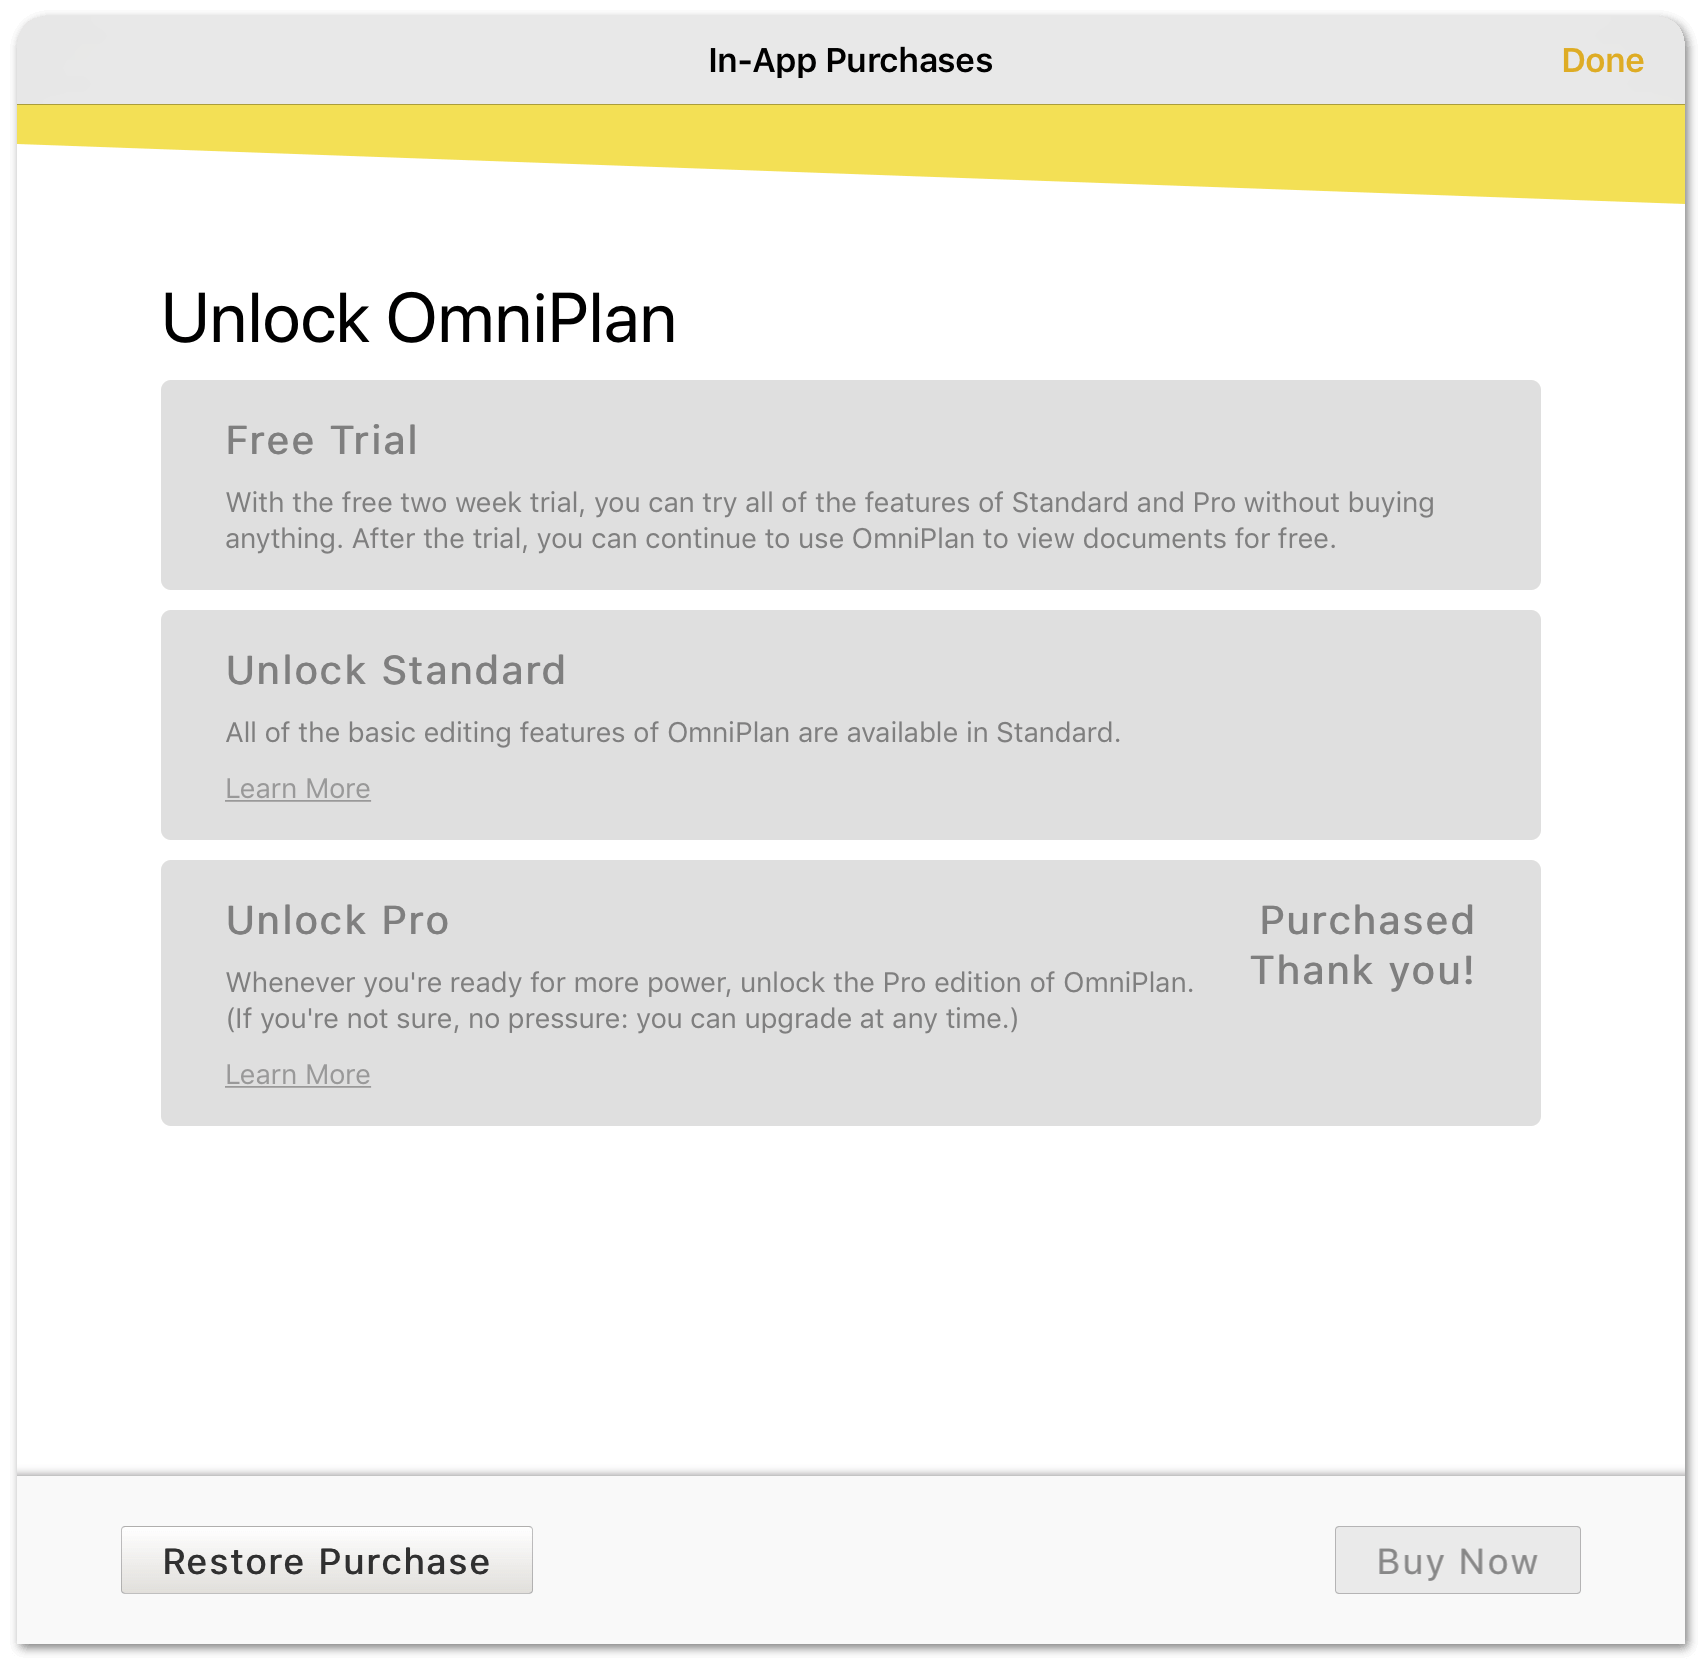
-
Optionally, if you previously purchased OmniPlan Pro but haven’t yet installed it on your device, tap Restore Purchase on the In-App Purchases screen.
Managing Your Project Files
When you first launch OmniPlan you arrive at the document browser, where you can open an existing file or create a new one from scratch.
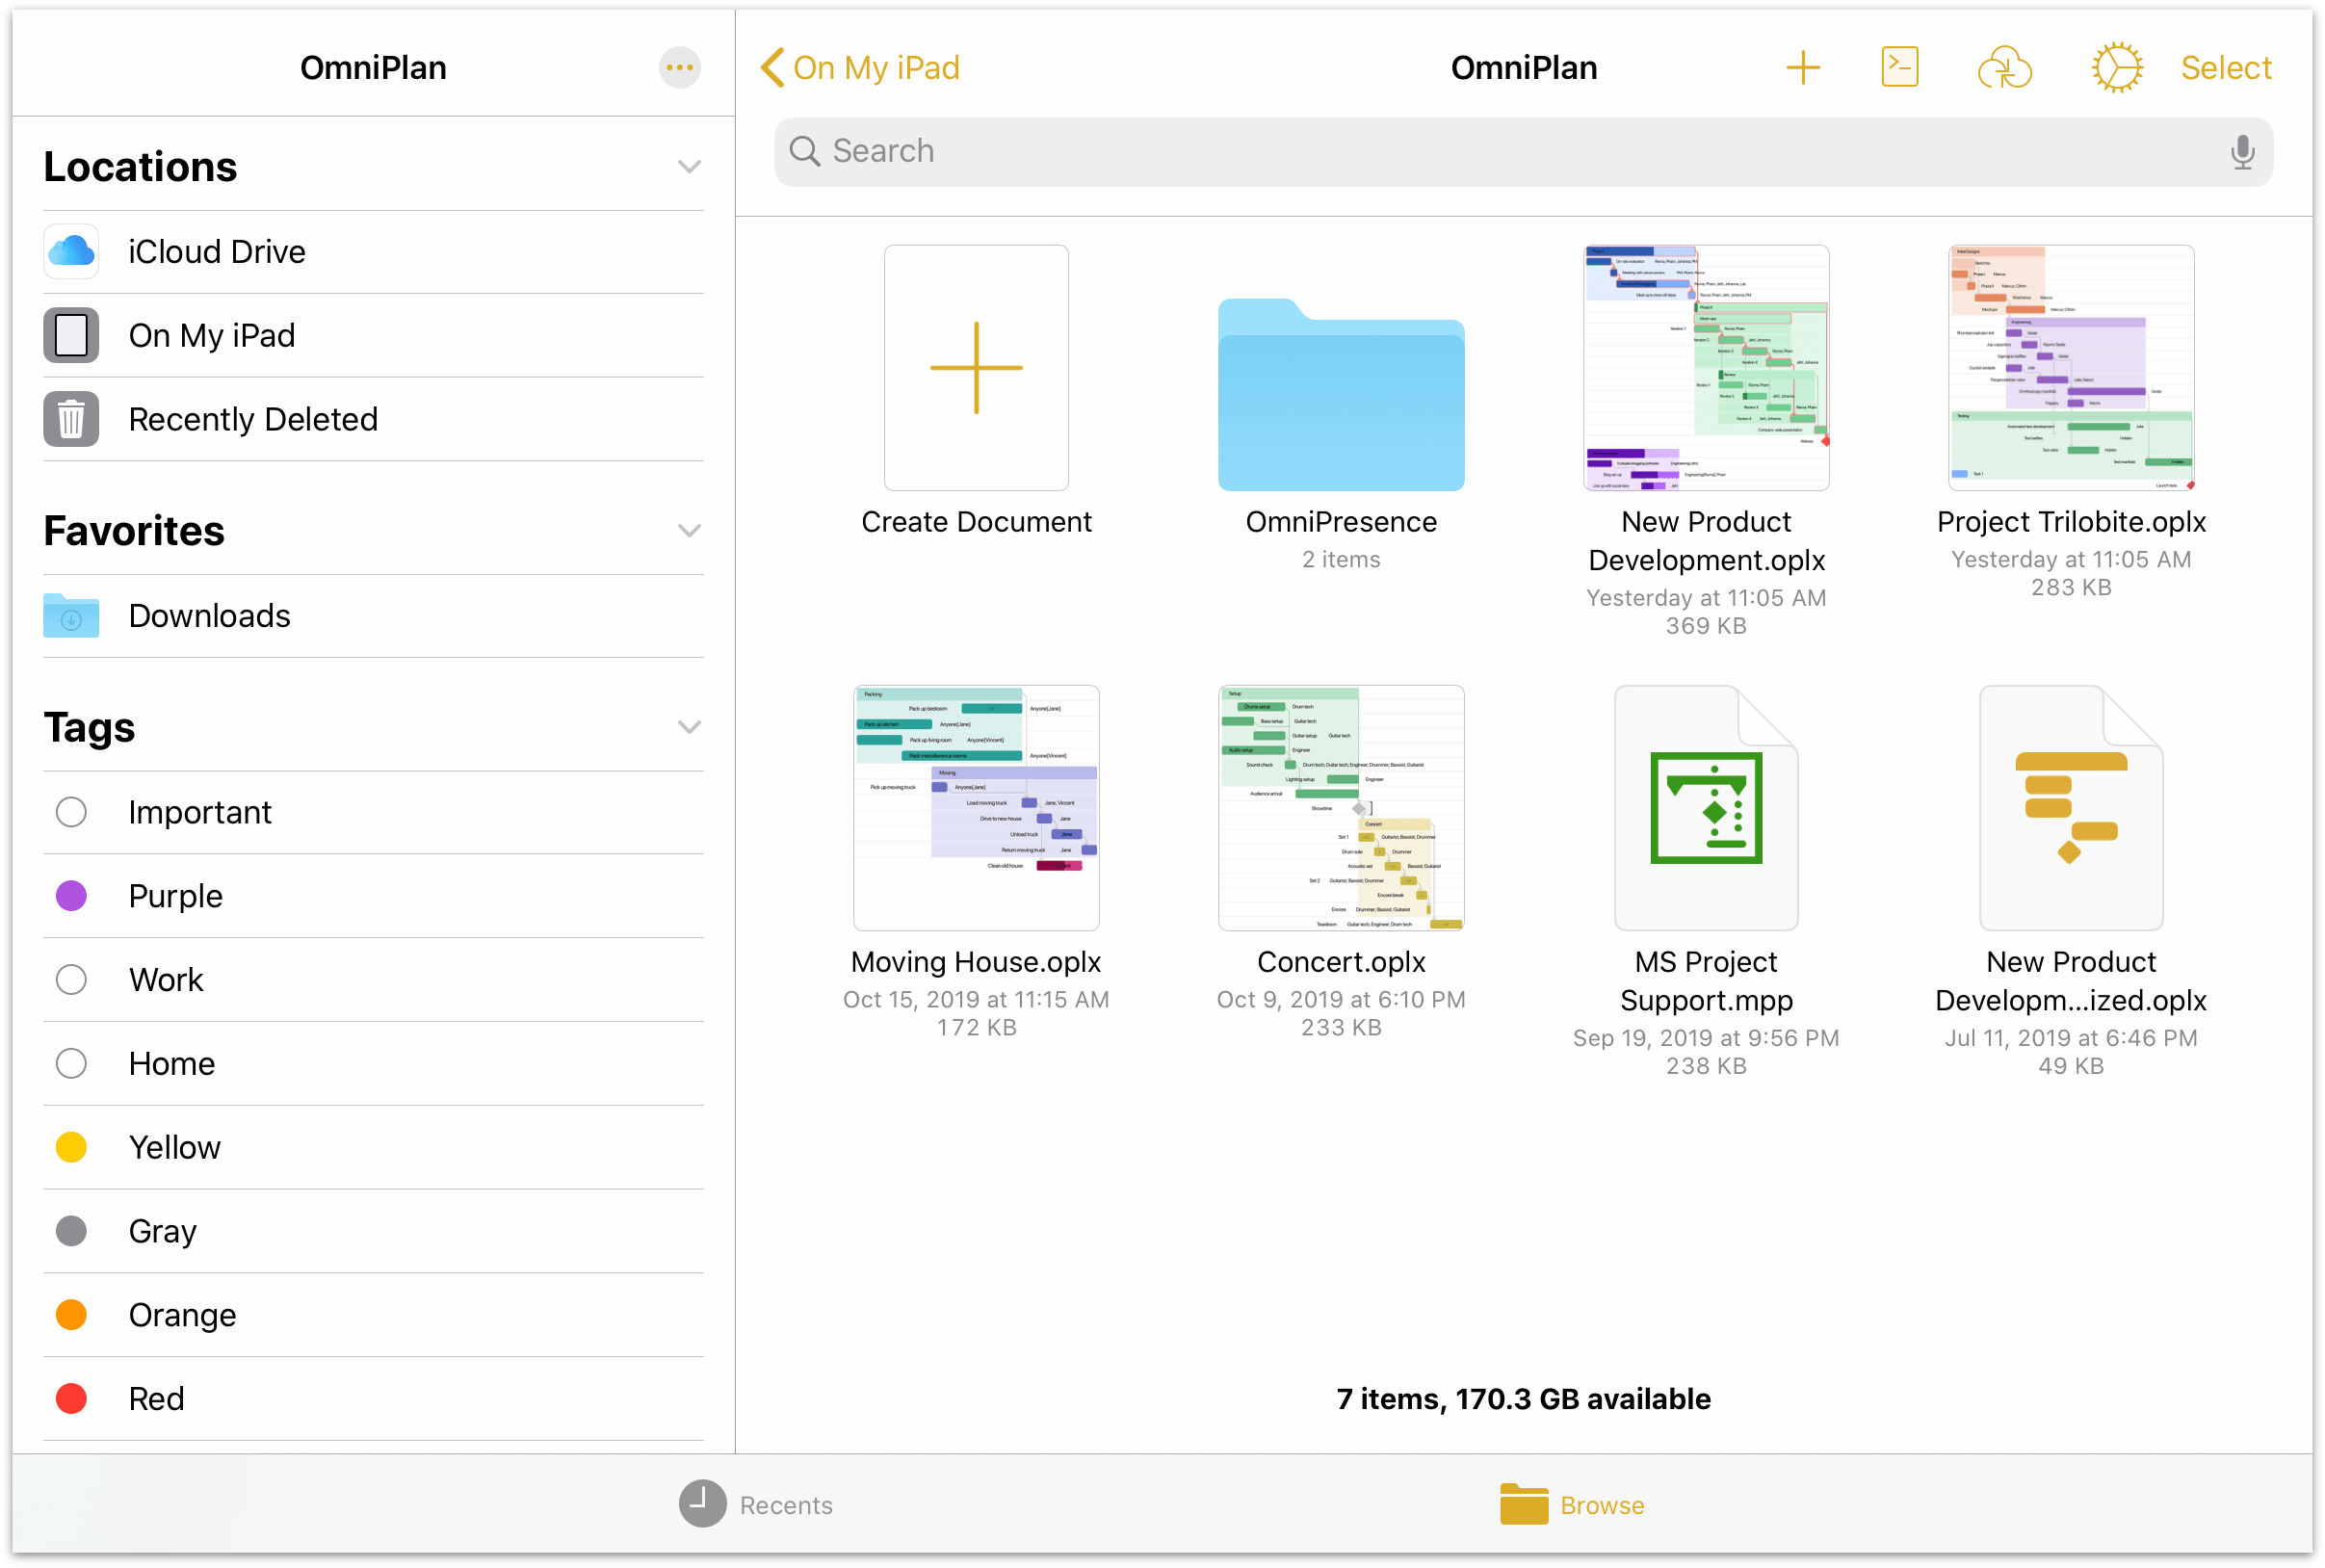
The document browser provides access to the same file storage locations as the iOS Files app, including the OmniPlan folder on your device (where files are kept locally), your cloud storage locations (such as iCloud Drive), and any OmniPresence folders you have connected.
OmniPlan files use the .oplx extension, a bit of text appended to the filename that tells the operating system what app the files belong to. This extension is hidden when browsing files in OmniPlan for iOS, but is retained when syncing back and forth with OmniPlan for Mac to make sure everything stays in order.
Recents View
Tap the clock icon  to switch to the Recents view of the document browser, which shows a collection of files that you have worked with recently. This list is drawn from every location available on your device, and includes files stored locally as well as those in the cloud.
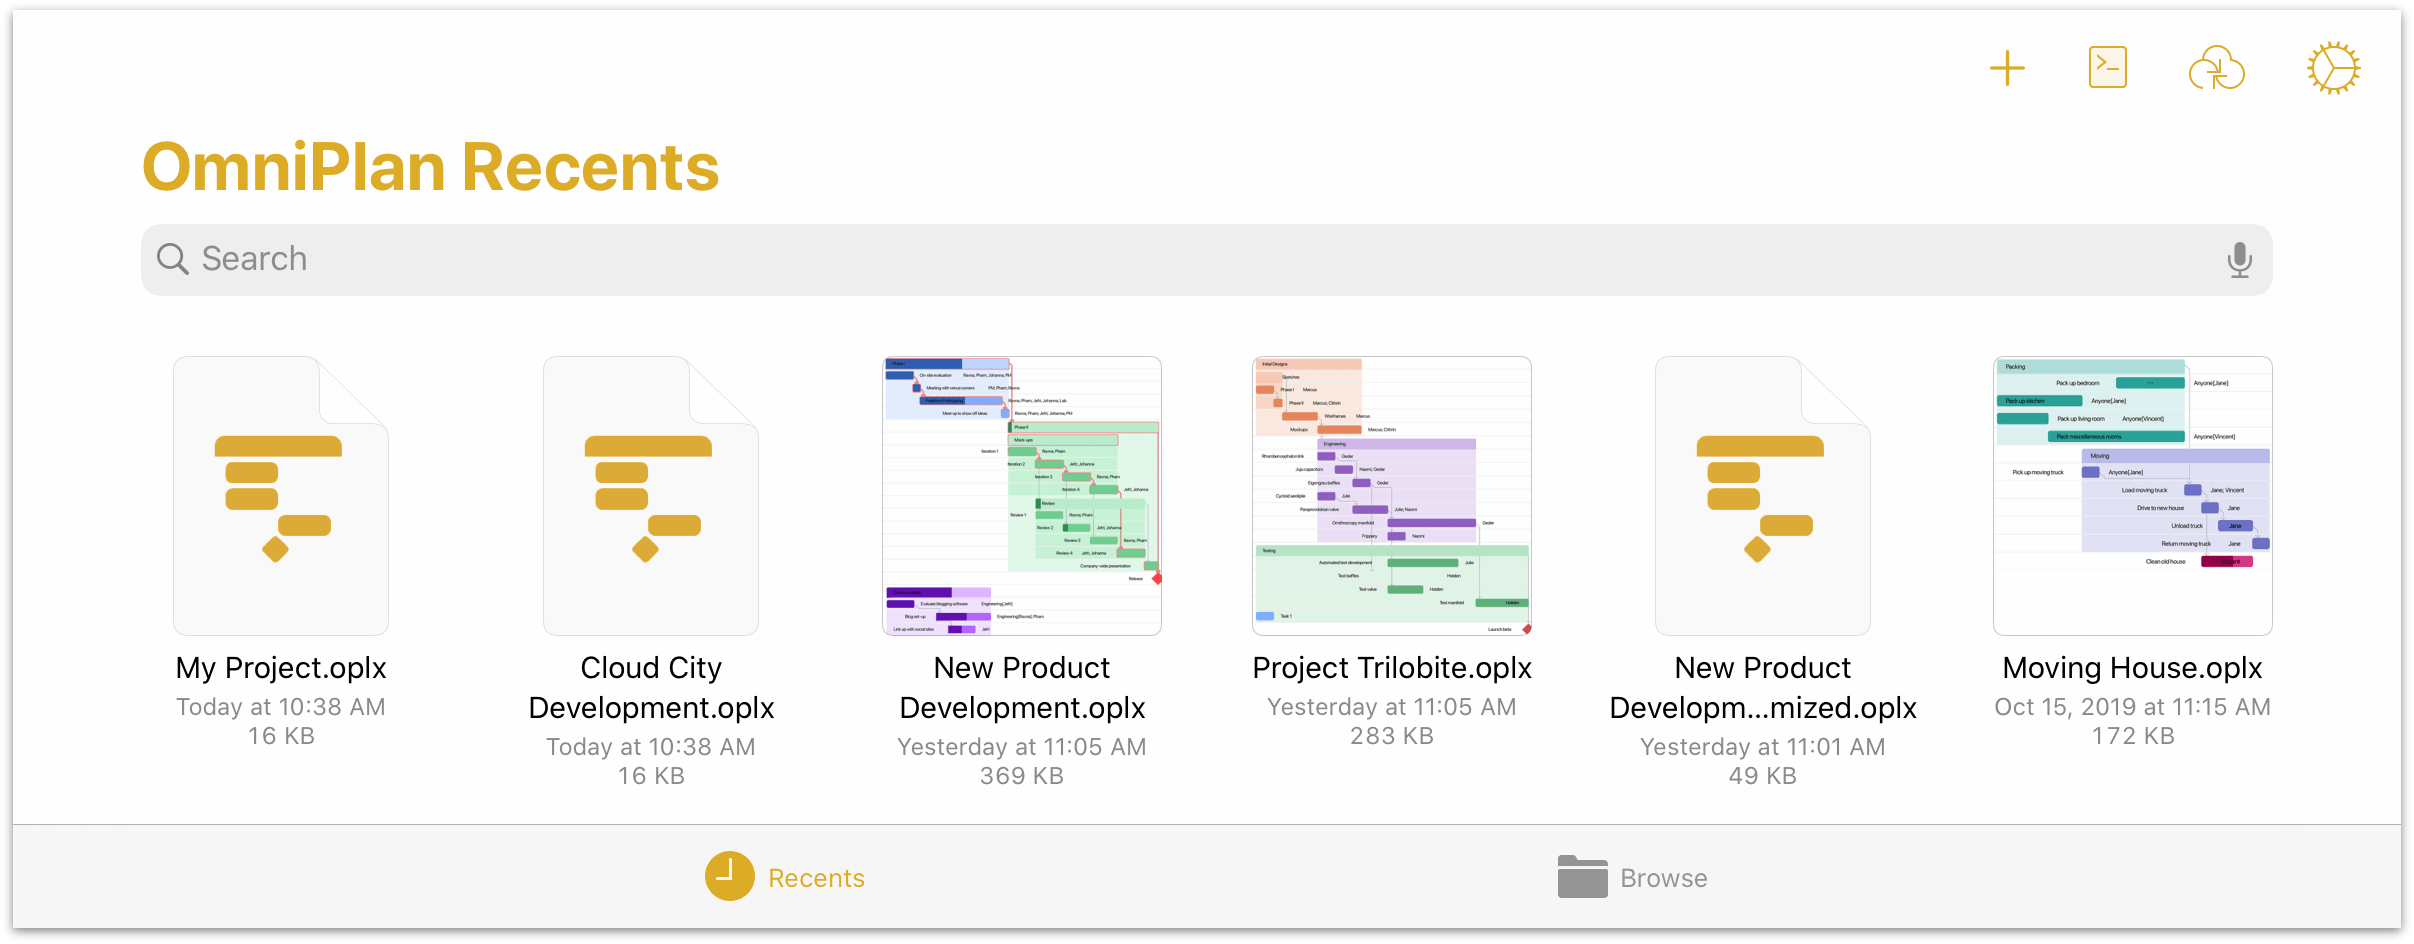
The Recents view is a flat list of files sorted by date from most recently accessed to oldest. If you don't see a file here that you expect, you can use the Search dialog to look through all the files available, or switch to the Browse view to look through the hierarchy of files on your device along with any connected cloud locations.
Browse View
Tap the folder icon  to switch to the Browse view of the document browser, which displays the hierarchy of locations and folders you have stored on your device, as well as any connected cloud service providers.

In wide device views, the Locations list offers high level navigation on the left side of the screen, with the contents of a selected location shown on the right; in compact views, Locations sits at the top of the navigation hierarchy with specific locations and their contents nested beneath.
The Locations List
When browsing your files, the Locations list displays the storage destinations that are available on your device. This always includes On My [device], which contains all of your files stored locally. If you have an Apple ID connected, iCloud Drive also appears as an available cloud storage location.
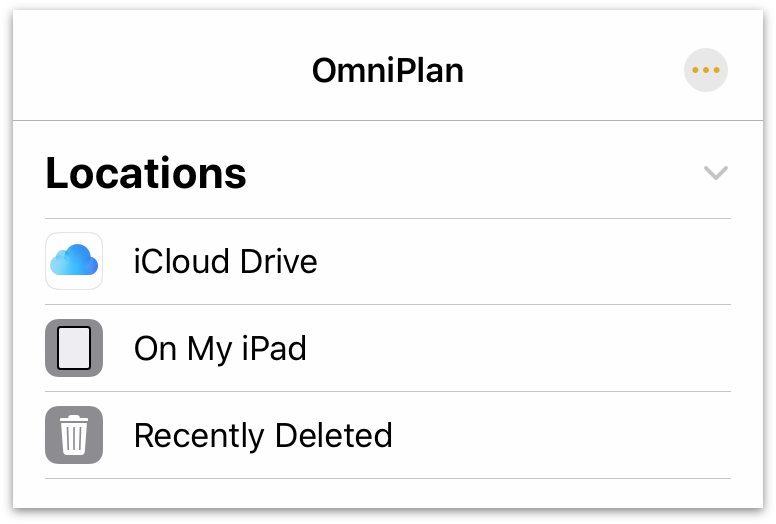
If you have any additional cloud storage providers installed on your device they will appear in this list as well.
Note that OmniPresence, the cloud sync solution operated by The Omni Group, does not appear in the list of service providers here because it doesn't run as a separate application. Instead, you can sync with a dedicated OmniPresence folder inside your On My [Device] > OmniPlan folder, as described here.
Not all cloud storage providers work equally well with all file formats. We recommend using iCloud Drive or a connected OmniPresence folder to sync your OmniPlan files; other providers may have trouble depending on the technologies they use.
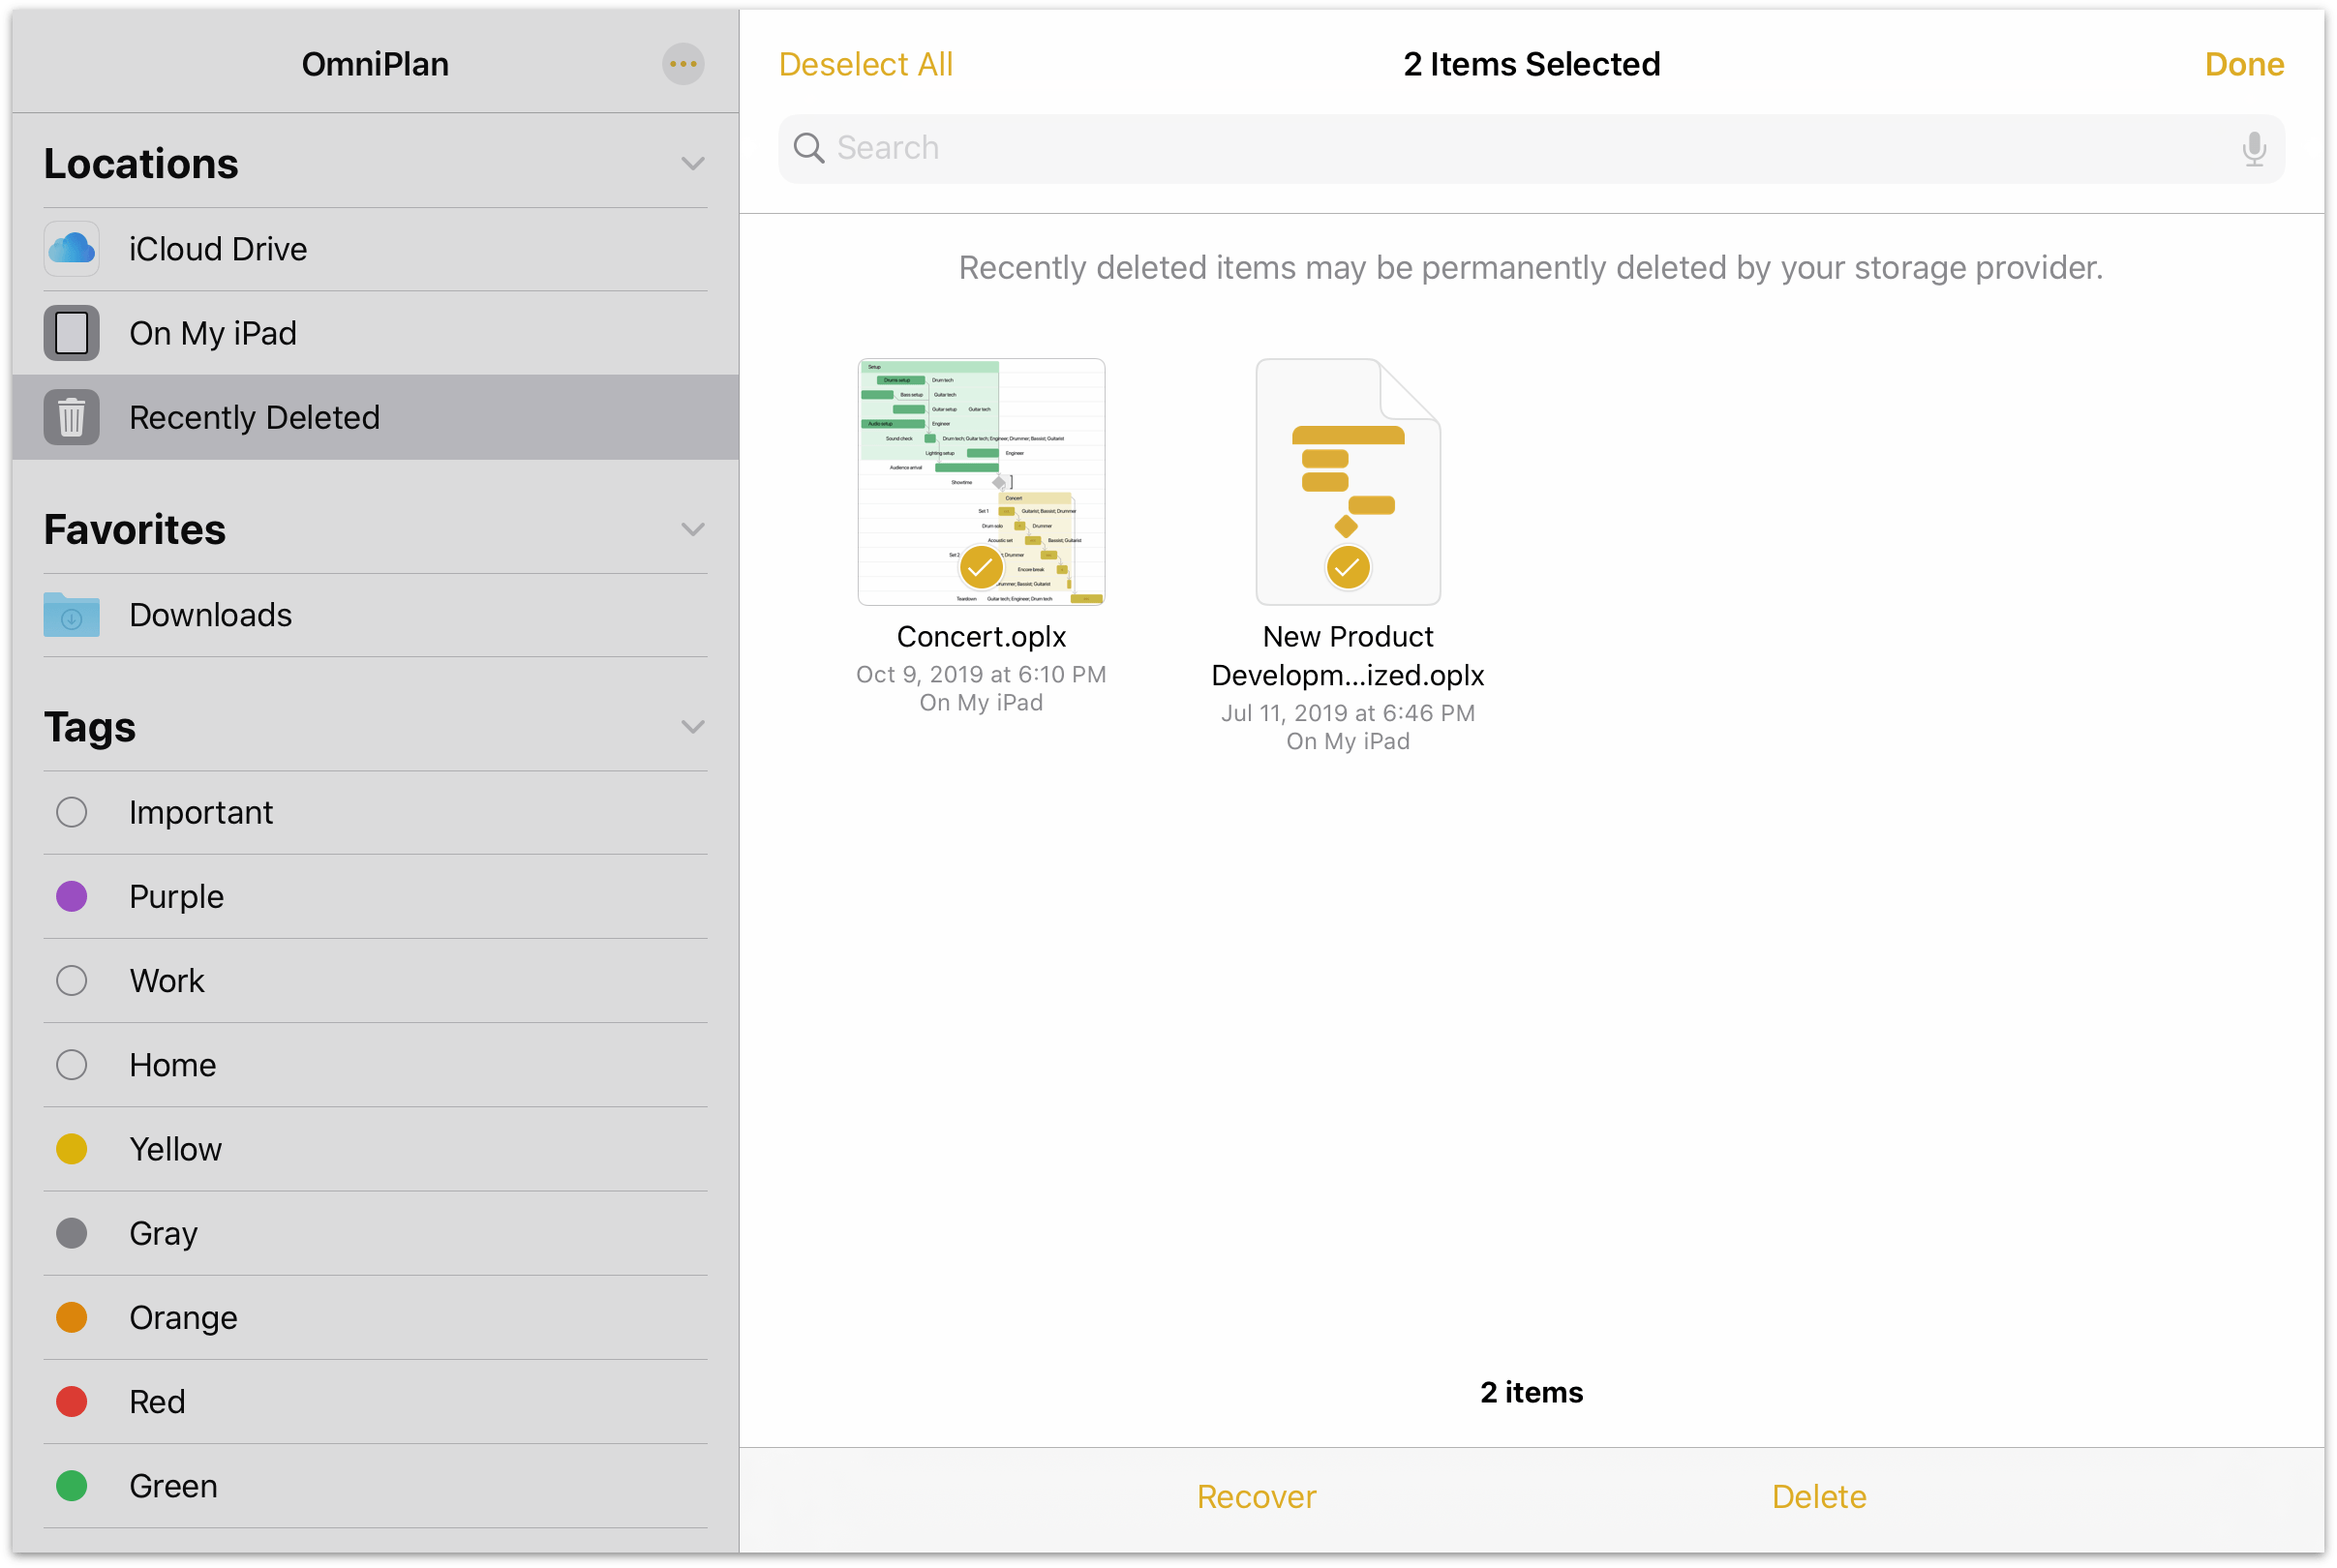
The final item in the Locations list is Recently Deleted, where iOS temporarily stores files after you have deleted them in case you want them back.
Beneath the list of available locations is a list of Tags. Tap a tag in the list to view all of the items with that tag applied; you can apply tags to individual files using their contextual menu (see File Details below).
Finally, the More button  at the top of the Locations list provides additional functions for modifying the contents of the list.
-
Connect to Server—Choose a server to connect to via SMB, adding it as a location in a separate Shared section of the Locations list.
-
Edit—Switch the list to Edit mode, where you can rearrange locations and tags, and choose which locations you want to be visible in the list. Note that changes made here apply to the Locations list everywhere it appears, including the Files app and other apps that use the iOS document browser.
Browsing a Location
Upon selecting a location in the Locations list, its contents appear in a pane to the right (this pane appears on top of the Locations list when in compact views).
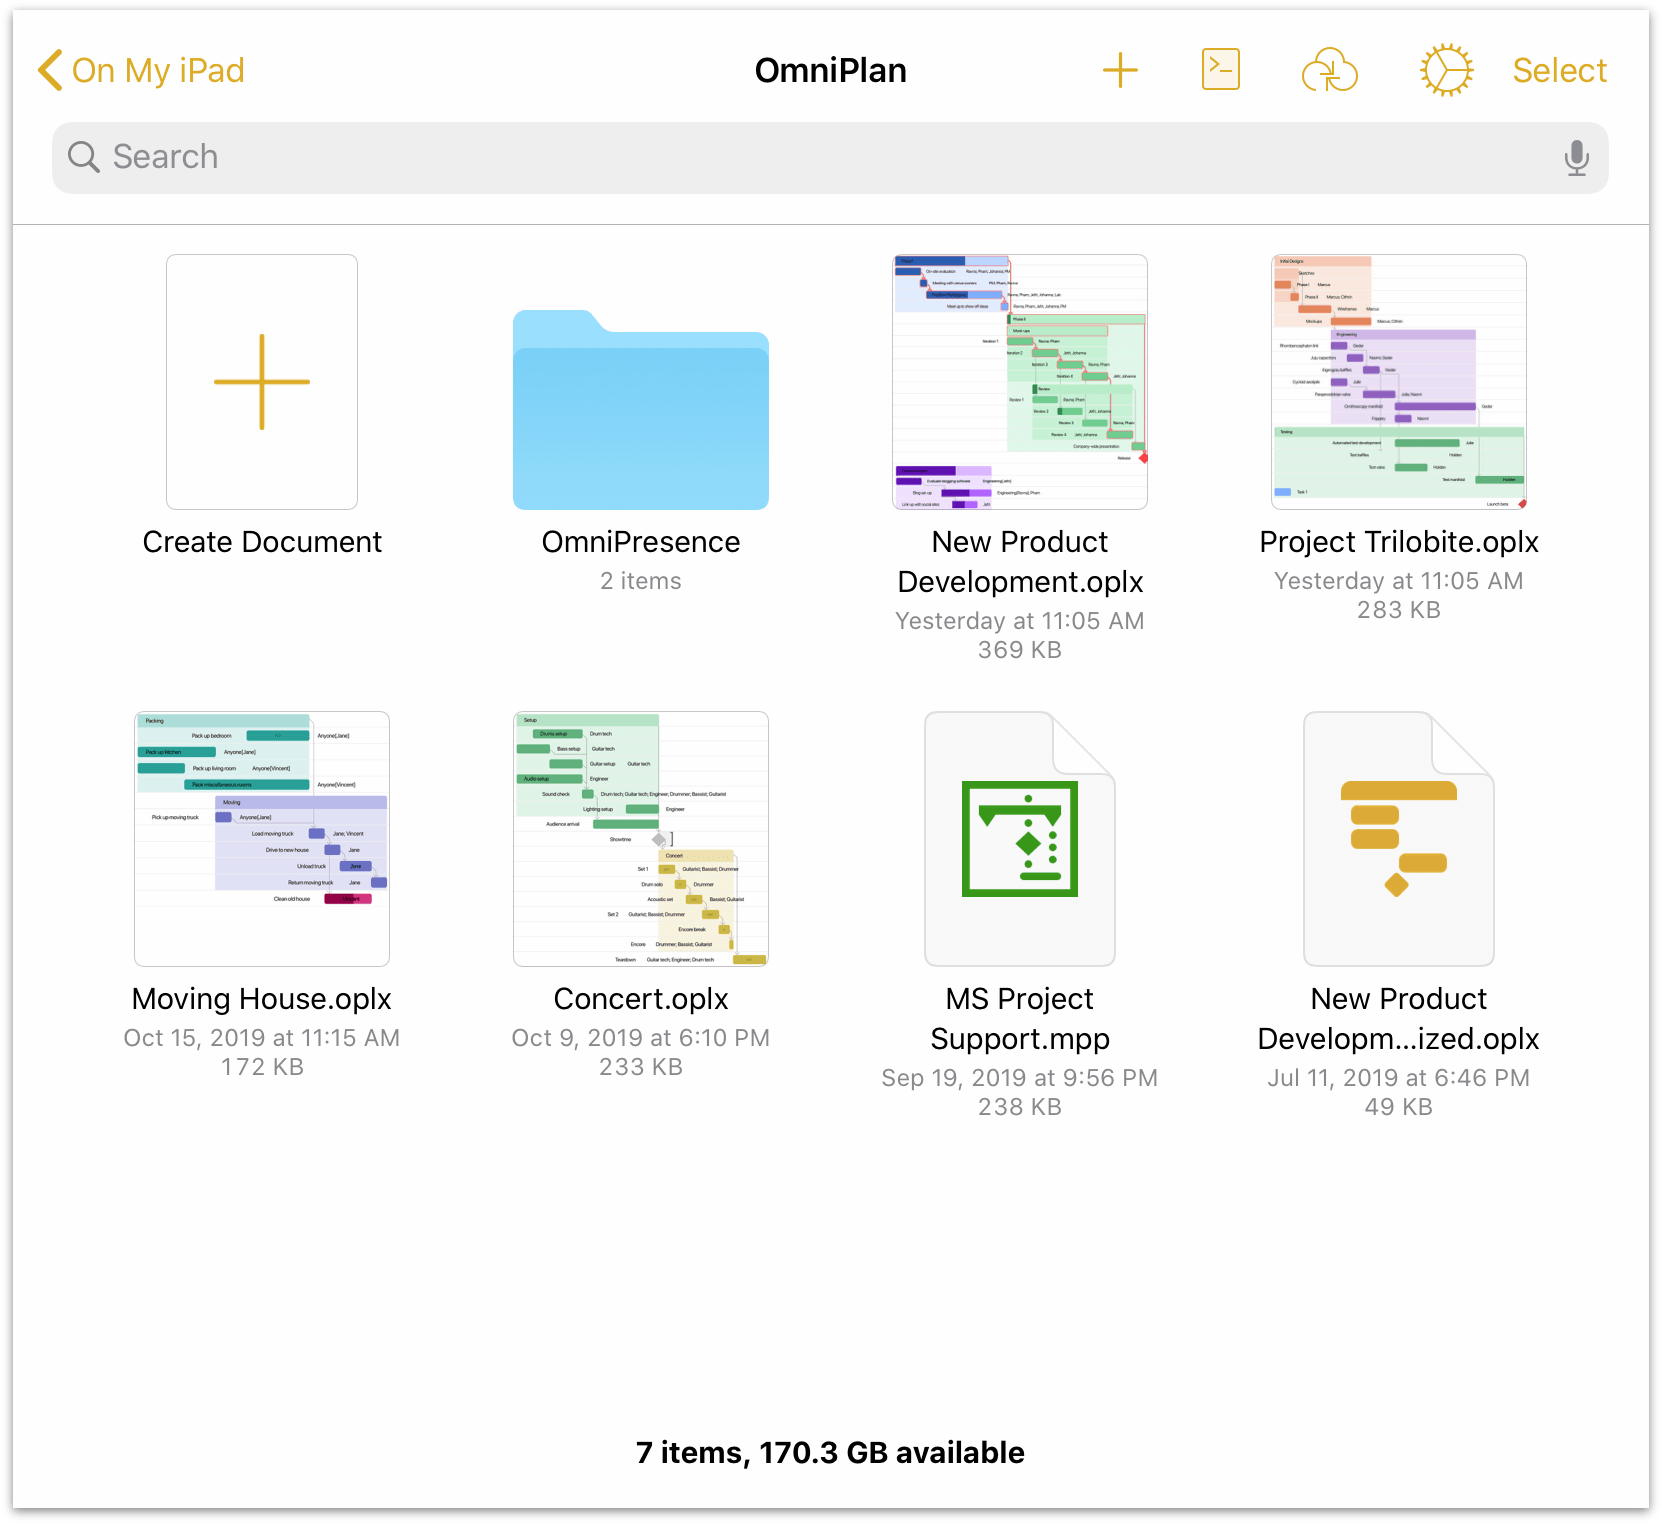
A search field at the top of the pane offers options to search recently opened files, the entire current location, or just the current folder for filenames that match the search terms.

Drag down on the browsing pane to access more controls for the location, choose how files are sorted, and switch between thumbnail and list views.
File Details
Each file is represented by a thumbnail image. Once modified, OmniPlan generates a preview based on the contents of the file; otherwise, the file is represented by a generic document icon.
Along with the thumbnail, each file displays its name, the date it was last modified, and its location on your device.
-
Tap a document preview to open the associated file.
-
To change the name of a file or folder, tap the name and then enter a new title.
Contextual Menu
Tap and hold a file's thumbnail to open a contextual menu for the file, with the following commands:
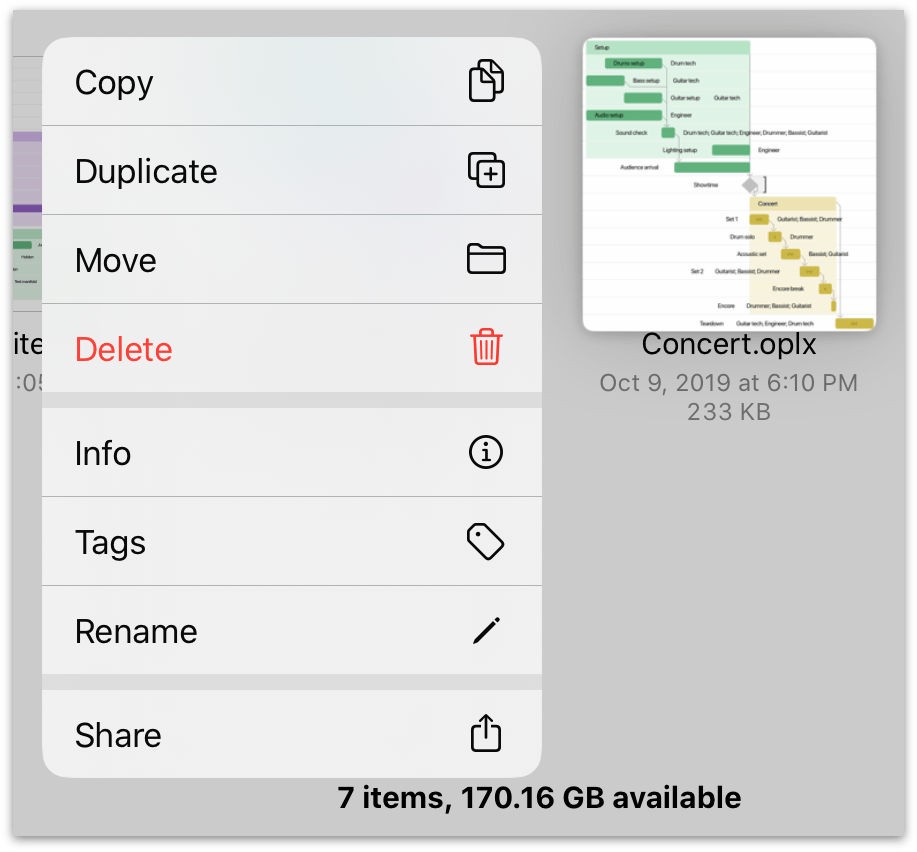
-
Copy—Copies the selected file and makes it available on the clipboard for pasting.
-
Duplicate—Copies and instantly pastes a copy of the selected file at the current location.
-
Move—Opens a hierarchical view of your locations where you can choose a new destination for the file.
-
Delete—Deletes the selected file (it can still be recovered if necessary).
-
Info—Presents a popup with detailed information on the file, including a larger document preview, metadata related to the file's creation and modification, location on your device, and any tags you have assigned.
-
Tags—Presents the list of available tags along with the option to create a new one. Tap a tag in the list to assign it to or remove it from the file.
-
Rename—Opens the file rename dialog, just as if you had tapped its name in the document browser.
-
Share—Opens the iOS share sheet, where you can choose from among the standard array of iOS share destinations as well as additional OmniPlan-specific share options, as described below.
Sharing and Exporting
From a file's contextual menu or with a file selected, tap the Share button  and then choose one of the following actions to perform on the file.
Share As... 
Choose a format for sharing the file, and then choose a destination from the standard set of iOS share destinations.
When sharing an OmniPlan file, the following file formats are available:
- OmniPlan — sends a copy of the selected OmniPlan file.
- Canvas Gantt — sends a PDF of the entire Gantt chart as a single page.
- Paginated Gantt — sends a PDF of the Gantt chart, but split over multiple printable pages.
- Task Report — sends an HTML page that lists all of the tasks in the project, which you can then print, save as PDF, or post to an internal website for the project.
- Resource Report — sends an HTML page that lists all of the tasks in the project by resource, which you can then print, save as PDF, or post to an internal website for the project.
- Microsoft Project MPP
 — sends a Microsoft Project (.mpp) file of the selected OmniPlan file via email or to another app. The Microsoft Project export option requires OmniPlan Pro.
Print 
Prints the selected file to an AirPrint printer of your choosing.
Copy 
Copies the selected file to the clipboard.
Importing to OmniPlan
If you receive OmniPlan files from elsewhere and would like to open them in OmniPlan for iOS, there are two primary ways to import files from other locations into OmniPlan on your iOS device.
When using OmniPlan on multiple devices you own, syncing is preferable to other methods of file transfer. It’s faster, simpler (once set up), provides a layer of backup for your documents, and helps avoid a mess of contradictory file copies.
iCloud Drive and OmniPresence are the two recommended sync services for OmniPlan files. See this support article for details on syncing with OmniPresence in iOS 13 and later.
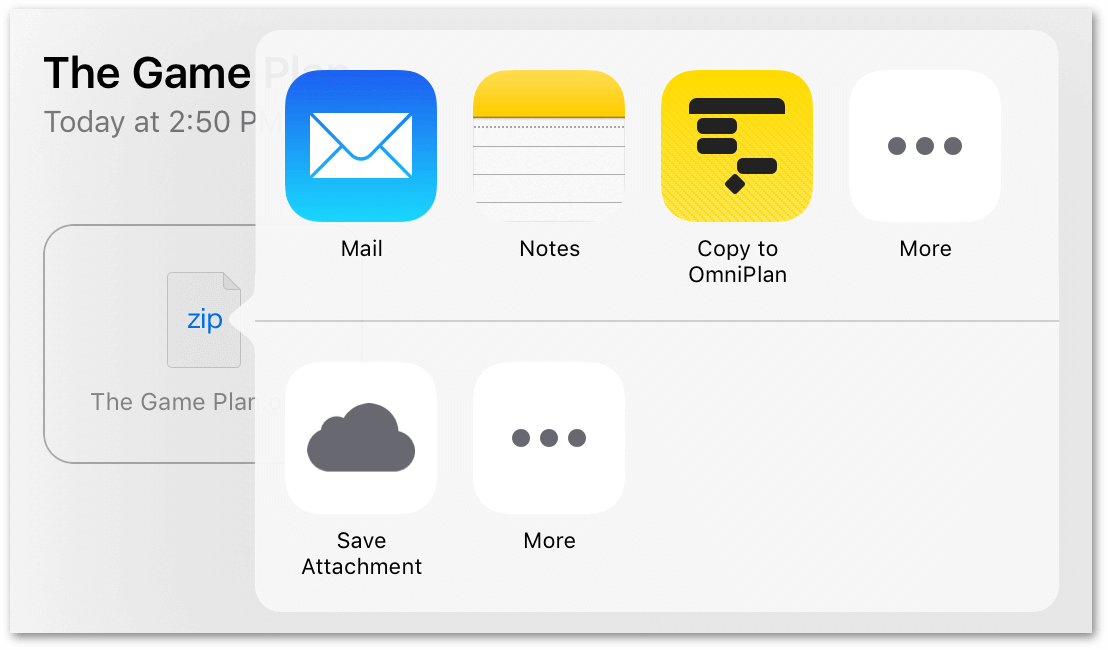
The first way to bring OmniPlan documents from the outside into OmniPlan for iOS is to copy them from another app. This works particularly well with Apple’s built in Mail app for iOS—you can email an OmniPlan file to yourself from anywhere, then tap the attachment and choose Copy to OmniPlan from the Send dialog that appears.
If you have a Mac or a PC with iTunes installed, a second way to transfer OmniPlan files to your iOS device is with iTunes file transfer.
- Make sure your iOS device with OmniPlan is connected to iTunes.
- Choose your device from the device list.
- Choose Apps in the device’s Settings sidebar and scroll down to the File Sharing section of the apps list
- Select OmniPlan in the list of file transfer-capable apps, and drag and drop your files into the list of OmniPlan documents.

Microsoft Project Import and Export (PRO)
OmniPlan Pro enables you to import and export Microsoft Project (.mpp) files. When you import a Microsoft Project file, the file is left in place (either on Omni Sync Server, iCloud Drive, or as an email attachment), and the file is converted to OmniPlan’s format (.oplx) and placed in the On My [device] folder in OmniPlan. Once in OmniPlan, you can edit the project, and then export the file back into Microsoft Project format as needed.
With OmniPlan Pro, the option to export documents as Microsoft Project .mpp files is displayed alongside the other options by tapping the Share button  and choosing Share As....
Microsoft Project .mpp files that haven’t yet been converted to OmniPlan’s .oplx file format are shown in the Document Browser with the following icon:
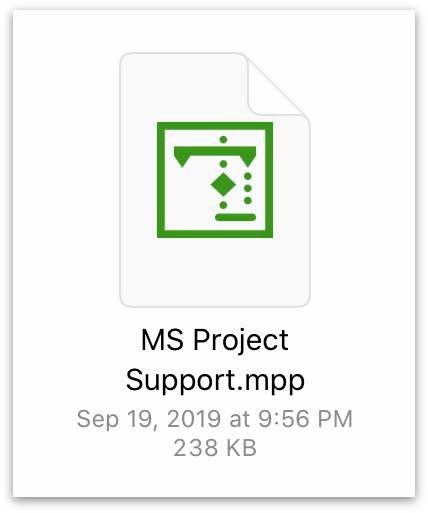
Once converted and saved, a Microsoft Project file appears and behaves just like any other OmniPlan document, and must be exported in the .mpp format again to be read by Microsoft Project.
The Location Toolbar
When viewing the contents of a location in the document browser, the toolbar along the top of the screen includes the following buttons:

Back 
On the far left of the toolbar is the Back button, followed by the name of the folder that contains the files being viewed. Tap to go backward in the folder hierarchy or return to the Locations list.
Folder Title 
At the center of the folder toolbar is the name of the current folder (such as On My iPad).
Add New 
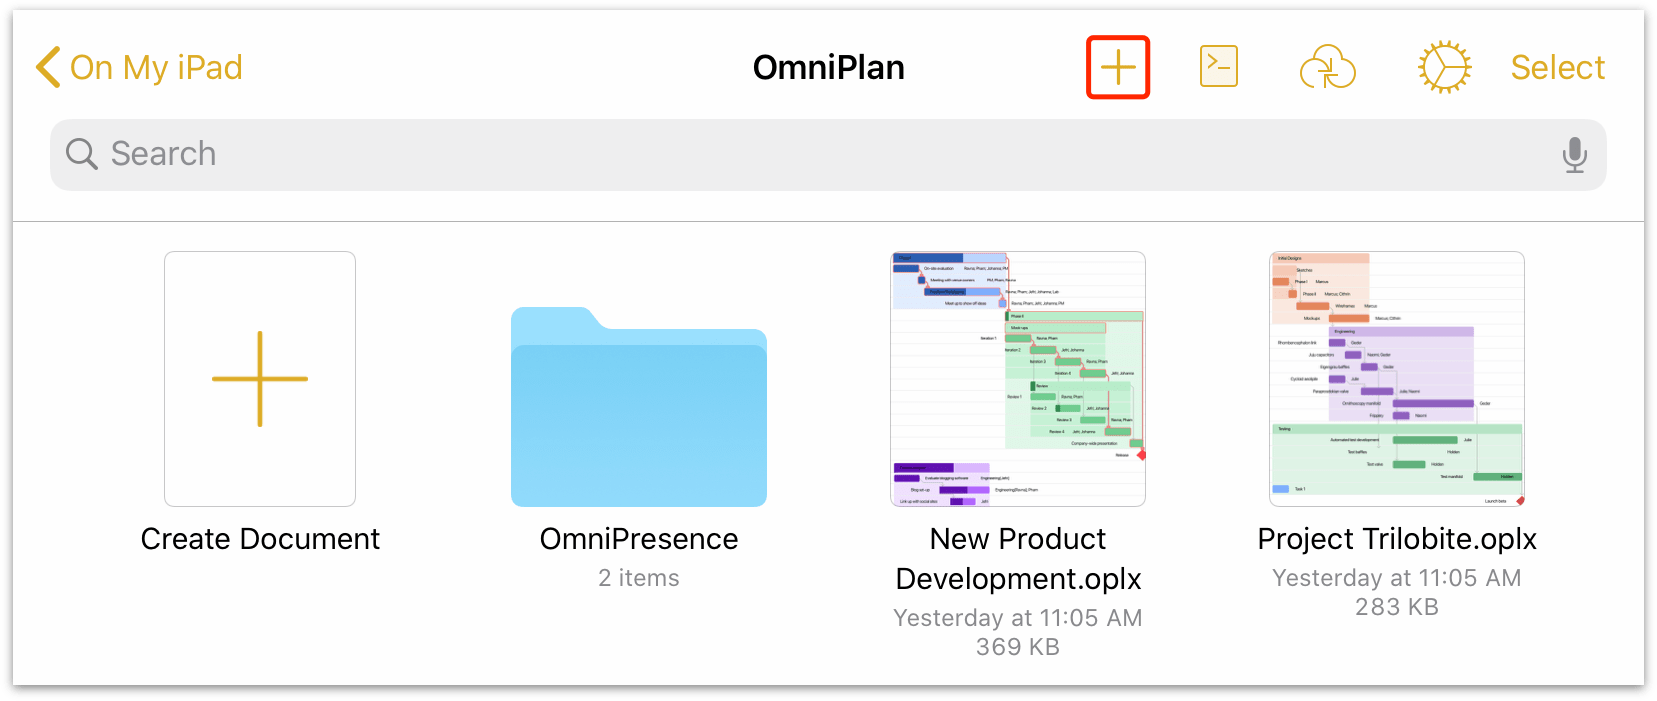
Tap to create a new OmniPlan document.
Automation Menu 

Tap to open a menu with controls related to Omni's JavaScript automation.
-
Automation Console—Opens the automation window to the console pane.
-
Automation API Reference—Opens the automation window to the API reference pane.
-
Configure Plug-Ins—Opens a pane that contains a list of automation Plug-Ins on your device, and controls for linking to a folder that contains Plug-Ins stored elsewhere (such as a cloud storage location).
If any Plug-Ins are installed, they appear in a list titled Actions beneath the Configure Plug-Ins menu item.
 Omni Automation Plug-Ins require OmniPlan Pro. For instructions on adding Omni Automation Plug-Ins to OmniPlan, see this article on the Omni Automation website.
Learn more about automating OmniPlan at the official Omni Automation website.
OmniPresence Menu 
With an OmniPresence folder connected, the OmniPresence menu button appears in the toolbar. Tap it to open the OmniPresence menu, where you can download files to a connected OmniPresence folder or navigate directly to them by tapping files in the list.
See this support article for details on using OmniPresence with iOS 13 and later.
App Menu 
Tap to open a menu with tools and settings related to OmniPlan itself. See The App Menu below for details.
Select 
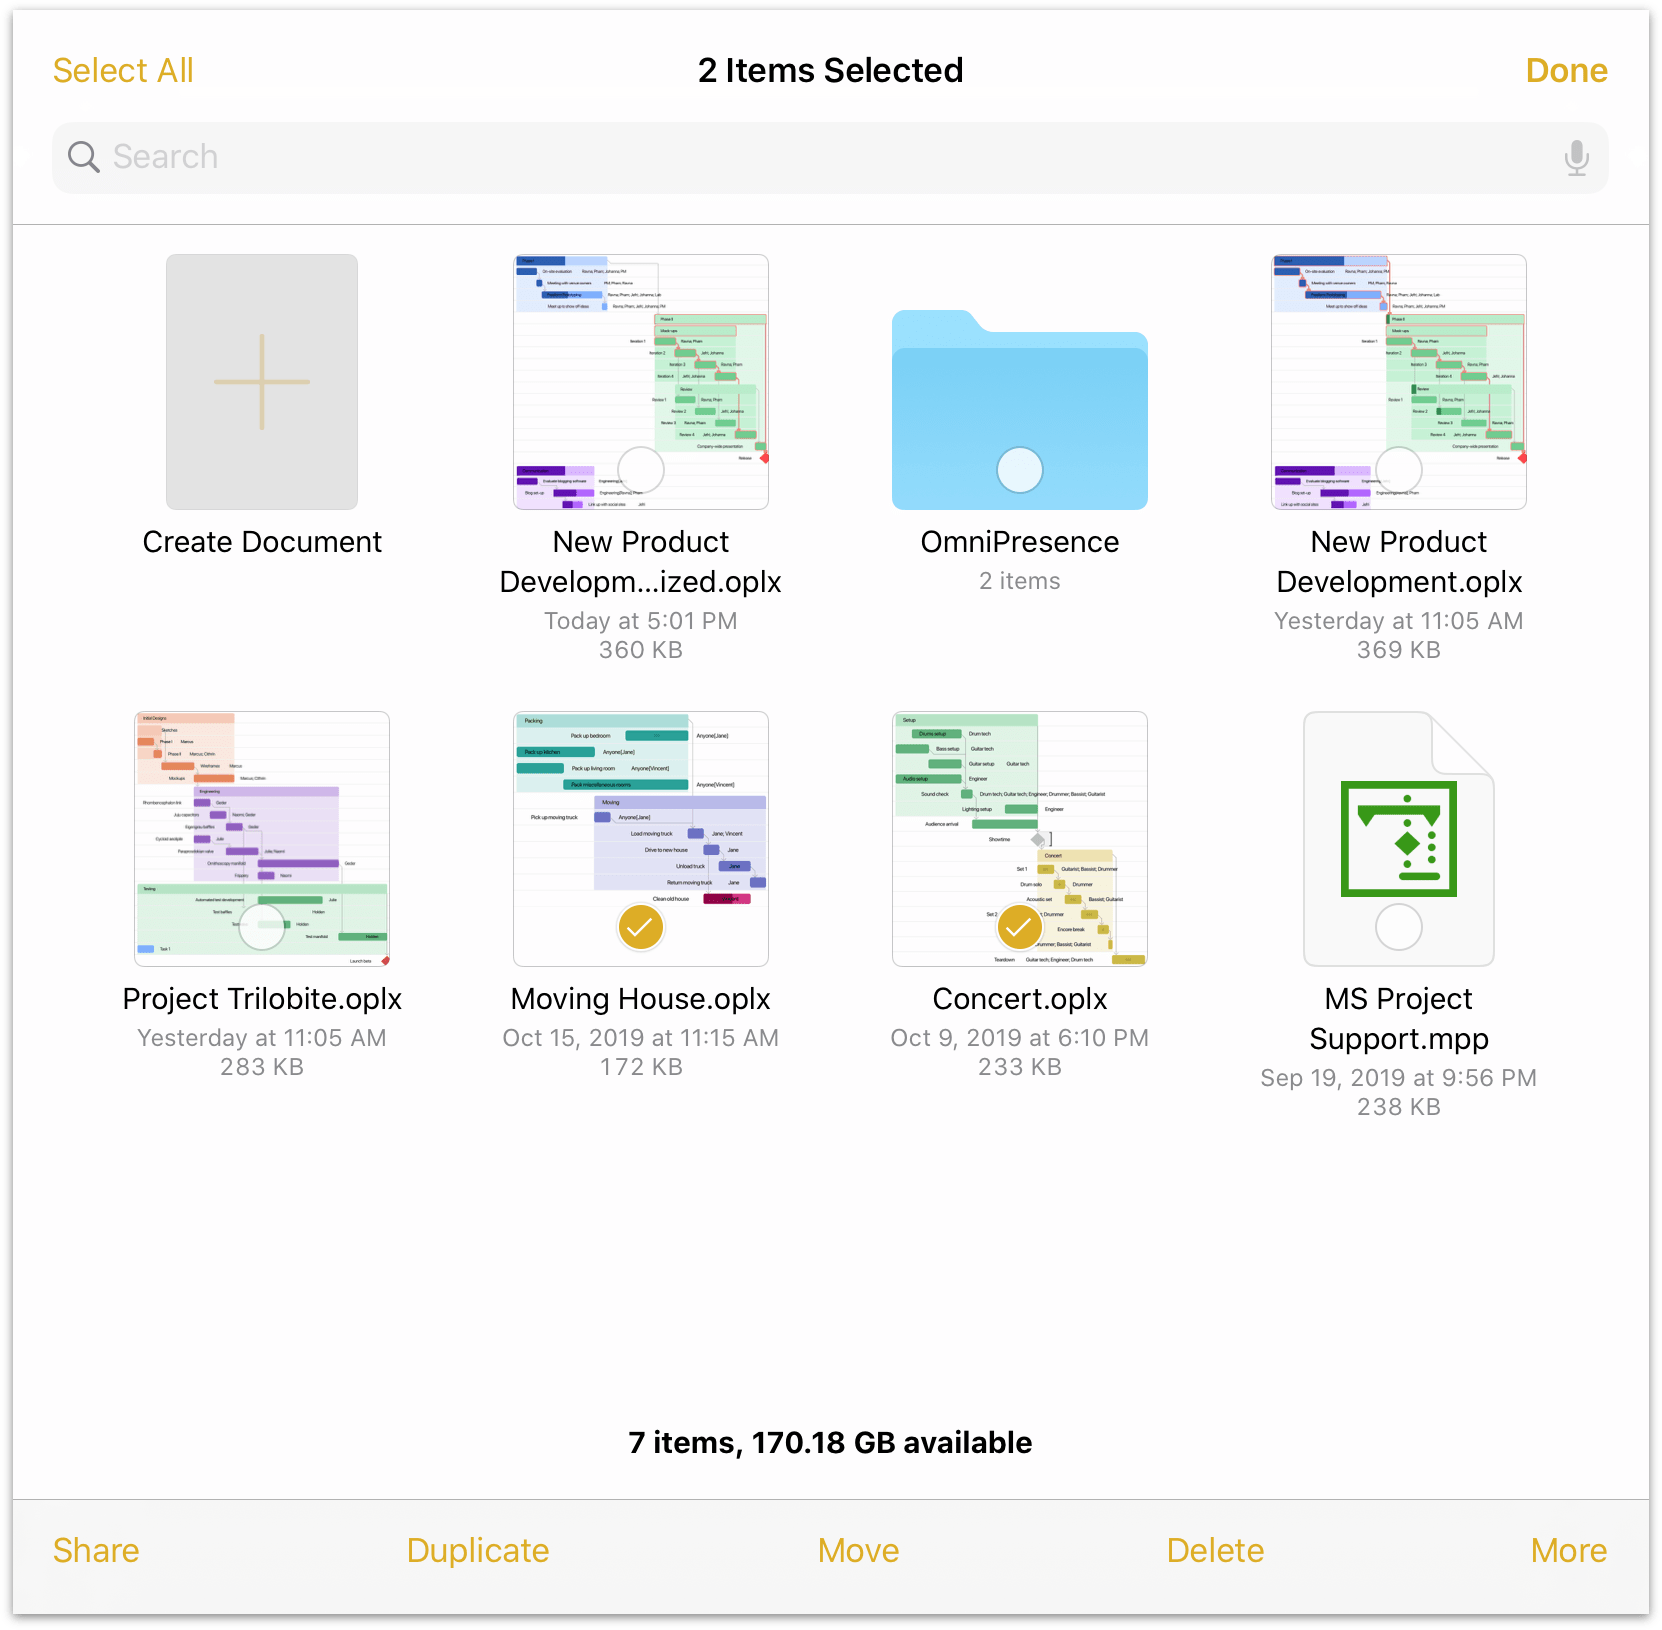
At the far right edge of a folder’s toolbar is the Select button. When tapped, Select makes it possible for you to tap to select documents within a folder. Once a document is selected, use the buttons in the bottom toolbar to share or duplicate the file, move it to another folder, delete it, or copy it.
The App Menu 
When viewing the contents of a location in the document browser, tap  at the top of the screen to open the App Menu:
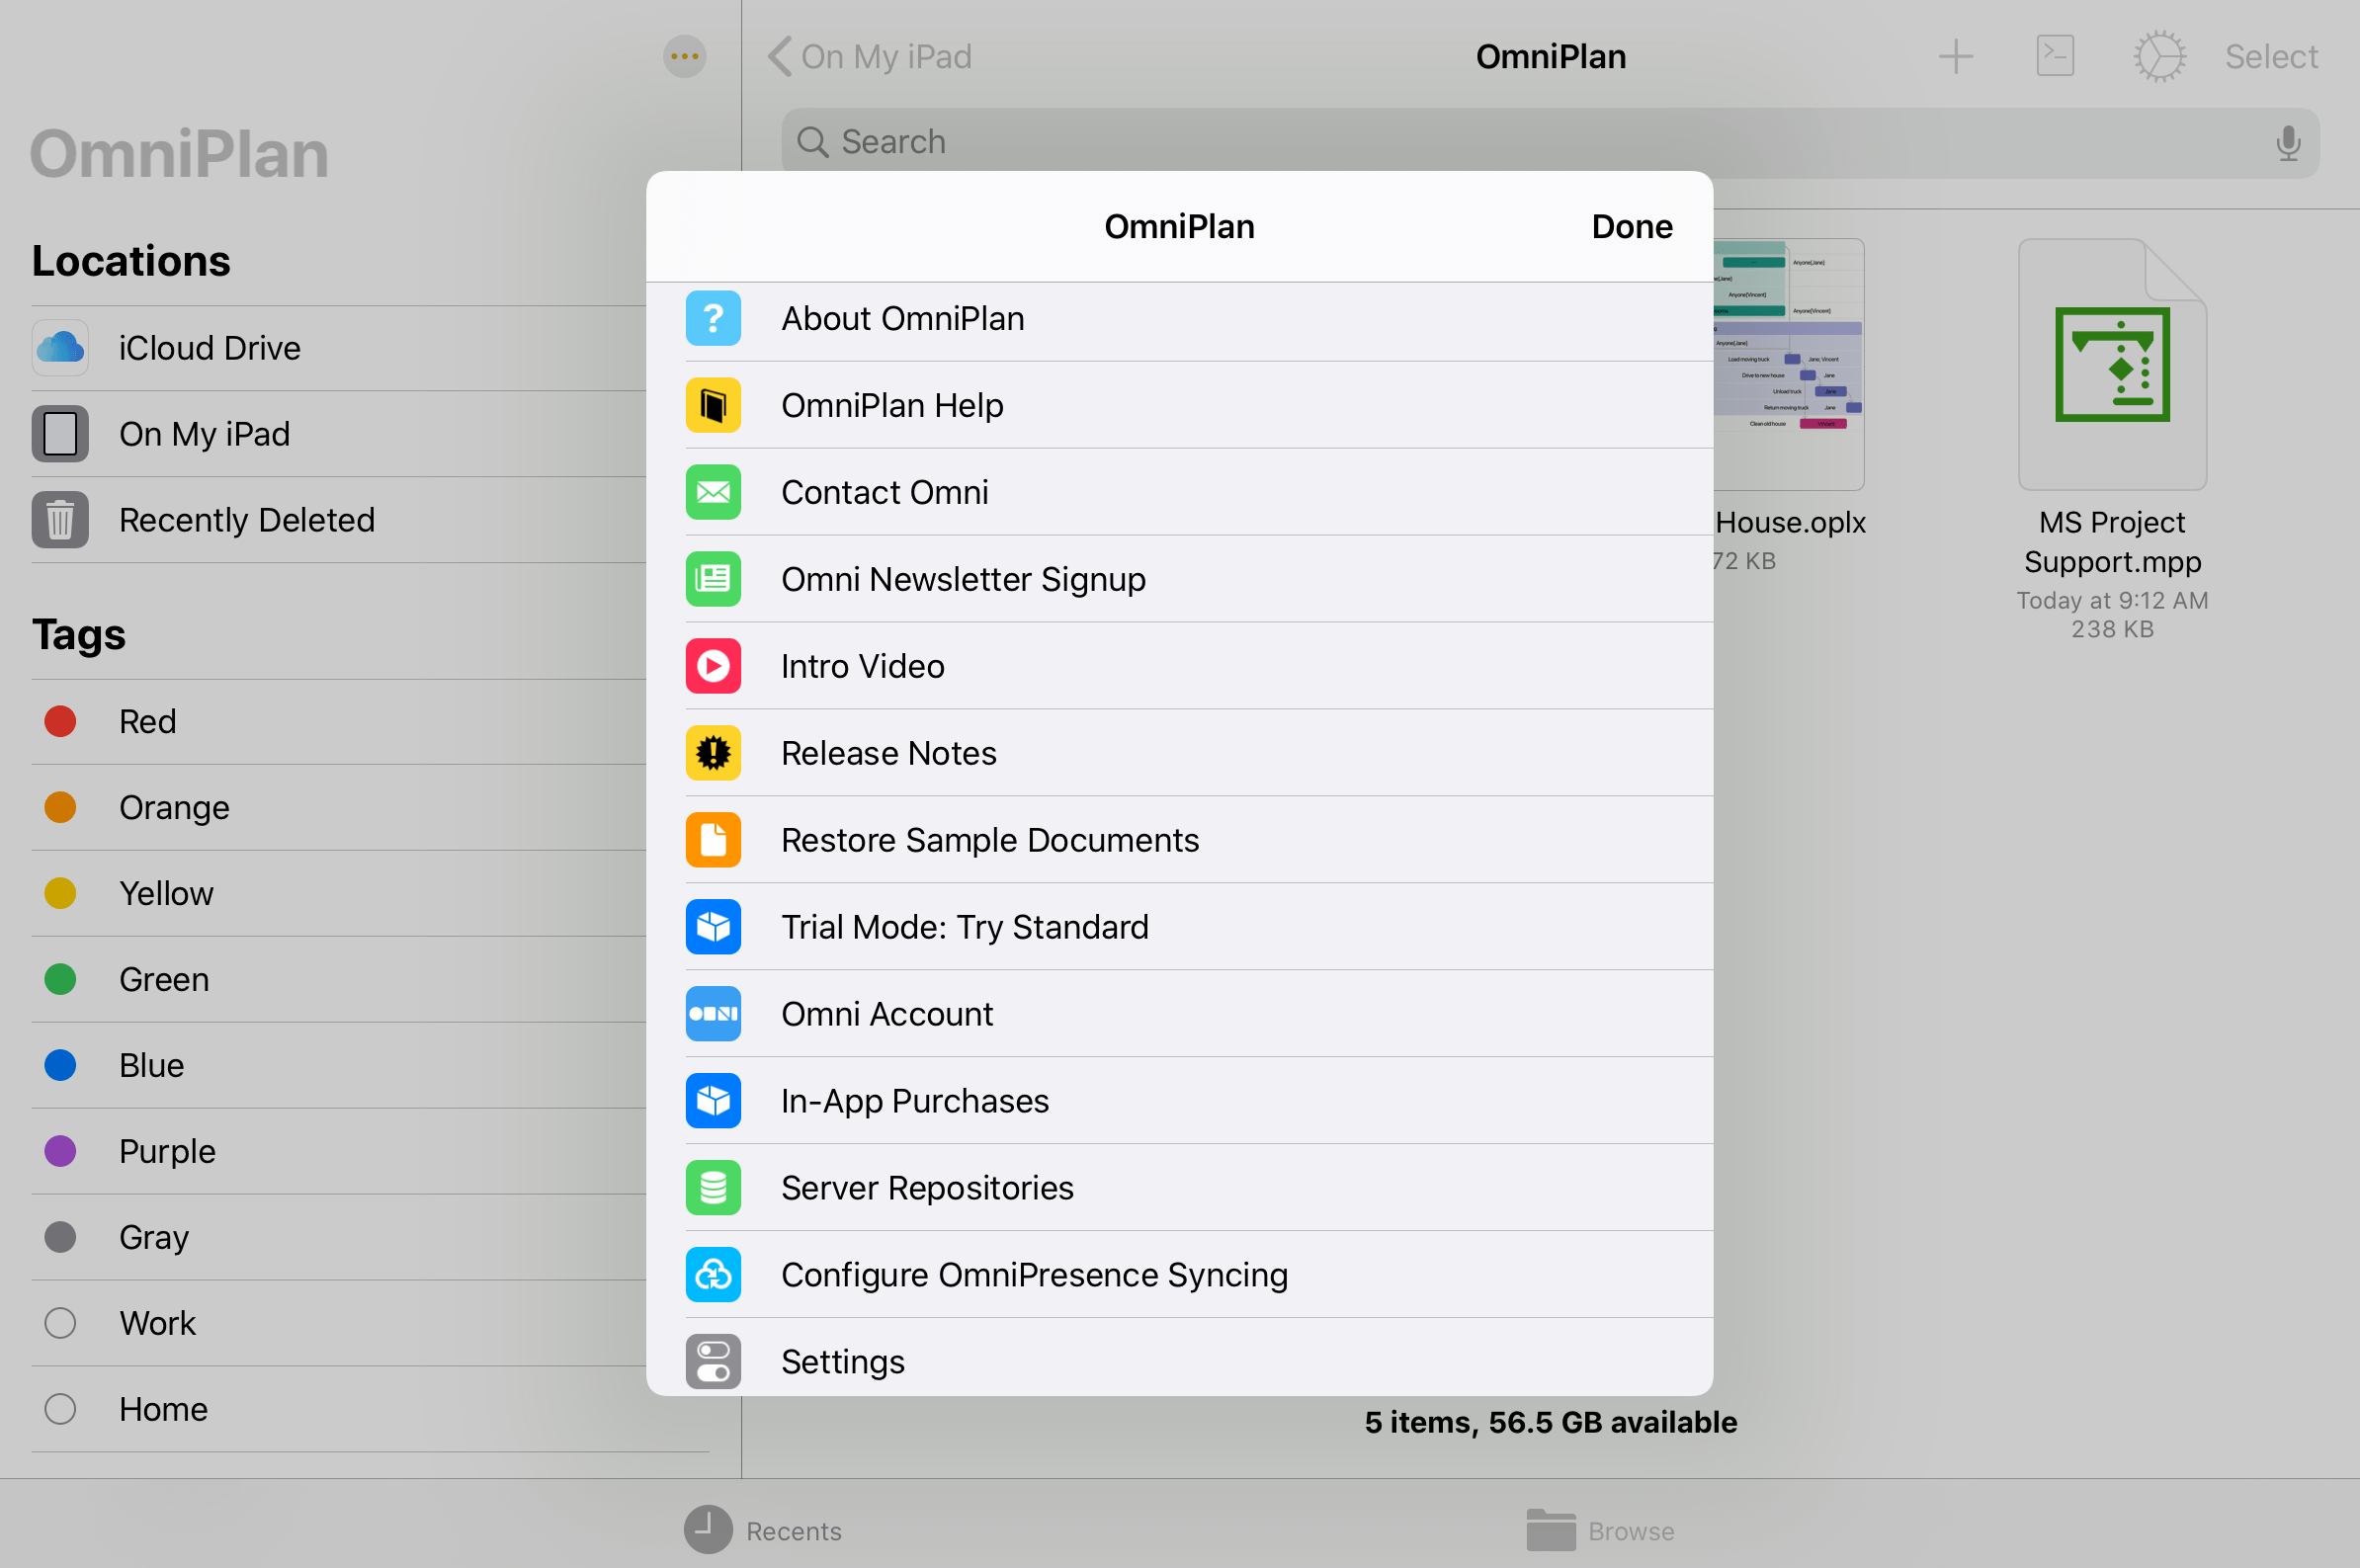
The App Menu has the following options:
About OmniPlan 
Tap to see which version of OmniPlan is installed on your device, and to find Omni’s contact information.
Reference Manual 
Tap to view the in-app reference manual.
Contact Omni 
Tap to send us an email.
Omni Newsletter Signup 
Tap to subscribe to Omni’s quarterly newsletter via email. When tapped, you are taken to the Omni website where you can enter your email address to subscribe.
Replay Intro 
Tap to revisit the introductory experience and tutorial presented the first time you opened OmniPlan.
Release Notes 
Tap to see what’s new in the current release. The release notes are also available on Omni’s website.
Trial Mode 
Trial Mode is only available prior to purchasing the upgrade to OmniPlan Standard or Pro. Tap to switch between Standard and Pro to see which version is right for you.
Omni Account 
Tap to open the Omni Account sign in sheet. If you are an OmniPlan subscriber, use this window to sign in to your Omni Account and unlock the full OmniPlan feature set.
In-App Purchases 
Tap to purchase the upgrade from Trial Mode to either OmniPlan Standard or Pro. This is also where you can restore purchases, if you ever need to reinstall OmniPlan on a device.
Server Repositories 
 Tap to open the sheet for setting up a shared server repository, useful when collaborating with multiple project contributors. Learn more about collaboration via server repository here: Collaborating on Projects with Publish Subscribe (PRO).
Configure OmniPresence Syncing 
Tap to connect an OmniPresence cloud synced folder to your device. Documents in this folder are automatically synced to the cloud whenever a change is made. You can sync with a free Omni Sync Server account, or an OmniPresence-capable WebDAV server of your choice.
See this support article for details on using OmniPresence with iOS 13 and later.
Settings 
Set preferences for working in OmniPlan. See OmniPlan Settings for more details.
OmniPlan Settings
Tap ![]() in the document browser toolbar to open the app menu and access OmniPlan settings.
in the document browser toolbar to open the app menu and access OmniPlan settings.
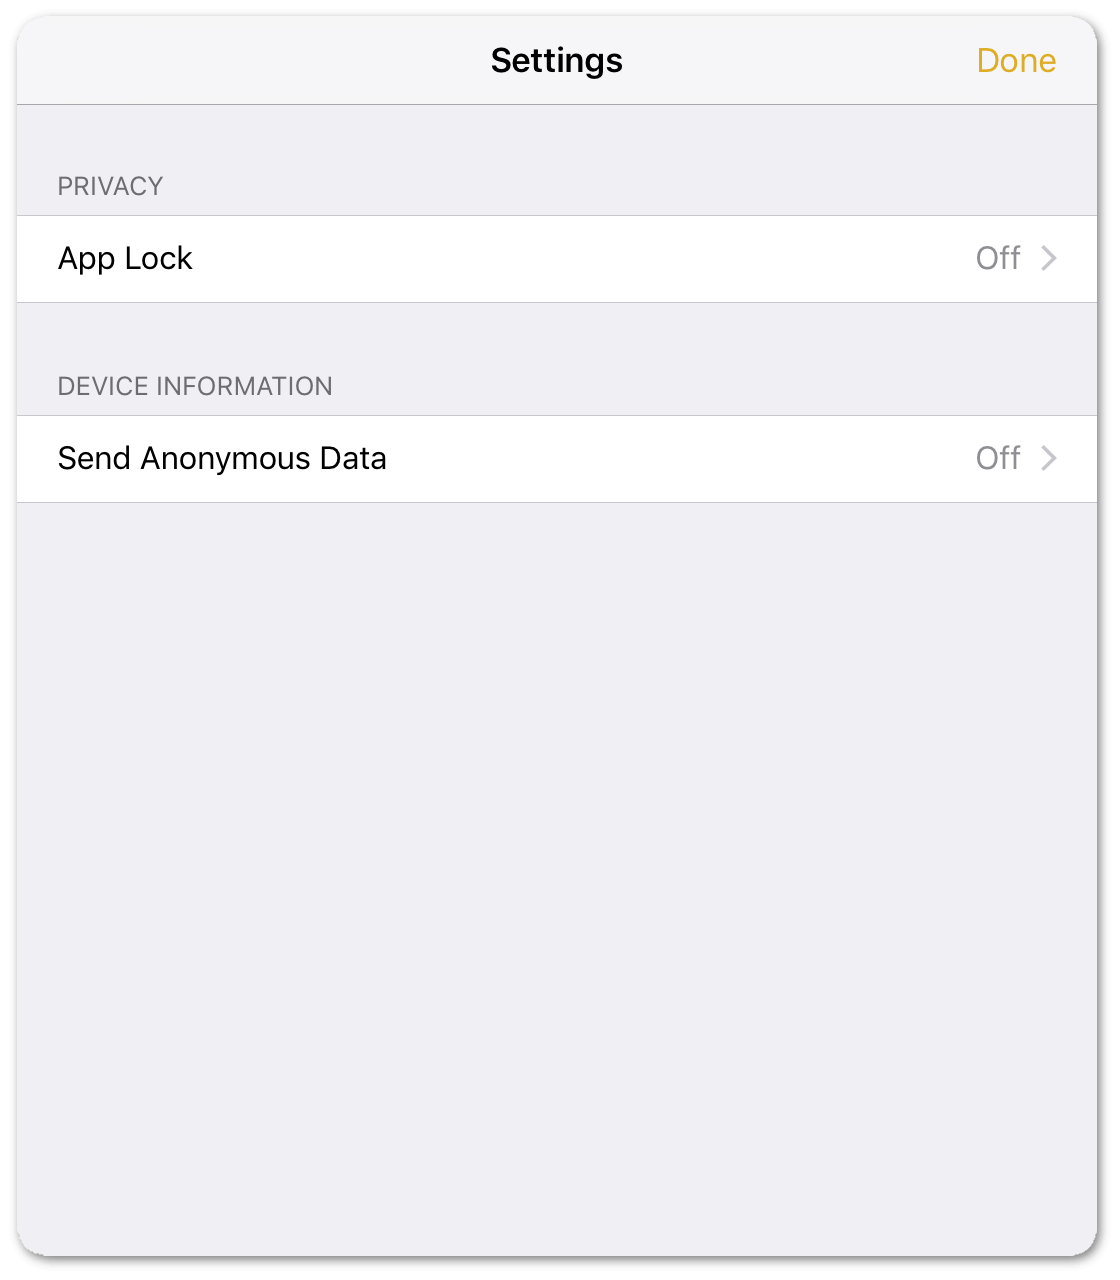
- App Lock—to keep others from accidentally viewing or modifying your OmniPlan data, add a password (or use Touch ID) to unlock the app. See Keeping Your Work Private with App Lock for details on this feature.
- Send Anonymous Data—if you’d like to help Omni improve future versions of OmniPlan, you can choose to share anonymous usage data with us. The full content of the data sent is displayed when you tap here.
Keeping Your Work Private with App Lock
If you use OmniPlan on a device that you occasionally share (with your children, coworkers, or clients, for example), there may be times when you would prefer that your OmniPlan data be out of reach.
The App Lock feature prevents accidental taps and casual glances by adding a password-locked privacy screen that must be dismissed before any of your documents or settings can be accessed.
To use App Lock, tap the gear icon ![]() in the Document Browser toolbar and choose Settings. App Lock appears in the Privacy section of Settings, and is turned off by default.
in the Document Browser toolbar and choose Settings. App Lock appears in the Privacy section of Settings, and is turned off by default.
When you turn on App Lock, you are prompted to choose and confirm a new password. If you use OmniPlan on multiple iOS devices, you need to configure and set an App Lock password on each device. App Lock passwords are device-specific and do not sync across devices.
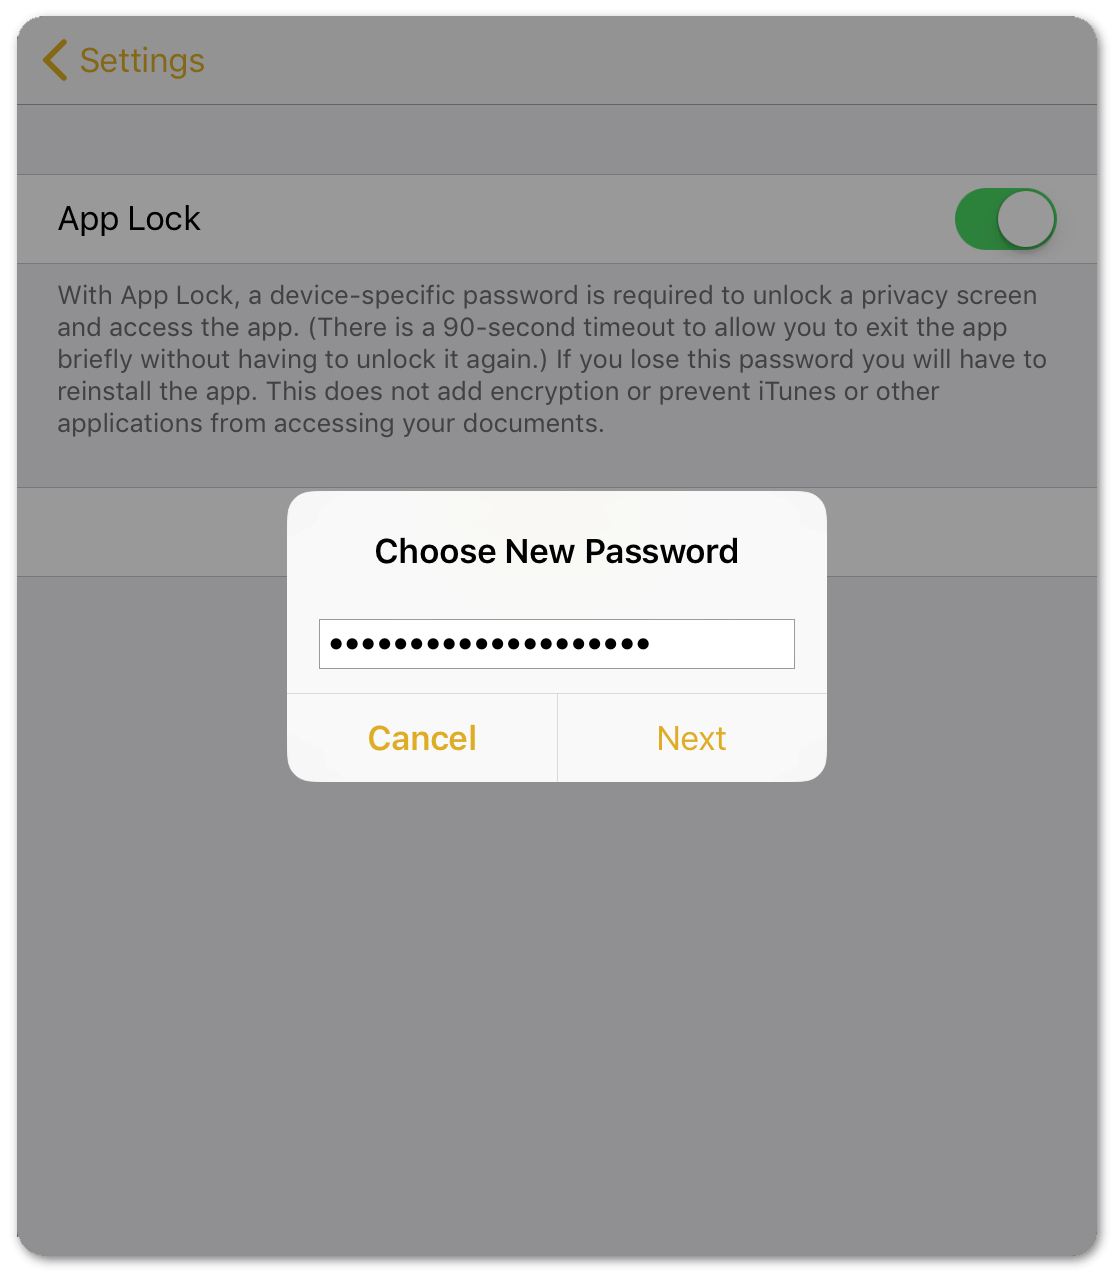
If you forget the App Lock password, OmniPlan can no longer be used on your device. However, you can retrieve your OmniPlan data by connecting your device to a computer with iTunes and copying your files to a safe location.
After saving a backup of your data, delete and then reinstall OmniPlan on your device. When you delete OmniPlan, your files—and your App Lock password—are deleted from the device. After reinstalling OmniPlan, you can set a new App Lock password and use iTunes again to load your OmniPlan files back onto your device.
If, however, you have your files stored in the cloud—either on Omni Sync Server via OmniPresence or some other cloud storage system—you can skip the whole iTunes file backup/restore process.
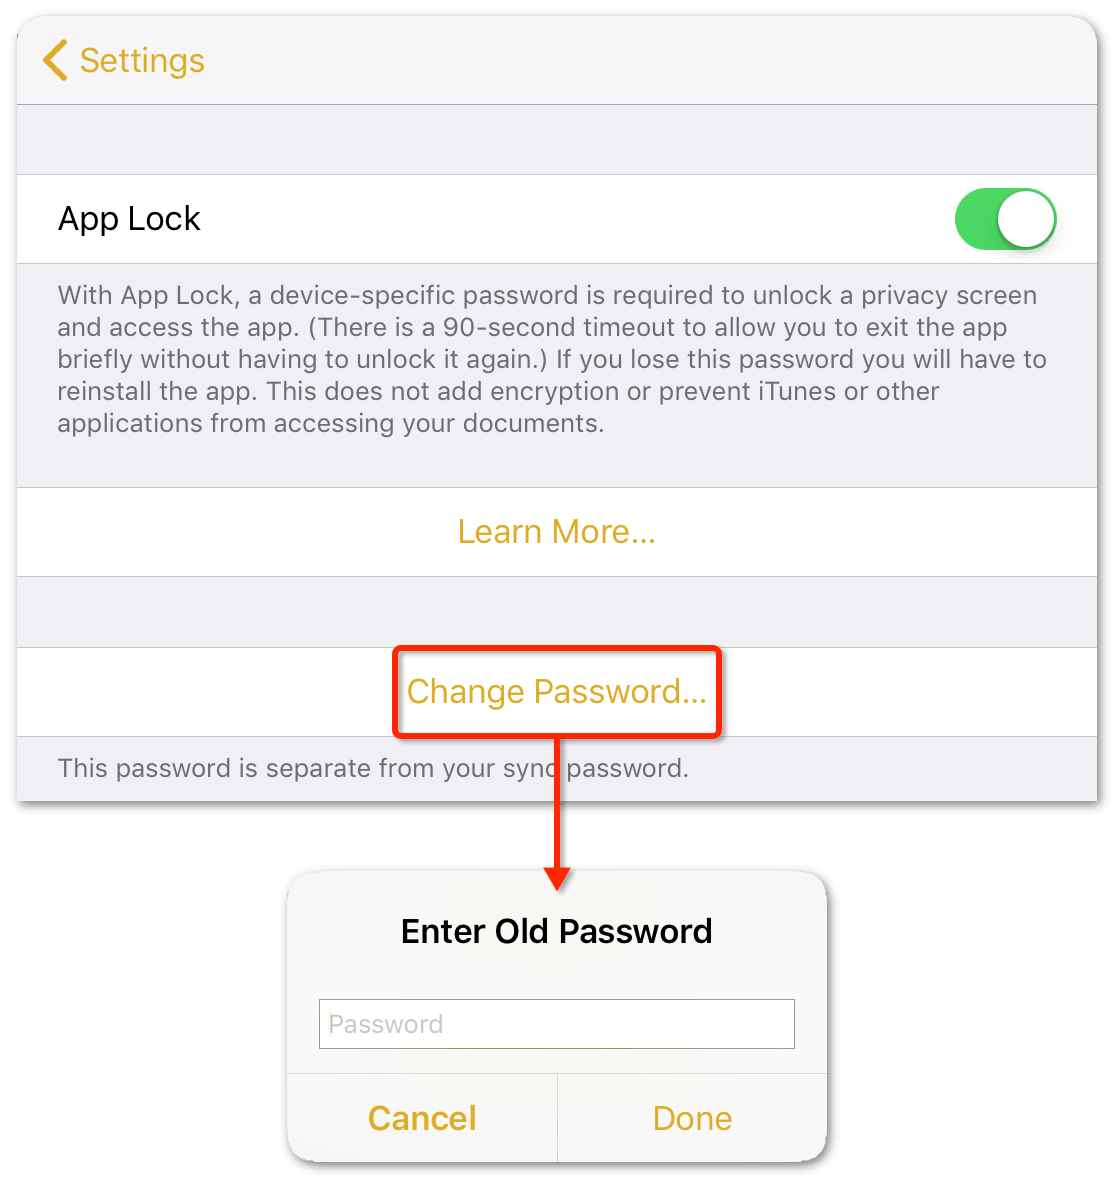
After choosing a password, App Lock is turned on. The App Lock Settings screen offers the option to turn App Lock back off, change your password, or enable Touch ID as an alternative means of unlocking OmniPlan on devices that support it.
To change your password, Tap Change Password. You are prompted to enter your old password, and then to choose and confirm a new one.
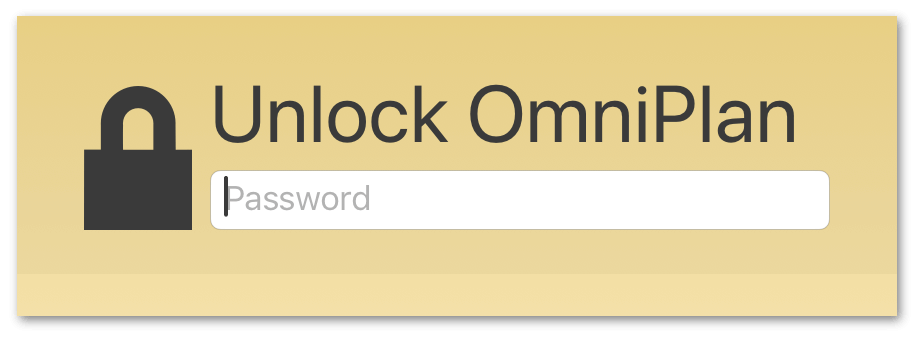
With App Lock turned on, the next time you open OmniPlan you will see a privacy screen with a field to enter the password you chose. Enter the password, and work resumes unimpeded.
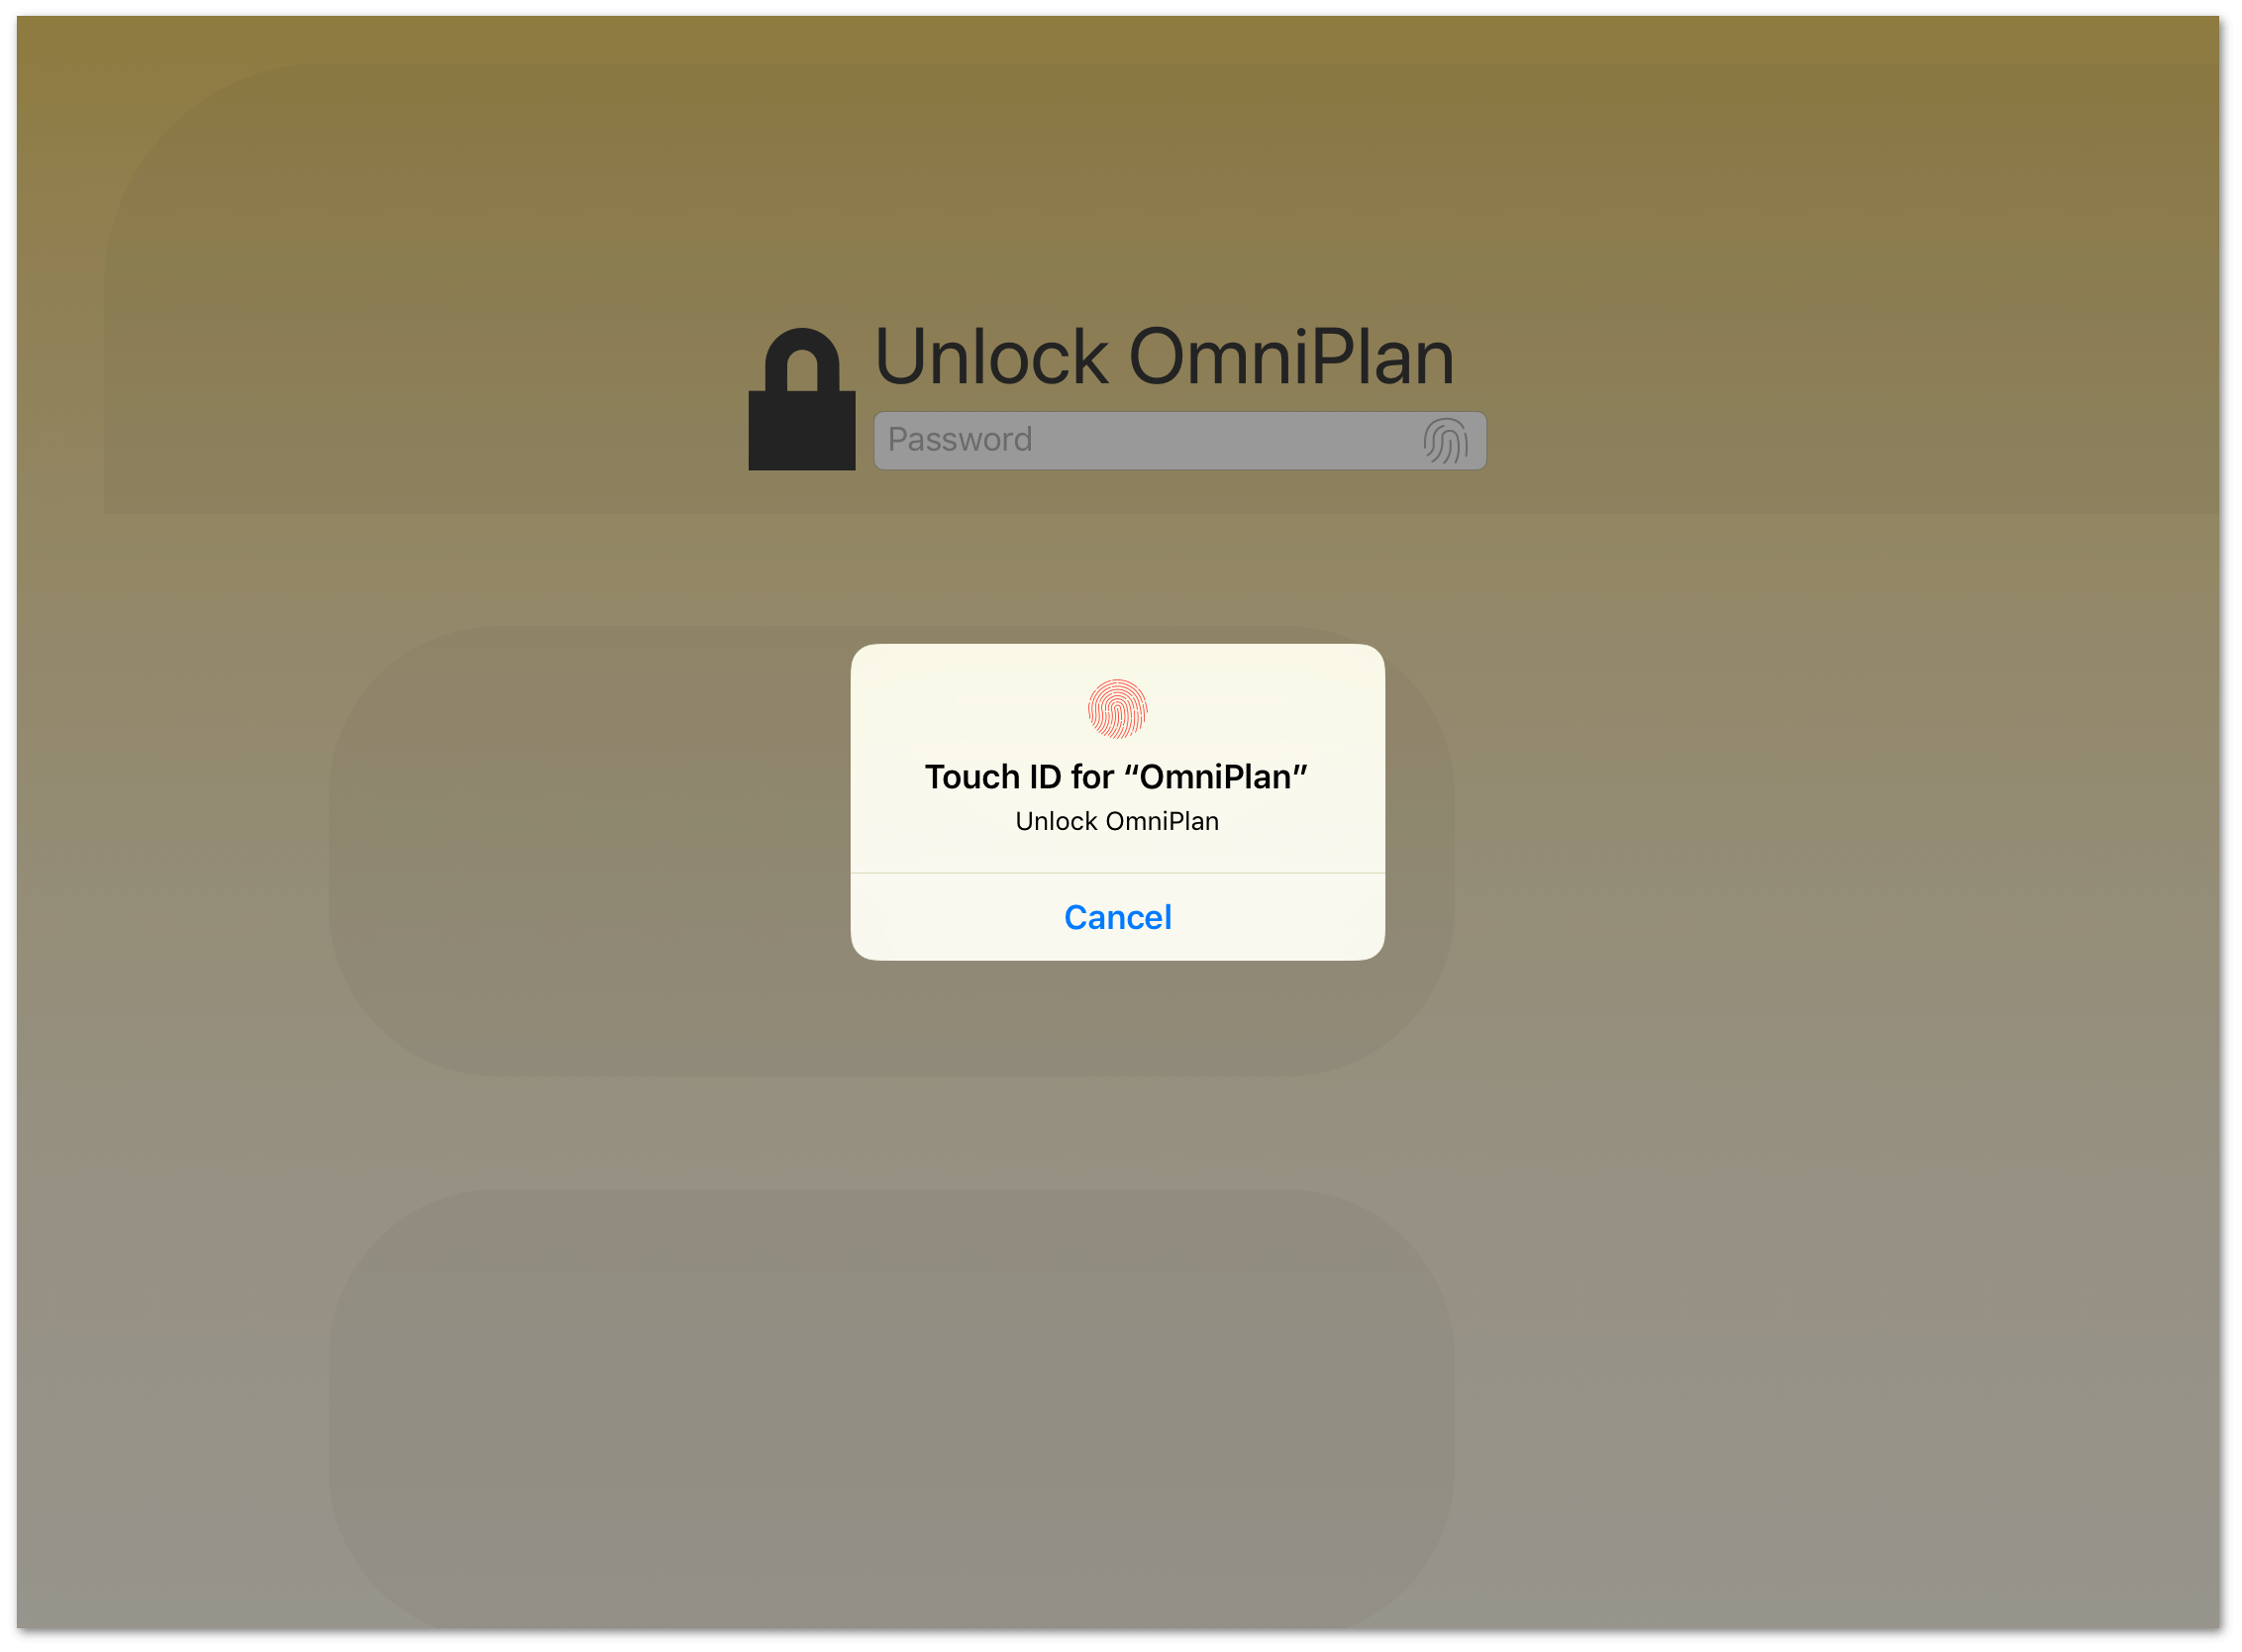
If you choose to use Touch ID, a prompt for your fingerprint will appear instead. You will still have the option to enter your password, or you can tap the fingerprint icon next to the password field to unlock with Touch ID if you dismissed the prompt initially.
Working in the Project Editor
When the time comes to build a new project or edit an existing one, tap the project in the document browser to enter OmniPlan’s Project Editor. The Project Editor consists of the Gantt chart, Network Diagram, and associated controls you’ll use to add and manage the tasks, resources, and calendars of your projects.
This chapter describes navigating the Project Editor and outlines the tools available within. As you read, one option is to dive right in and start building a new project. However, if you’re new to OmniPlan, exploring one of the pre-populated sample projects may help provide some initial context. The next chapter, Building Your First Project, offers a tutorial for when you’re ready to begin building in earnest.
As you explore the Project Editor, there are a few navigational tools that can help you get your bearings and fully contextualize the scope of the project at hand:
- Landscape Mode: Because tasks progress chronologically along the x-axis of both the Gantt chart and Network Diagram, their information is presented most efficiently in landscape mode. Rotate your device sideways to try it out; this is where OmniPlan for iOS is most comfortable.
- Pinch to Zoom: Many projects have more tasks than will fit on the screen at once at the default zoom level. When you need to view an entire project, pinch vertically (i.e., toward the top and bottom of the screen) to zoom in or out.
- Changing Time Scale: In the Gantt chart, pinch horizontally (i.e., sideways) to change the view’s time scale on the fly, or tap the date header to choose a scale from among granular options (including the ever-handy Scale to Fit Project).
Navigating the Project Editor
While the capabilities of OmniPlan’s Project Editor are identical across iOS devices, button placement varies slightly based on device size. The following figure shows the layout for larger devices (iPads and larger iPhones); on smaller devices, the bottom toolbar contains the row of inspector buttons.

The numbered controls correspond to the tools that make OmniPlan’s Project Editor tick. These tools are available both in the Gantt chart and in the Network Diagram, and function similarly in each view.
- Projects: Tap to exit the project you’re working on and return to the current folder in the document browser.
- View Switcher: Tap to switch between the Gantt chart and Network Diagram views.
- Undo/Redo: Tap to Undo or Redo the previous change.
- Share: Tap to choose an export method for the current project: Send via Mail, Send to App, or Print.
- Automation: Tap to open a menu with options to open the Automation Console or to view the Automation API Reference. This is an OmniPlan Pro-only feature, used for scripting OmniPlan with Omni Automation.
-
Add: Tap to add a new task to the project. Touch and hold to add a new Task, Milestone, or Group from the popover menu that appears:
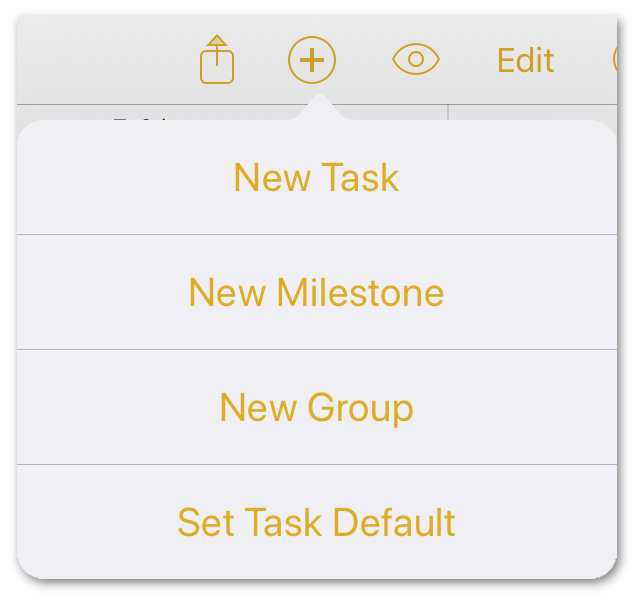
With a task selected in the Gantt chart, choose Set Task Default from the popover to designate it as the default for new tasks added to the project. New tasks are added as copies of the default task, complete with pre-filled name, duration, and resource assignments.
-
View Menu: Tap the View Menu to set a project filter, turn on change tracking, check for violations, and view baselines and critical paths.
- Edit: Tap to enter Edit Mode and reveal the editing controls along the bottom of the screen.
-
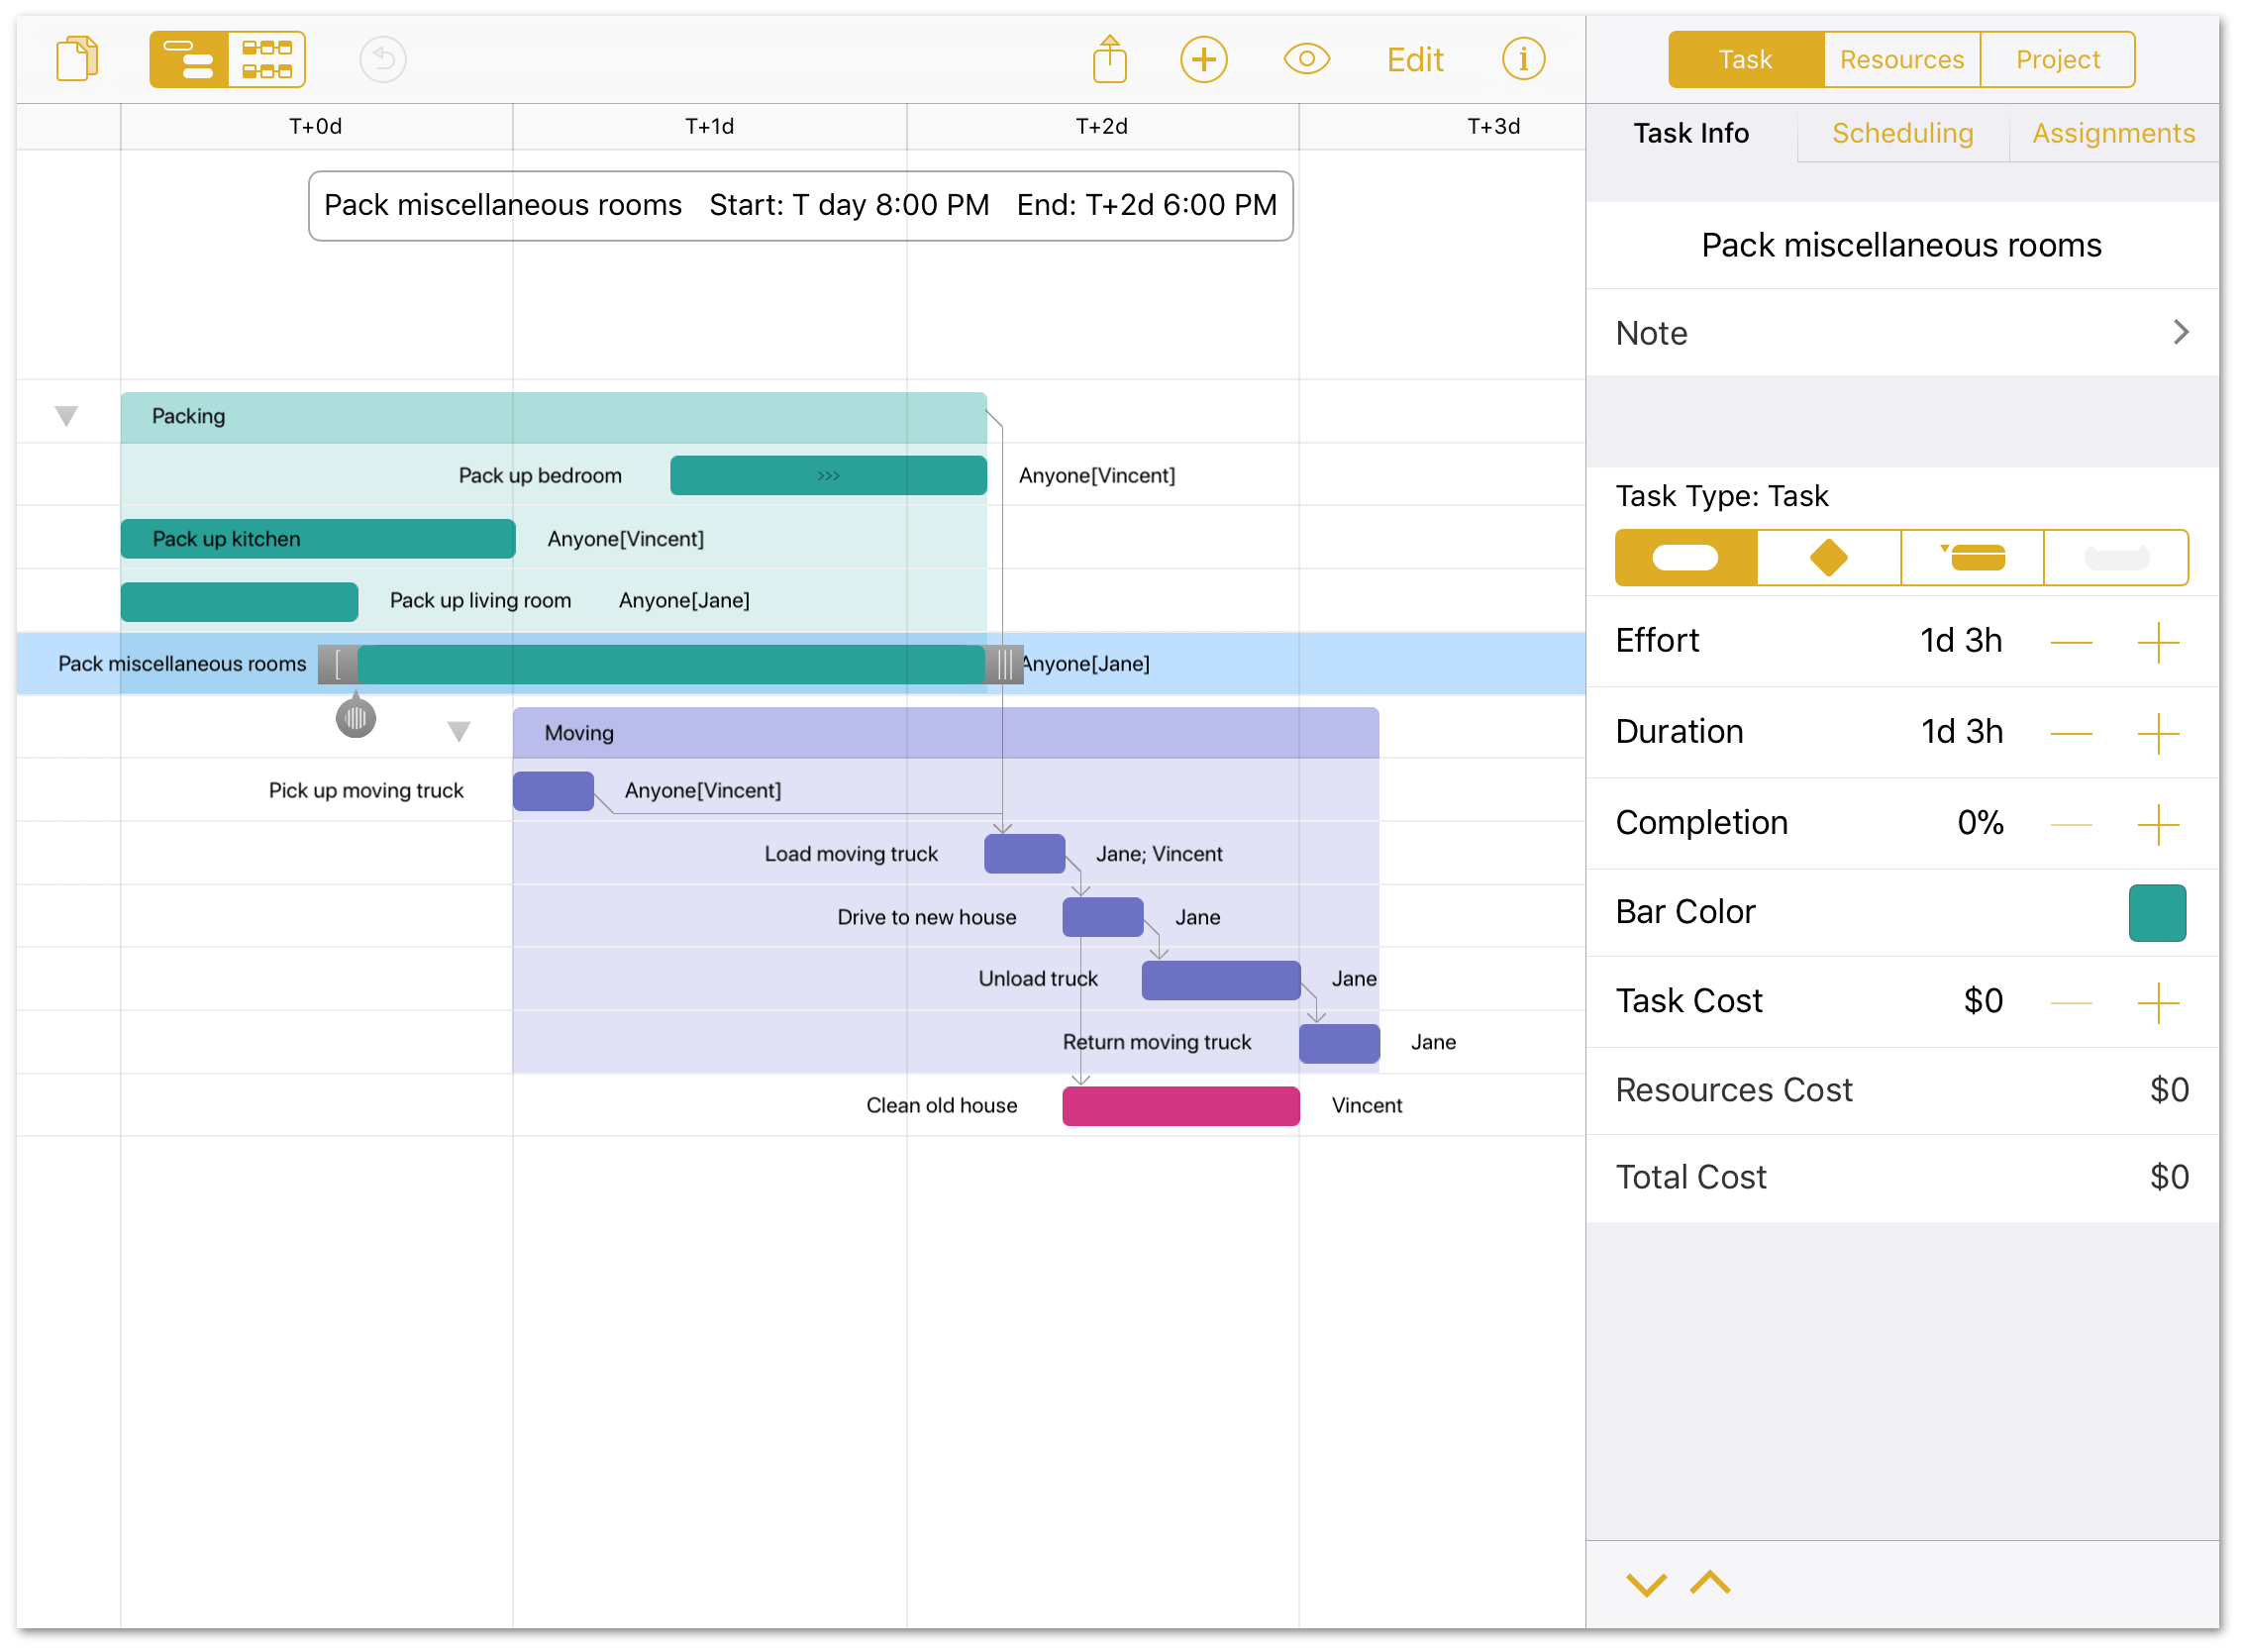
Inspectors: Tap to open or close the Inspectors:
-
Task Inspector: Available when a task or group is selected, use the Task Inspector to customize various aspects of the task using the tabs, Task Info, Scheduling, and Assignments.
-
Resources Inspector: Use the Resources Inspector to create and edit resources (Staff, Equipment, Materials, and Groups), and to modify their calendars of working hours.
-
Project Inspector: Use the Project Inspector to set the structure and parameters for your project.
-
The inspectors slide in from the right side of the display on larger screens, such as iPad or iPad Pro...
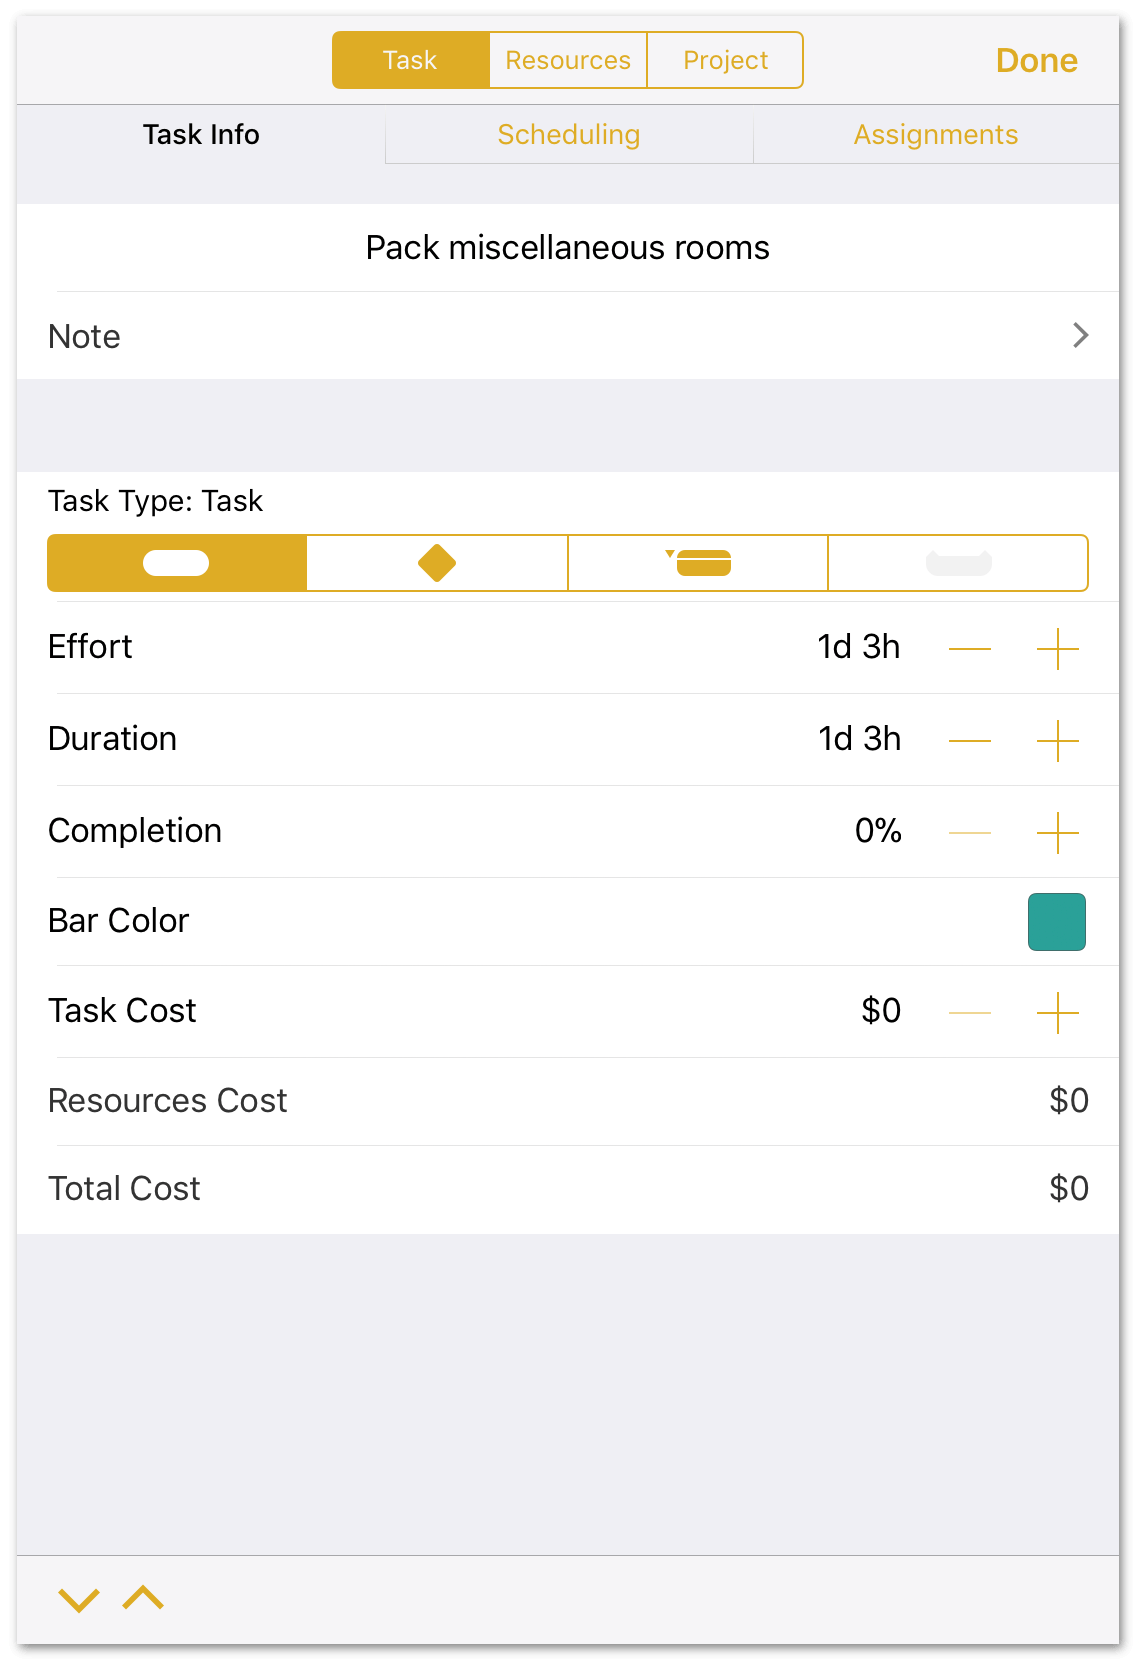
...or up from the bottom of the screen on iPhone or when multitasking on iPad; tap Done when you’re finished using the inspector:
Using the Gantt Chart
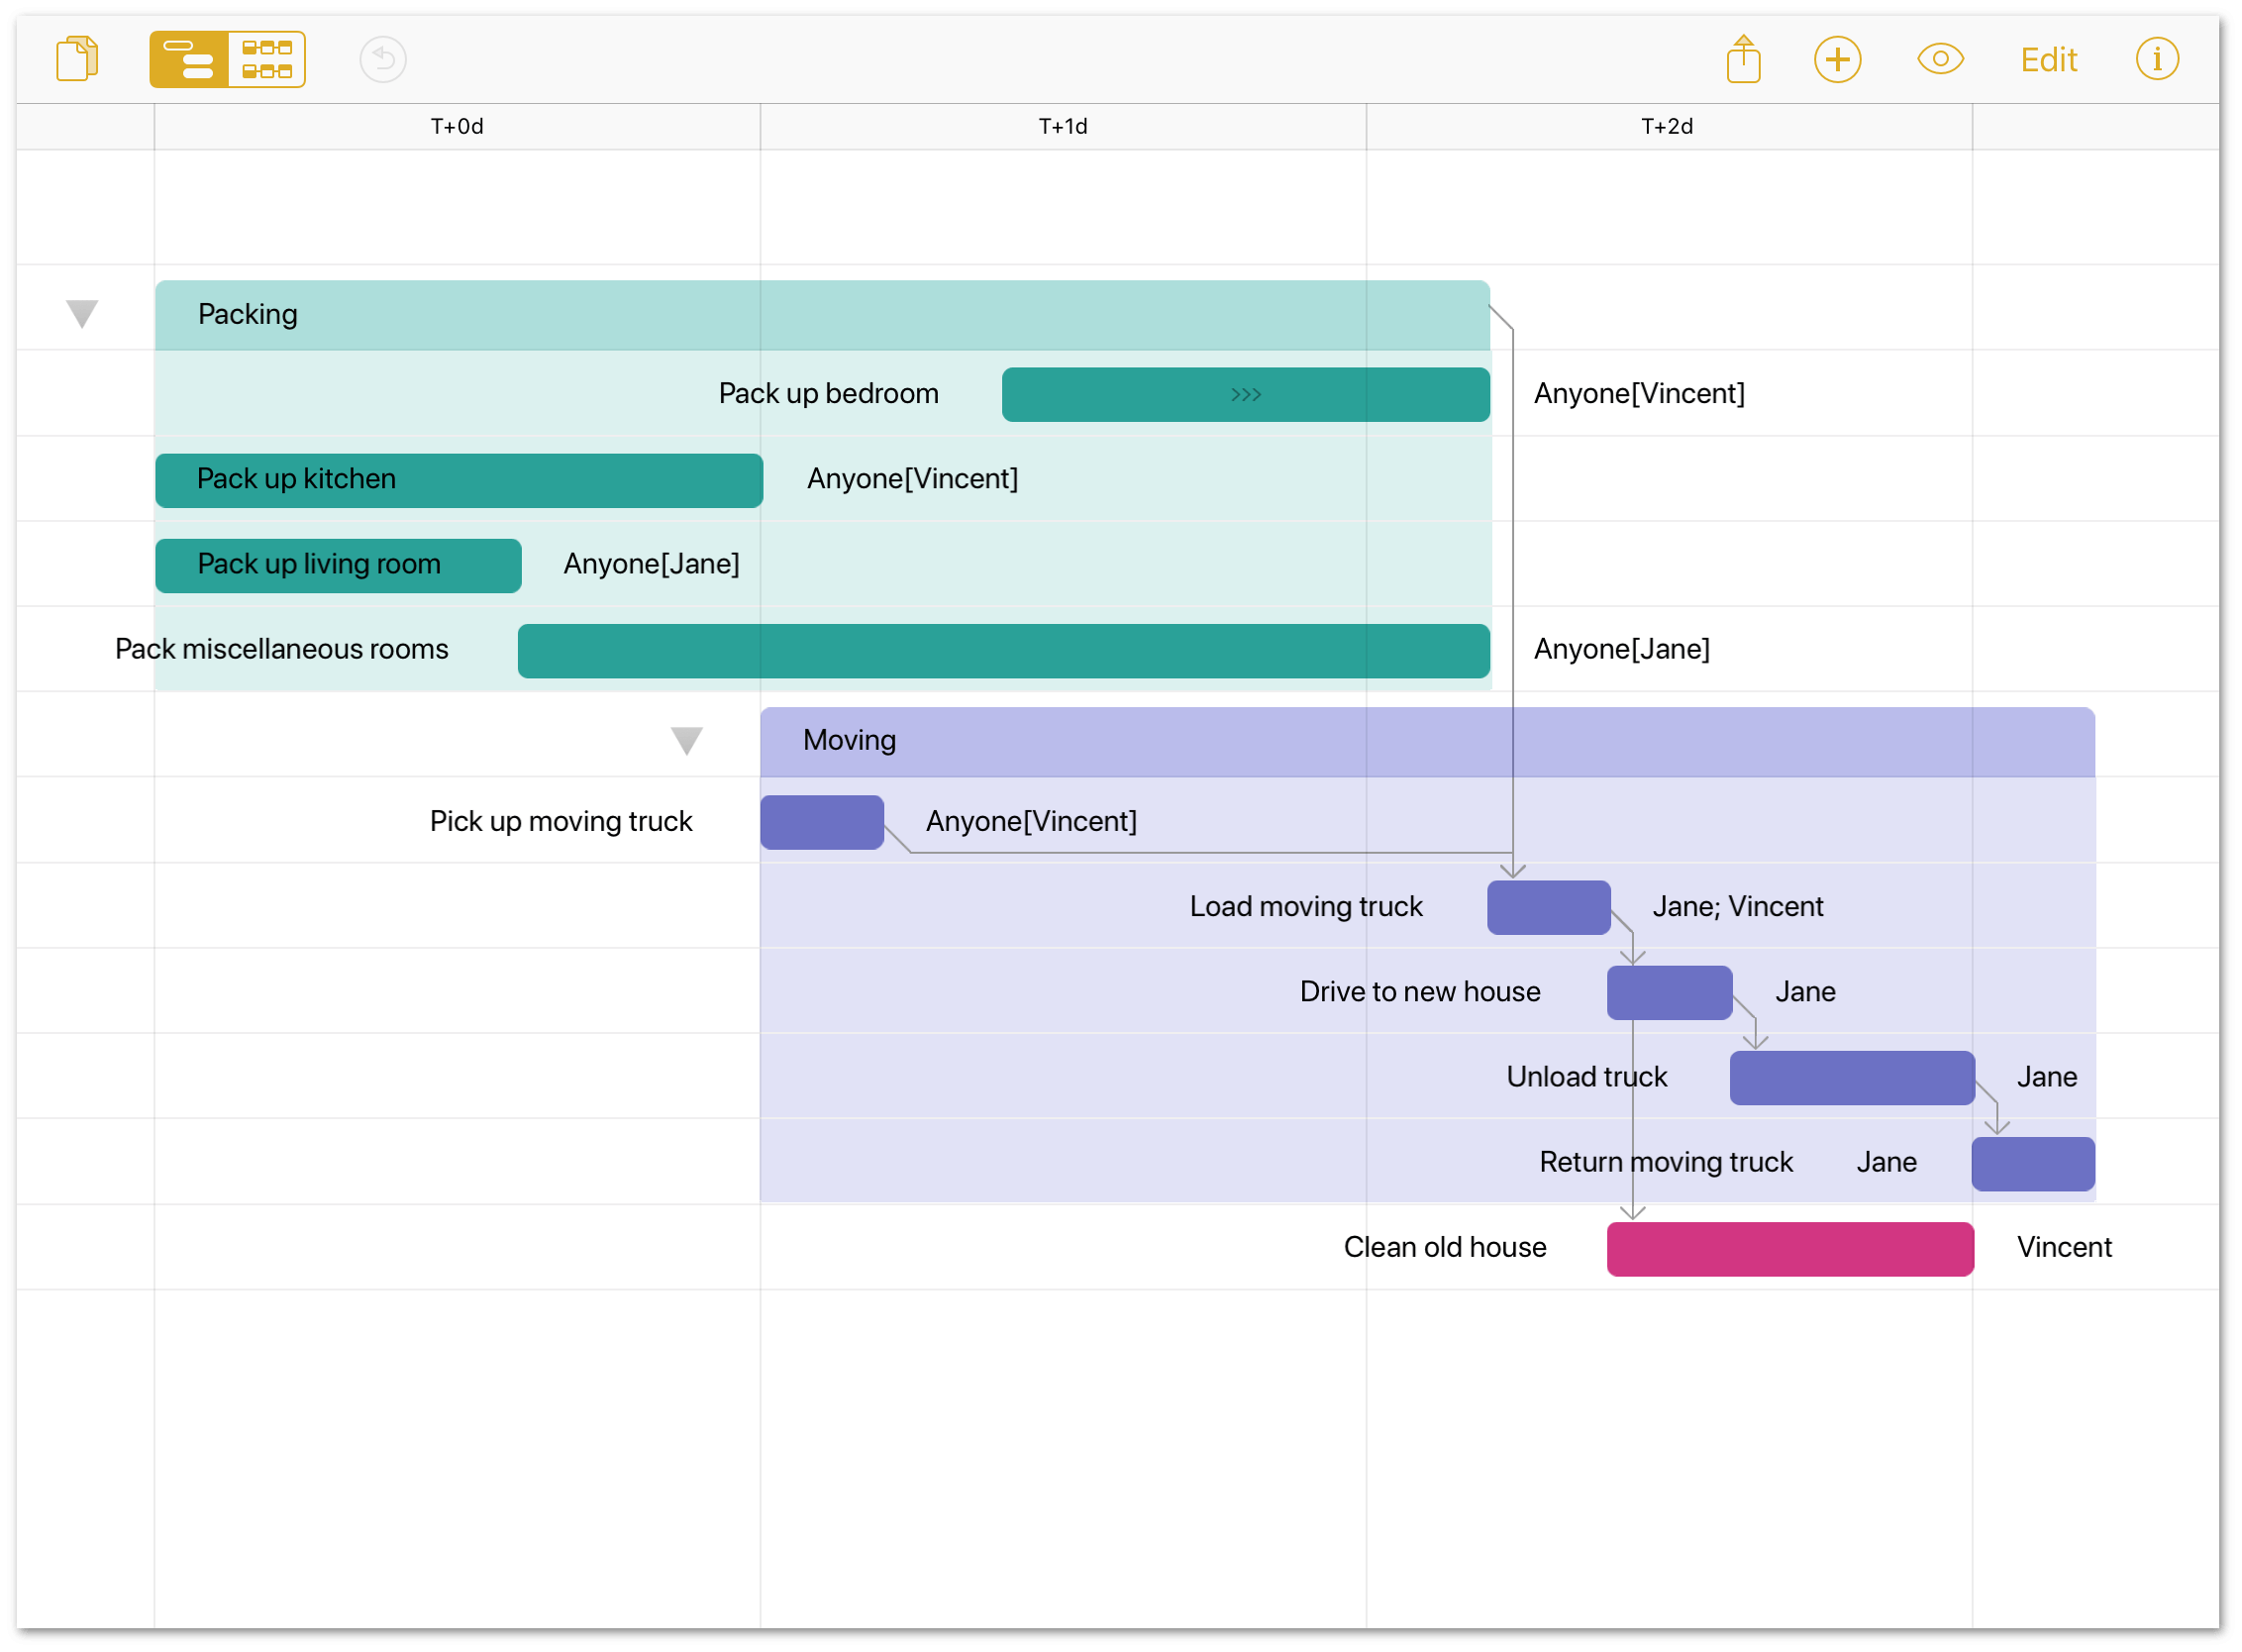
The Gantt chart is a chronological list of the tasks that comprise your project, displayed as horizontal bars whose length represents their duration. Tasks that depend on other tasks are connected via a series of stepwise dependencies (dependencies are explained in greater detail in the next chapter, Building Your First Project). The Gantt chart is where you spend the majority of your time; whether you’re creating a new project or guiding one to fruition, this is where the hard work comes together.
Working in Edit Mode
Beyond simply adding new tasks and milestones, the Gantt chart includes a suite of editing tools that provide more fine-grained control over tasks and the relationships between them.
Tap Edit in the toolbar to enter Edit Mode; you’ll see a set of editing controls along the bottom of the screen.

- Cut: Delete the selected item or items and copy them to be pasted later. Paste by tapping Done to exit edit mode and touching and holding an item on the Gantt chart to reveal the contextual menu. When pasted, the copied items will appear below the one selected.
- Copy: Copy the selected item(s) to be pasted later.
- Delete: Delete the selected item(s) from the Gantt chart.
- Group/Ungroup: With multiple items selected, Group creates a group containing those items. With a group selected, Ungroup removes the grouping container (but not the tasks inside it).
-
Move: Move the selected item or items elsewhere in the Gantt chart.
To move an item or items in Edit Mode, tap to select them, then tap Move. To choose their destination, tap another row. A contextual menu appears that provides three location options: Above the chosen row, Below it, and Inside. Choosing Inside converts the chosen row into a group (if it isn’t one already) and adds the items to be moved as tasks inside it.
-
Connect/Disconnect: With multiple items selected, this command connects the selected tasks with Finish-Start dependencies (if not connected) or removes dependencies between them (if currently connected).
Using Drag and Drop in the Project Editor
You can use drag and drop in the Project Editor—instead of Edit Mode—to rearrange tasks in your project.
To use drag and drop in the Project Editor:
-
Touch and hold on the task that you want to drag:

Wait for the task to lift up from the Project Editor; you’ll know a task is ready to be dragged in the Project Editor its color dims slightly and a drop shadow appears around the task.
-
Drag the task to where you want it to go:

-
Remove your finger from the screen to drop the task in place:

When you use drag and drop to move tasks around in your project, bear in mind that its previous dependencies (if applicable) are carried with the task to its new location. You may need to reassign dependencies, if needed.
You can also use drag and drop to move multiple tasks in your project. To drag multiple tasks, do the following:
-
Touch and hold on one of the tasks that you want to drag:
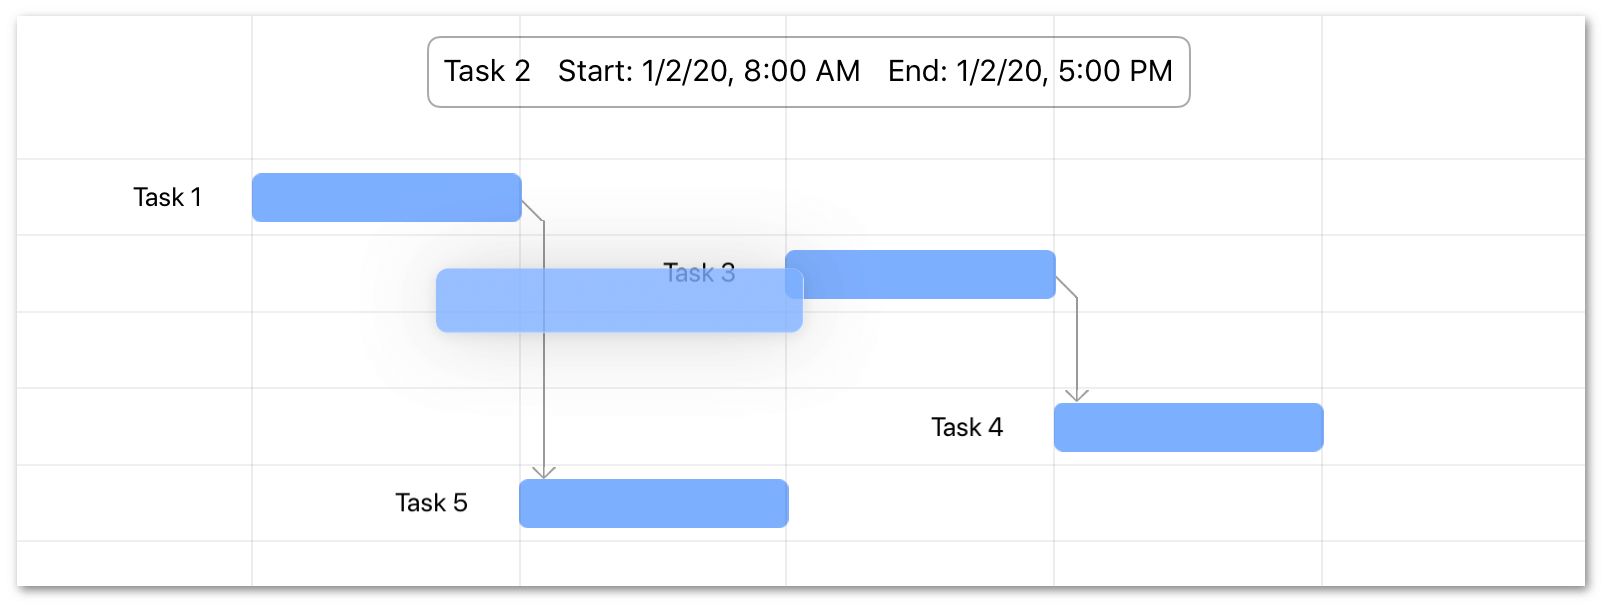
-
With the first task lifted, tap to select the other tasks you want to move. The selected tasks join the first task, and a number appears over the selection to let you know how many tasks have been selected:
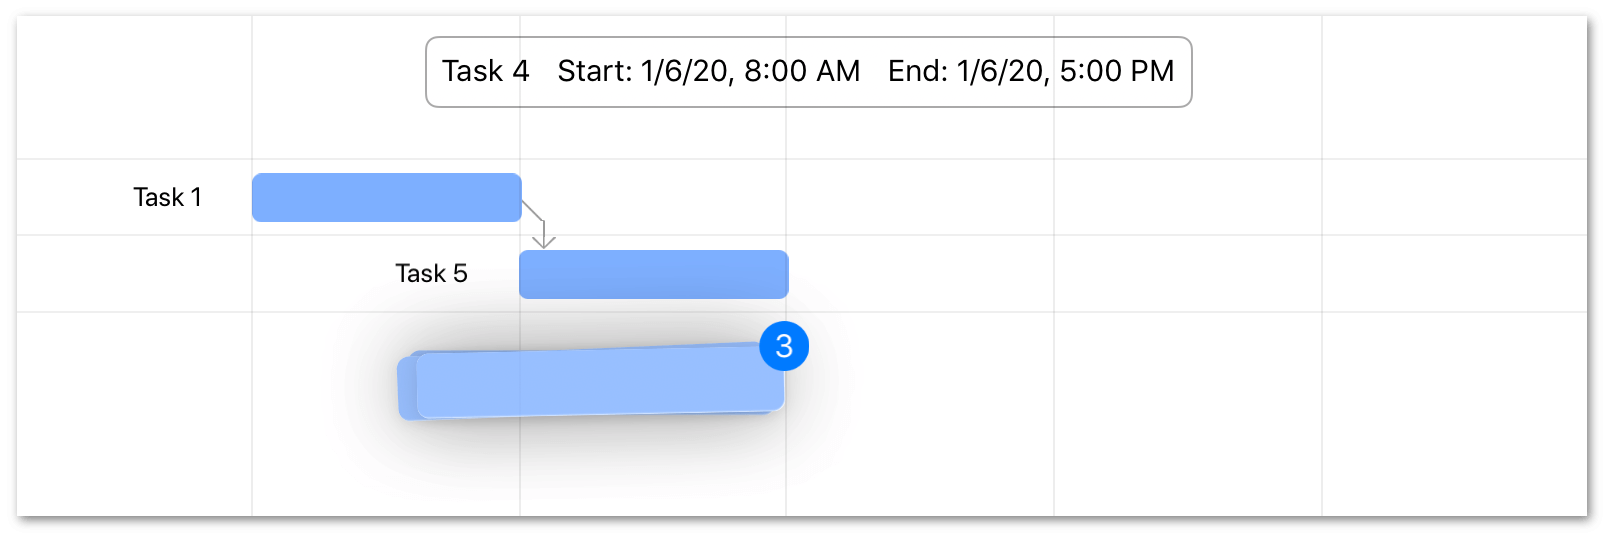
-
Drag the selected tasks to their new location and drop them in place:
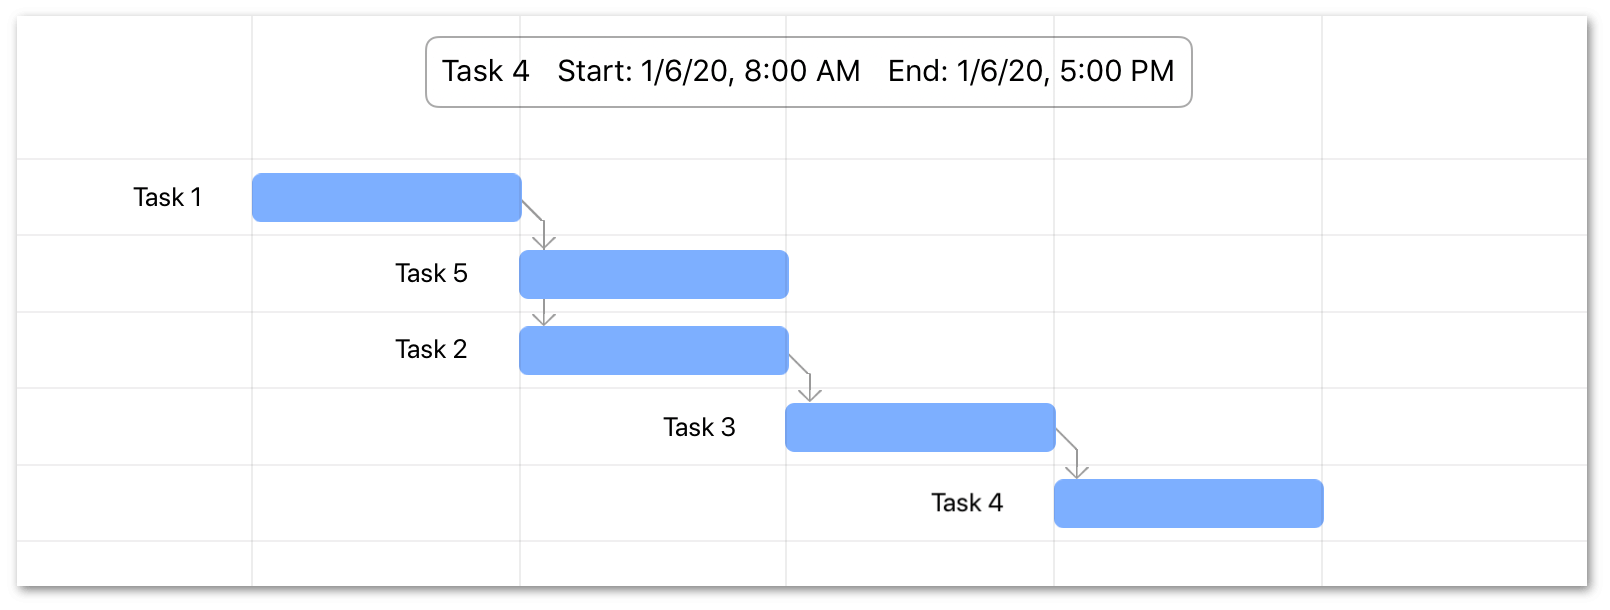
When multiple tasks are lifted, they are dropped in the order in which they were selected.
Dragging from OmniPlan to Other Apps
On iPad, you can use multitasking mode drag tasks out of a project’s Gantt Chart or Network Diagram and drop them into other apps on your device in split view. For example, you can drag from OmniPlan to...
- OmniFocus, add tasks to the Inbox or directly into your Projects.
- OmniGraffle, add text objects to the canvas for each task you drag in.
- Mail, add a task list to an email.
- Notes, add a task list to a note.
- Calendar, add events to your calendar for each task you drop.
- Messages, send Calendar events (.ics) files for each task you drop in a text message.
You can even drag tasks from one OmniPlan file to another. To do this:
- Touch and hold on the task that you want to copy to another OmniPlan file; wait for the task to lift up from the Project Editor before tapping additional tasks.
- In the toolbar, tap
 to close the current document and return you to the Document Browser.
 - In the Document Browser, either locate and tap the file you want to drag the tasks into, or tap
 in the toolbar to create a new OmniPlan document.
 - With the other file open, drop the tasks in place.
After dropping the tasks in place, OmniPlan removes any prior dependencies so you can integrate them into the new project.
Dragging from Other Apps into OmniPlan
Similarly, you can drag into a project’s Gantt view (you cannot drag into the Network Diagram) from other iOS apps. For example, you can drag in...
- Individual tasks from OmniFocus.
- Text objects, or objects with labels from OmniGraffle; text and labels are converted to tasks in the project.
- Text from an email message in Mail; each line you select and drag into OmniPlan appears as a separate task in the project.
- Selected text from Notes; each line you select and drag into OmniPlan appears as a separate task in the project.
- Events from Calendar.
- Text bubbles from Messages; each bubble you drag into OmniPlan appears as a separate task in the project.
Using the Network Diagram
A project’s Network Diagram offers an elegant, visually descriptive view that depicts the project’s tasks as a collection of nodes connected by their dependencies. Whether used as a tool for rapid-prototyping a new project or getting a handle on the complexities of an existing one, the Network Diagram provides a great new perspective on your project.
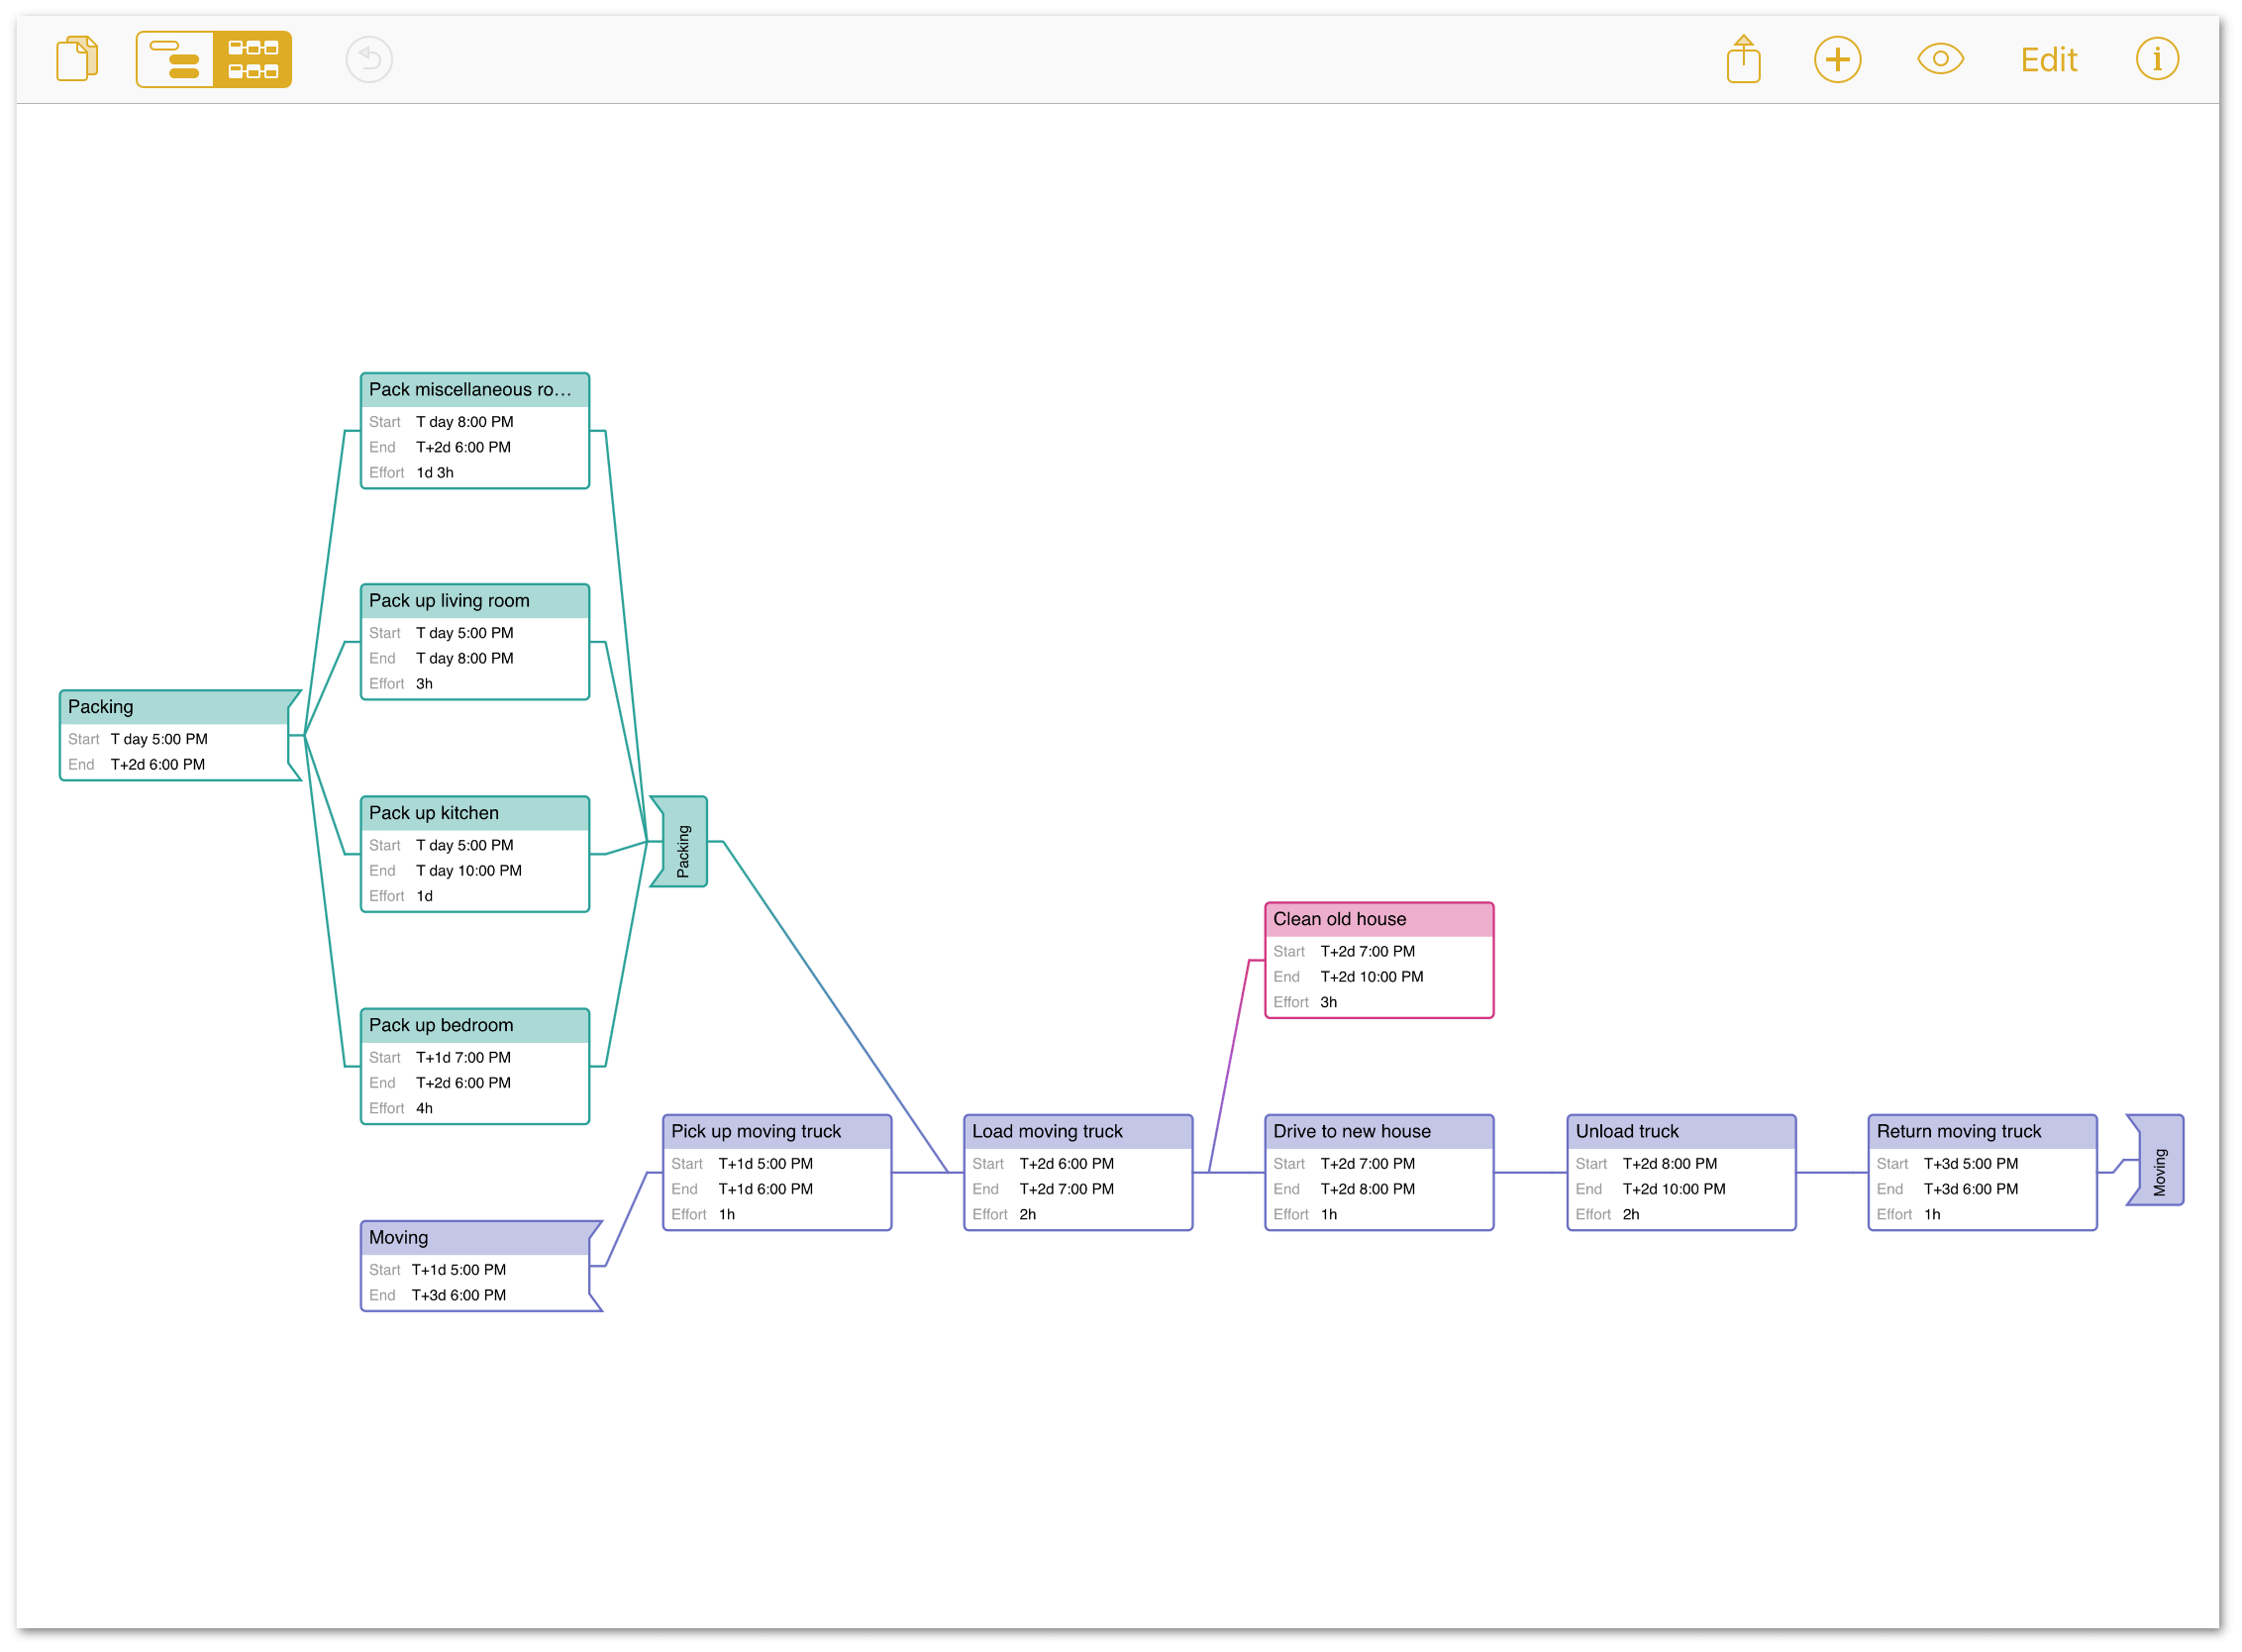
Charting Tasks and Dependencies
When you’re ready to start building (or adding to) a project in Network View, tap the View Switcher to toggle away from the Gantt chart, and tap  in the toolbar. That’s it! A new task is created.
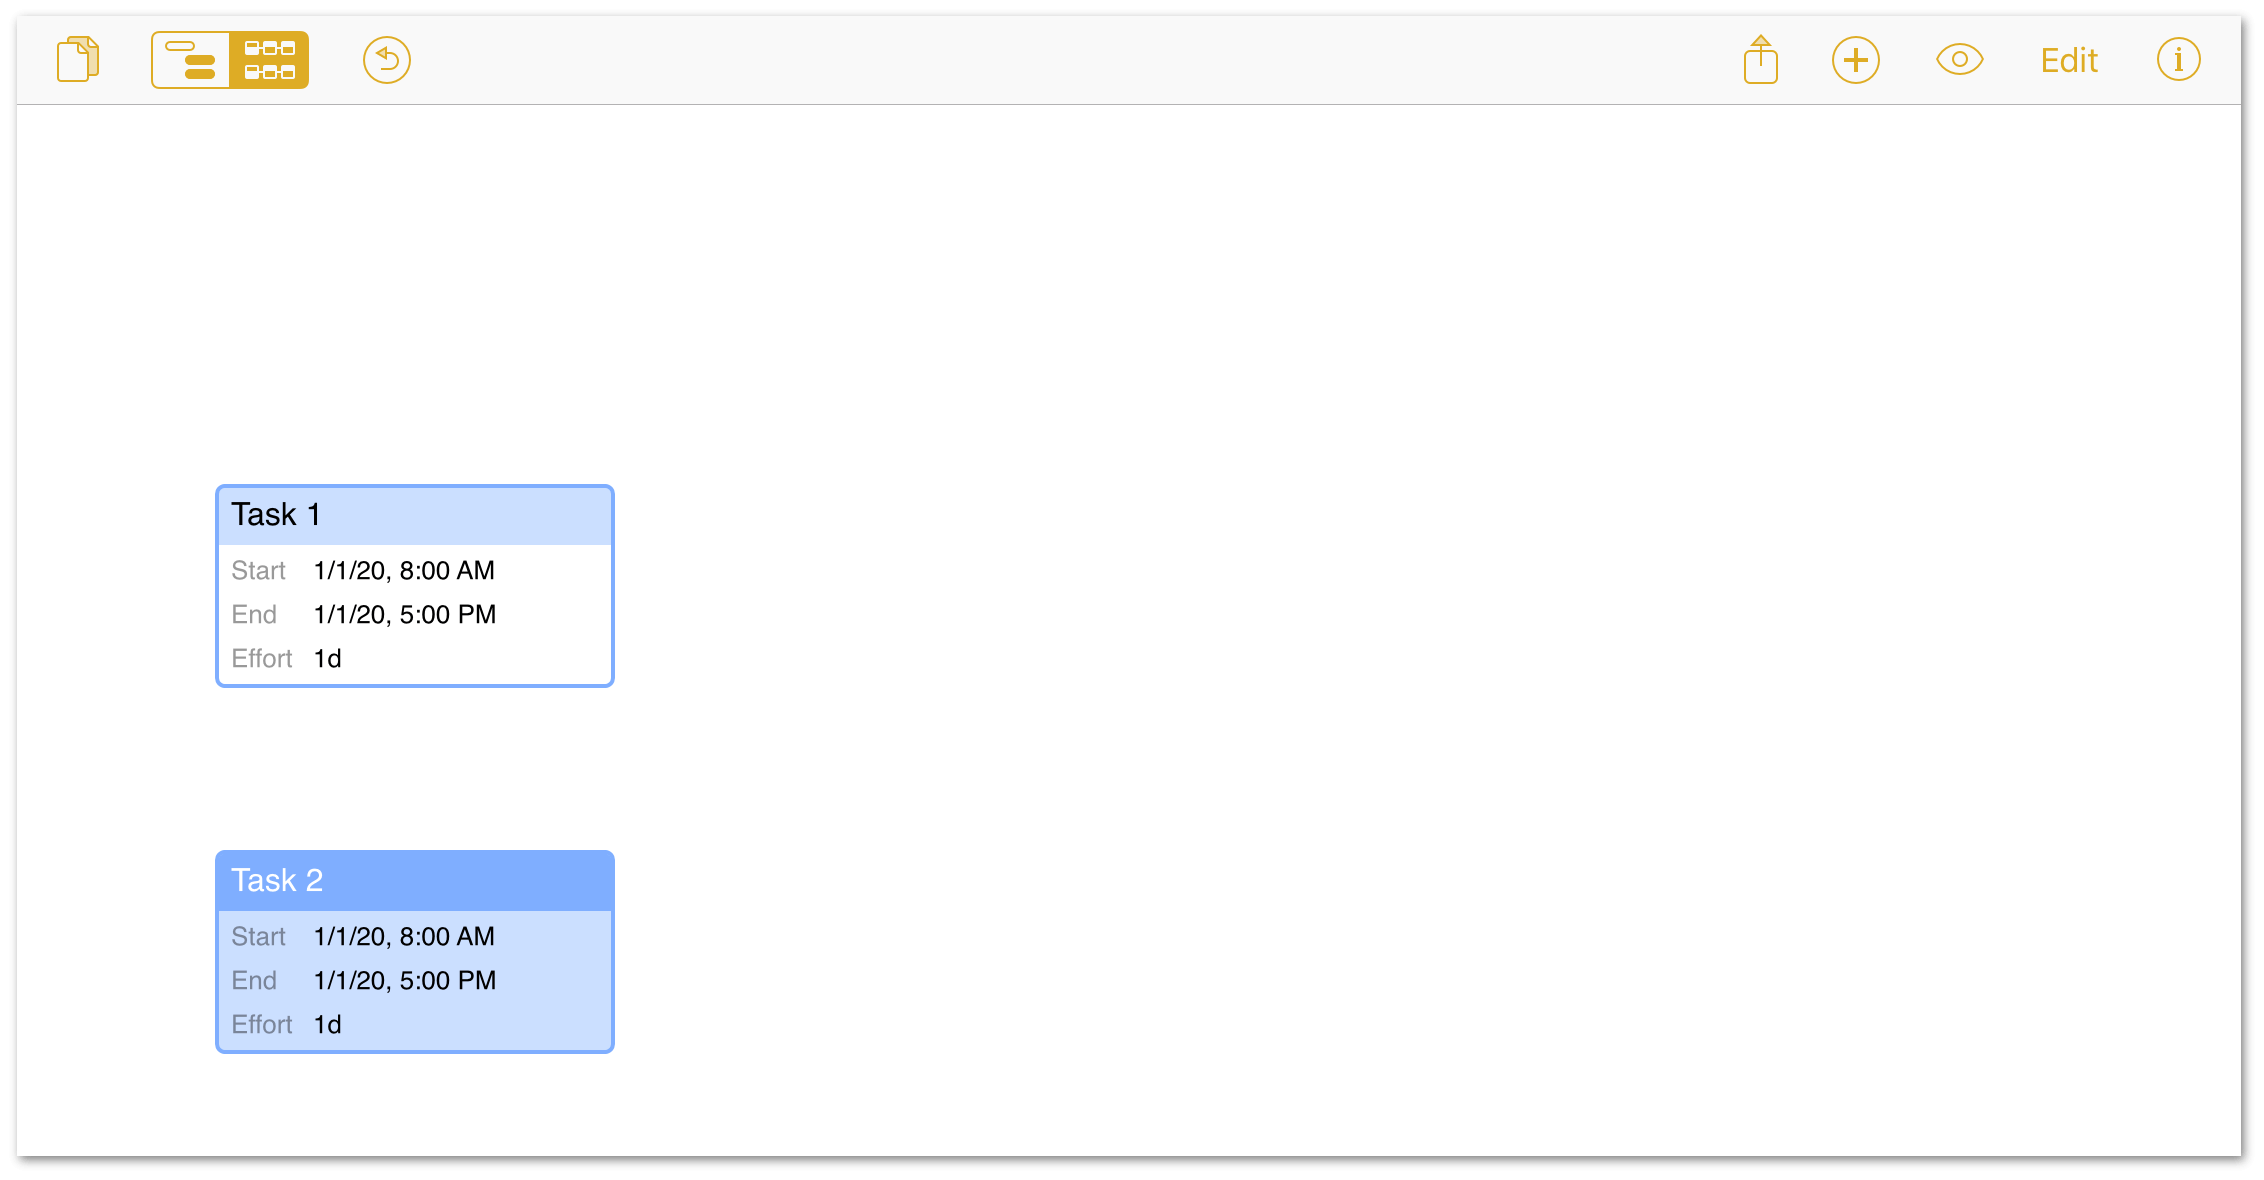
If you had a task selected previously, the new task will be connected to it by a line that represents a Finish-Start dependency. As long as a task is selected, you can quickly create a chain of tasks connected with Finish-Start dependencies by continuing to tap Add. If no tasks were selected, the newly created task is independent of any others.
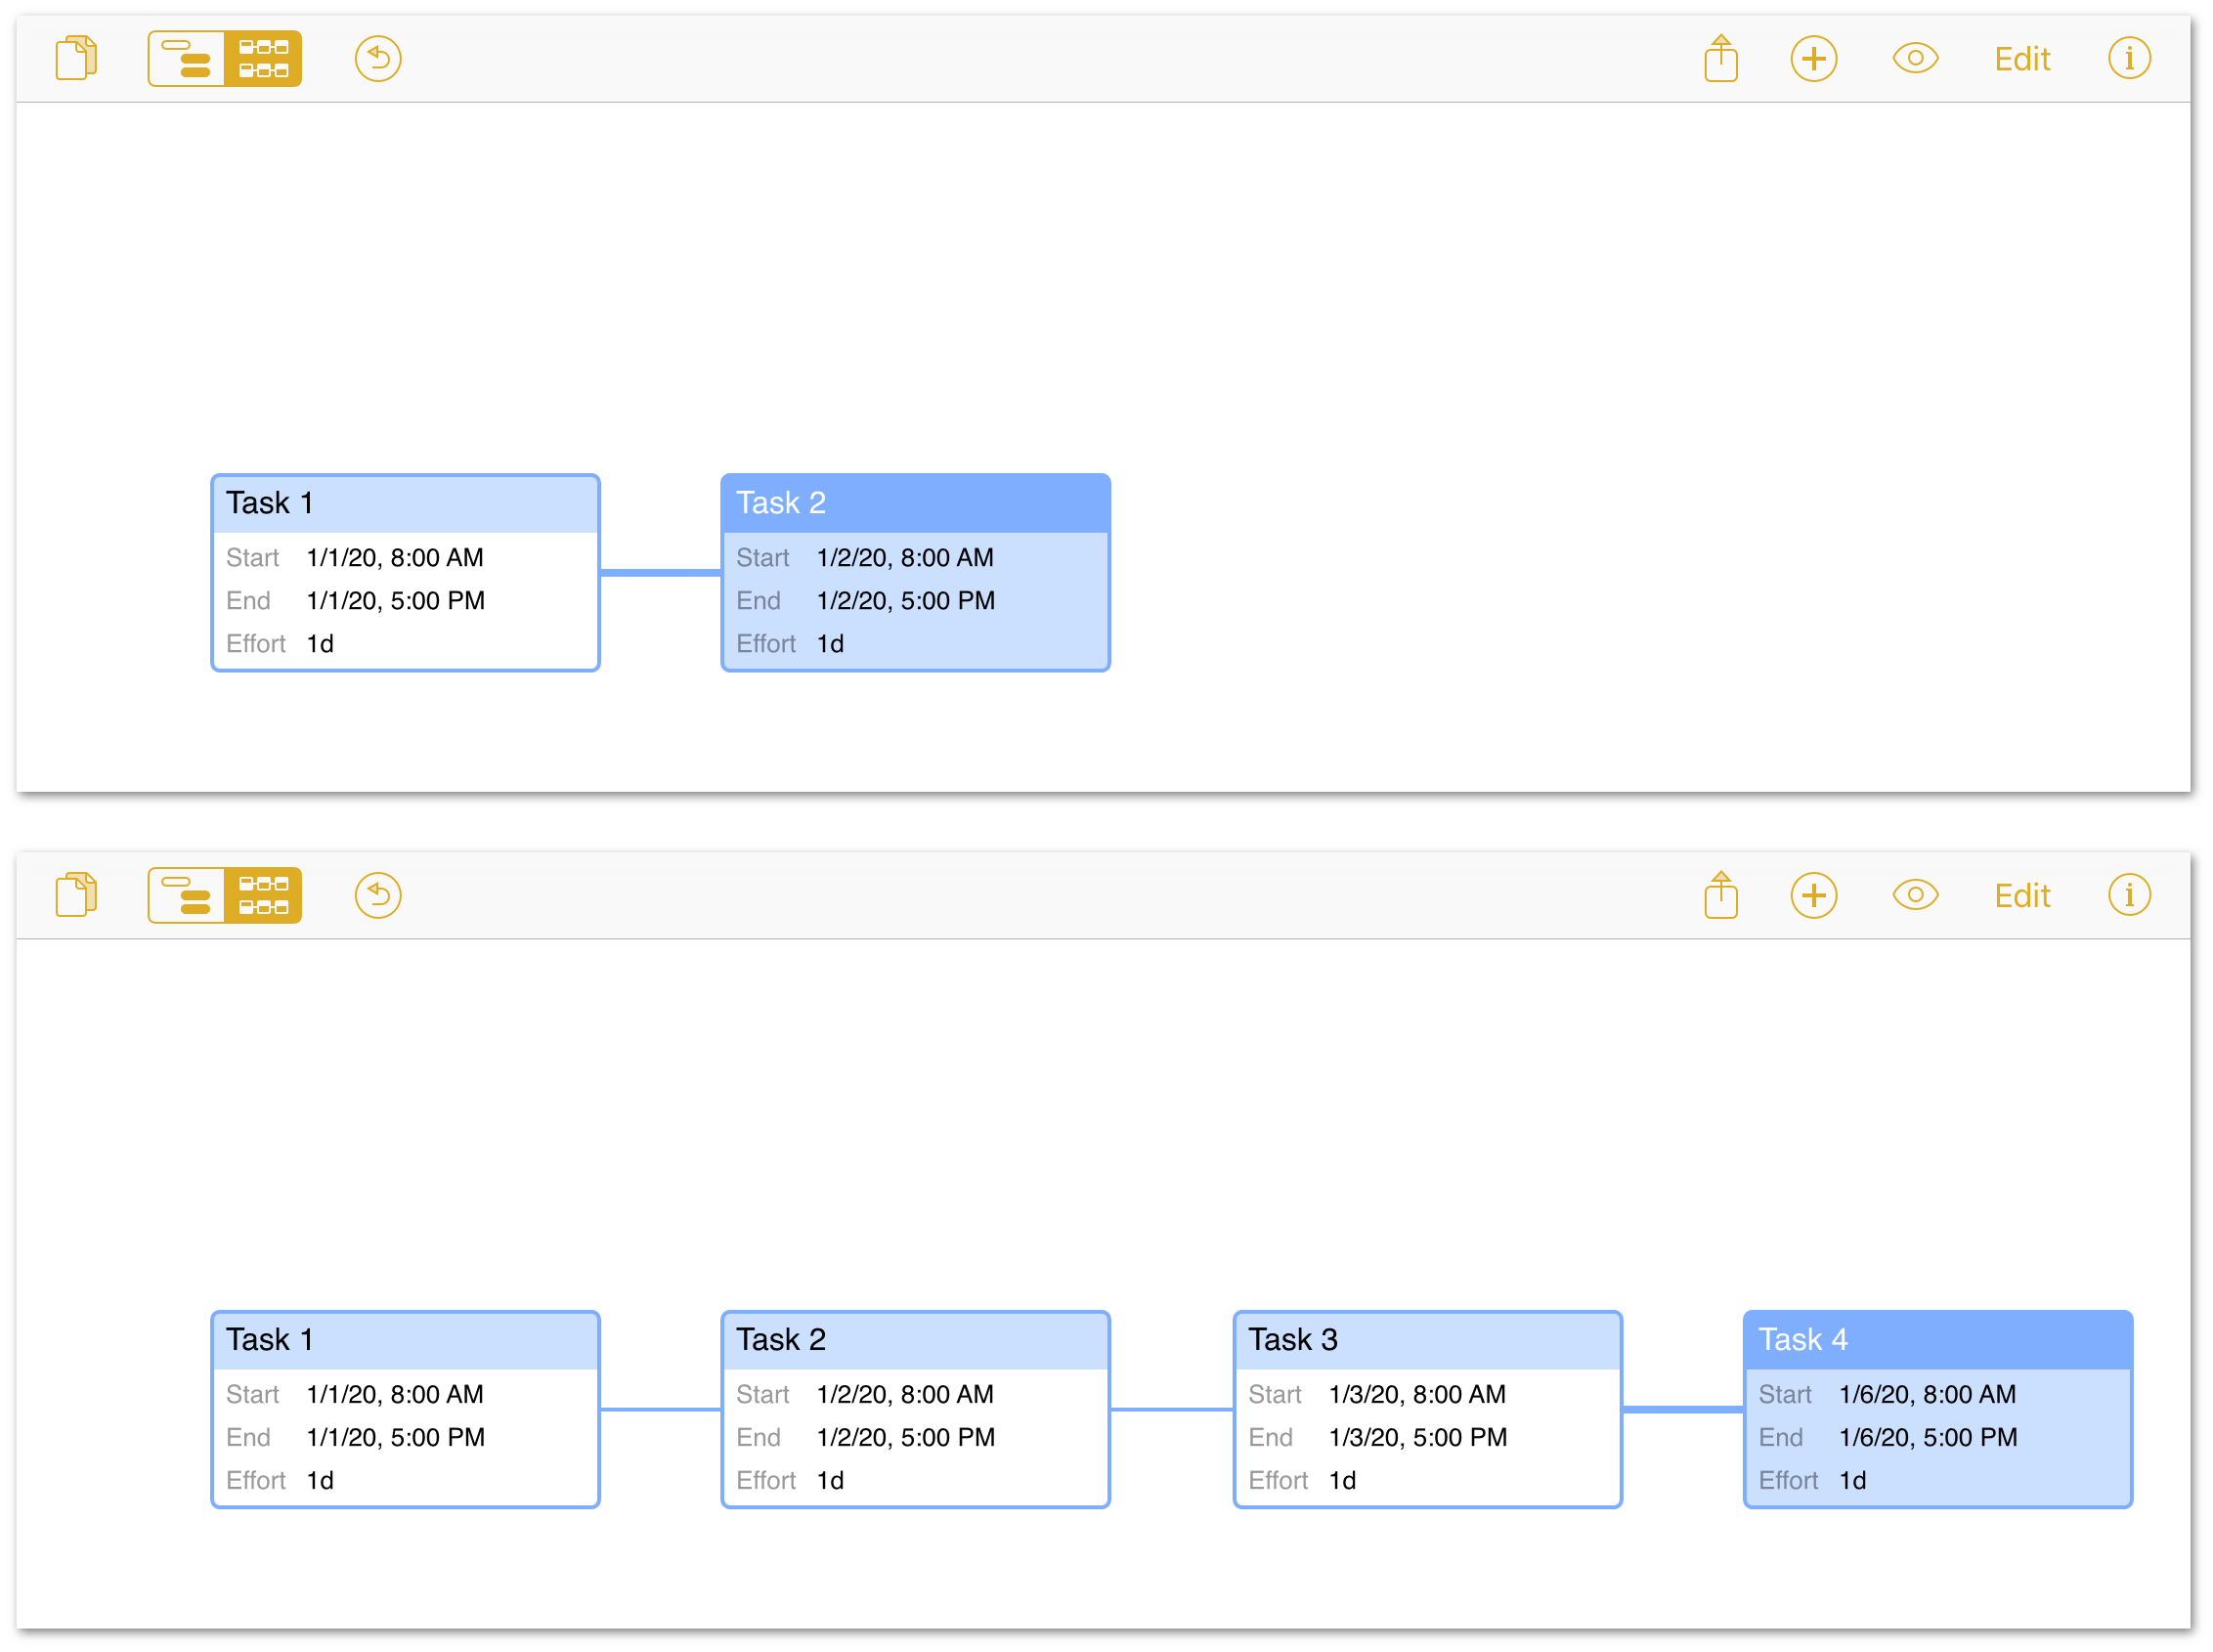
An unbroken chain of tasks with Finish-Start dependencies is arrayed in a straight horizontal line.
To create other dependency relationships, tap a task node to select it and drag the line that appears to another task. This creates a dependency between them, and you’ll see the tasks rearrange in the diagram automatically to reflect this new relationship.
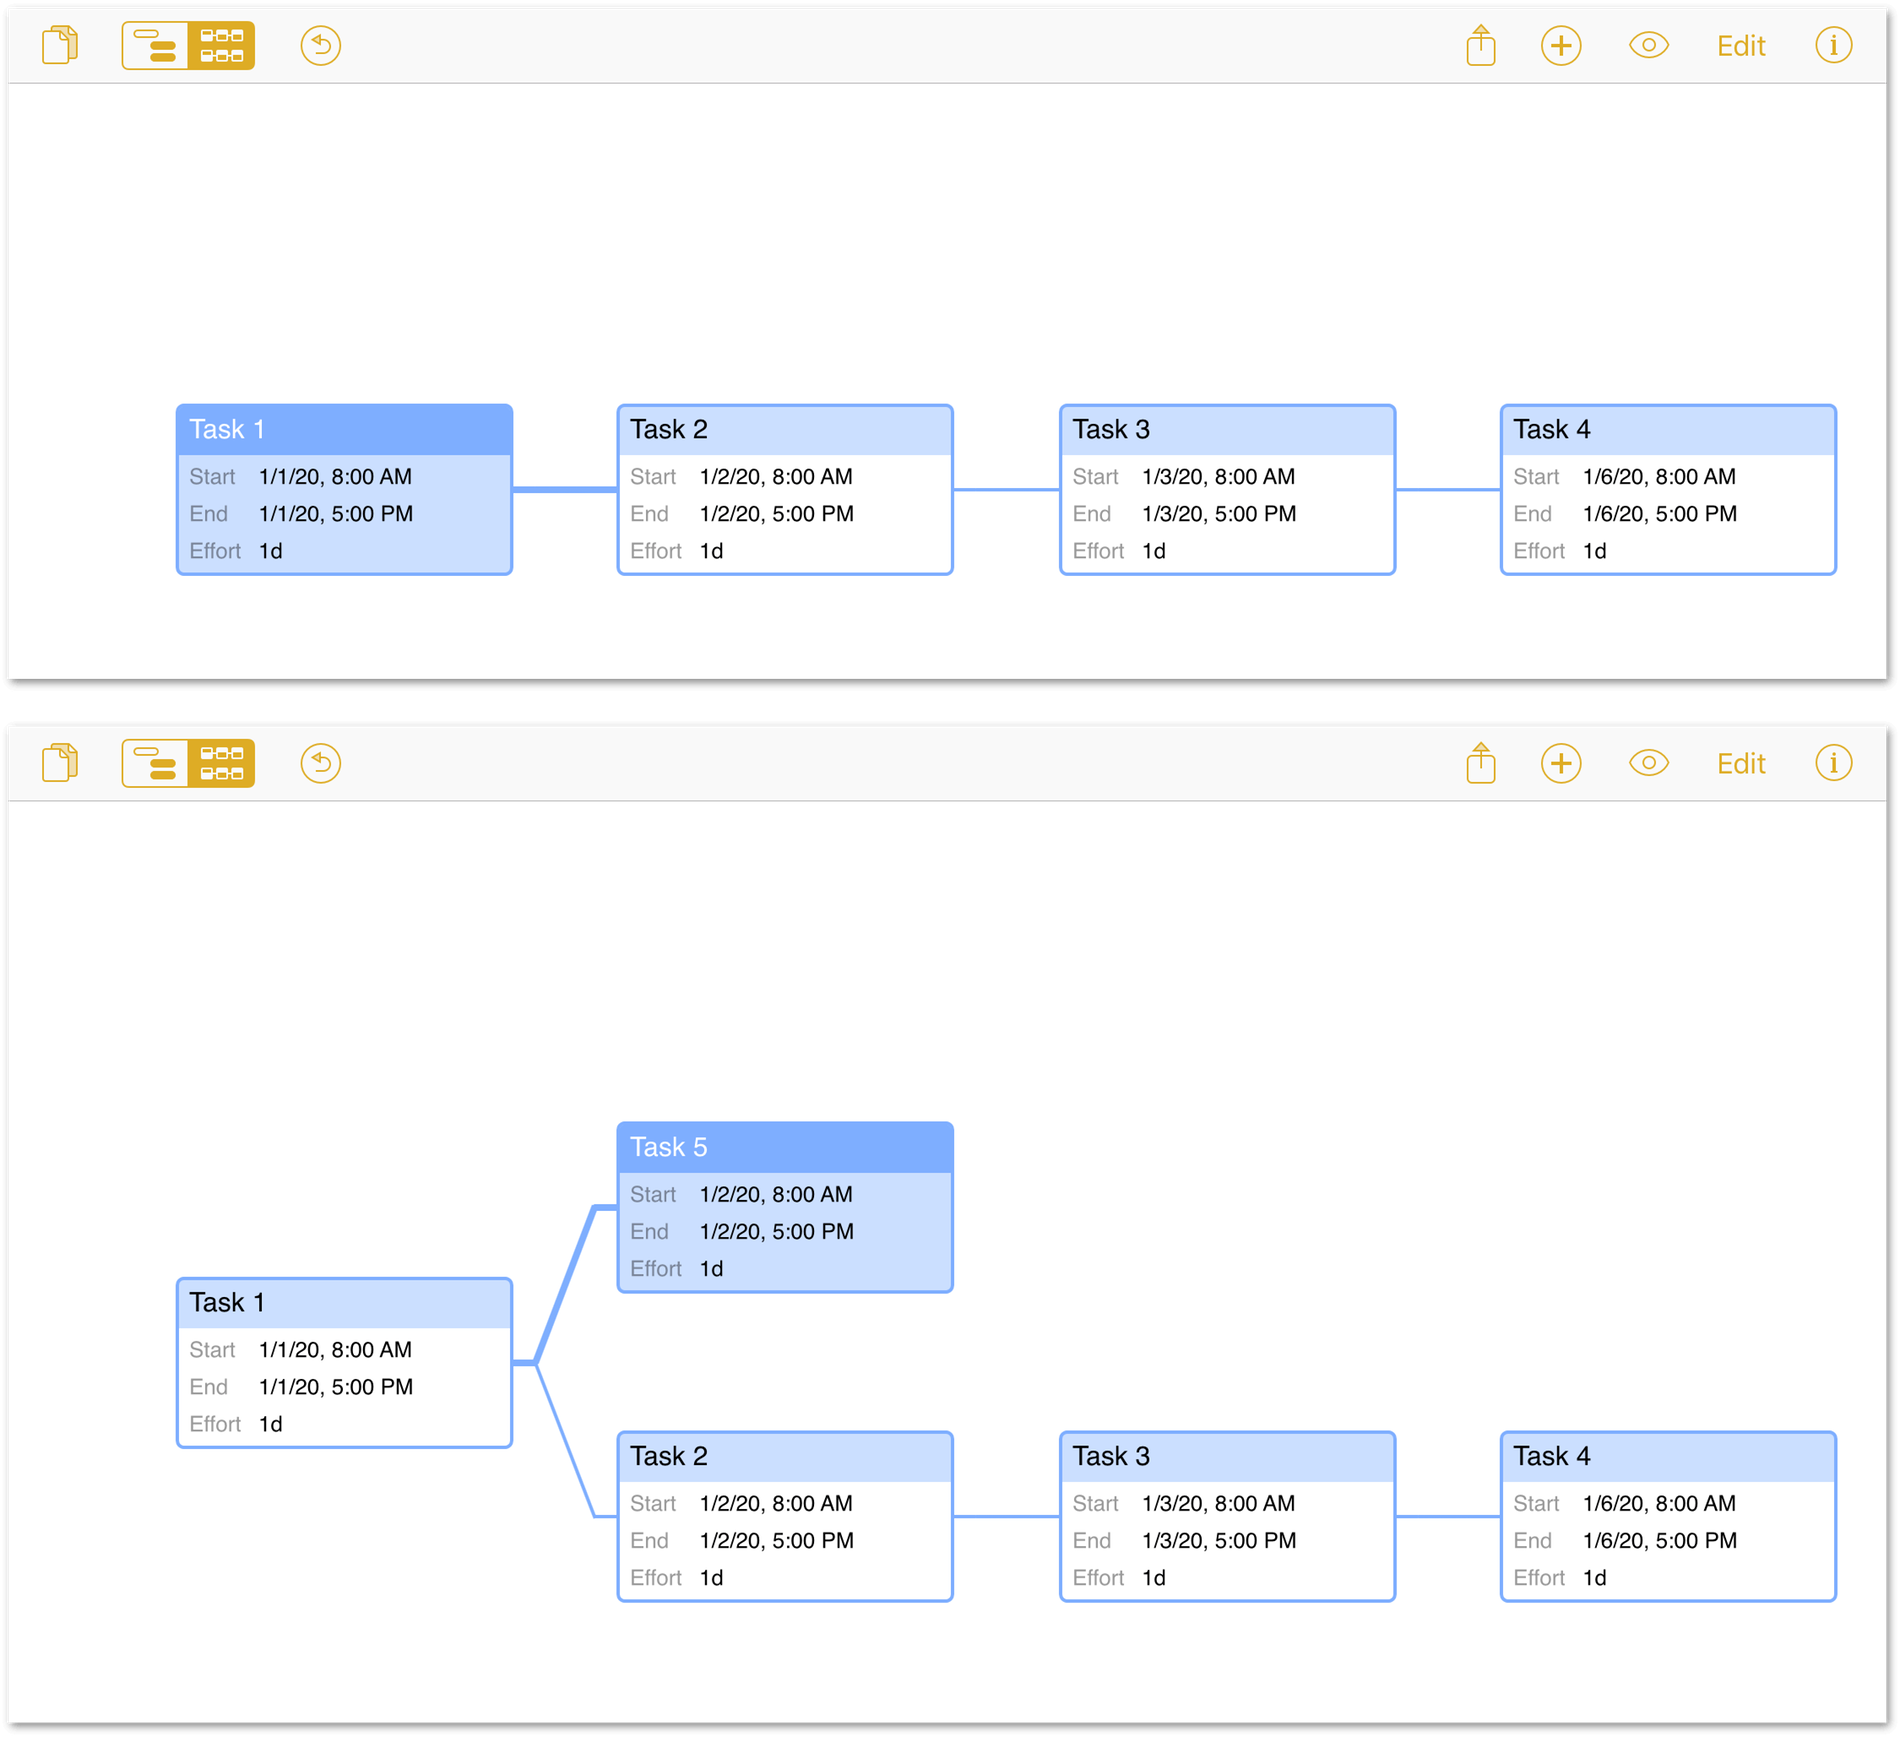
At any time while working in the Network Diagram, you can switch to the Gantt chart to see how your project-building exercise is looking, and see how its dependencies are described there.
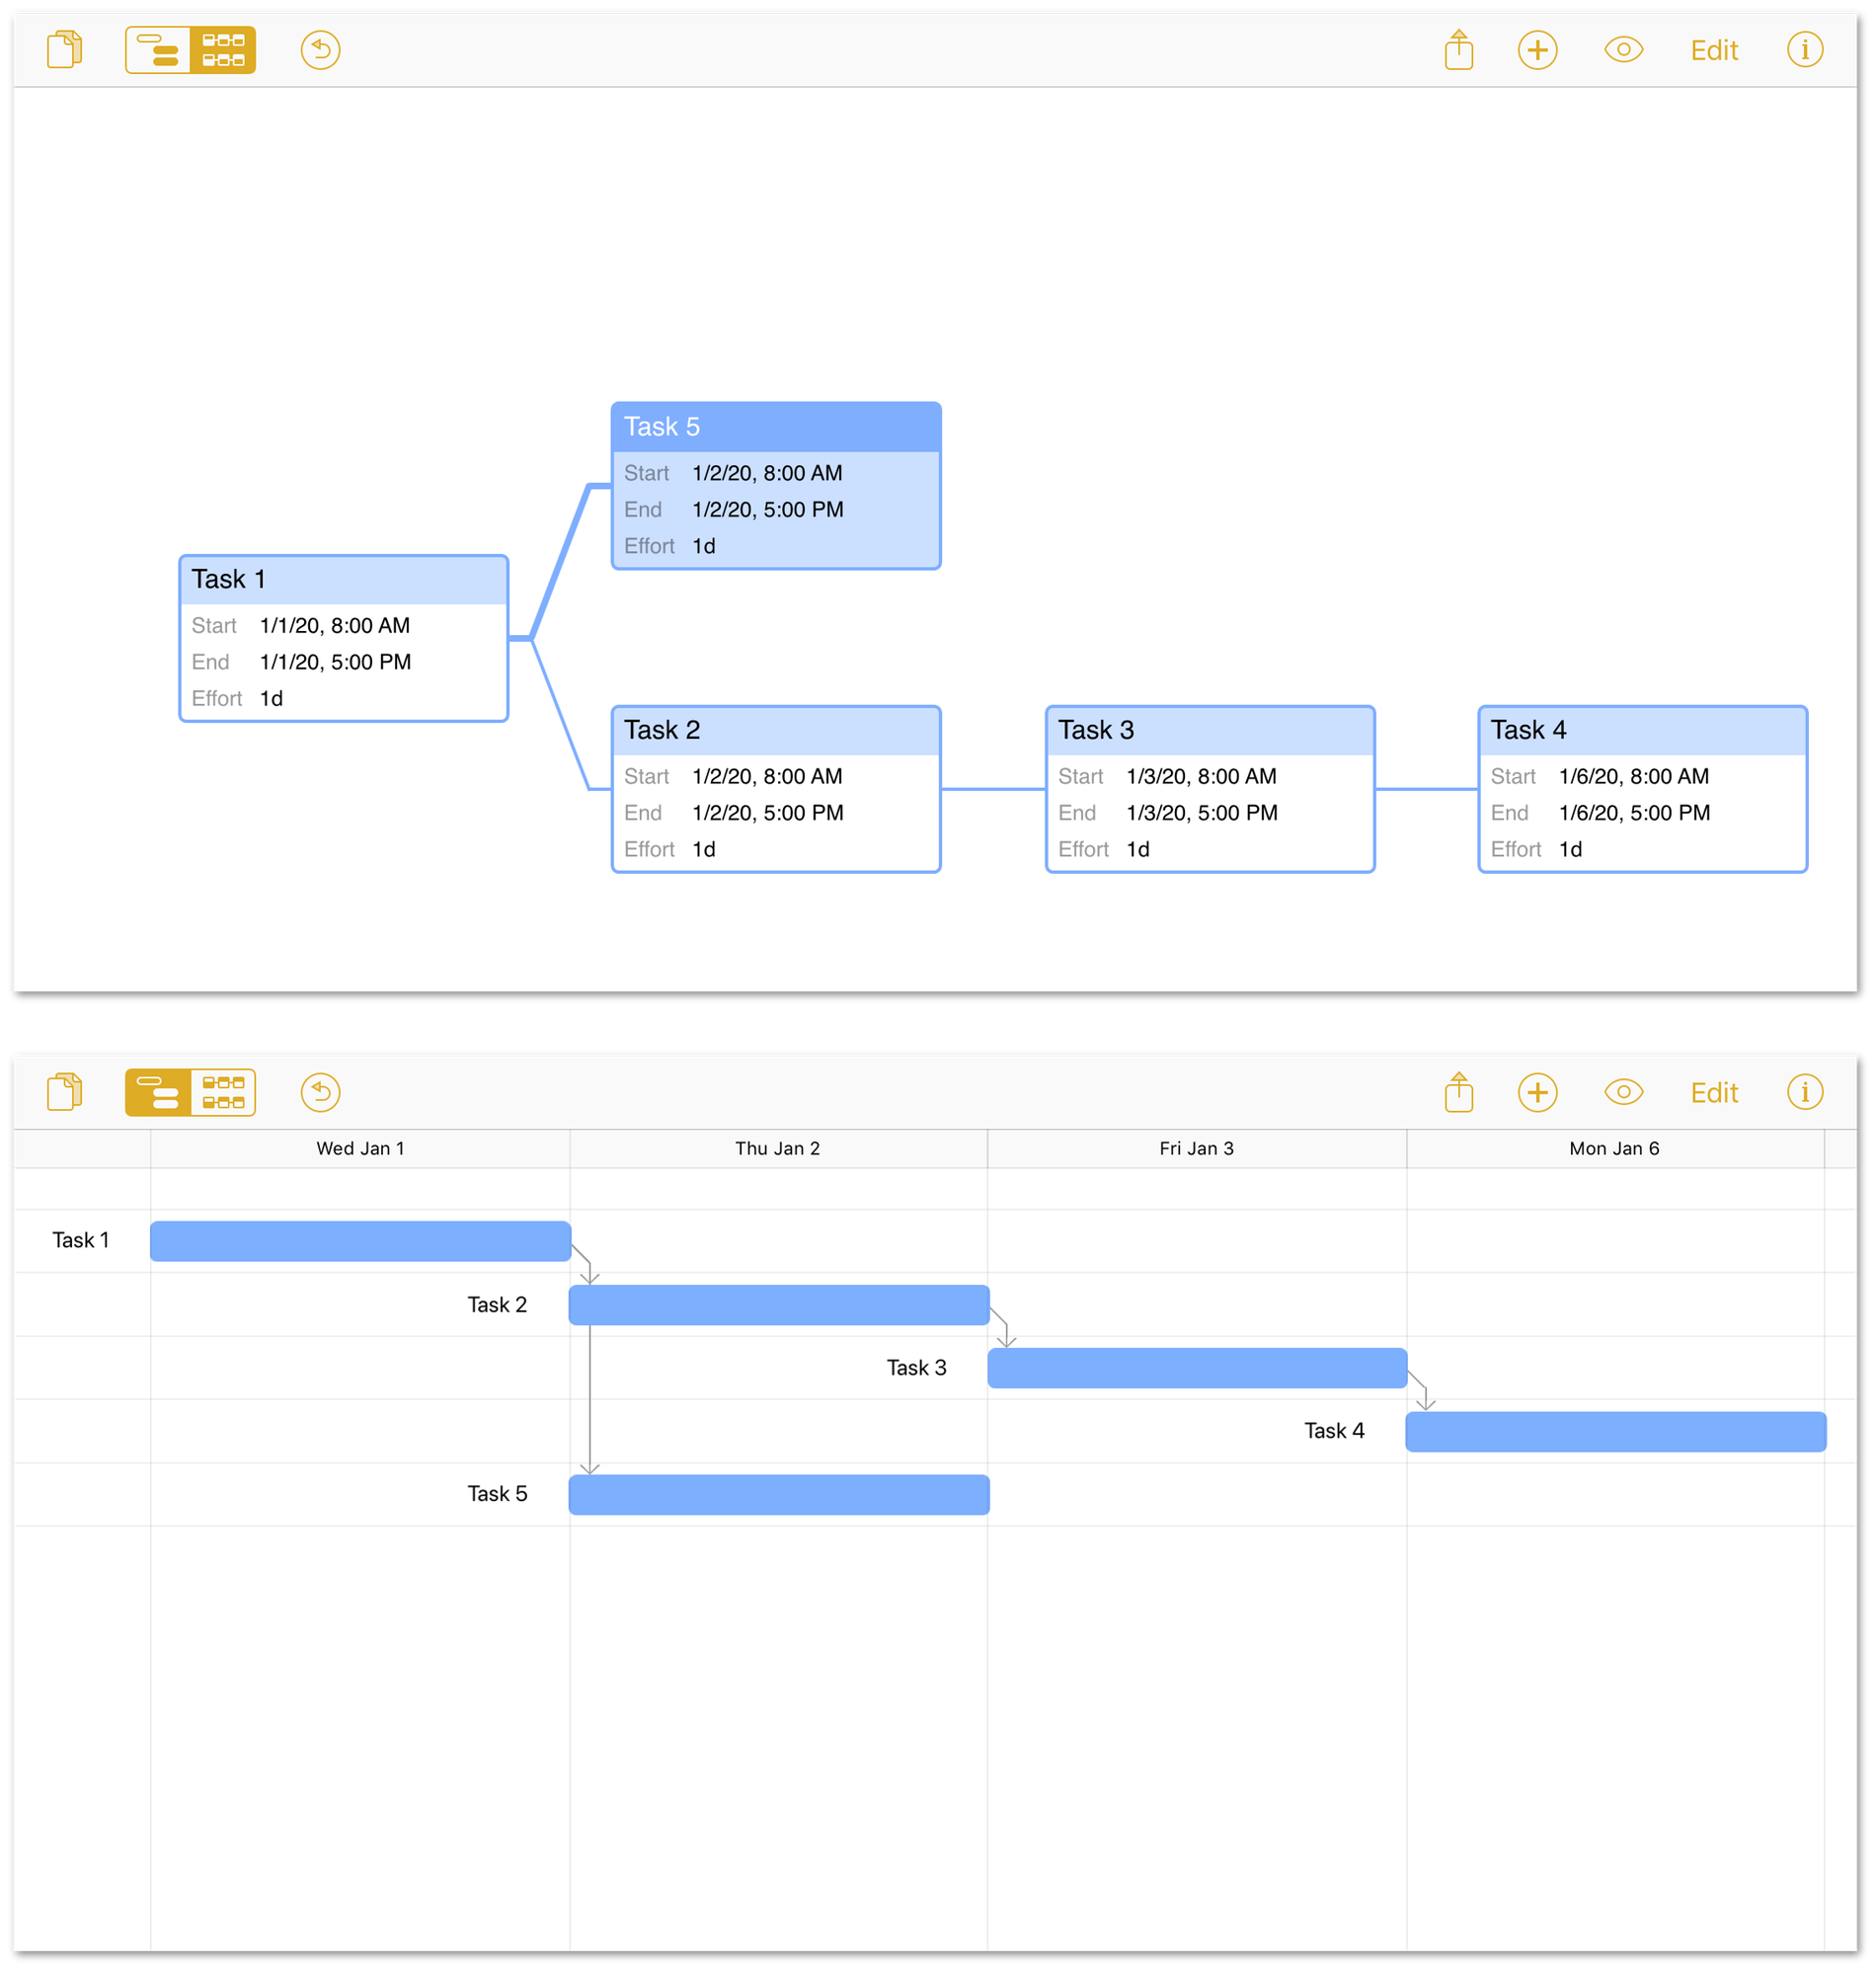
When you’re working on a project of considerable size, you can zoom in and out on the Network Diagram using the vertical pinch gesture shared by the Gantt chart.
Using the Task Inspector
The Task Inspector has the following three tabs:
- Task Info: Contains tools for setting details of tasks.
- Scheduling: Enables you to set scheduling influences and constraints on the task.
- Assignments: Set the resources assigned to the task.
Each tab of the Task inspector is covered in the following sections.
The Task Info Pane
The Task Info pane of the Task Inspector provides settings for describing the parameters of the task, including its name, note, type, amount of effort or duration required to complete, and its visual appearance in the Gantt chart and Network Diagram.
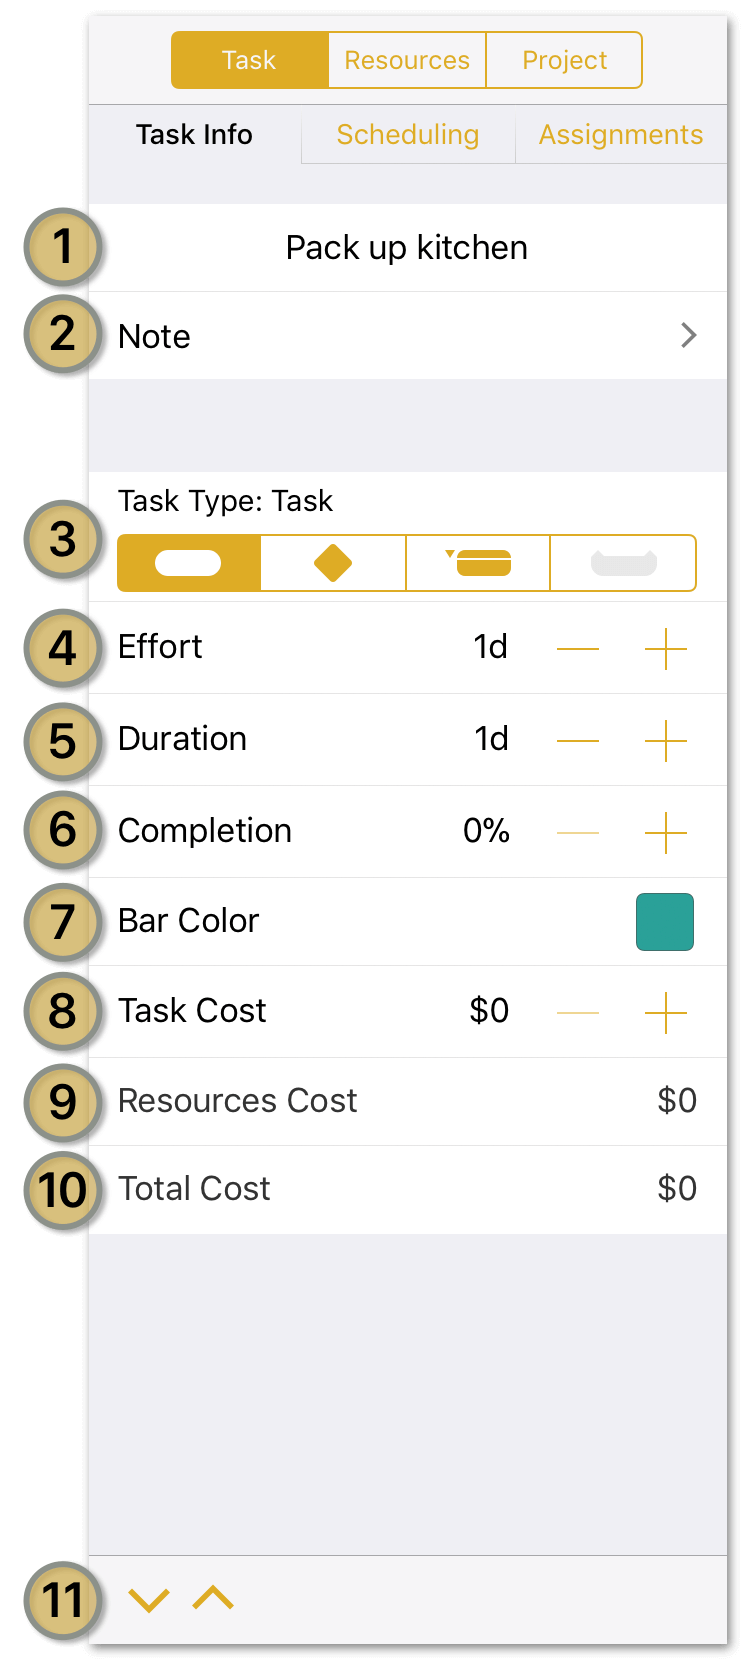
- Task Name: Edit the task’s name.
- Note: Enter a note for the selected task.
- Task Type: Choose a type for the task: Task, Milestone, Group, or Hammock.
- Effort: The amount of work hours required to complete the task. This value may be automatically adjusted based on the method for assigning resources chosen in Resource Assignment Options in the Assignments pane of the Task Inspector.
- Duration: The length in actual time required to complete the task, based on the amount of effort assigned to it. This value may be automatically adjusted based on the method for assigning resources chosen in Resource Assignment Options in the Assignments pane of the Task Inspector.
- Completion: The amount of work on the task that is currently complete, expressed as a percentage.
- Task Cost: The cost of the task, in addition to the cost/hour or cost/use of any resources assigned to it. Expressed in the units of currency set up in the Project Inspector.
- Bar Color: the color of the task’s bar in the Gantt chart.
- Resources Cost: This value isn’t edited directly, but represents the total cost of the resources currently assigned to the project based on the resources’ cost per hour or cost per use.
- Total Cost: As with Resources Cost, this value isn’t edited directly. It combines the Task Cost and Resources Cost values for an at-a-glance summary of the projected cost of the task in its entirety.
- Task Switcher: Use the up and down arrows to move between tasks in the Project Editor while keeping the Task Inspector open.
The Scheduling Pane
The Scheduling pane of the Task Inspector describes how the task is contextually integrated into the project. It lists other factors influencing when the task is allowed to begin, provides controls for locking the task at a point in the project’s calendar, and shows any other tasks that are dependent on the tasks completion to begin.
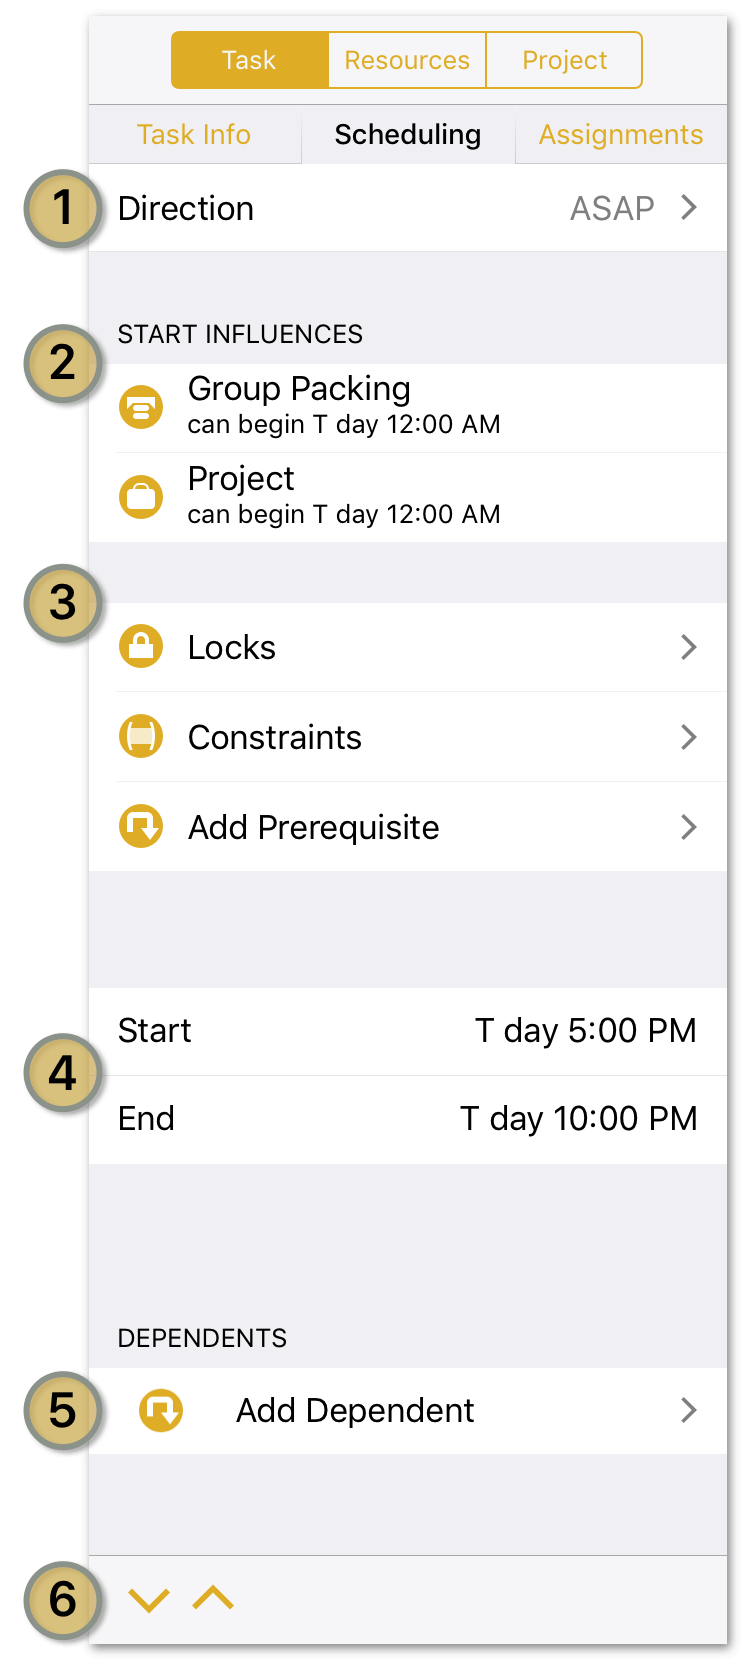
- Direction: Choose whether the task should be scheduled as soon as possible (ASAP) or as late as possible (ALAP). This affects how the task is scheduled when leveling resources, and overrides the Direction setting in the Project Inspector for this individual task.
- Start Influences: This section lists other aspects of the project that affect when the task can be scheduled, such as the project’s overall start date or the date a task group containing the task can begin.
-
Constraint Controls: Use the following Constraint controls to set parameters that limit when the task can be scheduled:
- Locks: Lock the task’s start and/or end dates here. Locking either or both of these dates prevents other factors, such as leveling after assigning additional resources to the task, from changing the dates its work is scheduled for.
- Constraints: Add bounding constraints to anchor the task loosely in time between “bracket periods” during which the task is allowed to start or end.
- Add Prerequisite: Choose a task from the list to create a Finish-Start dependency between that task and the one currently being edited, adding a new prerequisite task that must be completed before this one can begin.
-
Start and End: Edit the task’s start and end dates. One or the other may be inaccessible; this can be due to a scheduling rule or other constraint (such as the absolute start date of the project). Note that unless they’re locked in, setting these dates doesn’t prevent them from being changed by leveling later.
-
Task Dependents/Prerequisites: A list of tasks dependent on the current task’s completion to begin. Tap a task to view its details and add lead time if desired. Tap Add Dependent to select another existing task to add as a dependent using a finish ▸ start dependency from the current task.
If the selected task has any prerequisites to its own beginning, those will be listed here as well.
-
Task Switcher: Use the up and down arrows to move between tasks in the Project Editor while keeping the Task Inspector open.
The Assignments Pane
The Assignments pane of the Task Inspector controls how the task should be prioritized when leveling, and provides tools for assigning and configuring resources assigned to the task.
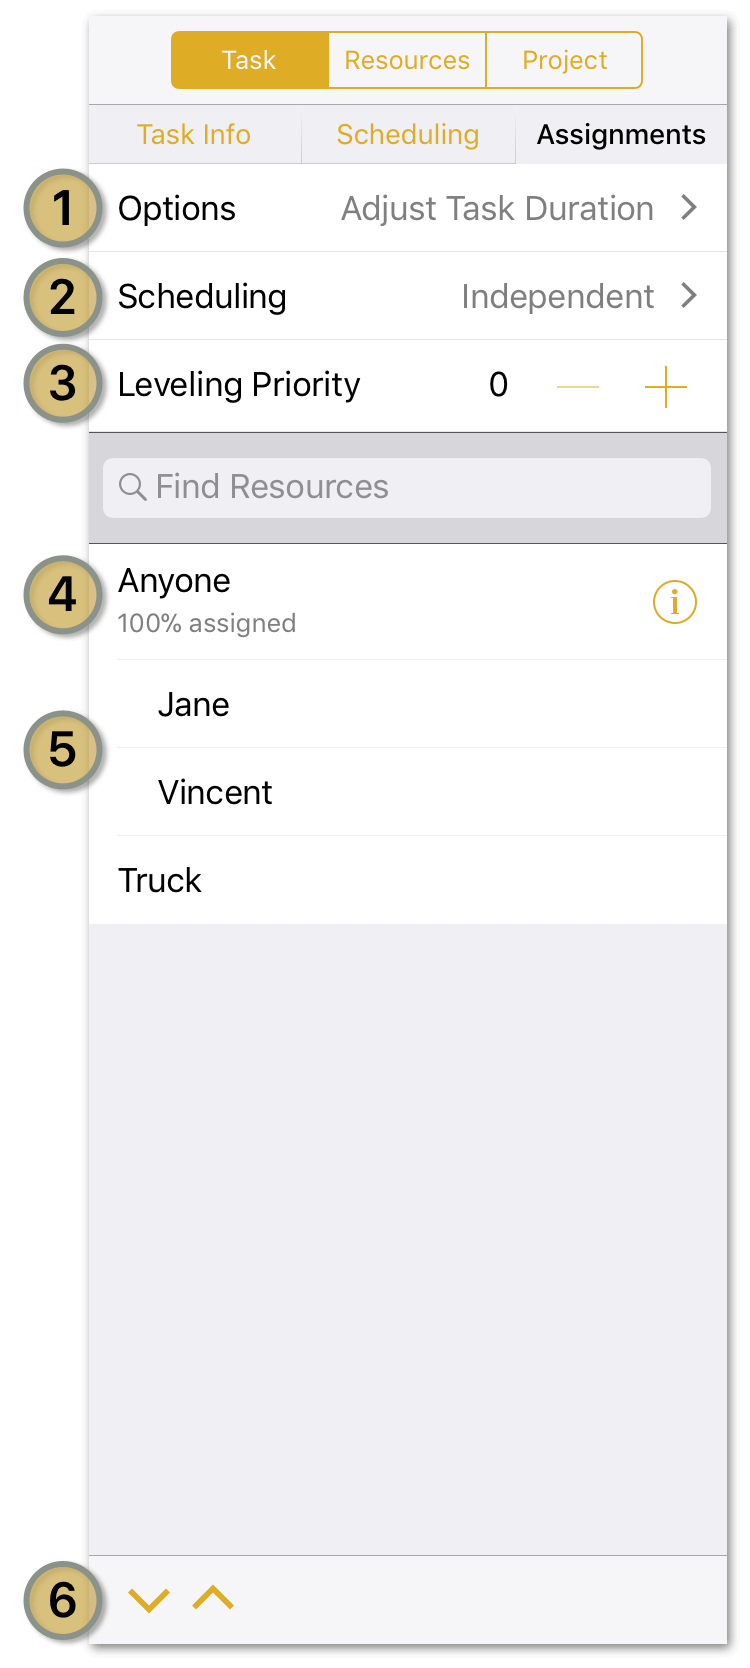
- Resource Assignment Options: When resources are assigned to (or removed from) the task, set how the task’s effort, duration, and assignment percentages should change based on the revised resource allocation.
- Resource Scheduling Method: By default, resources assigned to a task can put in their hours whenever is most convenient based on other scheduled work. The Meeting task type adds the option, when leveling, to require all resources be present to work on the task simultaneously.
- Task Leveling Priority: When leveling, tasks with no constraints or dependencies will be queued based on their order in the Gantt chart unless they are given a priority here. Lower positive integers indicate higher priority (1 is the highest); tasks do not require consecutive priority numbers for their order to be respected.
- Resource Selector: Use this field to filter the resource list alphabetically. If a desired resource doesn’t already exist, add it using the Plus button that appears at the bottom of the filtered list.
- Assigned Resources: View a list of all the project’s resources here, along with information about their assignments relative to the selected task. Any resource assigned to the task will list the percentage of its effort assigned below its name, and will have an Info button with details about the assignment and the option to change the percentage of effort being contributed.
- Task Switcher: Use the up and down arrows to move between tasks in the Project Editor while keeping the Task Inspector open.
Using the Resources Inspector
The Resources Inspector contains tools for resource creation, calendar customization, and resource leveling.
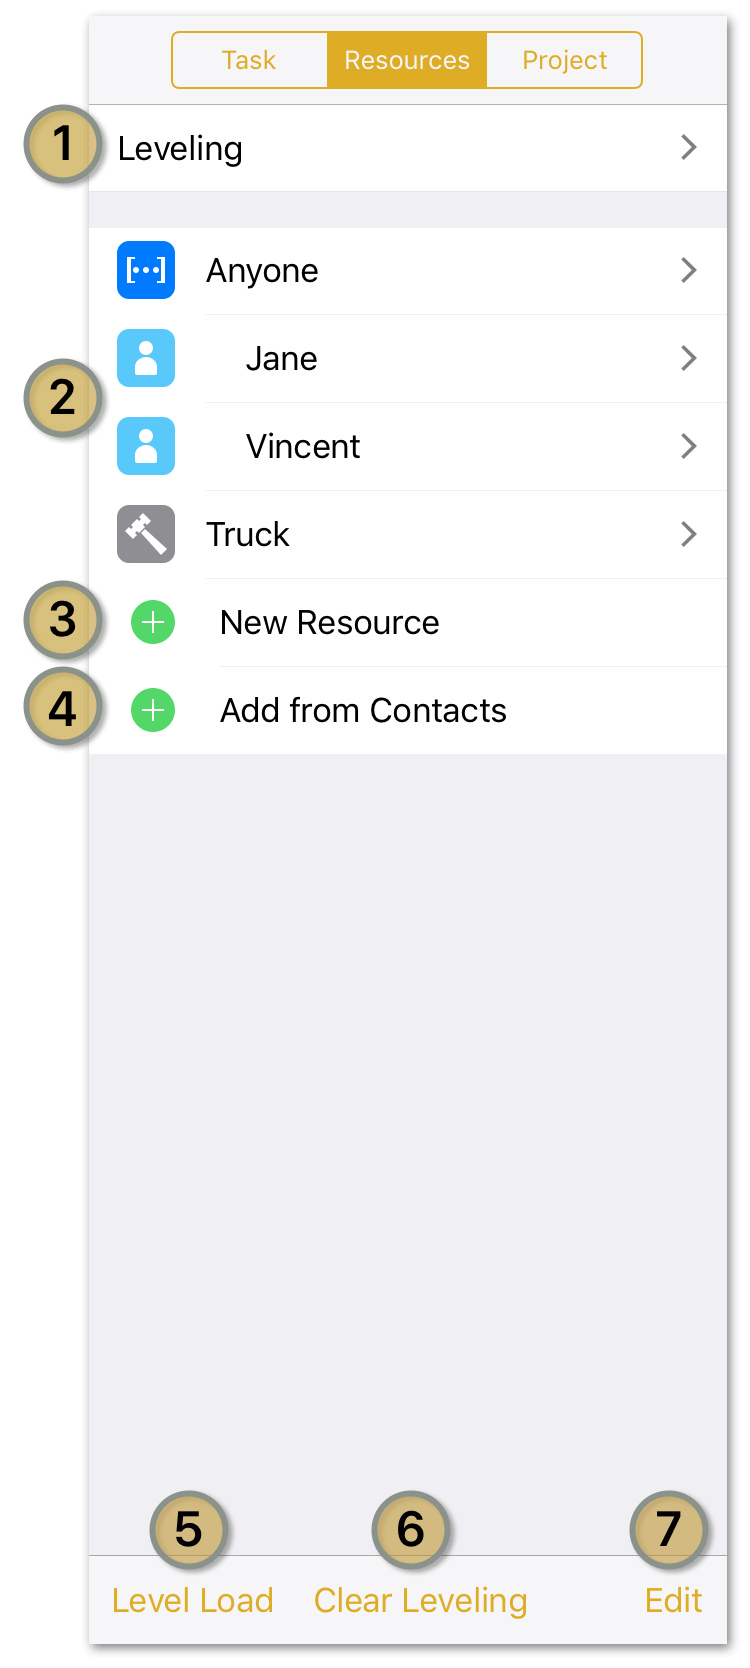
- Resource Load Leveling Controls: Choose whether to automatically level resource loads across the project whenever a change is made, whether leveling affects only the schedules of tasks in the future (from the current date), and whether to allow tasks to be split as part of the leveling process.
- Resource List: A list of all resources currently assigned to the project. Tap a resource to view its details, including type, email address, regular work hours and off hours calendar, units and efficiency, cost/use and cost/hour, and bar color (only relevant when sharing resources with a project in OmniPlan Pro for Mac).
-
New Resource: Add a new resource to the project and customize its details. Resource types include:
-
Staff: People who work on the project. Staff units are measured as percentages. A person who is fully available to the project has a units value of 100%; someone who is spending part of their working hours on other projects would have lower available units. Note that this is not the same as having fewer working hours or being less efficient; these values can be edited by tapping the individual resource.
If you are collaborating with multiple users across projects, a staff member’s email address serves as their unique identifier for purposes of leveling resources loads.
-
Equipment: Some kind of reusable asset, such as special computer hardware. It can be useful to consider things like meeting rooms to be “equipment,” if you need to balance their use between different tasks. For equipment resources, Units means how many of the resource are available. The number of available units can affect resource leveling.
-
Material: Consumable supplies. For material resources, Units means how many of the resource are being used throughout the project. This value updates as the resource is assigned to more tasks.
-
Group: a way to organize several resources together. As such, groups lack some characteristics of individual resources. Others, such as Efficiency and Cost, represent the average of the individual resources that form the group. If these values are changed for the group they are changed for each resource within the group as well, overwriting any existing values.
When a resource group is created, it is initially empty; to add resources to the group, create them and move them inside the group with Edit Mode.
-
-
Add from Contacts: Grant OmniPlan access to your Contacts list to add resources to your project directly from there.
- Level Resource Loads: Reschedule tasks and change resource loads to most efficiently complete your project based on all the other parameters you’ve set up for individual tasks, resources, and the project as a whole.
- Clear Leveling: Remove leveling optimization.
- Edit: Switch to Edit Mode, where resources can be removed with the deletion switch next to their names, and reorganized—including movement between resource groups—with their reordering handles.
Using the Project Inspector
Accessed from the toolbar, inspectors are menus that contain sets of controls and input options for defining the parameters of all aspects of your project.
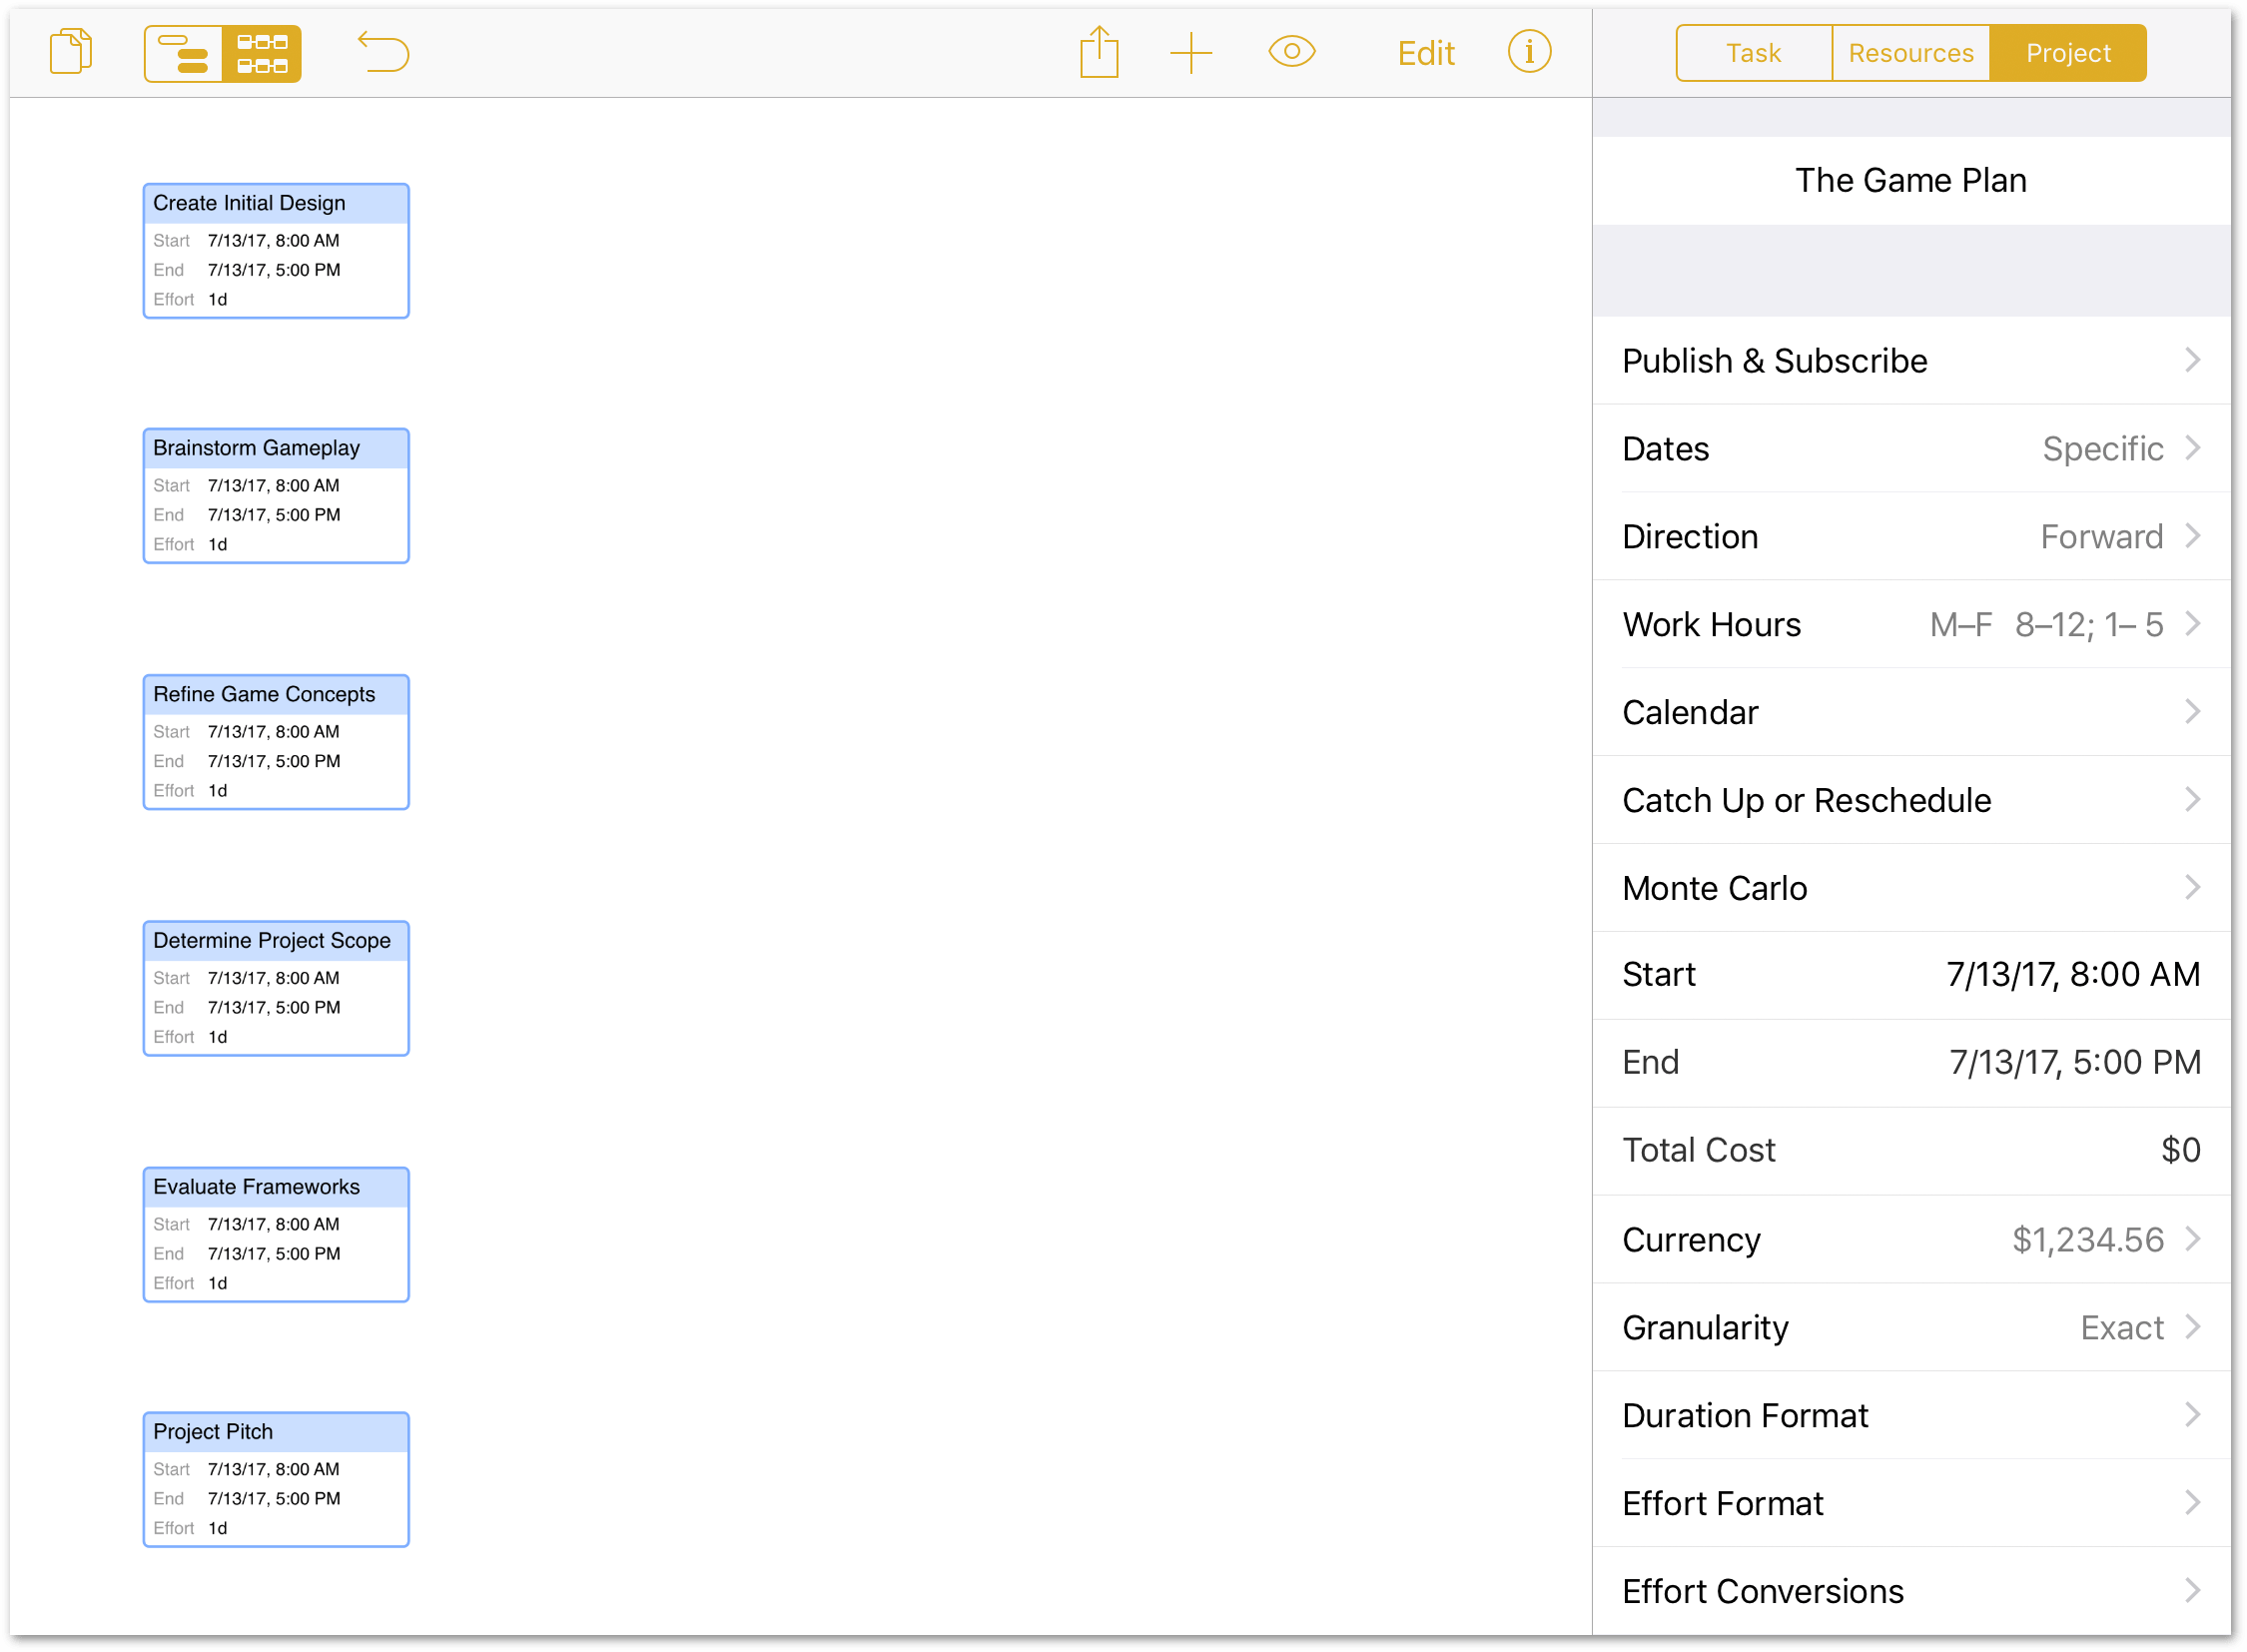
The Project Inspector contains tools for fine-tuning the details of your project’s structure and operating parameters.
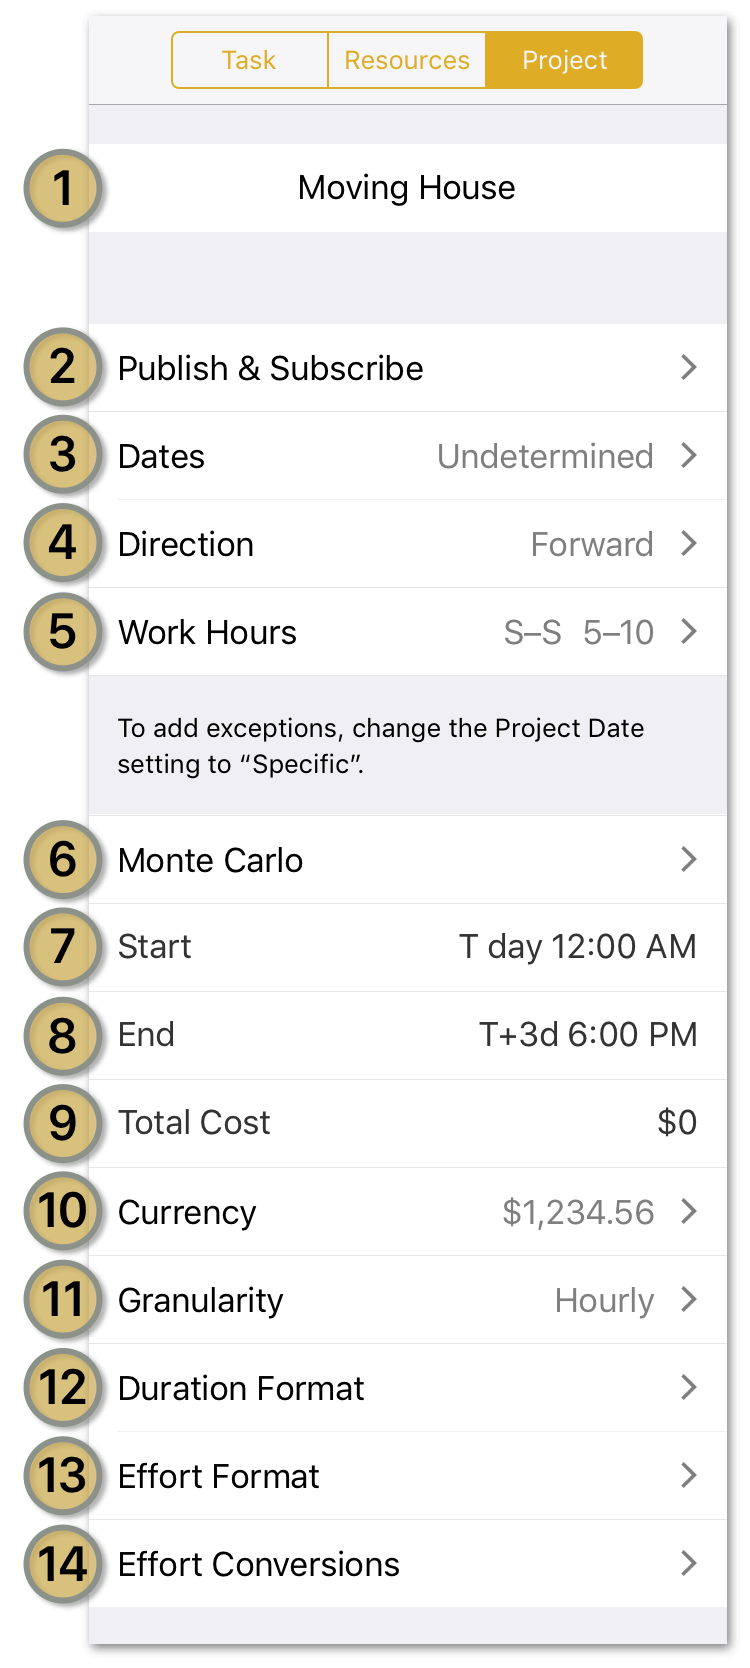
- Project Title: Edit the project name here.
- Publish & Subscribe (PRO): Configure the publication and subscription settings for this particular project. See Collaborating on Projects with Publish Subscribe (PRO) for complete details on using Publish & Subscribe.
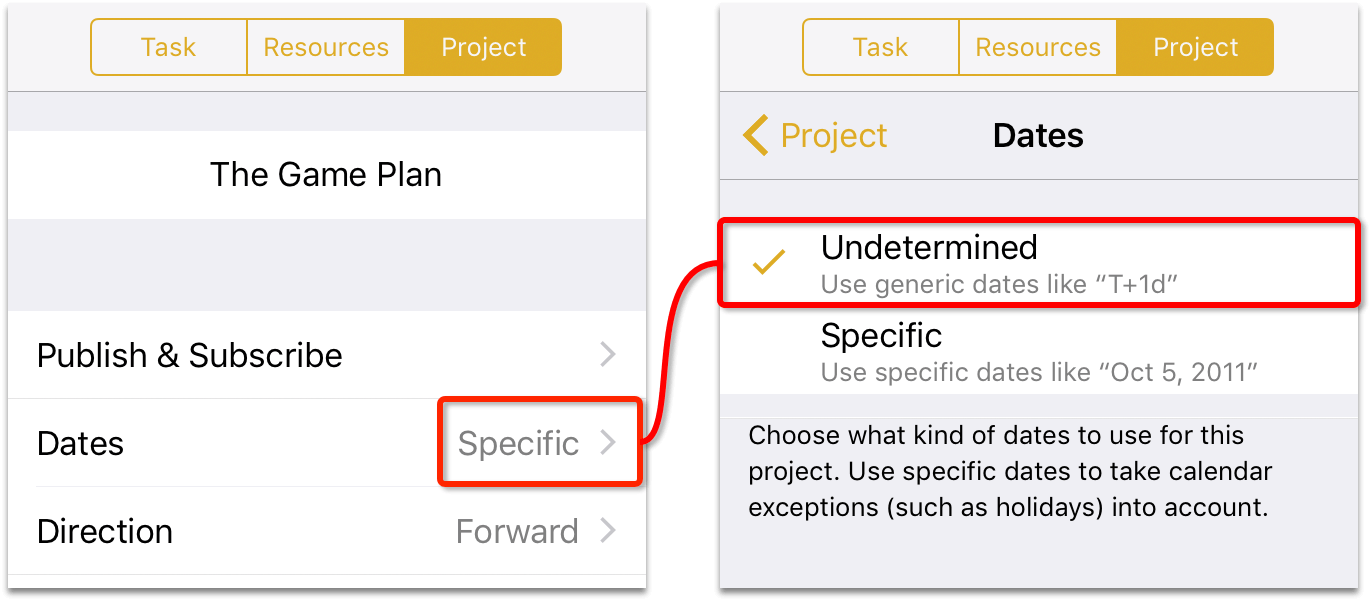
- Dates: Choose from Undetermined or Specific dates for your project. Undetermined dates are represented by T+0d, T+1d, T+2d, and so on, while Specific dates are chronologically anchored to set days in the calendar.
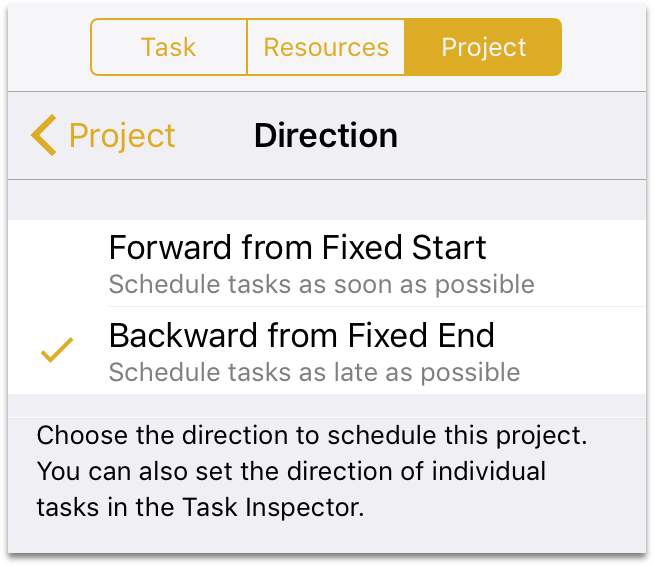
- Direction: Choose whether work on your project proceeds Forward from a Fixed Start or Backward from a Fixed End. This determines the direction from which tasks will be scheduled; the former schedules tasks as soon as possible, while the latter schedules them as late as possible. Individual task directions can be set in the Task Inspector. Projects typically have a predefined start date or final deadline (and sometimes both), so choose whichever is appropriate for your project.
- Work Hours: Set the calendar of normal working hours for the project here.
- Monte Carlo Simulations (PRO): In OmniPlan Pro, use this control to assign effort estimates and run Monte Carlo simulations to estimate on-time milestone completion.
- Start Date: set the start date for the project. This option is only available if you have set a Specific start date for your project, rather than an Undetermined date.
- End Date: set the end date for the project. This option is only available if you have set a Specific end date for your project, rather than an Undetermined date.
- Total Cost: check here to see the total cost for your project, based on Cost/Hour and Cost/Use values you’ve assigned to resources contributing to the project.
- Currency: set the currency type for your project’s expenses and costs.
- Granularity: choose from Exact, Hourly, or Daily to specify how precisely to schedule task start and end times (this applies when leveling, too).
- Duration Format: choose how to display time amounts throughout the project. The duration at the top of the screen is a preview that changes based on which time units you choose to display.
- Effort Format: choose how to display effort amounts throughout the project. The effort value at the top of the screen is a preview that changes based on which units you choose to display.
- Effort Conversions: choose how many work hours to count as one day, week, month, or year. This affects how large amounts of effort are entered an displayed.
Using the View Menu
The View Menu contains tools for customizing how data is displayed in the Project Editor, with a particular emphasis on tracking project progress.
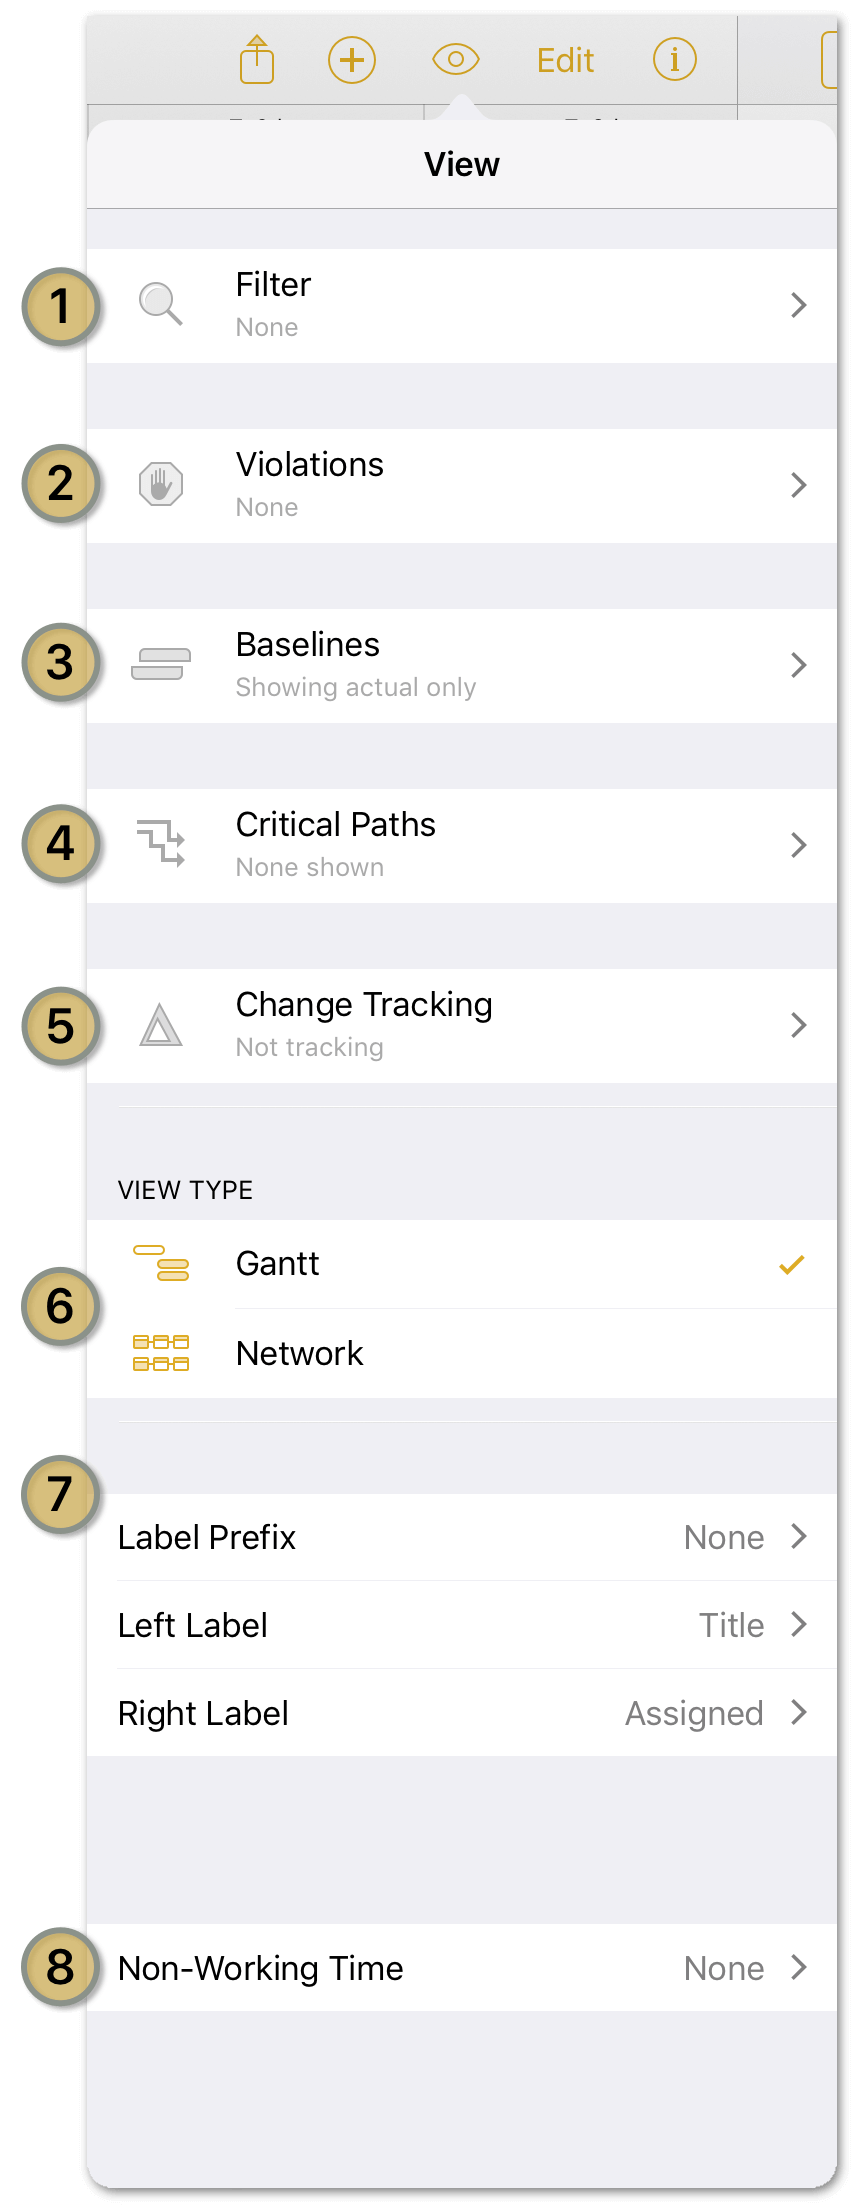
- Filter: Apply a filter to the Project Editor that limits which tasks are visible. Choosing a filtering parameter here doesn’t affect the hidden items beyond removing them from view.
- Violations: When a logical contradiction arises in your project, such as a result of an impossible dependency relationship or a scheduling change that violates date restrictions you’ve set up, you’ll see details on the problem here along with a suggested solution to resolve it.
- Baselines: A baseline is a snapshot of project’s state of affairs against which the actual schedule can be compared. Set a baseline with Set Baseline in the bottom toolbar, and choose which you’d like to compare against the actual schedule from the list. Tap Edit to remove baselines with the deletion switches next to their names.
- Critical Paths: Choose which critical paths you would like to display in the Gantt chart, including critical paths to each milestone and the overall project. Tap a milestone to edit details of its critical path display: choose whether or not resource constraints are considered in charting the path, pick a color for the path line, and set an amount of slack OmniPlan considers built in to tasks for purposes of considering them part of the critical path to that milestone.
- Change Tracking: If you’re publishing your project to a shared server repository with multiple contributors, enable change tracking to view and approve changes made to the project by yourself and others. Select changes in the list and tap Accept Change or Reject Change at the bottom to approve or deny them.
- Gantt or Network: Choose to show either the Gantt or Network Chart.
- Labels: Determine which, if any, labels are displayed alongside each task.
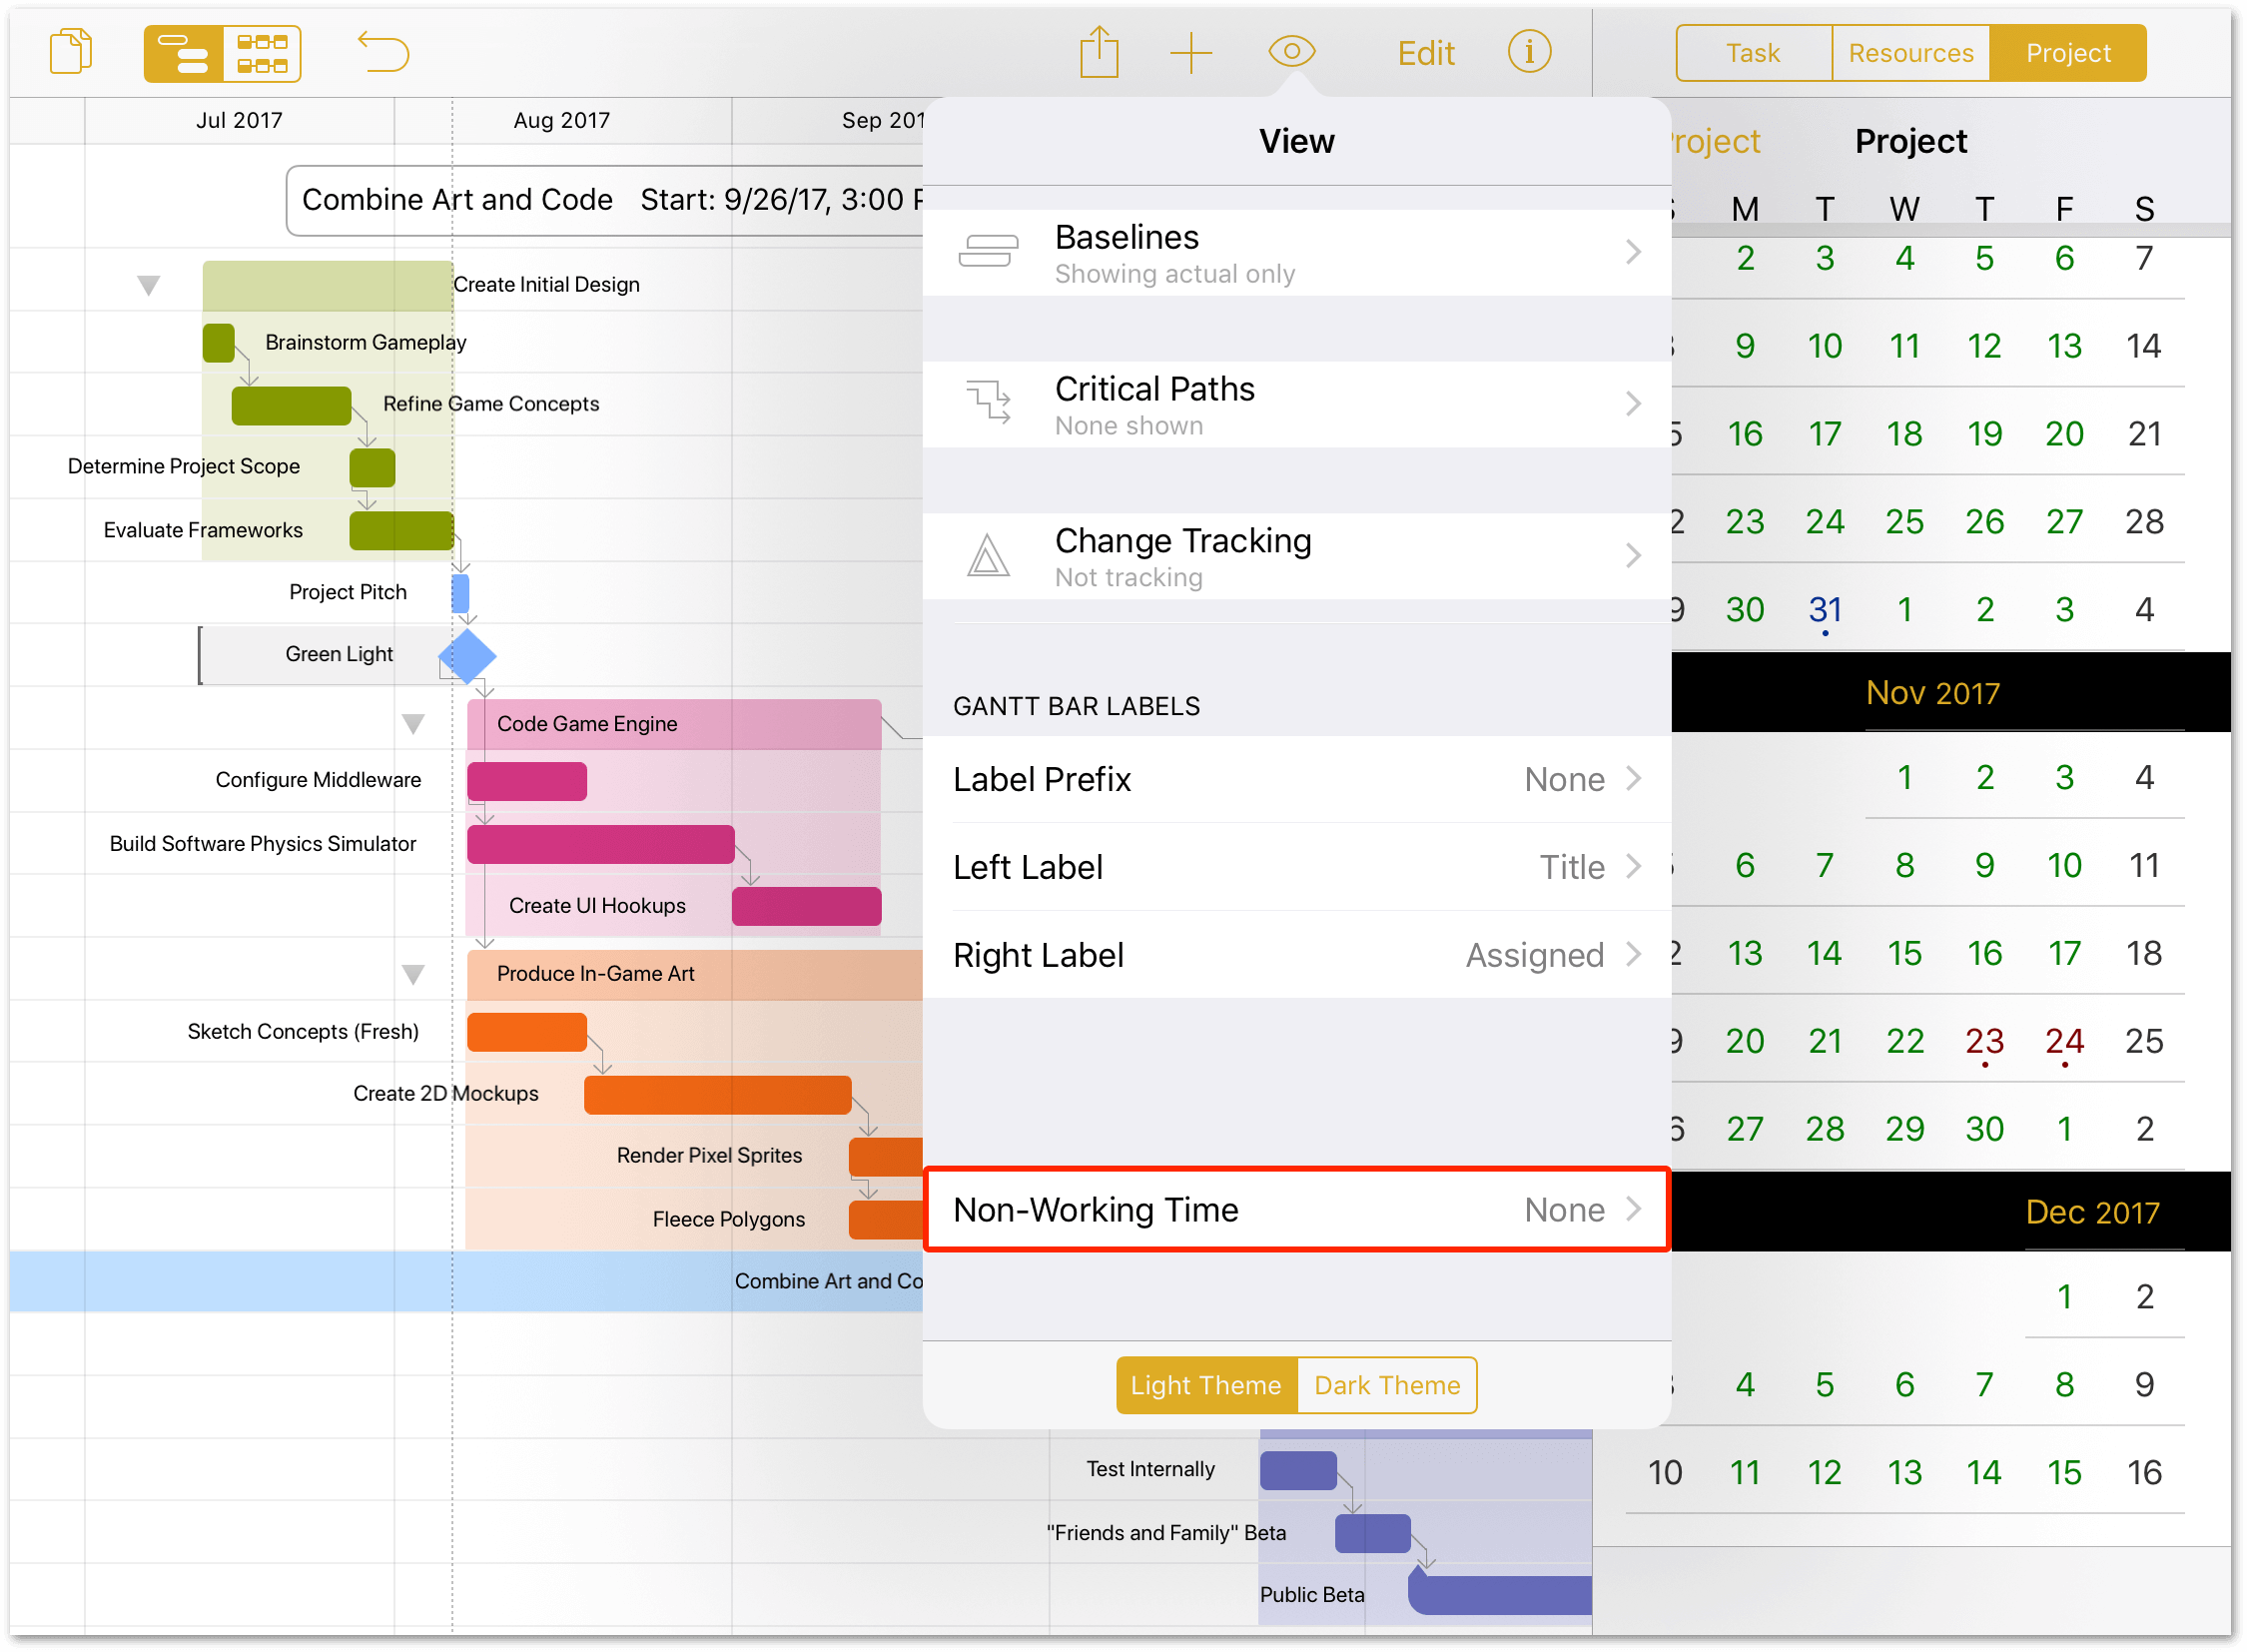
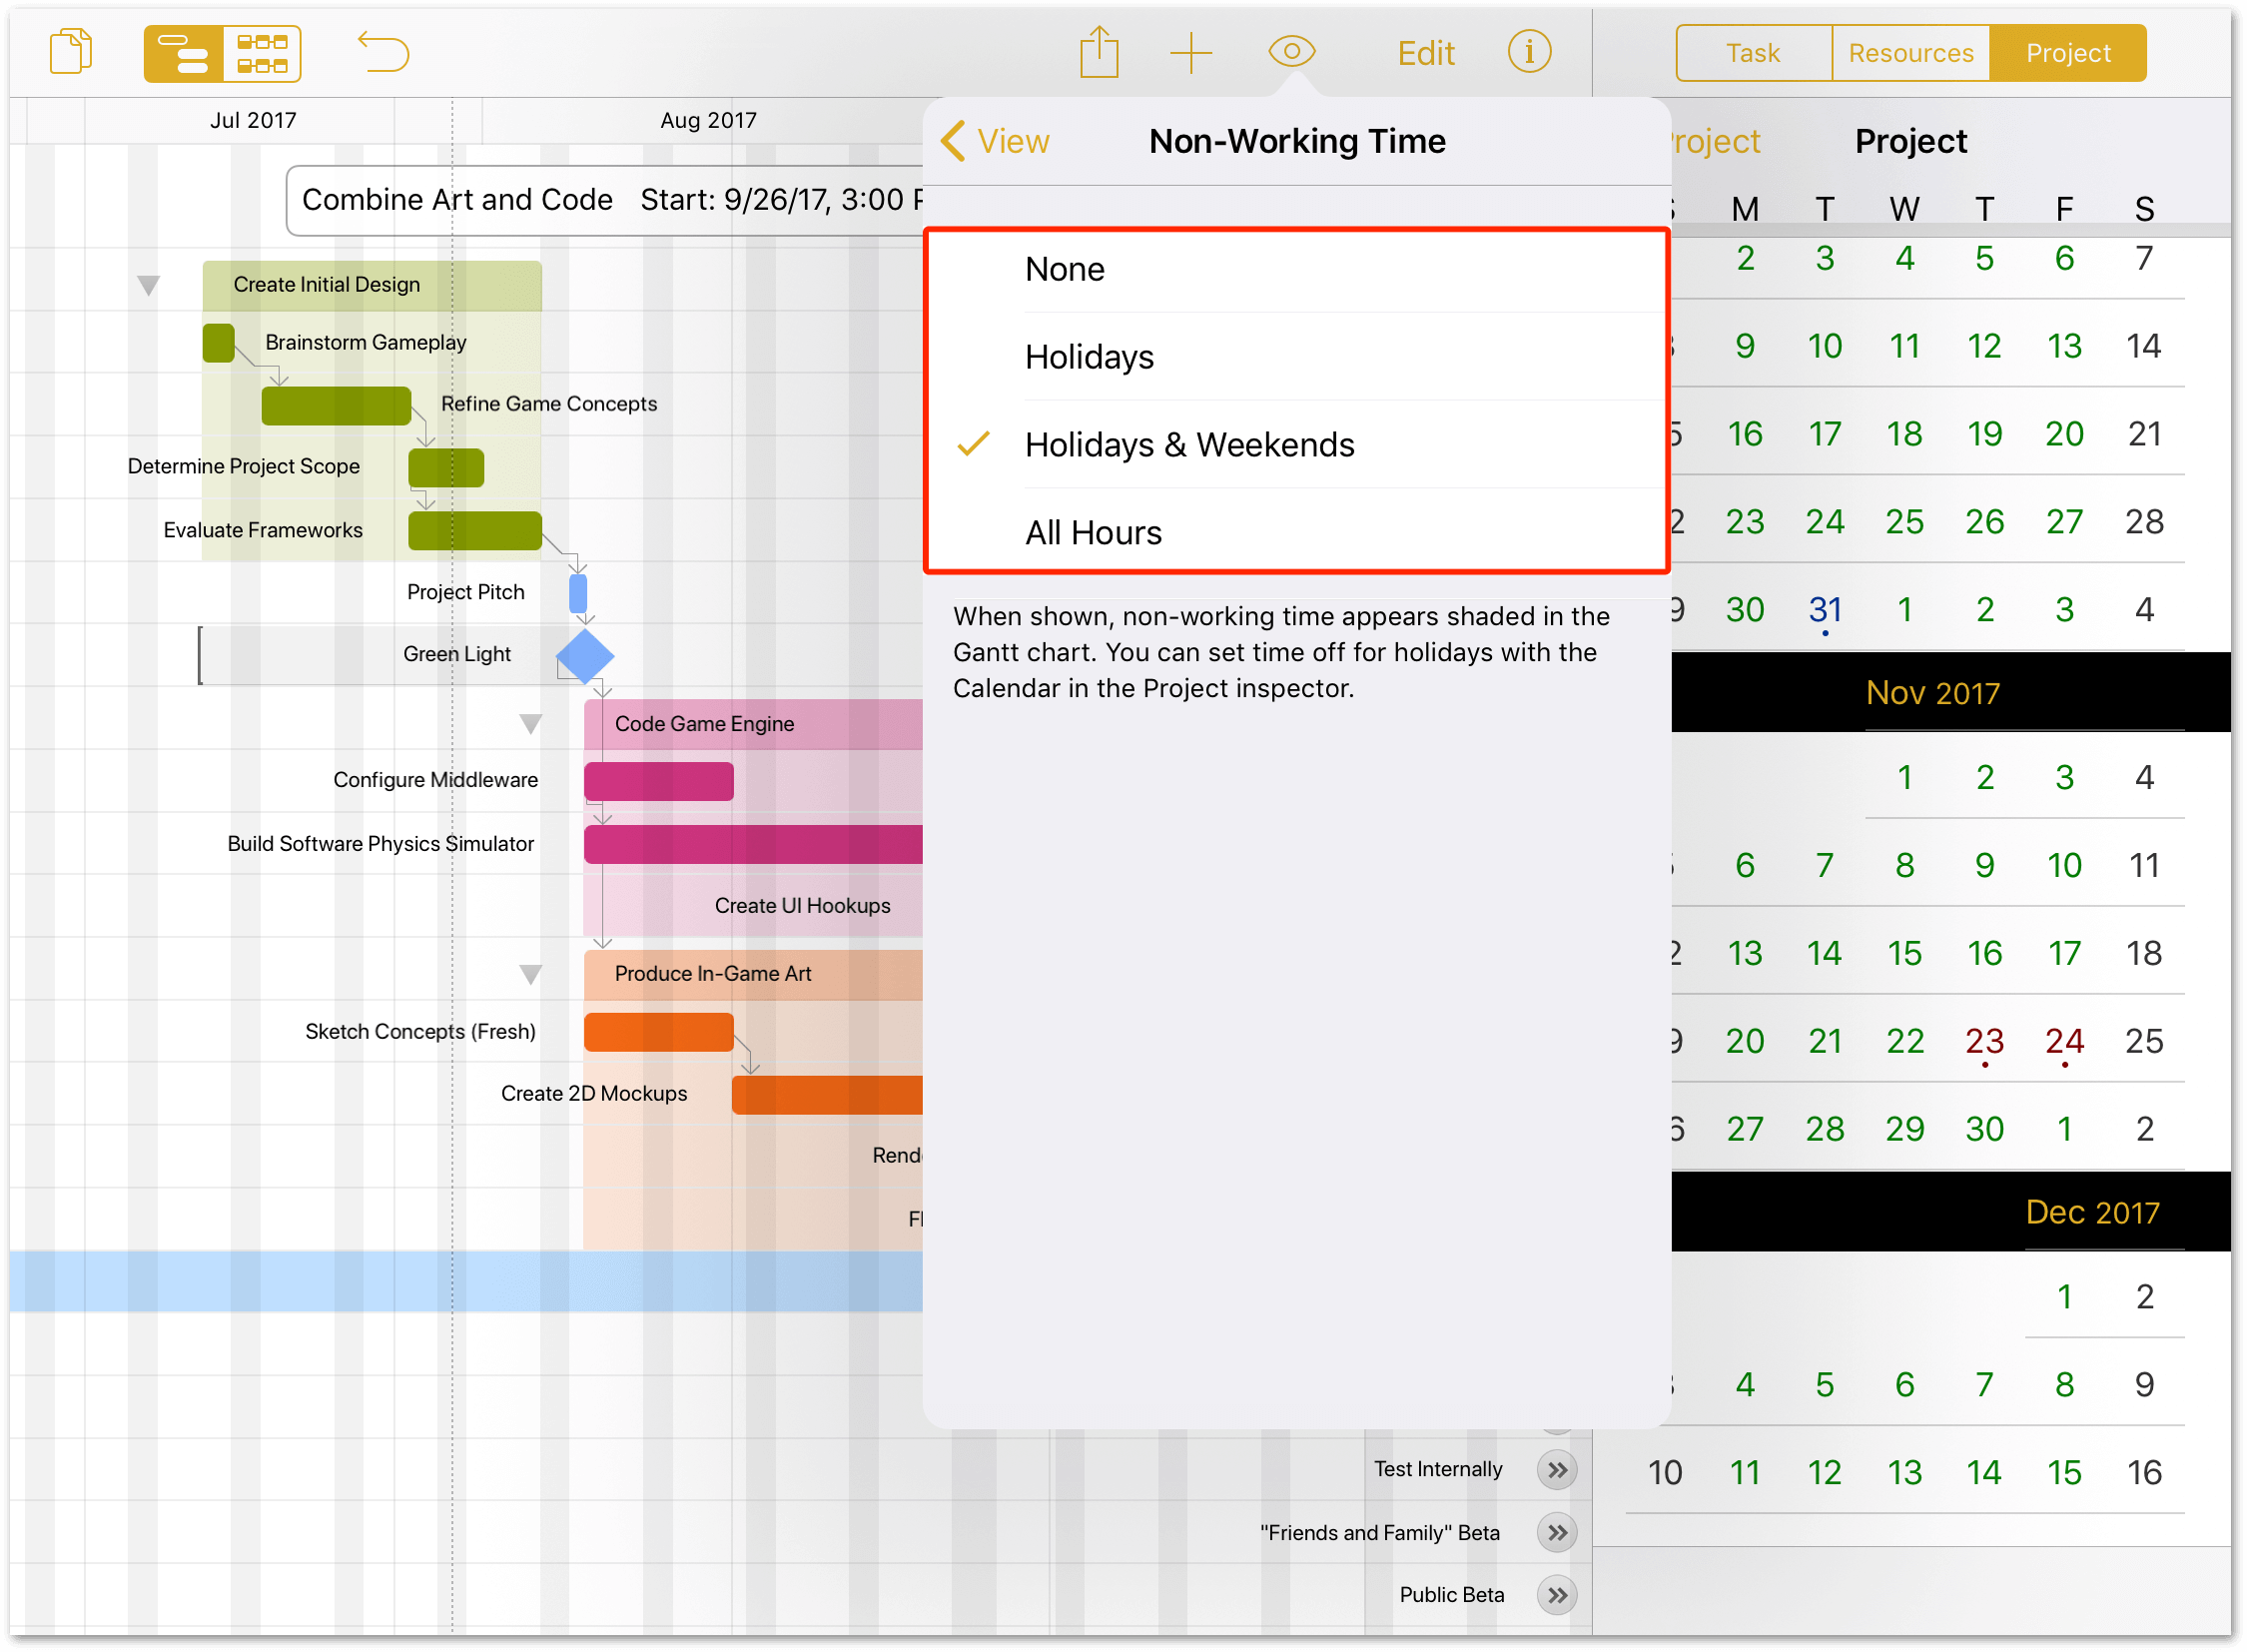
- Non-Working Time: Add shading to date columns in the Gantt chart that correspond to time where no work is scheduled (based on Calendar settings in the Project inspector). Visualization options include None, Holidays, Holidays & Weekends, and All Hours.
In versions prior to OmniPlan 3.12, a switch at the bottom of the View Menu controlled whether the document used a light or a dark document theme. Starting with OmniPlan 3.12 the document theme is set automatically based on your iOS dark mode system setting, so this switch has been removed.
With an overview of the tools in the Project Editor complete, the next step in mastering OmniPlan is to begin building your first original project.
Building Your First Project
There are two phases to project management with OmniPlan. The first is setting up your project; adding tasks, assigning resources, setting due dates, and such. That part of project management is covered in this chapter’s tutorial. The second phase is Managing a Project with OmniPlan’s tools.
Topics covered in the tutorial include:
- Step 1: Creating a Project
- Step 2: Choosing a Start or End Date
- Step 3: Creating Tasks
- Step 4: Grouping Tasks
- Step 5: Creating Milestones
- Step 6: Setting Task Durations
- Step 7: Connecting Tasks with Dependency Lines
- Step 8: Creating Hammock Tasks
- Step 9: Editing the Work Week
- Step 10: Setting Project Schedule Exceptions
- Step 11: Creating Resources
- Step 12: Assigning Resources to Tasks
- Step 13: Setting Individual Schedule Exceptions
- Step 14: Assigning Costs to Tasks and Resources
- Step 15: Leveling the Project
- Step 16: Setting a Baseline
This tutorial takes you through the process of laying out an entire project—from start to finish—in OmniPlan. Along the way, you’ll use the inspectors and various tools to quickly create a project plan. Even if you have used previous versions of OmniPlan, we encourage you to work through the tutorial as a way of familiarizing yourself with OmniPlan’s interface.
Step 1: Creating a Project
For the purpose of this tutorial we’ll be looking at the development process of a game being put together by an independent team of intrepid designers, coders, and testers. The project design described as we proceed is loosely based on a software development cycle, but applies just as well to any complex work consisting of interdependent and occasionally concurrent phases.
Starting off in the document browser, tap  in the toolbar to create a New Project:
The Project Editor displays the Gantt Chart by default; you can switch over to the Network View by tapping  in the toolbar. To switch back to the Gantt Chart, tap
  .
.
As you can see, your first task awaits editing. Before you get to that, though, the next order of business is to give your project a proper name; something that better reflects the project at hand.
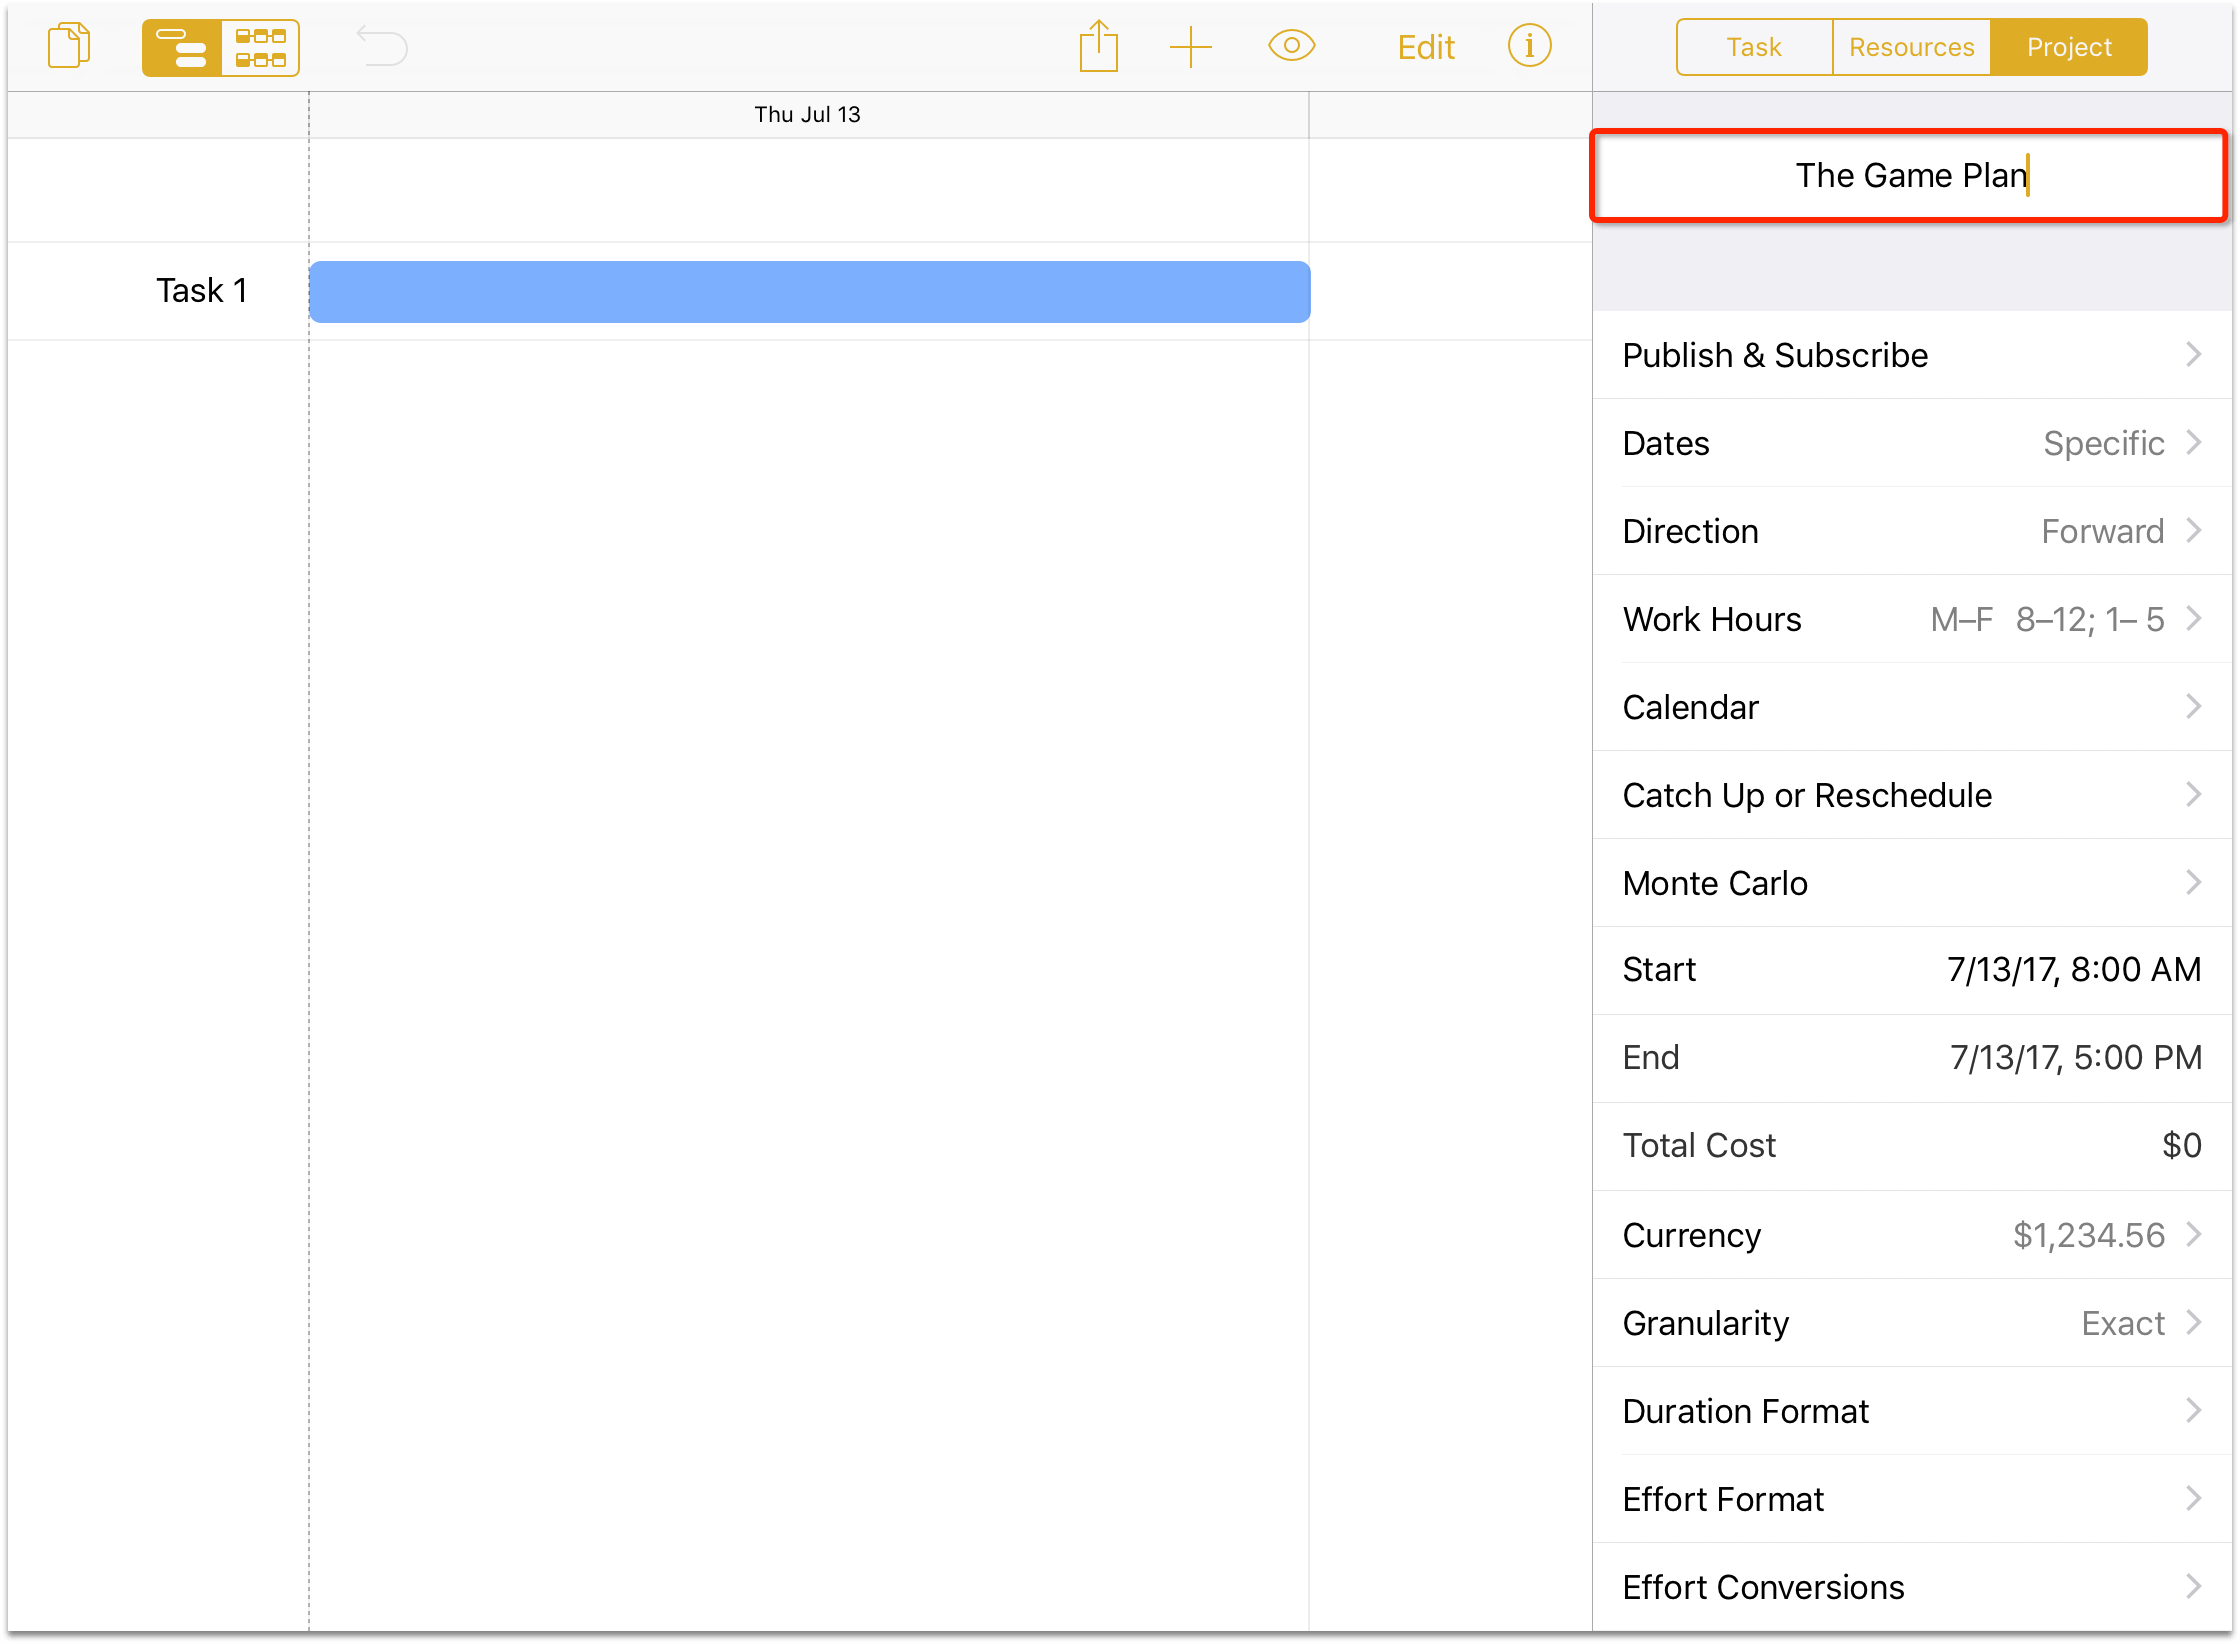
Tap  in the toolbar, and then tap the Project tab to open the Project inspector so you can edit the project title. Tap where it says My Project, press the backspace key to erase that title, and then enter The Game Plan as the new project name for this tutorial.
Step 2: Choosing a Start or End Date
When setting out to build a project, one of the most important aspects is the timeframe. This, in turn, is dictated by any deadlines or start constraints that exist for the project.
Design and building the game project doesn’t have a hard deadline for completion; it just needs to be done when it’s ready. To indicate this, go to the Project inspector, tap the Start field, and then tap the today button to use today’s date as the start date.
If you are working through this tutorial, your project’s start date will obviously be different from the dates reflected in the text and screenshots that follow.
When planning a project, all of your dates will be in the future. As a suggestion, perhaps pick a date a few weeks in the future as your project’s start date for the tutorial.
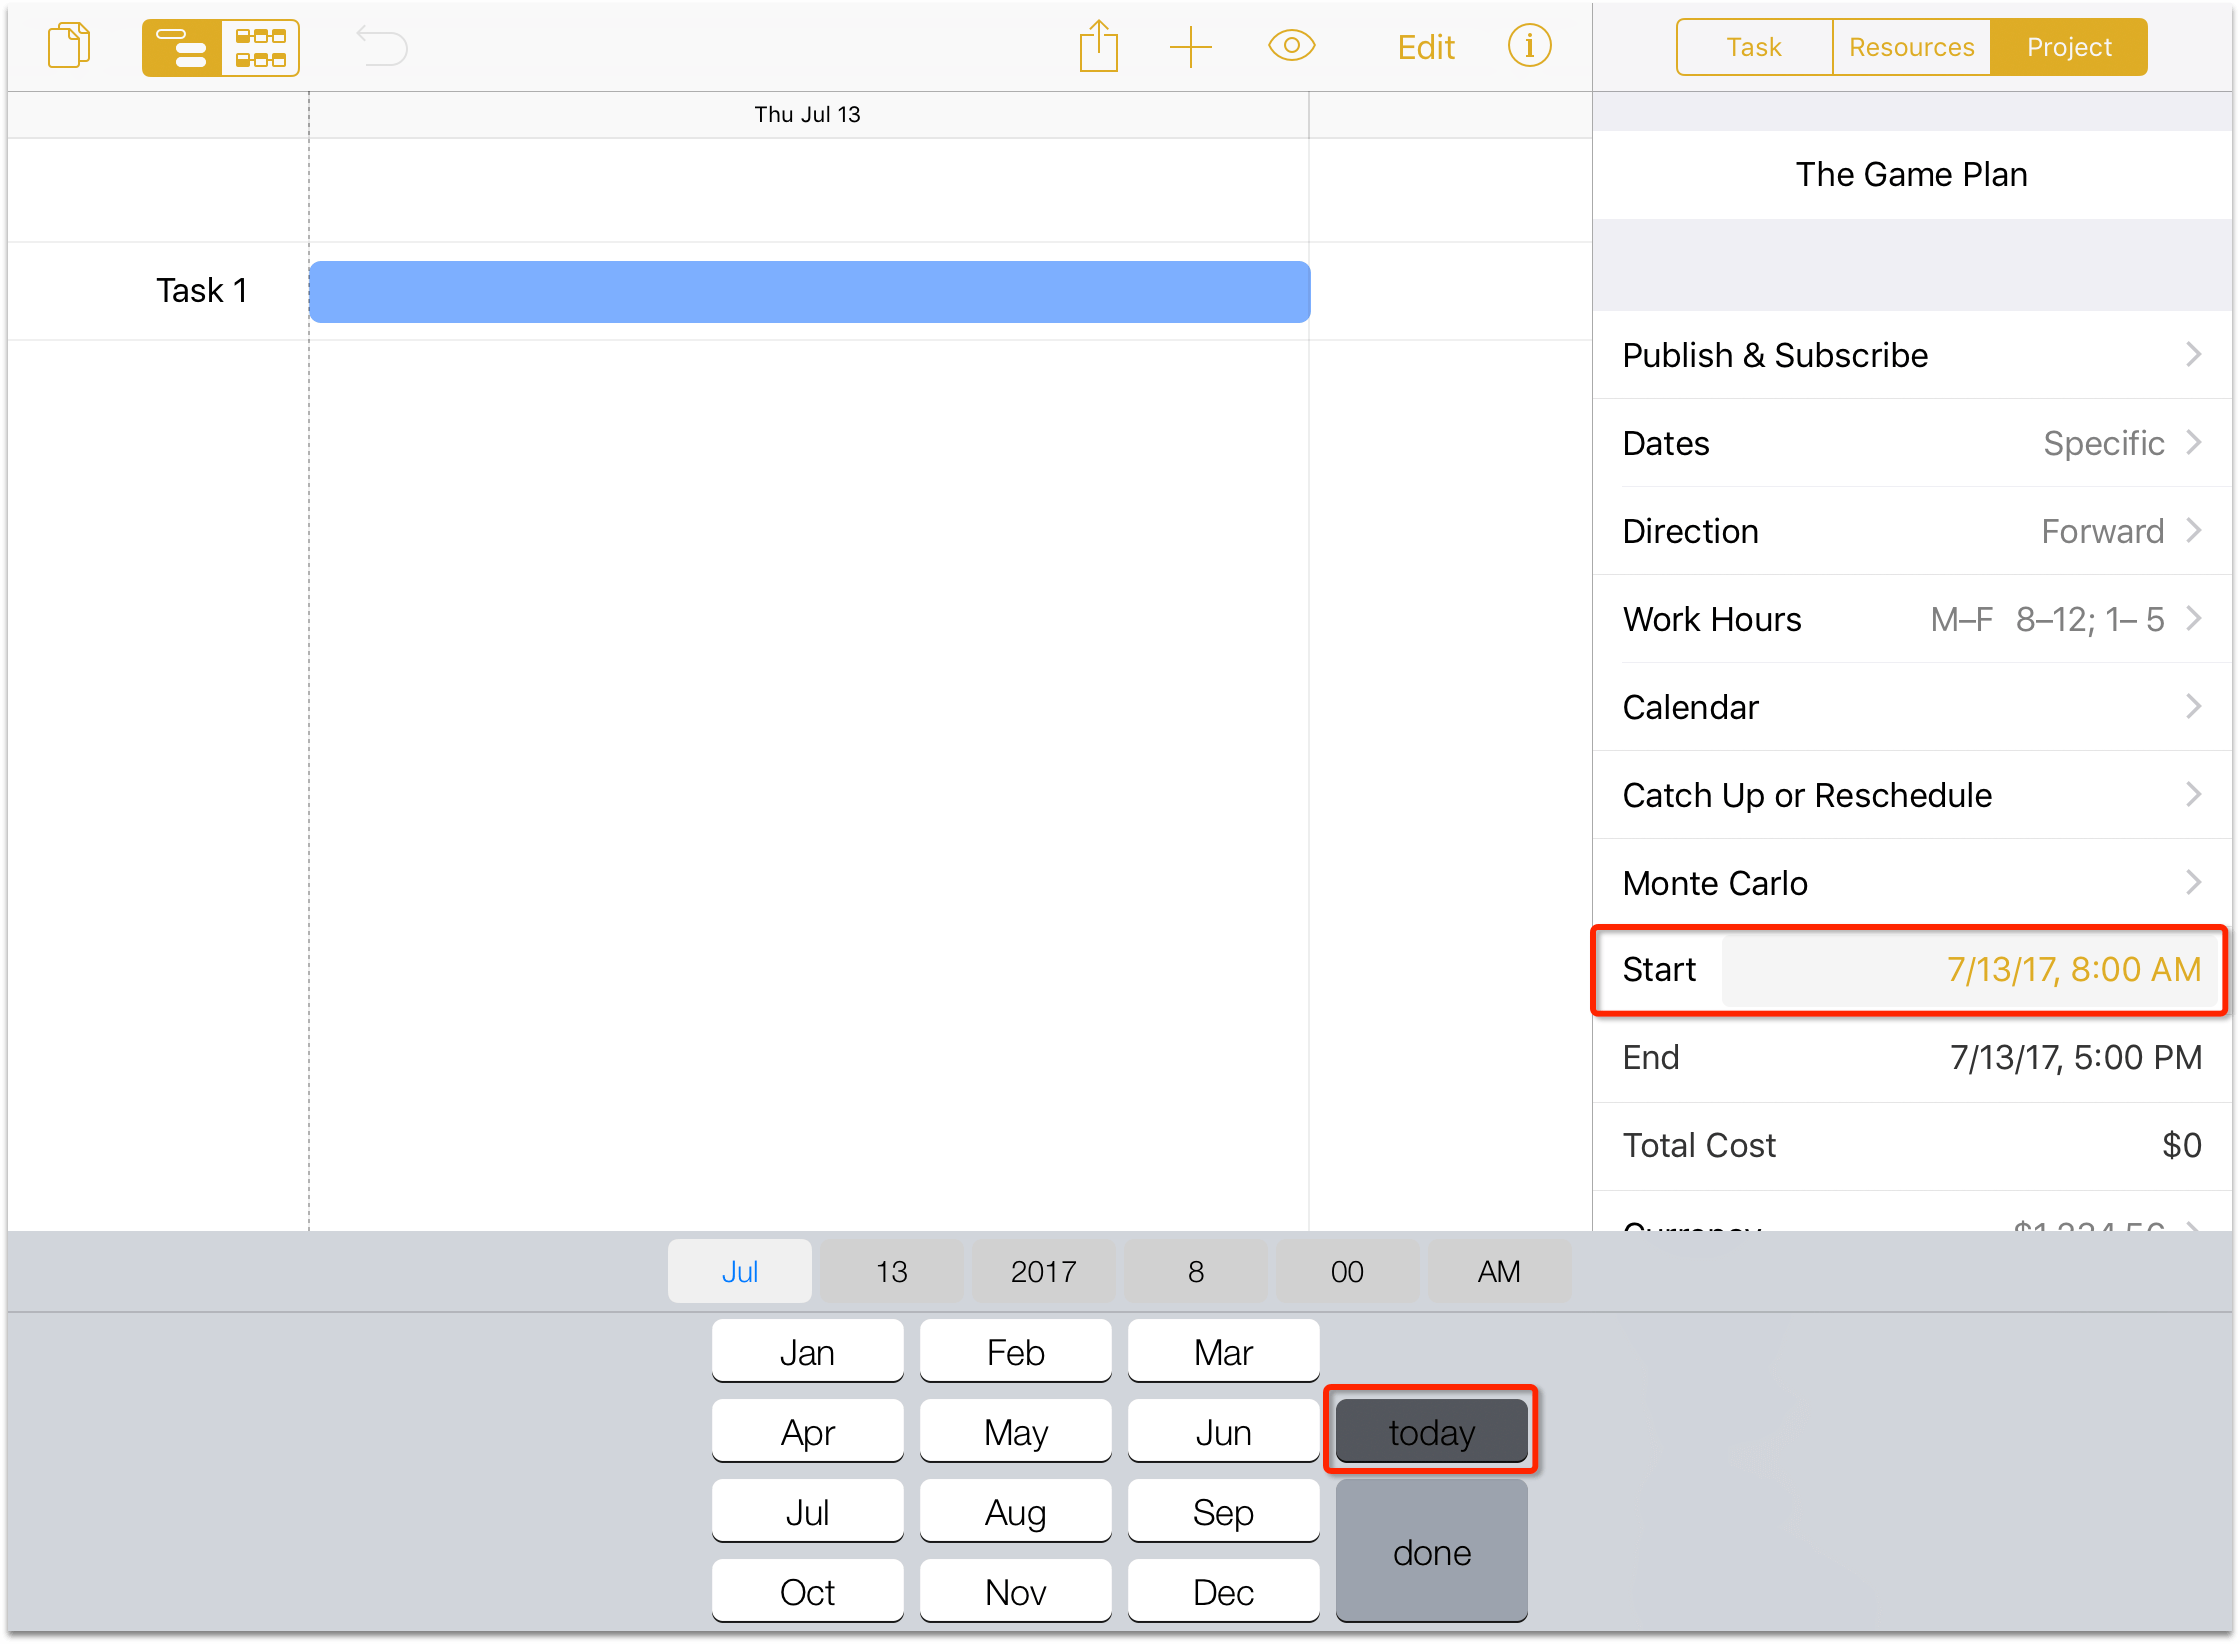
Conveniently, the day you initially create a new project is used as the default setting for starting the project. If you need to set the Start date to something else, you can certainly do that.
After setting the Start date, you’ll notice a couple things:
- The project’s End date is initially set to 5:00 PM of the same day as the Start date. This date will change as you add more tasks to the project and assign schedules and dependencies, but let’s not get ahead of ourselves.
- The project’s Direction is set to Forward, which means that all tasks are will be scheduled to complete as soon as possible (or ASAP) based on their duration.
Step 3: Creating Tasks
With the Start date for the project set, it’s time to return to the Gantt chart, where the first default task awaits details.
Tasks in OmniPlan represent discrete pieces of work that require substantial effort to complete, usually across a duration expressed in hours or days, rather than minutes. Prepare morning coffee, for example, is a task that’s typically not within the scope of OmniPlan, while Install espresso machine very well could be—maybe even a group of tasks, if you need external help getting pipes or electricity connected.
The notion of “task” in OmniPlan is in contrast with action item-based productivity apps such as OmniPlan’s counterpart OmniFocus, where anything you can conceive of as something you’d like to accomplish can—and should—be included in thinking about your project plans.
OmniFocus is built around personal task execution; the granularity of OmniPlan’s tasks is intended for work that must be considered by (or requires input from) a group of stakeholders, often as a team.
The process of project building starts with a brainstorm session for all the tasks that the project should include. As noted, these are typically things that take the effort of multiple people to complete, or have some impact on other work that the project requires. Don’t worry too much about whether a task fits the project’s scope at this point—it’s more important to get the ideas flowing. You can always come back and edit these later.
Start by changing the name of the default task:
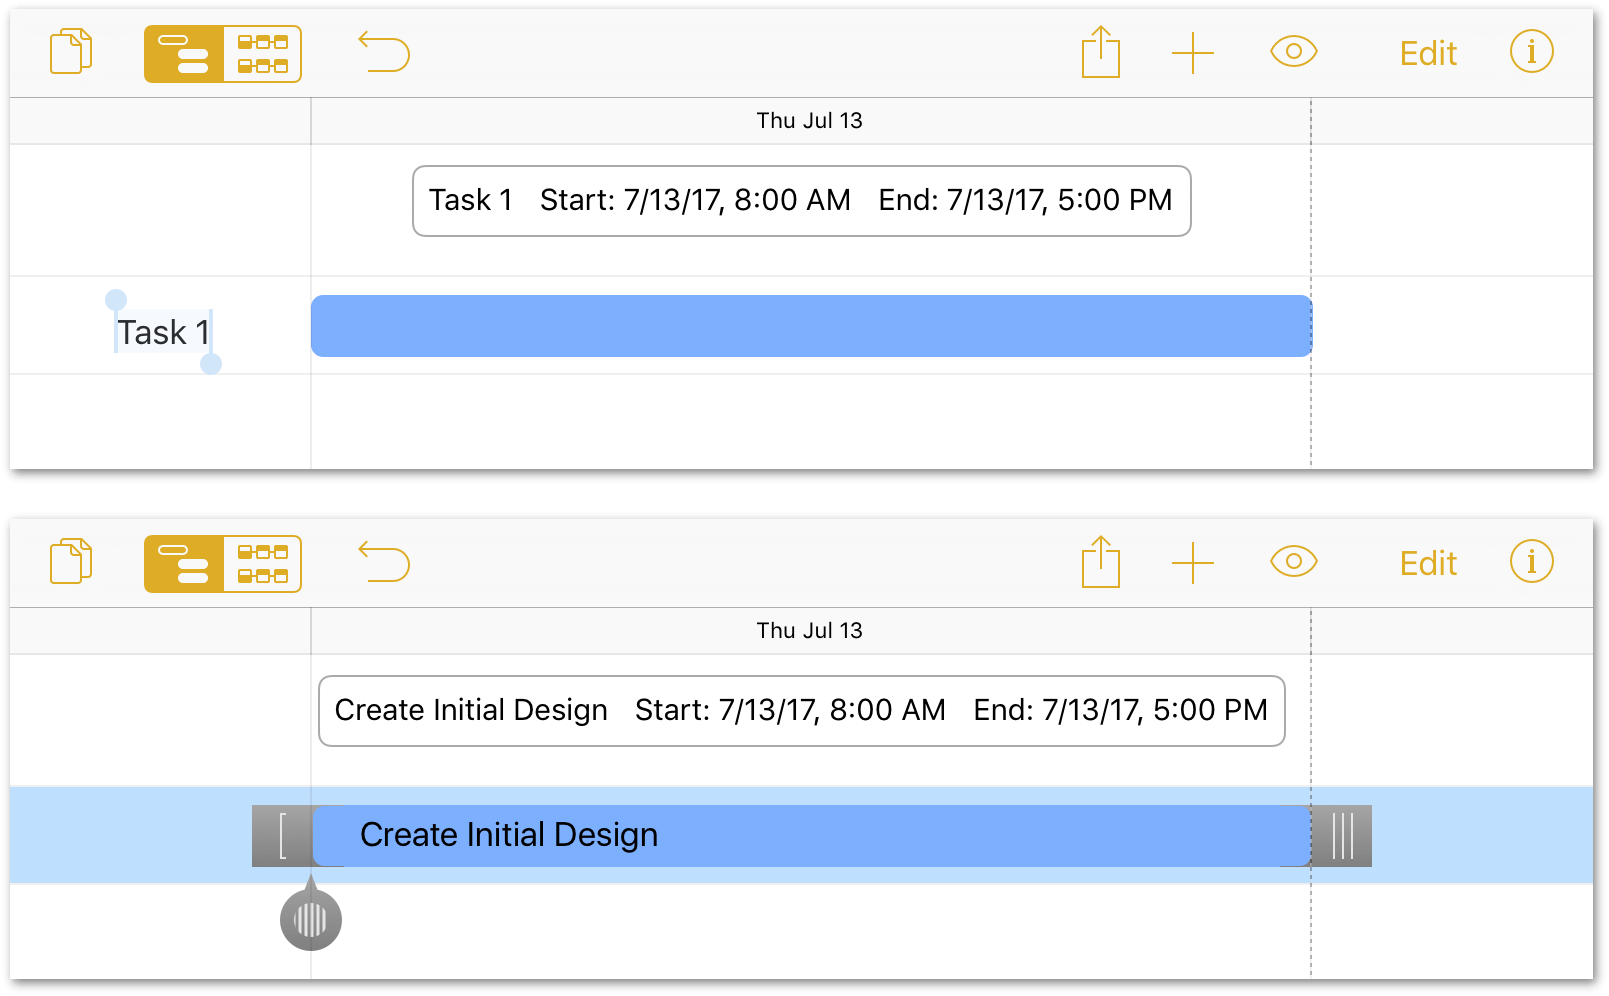
- To the left of the Gantt bar, double-tap Task 1 to make the task name editable.
- Enter Create Initial Design as the new name for the task and then press Return.
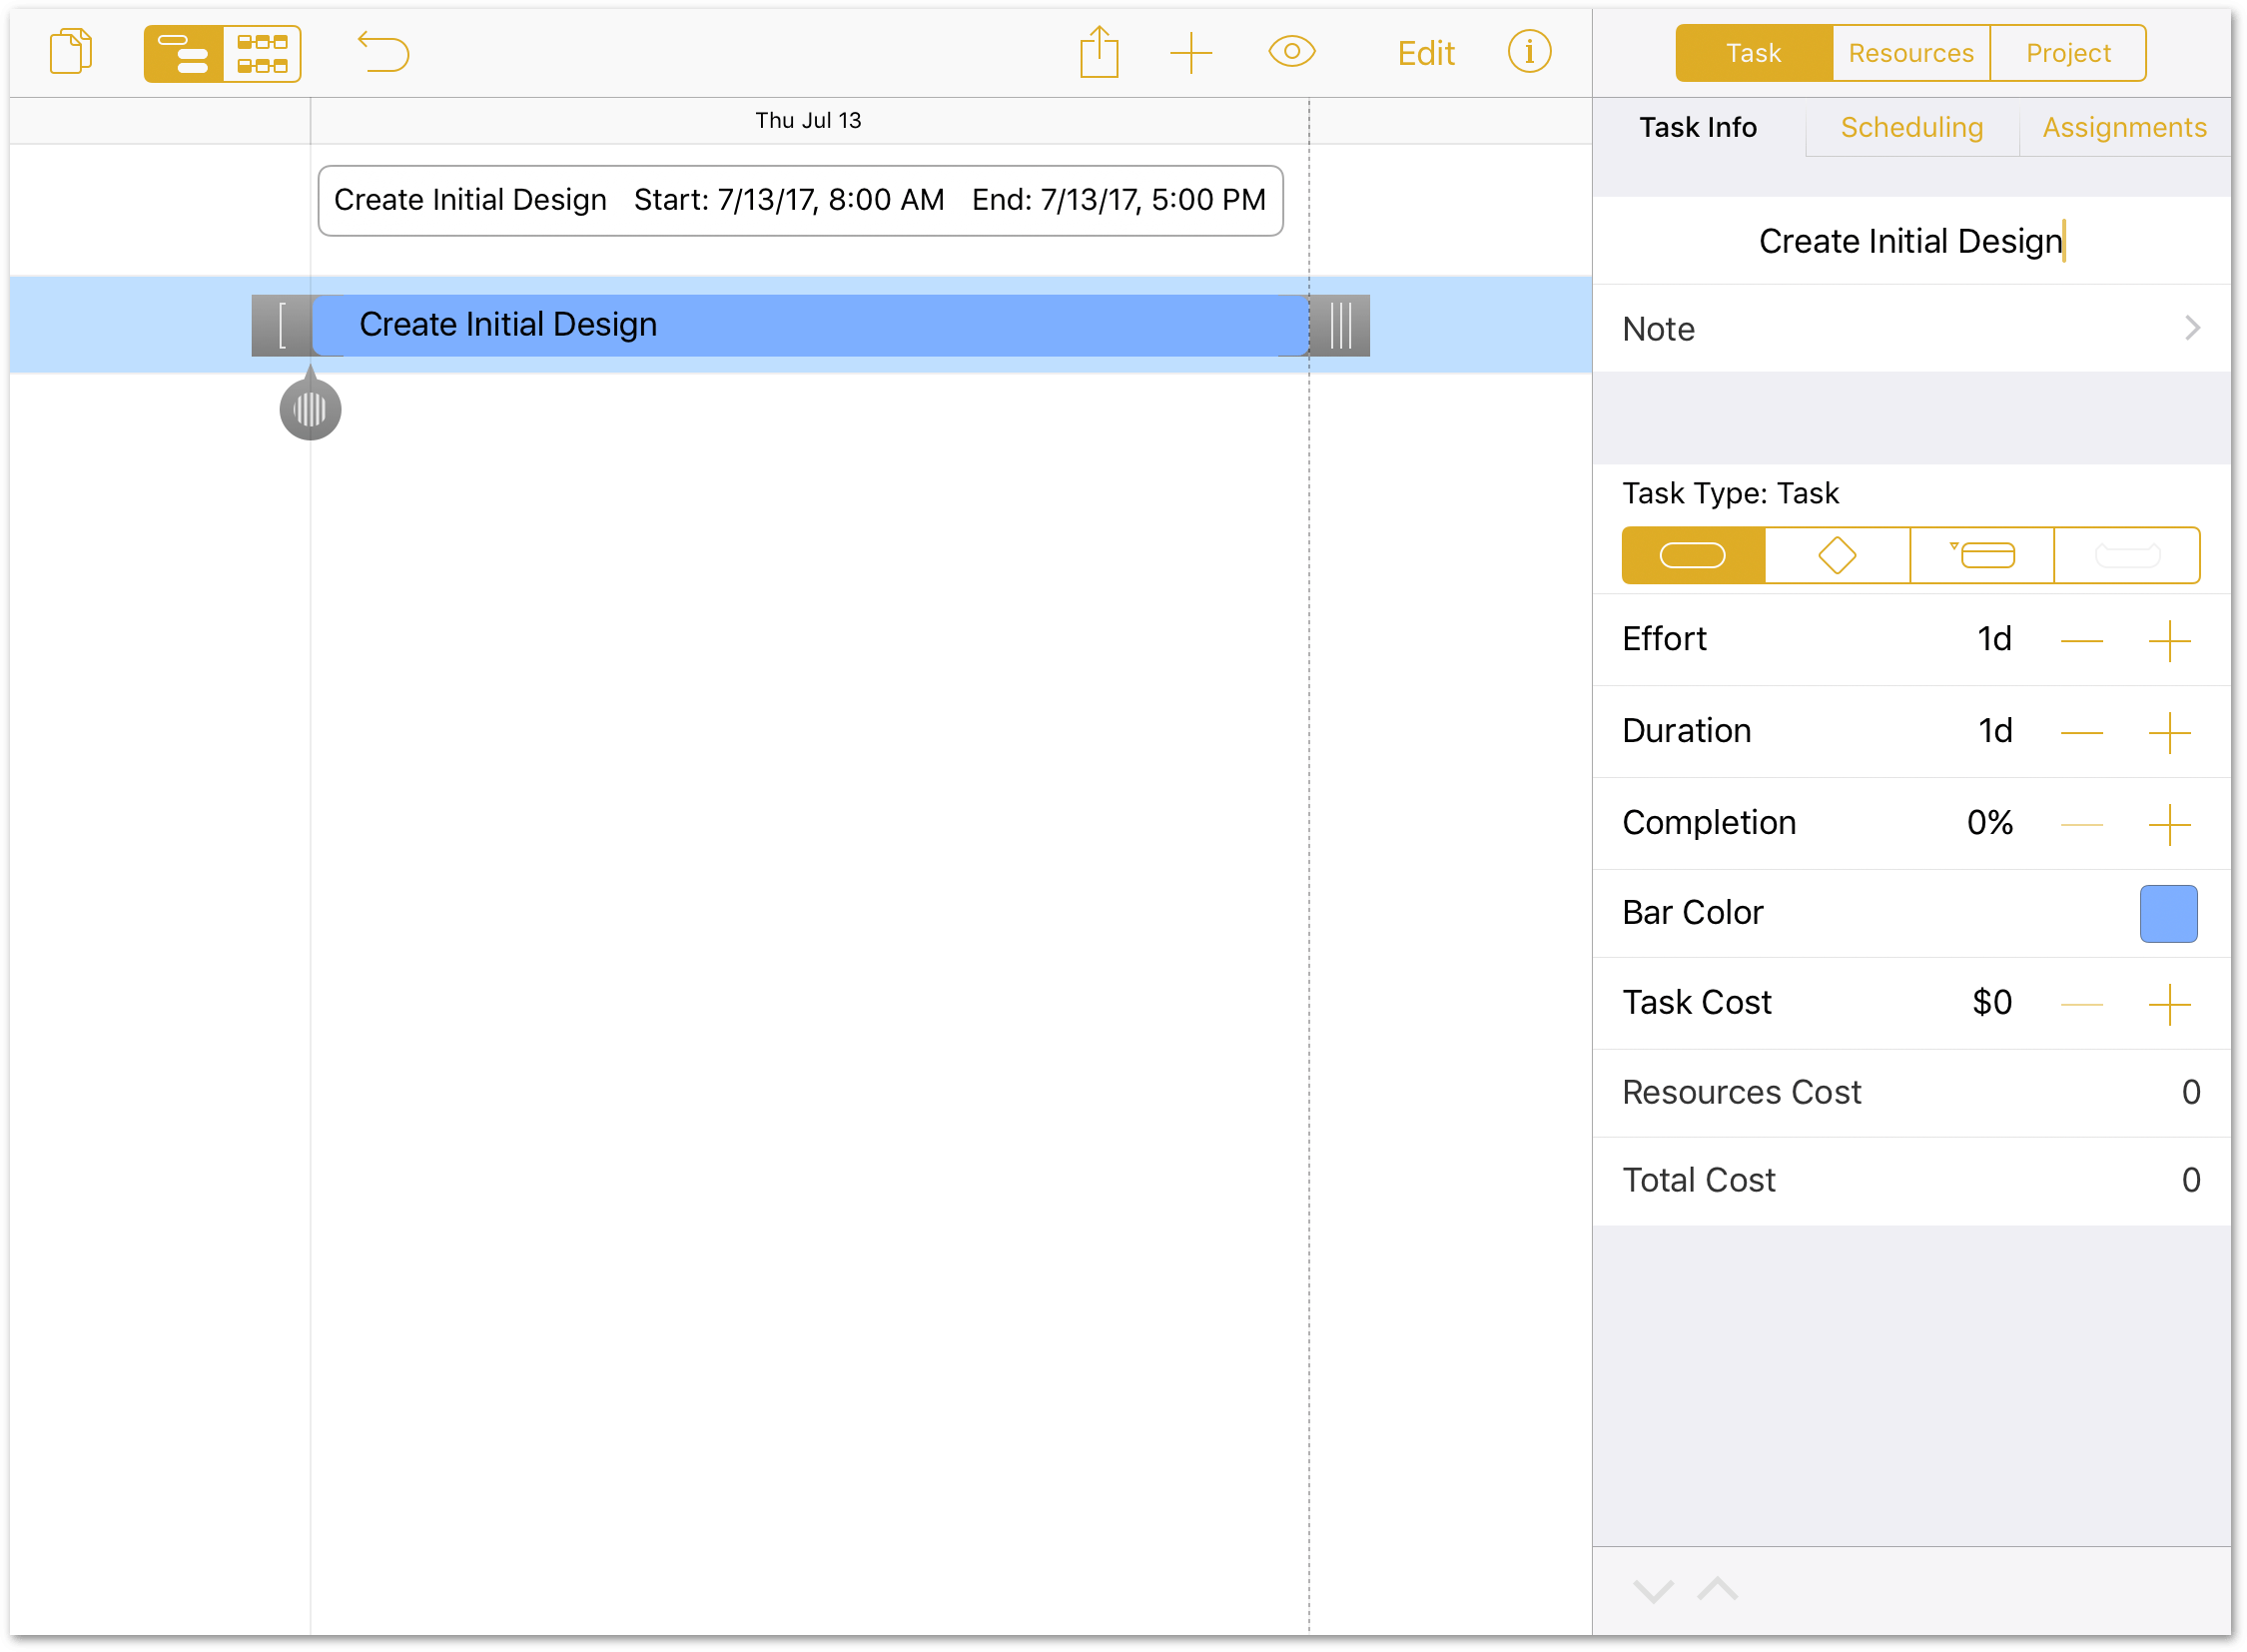
You could also edit the Name field in the Task inspector:
To add more tasks to the project, tap  in the toolbar. Create the following tasks:
- Brainstorm Gameplay
- Refine Game Concepts
- Determine Project Scope
- Evaluate Frameworks
- Project Pitch
- Code Game Engine
- Configure Middleware
- Build Software Physics Simulator
- Create UI Hookups
- Produce In-Game Art
- Sketch Concepts (Fresh)
- Create 2D Mockups
- Render Pixel Sprites
- Fleece Polygons
- Combine Art and Code
- Release Candidate 1 (RC1)
- Assure Quality
- Test Internally
- “Friends and Family” Beta
- Public Beta
- Game Release
New tasks appear beneath the currently selected item in the Gantt chart, or at the bottom of the list if no tasks, milestones, or groups are selected.
As you may notice while entering the tasks, the project now has more tasks than can comfortably fit in a single screen. However, you can use the pinch gesture to zoom out on the Gantt chart so everything fits within the window.
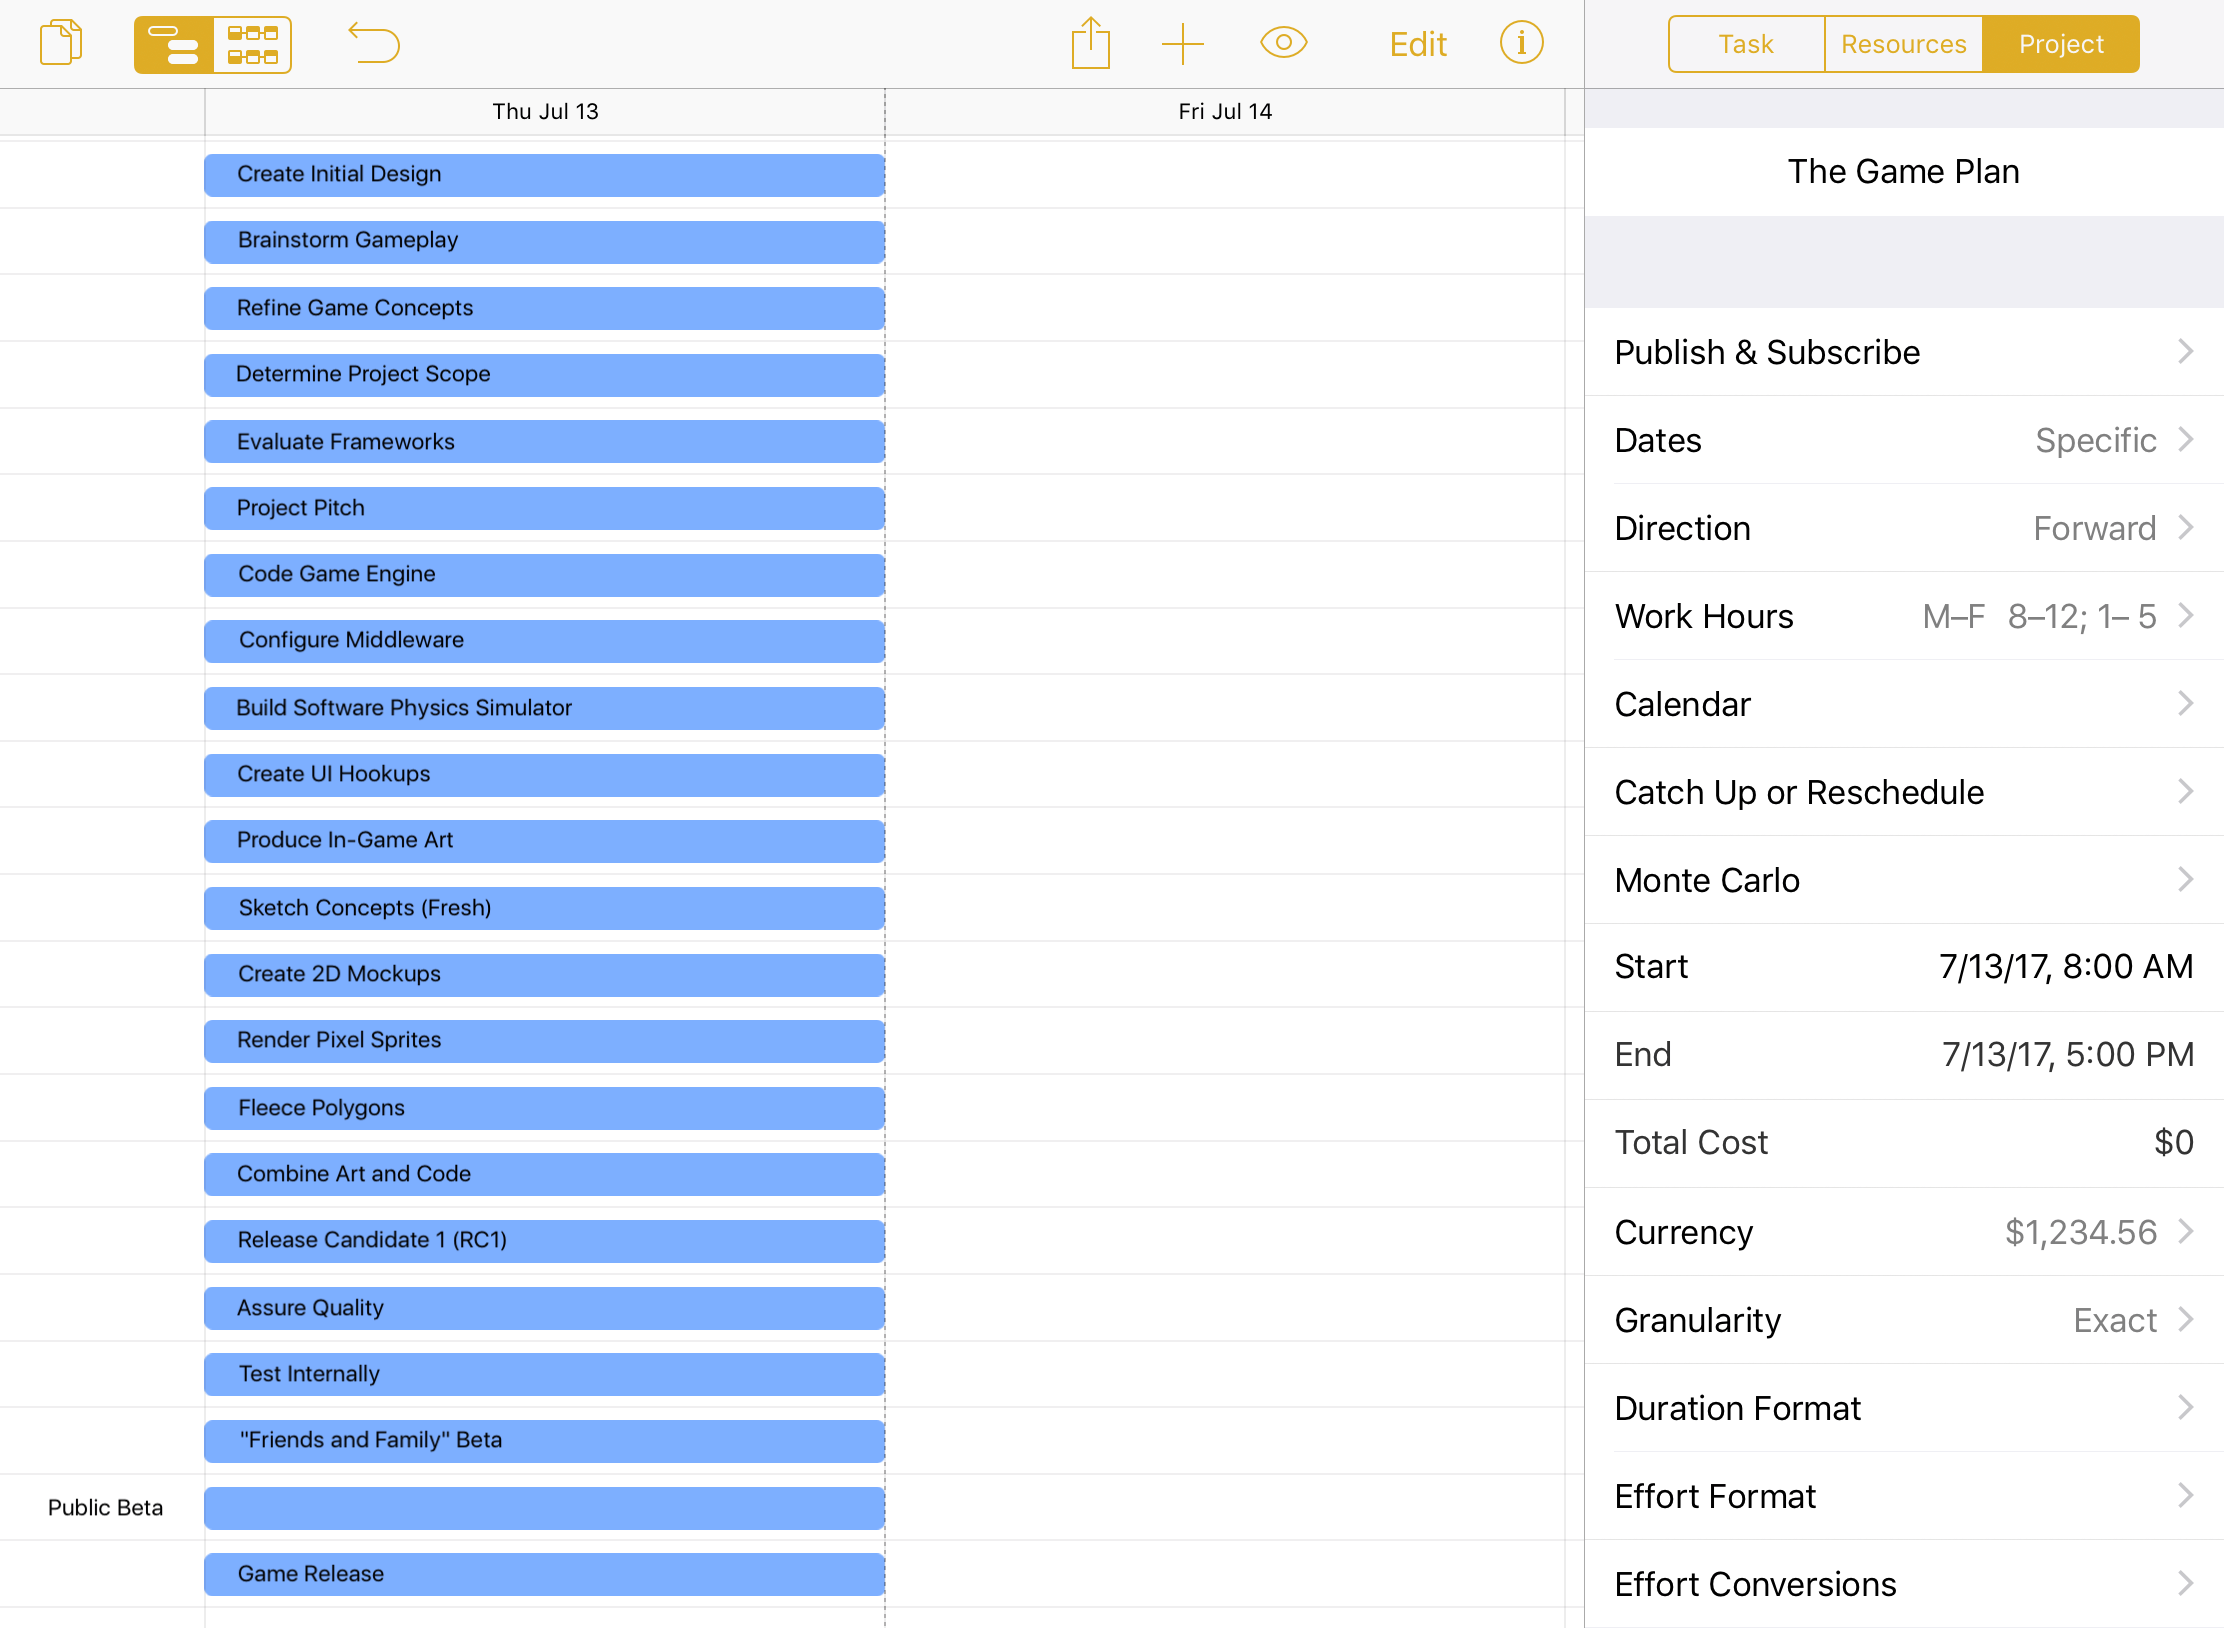
Initial task entry can be greatly sped up with the aid of a connected or paired keyboard. After entering the name for a task, pressing Return twice accepts the name of the task and creates the next one.
Step 4: Grouping Tasks
When tasks are closely related or interdependent it can be useful to put them in a group. Groups help organize a project conceptually, and also act as meta-tasks that can be linked via dependencies to other tasks or groups.
A task group is just a container—it has no duration or effort of its own. The amount of time and energy needed to complete the group is equal to the sum of the requirements of the group’s individual tasks.
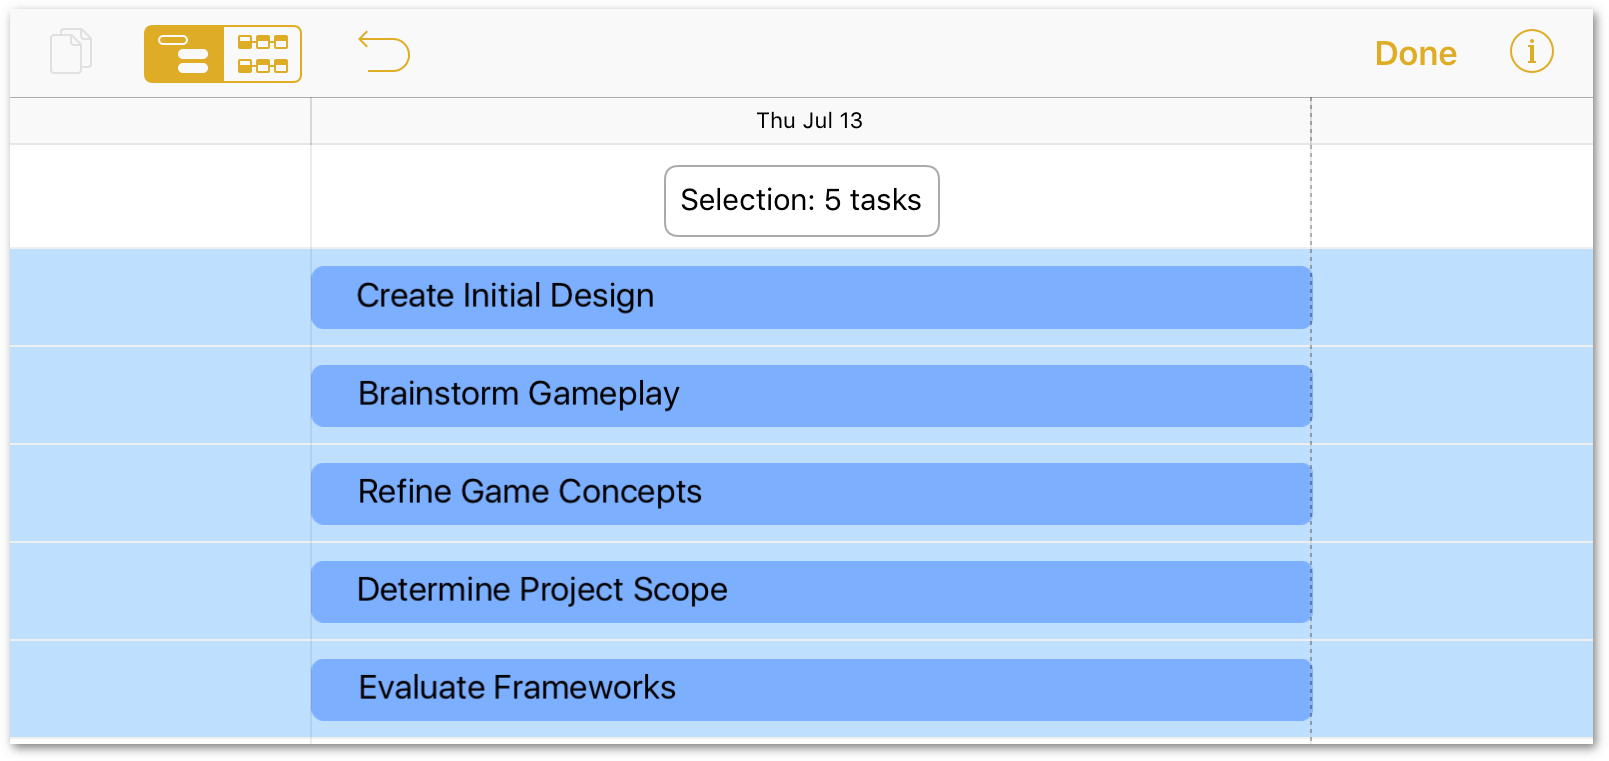
An easy way to gather tasks into a group is in Edit Mode. Tap Edit in the toolbar, and then tap to select all of the tasks and milestones that you want to group together:
- Tap Edit in the toolbar.
-
Tap to select the following tasks in the project:
- Create Initial Design
- Brainstorm Gameplay
- Refine Game Concepts
- Determine Project Scope
- Evaluate Frameworks
-
At the bottom of the screen, tap Group to place those five tasks in Group 1 and ends Edit Mode.
-
Press Return to accept Group 1 as the group name for now.
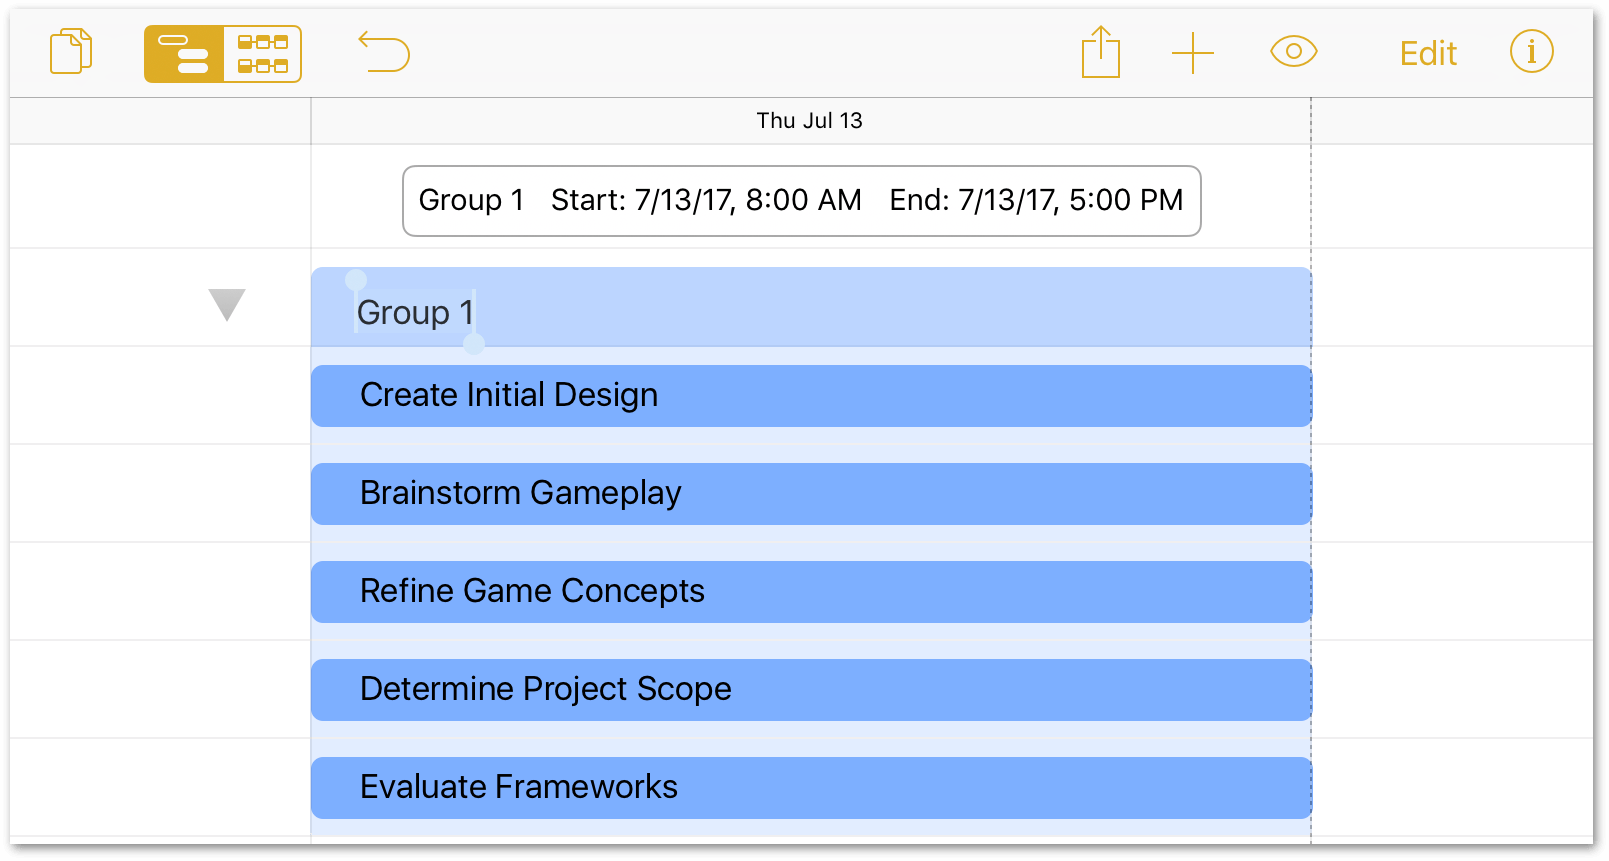
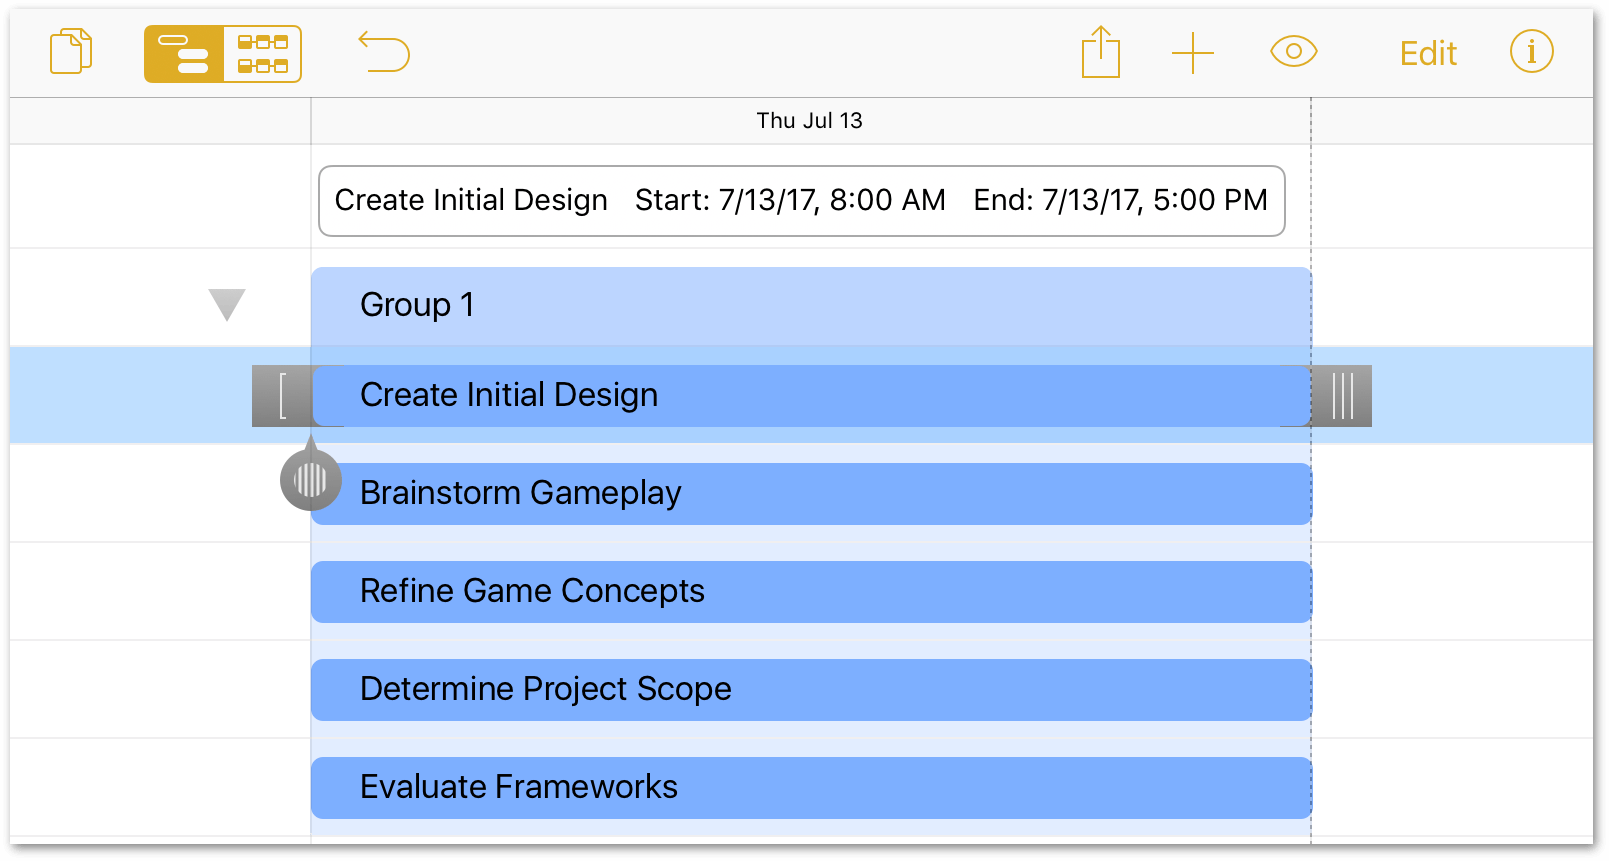
Admittedly, Group 1 is a boring name for a group. And while you could name it anything you’d like, a suitable choice may already be there. In looking at the list of grouped tasks, the first one—Create Initial Design—appears as the front-runner as group leader, so let’s make that change:
-
Tap to select the Create Initial Design task:
-
Tap the Task inspector, and then tap Task Info.
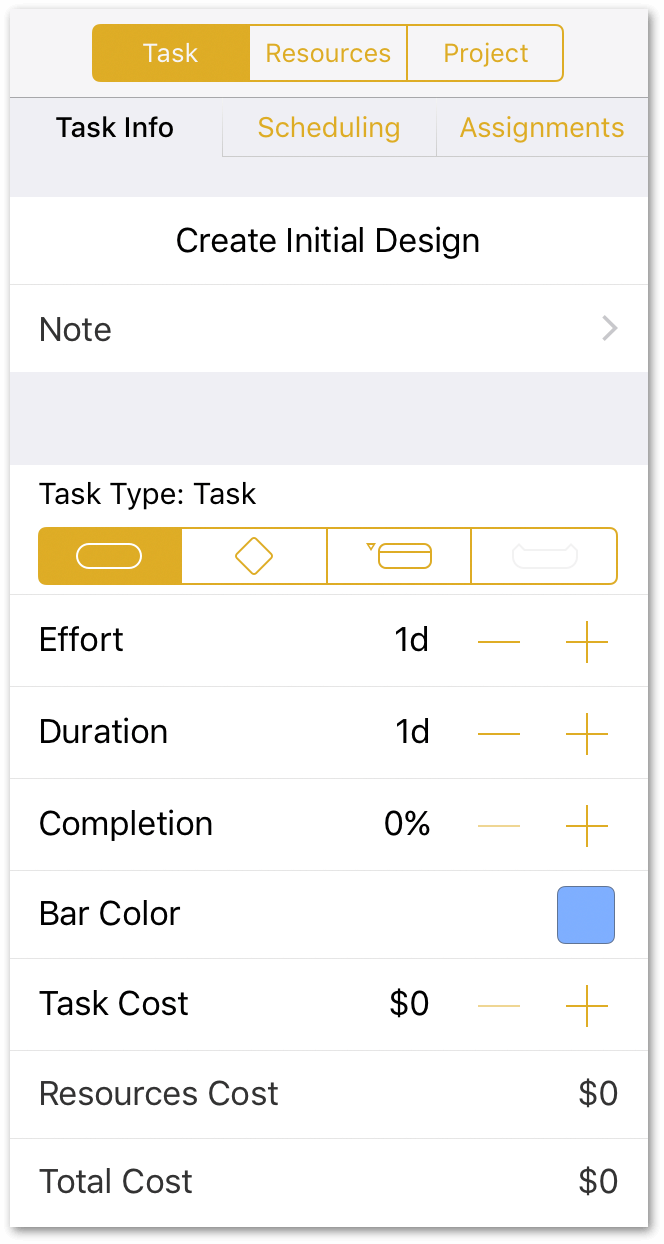
-
In the Task Type selectors, tap
 to change its task type to Group.
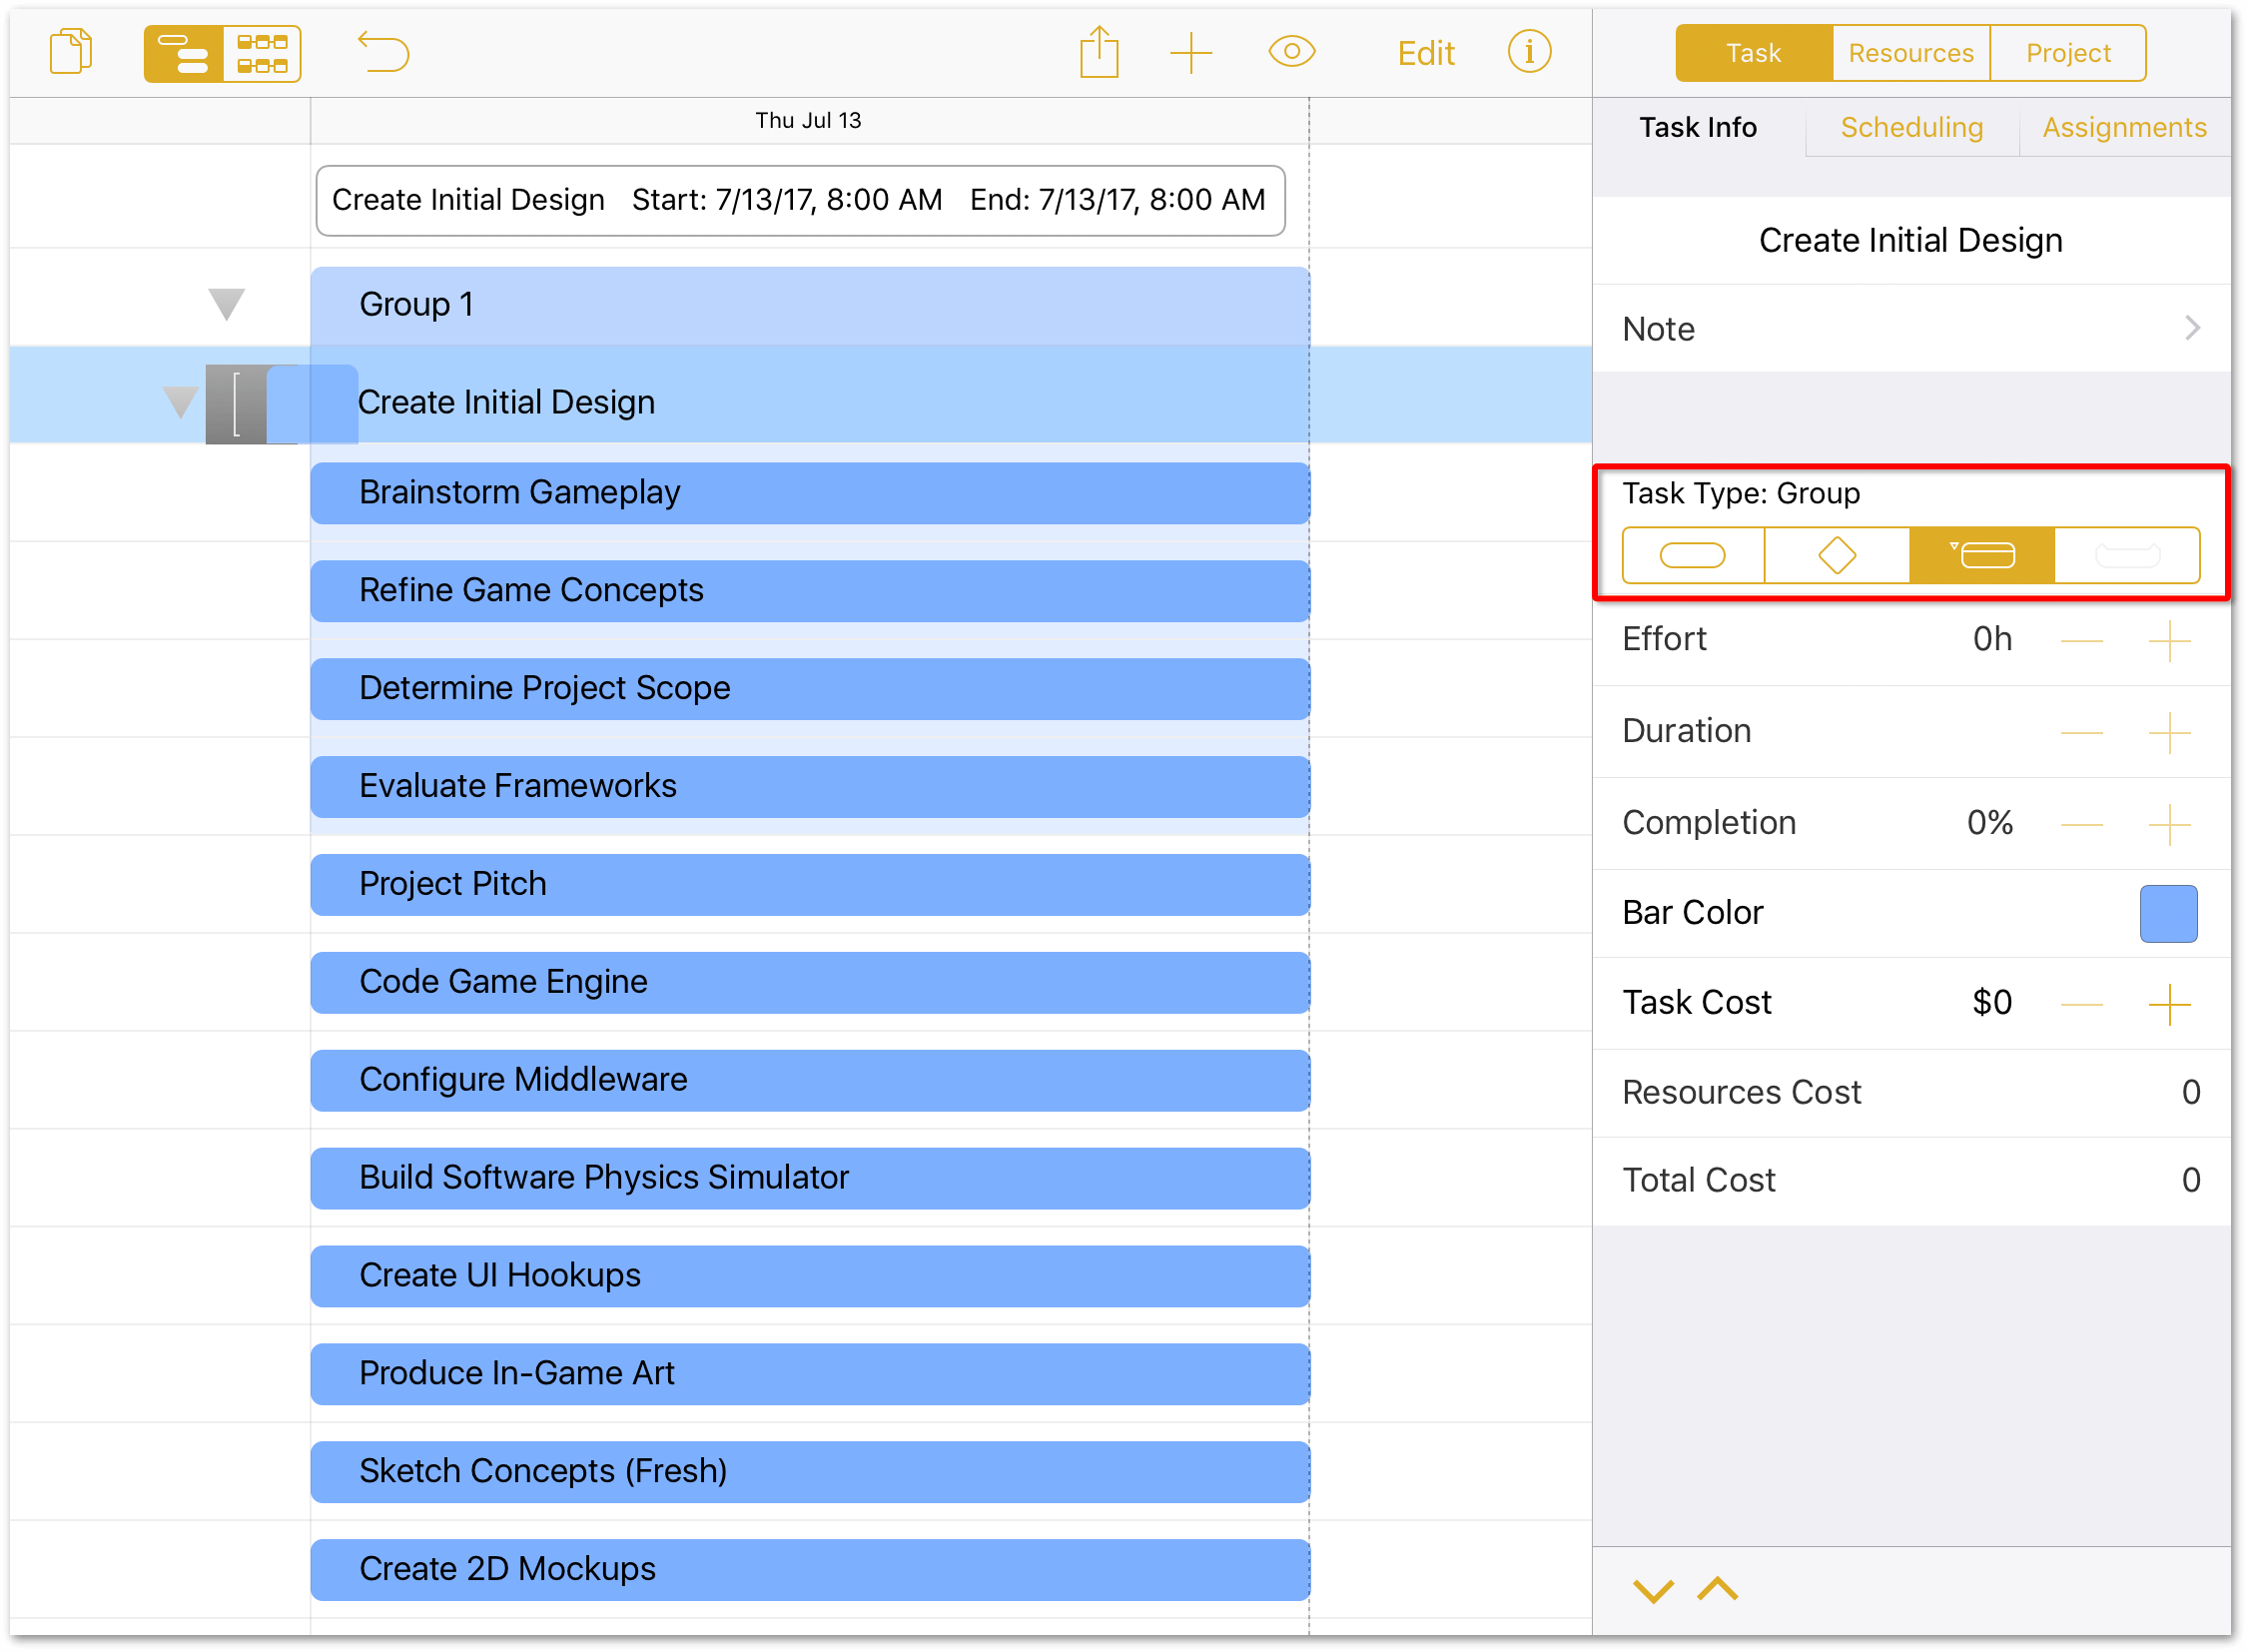
-
In the toolbar, tap Edit.
-
Tap to select the following tasks:
- Brainstorm Gameplay
- Refine Game Concepts
- Determine Project Scope
- Evaluate Frameworks
At this point, do not select Create Initial Design.
-
This time, instead of tapping Group, tap Move so you can move the four selected tasks into the Create Initial Design task group.

-
After tapping Move, a message appears at the bottom of the Project Editor, directing you to Tap where you want to move these tasks; tap to select Create Initial Design.
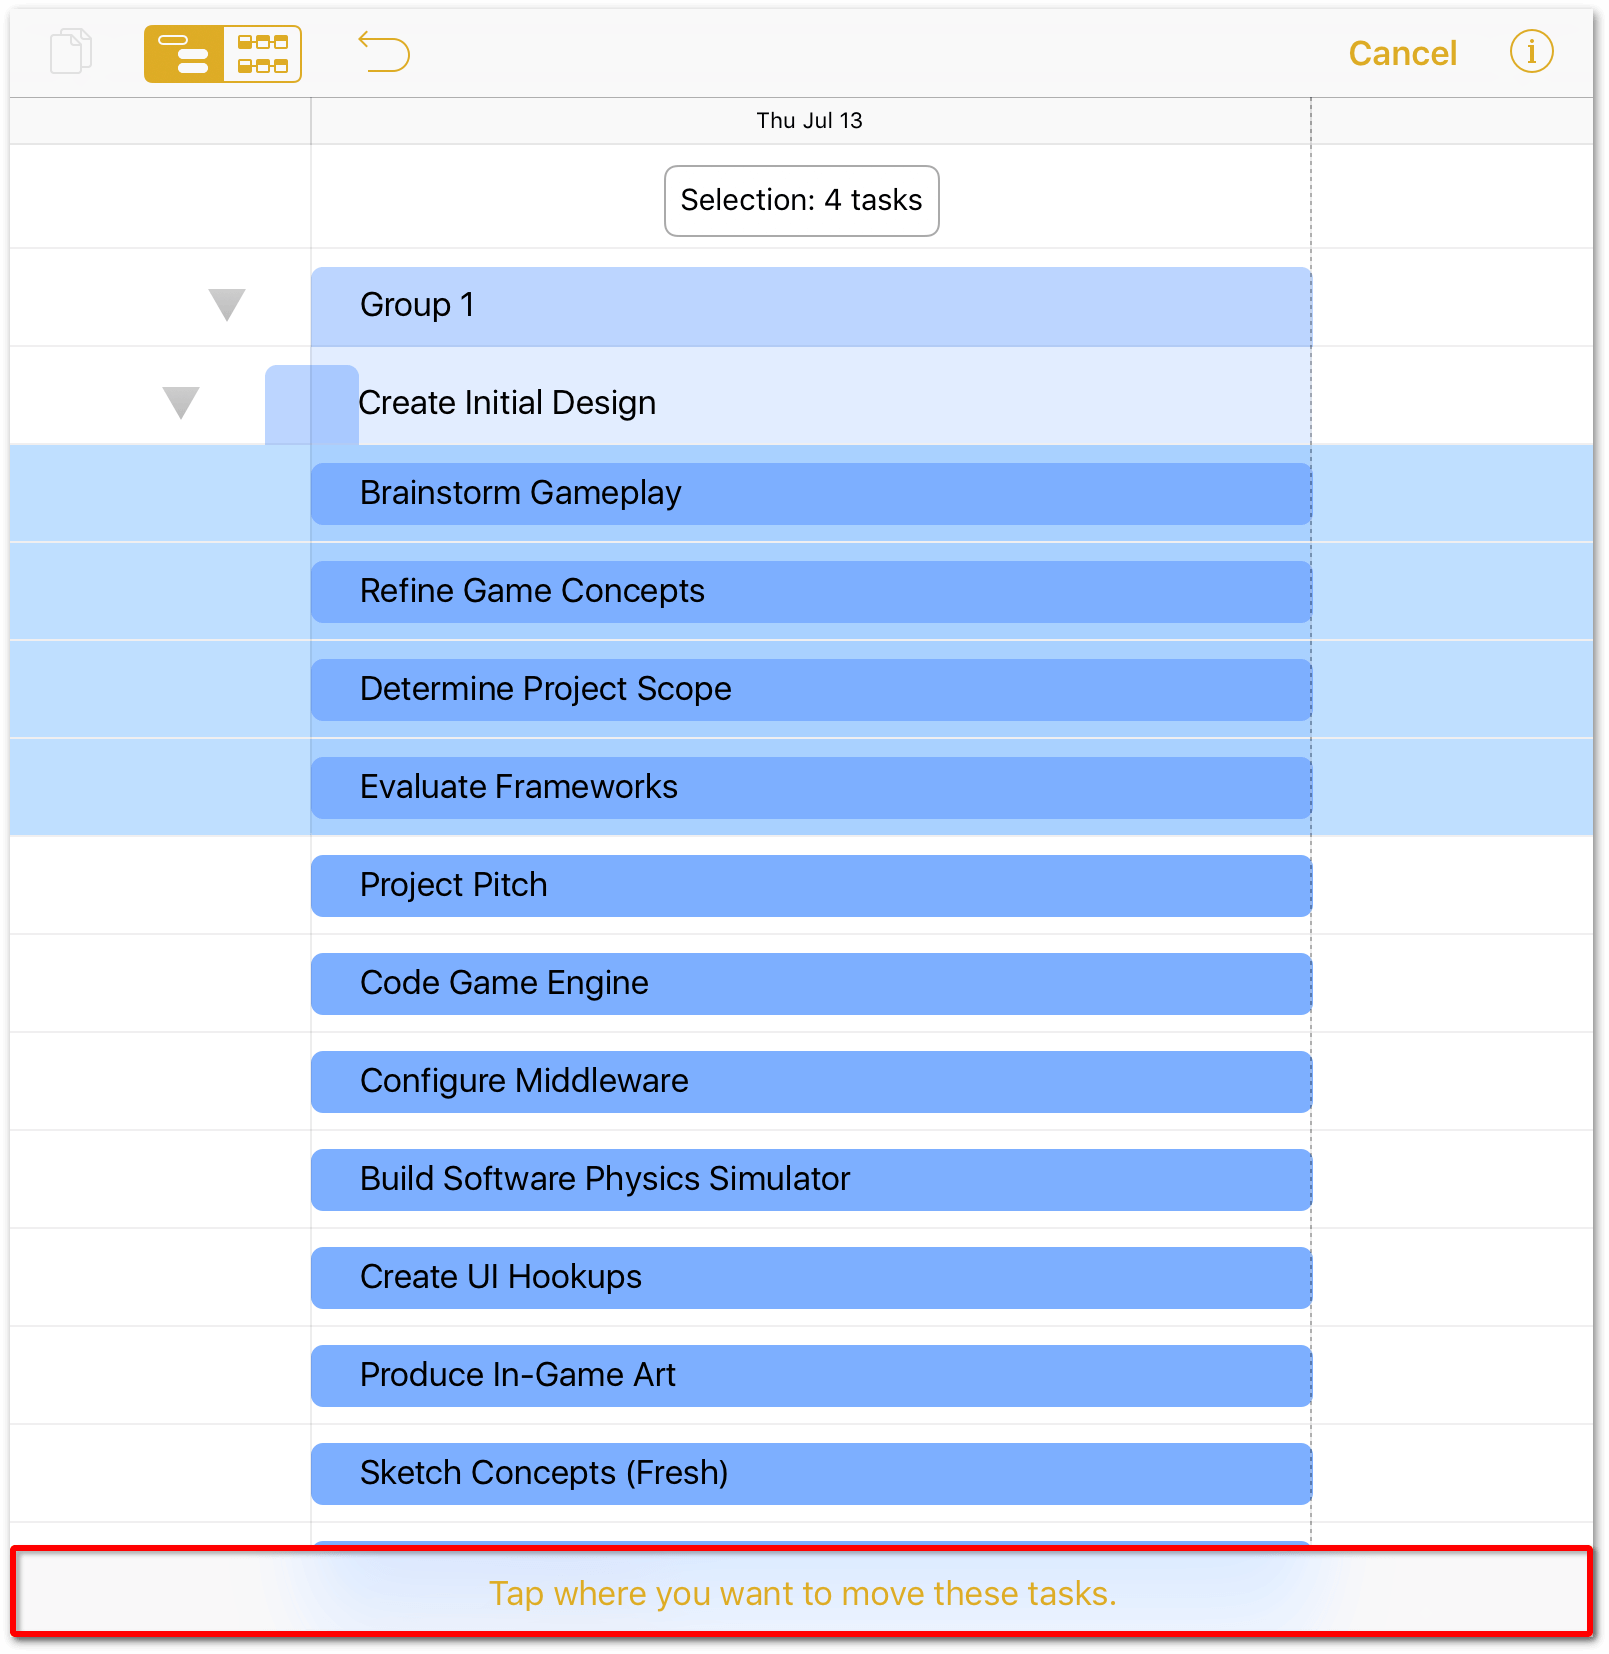
-
A contextual menu appears over Create Initial Design, giving you the option to place the moved tasks Above, Below, or Inside. Tap Inside to make the tasks part of the Create Initial Design group.
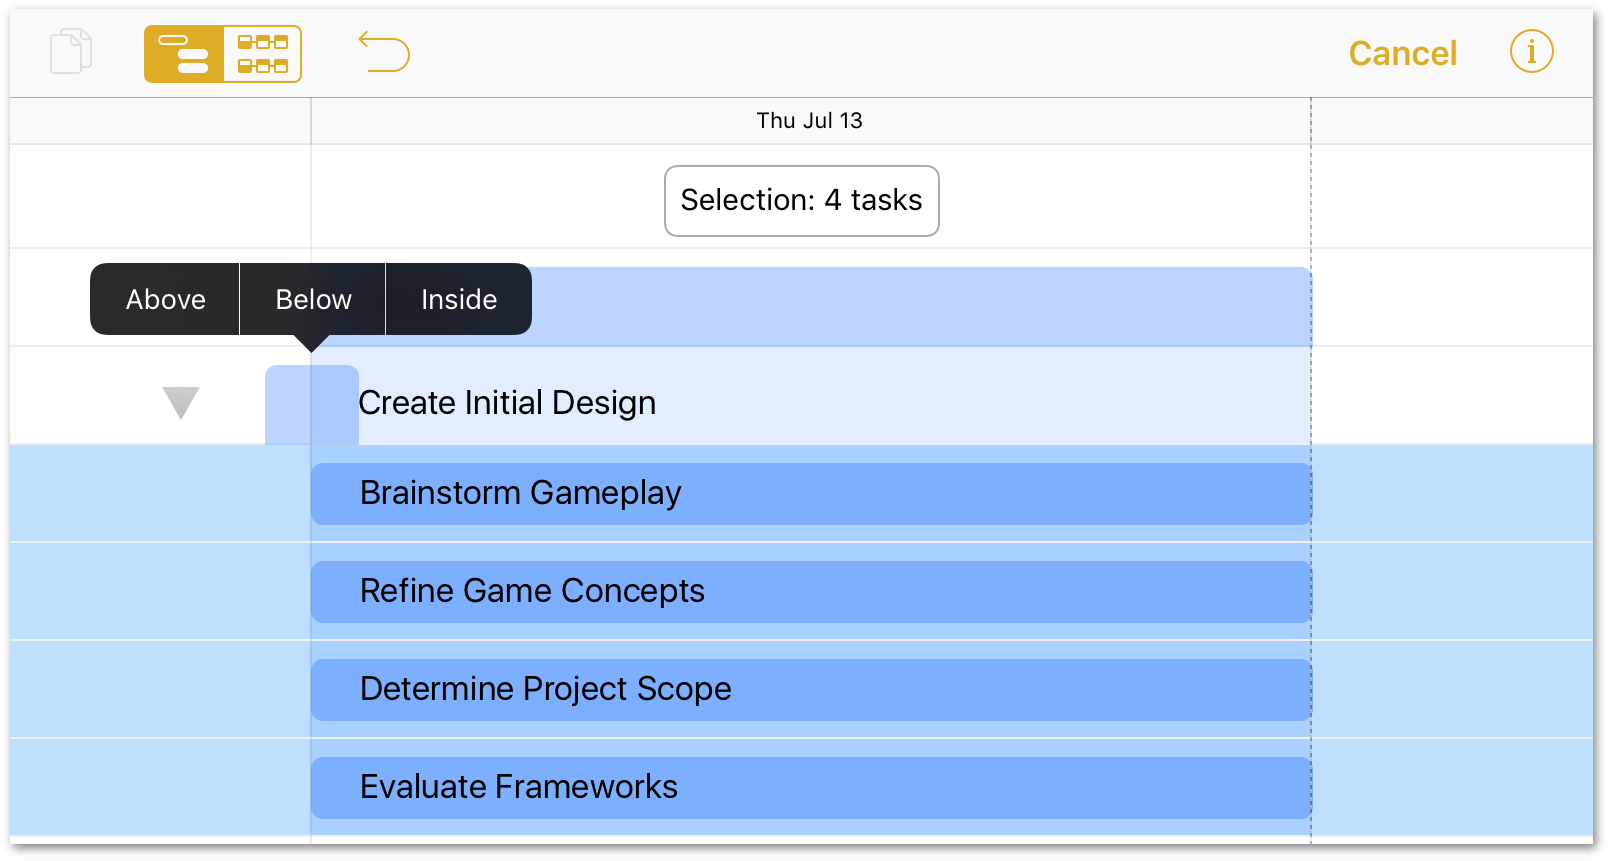
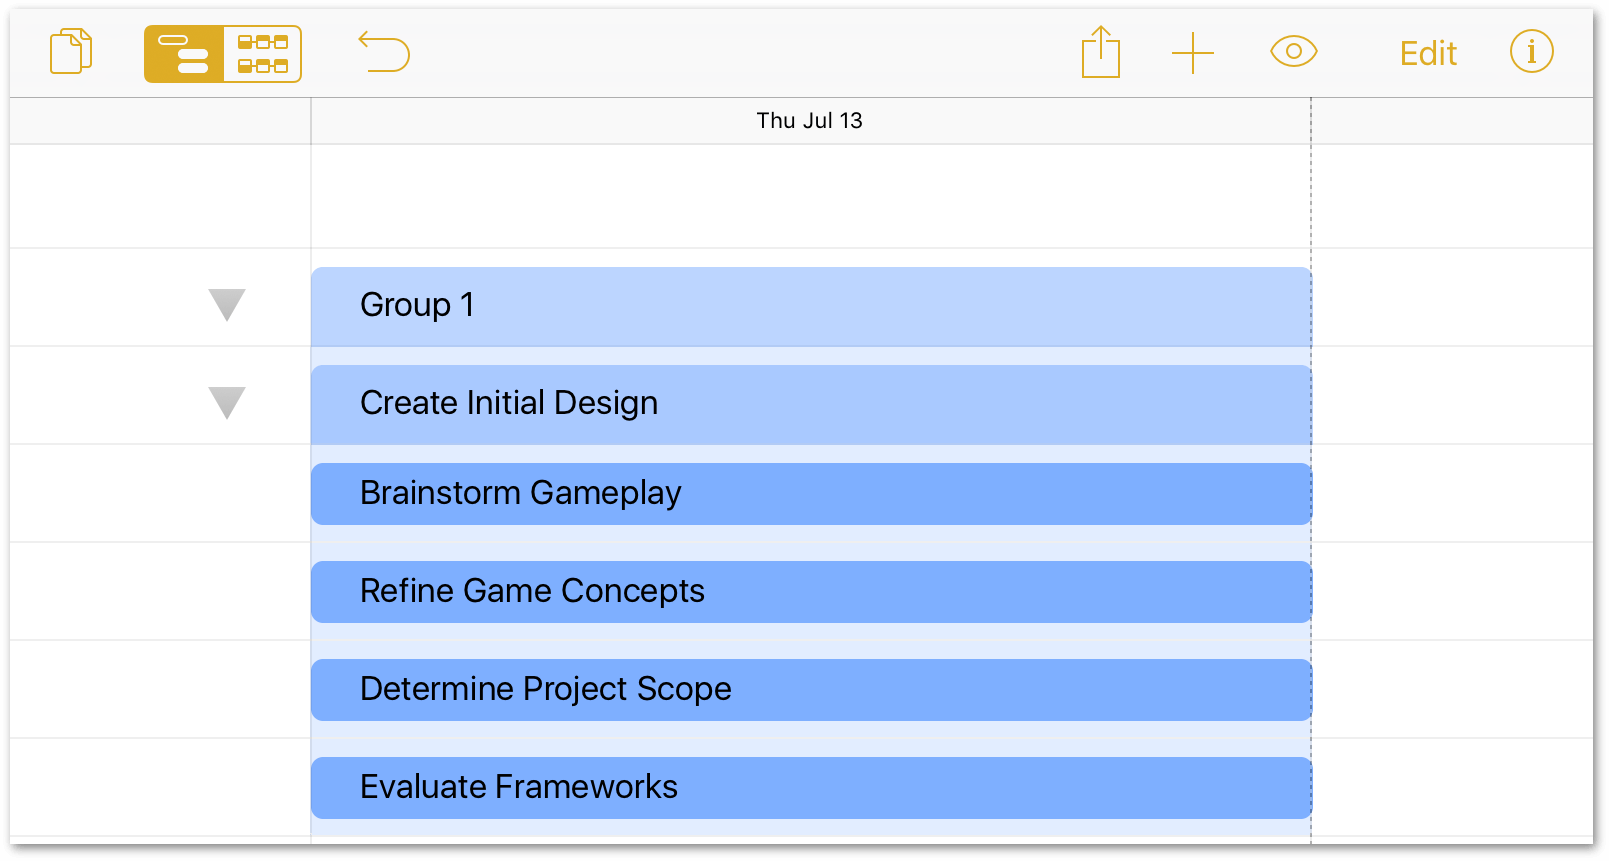
As you may have noticed, the Create Initial Design group is actually a subgroup of Group 1. Since there’s no need for this to be a subgroup, let’s remove Group 1 so that Create Initial Design stands on its own:
- In the toolbar, tap Edit.
-
Tap to select Group 1:
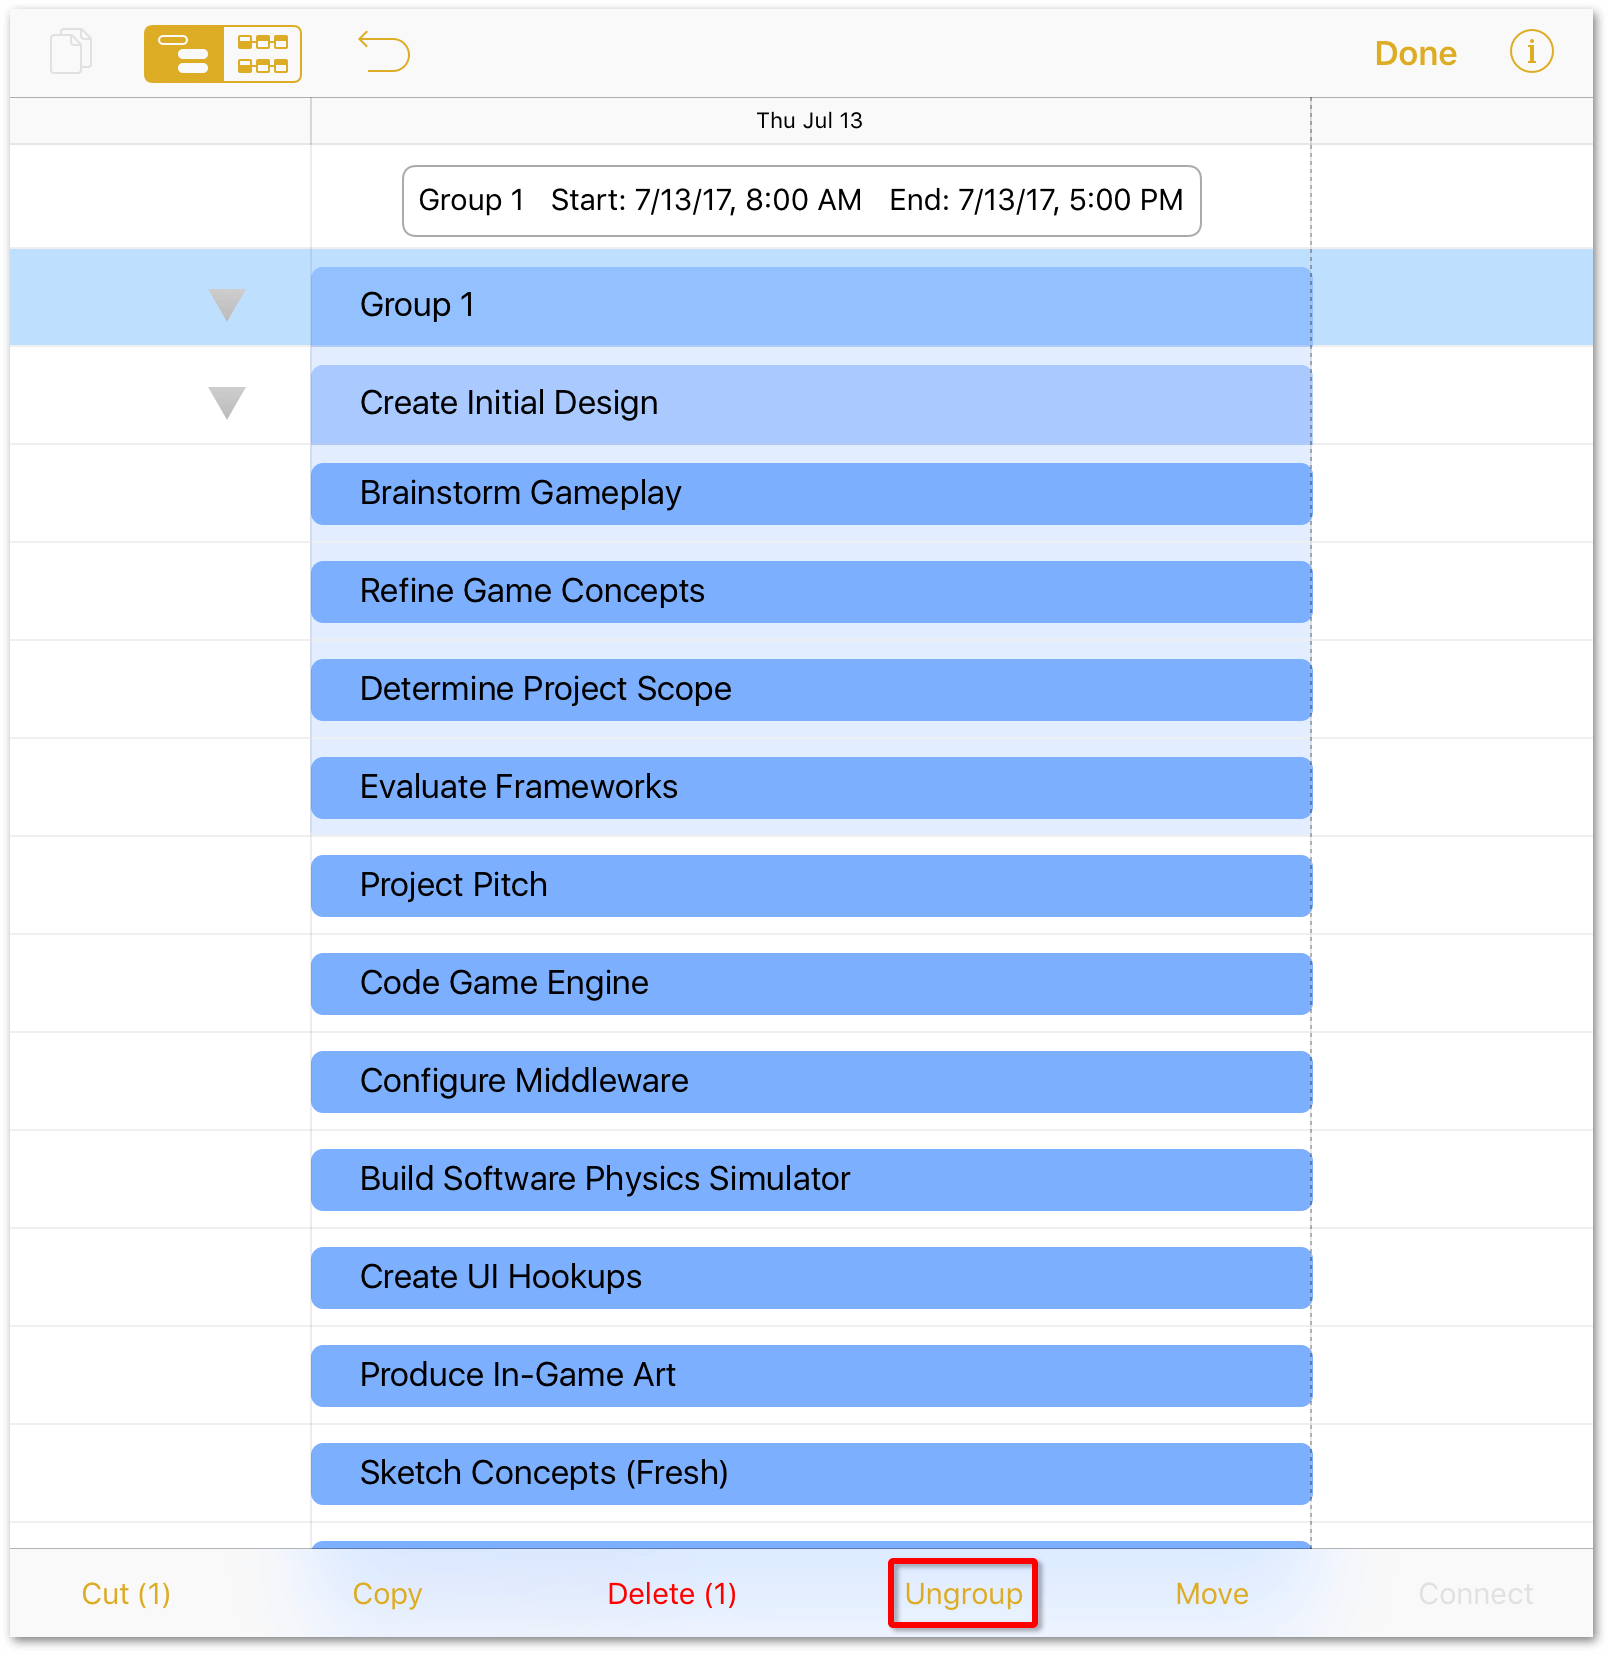
-
At the bottom of the Project Editor window, tap Ungroup; this removes Group 1 from the project, but leaves the Create Initial Design group alone.
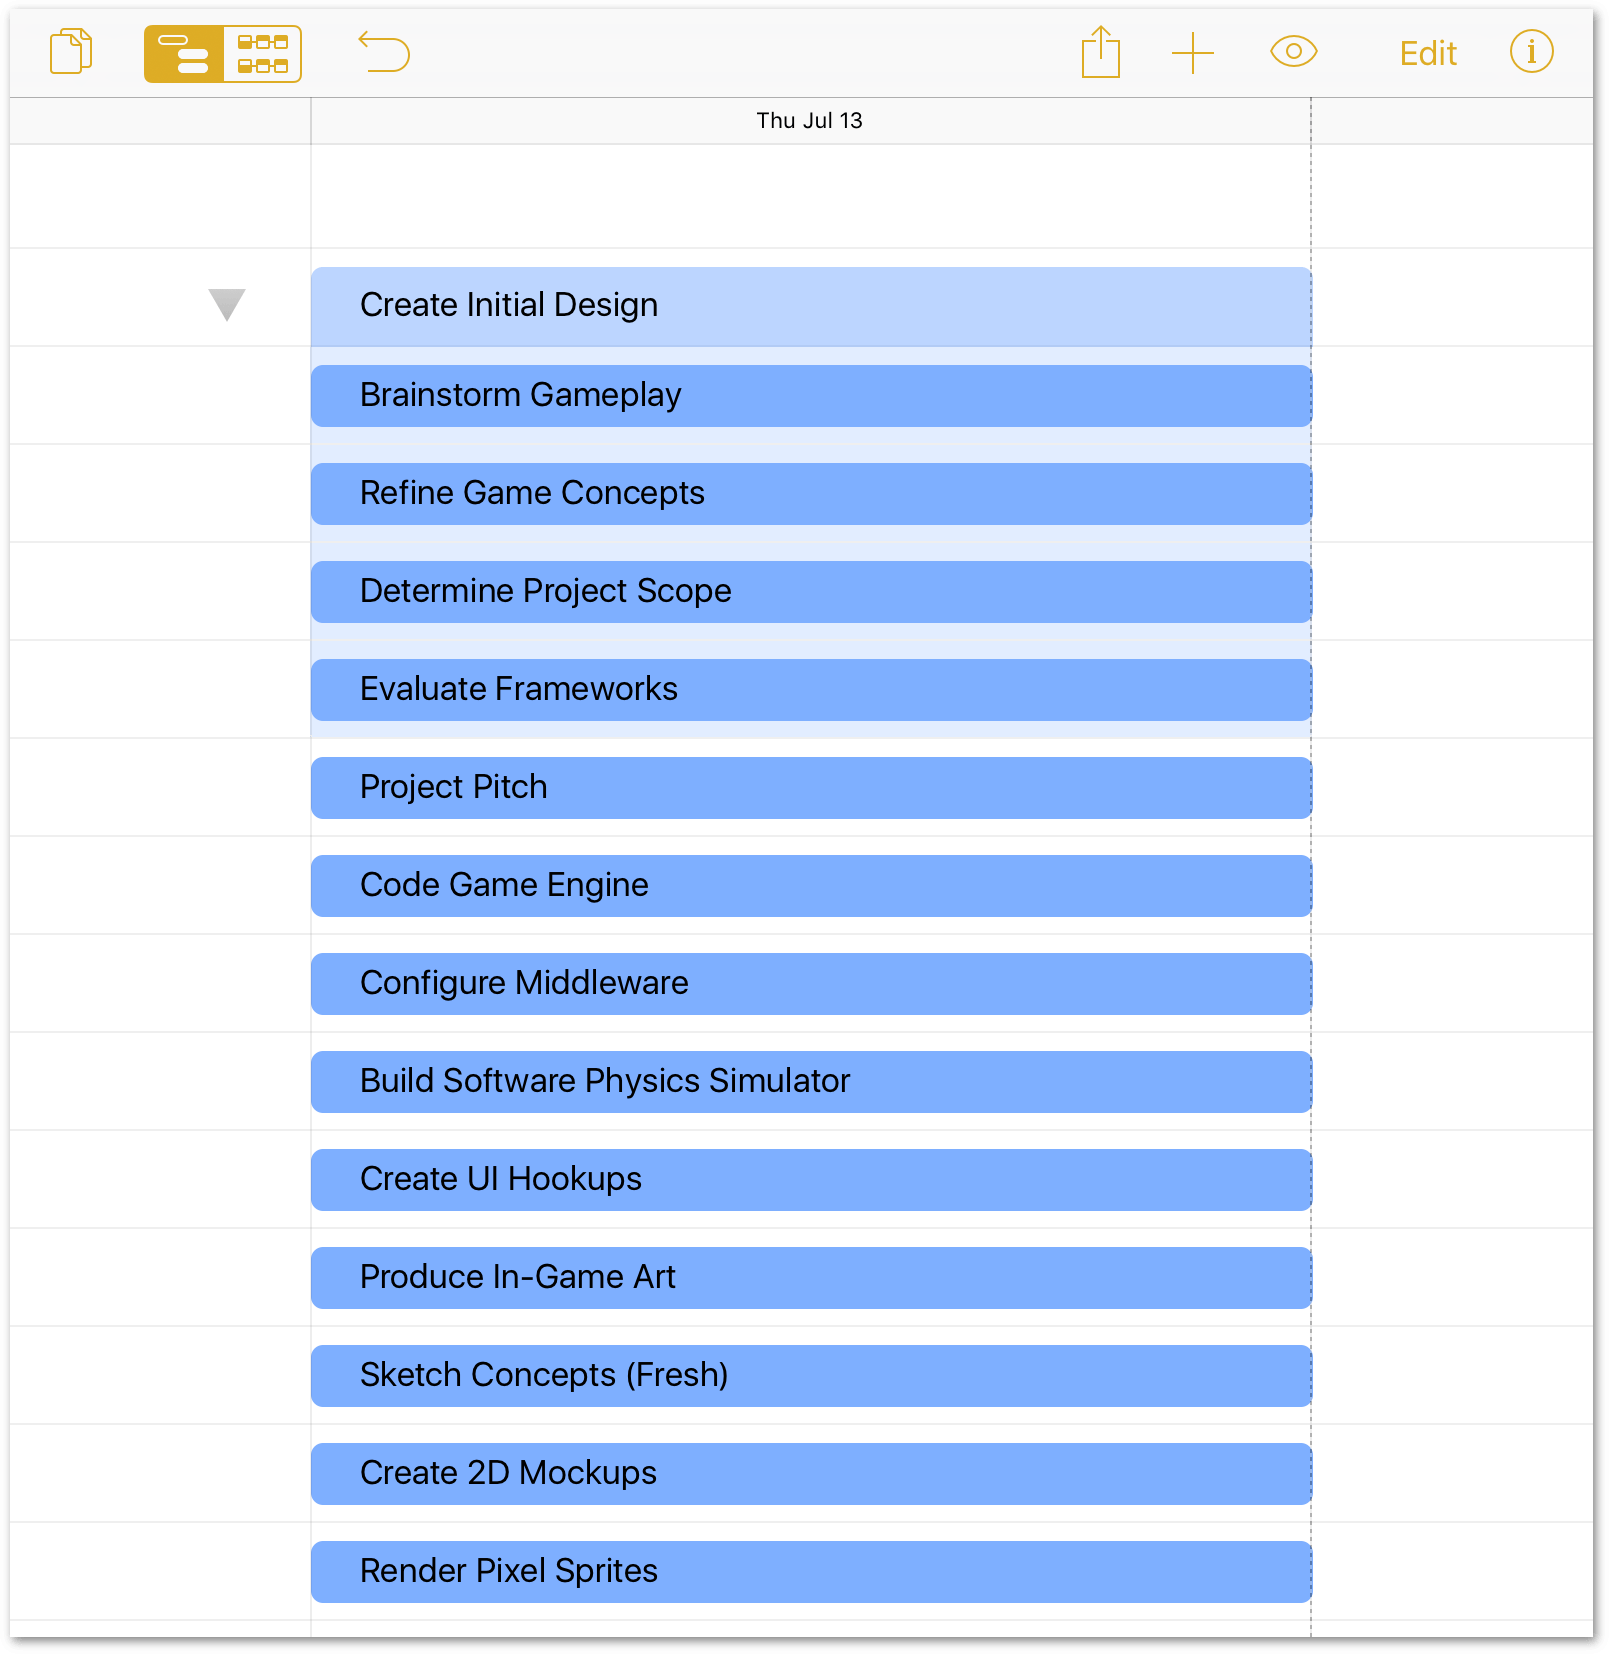
With the initial group established, let’s set these tasks apart from the others by changing their bar color:
- Tap Edit in the toolbar.
-
Tap to select the following tasks:
- Create Initial Design
- Brainstorm Gameplay
- Refine Game Concepts
- Determine Project Scope
- Evaluate Frameworks
-
In the Task Info tab of the Task inspector, tap the color swatch next to Bar Color and then choose a color:
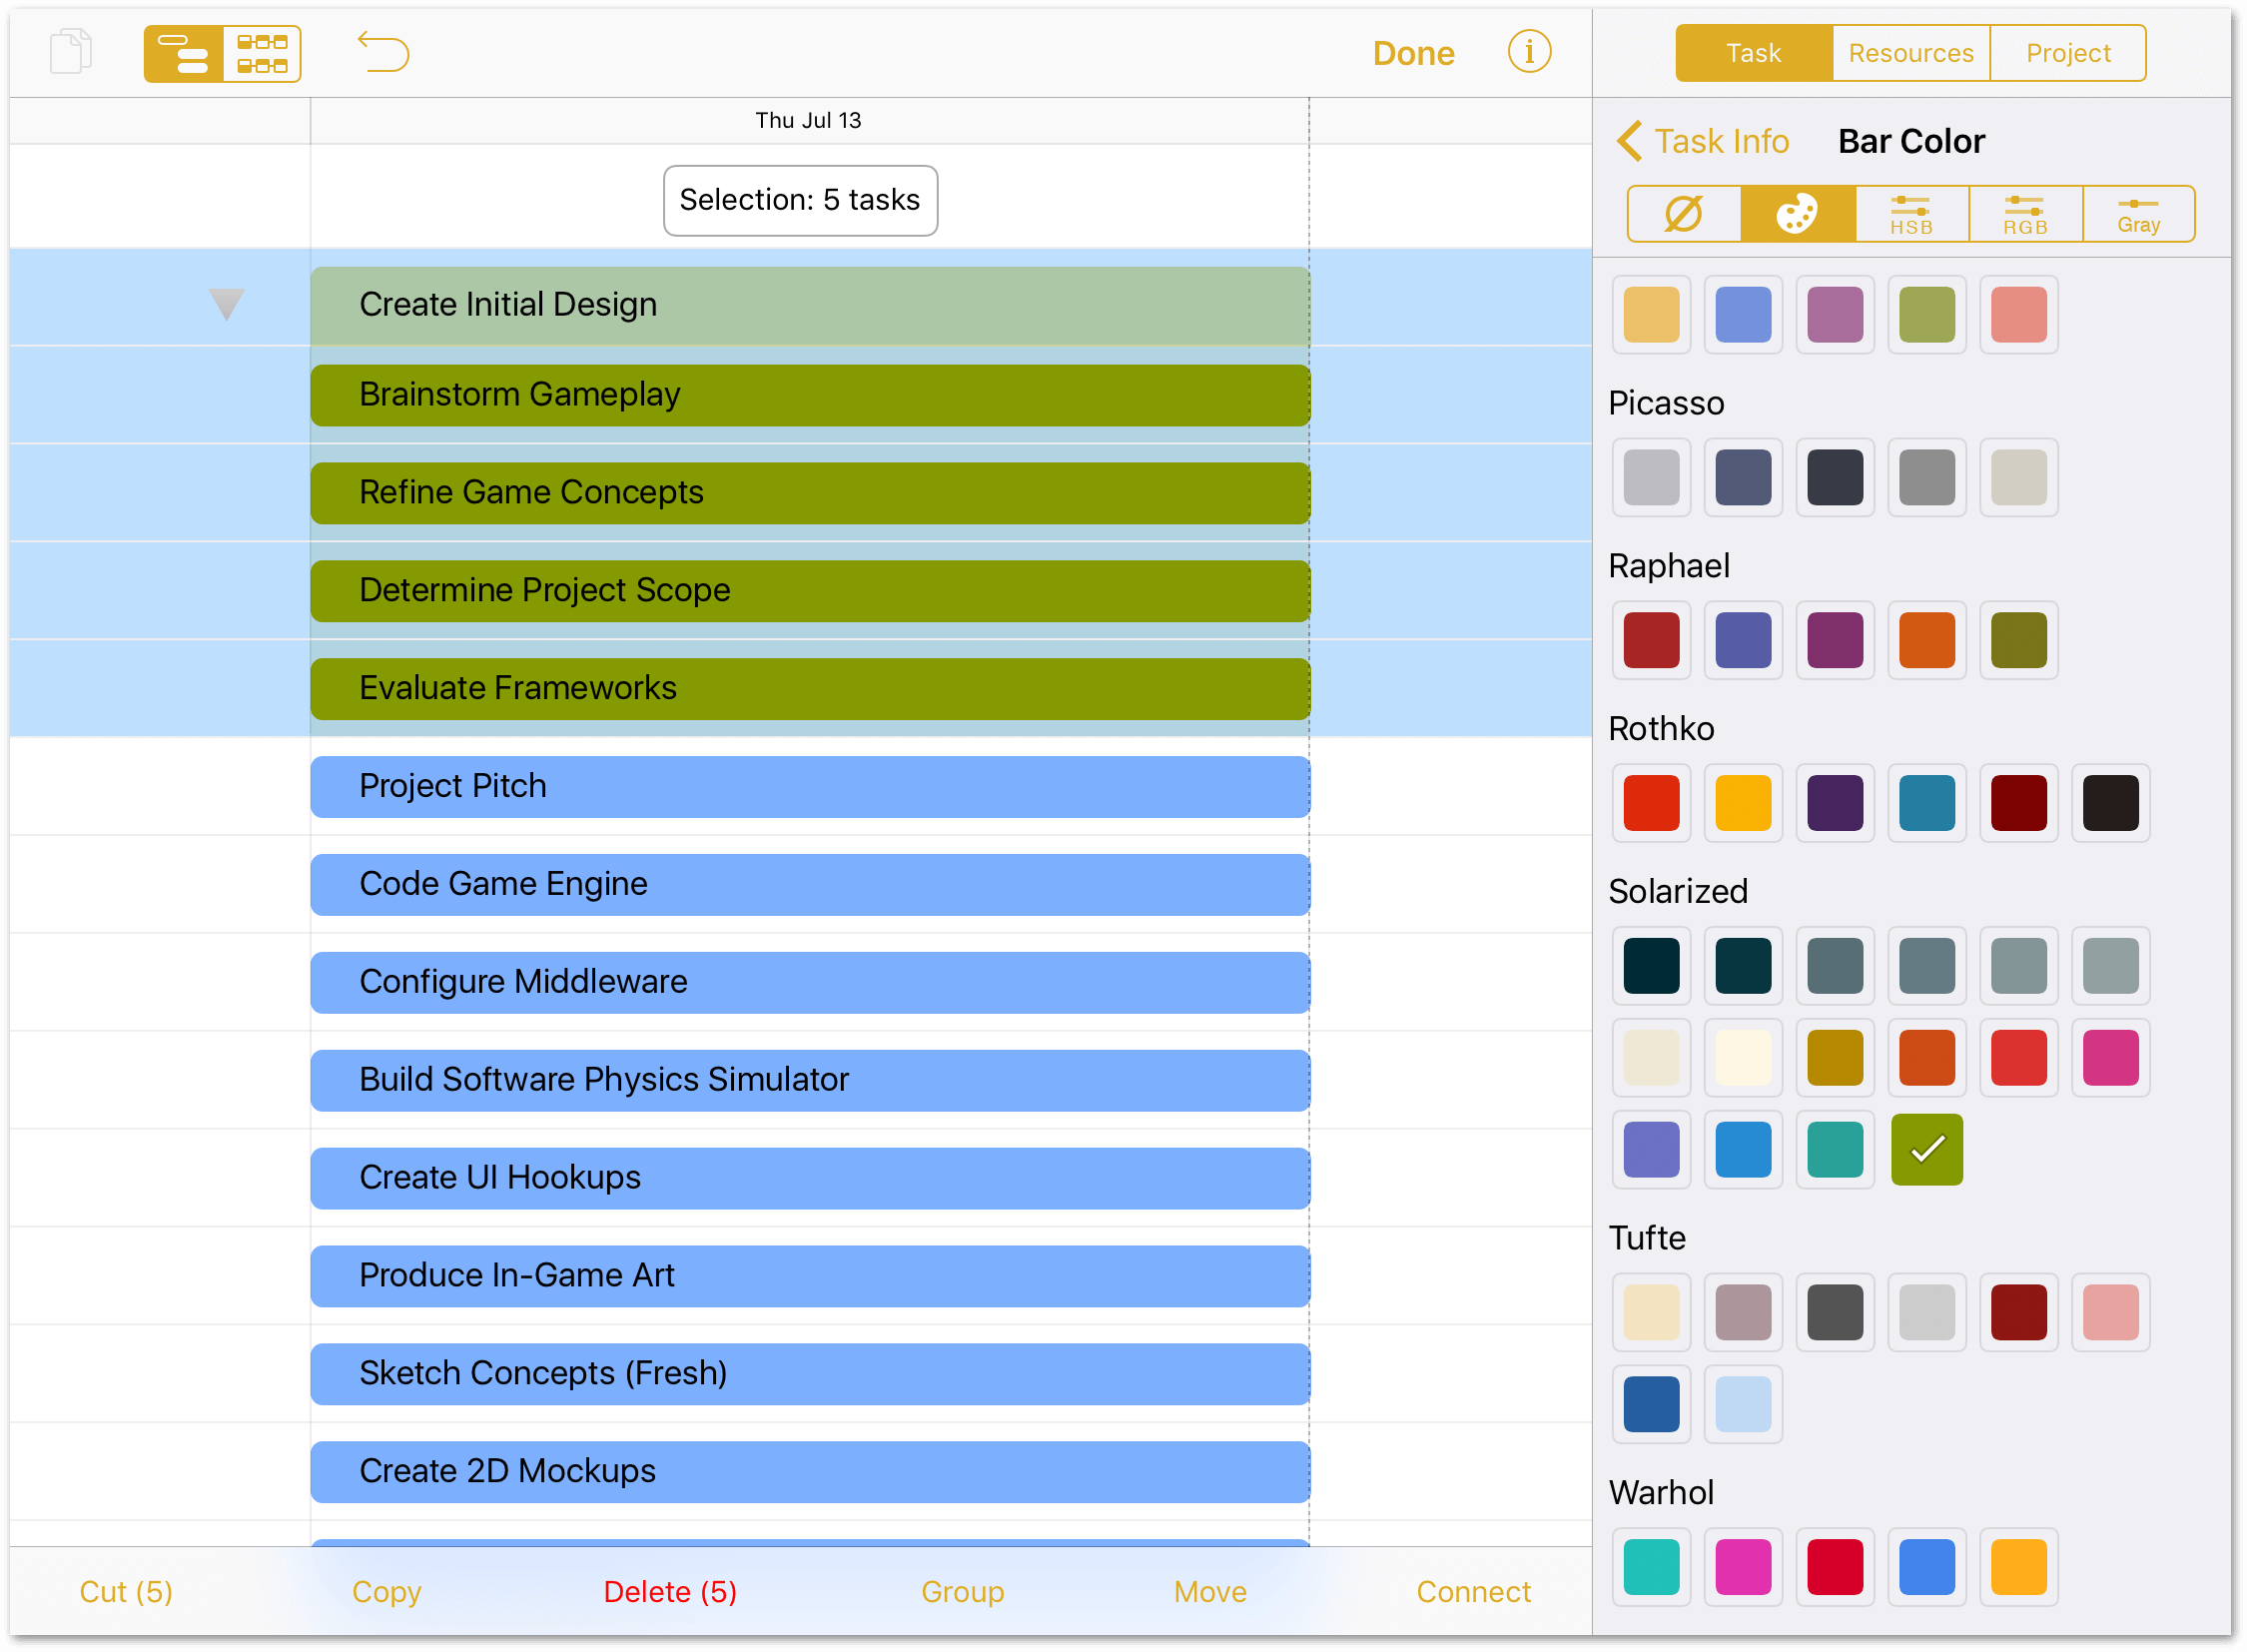
-
Tap Done in the toolbar when you have set the perfect color for your project’s first group.
Using the methods you’ve learned in Step 4, create three additional groups as follows:
- Code Game Engine
- Configure Middleware
- Build Software Physics Simulator
- Create UI Hookups
- Produce In-Game Art
- Sketch Concepts
- Create 2D Mockups
- Render Pixel Sprites
- Fleece Polygons
- Assure Quality
- Test Internally
- "Friends and Family" Beta
- Public Beta
Don’t do anything with Project Pitch, Combine Art and Code, Release Candidate 1 (RC1), or Game Release; those will get some special attention later on.
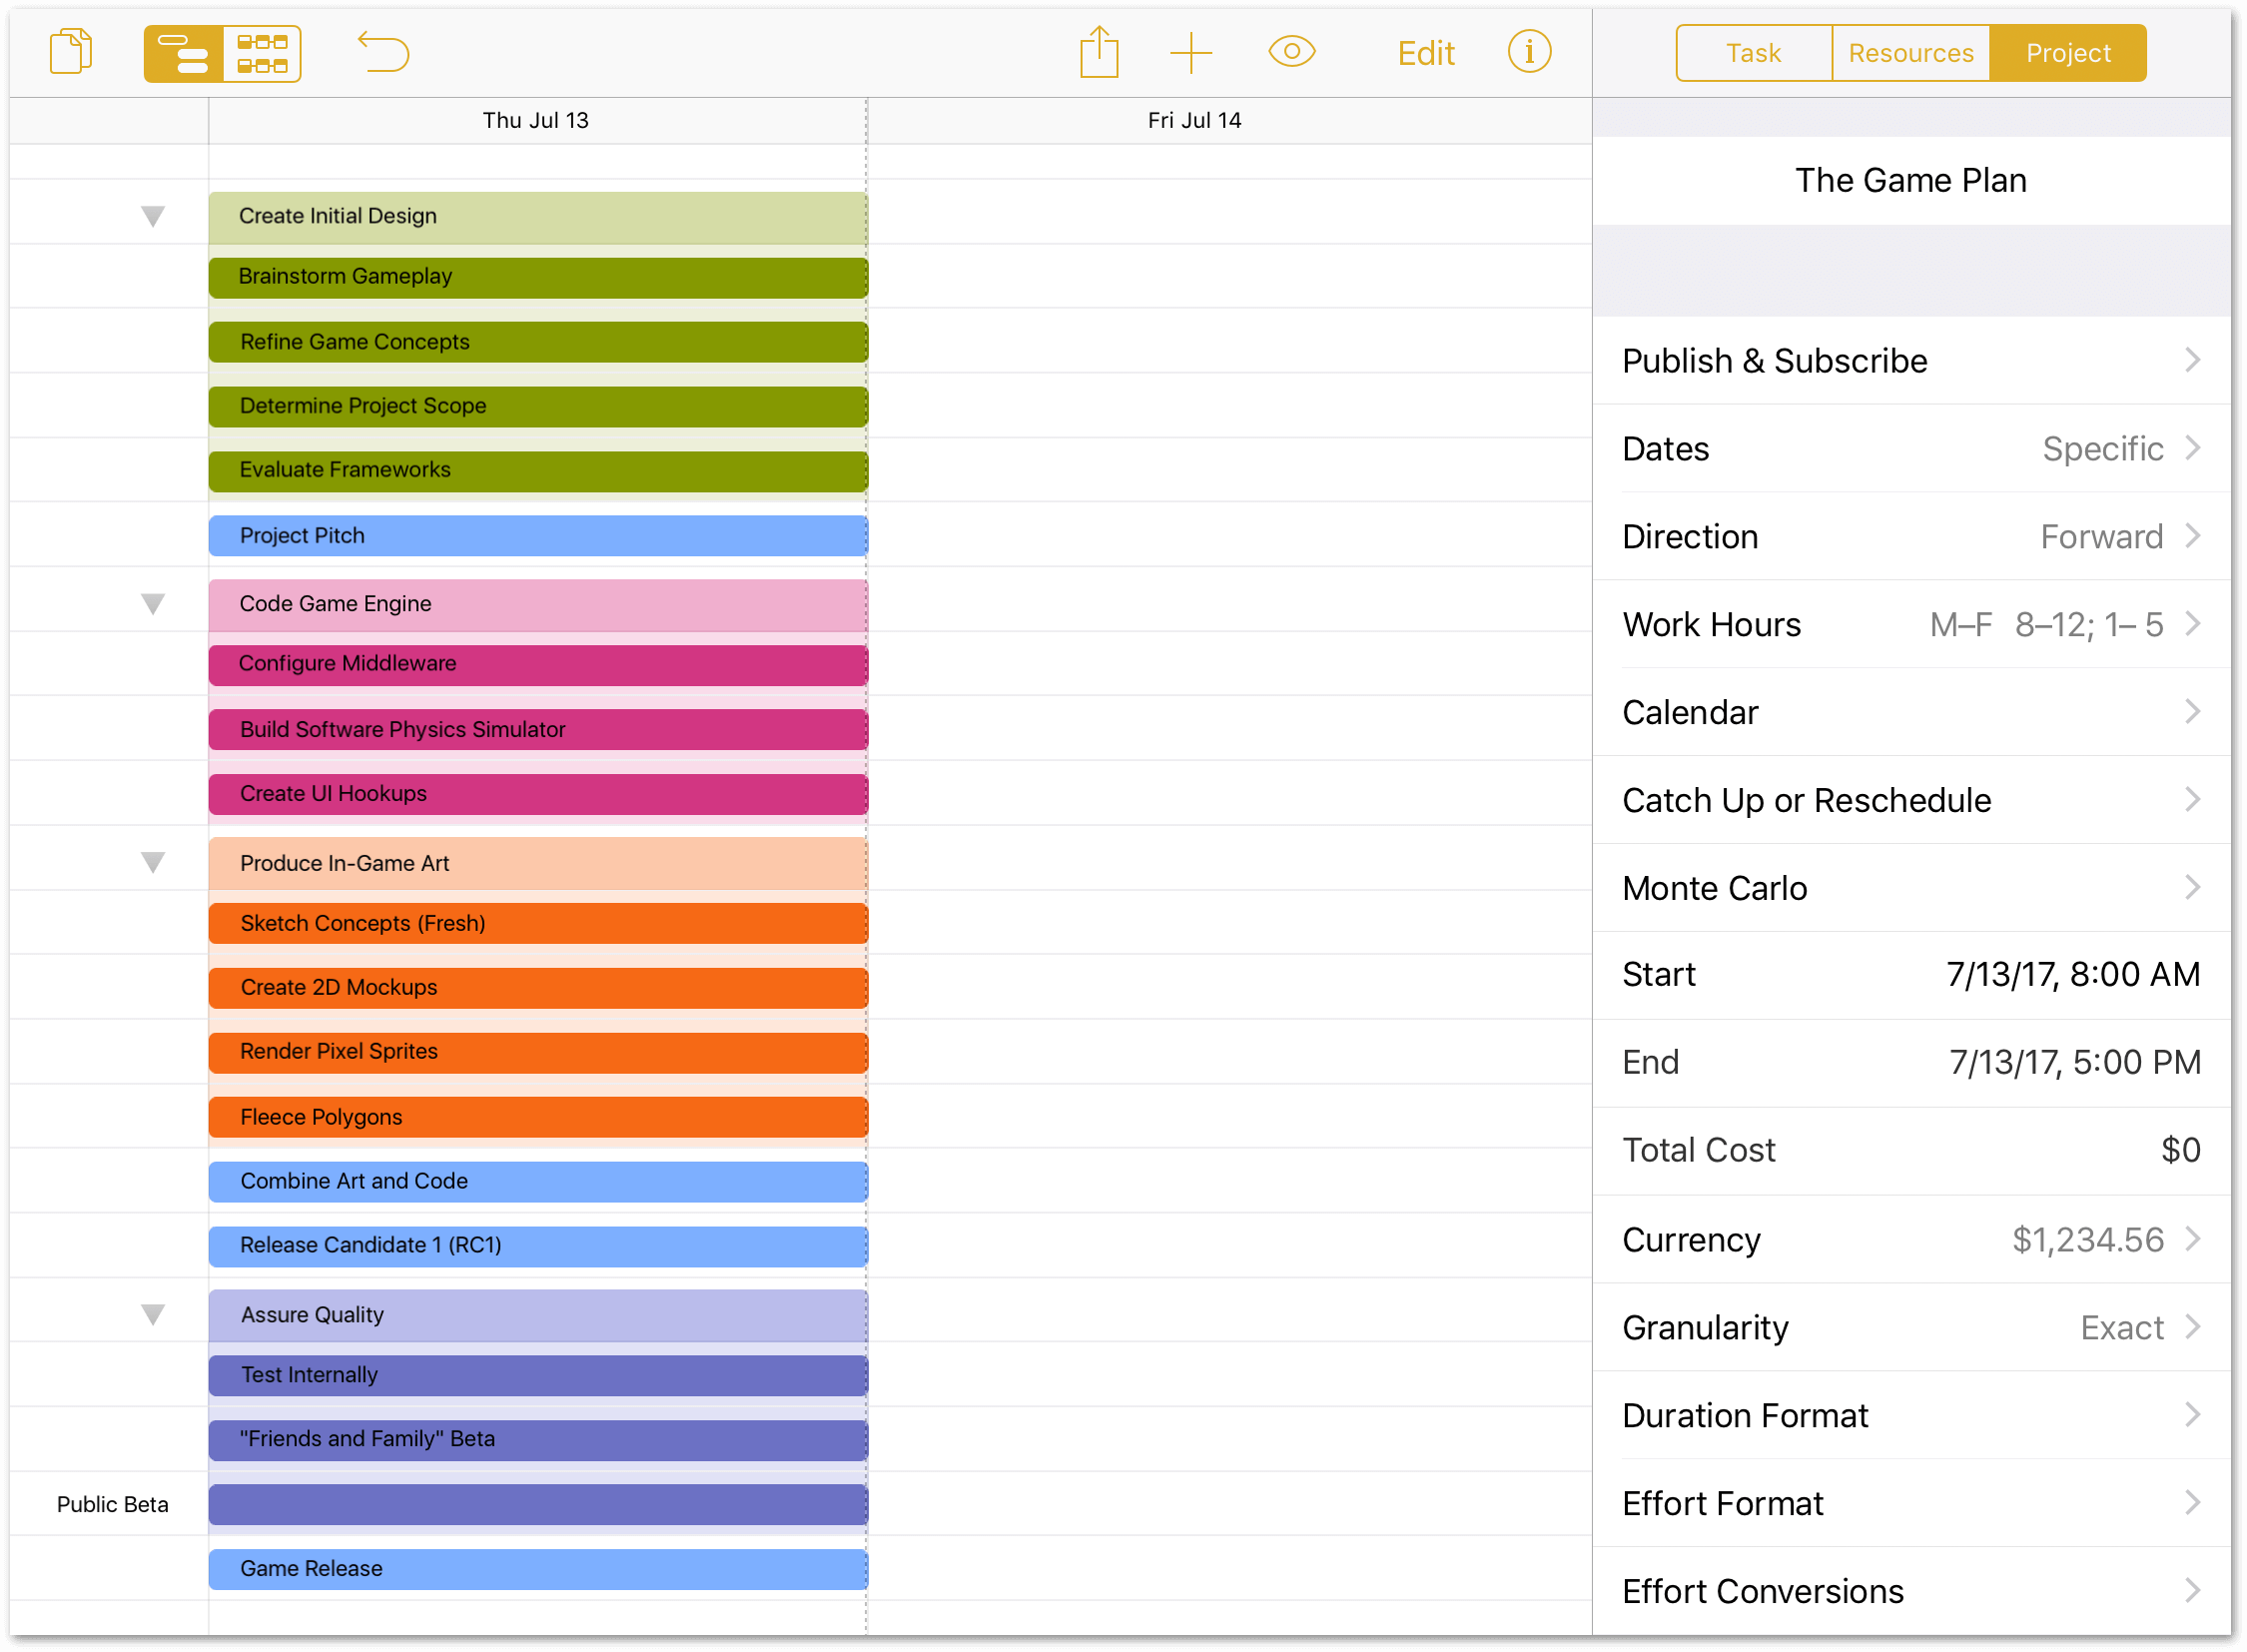
After you have created those groupings, your project should look similar to the following (your color choices may vary):
Step 5: Creating Milestones
Milestones are used in project management to denote specific events of importance. A milestone can be a specific event, such as giving a client presentation, and are often used as checkpoints along the project timeline.
There are two ways to get milestones into your project: you can insert a new milestone between existing tasks, or you can convert an existing task into a milestone. Let’s look at the former option first.
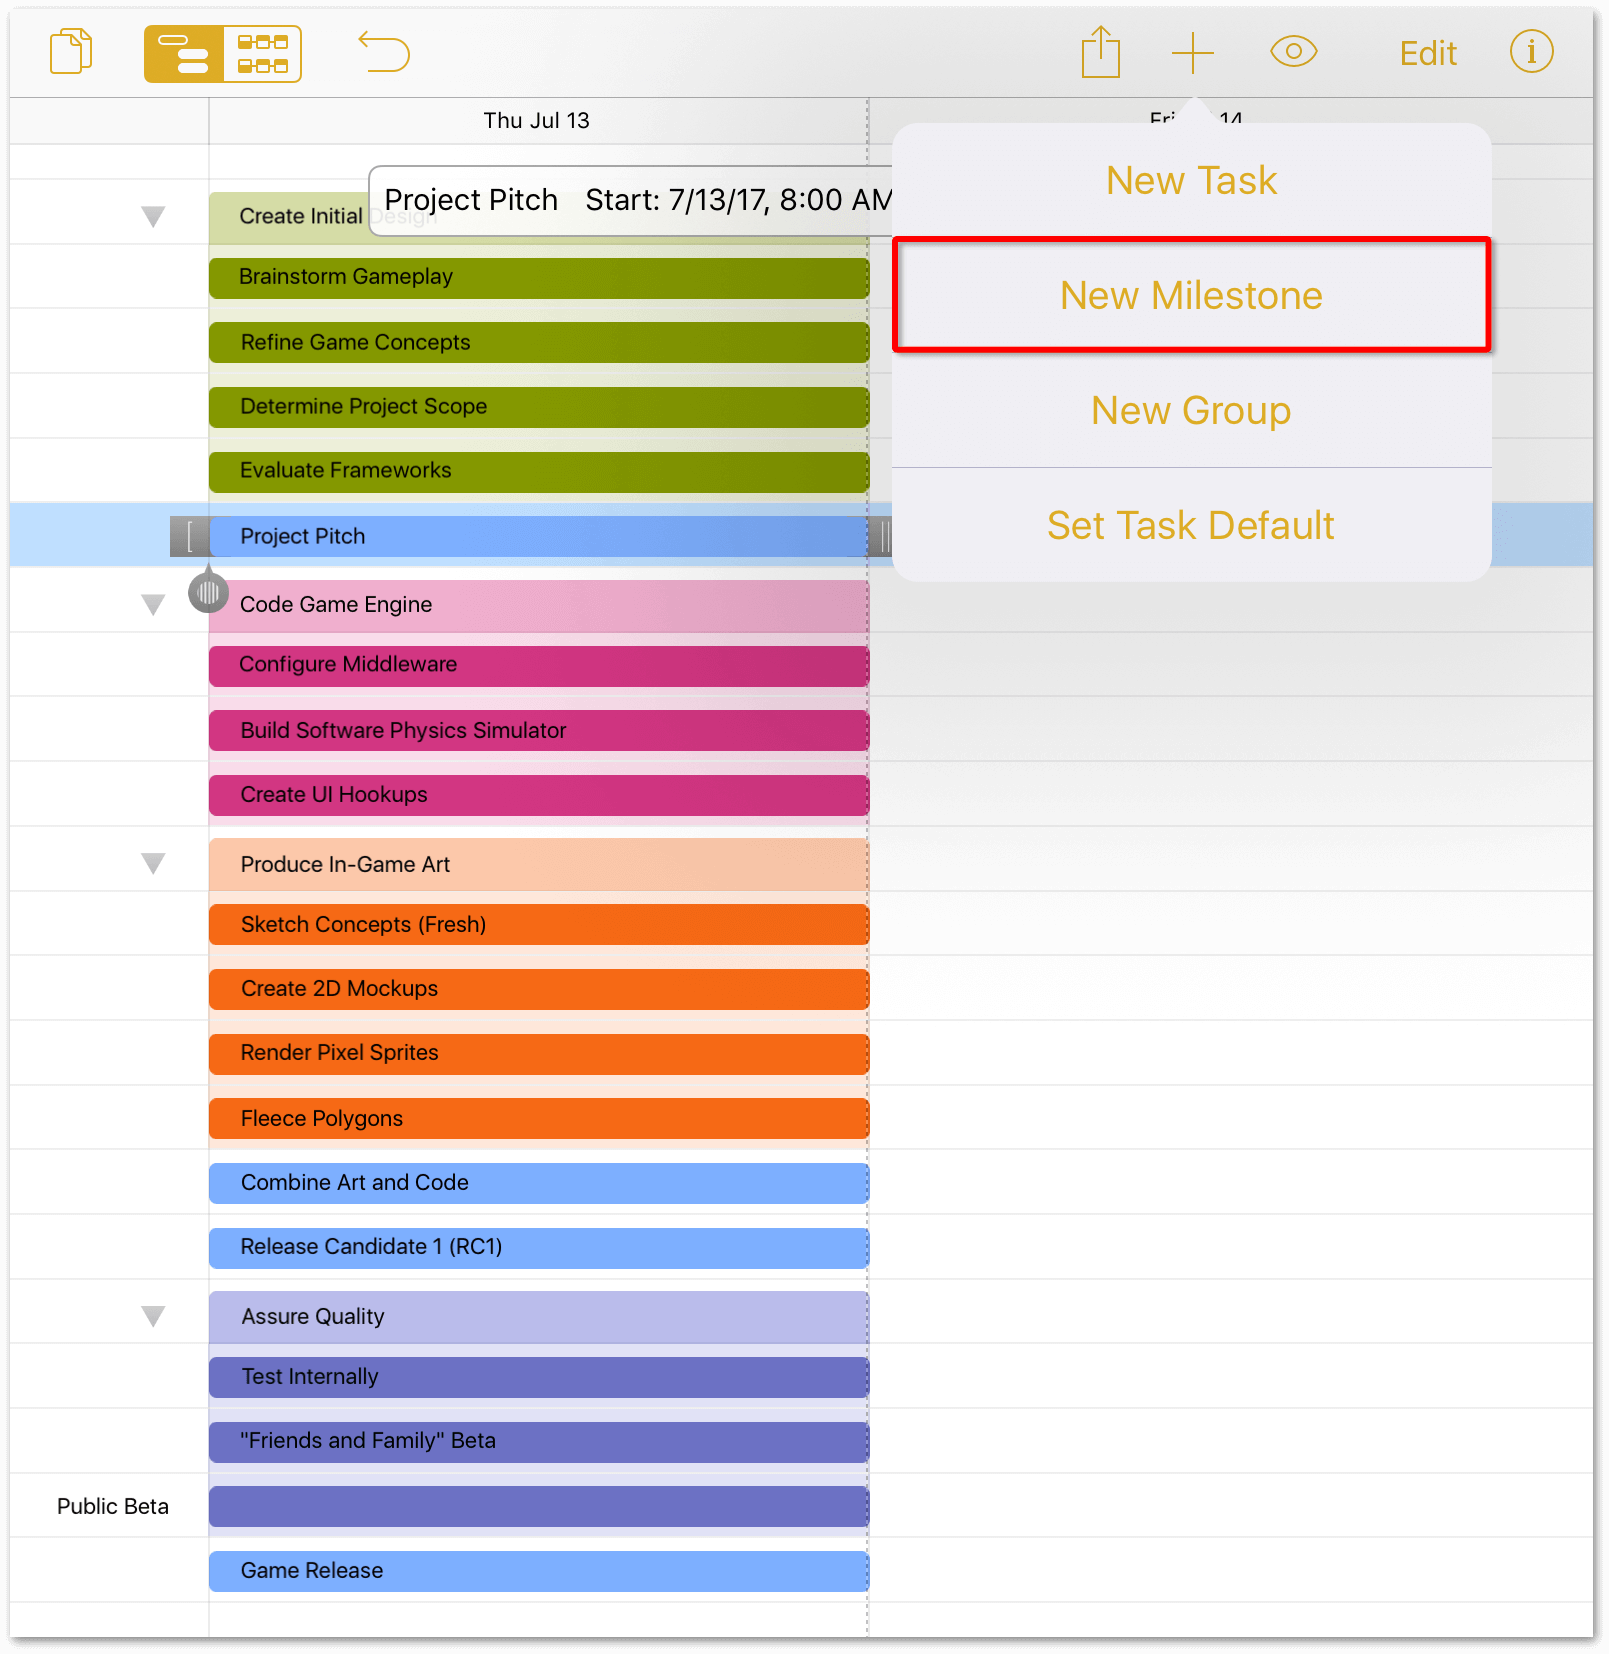
To insert a milestone in a project, do the following:
- Tap to select the Project Pitch task.
-
In the toolbar, touch and hold
 , and then choose New Milestone from the popup menu that appears.
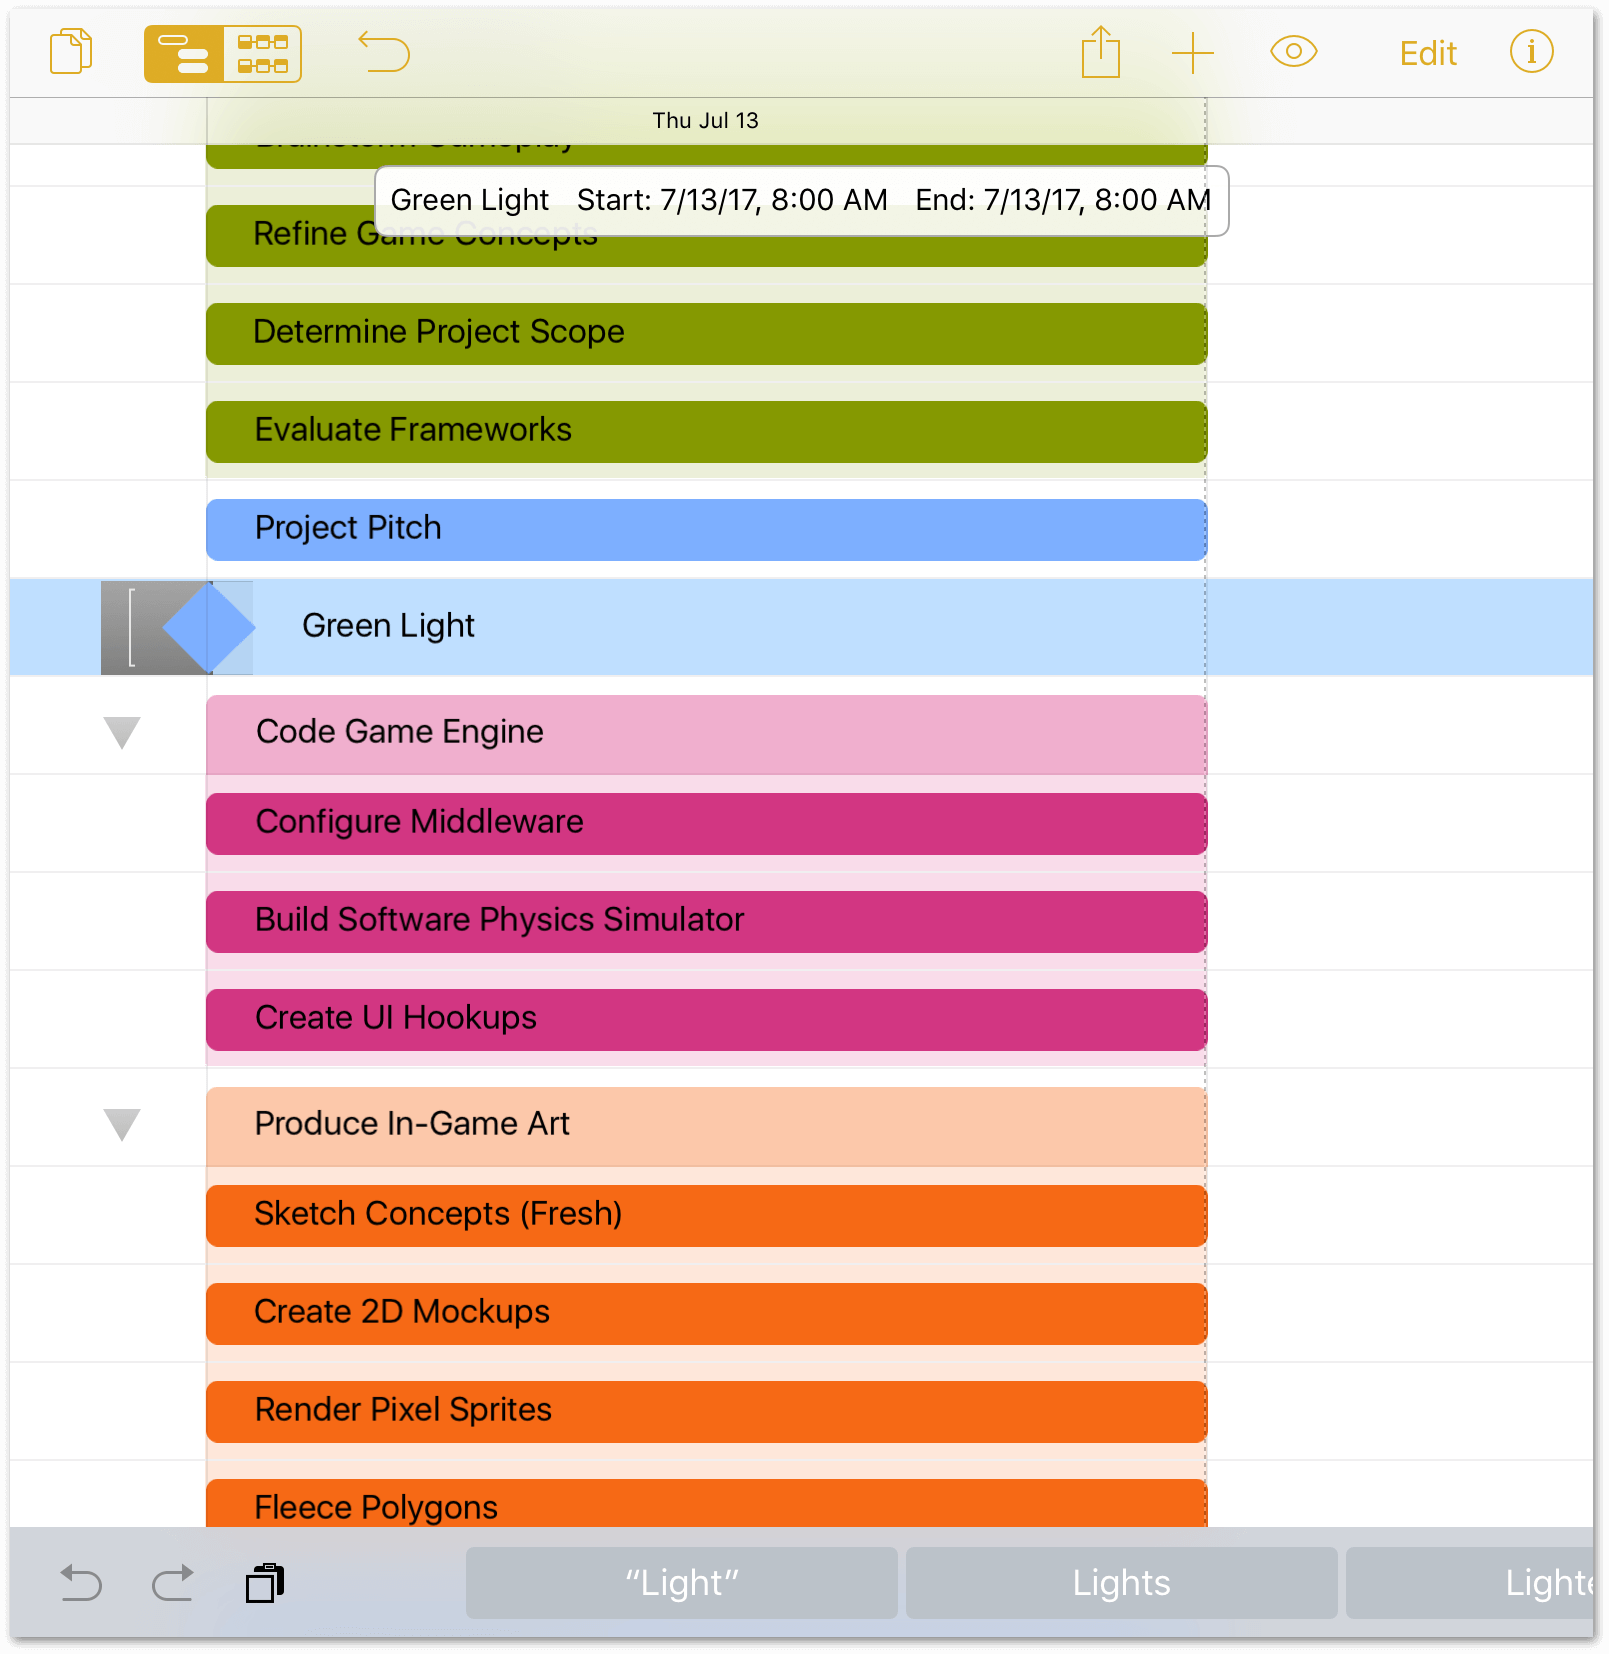
-
Enter a name for the milestone. In this case, name this milestone Green Light to denote that the project receives the go-ahead following the Project Pitch task.
You can also convert an existing task into a milestone, similar to how you earlier converted the Create Initial Design task into a group. There are two tasks that weren’t placed into groups earlier that are perfectly suited for turning into milestones, so let’s do that:
-
Tap to select the Release Candidate 1 (RC1) task:
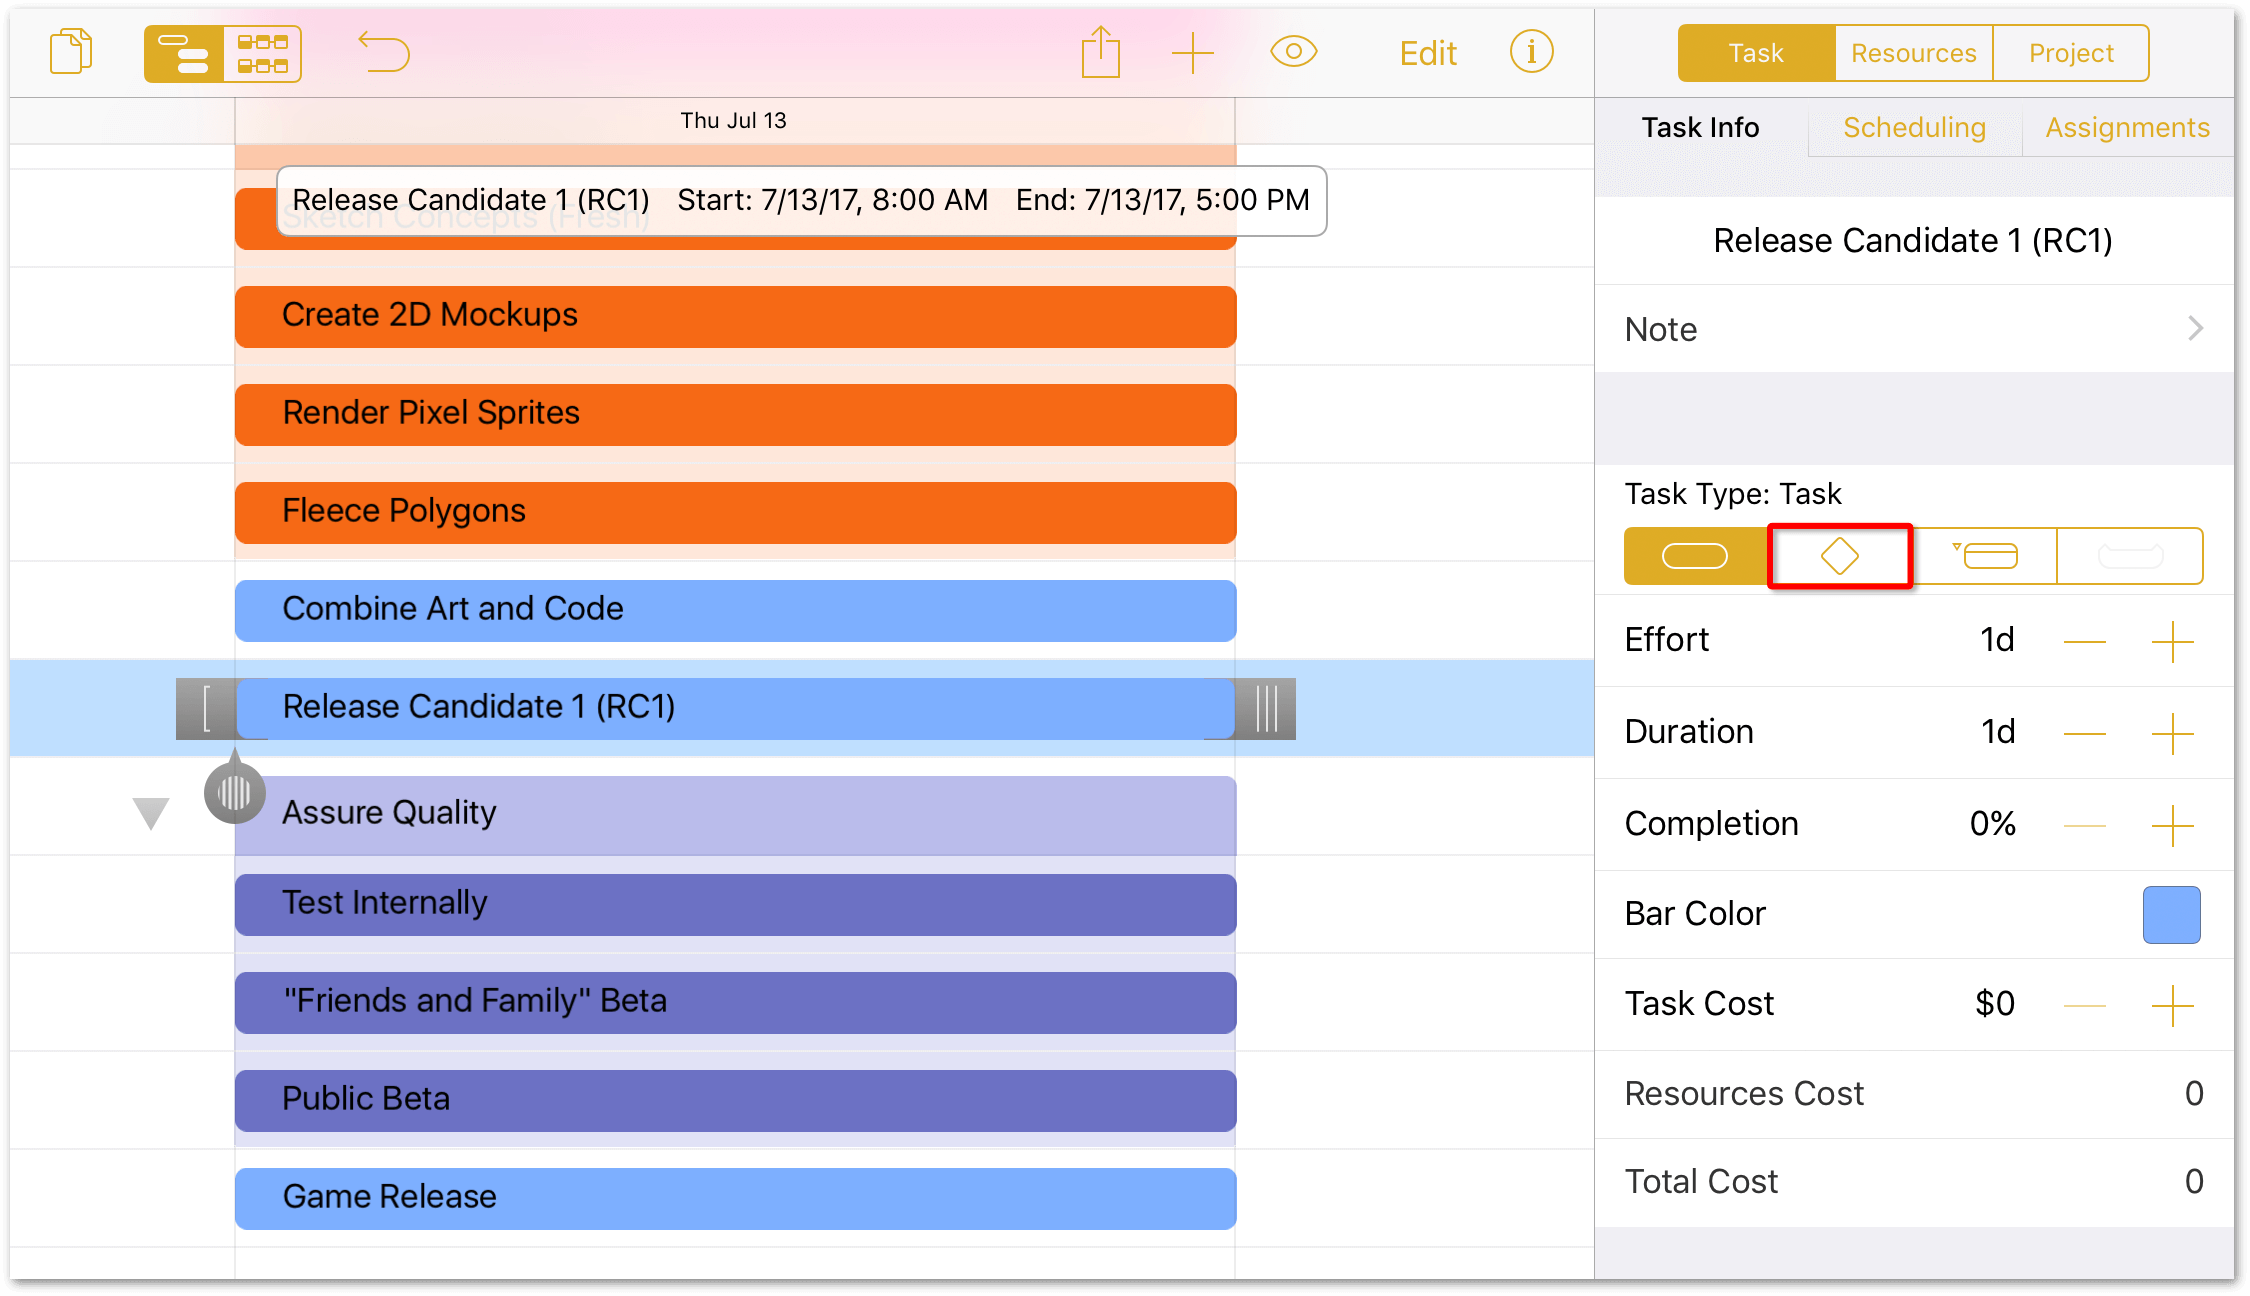
-
In the Task Info tab of the Task inspector, change the Task Type to a milestone by tapping the Milestone button:
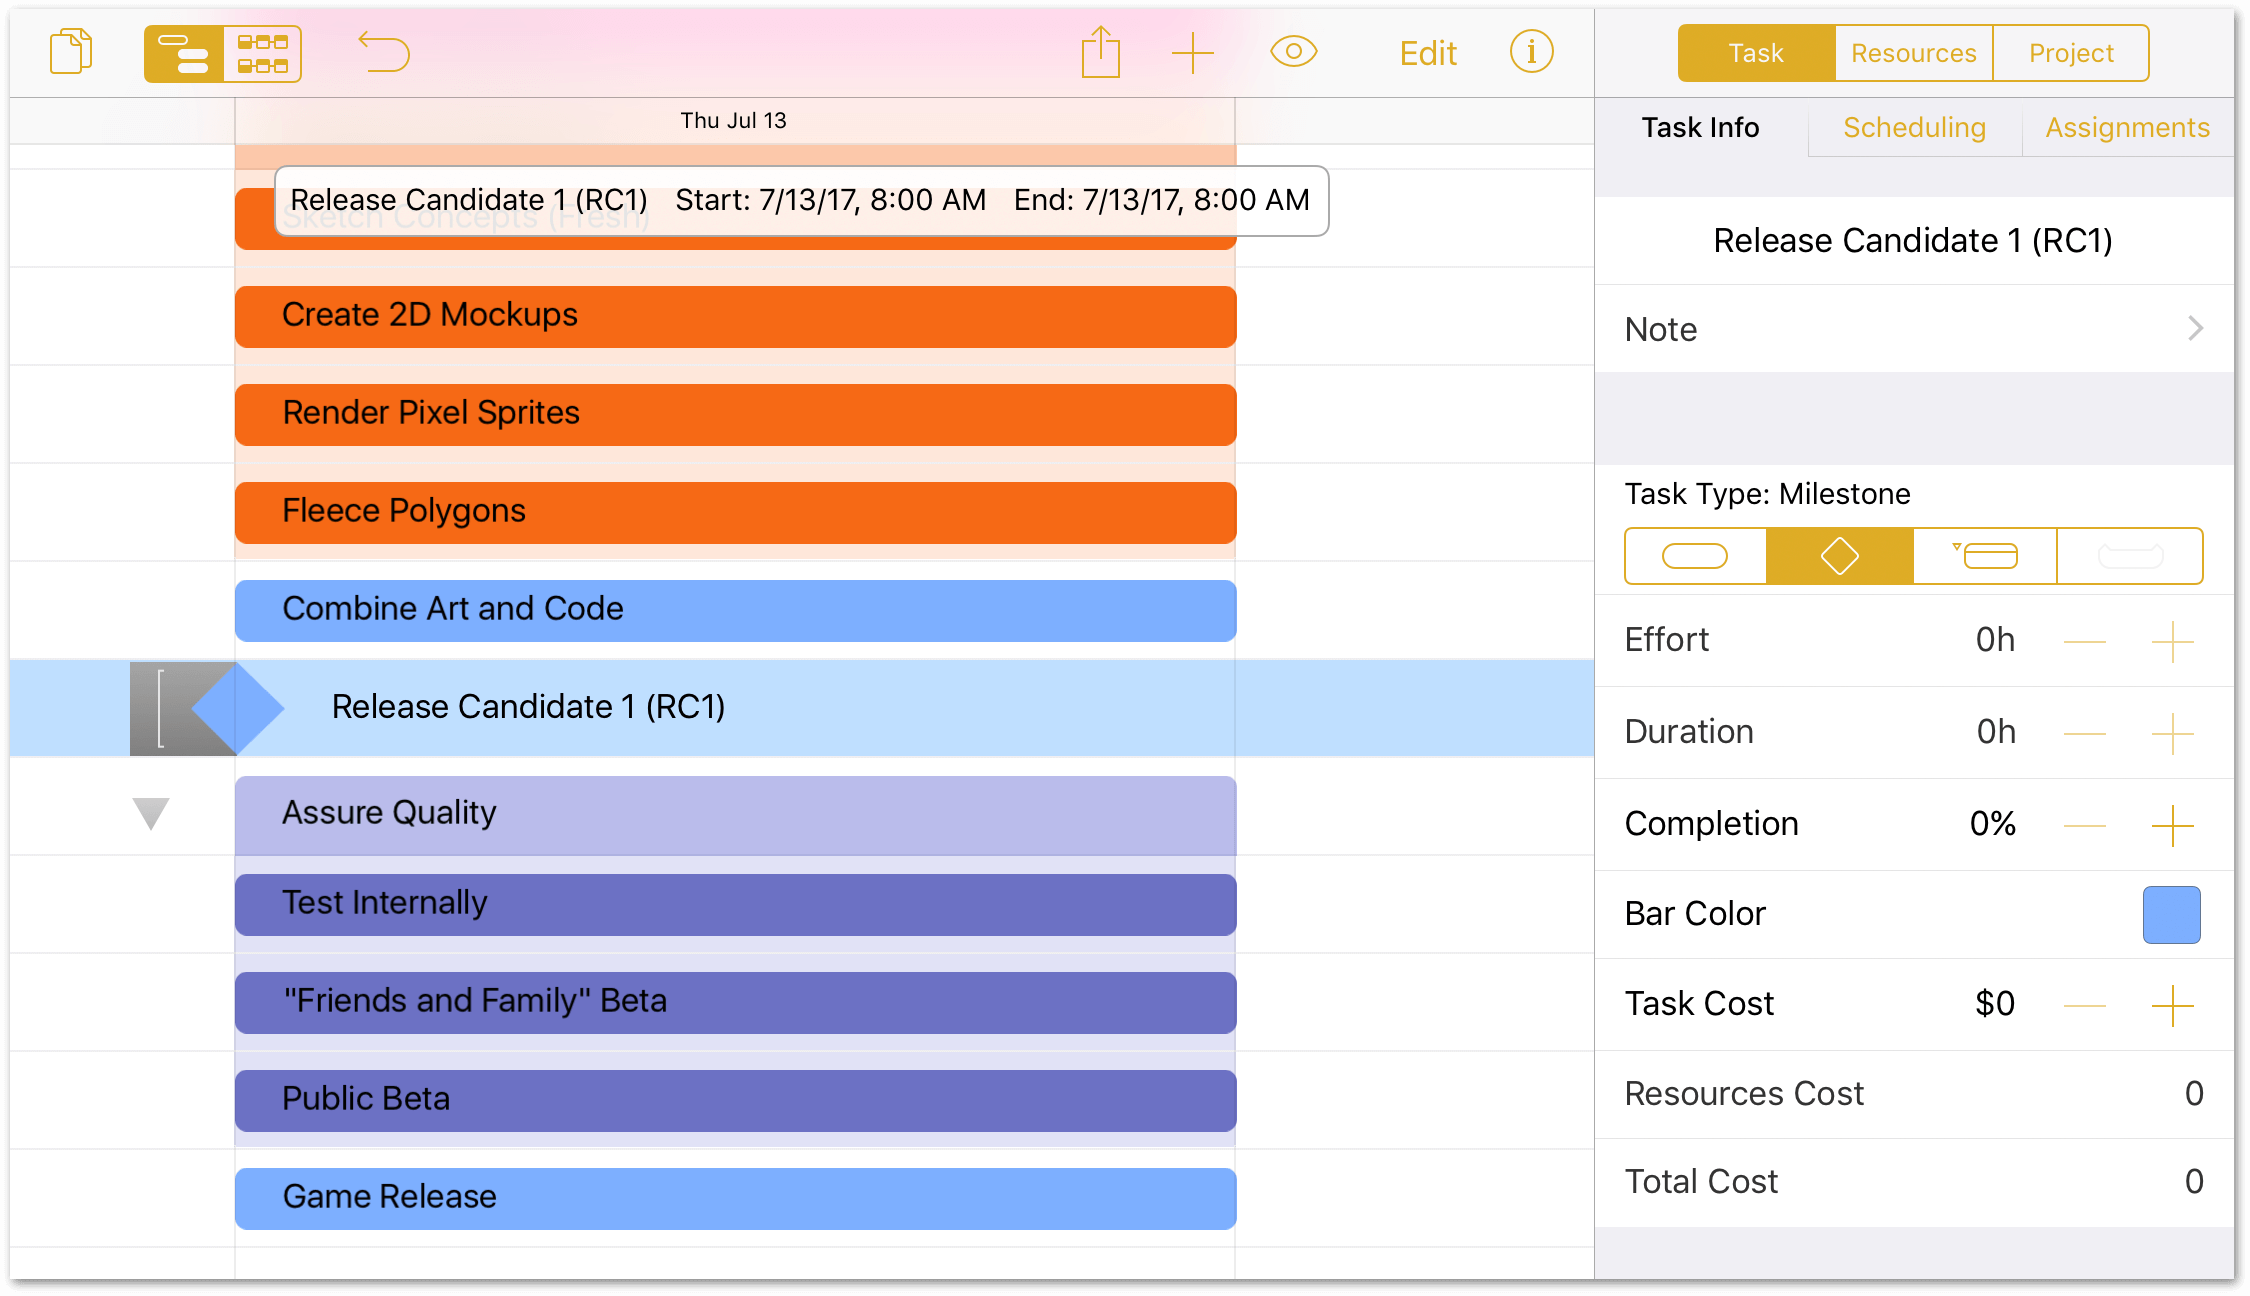
-
Repeat the previous two steps, and convert the Game Release task into a Milestone:
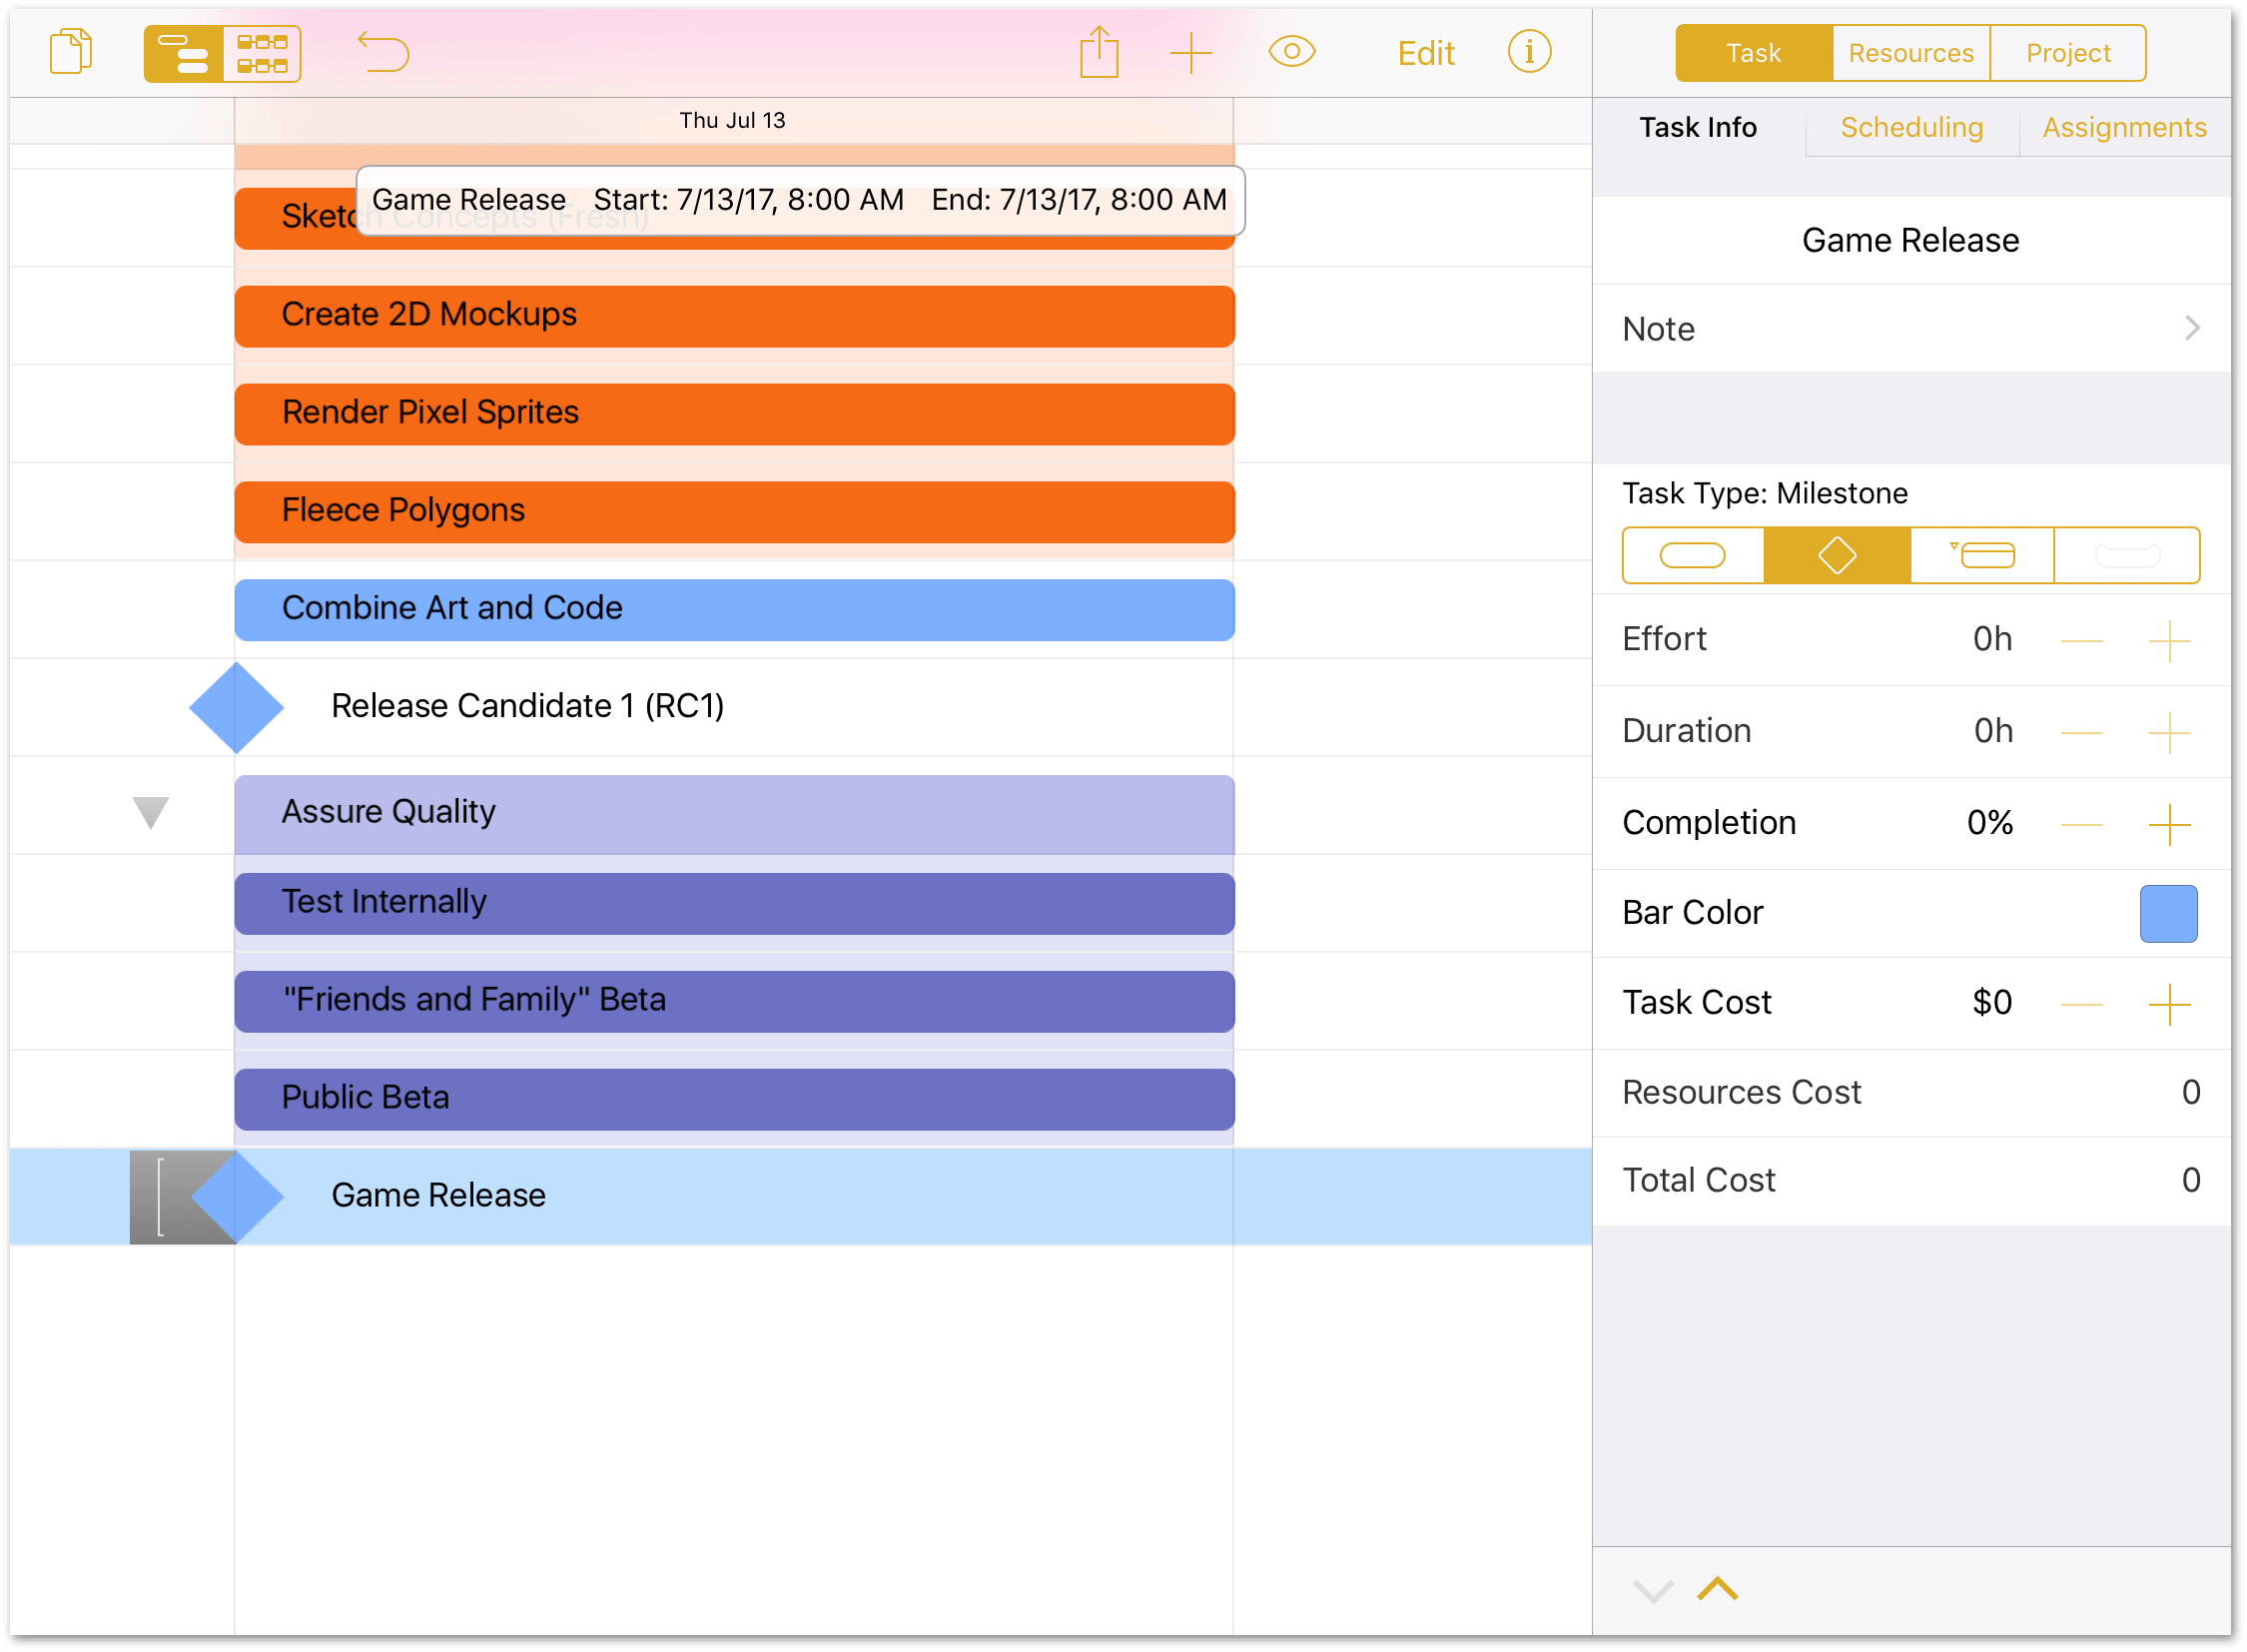
When you convert a task to a milestone, you’ll see that its Effort and Duration fields in the Task inspector have been set to 0h. Unlike the tasks assigned to a milestone, milestones themselves don’t take any time to complete—they are the culmination of the work that went into hitting that milestone.
Step 6: Setting Task Durations
With the tasks grouped and milestones set, you can now focus on detailing the amount of time required to accomplish each task.
When you initially entered the tasks for The Game Plan project, the Duration of each task was set to 1d, or one day. As with any project, some tasks will take less time than others, and some could span days or weeks depending on their complexity.
When you enter task durations, a special Duration Keyboard appears. This keyboard facilitates date and duration entry, so let’s take a moment to examine the keyboard before you embark on entering durations for all of the tasks.
Using the Duration Keyboard
When entering the duration in the Task inspector, you’ll notice that tapping the duration value brings up a special Duration Keyboard, with a row of buttons for selecting the following duration types:
- y for years
- mo for months
- w for weeks
- d for days
- h for hours
- m for minutes
- s for seconds

To use the number pad, do the following:
- Start by tapping clear; this clears any durations that may already exist for that task.
- In the top row, tap one of the buttons; for example, d if you need to specify the number of days a task should take.
- Then, tap the appropriate number.
If a task, such as the Refine Game Concepts task, has a mixed duration (1w 3d), do the following:
- Select the task.
- Tap the duration in the Task inspector to bring up the number pad.
- Tap clear.
- Tap w for weeks, and then press 1.
- Tap d for days, and then press 3.
- Tap done to close the number pad.
Use whichever method you prefer to extend the durations of the project’s tasks. However, please do give each a try, since there are huge benefits to using the numerical pad to enter a duration.
Enter Task Durations
Now that you know how to use the Duration Keyboard, let’s start by setting the duration of the Brainstorm Gameplay task to two days, rather than the default of one day:
- Tap to select the Brainstorm Gameplay task:
-
Drag the task’s right handle to the right, stopping at the 2d duration.
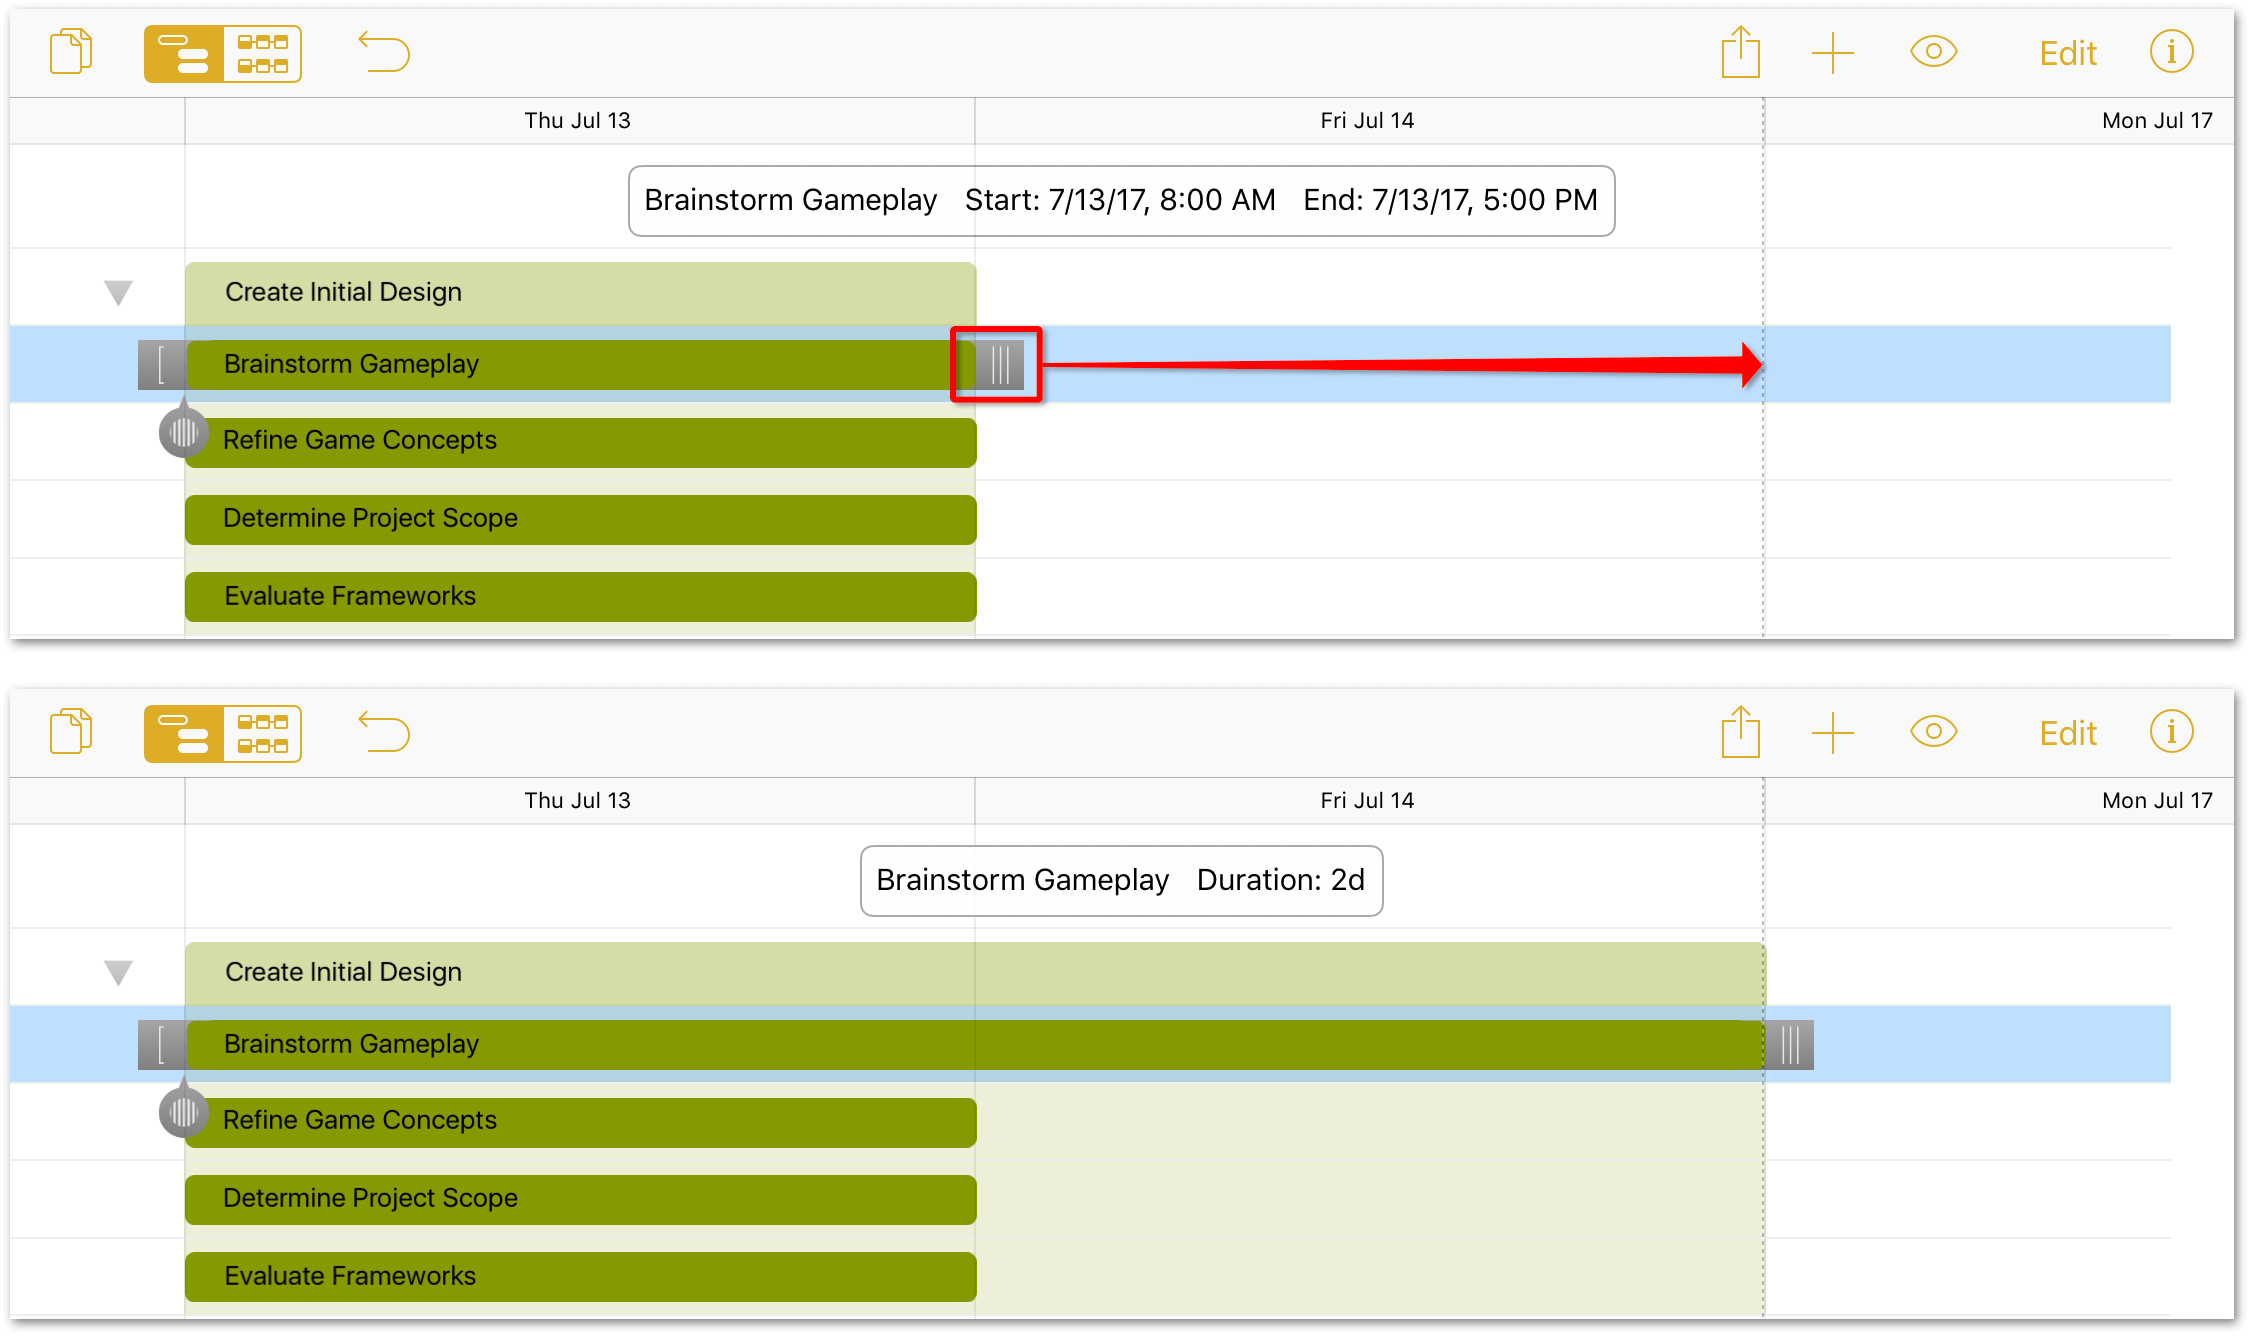
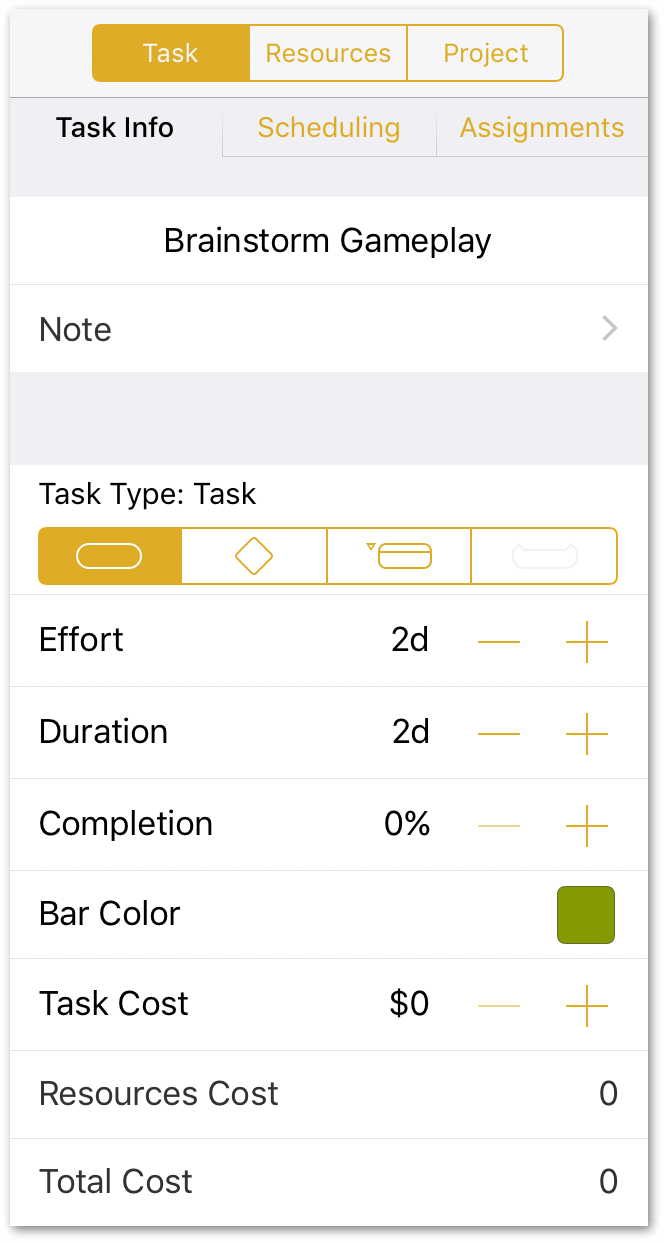
If you examine the task in the Task inspector, you’ll see that both the Effort and Duration are set to 2d:
Using either the drag method, or the Task inspector, set the Duration for the remaining tasks as follows:
- Refine Game Concepts: 1w 3d
- Determine Project Scope: 3d
- Evaluate Frameworks: 1w 2d
- Project Pitch: 1d
- Configure Middleware: 1w 3d
- Build Software Physics Simulator: 3w 3d
- Create UI Hookups: 2w
- Sketch Concepts (Fresh): 1w 3d
- Create 2D Mockups: 3w 3d
- Render Pixel Sprites: 2w
- Fleece Polygons: 1w 3d
- Combine Art and Code: 3w 3d
- Test Internally: 1w
- “Friends and Family” Beta: 1w
- Public Beta: 2w
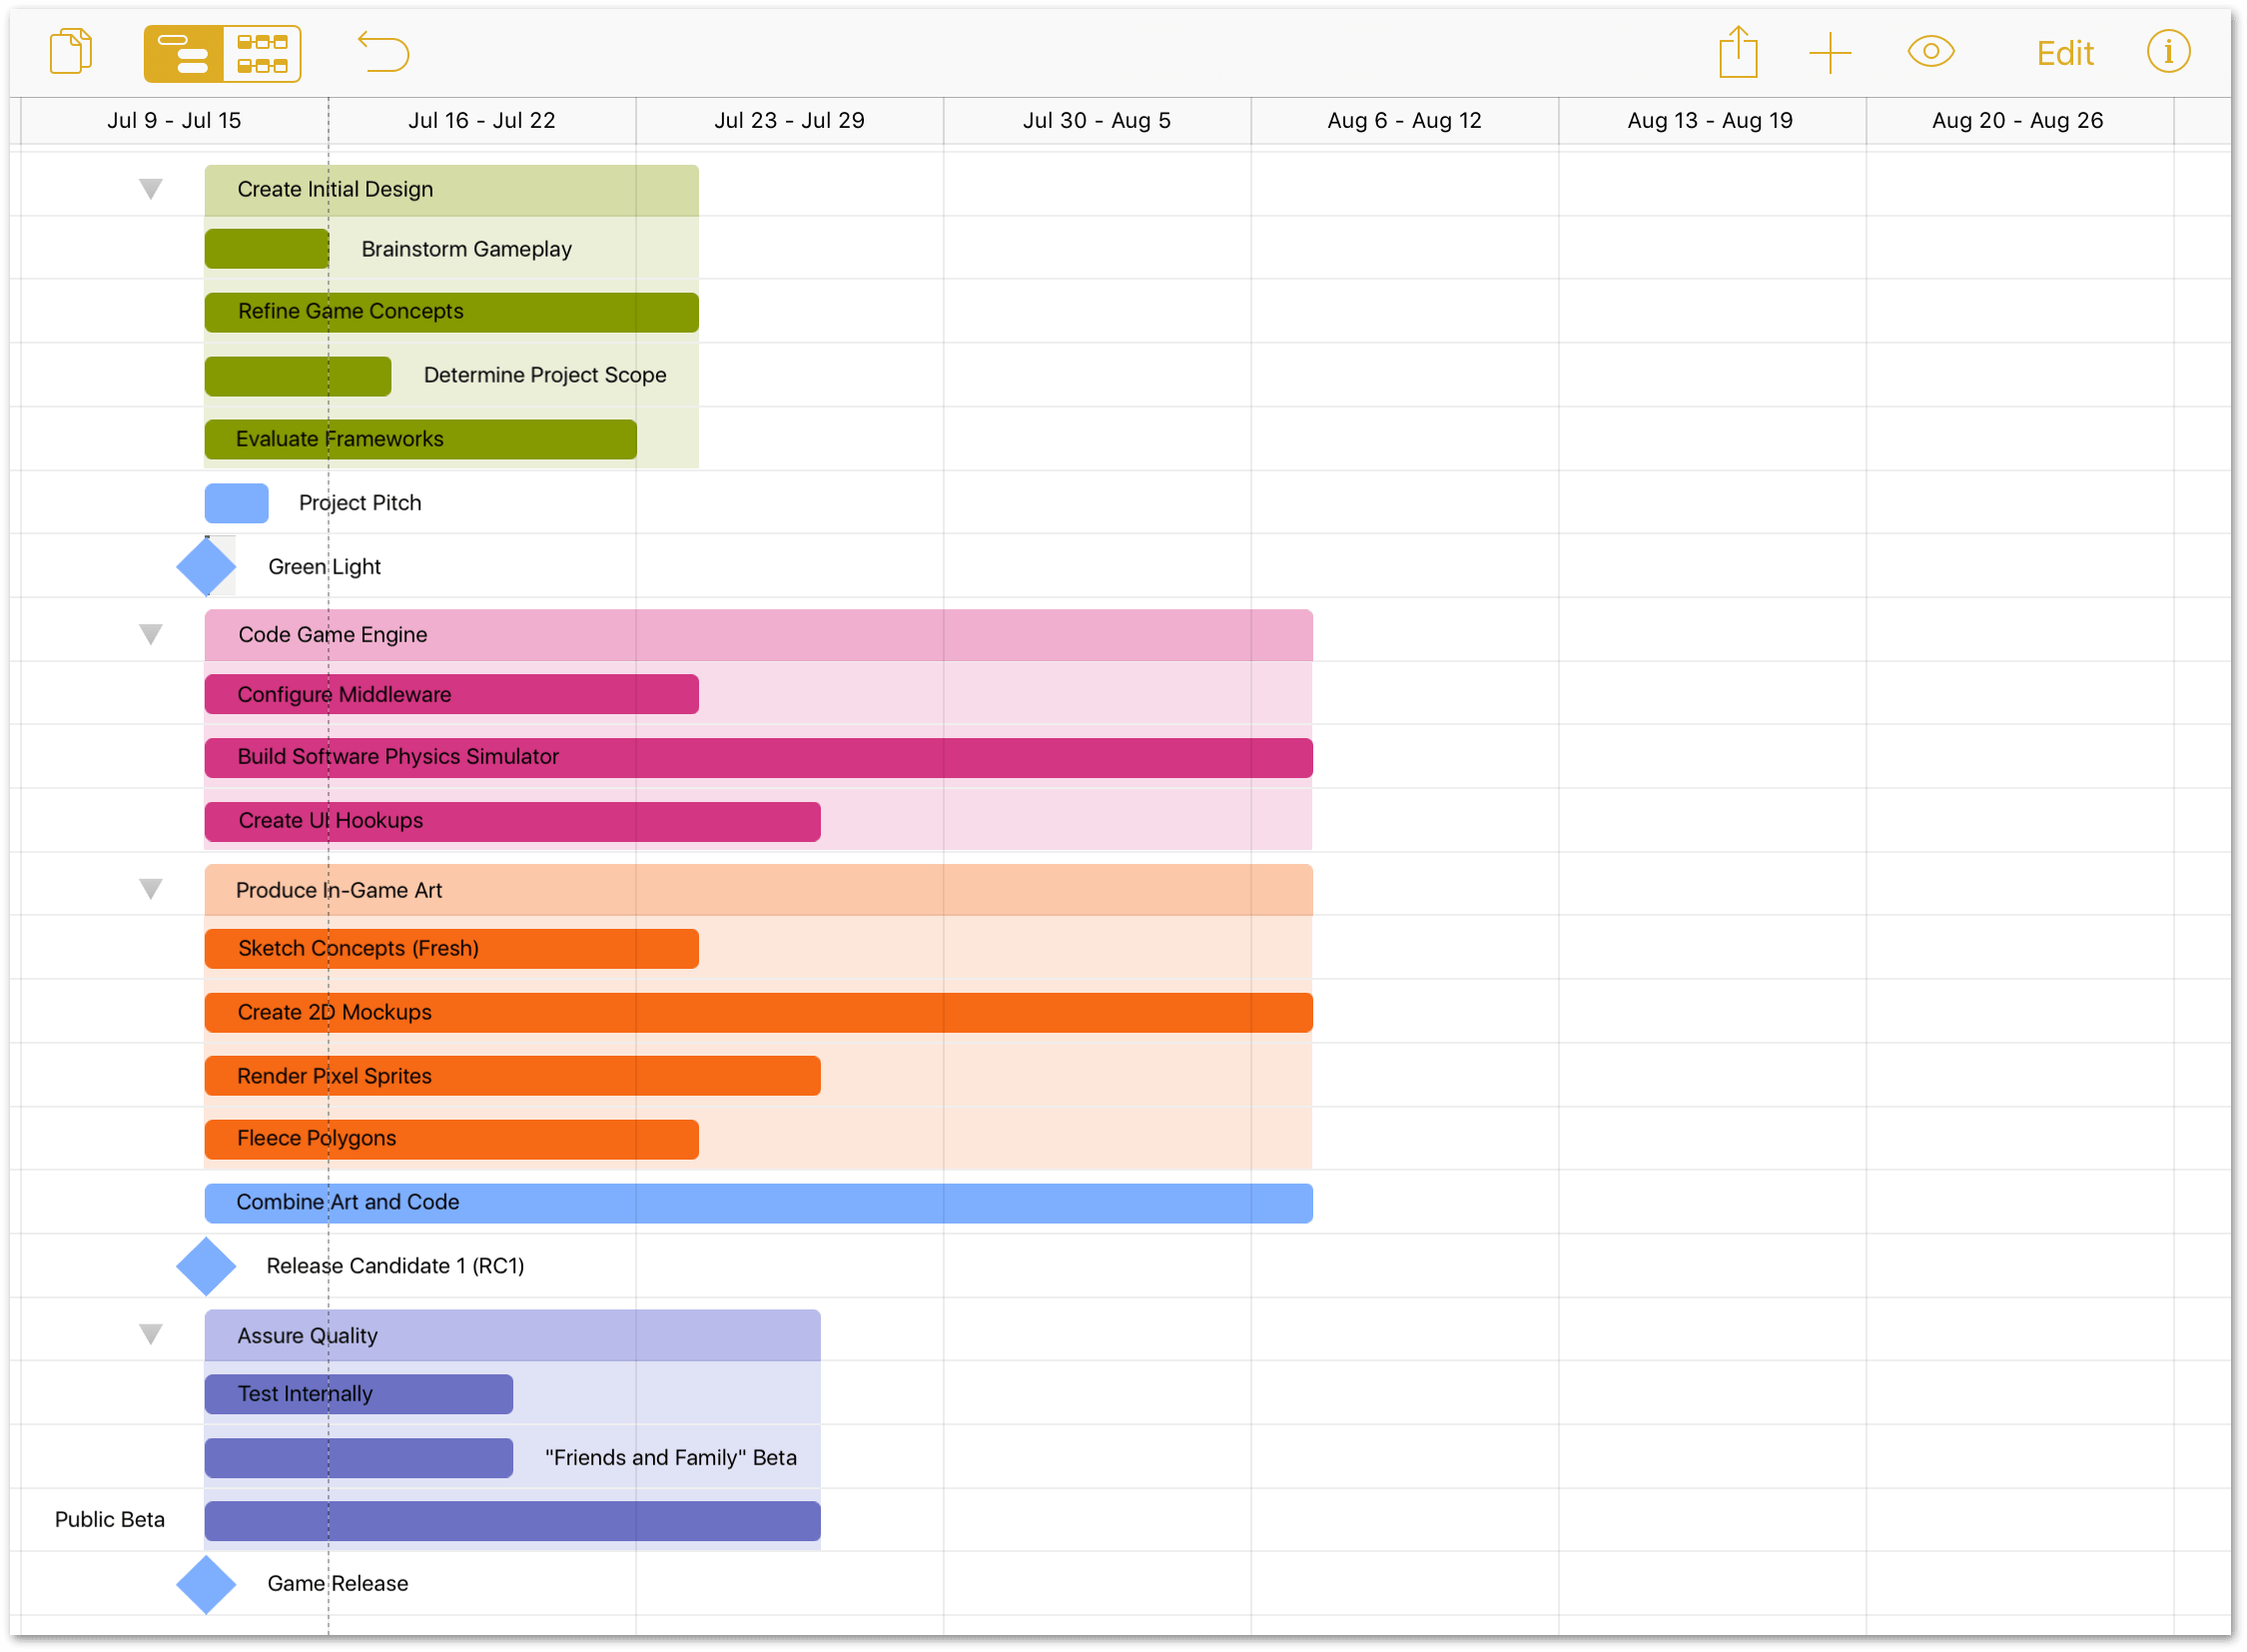
After you have finished setting the durations, your project should look similar to the following:
Step 7: Connecting Tasks with Dependency Lines
With the durations set for all of the tasks, one thing becomes exceptionally clear: your team cannot complete all of the tasks if they start at the same time. Even if you had all of the resources to do so, some parts of the project can’t even begin until others have been completed.
Thankfully, all of the pieces are now in place to establish task dependencies. There are four ways that dependencies can exist:
- Finish-Start dependencies are the most common; these tasks rely on a task to finish before the next can begin. For example, when Task A finishes, Task B can start.
- Start-Finish dependencies indicate that when Task A starts, Task B can finish.
- Start-Start dependencies indicate that when both Task A and Task B can start at the same time.
- Finish-Finish dependencies indicate that when Task A and Task B need to finish at the same time.
To set up a dependency between two tasks, do the following:
-
Tap to select the Brainstorm Gameplay task. When the task is selected, OmniPlan places dependency arrows at either side of the task bar:
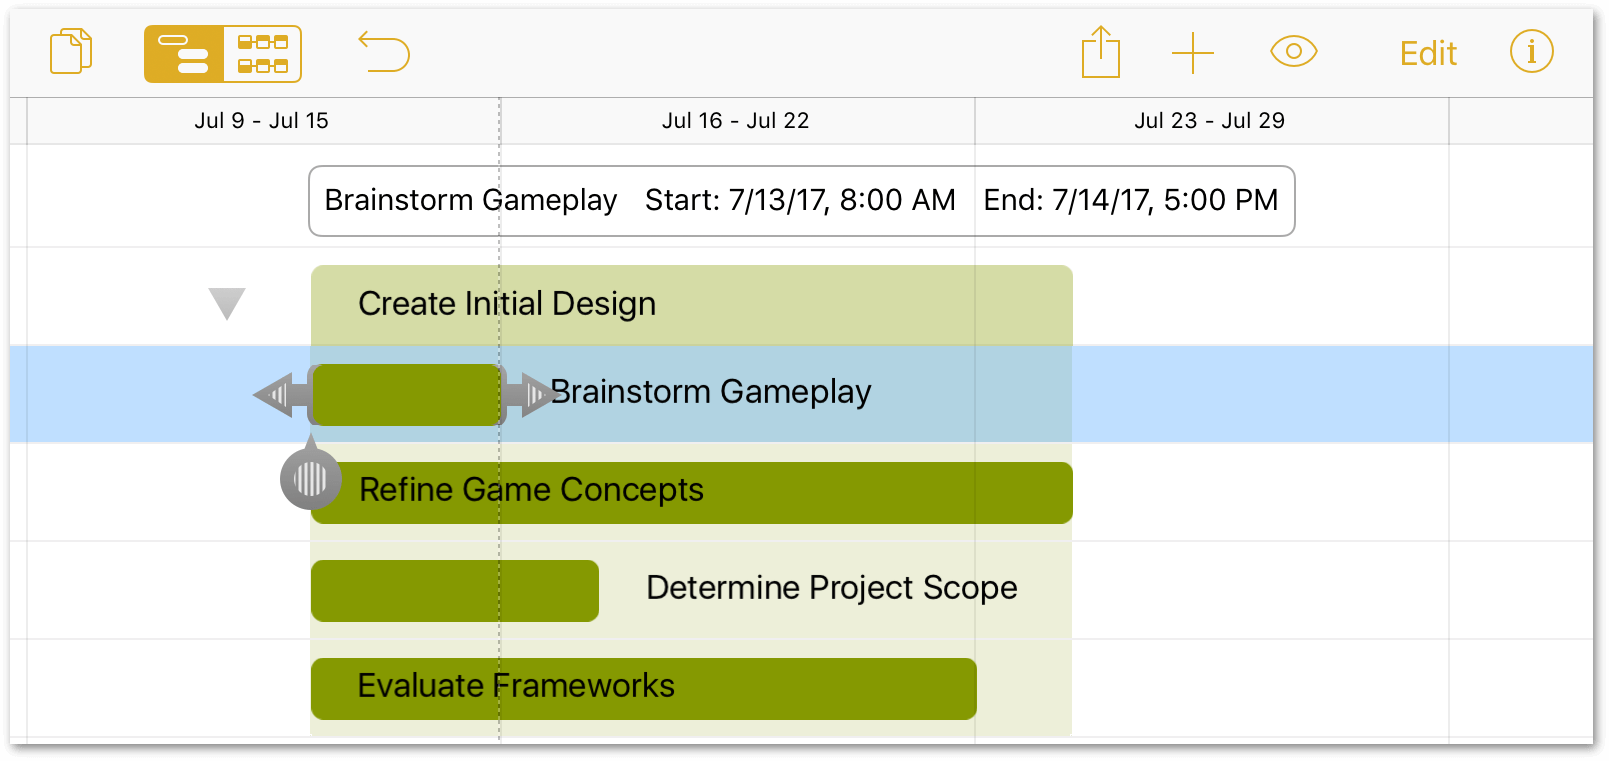
-
Drag the right task arrow to the beginning of the Refine Game Concepts task:
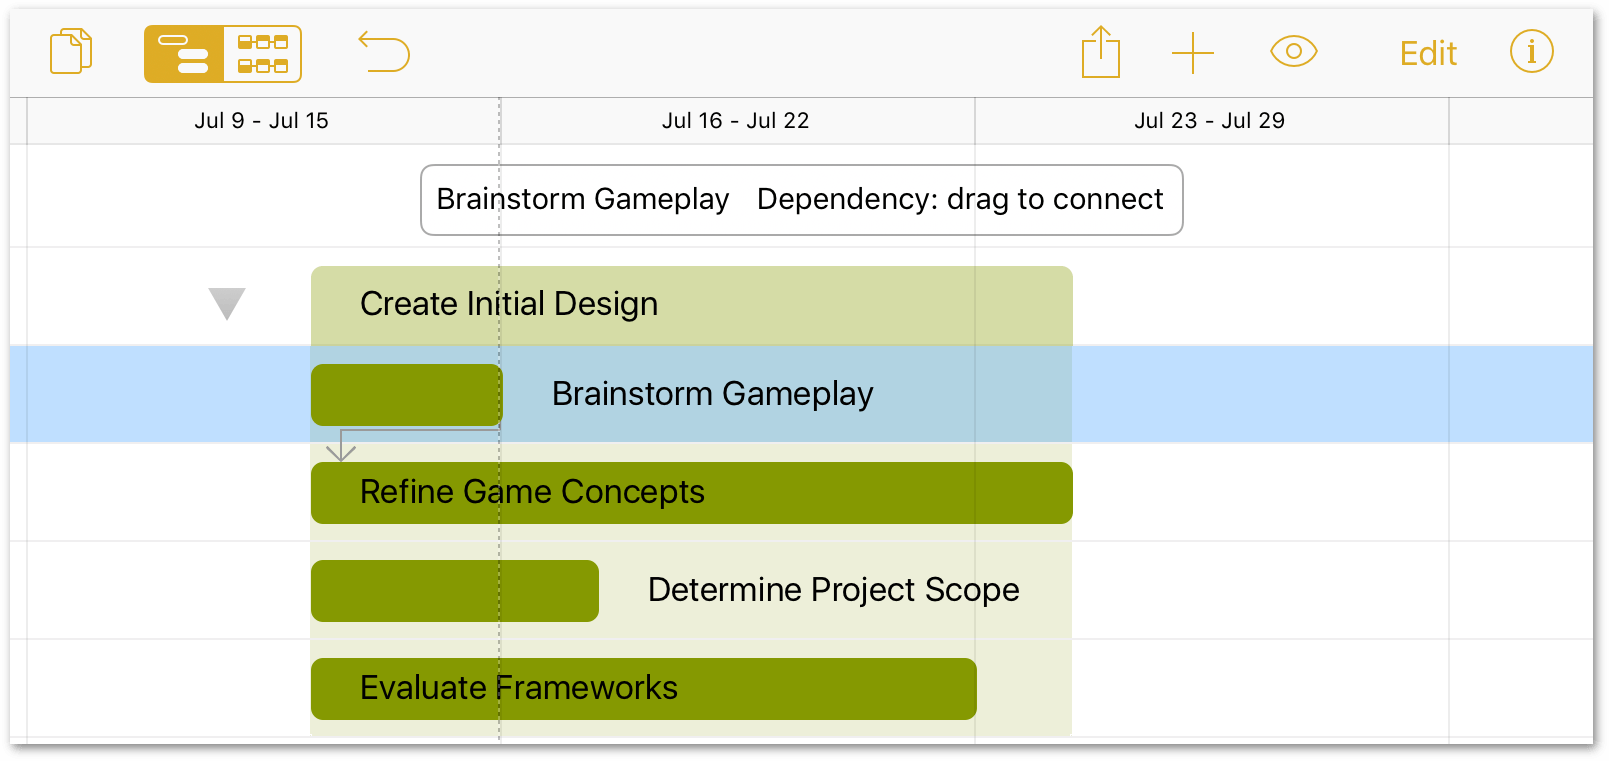
-
After dragging the dependency arrow, you’ll notice that Refine Game Concepts has shifted over in the timeline to indicate that its work cannot start until the work of the previous task (Brainstorm Gameplay) has finished:
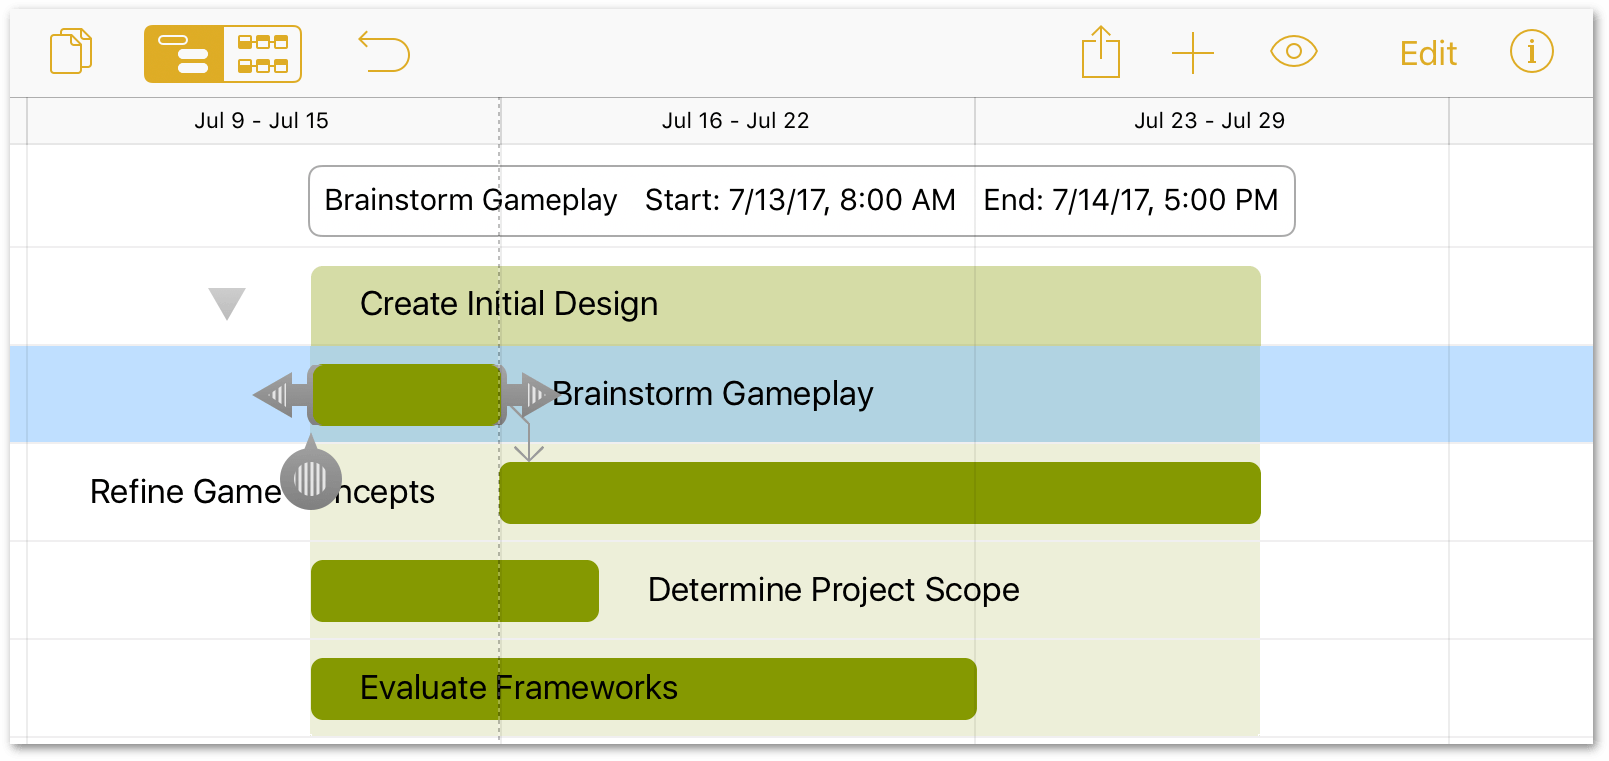
Dragging the dependency arrow from the completion of one task to the beginning of another creates a Finish-Start dependency.
While in Edit mode, you can use the Connect/Disconnect button to add Finish-Start dependencies or remove dependencies between any number of selected tasks simultaneously.
Now, set up the remaining task dependencies as follows:
- Refine Game Concepts Finish-Start with Determine Project Scope
- Determine Project Scope Start-Start with Evaluate Frameworks
- Evaluate Frameworks Finish-Start with Project Pitch
- Project Pitch Finish-Start with Green Light milestone
- Green Light milestone Start-Start with Code Game Engine and Produce In-Game Art
- Configure Middleware Start-Start with Build Software Physics Simulator
- Build Software Physics Simulator Finish-Start with Create UI Hookups
- Sketch Concepts (Fresh) Finish-Start with Create 2D Mockups
- Create 2D Mockups Finish-Start with Render Pixel Sprites
- Render Pixel Sprites Start-Start with Fleece Polygons
- Code Game Engine and Produce In-Game Art Finish-Start with Combine Art and Code
- Combine Art and Code Finish-Start with Release Candidate 1 (RC1) milestone
- Release Candidate 1 (RC1) Start-Start with Assure Quality
- Test Internally Finish-Start with “Friends and Family” beta
- “Friends and Family” Beta Finish-Start with Public Beta
- Public Beta Finish-Start with Game Release milestone
Once all of the connections are made, your project should look similar to the following:
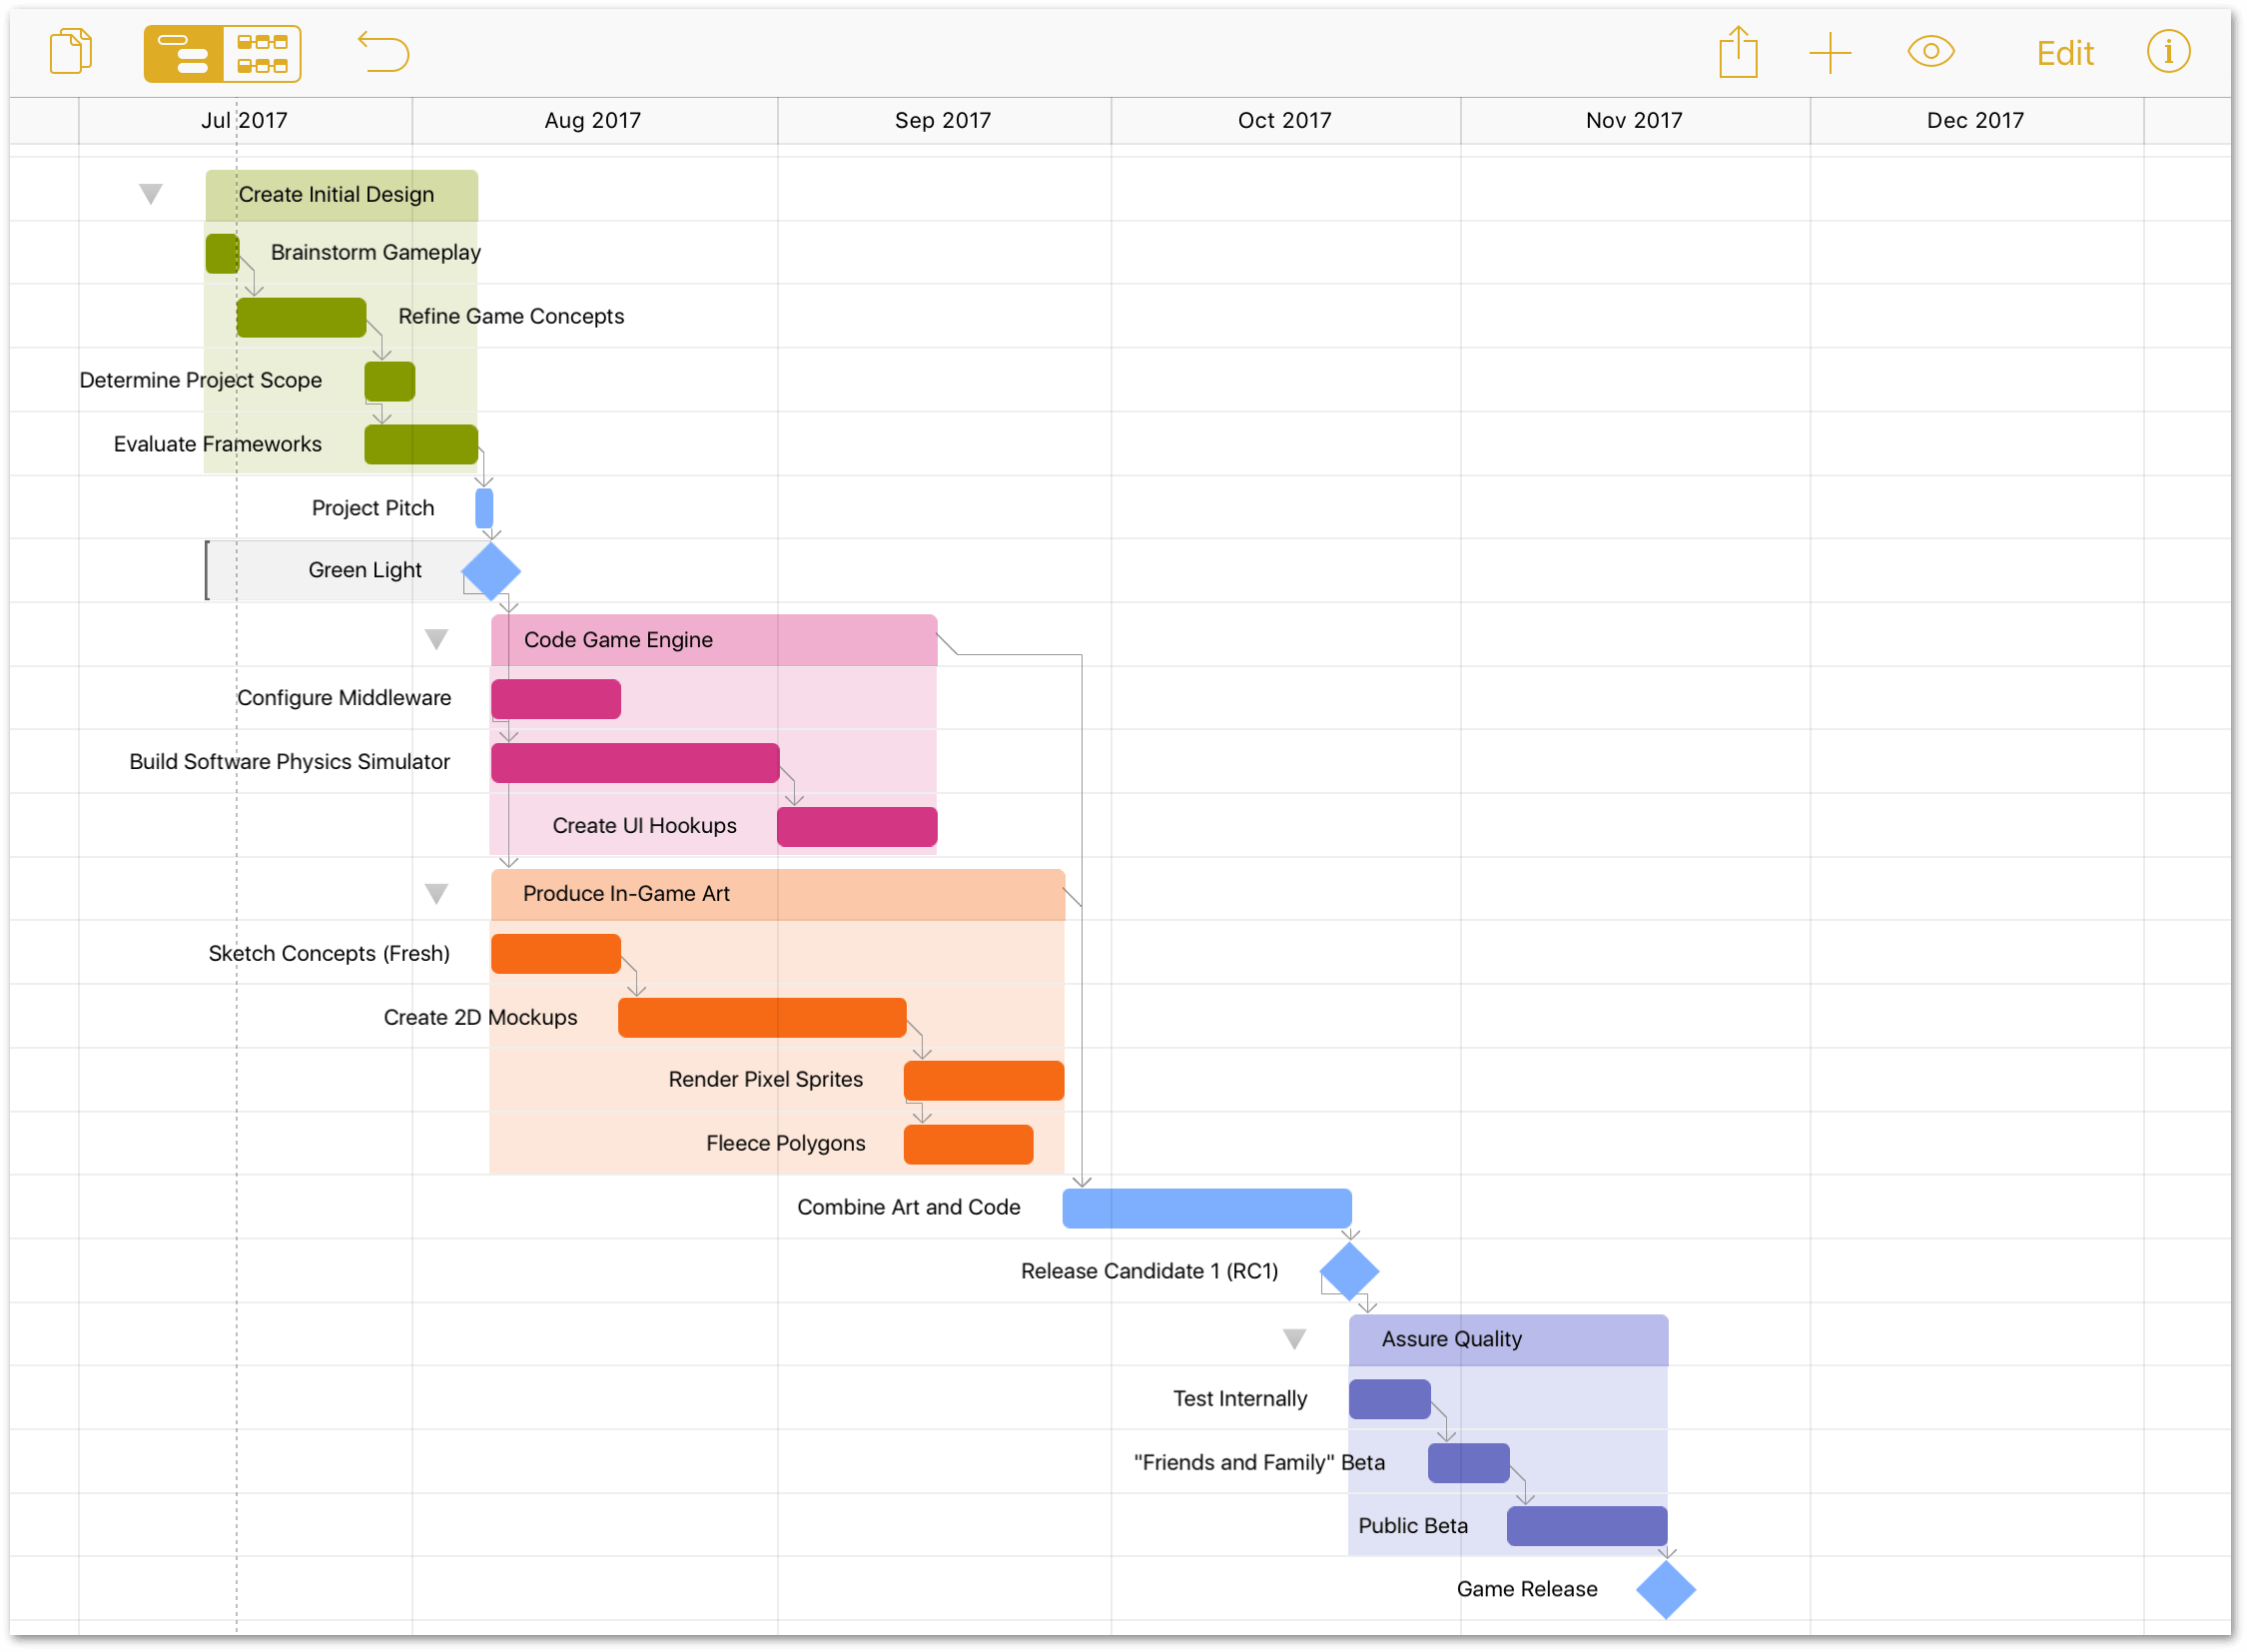
As you can see, the project is really starting to take shape. However, as the project manager, it’s not quite time to assign resources to the tasks. The next few steps take care of a little bit of project housekeeping.
Step 8: Creating Hammock Tasks
In the life of a project, there are certain tasks whose duration is dependent on both when the previous task ends and when the next task can start. These tasks, known as Hammock Tasks, are useful when your project faces a hard deadline.
Hammock tasks can help you decide which tasks can be compressed if the project is running behind schedule, or if there are any external factors that influence when parts of the project must happen.
Now that all of the tasks in The Game Plan project have their dependencies set, you can see (roughly) how long the project should take to hit the final milestone, Game Release. As it just so happens, the Game Release milestone falls a few weeks short of a major gaming conference, which gives the project a hard deadline for completion.
In reviewing the other parts of the project, the one task that seems the most flexible for converting into a Hammock task is the Public Beta. If additional time is needed for squashing bugs, the team can use some of the Public Beta time to do that work, while still ensuring the project releases on schedule.
In Step 7, the Game Release task received a Finish-to-Start prerequisite from the Public Beta task. However, the Game Release milestone needs to start when the Public Beta finishes. So, the first order of business is to remove the prerequisite from the Game Release task:
- Tap to select the Game Release milestone.
-
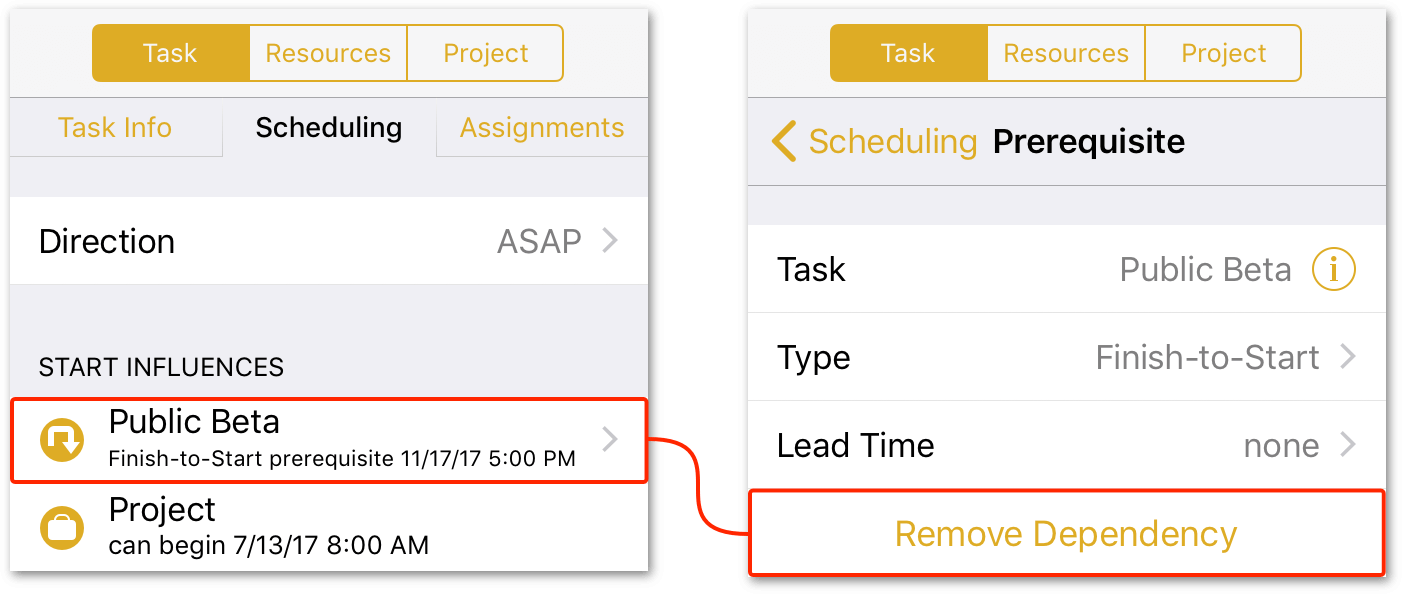
In the Scheduling tab of the Task inspector, tap the Public Beta prerequisite, and then tap Remove Dependency. This disassociates the Game Release milestone from the tasks in the Assure Quality group.
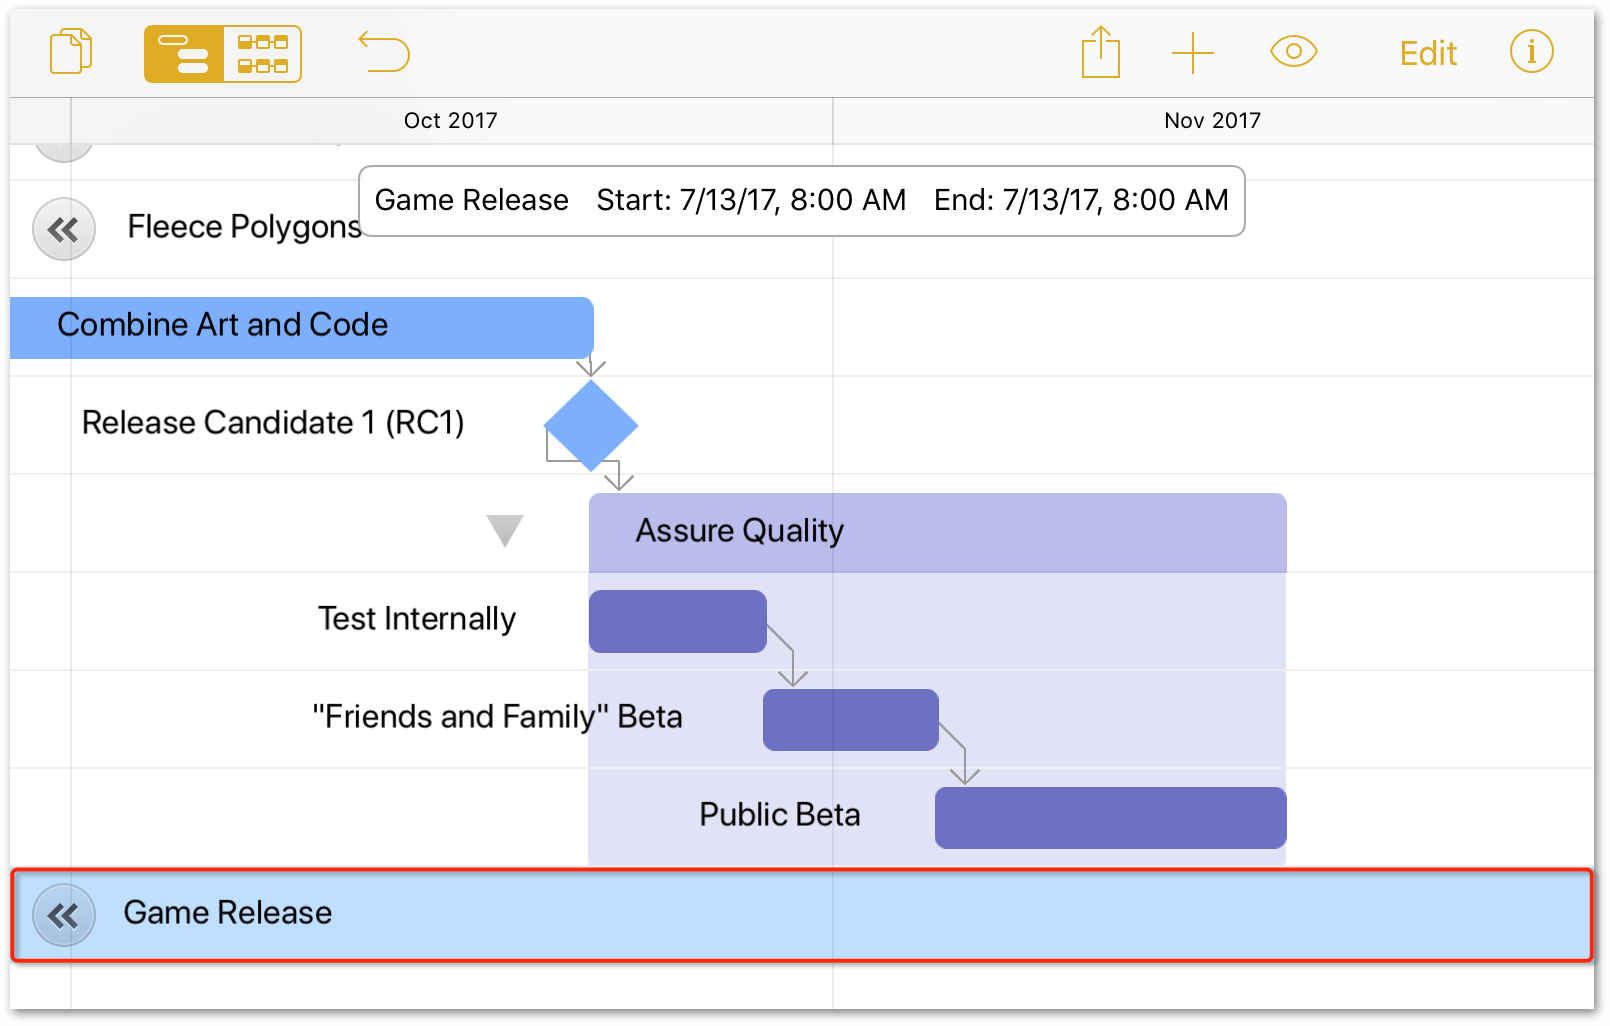
When you break the dependency between the Public Beta and Game Release tasks, you’ll notice that the Game Release milestone zips offscreen to the left. Don’t fret, the milestone is still there; you can tap
 along the left edge of the screen to be taken to the desired offscreen task:
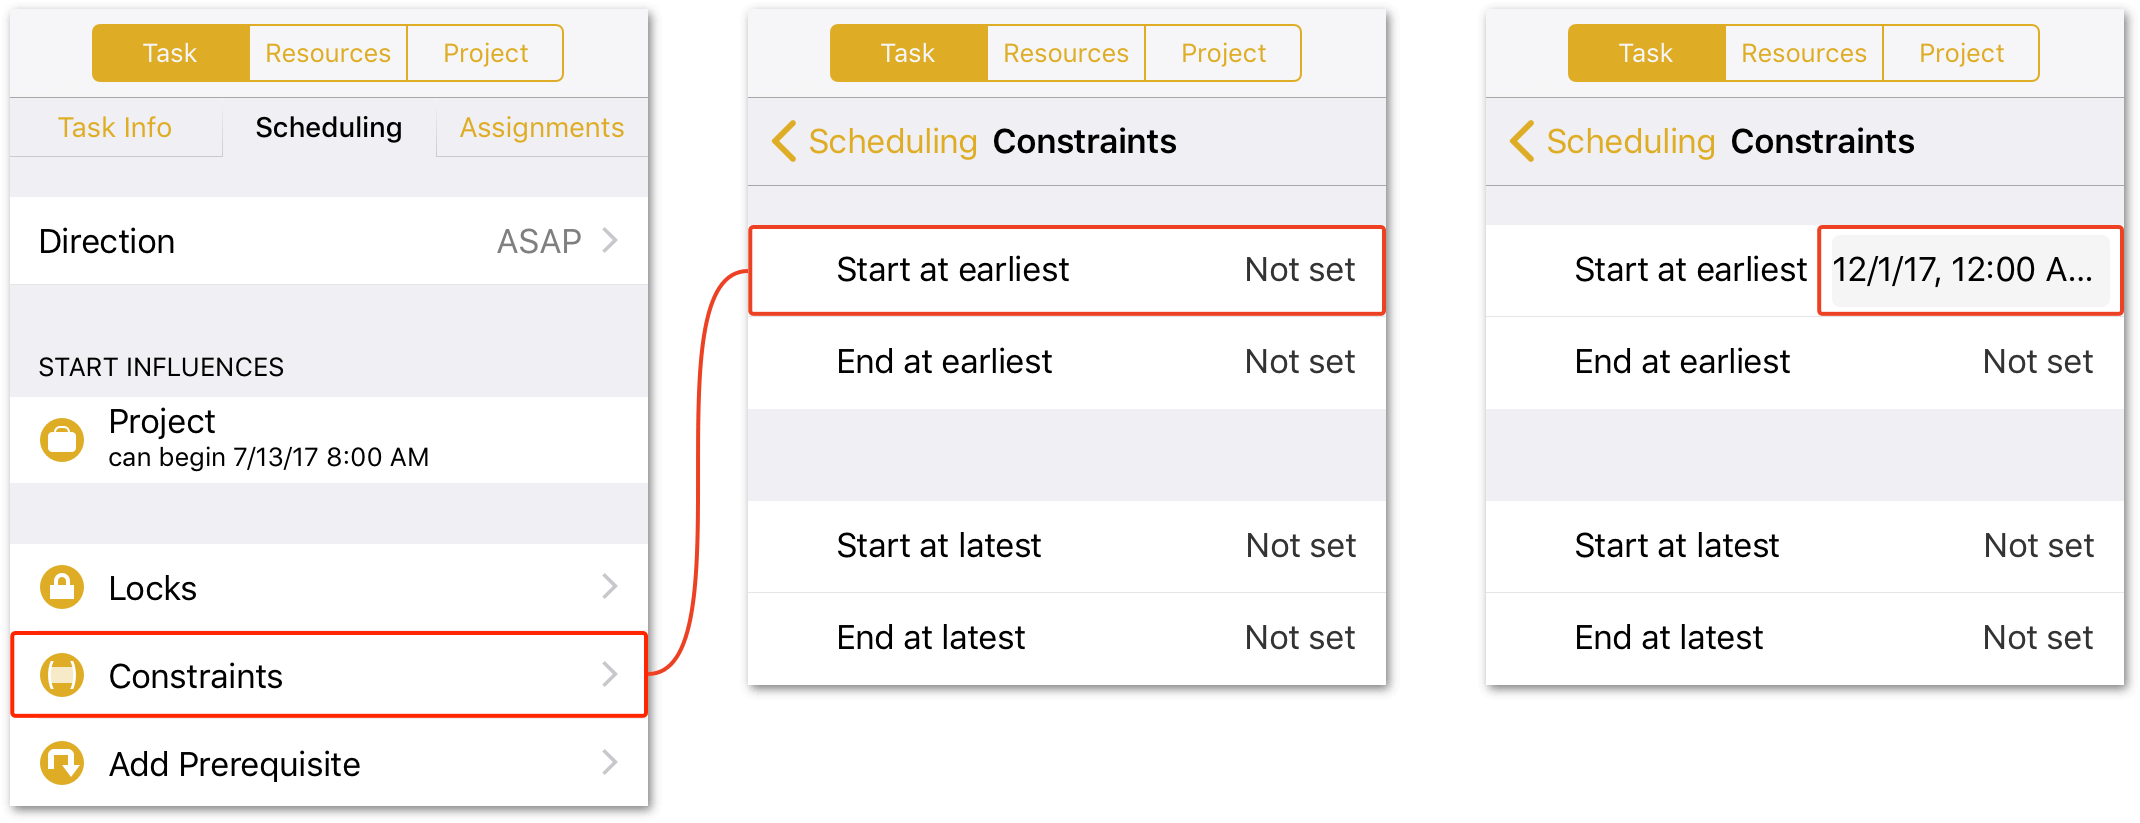
Next, you’ll need to set an implicit date for the Game Release.
-
In the Scheduling tab of the Task inspector, tap Constraints, tap Start at earliest, and then enter a date that is a week or two out from when the Public Beta is currently scheduled to wrap up.
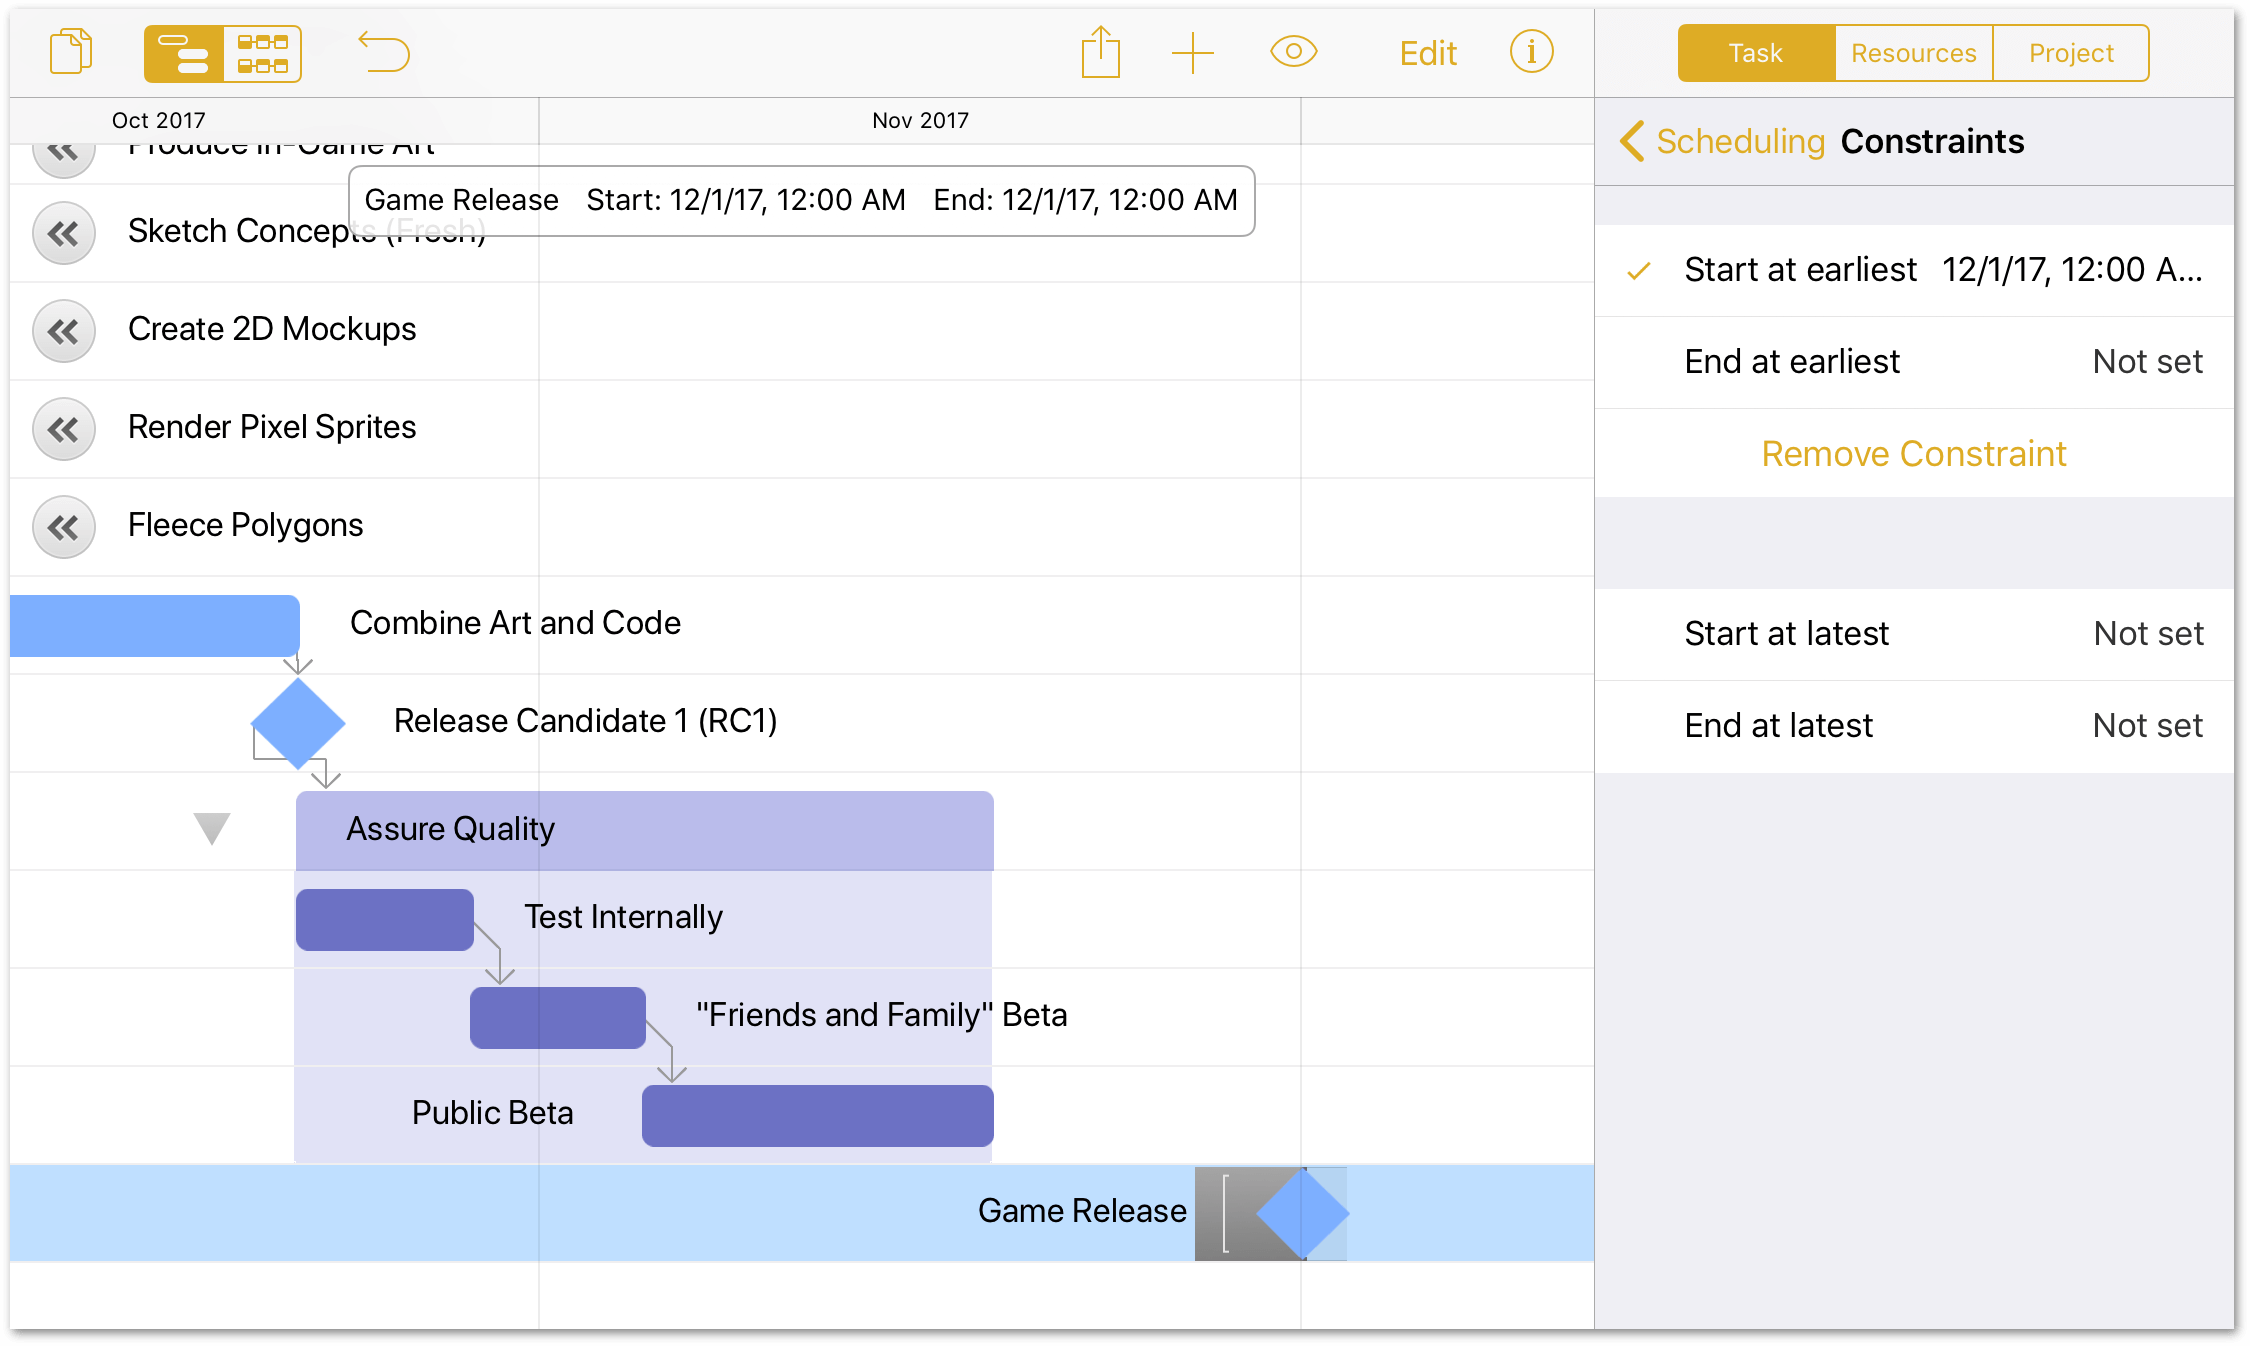
-
Drag the left dependency arrow from the Game Release milestone to the end of the Public Beta task:
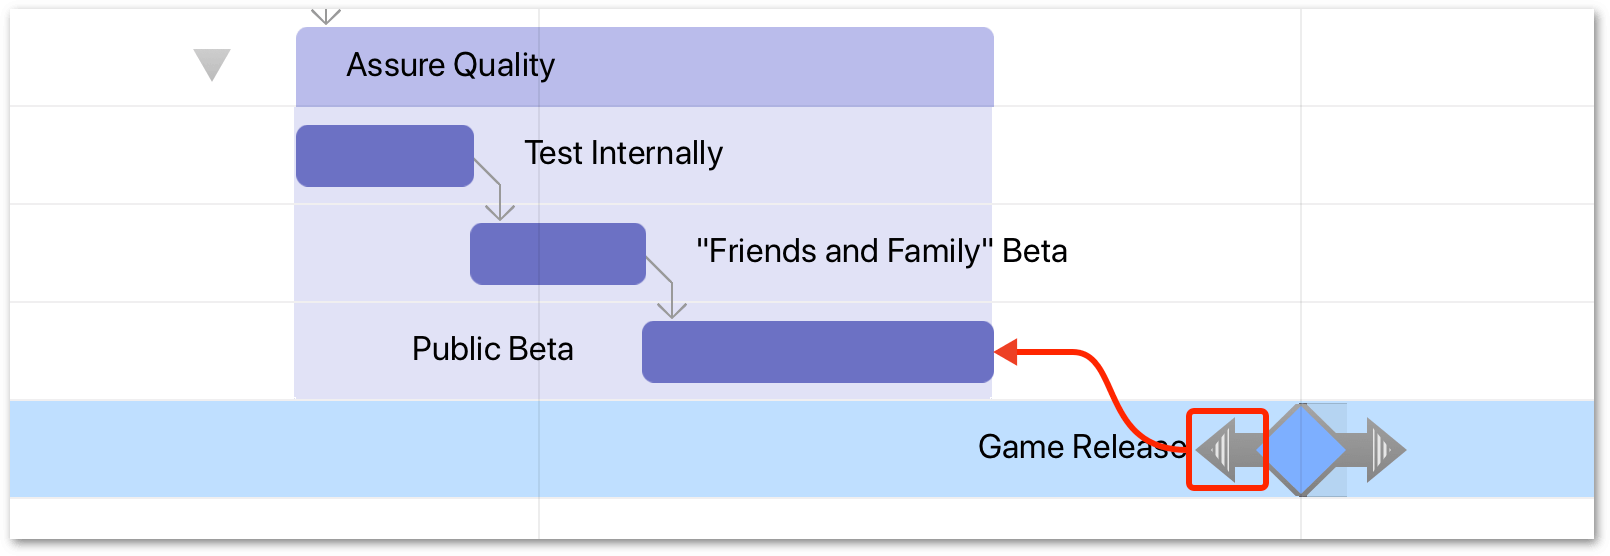
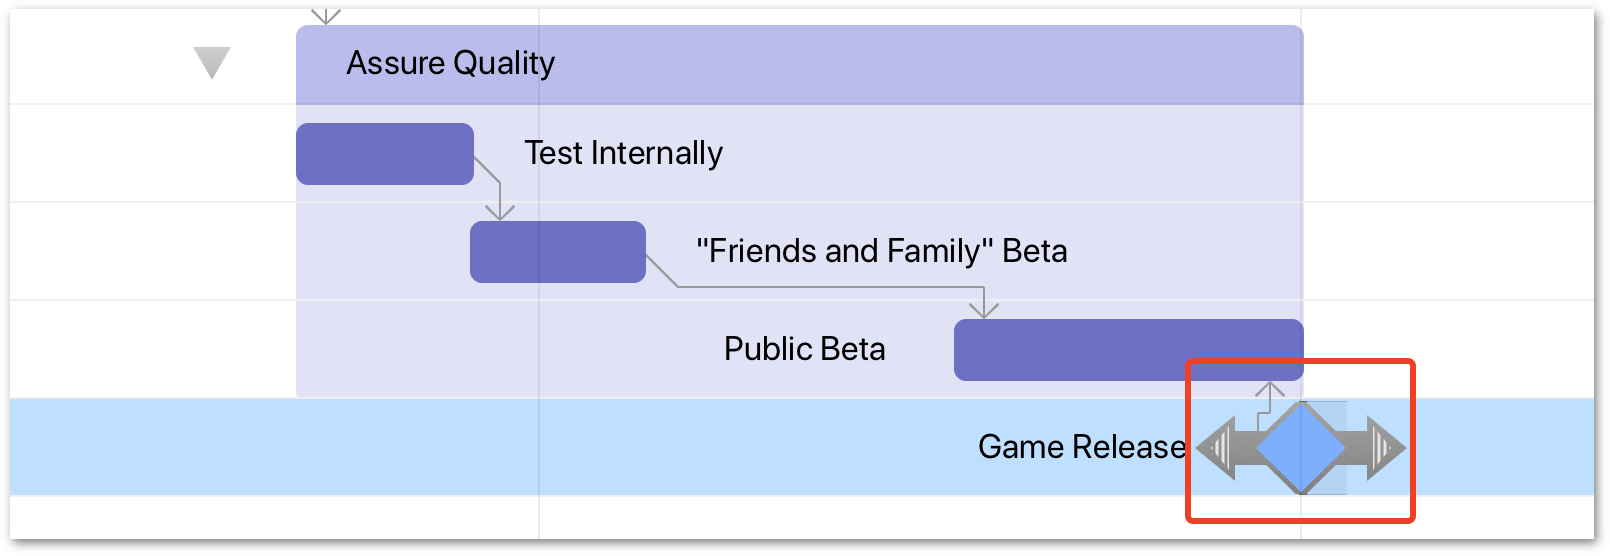
When you connect the Game Release milestone to the Public Beta task, notice that Public Beta slides over so it ends when Game Release starts:
-
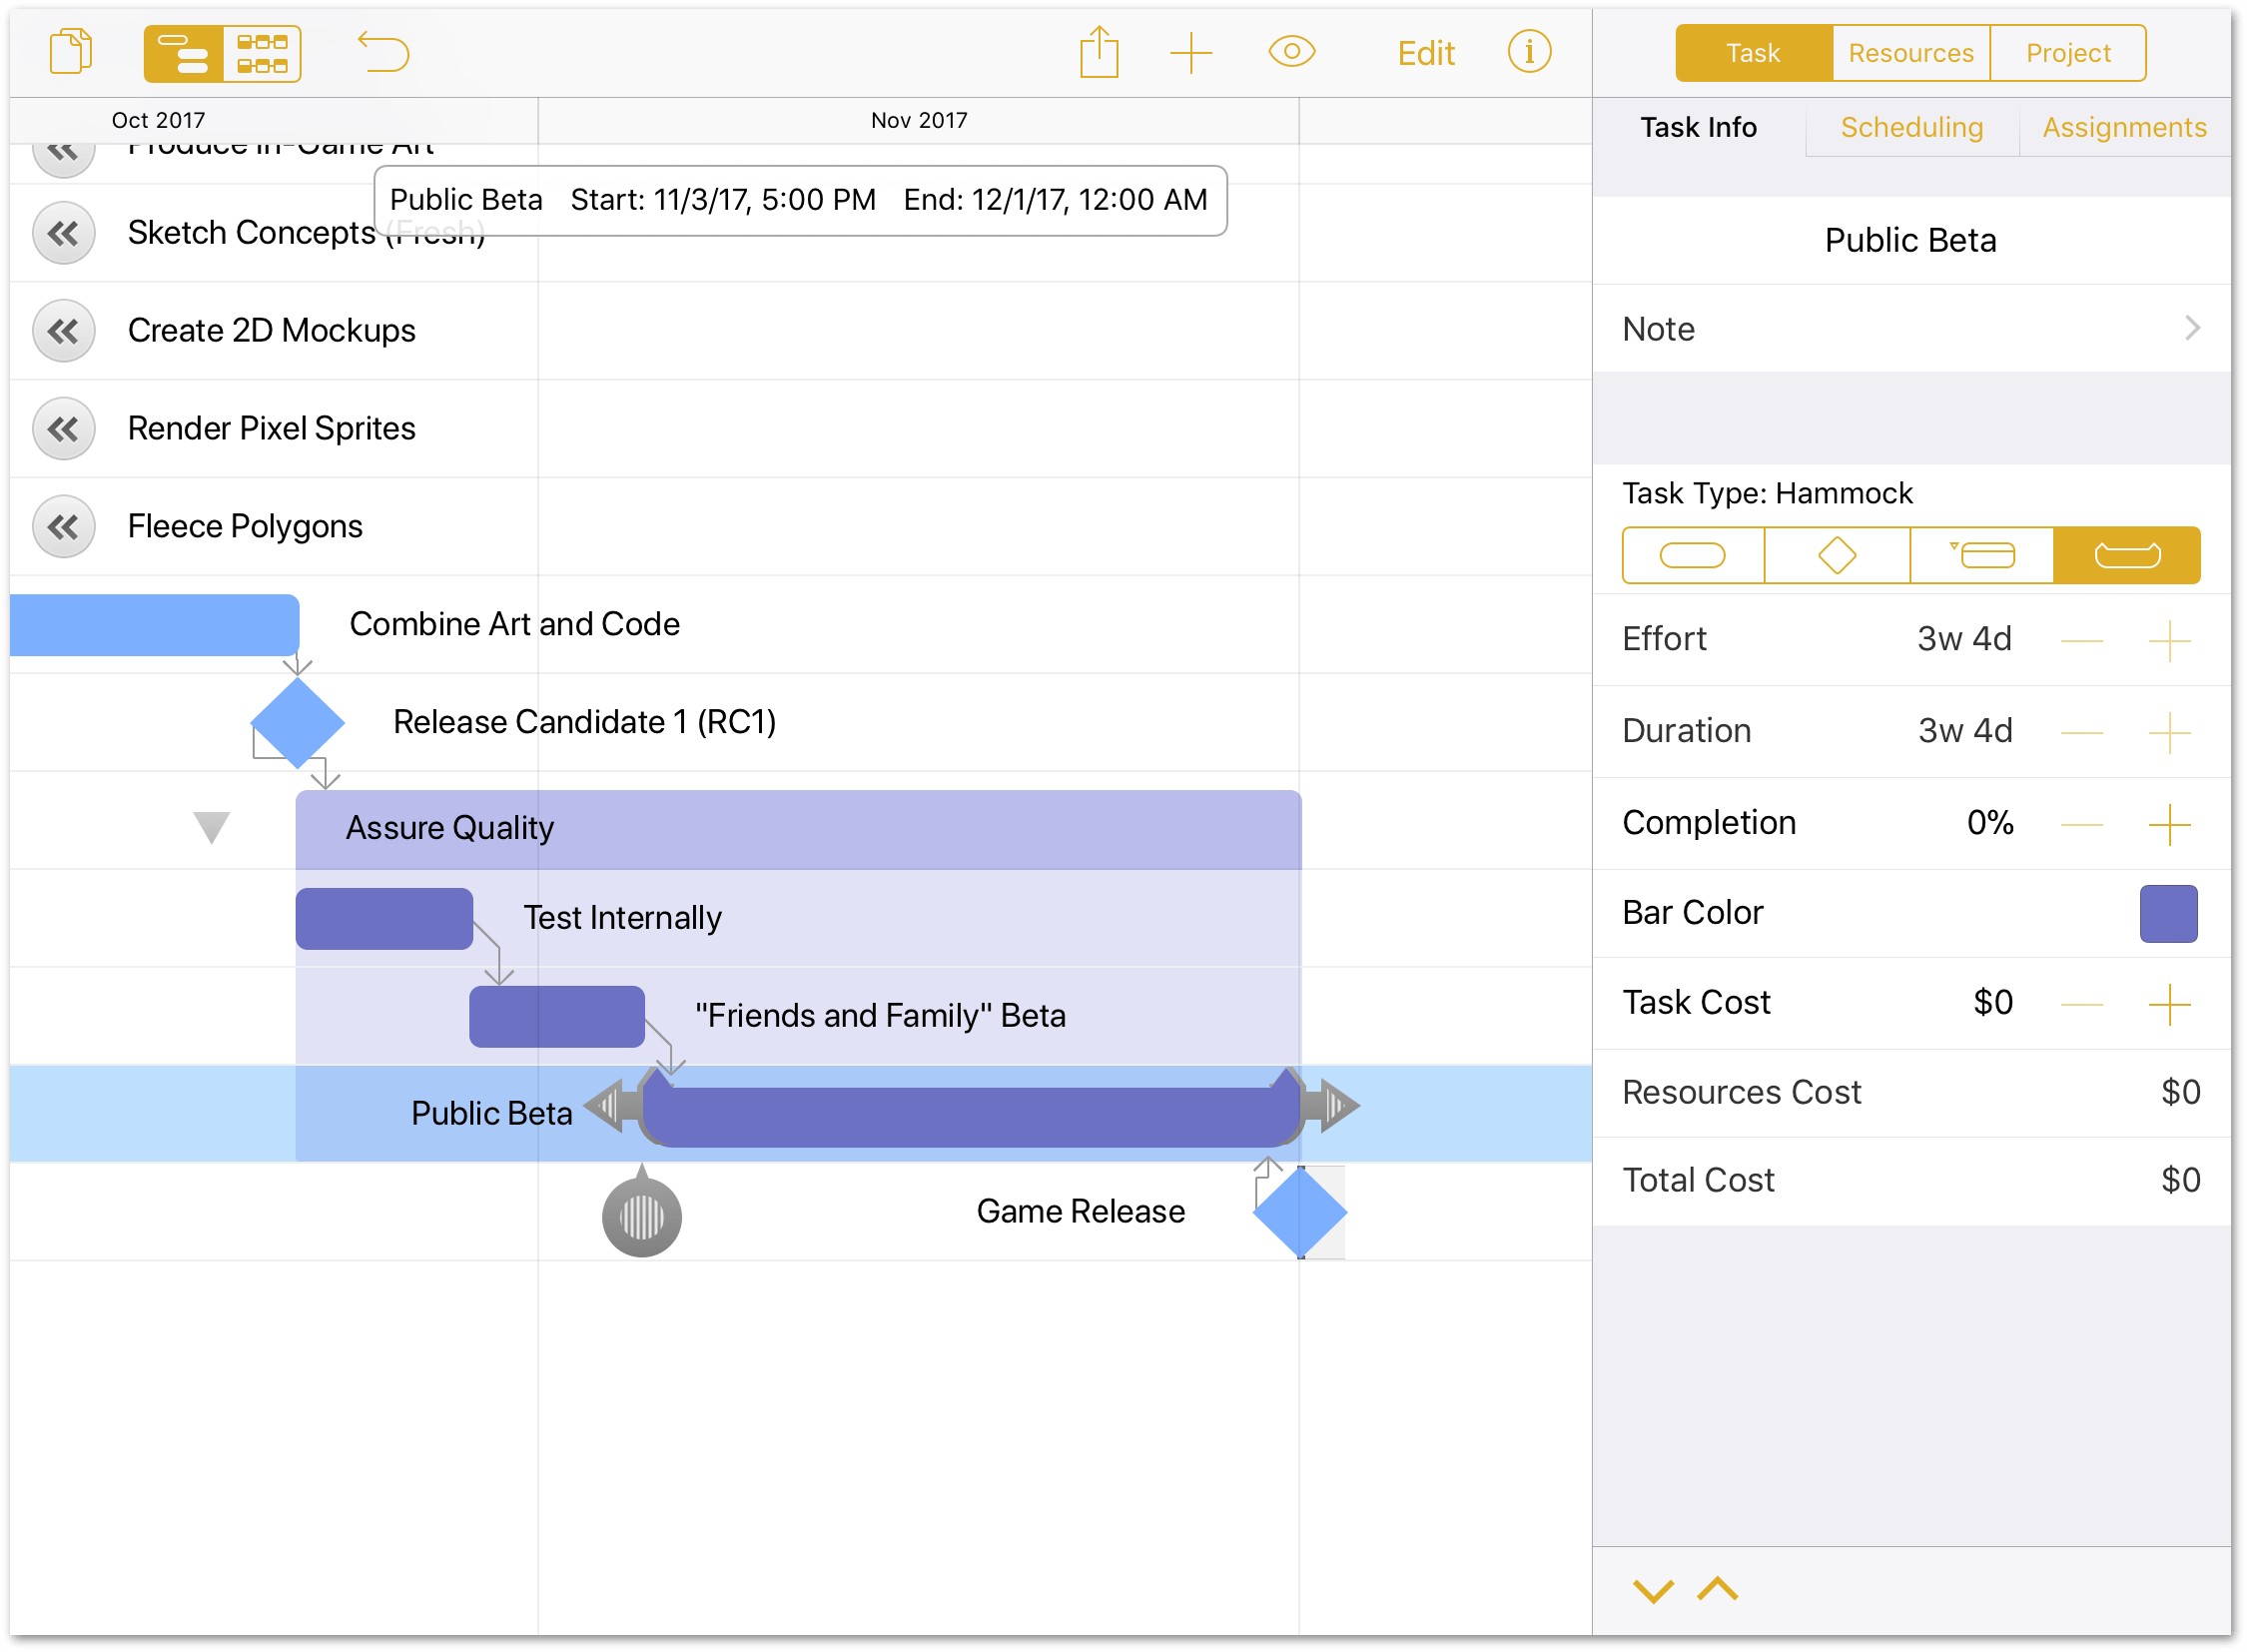
Finally, tap to select the Public Beta task, and then change its Task Type from Task to Hammock by tapping the Hammock task selector.
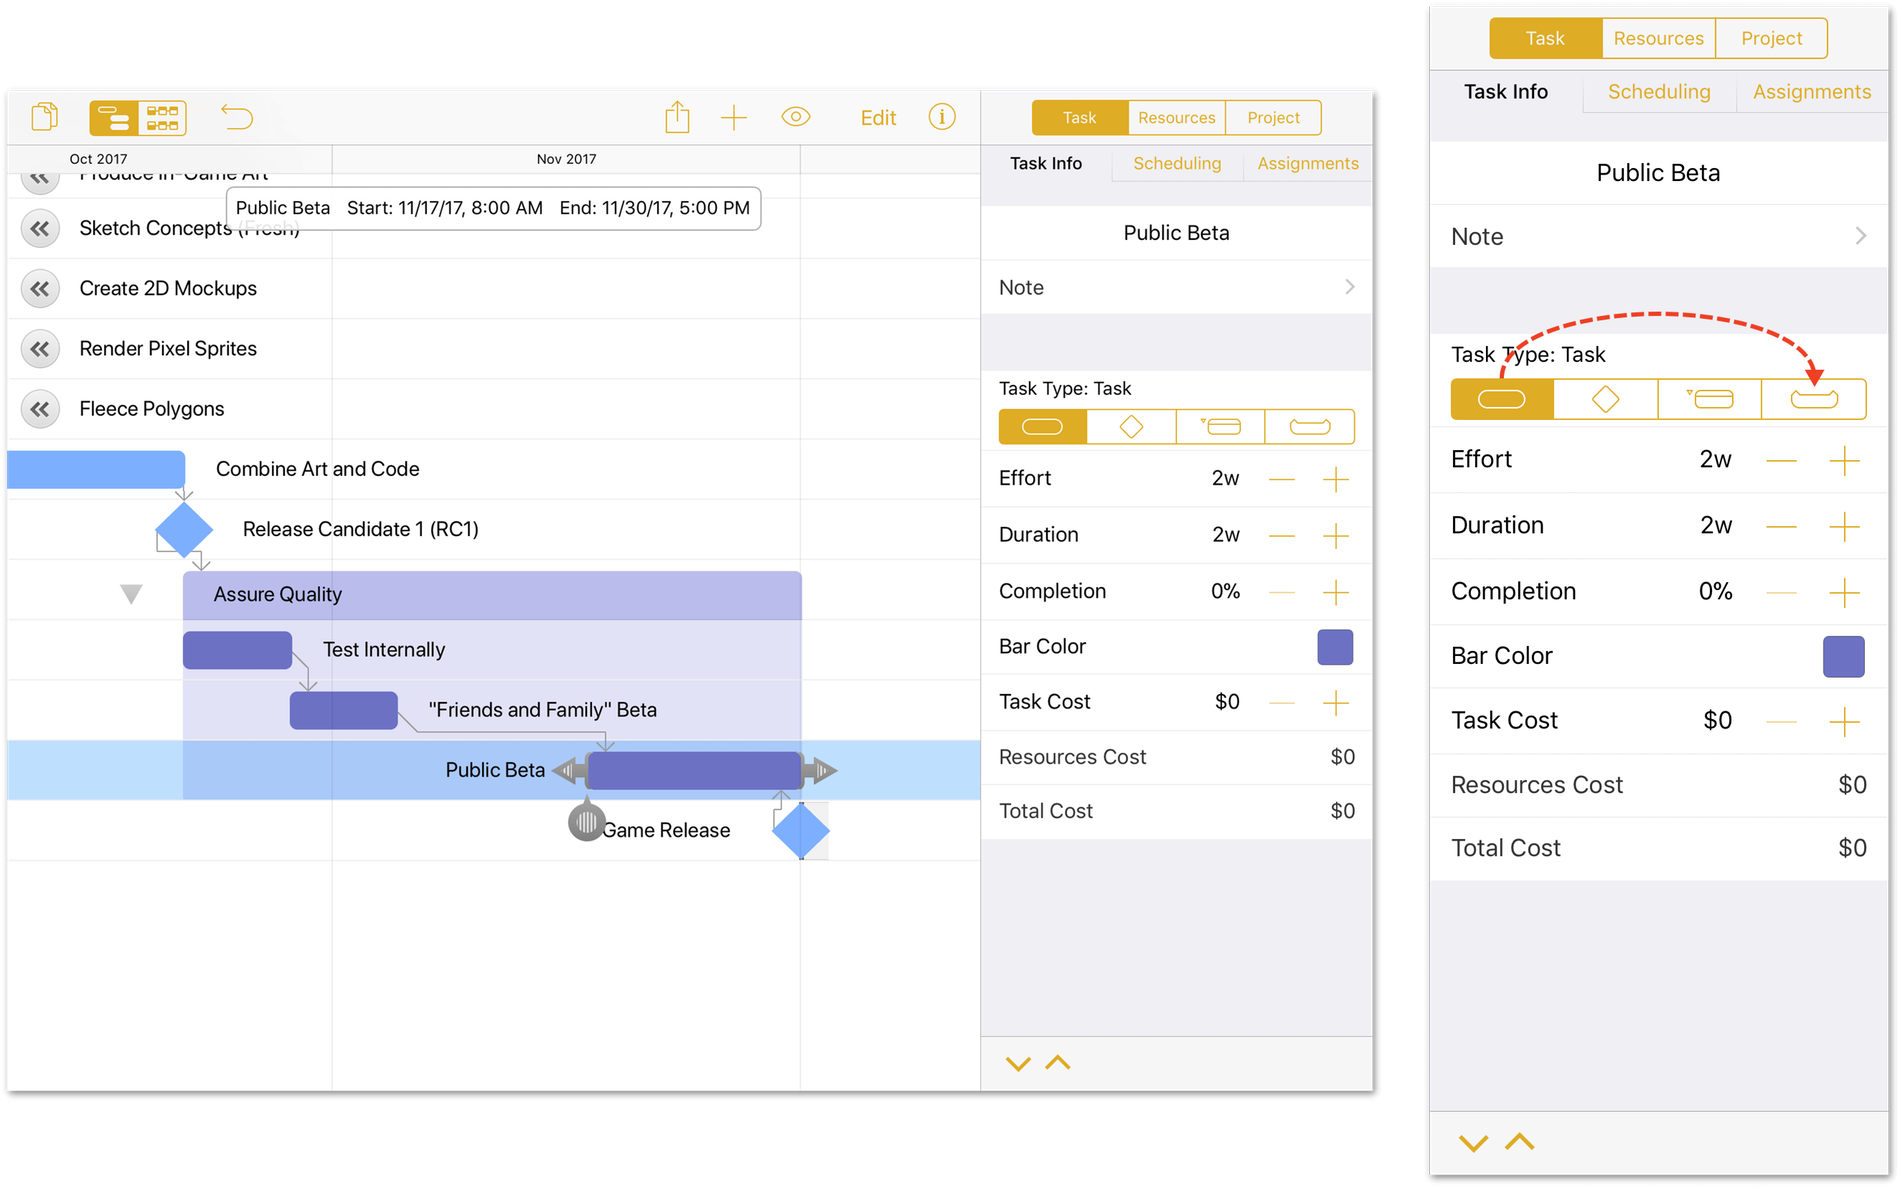
Depending on where you set the Start at earliest date for the Game Release milestone, the Public Beta Hammock task should stretch a bit to fill in the space between the "Friends and Family" Beta task and the Game Release milestone.
Step 9: Editing the Work Week
One thing that you may need to do as a project manager is to define the work week. For example, the typical 40-hour work week is Monday through Friday, from 8 a.m. to 5 p.m. each day, with an hour of unpaid lunch somewhere in between.
To define the work week for your company/project:
- Tap
 to open the Inspectors.
 - Tap to select the Project inspector.
-
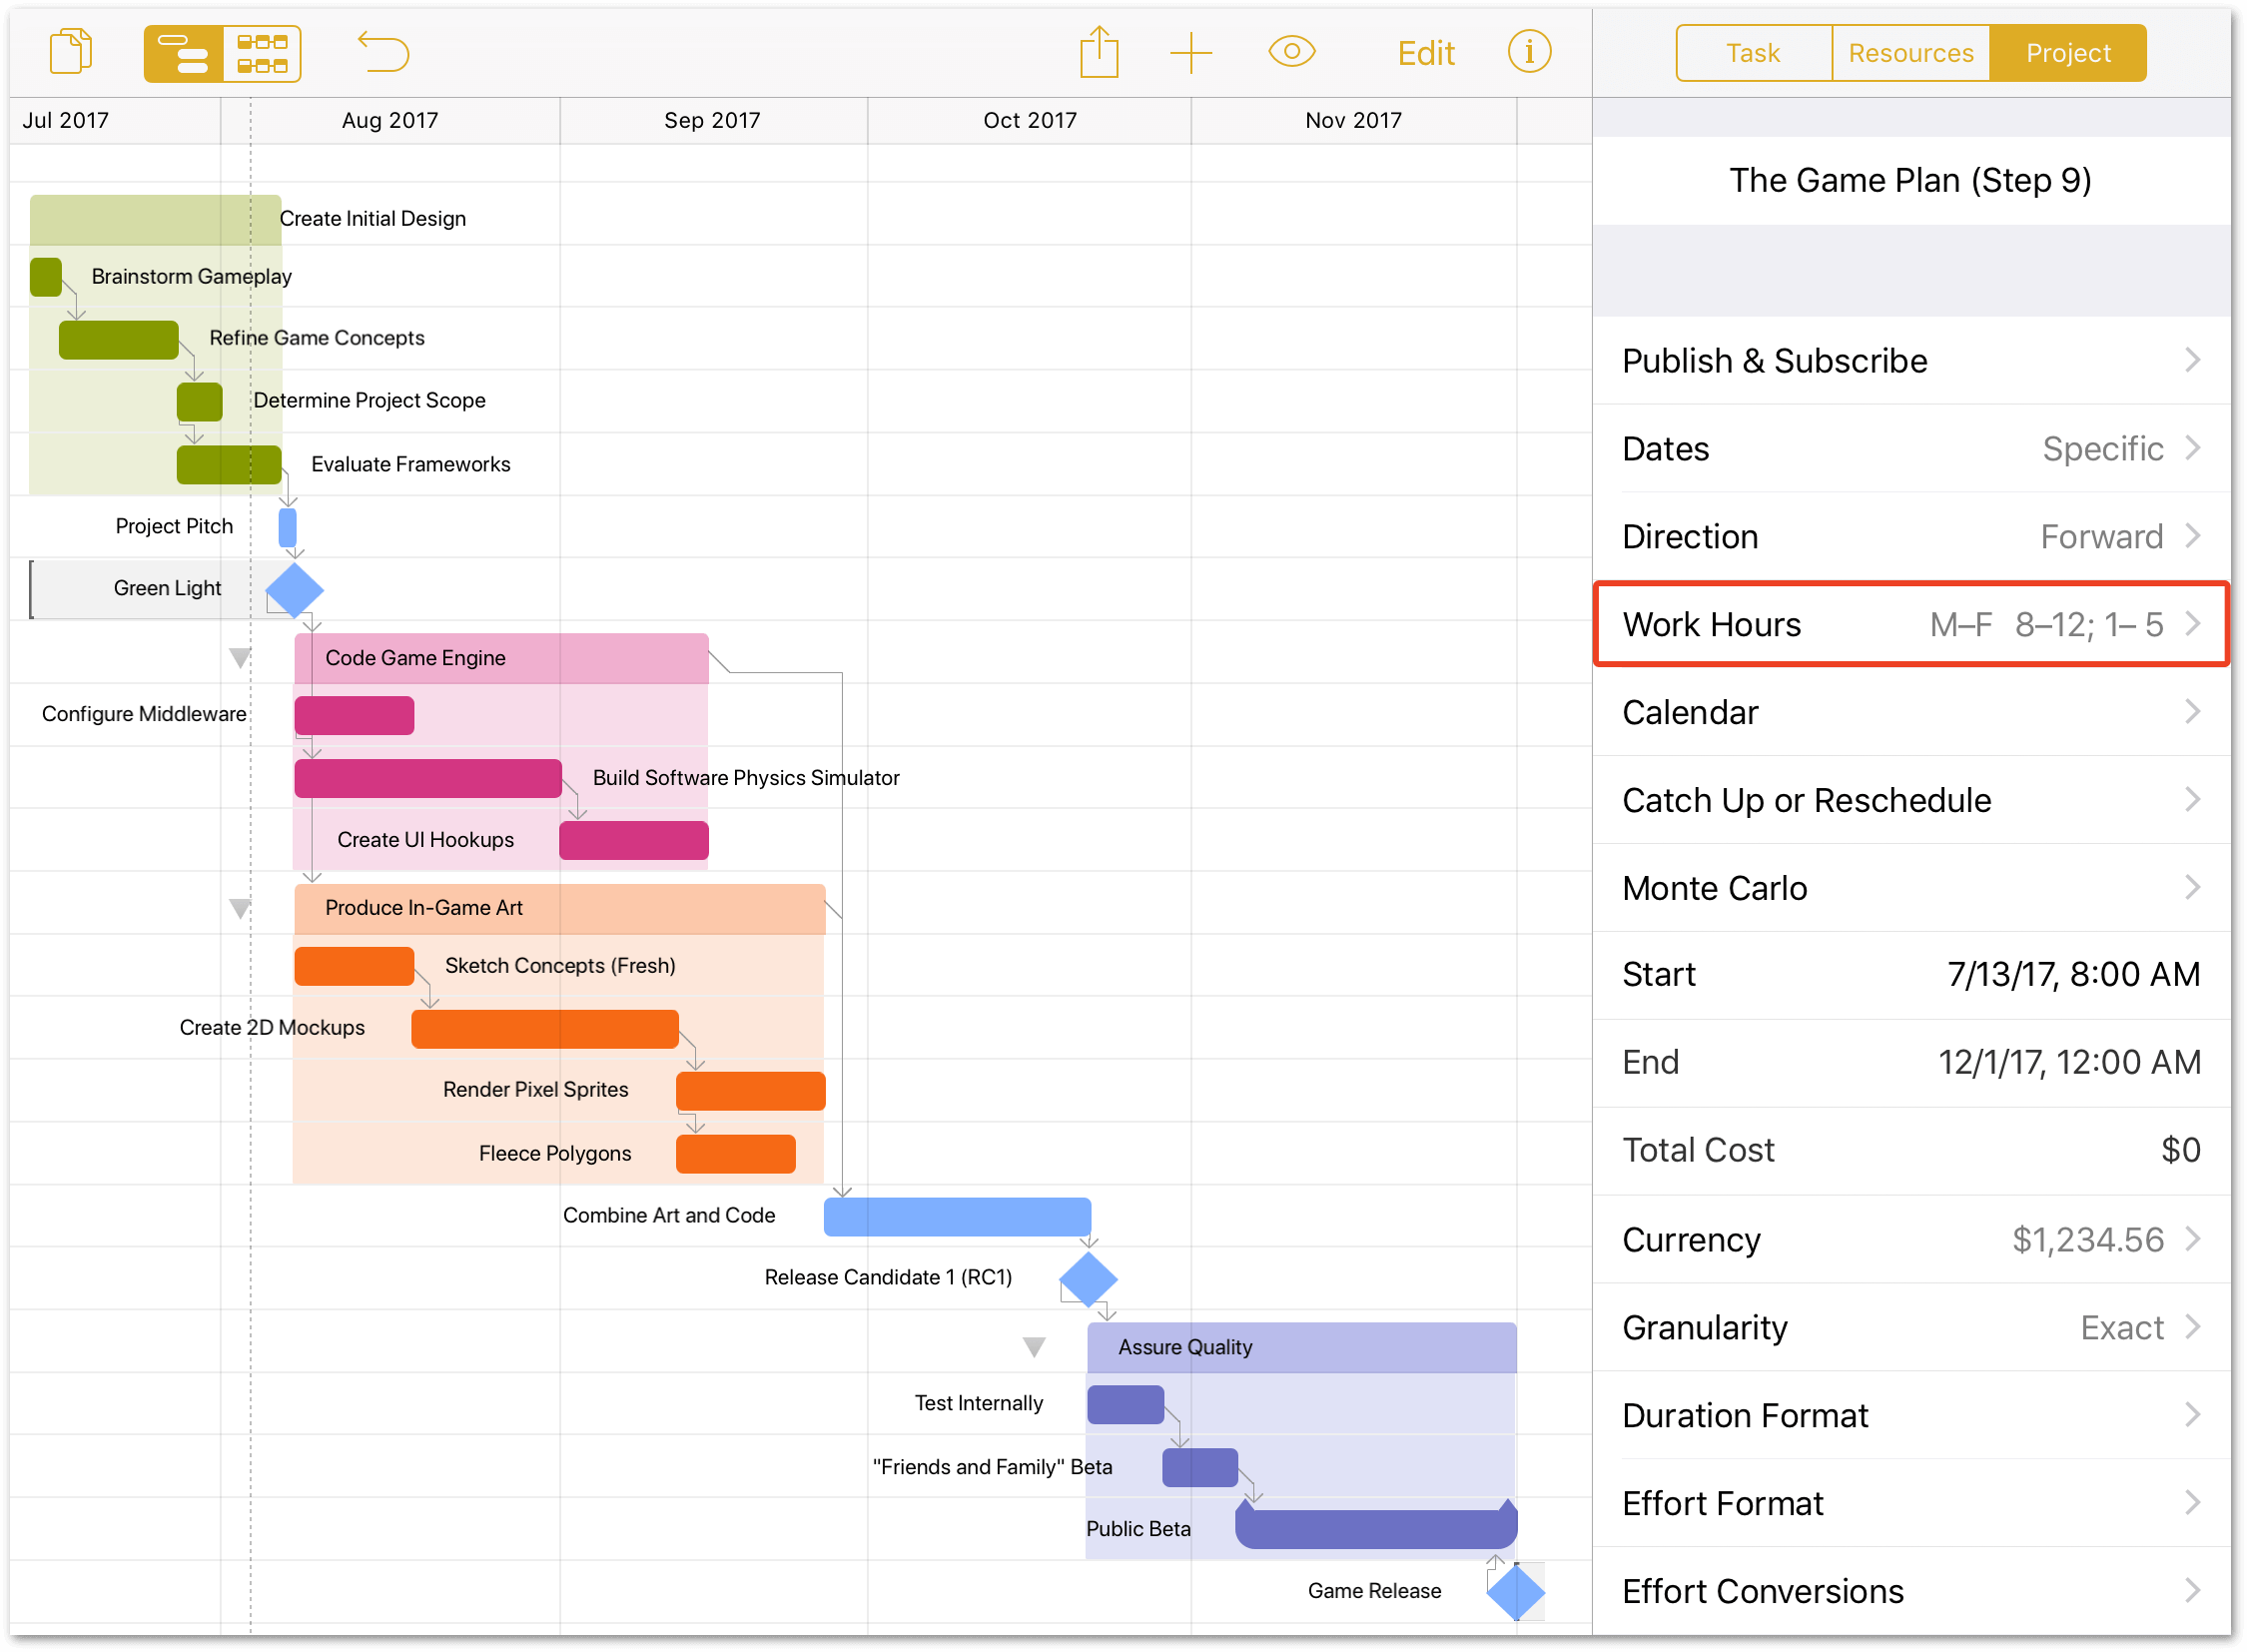
Tap Work Hours to view and adjust the Normal Working Hours for your company:
-
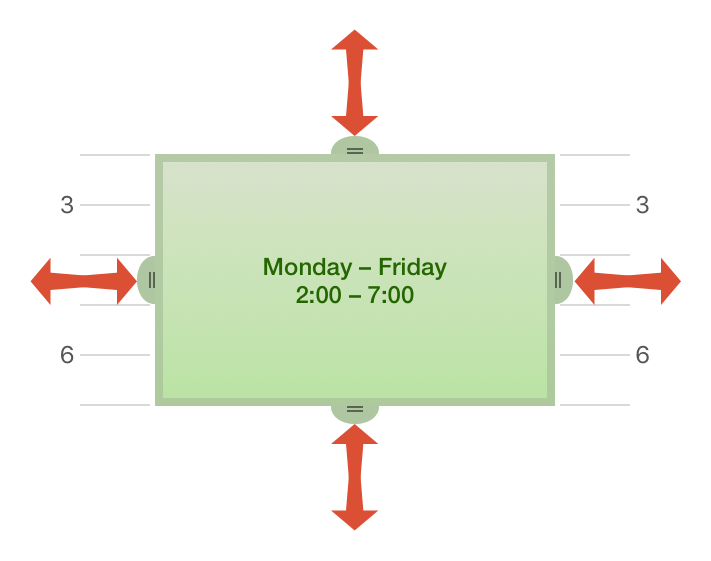
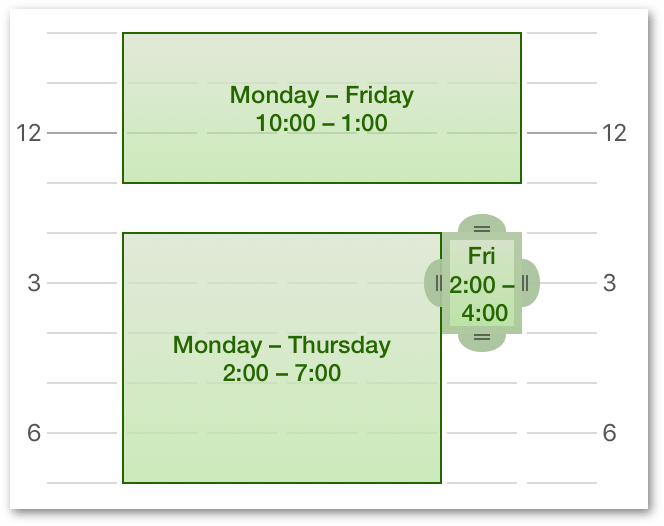
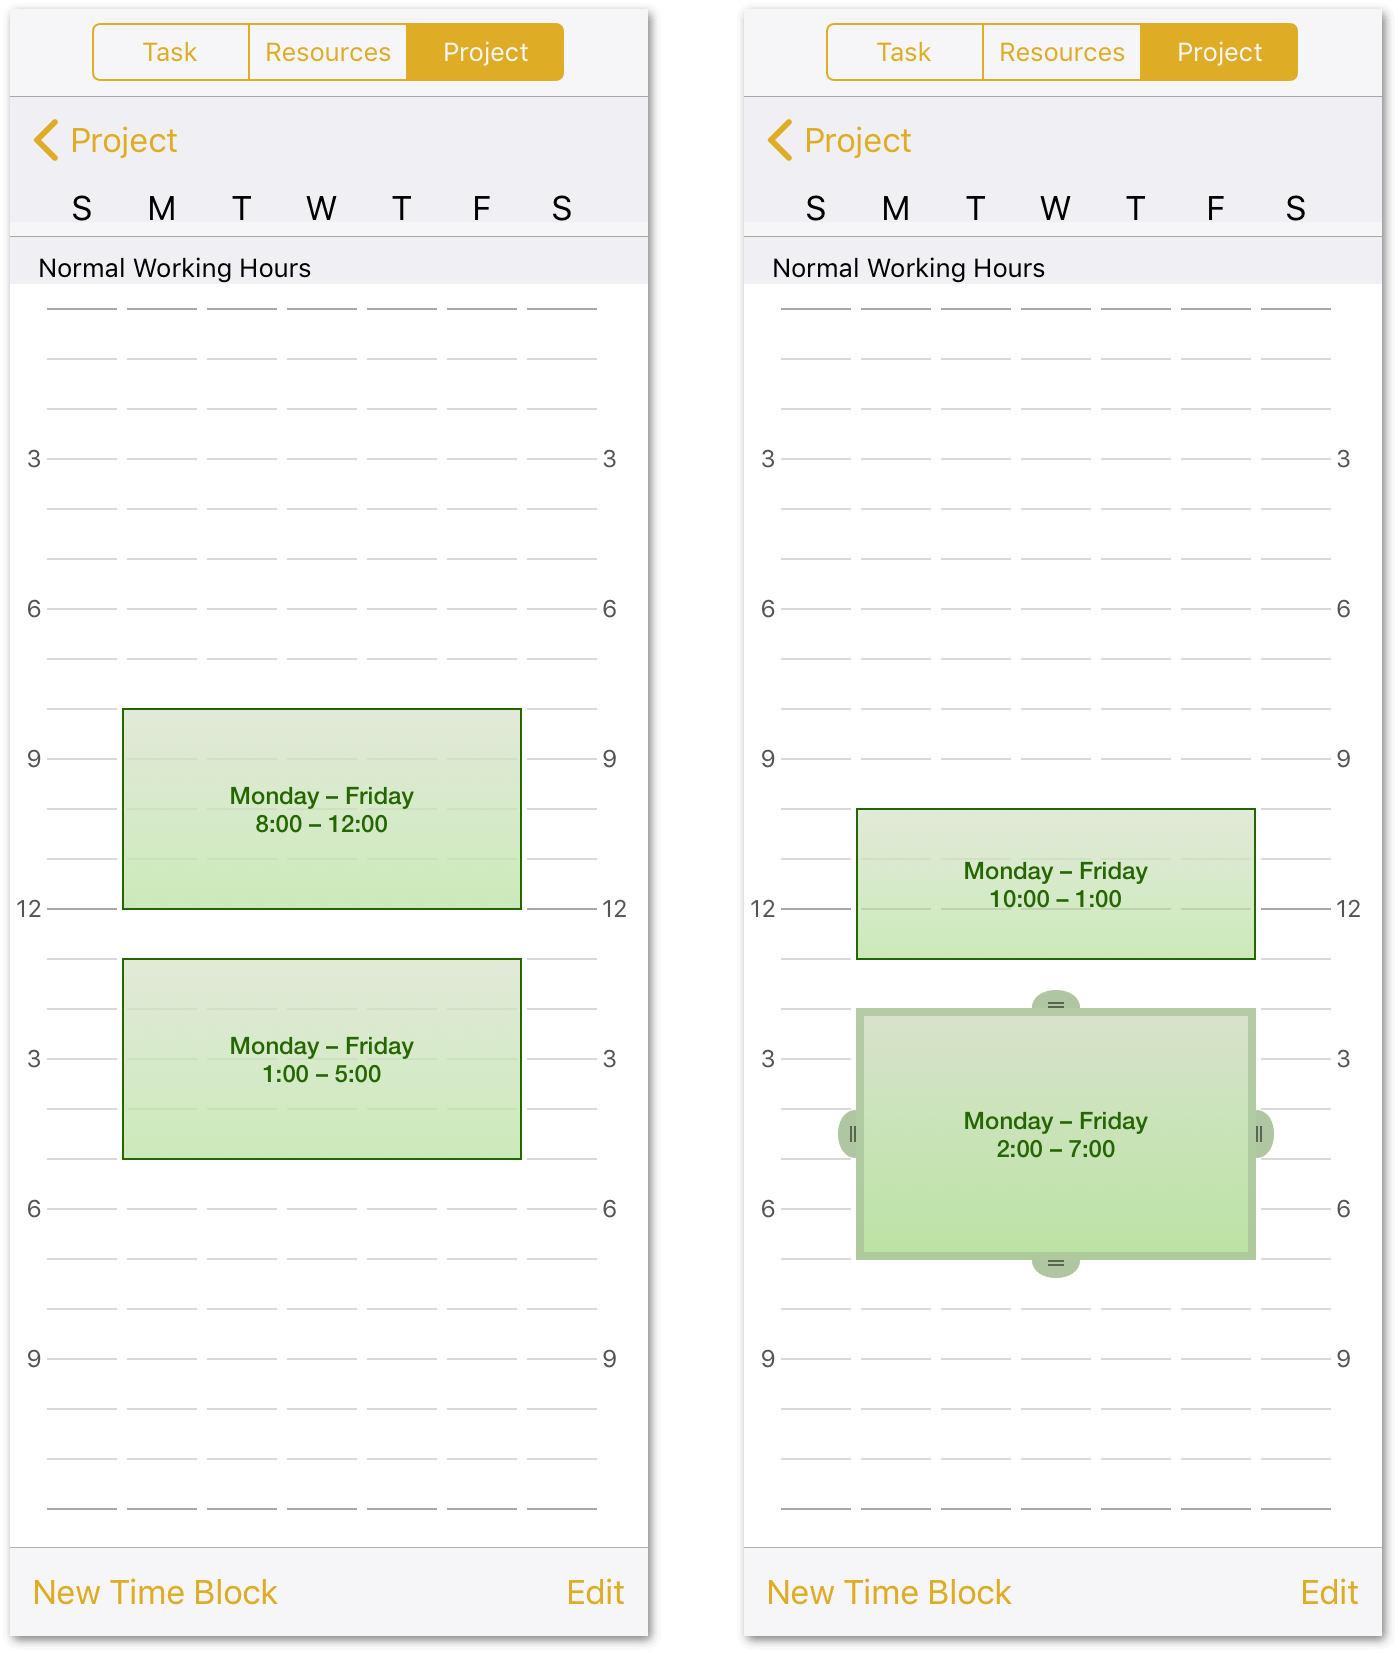
To accommodate the late nights that often fuel game development, your company starts a little later in the morning. Touch and hold one of the Time Blocks on the calendar to bring it to a new position, or drag one of the side handles to adjust the work hours.
Set the Normal Working Hours to 10:00 – 1:00, and 2:00 – 7:00, as shown here:
Step 10: Setting Project Schedule Exceptions
Even the most accommodating work week will occasionally have days that are out of the ordinary. Whether it’s a national holiday, a team-wide training seminar, an industry expo or conference, or just a patch of bad weather that keeps folks out of the office, setting exceptions to the regular work schedule can be key to keeping a project on track.
In looking at the calendar, there are three holidays that fall during this particular project’s duration (Labor Day, Halloween, and U.S. Thanksgiving) that need to be factored into the schedule.
If you are working through this tutorial, the holidays you encounter will most assuredly be different than the ones noted here. The takeaway from this example, however, is to show the importance of how holidays and observances can affect a project’s timeline.
When setting up your own projects, be sure to examine the calendar for holidays, observances, and any other special events that could impact normal working hours.
To view and edit the project calendar, do the following:
- Tap to select the Project inspector.
-
Tap Calendar to view the project calendar:
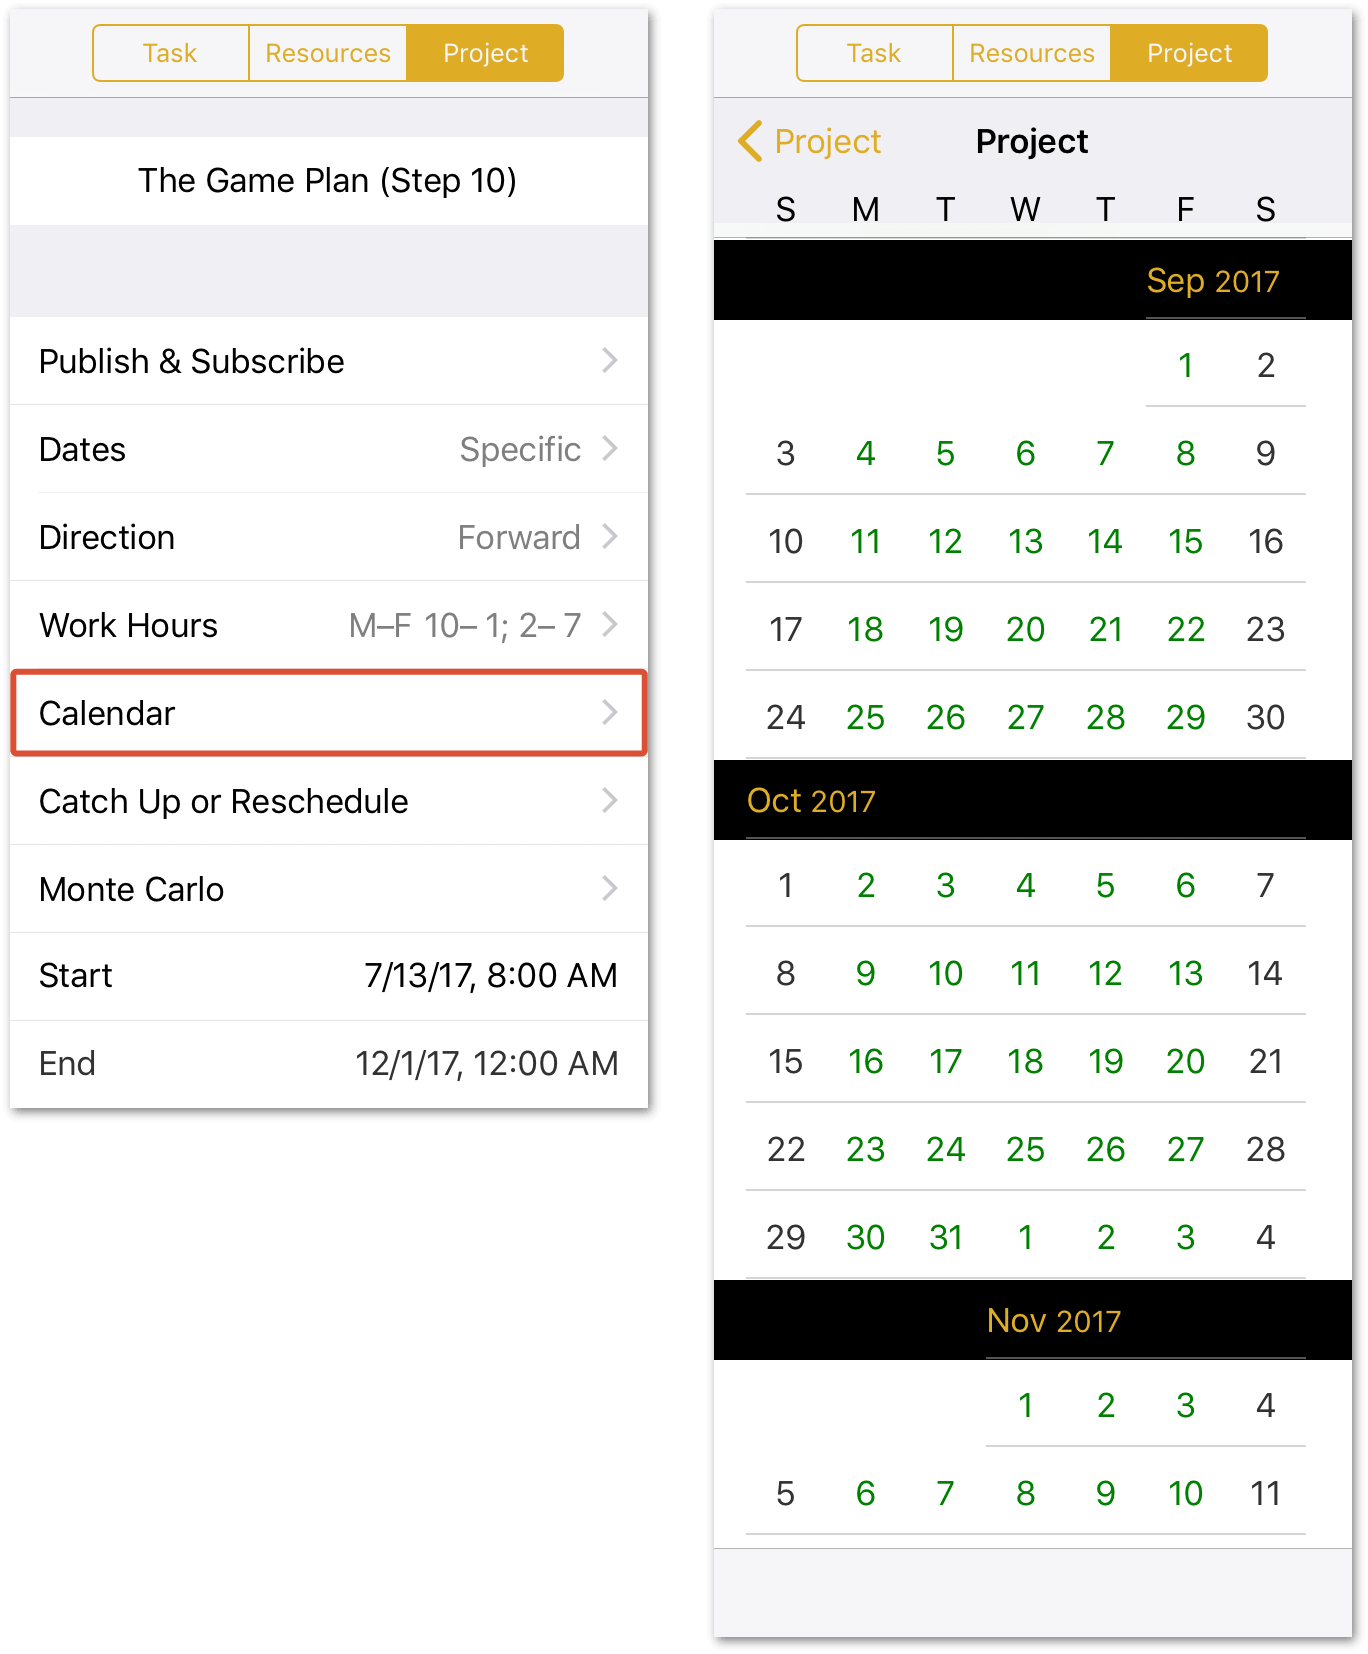
Dates on the calendar are color-coded as follows:
- Green dates indicate regular work days as defined by the Normal Working Hours set in the Step 9.
- Black dates indicate non-working days.
- Red dates indicate a working day that has been blocked as time off.
- Blue dates indicate days where overtime is permitted.
-
Swipe to scroll down to September, then tap the week of September 4th to access the exceptions calendar for that week:
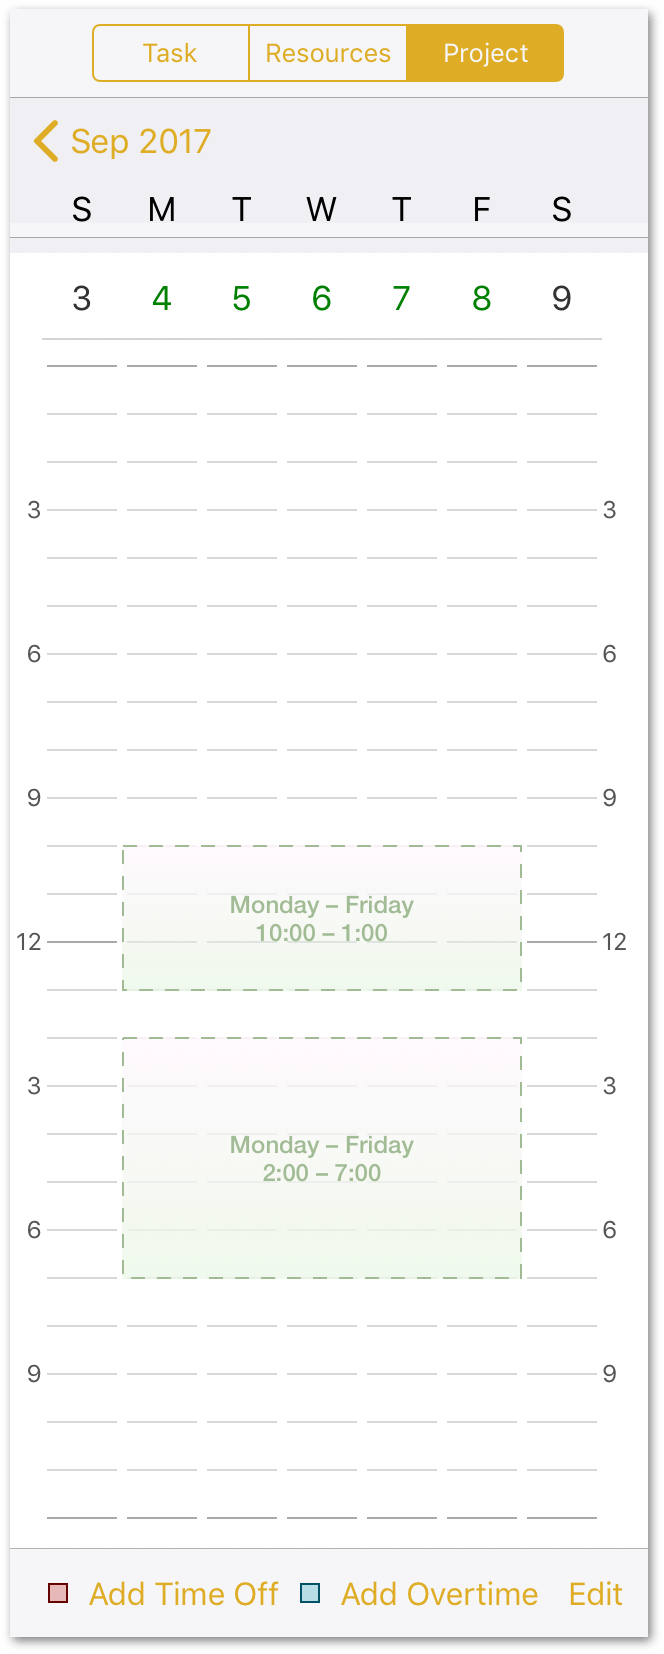
For quick navigation between individual weeks of the exceptions calendar, swipe left or right on the numerical date headers. It’s a secret tiny productivity boost—and every little bit helps!
-
To block off Monday, September 4, tap Add Time Off at the bottom of the Calendar, and then drag the handles of the Time Block to fill in the normal working hours for Monday.
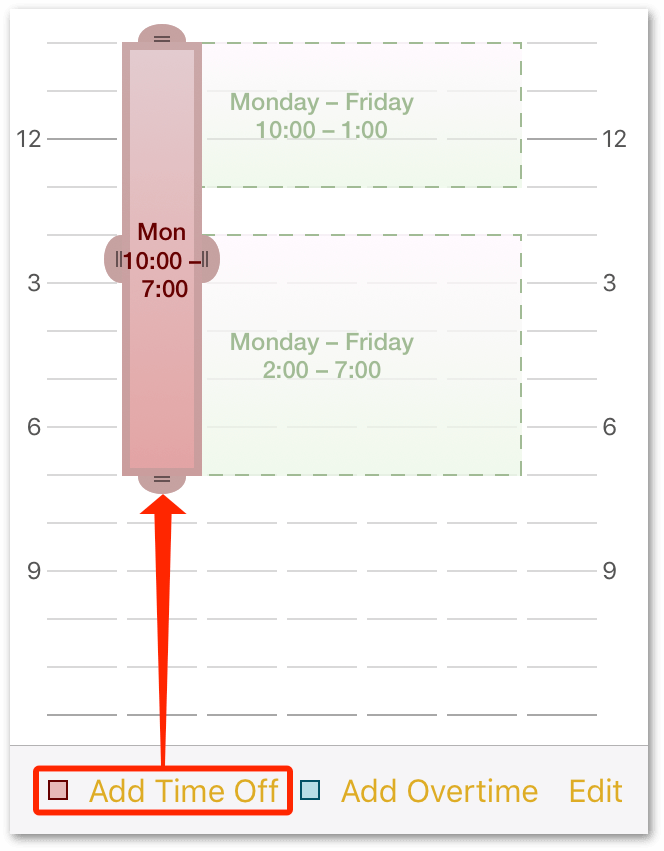
-
To compensate for the day off, you may want to pre-authorize overtime for the remainder of the week. Tap Add Overtime to add a Time Block for that, and adjust its size to span Tuesday through Friday from 7:00 to 10:00 p.m.
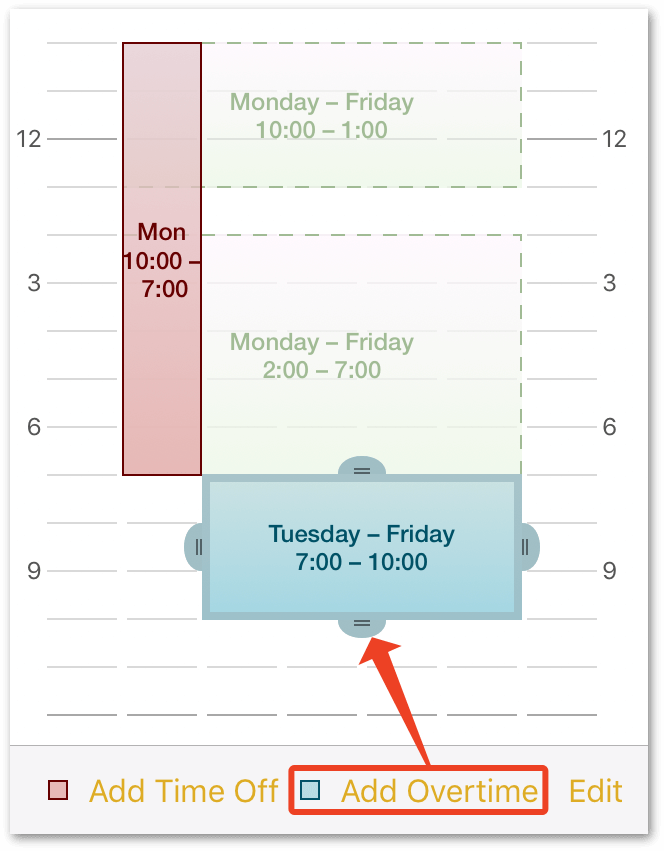
-
Using the same techniques, do the following:
- October 31: Add time off from 3:00 to 7:00 p.m. to permit staff to partake in the company’s annual Halloween festivities:
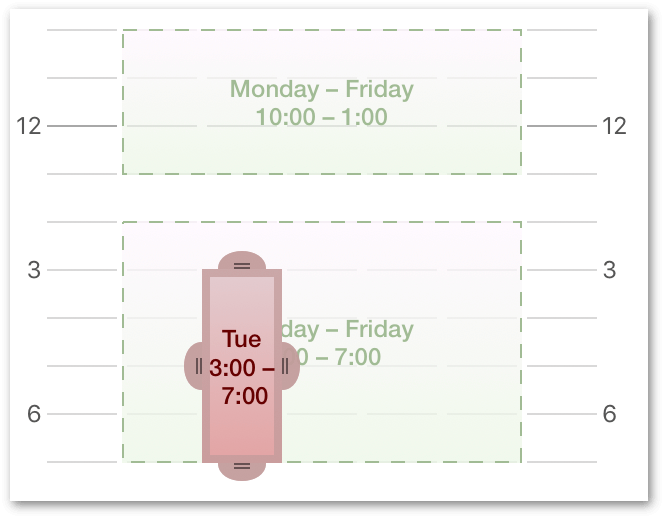
- November 23 and 24: Block these days off to cover U.S. Thanksgiving and the day after:
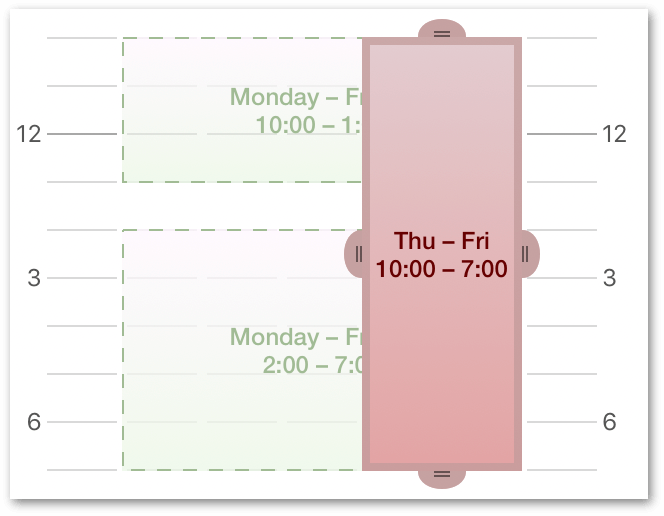
Step 11: Creating Resources
Now it’s time to start adding the team members, equipment, and materials necessary to bring the project to fruition. Every person, piece of infrastructure, and raw ingredient that contributes to reaching the project’s goal is counted as a resource.
-
Start by tapping the Resources tab:
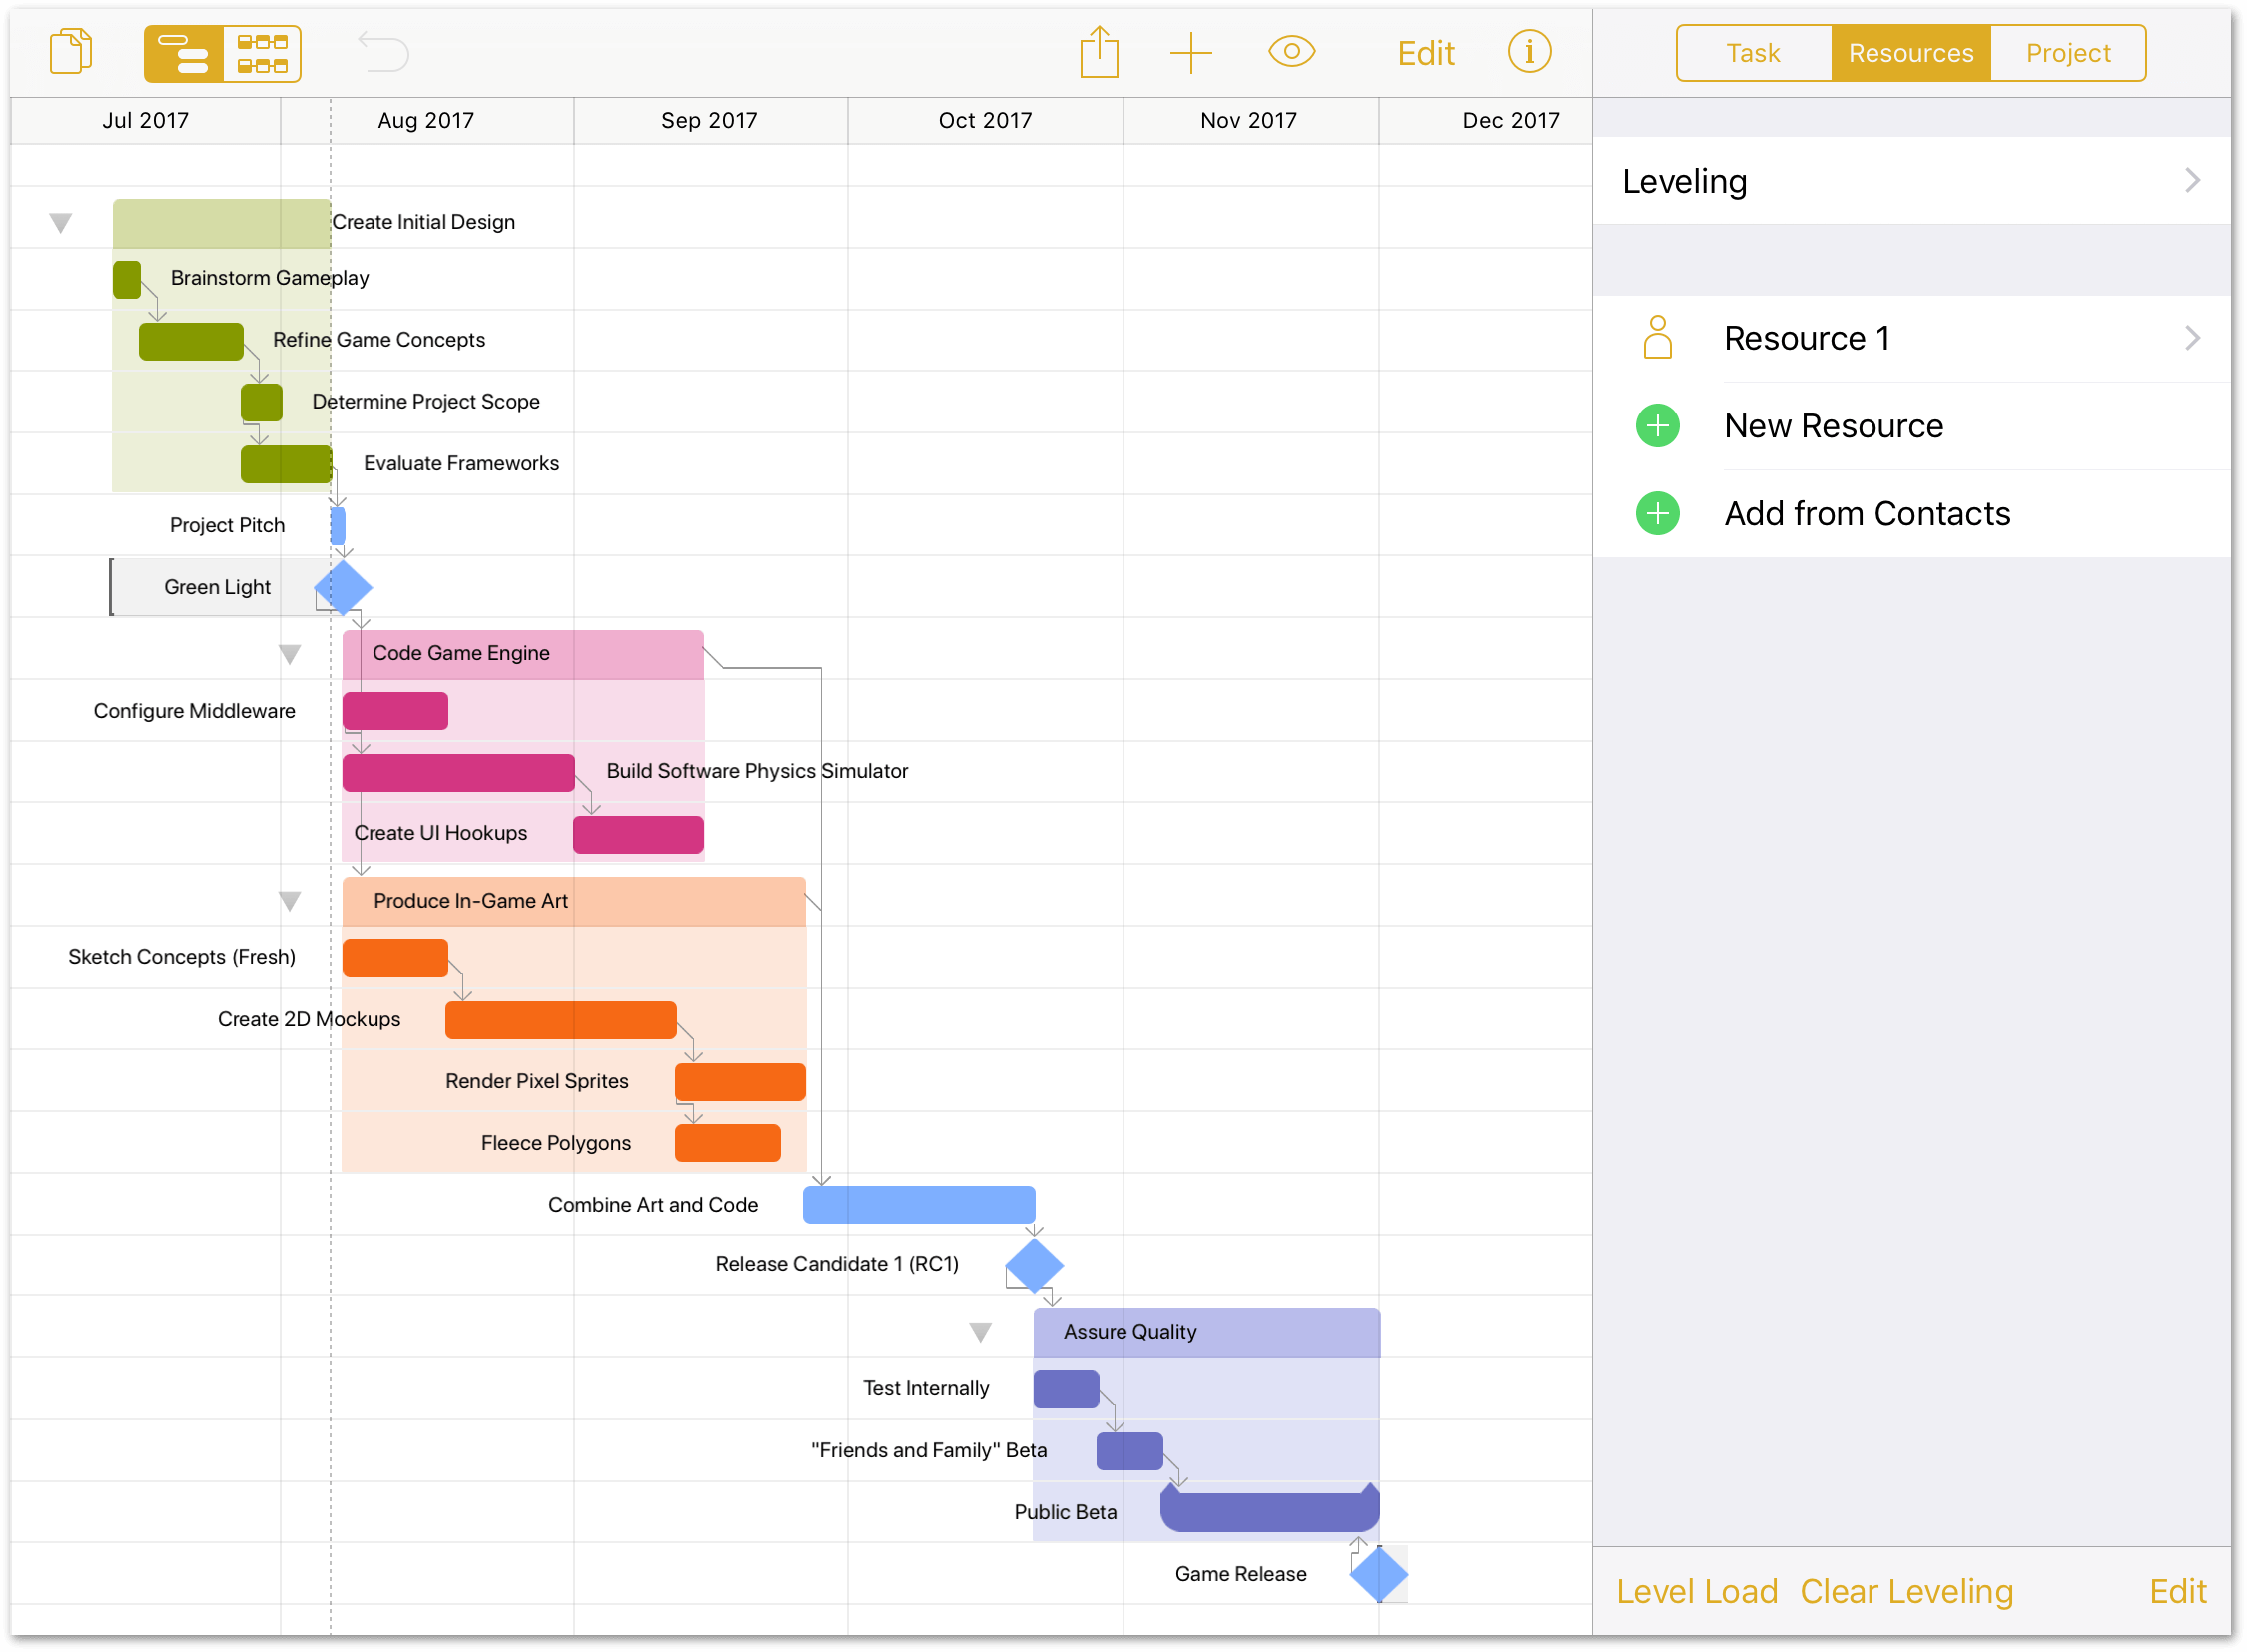
As you can see, the project already has one resource type assigned: Resource 1, a Staff member.
-
Tap Resource 1 to edit the resource’s details, including name, email address, resource type, and personal calendar:
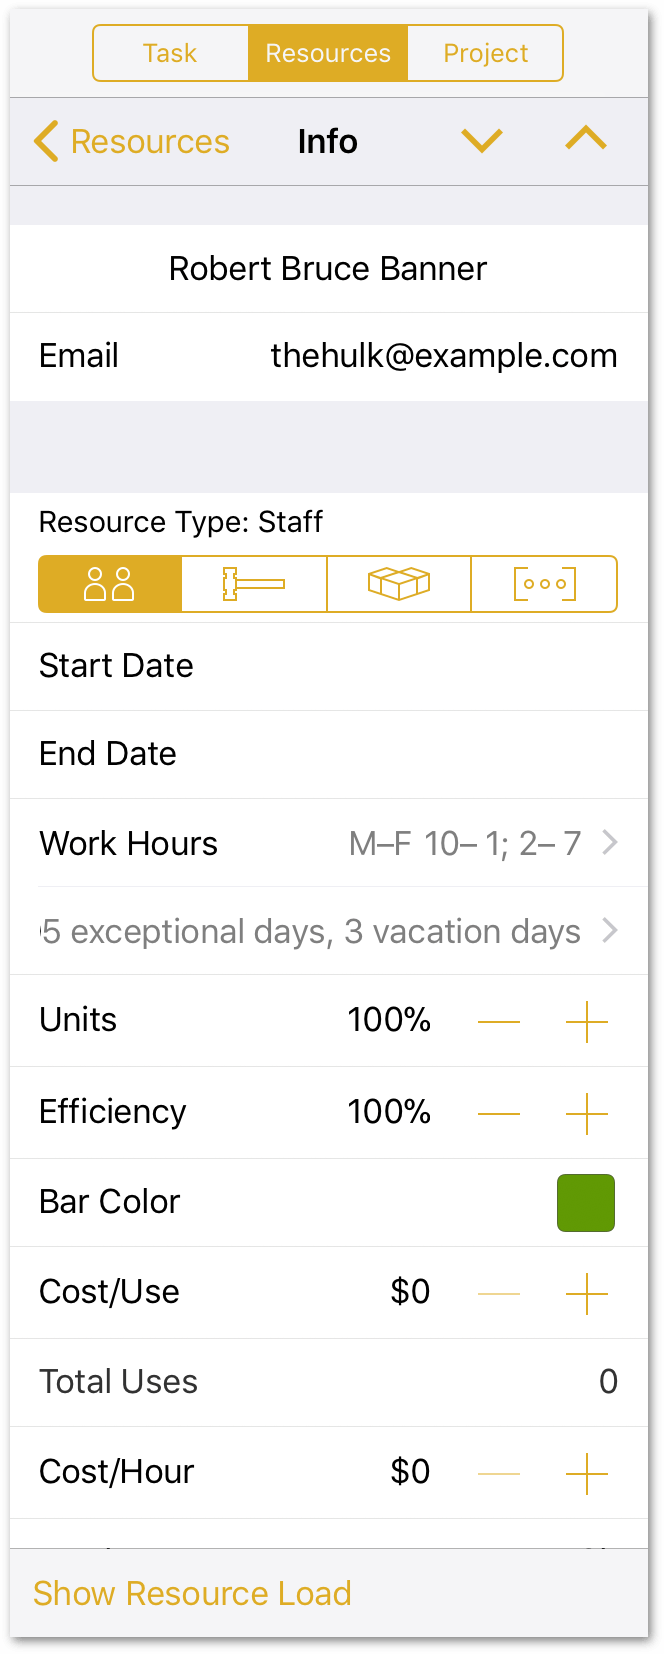
For identification purposes, OmniPlan Pro uses the email address assigned to Staff resources as their unique identifier. If you are managing multiple projects in OmniPlan Pro, and trying to balance workloads and resources across those projects, be sure to verify that the email addresses you provide are unique.
Typically, this shouldn’t be a problem; just be careful about using group email addresses when, instead, you should use each person’s individual email address.
For this tutorial, you can use whatever names you’d like, or you can use the handy list of resources in the following table. Just be sure to specify a half-dozen people and one resource type as Equipment.
| Name | Resource Type |
|---|---|
| Henry Jonathan | Staff |
| Janet van Dyne | Staff |
| Anthony Edward Stark | Staff |
| Robert Bruce Banner | Staff |
| Thor Odinson | Staff |
| Richard Milhouse Jones | Staff |
| J.A.R.V.I.S (Render Farm) | Equipment |
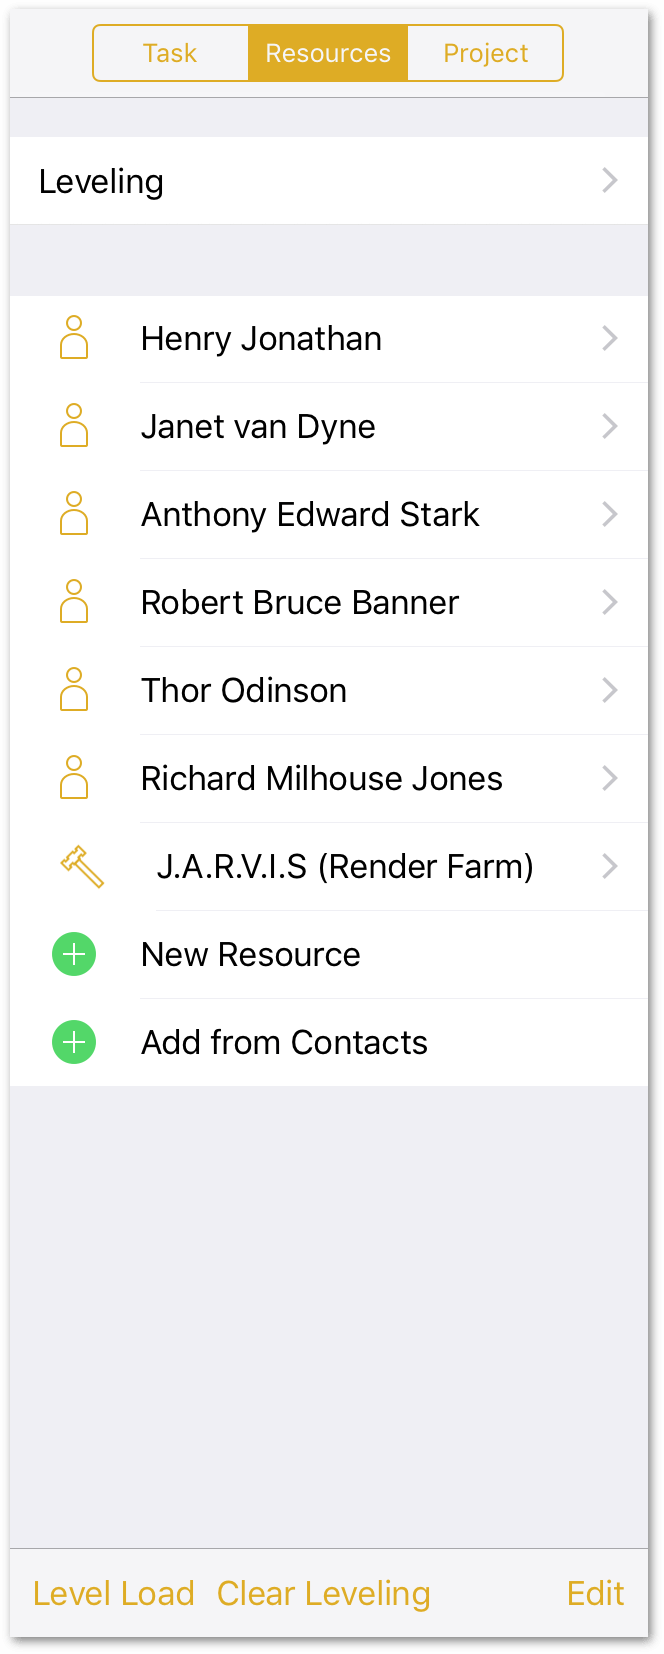
You can remove or rearrange resources at any time by tapping Edit at the bottom of the Resources inspector.
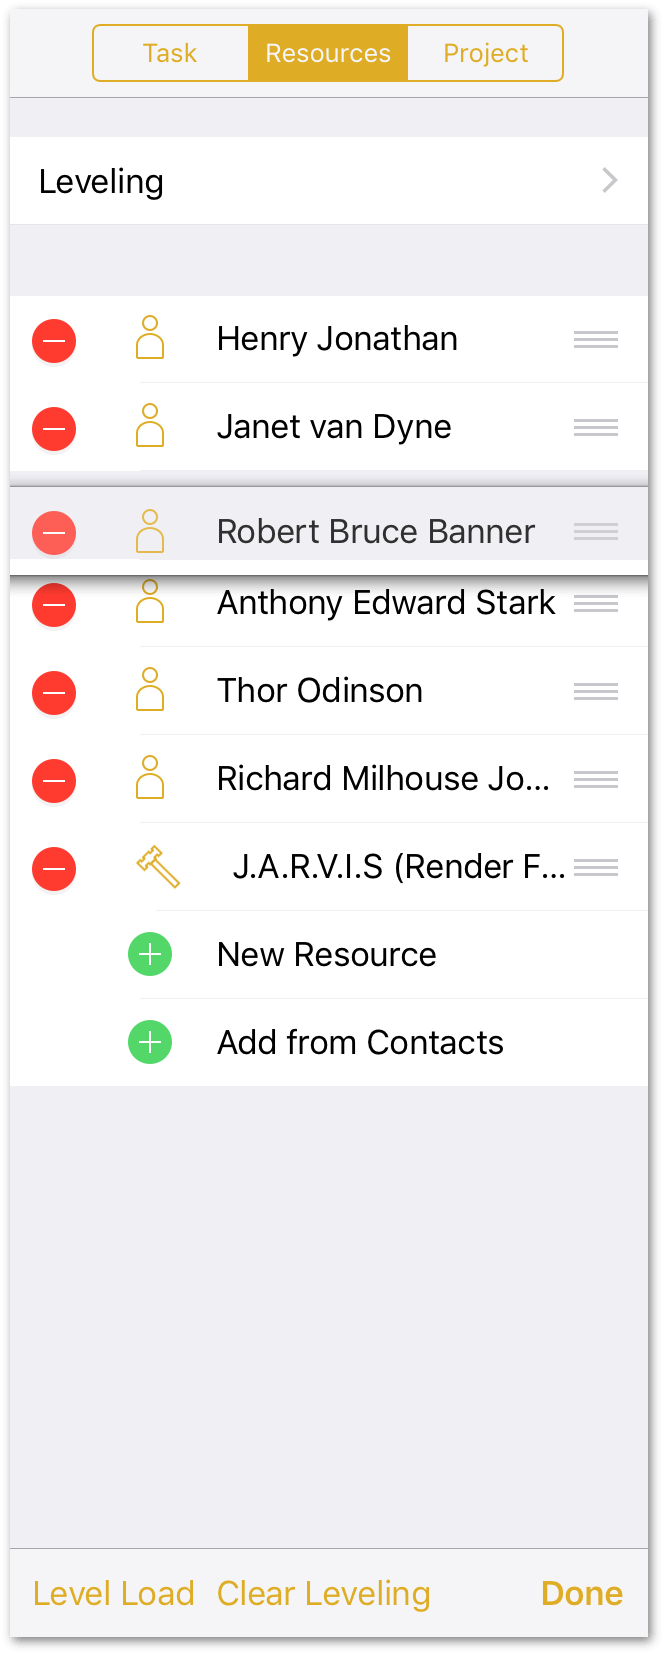
Drag on the handle at the right edge of a resource to move it up or down in the list, or tap the delete button at left to remove a resource. Tap Done when you’re finished rearranging or pruning the resources.
Step 12: Assigning Resources to Tasks
Now that you’ve added the resources necessary for The Game Plan, the next logical thing to do is assign those resources to the tasks.
To assign resources, tap to select the first task in the project (Brainstorm Gameplay), open the Task inspector, and then tap the Assignments tab:
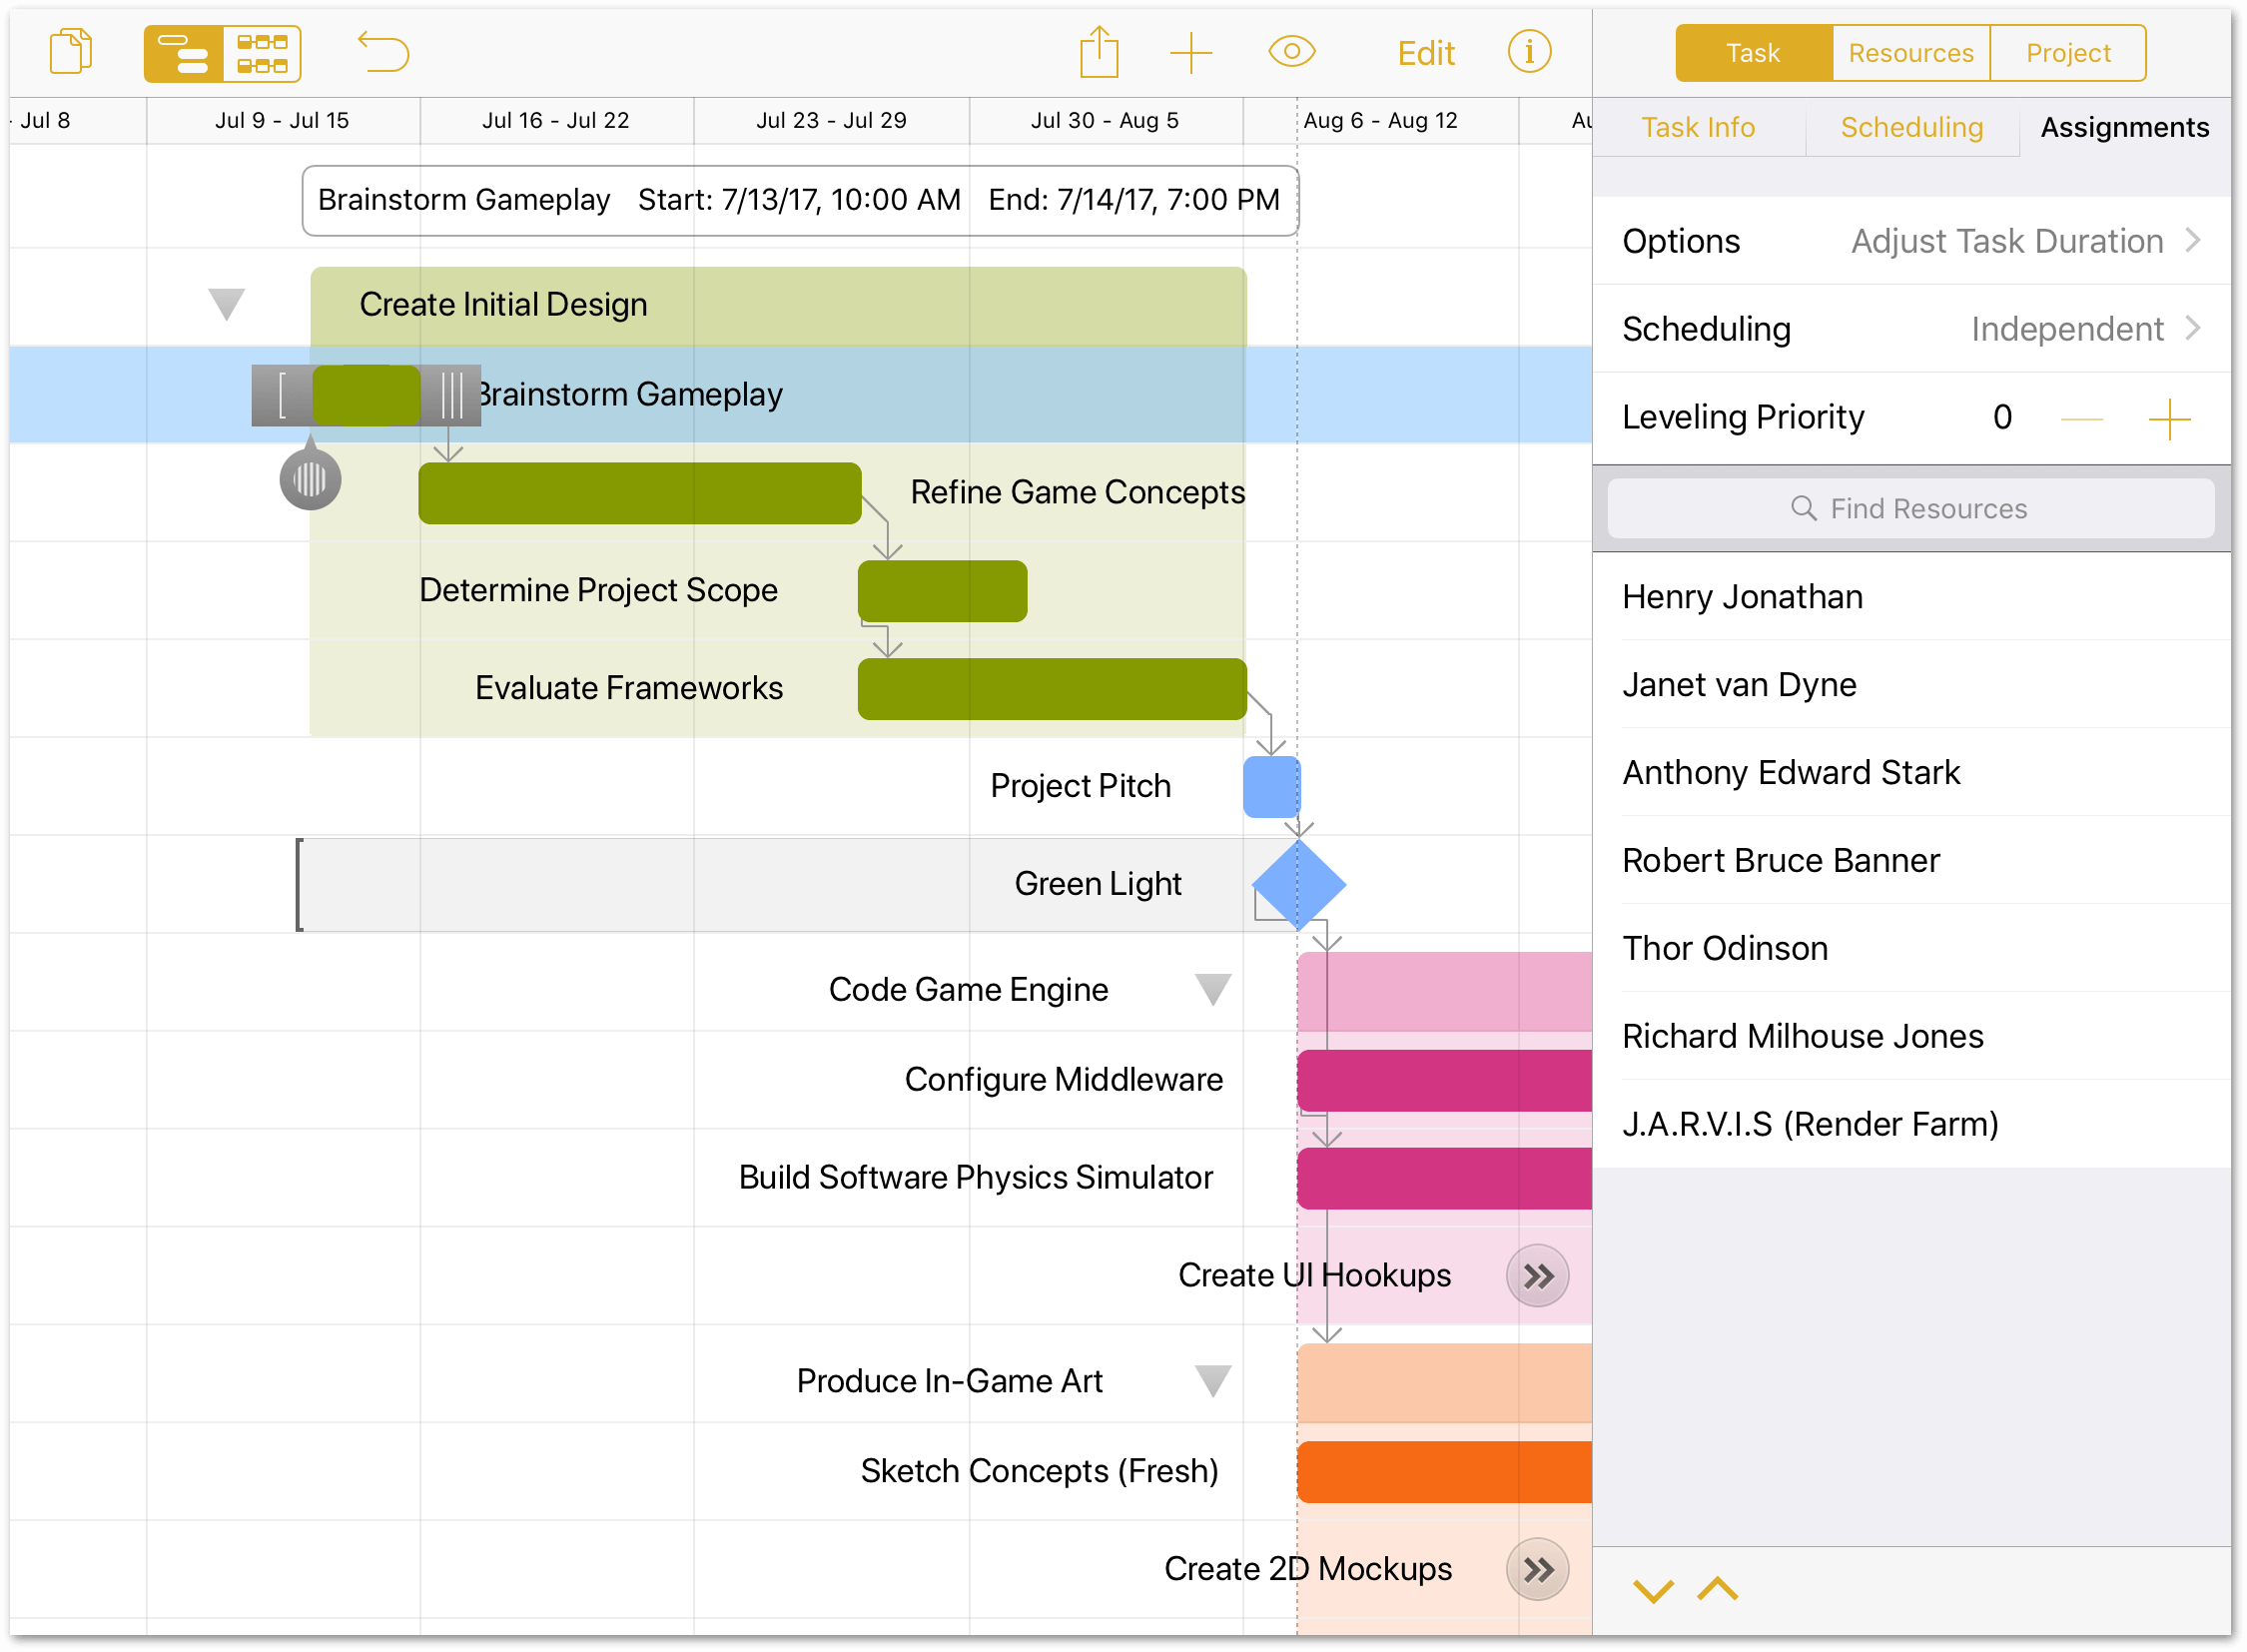
However, before diving into making the assignments, let’s first examine the top part of the Assignments tab:
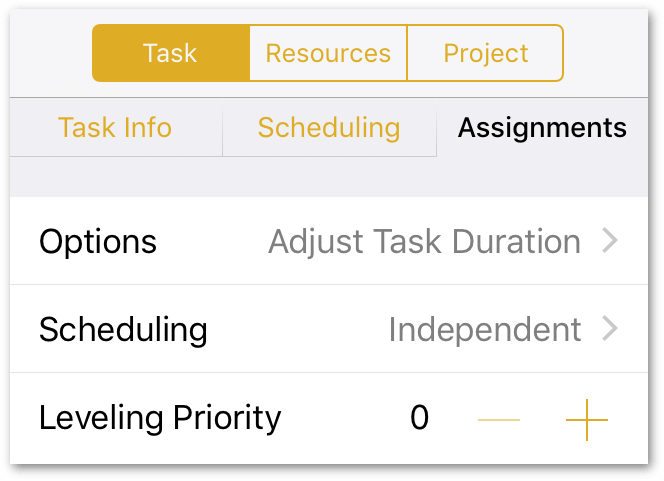
This section of the Assignments tab gives you the ability to adjust the behavior of tasks when resources are assigned, how tasks are treated for scheduling, and which tasks receive priority over others when leveling your project. The task Assignment behaviors include:
-
Options: Choose one of the following options:
- Adjust Task Duration: As resources are assigned, the task’s duration adjusts according to the amount of effort each resource contributes. For example, if you assign two people who are working 100% on a task that should take 2 days, the task’s duration is reduced to 1 day.
- Adjust Task Effort: As resources are assigned, the task’s duration remains fixed, and each person assigned to the task devotes all of their time (100% effort) to the task.
- Adjust Assigned Amounts: As resources are assigned, the task’s duration remains fixed, while the amount of effort each resource contributes is reduced. For example, if you assign two people to a task that should take 2 days, the task’s duration remains set at two days, and the effort contributed by each resource is adjusted to 50%. If you assign a third person to the task, each resource’s effort is reduced to 33%, and so on.
-
Scheduling: Choose between the following two choices:
- Independent: Assigned resources work independently on the task.
- Meeting: Assigned resources meet and work on the task at the same time. Resources need to be available for work on the assigned task.
-
Leveling Priority: Assign a numerical value to tasks that you want to have prioritized whenever you level the project. The lower the number, the higher priority the task receives.
Now that you know how to adjust a task’s behavior, let’s return to the Brainstorm Gameplay task. This particular task requires everyone’s effort, where the team meets in the Conference Room of Extraordinary Size to whiteboard and hash out ideas.
In the Assignments tab, do the following:
- Set Options to Adjust Task Effort.
- Set Scheduling to Meeting.
- Set the Leveling Priority to 1, making this a high-priority task.
- Tap to select all available human resources (no equipment necessary).
When finished, here’s how the Assignments tab for the Brainstorm Gameplay task should appear:
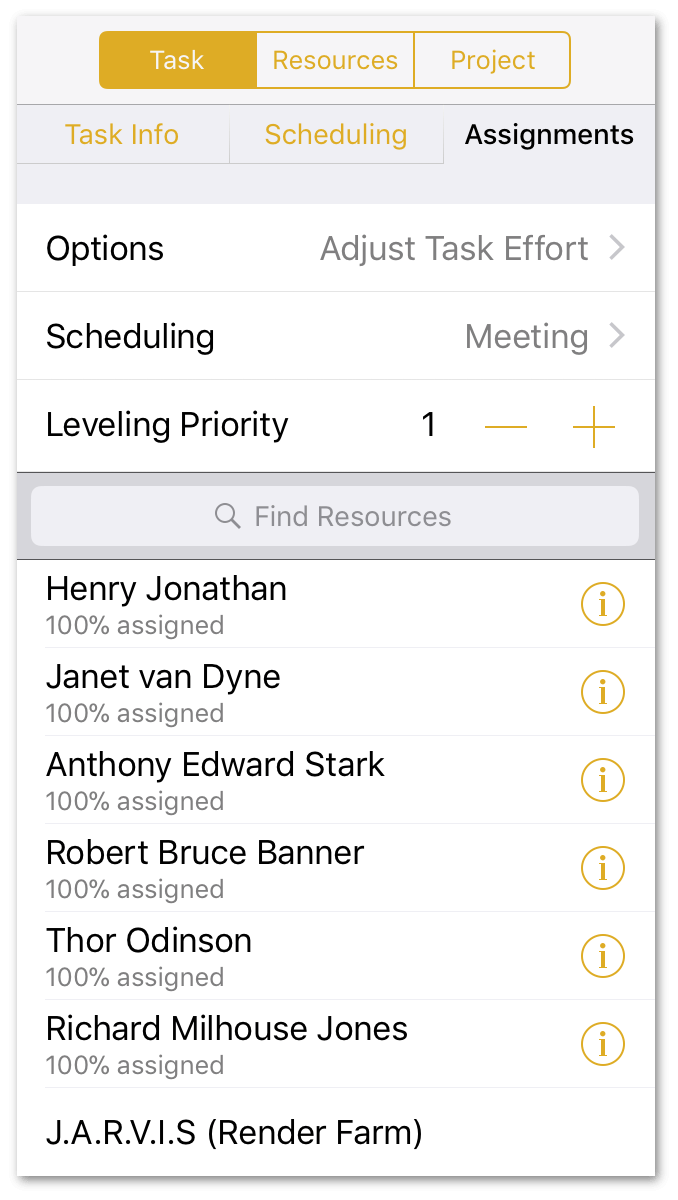
Using similar methods, use the information in the following table to set task behaviors and assign resources:
| Task | Options | Scheduling | Priority | Resources |
|---|---|---|---|---|
| Refine Game Concepts | Adjust Task Effort | Meeting | 1 | Everyone |
| Determine Project Scope | Adjust Assigned Amounts | Meeting | 1 | Janet van Dyne, Robert Bruce Banner |
| Evaluate Frameworks | Adjust Assigned Amounts | Independent | 0 | Henry Jonathan, Anthony Edward Stark, Richard Milhouse Jones |
| Project Pitch | Adjust Task Effort | Meeting | 1 | Everyone |
| Green Light | Adjust Task Effort | Meeting | 1 | Janet van Dyne |
| Configure Middleware | Adjust Task Effort | Independent | 1 | Henry Jonathan, Richard Milhouse Jones |
| Build Software Physics Simulator | Adjust Task Duration | Independent | 1 | Anthony Edward Stark |
| Create UI Hookups | Adjust Assigned Amounts | Independent | 1 | Henry Jonathan, Richard Milhouse Jones, Anthony Edward Stark |
| Sketch Concepts (Fresh) | Adjust Task Effort | Independent | 1 | Thor Odinson, Robert Bruce Banner |
| Create 2D Mockups | Adjust Task Effort | Independent | 1 | Thor Odinson, Robert Bruce Banner |
| Render Pixel Sprites | Adjust Task Duration | Independent | 1 | J.A.R.V.I.S (Render Farm) |
| Fleece Polygons | Adjust Task Duration | Independent | 1 | Thor Odinson |
| Combine Art and Code | Adjust Assigned Amounts | Independent | 1 | Thor Odinson, Robert Bruce Banner, Janet van Dyne |
| Release Candidate 1 (RC1) | Adjust Task Duration | Independent | 1 | Janet van Dyne |
| Test Internally | Adjust Task Effort | Independent | 1 | Everyone |
| “Friends and Family” Beta | Adjust Task Effort | Independent | 2 | Everyone |
| Public Beta | Adjust Task Effort | Independent | 2 | Everyone |
| Game Release | Adjust Task Duration | Independent | 1 | Janet van Dyne |
When you’ve finished assigning everyone to the project, it should look similar to the following:
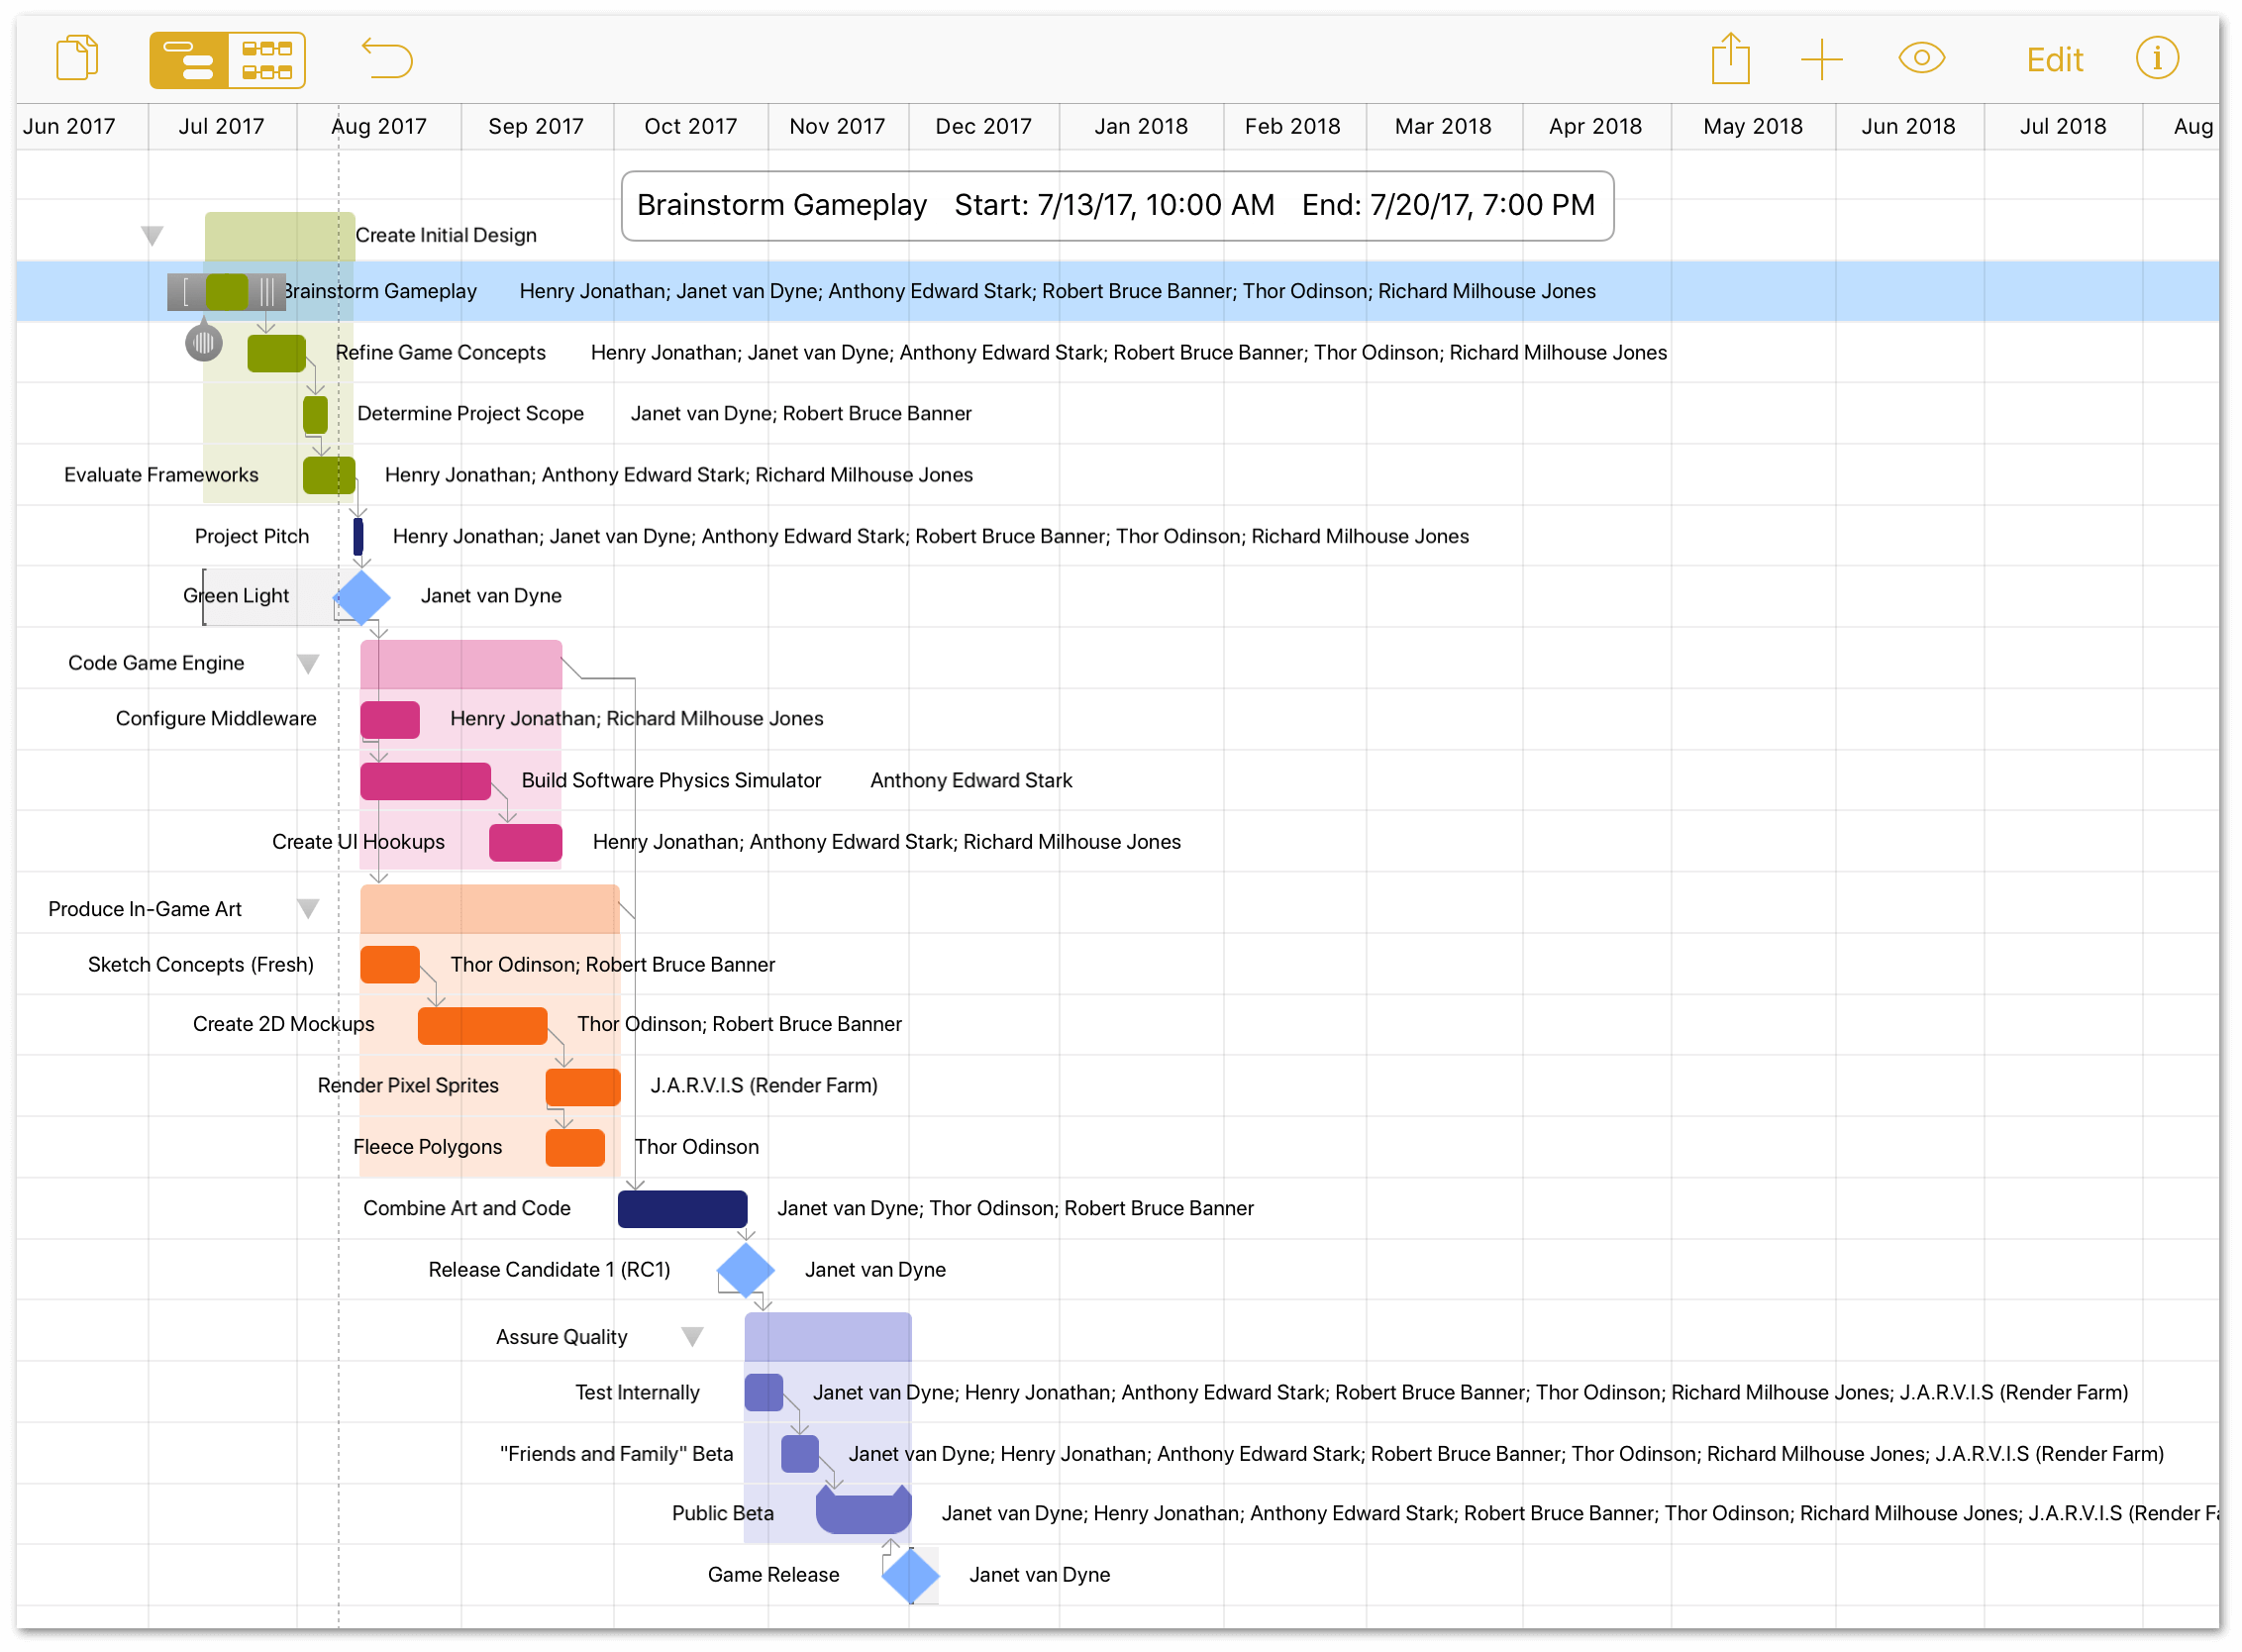
Step 13: Setting Individual Schedule Exceptions
Individual staff members may have personalized work schedules, and they’ll almost certainly have individual needs for time off over the course of a project.
To display an employee’s normal schedule:
- Tap to choose the Resources inspector.
- Tap to select the employee whose schedule you need to adjust.
-
To adjust their Normal Working Hours, tap Work Hours, and then adjust their schedule accordingly:
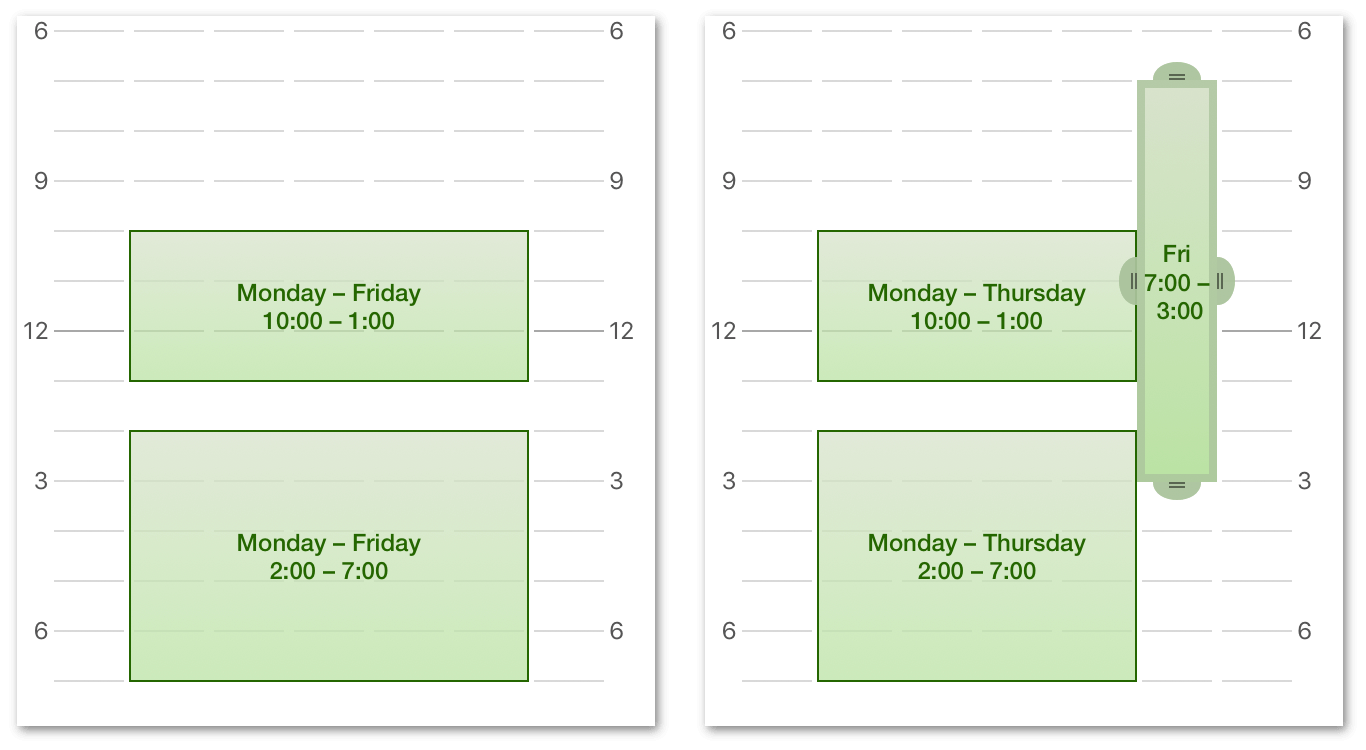
Here, Bruce’s Normal Working Hours have been changed so he can come in and leave earlier on Fridays.
-
To add time off, or to authorize overtime, tap the Calendar field, tap to select the date, and adjust their schedule accordingly:
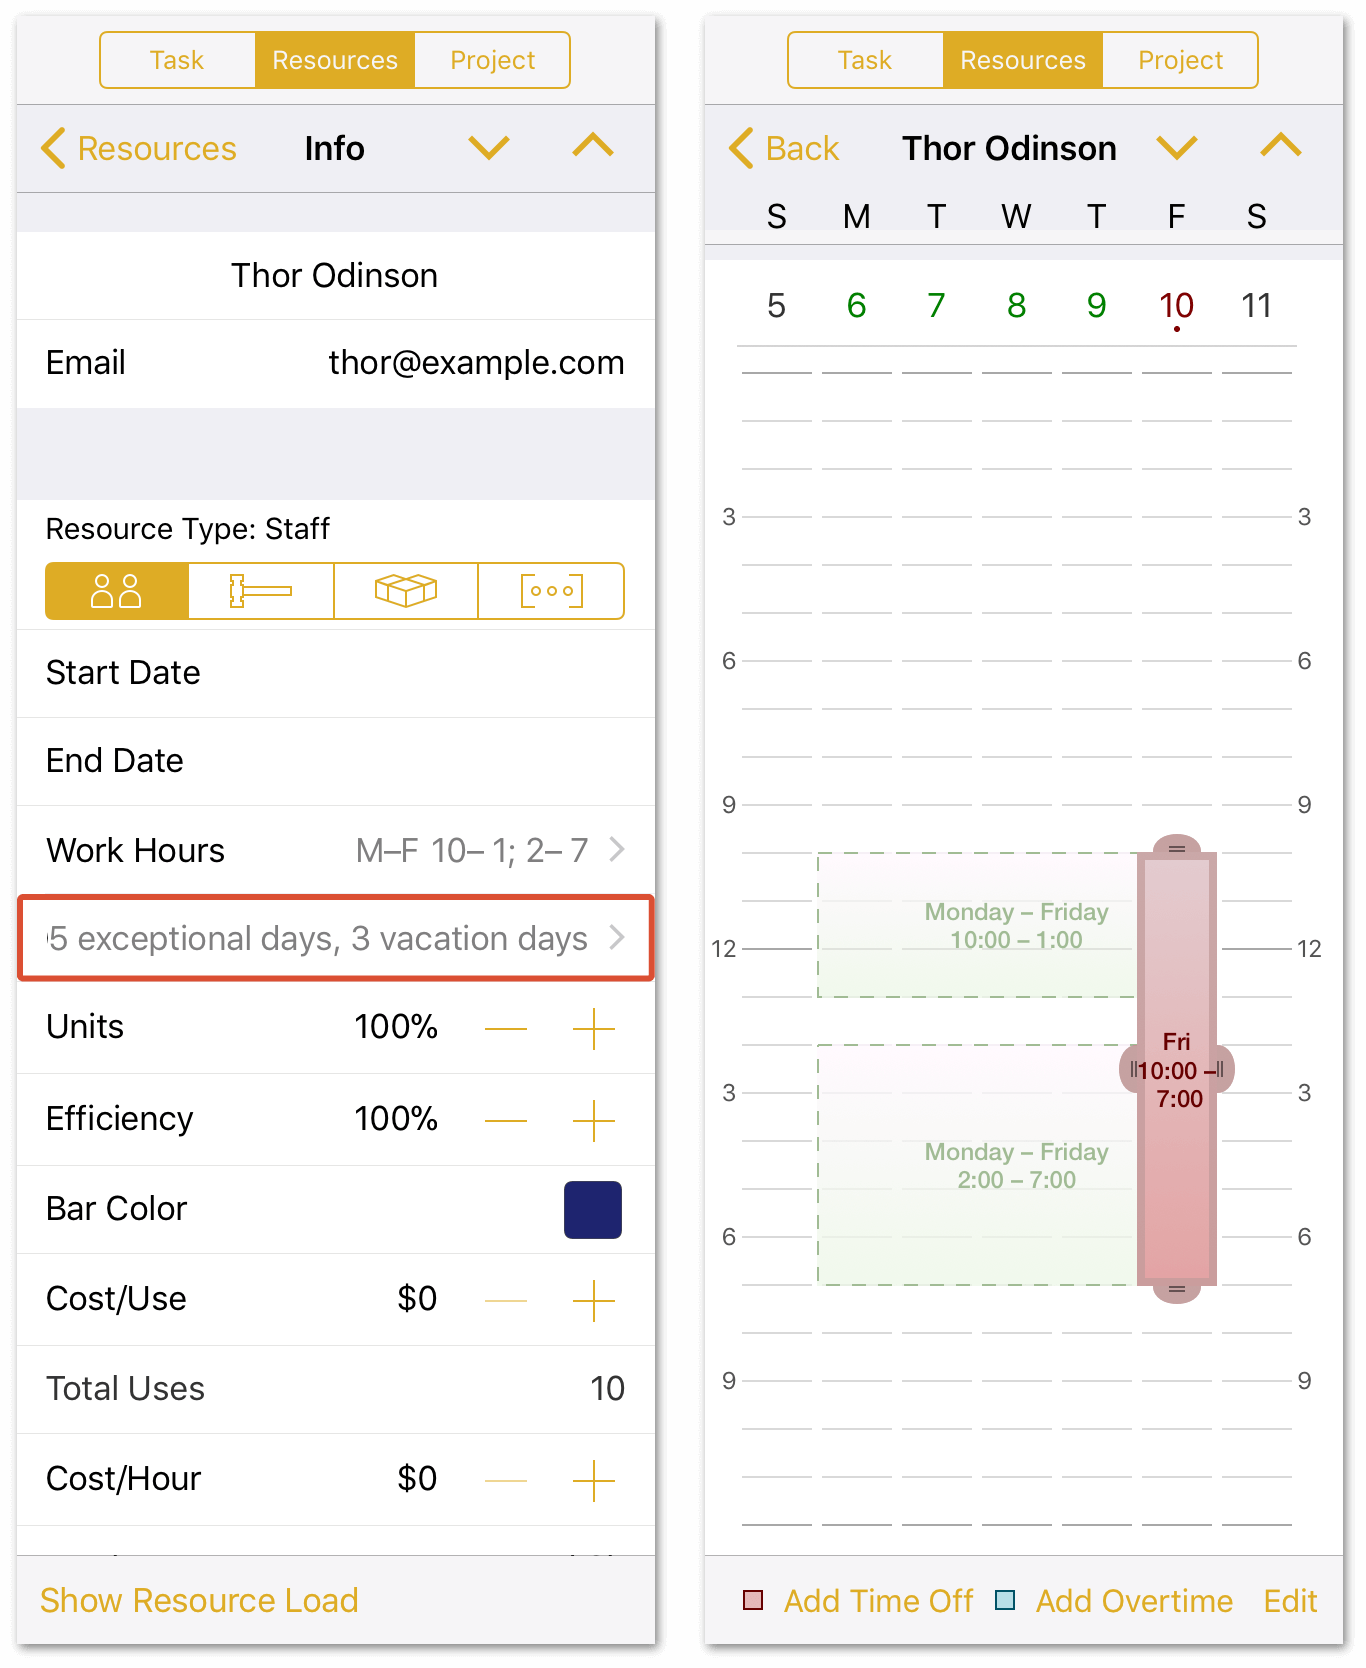
Here, Thor is scheduled to be out of the office on Friday, November 10 so he can make it back to Asgard in time for the Feast of the Einherjar.
Step 14: Assigning Costs to Tasks and Resources
Once a project gets started, tracking costs and expenses is a critical part of your role as project manager. As part of setting up the project and determining how much it will cost, you can assign costs to every resource used or acquired during the course of the project, including Staff, Equipment, and Materials.
Resources can be assigned both Cost per Hour and/or a Cost per Use in the Resources inspector. Miscellaneous costs not associated with a specific resource can instead be added to the task itself, as Task Cost in the Task inspector.
To get an idea of how much this project will cost, start by assigning an hourly rate to the team members:
- Tap to view the Resources inspector.
-
Tap to select individual team members, and assign a Cost/Hour for each as follows:
- Henry Jonathan ($42.00/hour)
- Janet van Dyne ($60.00/hour)
- Anthony Edward Stark ($50.00/hour)
- Robert Bruce Banner ($50.00/hour)
- Thor Odinson ($45.00/hour)
- Richard Milhouse Jones ($43.00/hour)
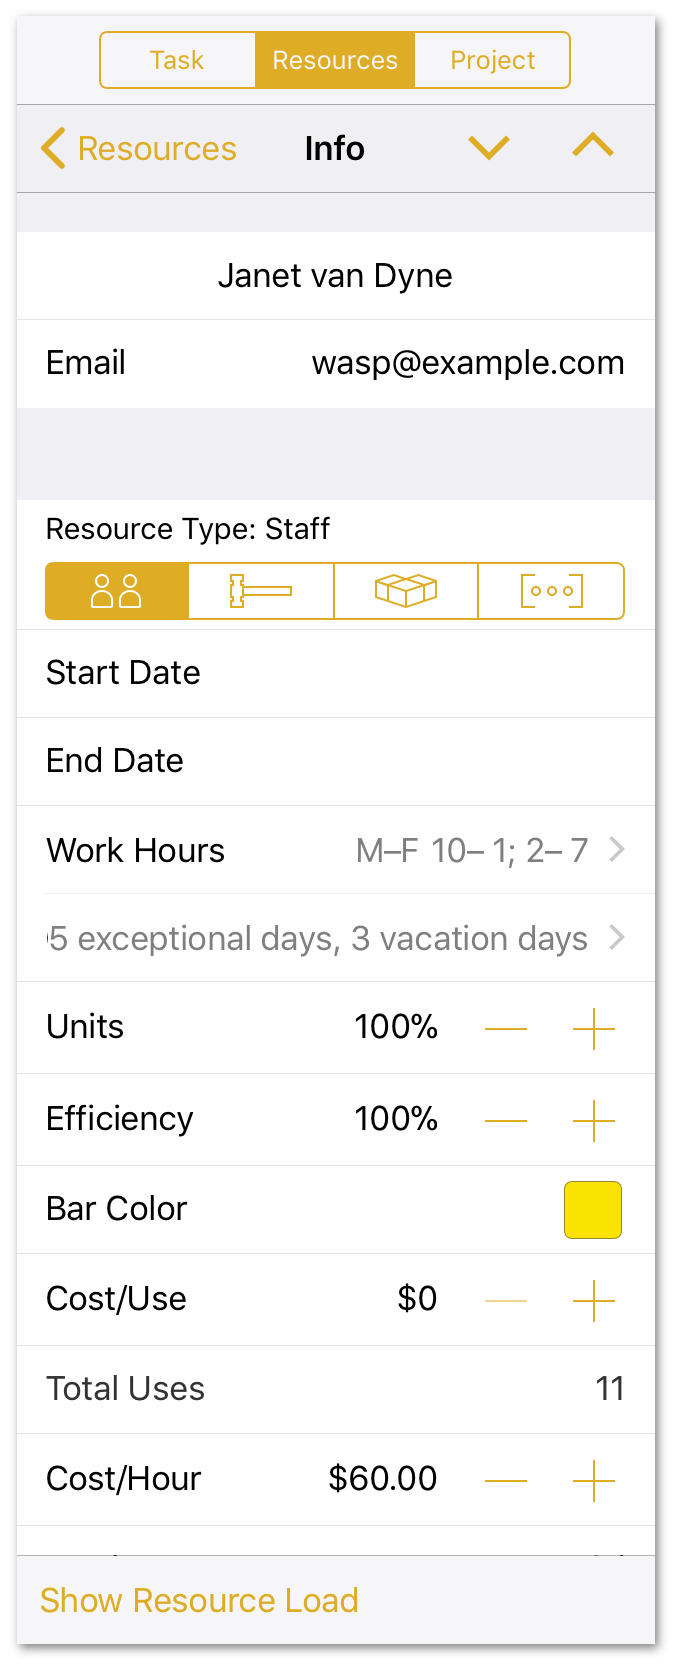
-
Still in the Resources inspector, tap to select J.A.R.V.I.S (Render Farm), and set the Cost/Use to $2000.00:
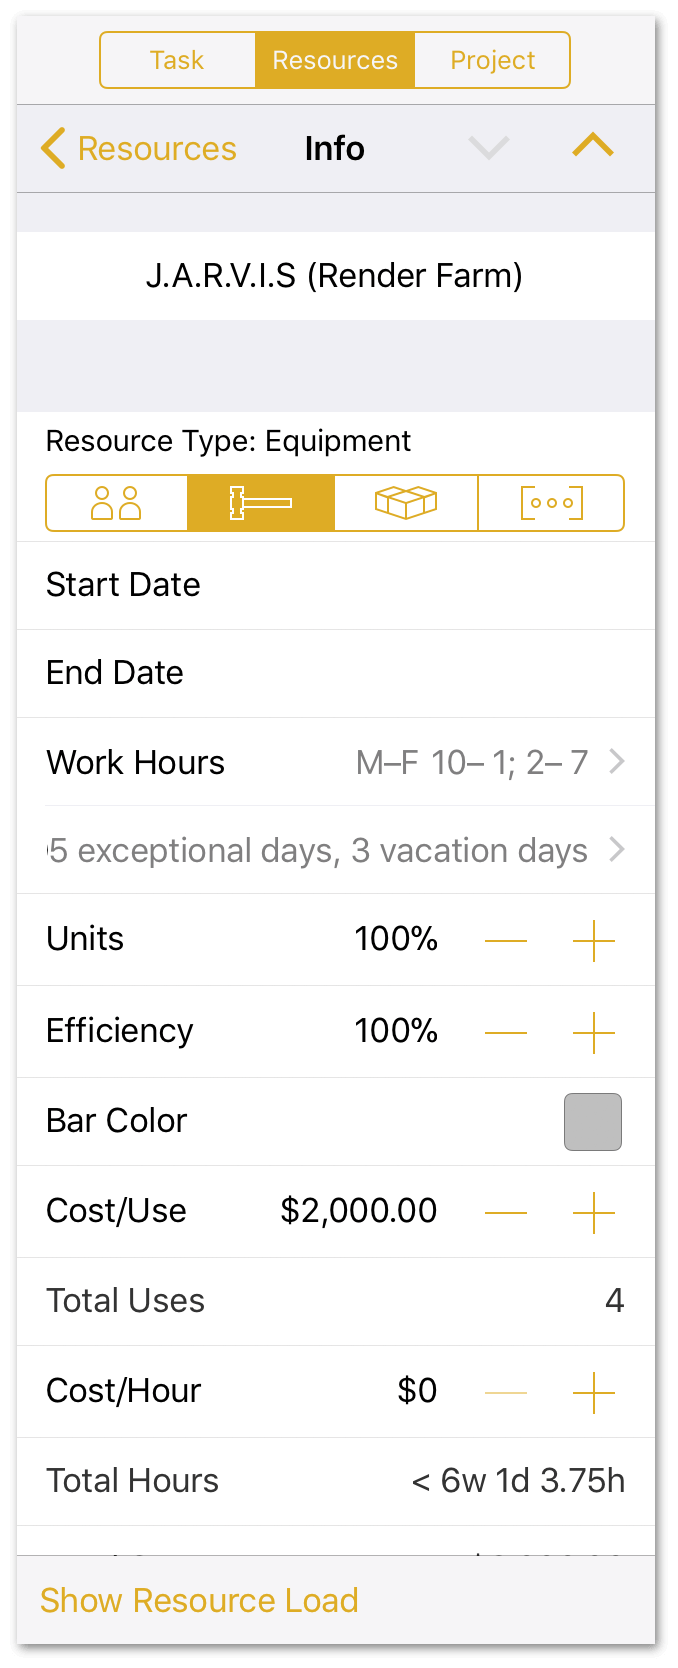
-
To add an additional expense to a task, do the following:
a. Tap to select Public Beta.
b. Tap to select the Task inspector.
c. Assign a Task Cost of $2,000.00 to cover bringing in a Social Media consultant to monitor and respond to customers during that time.
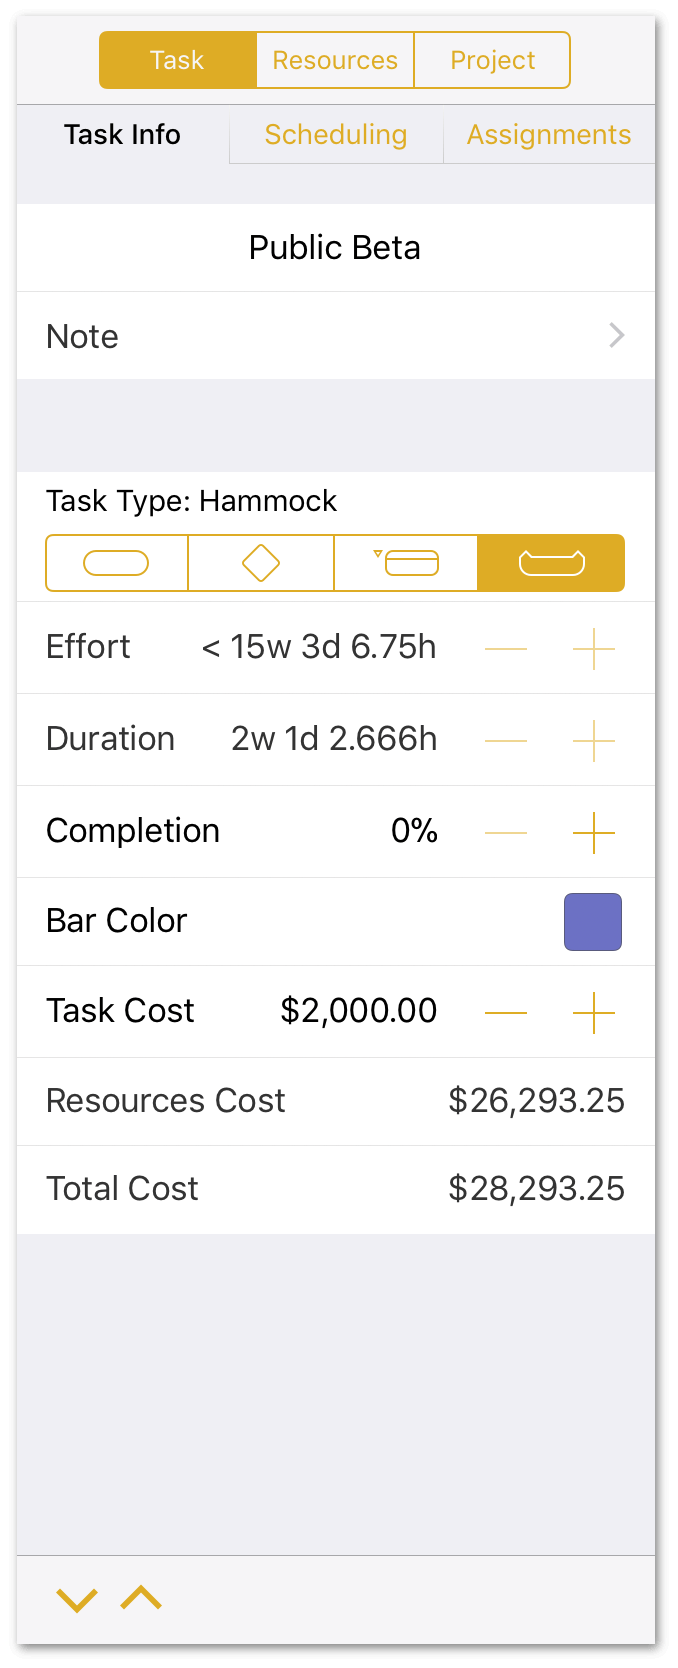
To see the overall cost of the project, tap to select the Project inspector and look at the Total Cost field. Knowing this in advance helps you to plan for additional costs, or it could force you to go back and reallocate resources if the project is over budget.
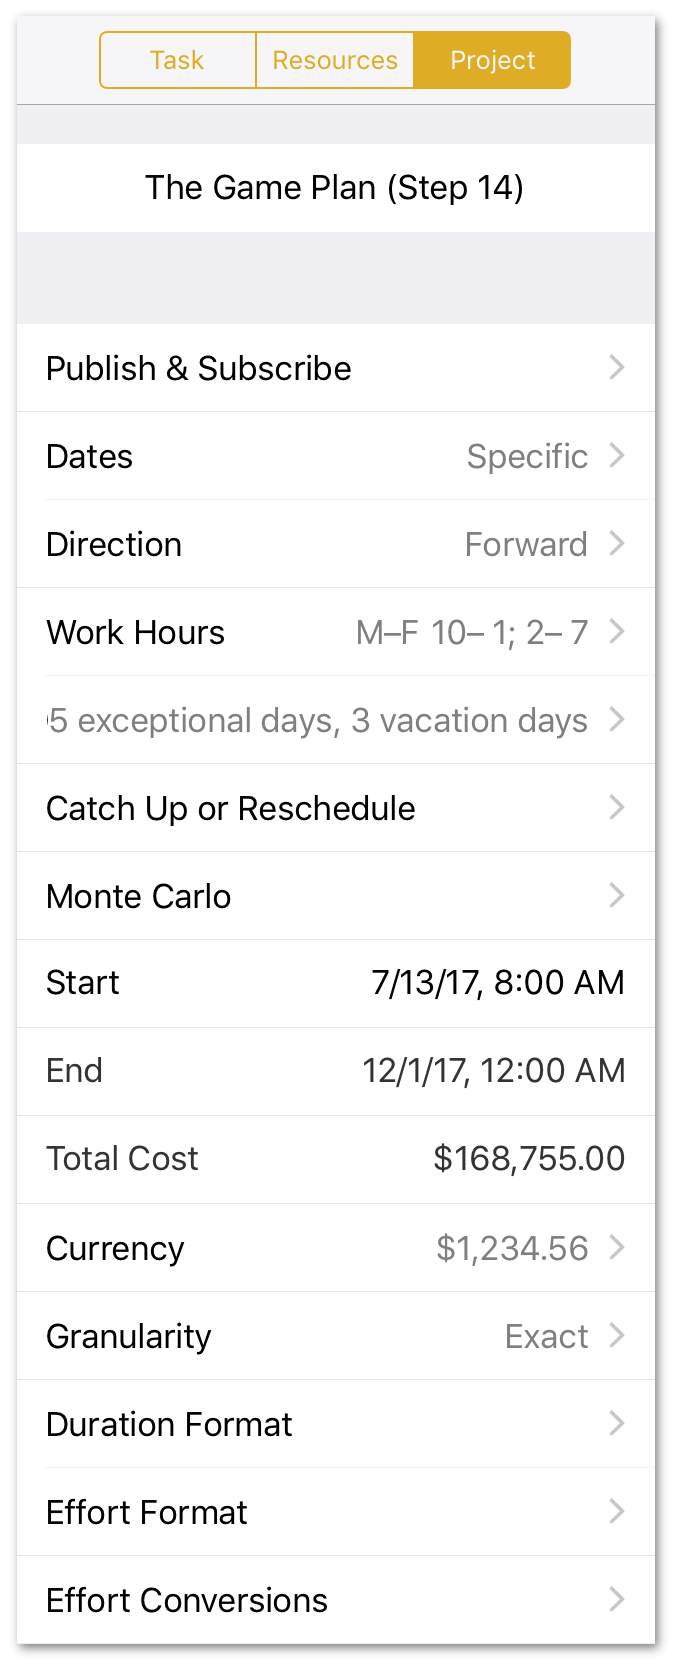
The Total Cost of the project, however, isn’t entirely accurate right now. This is because the Public Beta has been set up as a Hammock Task, which allows it to shrink or grow as the project progresses. You’ll want to keep a close eye on the Total Cost, as it will most certainly go down, as the duration of the Hammock Task shortens.
Step 15: Leveling the Project
After assigning team members and equipment to the tasks, you can ensure the team is at its most productive by Leveling the workload across resources and tasks.
It’s hard to overstate the power of leveling in OmniPlan. When you first level a project, you cross the line between human and machine—making the statement that you’ve added everything you know about the project to the plan, and now it’s time to see what OmniPlan can do to help get all those things done optimally. Automation happens, and everything moves to its most efficient place based on the model of the project you’ve described.
To level the resource workload for your project, do the following:
-
Tap to select the Resources inspector:
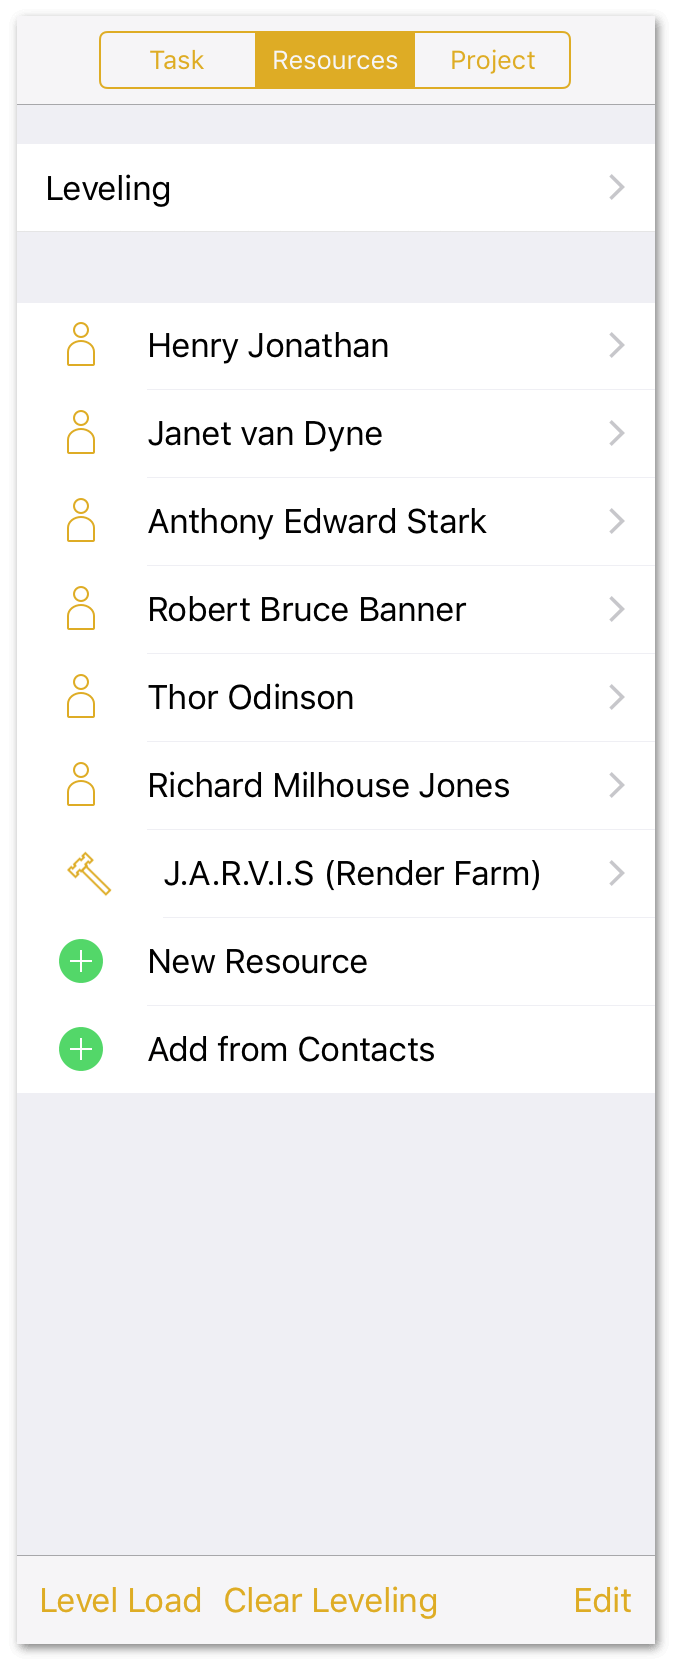
-
Tap Leveling at the top of the inspector and turn on Automatic Leveling and Constrain to Future; turn off Allow Splitting:
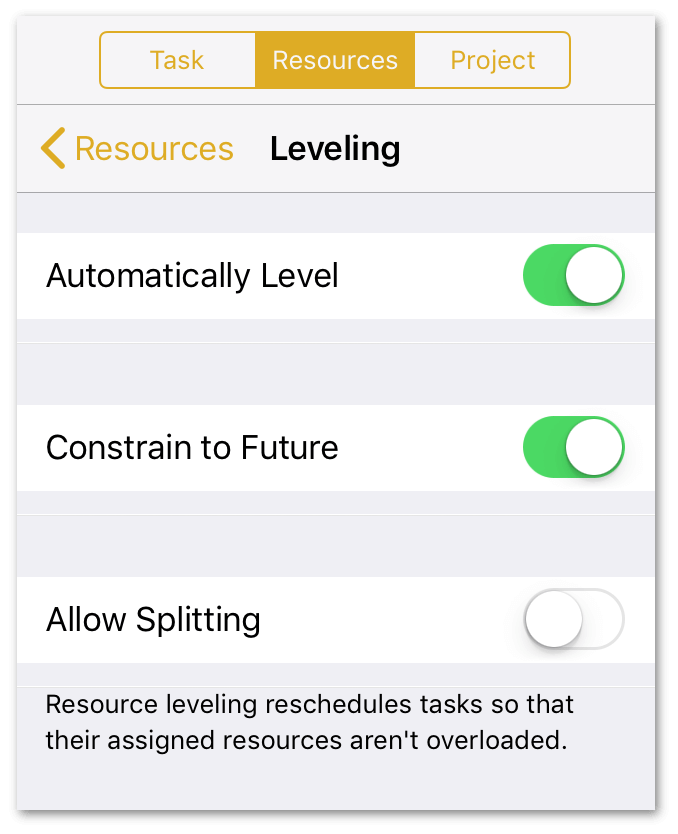
The Automatic Leveling option optimizes the resources in your project plan whenever a change is made.
Unless your staff is already in the optimal configuration you’ll see the tasks in the Gantt view shift to accommodate the most efficient use of their time.
If you tap on the Project inspector, you’ll notice that the Total Cost has already gone down slightly due to shrinkage in the Public Beta hammock task.
Step 16: Setting a Baseline
With tasks set and resources assigned and leveled, the project now reflects the best of all possible worlds—one where unforeseen hindrances don’t bog down progress. A world where optimistic estimates rule the day.
This is the world that is captured when a Baseline for progress is set. The Baseline is used to compare the project’s initial expectations against how the project is actually progressing. Setting the Baseline is important because, as the project manager, it enables you to adjust milestones and resource allocations to complete the project on time.
To set a Baseline, do the following:
-
In the toolbar, tap
 to open the View menu:
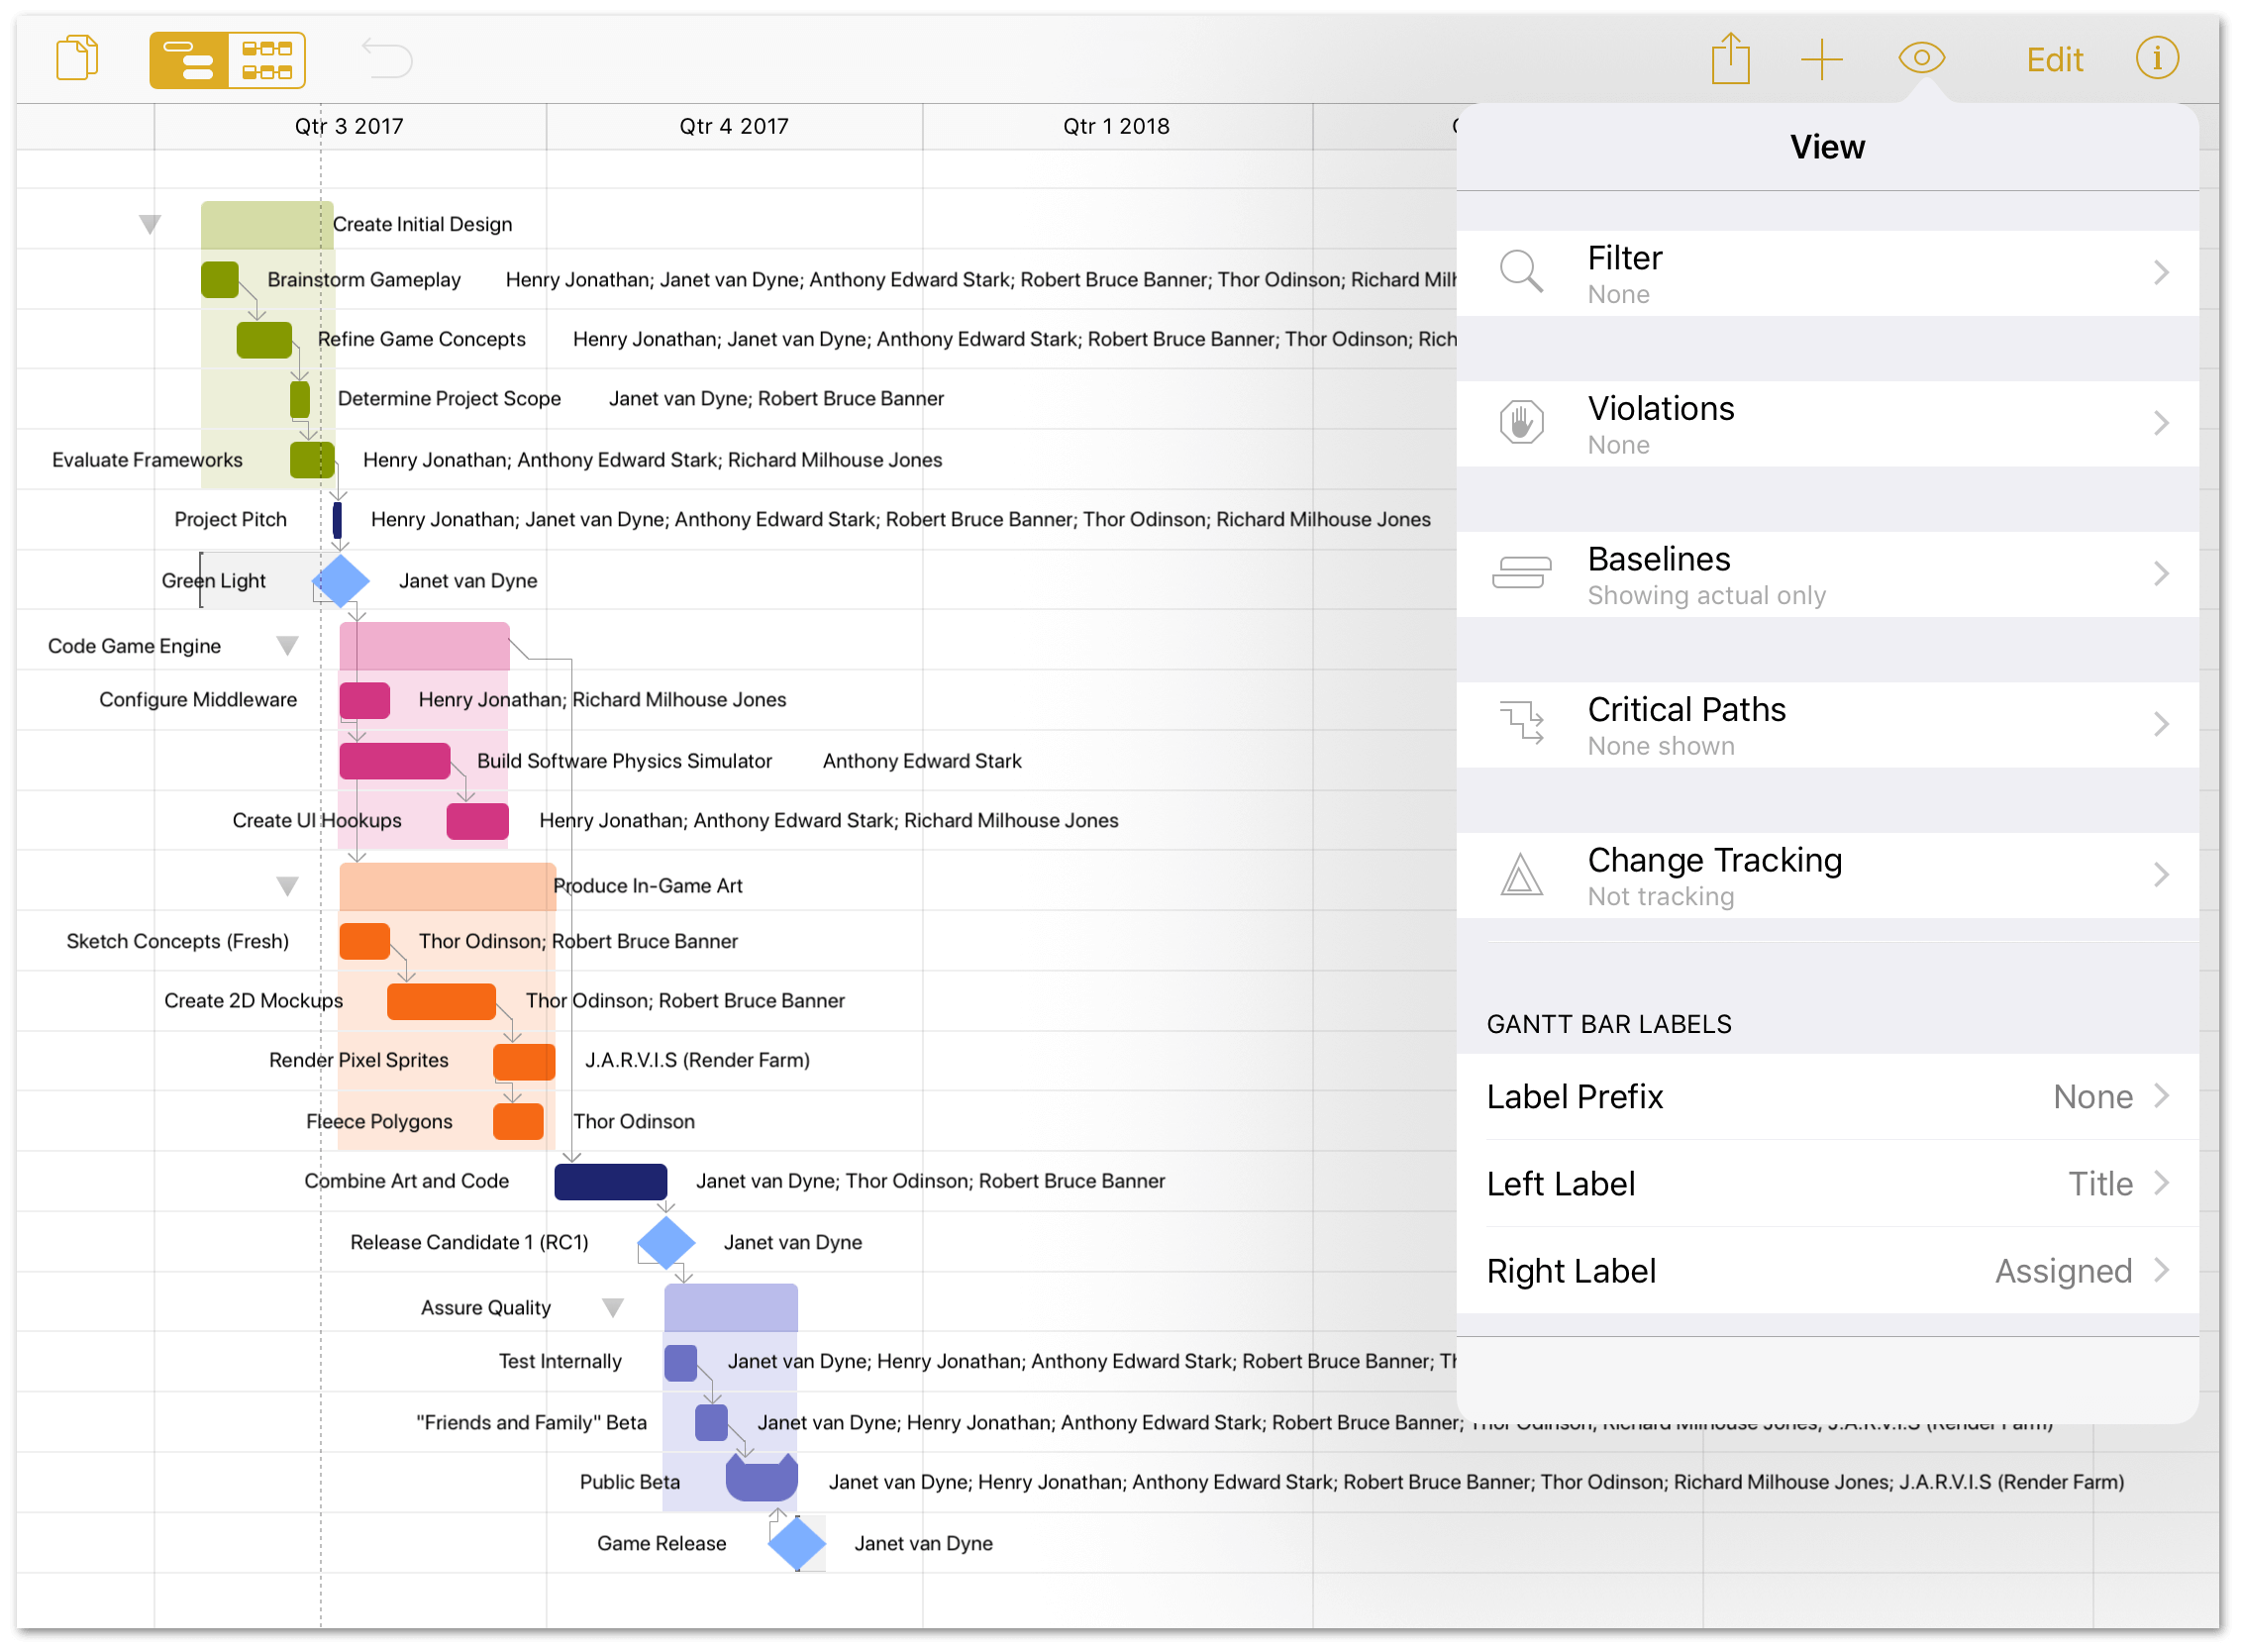
-
Tap Baselines.
-
Tap Set Baseline at the bottom of the View menu. This sets the name of the Baseline to the current date, but you can change this to anything you’d like (it doesn’t have to be a date).
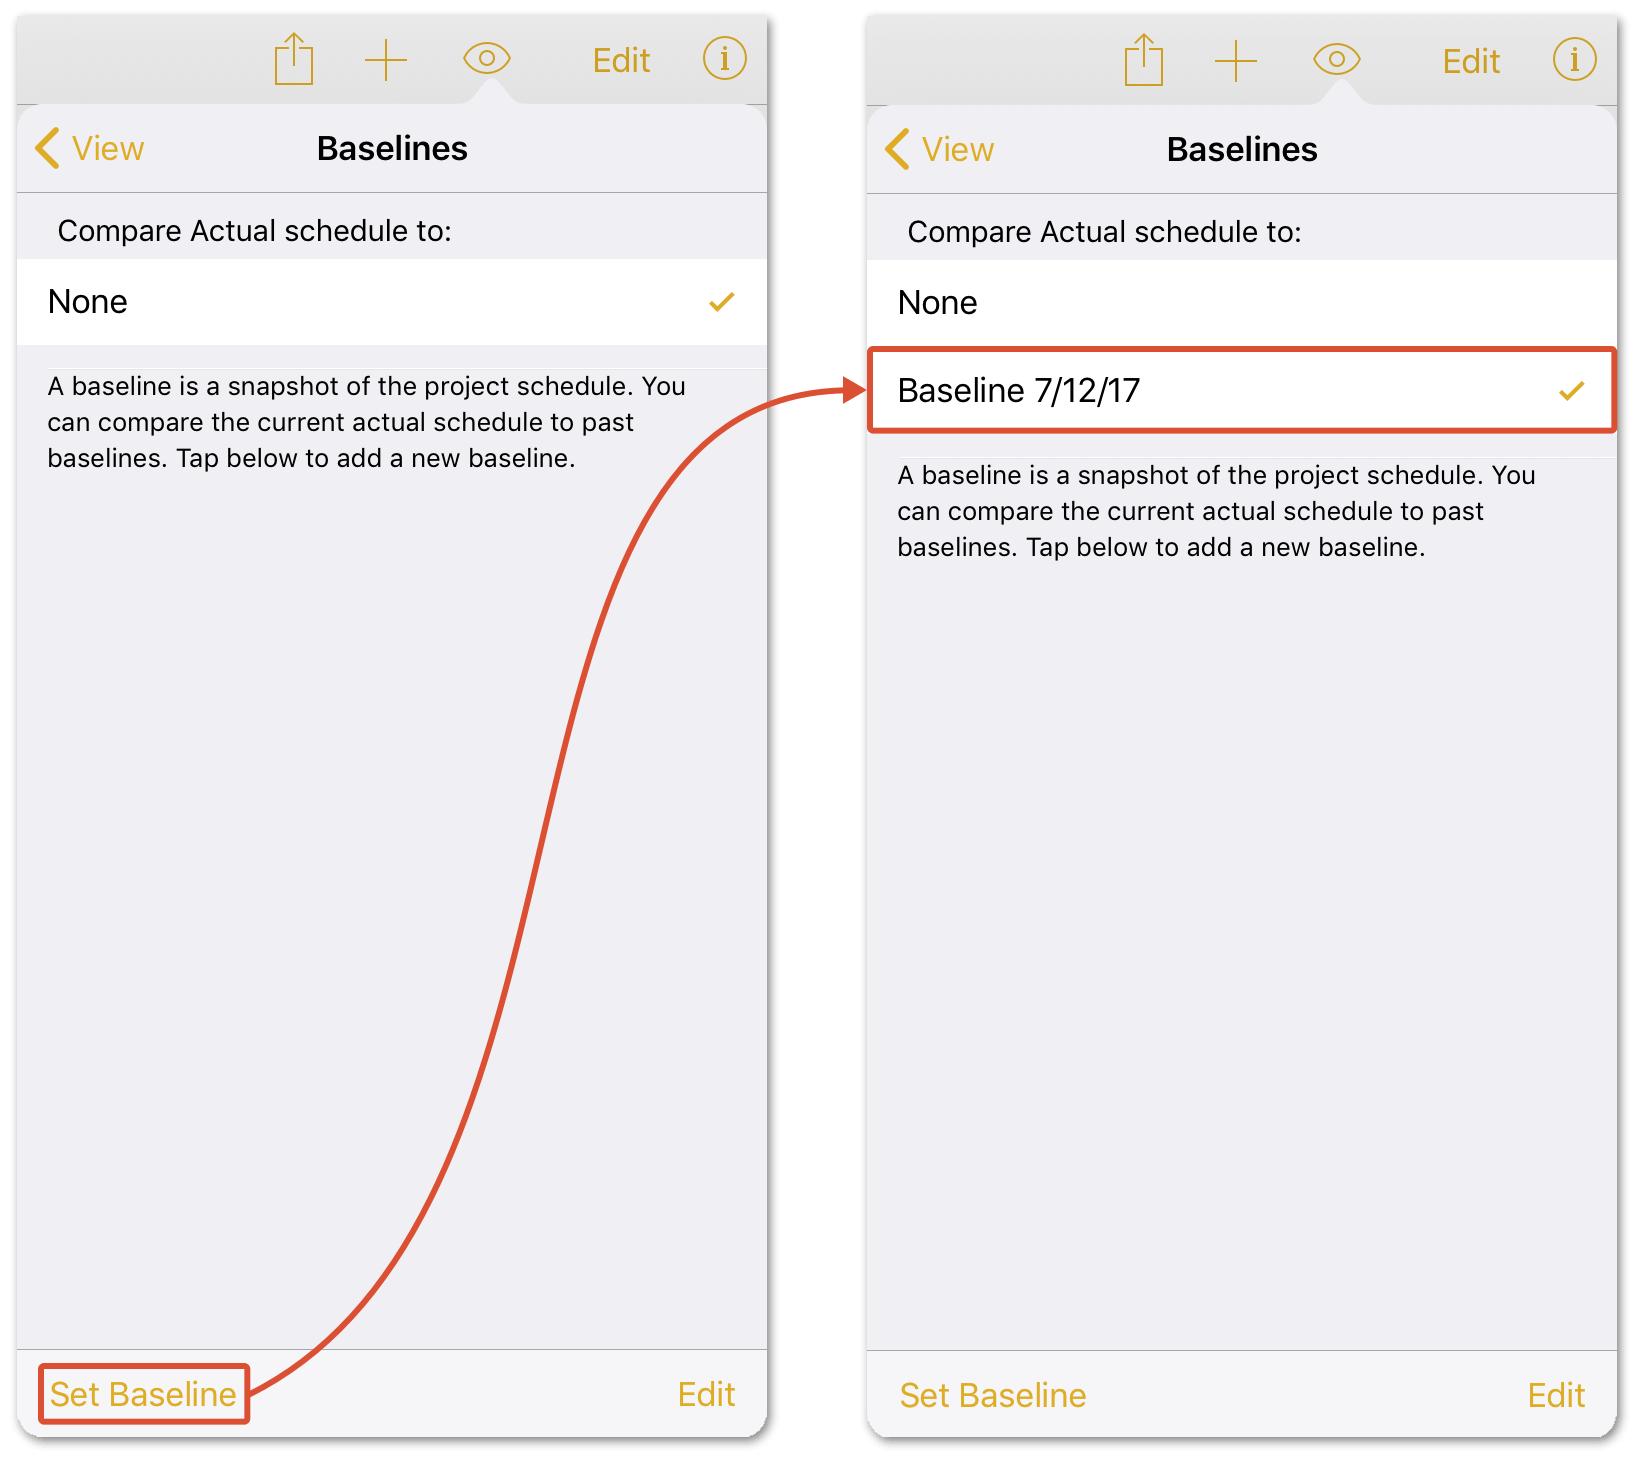
Your project can have more than one Baseline; simply add another by tapping Set Baseline at the bottom of the View menu. This allows you to compare how the project is progressing compared to the original timeline or against subsequent baselines.
What Comes Next?
The Game Plan project is now in its ideal form, right before the real work begins.
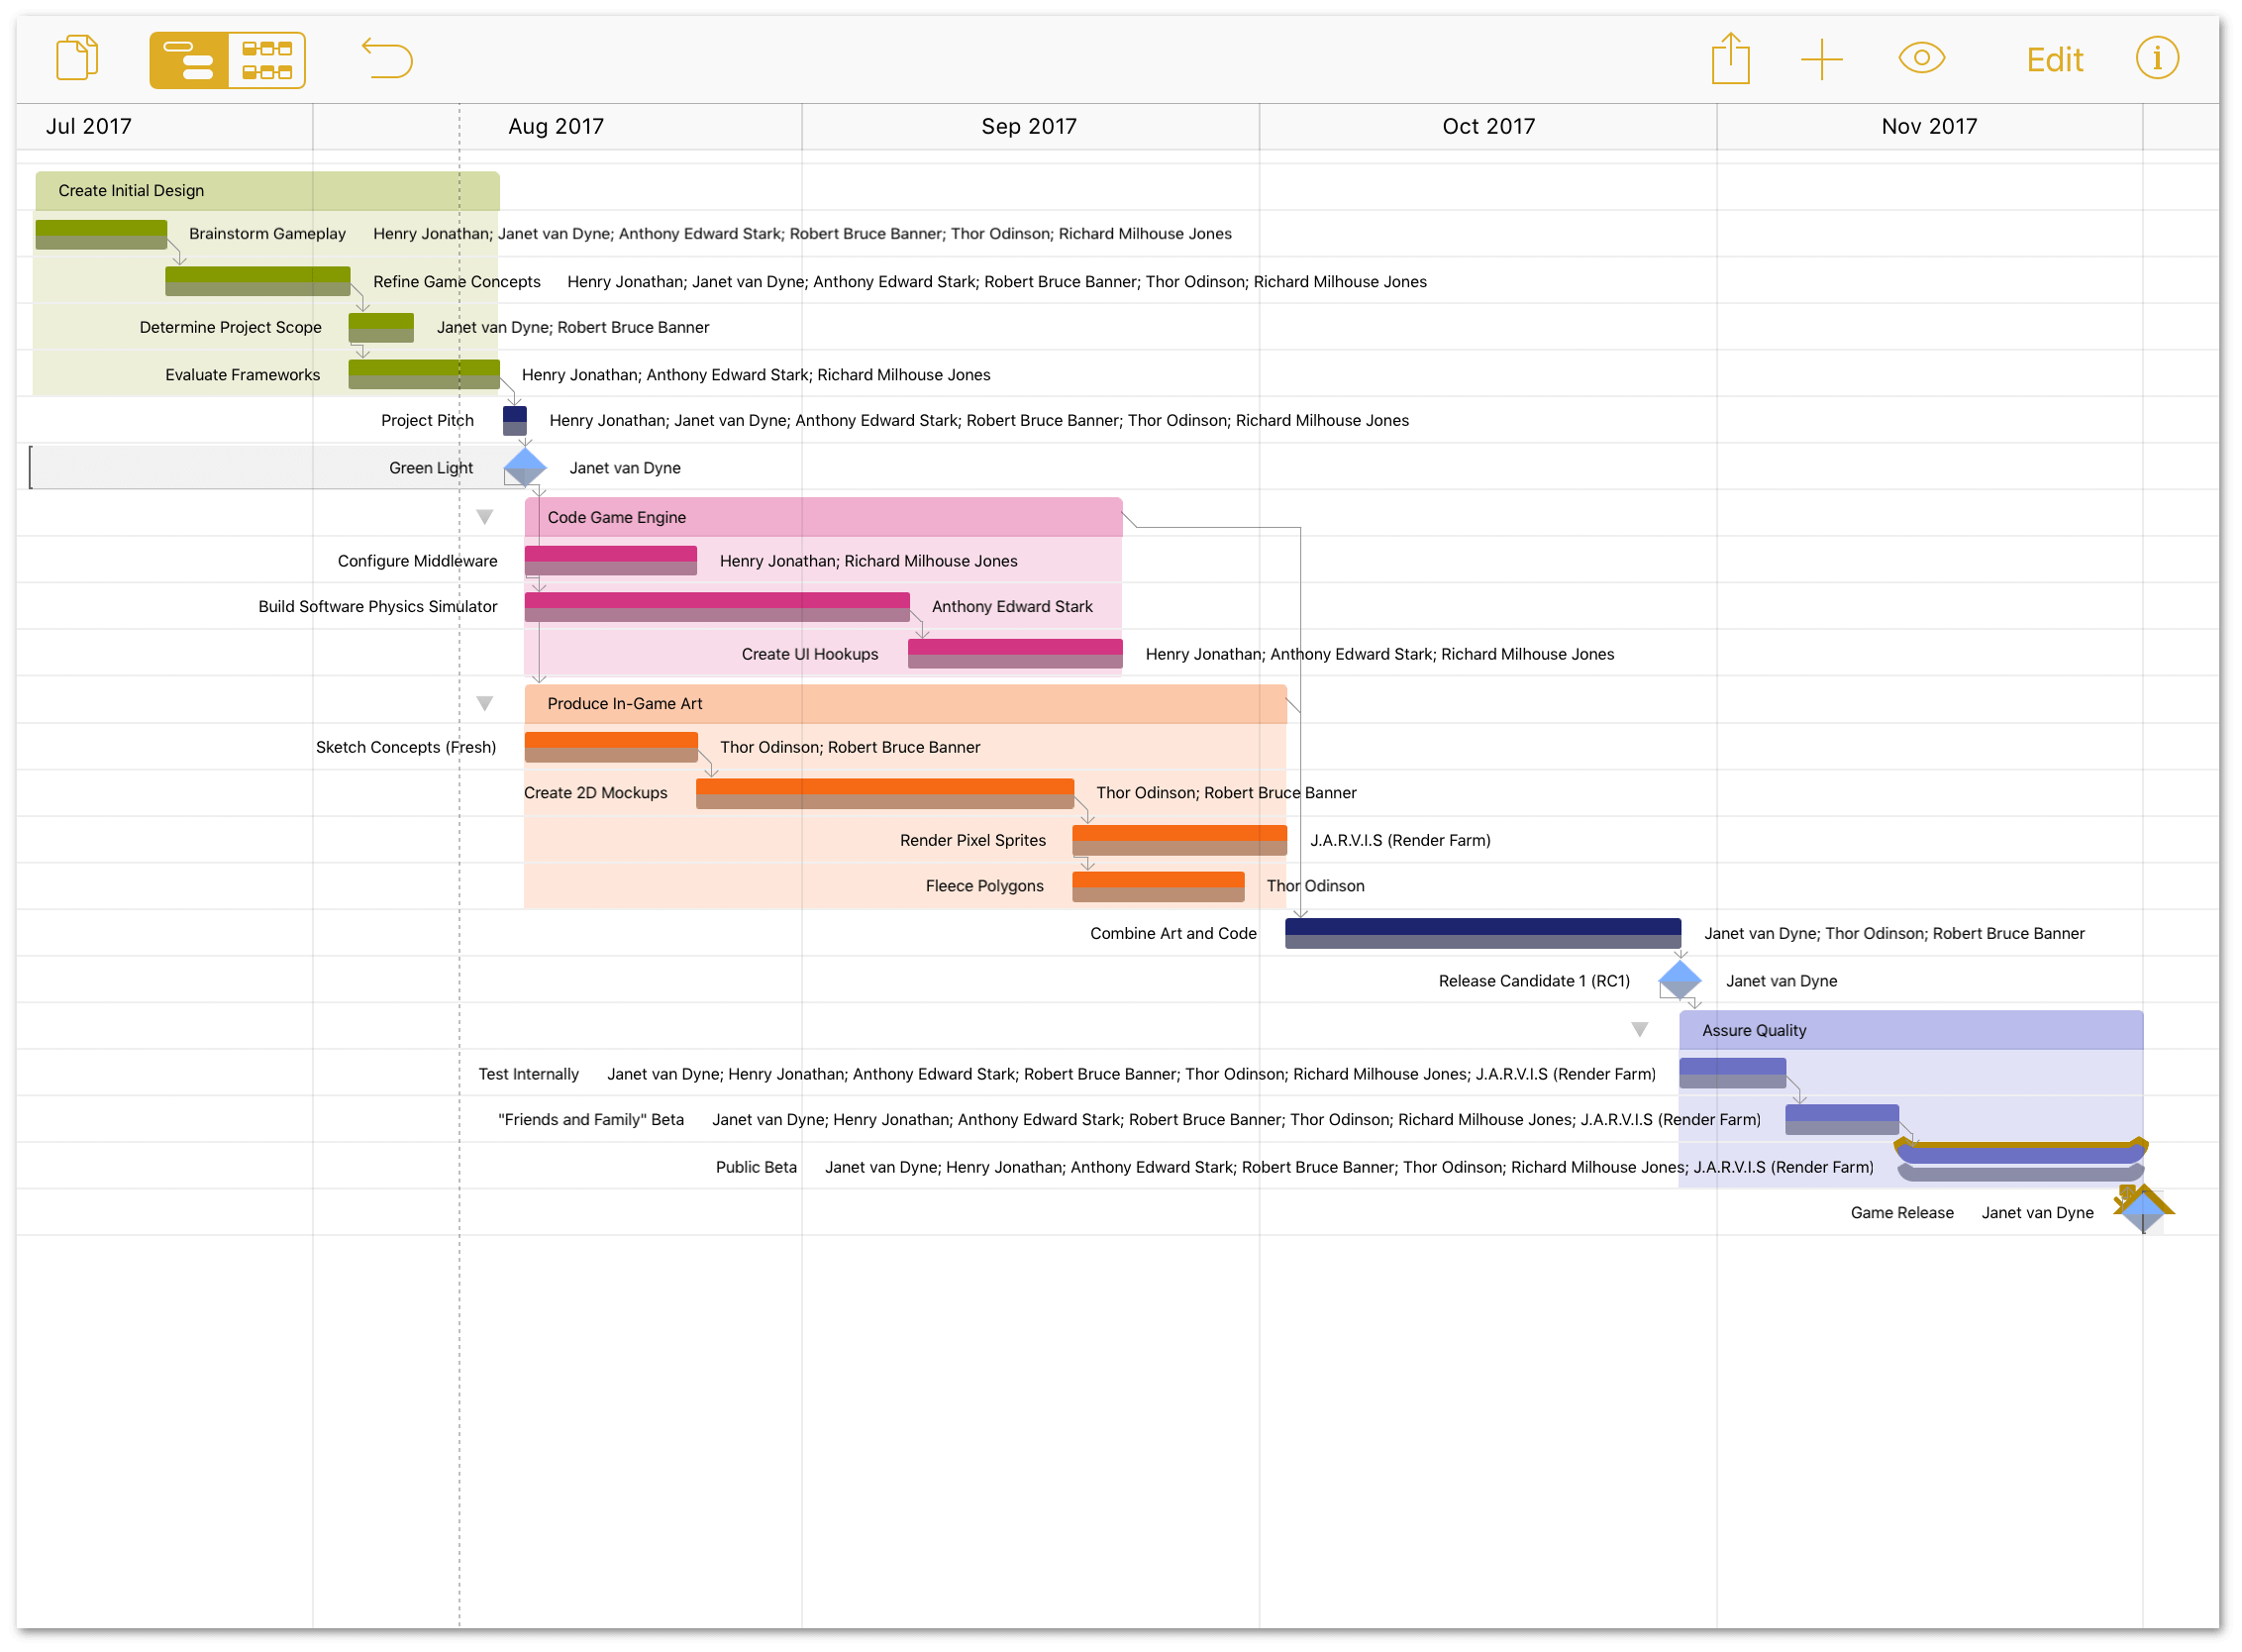
By laying out the project in OmniPlan, you should have a pretty good idea of what to expect. All of the tasks are in place, resources are assigned, you’ve set up the baseline, and you know how much all of this is going to cost. Well done!
Now comes the fun part of updating and managing the project along the way. The next chapter, Managing a Project, shows you how to use a variety of tools to see your project through to completion.
Managing a Project
Once work on a project begins, the steps to keep it running aren’t quite as predictably sequential as the ones used to set it up beforehand. The first few steps presented in this chapter are things to keep an eye on regularly, but some of the other tools are more specialized—they aren’t always needed, but when they are, they can be a huge help for keeping work progressing smoothly or correcting the course when unexpected situations arise.
The previous chapter, Building Your First Project, ended after setting the project’s baseline and looking at the Total Cost for the project. The first baseline creates a snapshot of the project in its initial, pre-work, phase, and acts as a point of reference for the original plan when you need one.
Updating Task Completion
As work begins on the project, you can track progress against the baseline by tapping a task currently in progress and moving the slider along to the task’s completion percentage (this can be edited in the Task inspector as well).
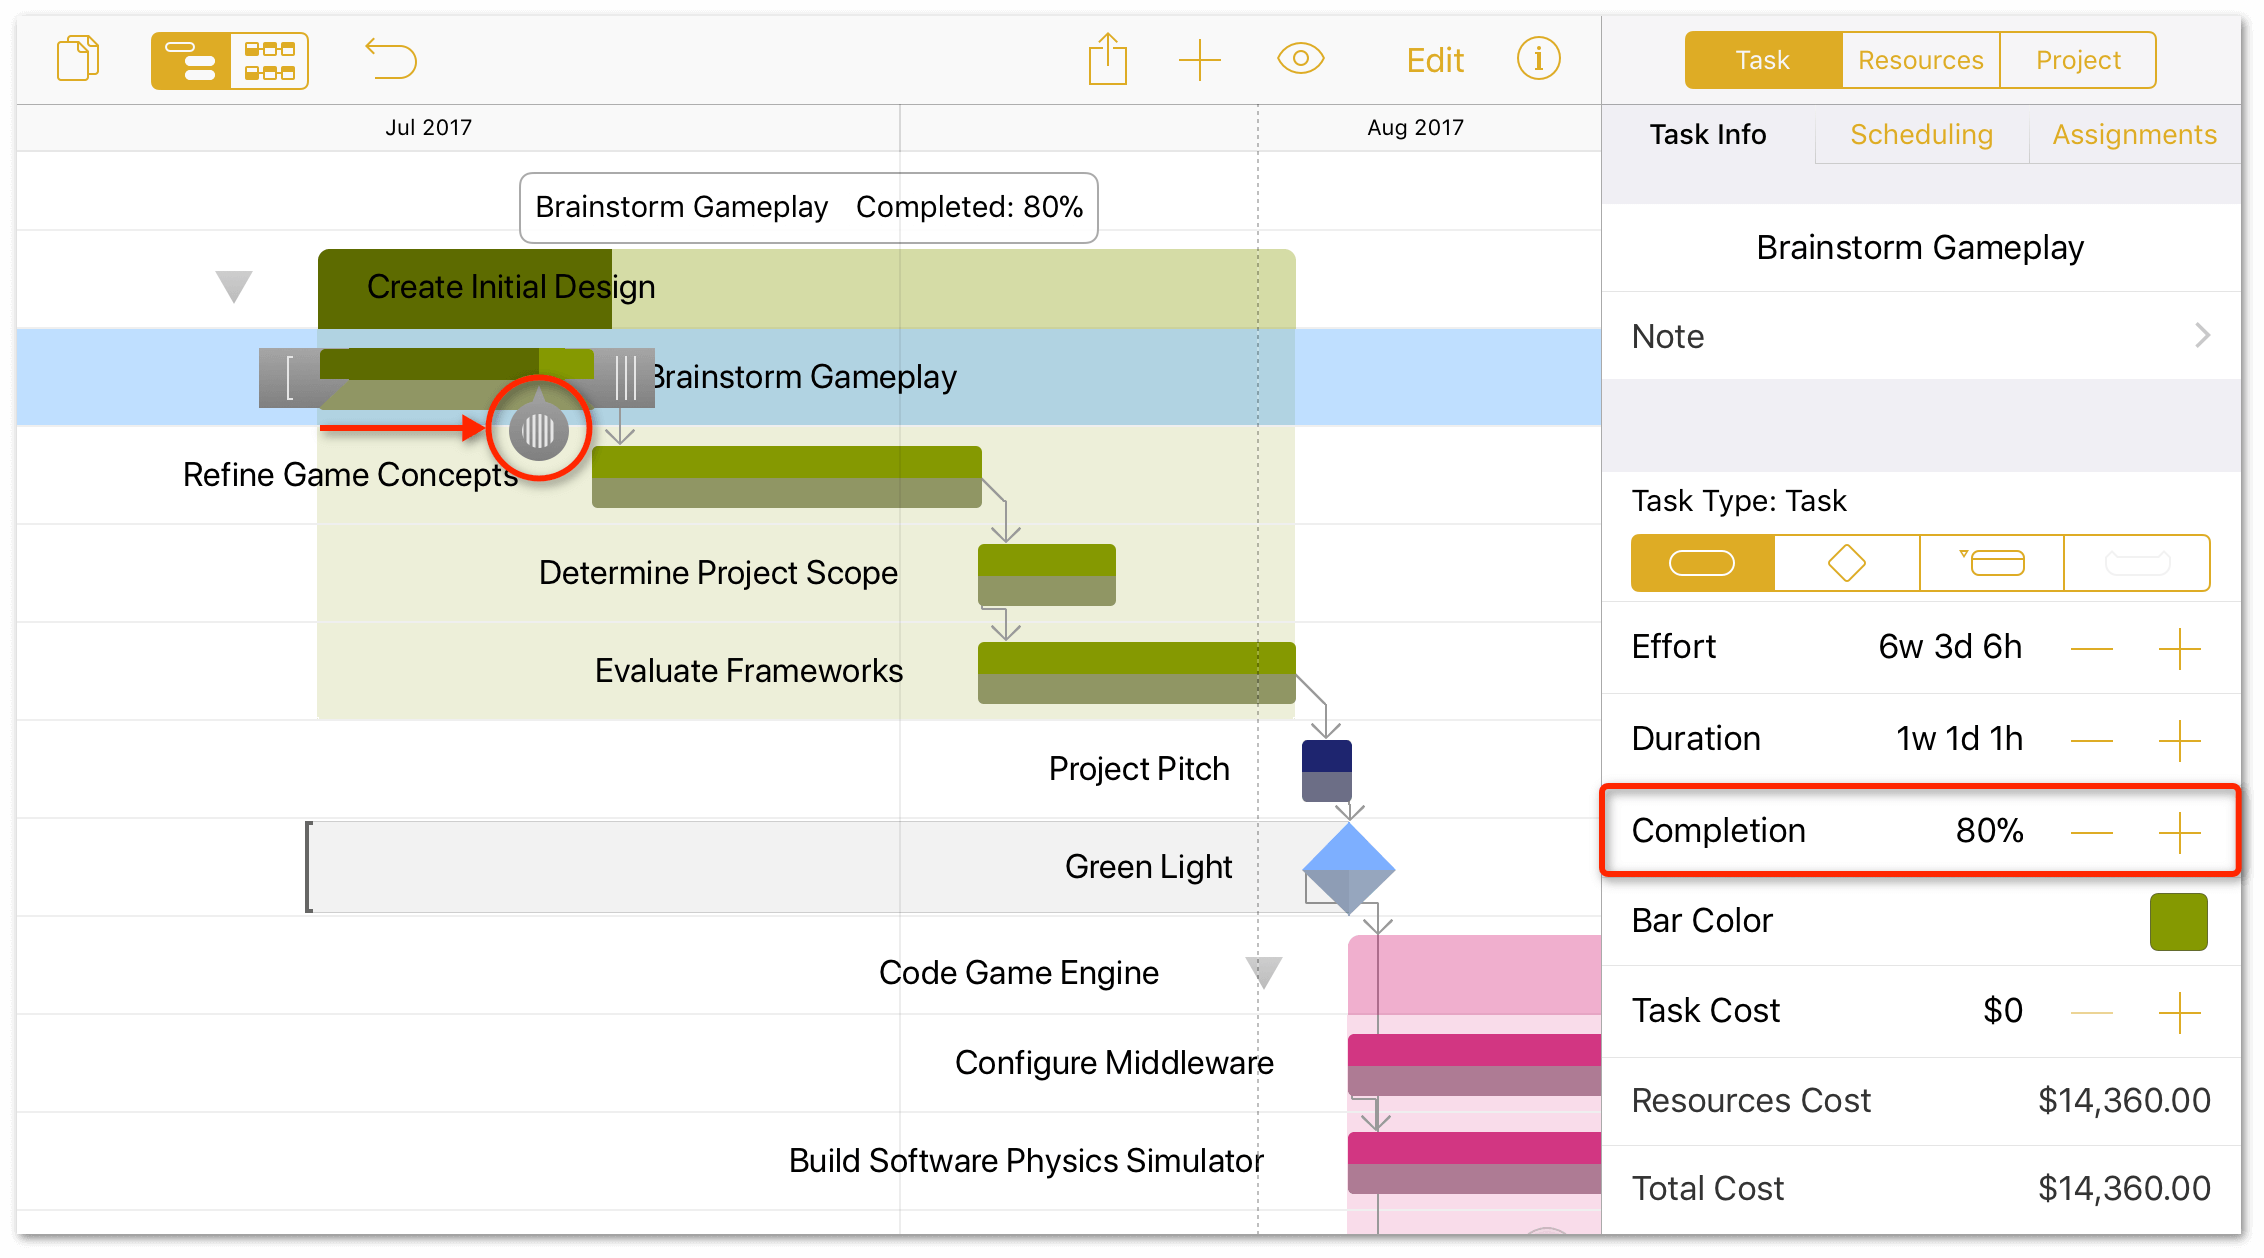
If everything is proceeding according to plan, you can use the Catch Up tool in the Project inspector to advance the completion percentage of all tasks to where they should be as of the end of today’s workday.
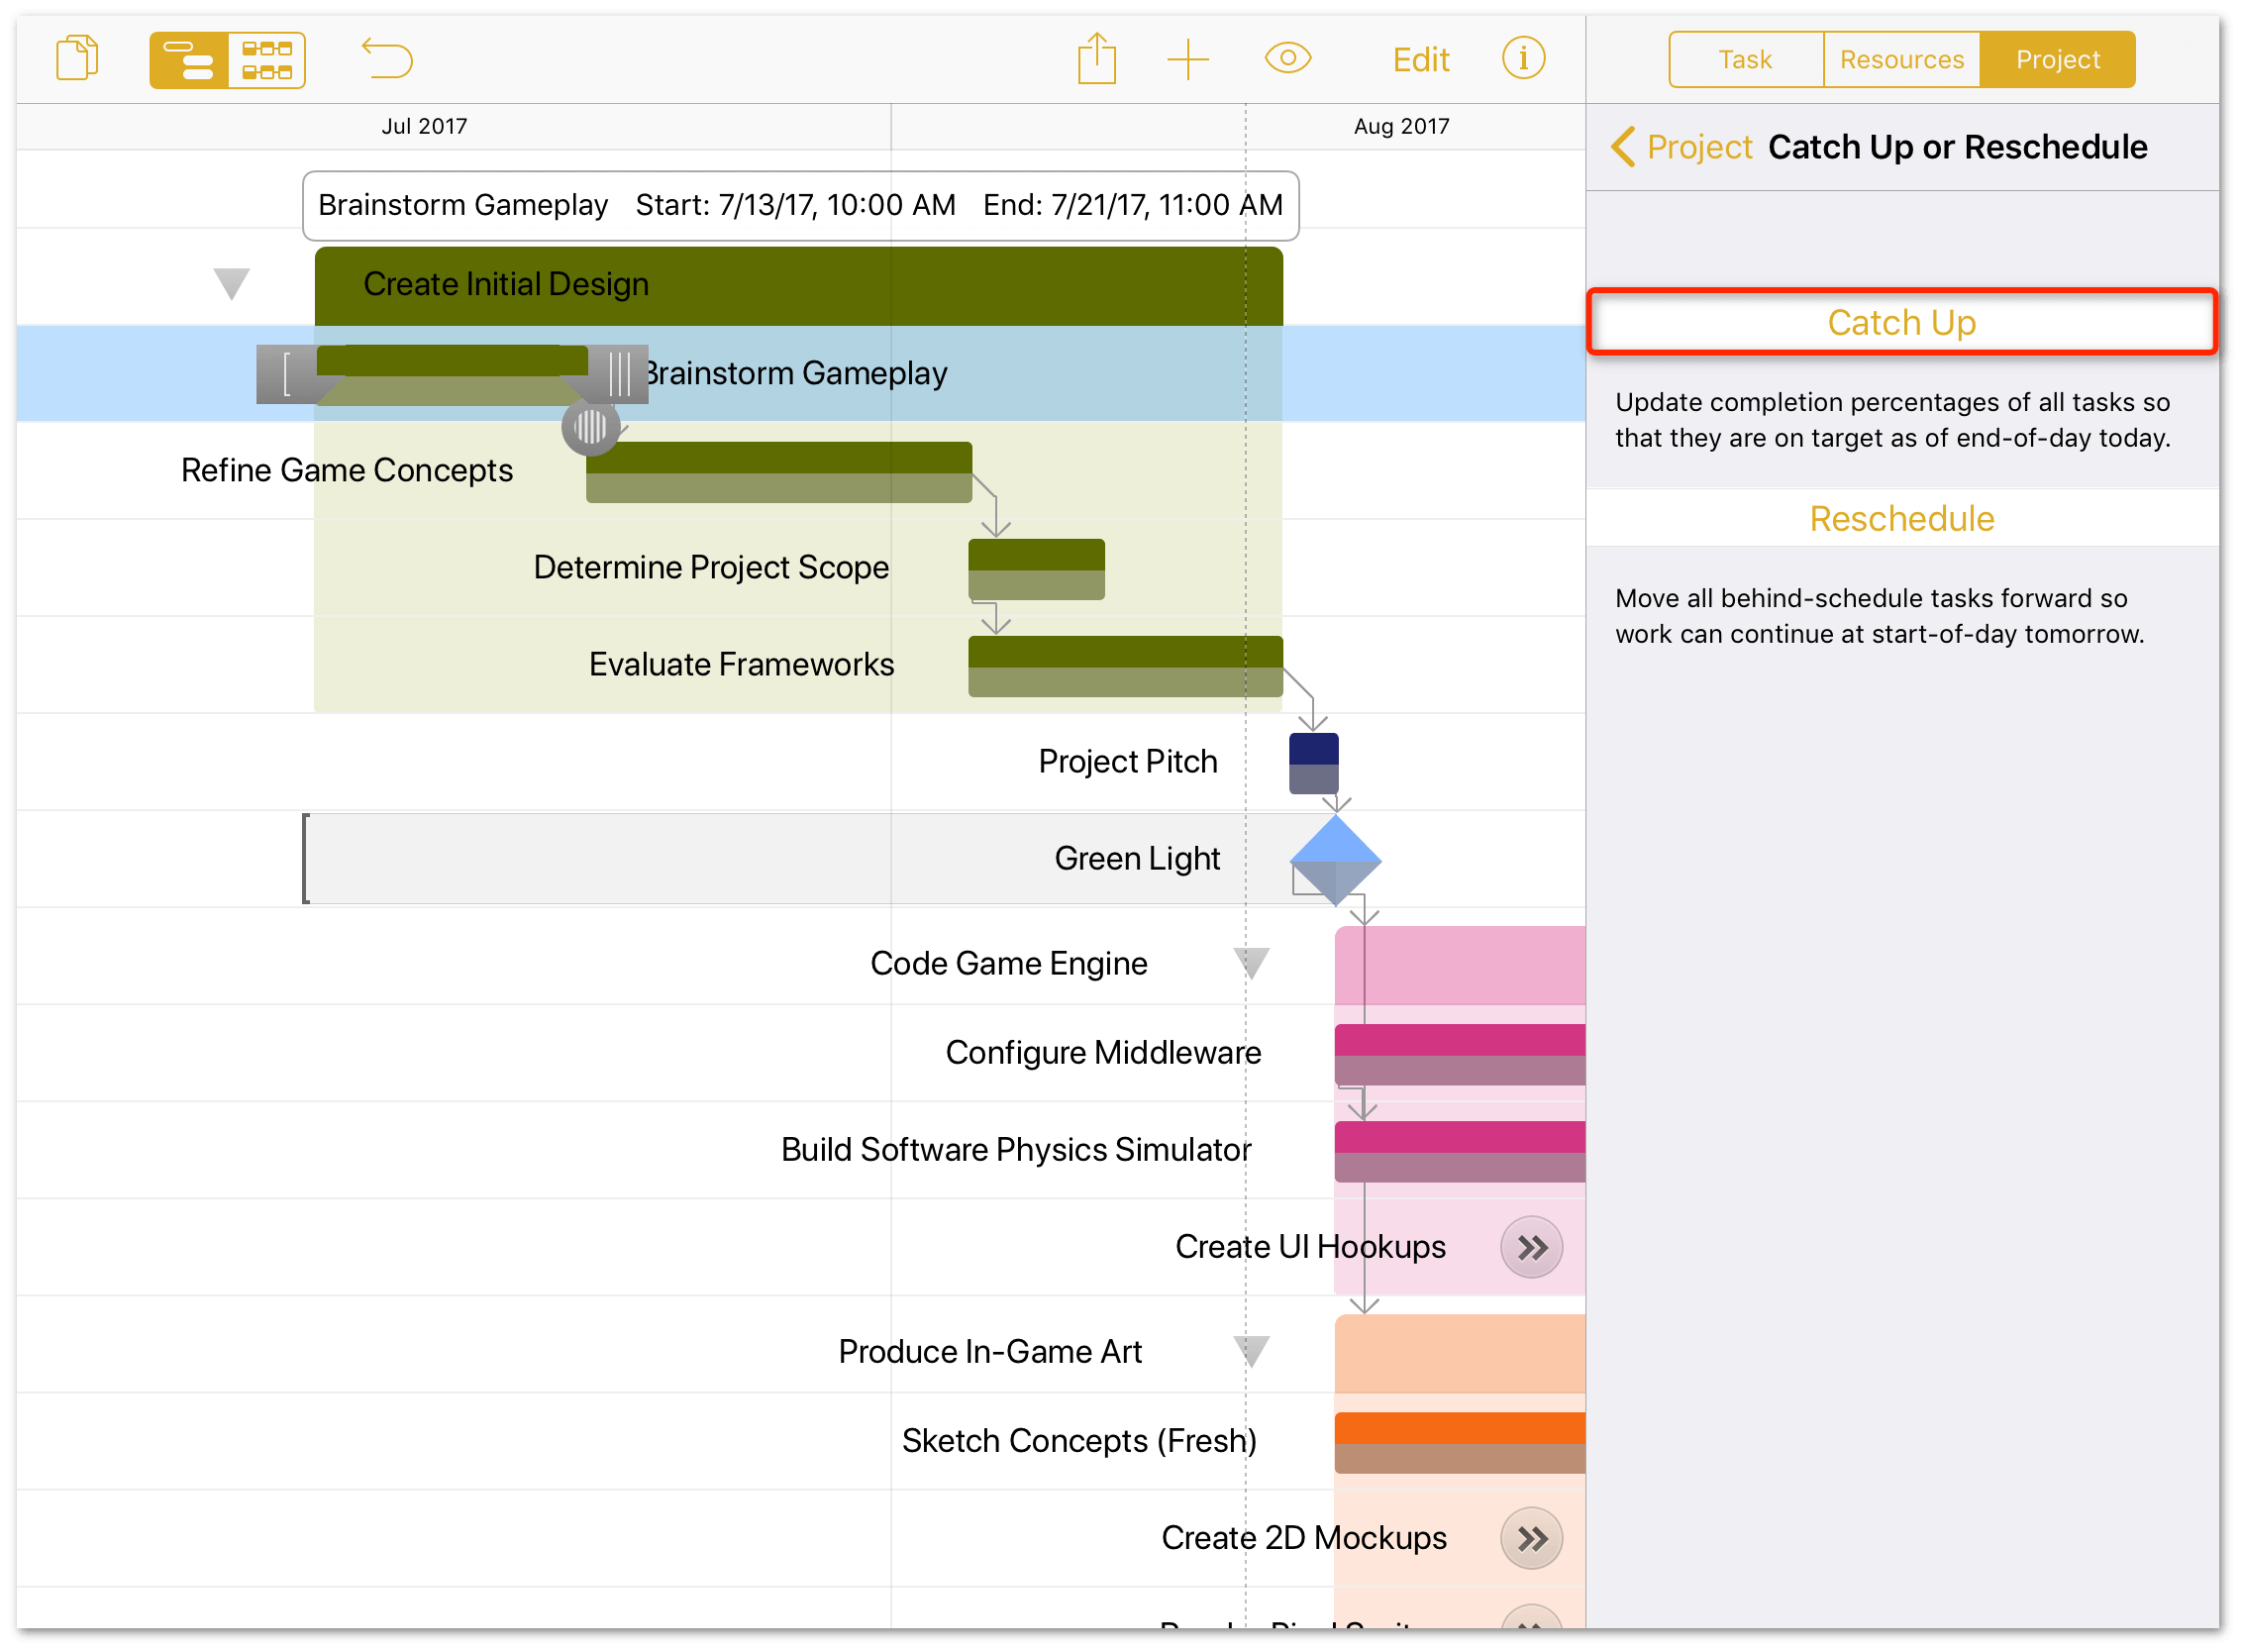
Extending a Task’s Duration
If you discover that a task requires more time than originally estimated, you can track this in your project. Doing so also reschedules subsequent tasks that are dependent on the updated task, or that are assigned to the same resource.
For example, the artists have come to you and say that they need two additional days to work on the Sketch Concepts before they can create the 2D mockups:
- Tap to select the Sketch Concepts (Fresh) task.
-
Select the Task inspector, and choose the Task Info tab:
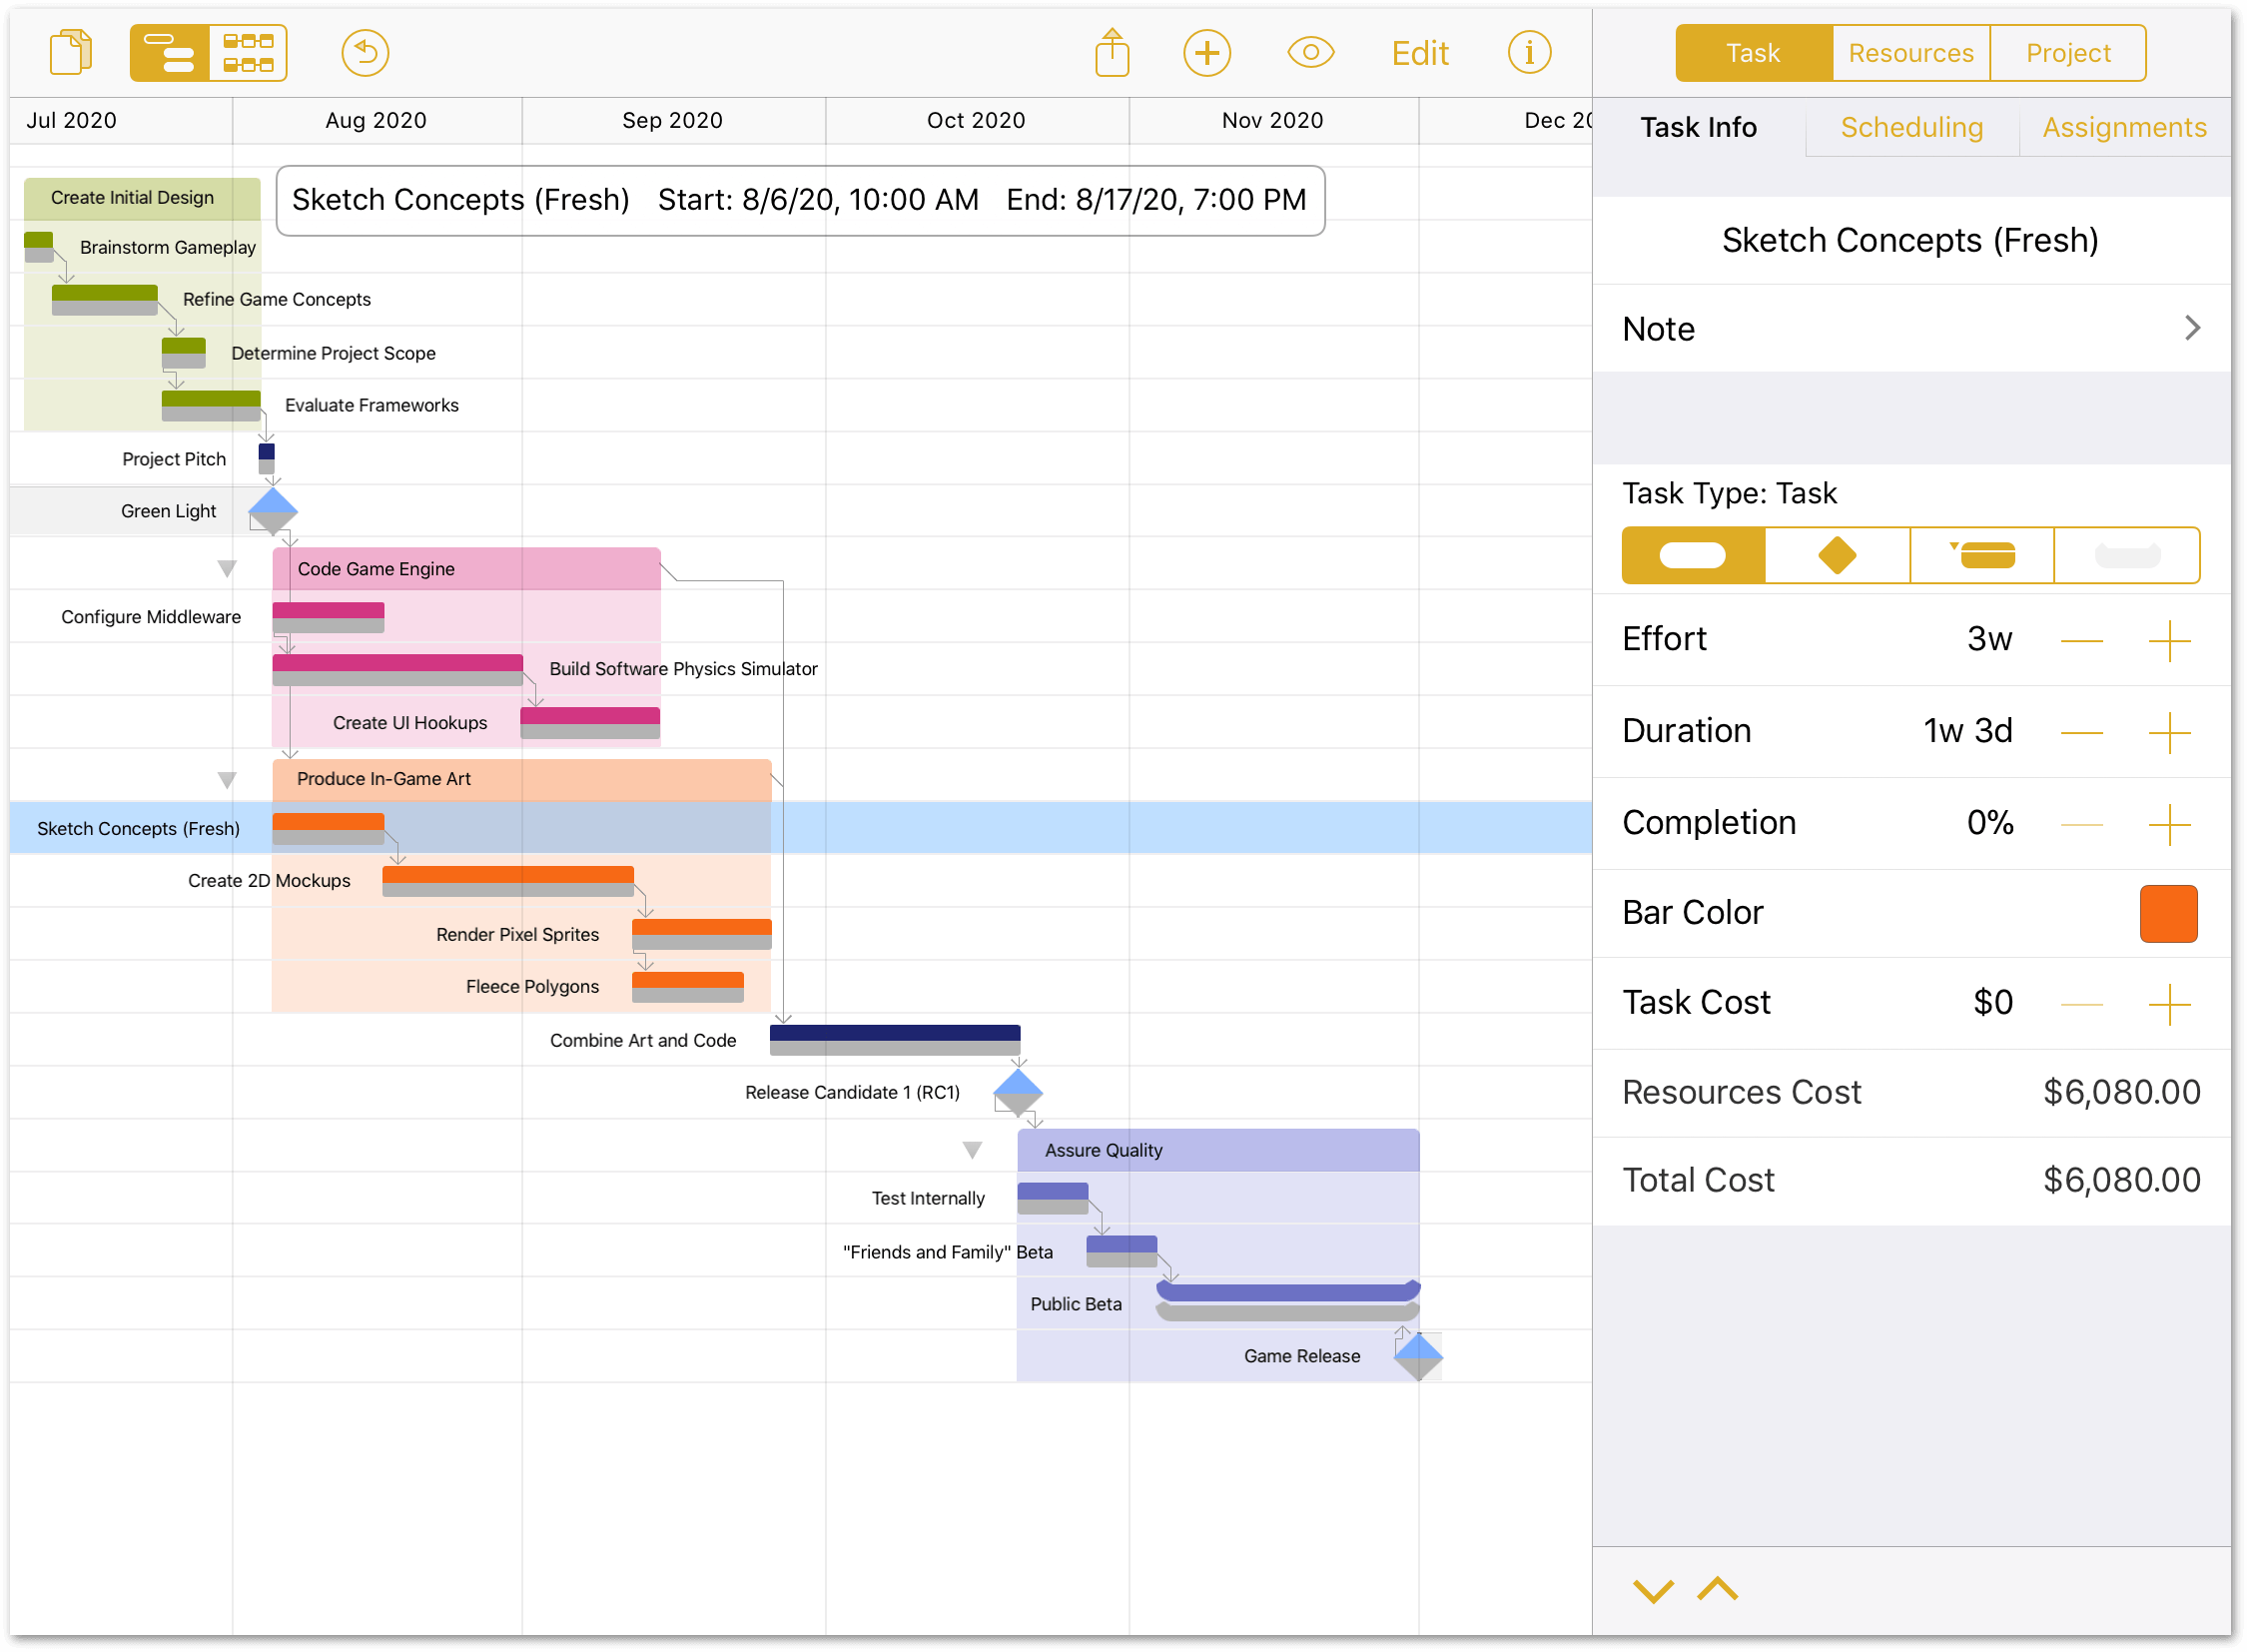
-
Change the Duration from 1w 3d to 2w:
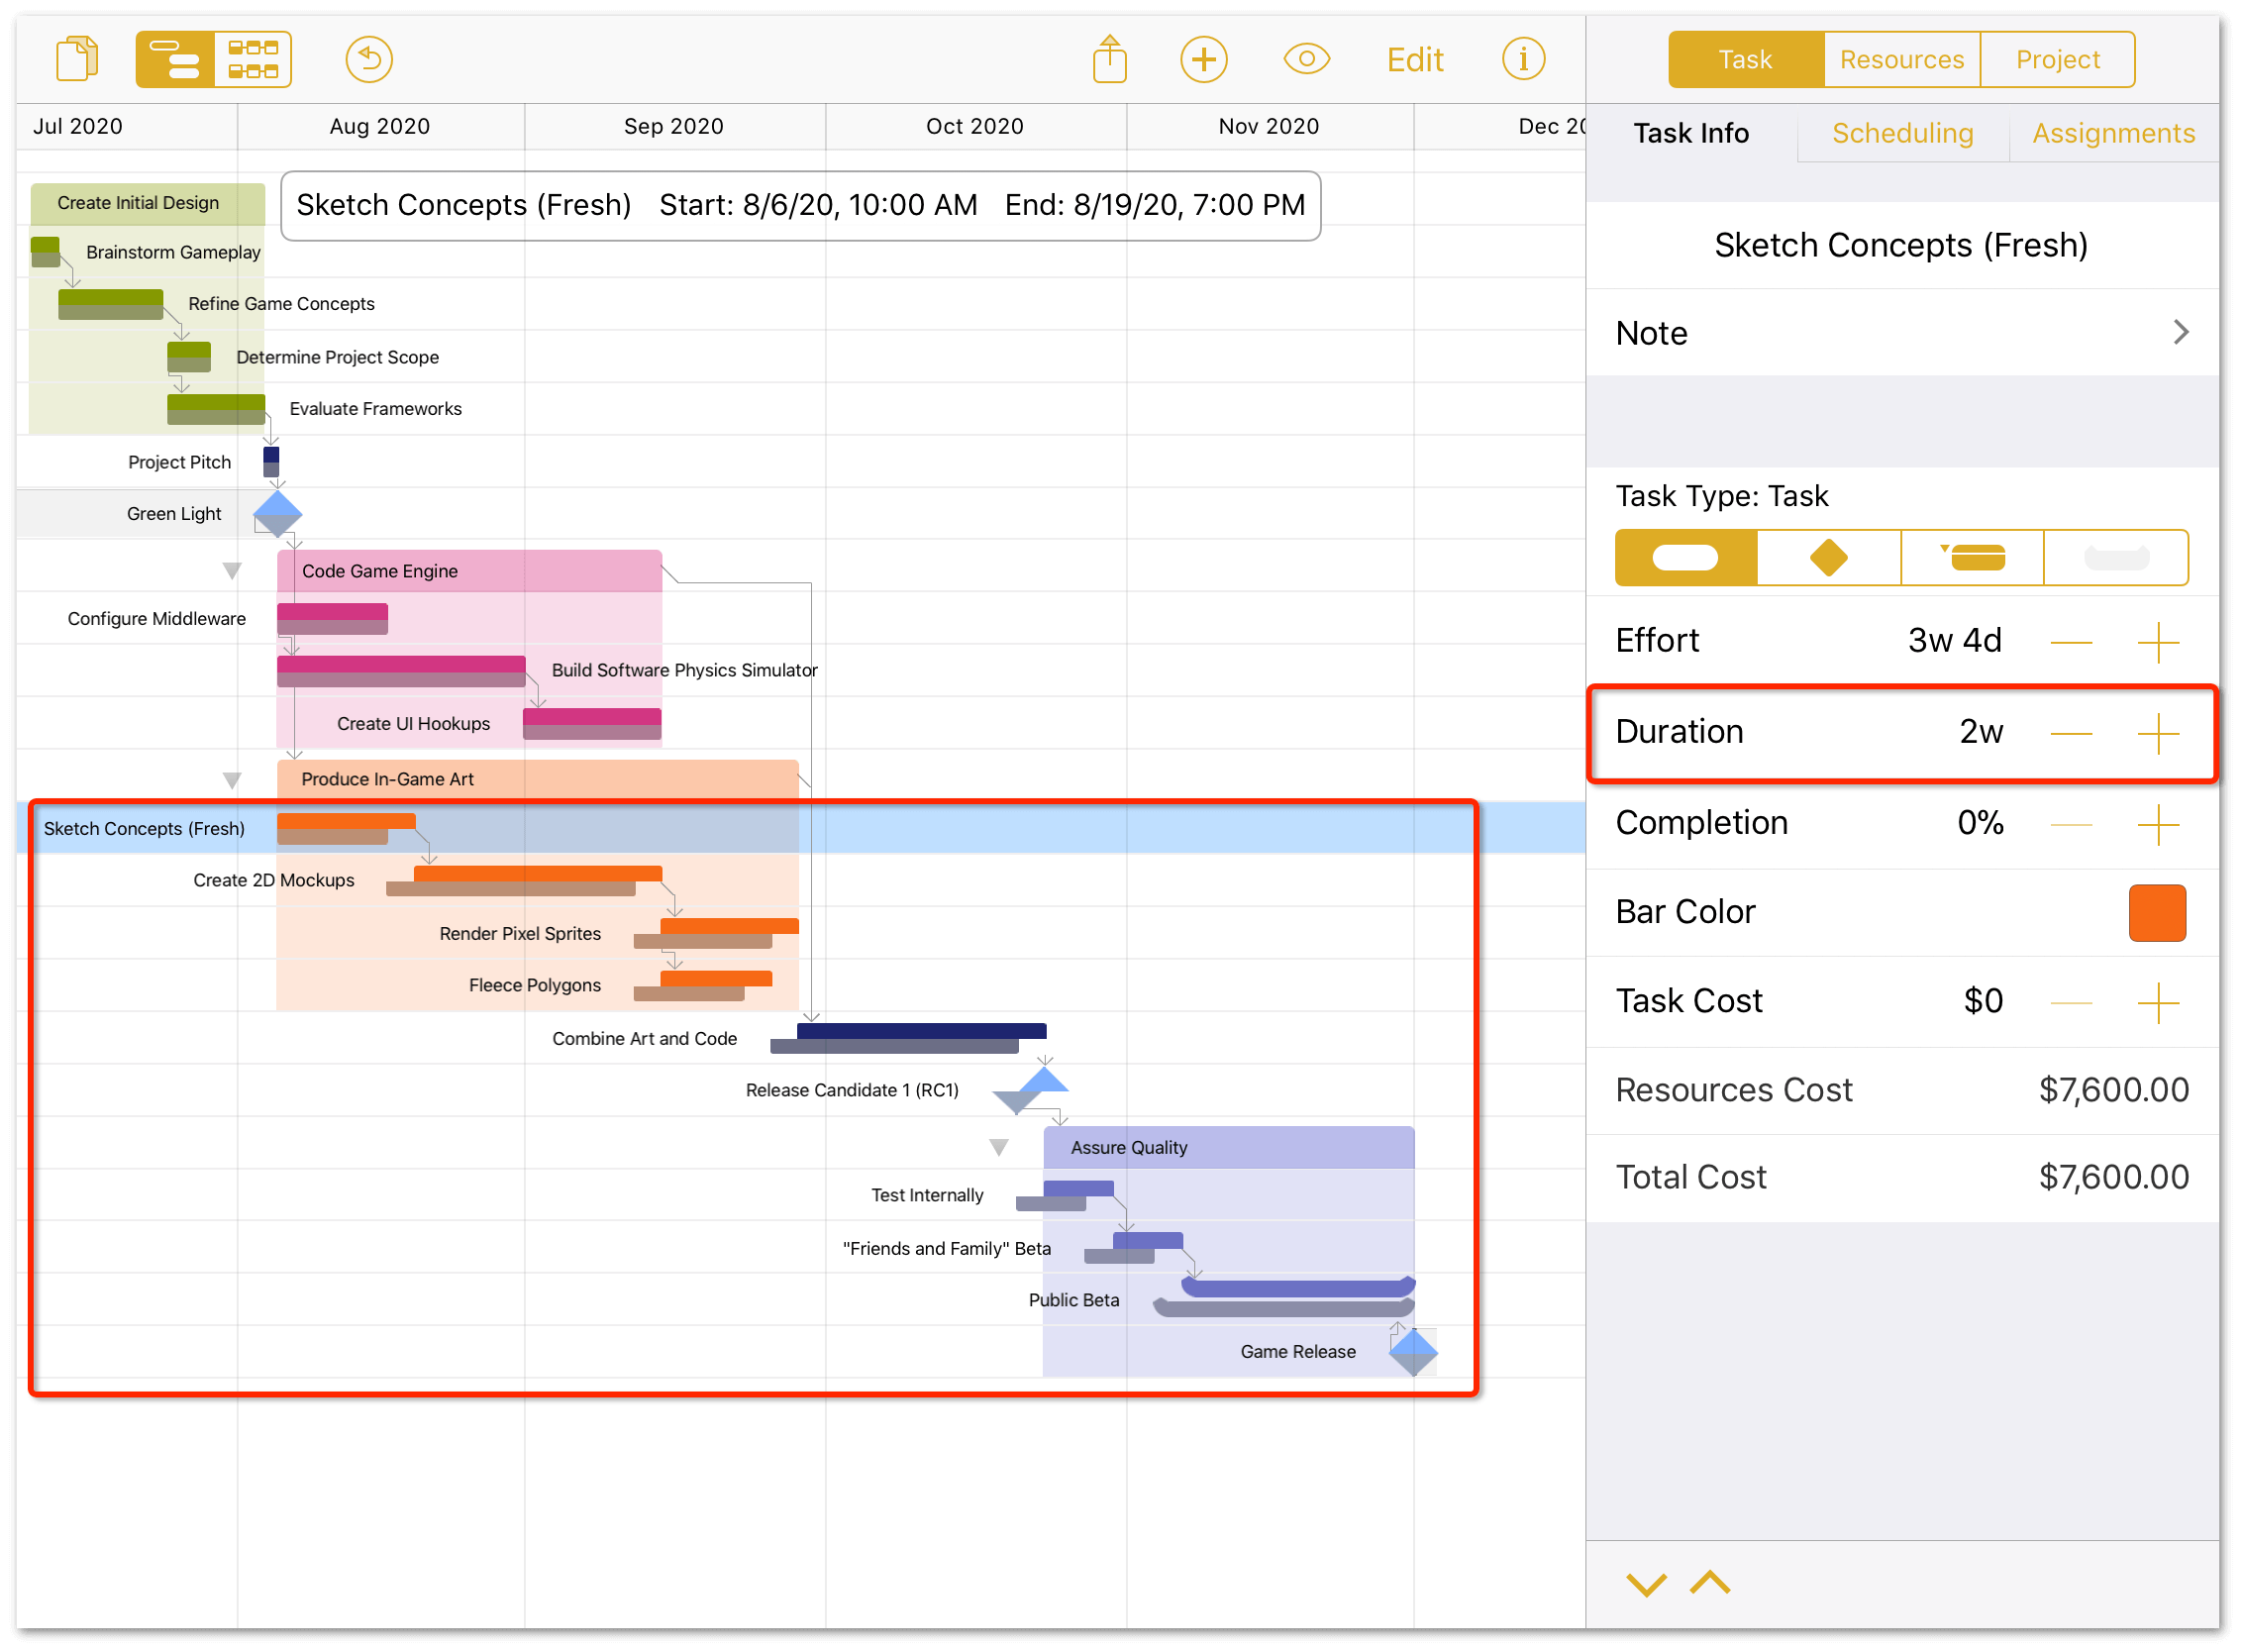
After changing the task’s Duration, notice how the remaining tasks and milestones have moved forward in the timeline, and are split from their respective Baselines. This allows you to monitor the project status against the original projections, and—if necessary—look for ways to tighten the schedule later.
Remember, your projects can have multiple Baselines, which is helpful for evaluating different stages of a project’s progression. For example, you could always set another Baseline here and give it a name such as Sketch Concepts Extended.
If you set up Automatic Leveling in the previous chapter, your project should level automatically when you adjust the duration. If you didn’t, go to the Resources inspector, tap Leveling, and then tap Level Load at the bottom of the inspector.
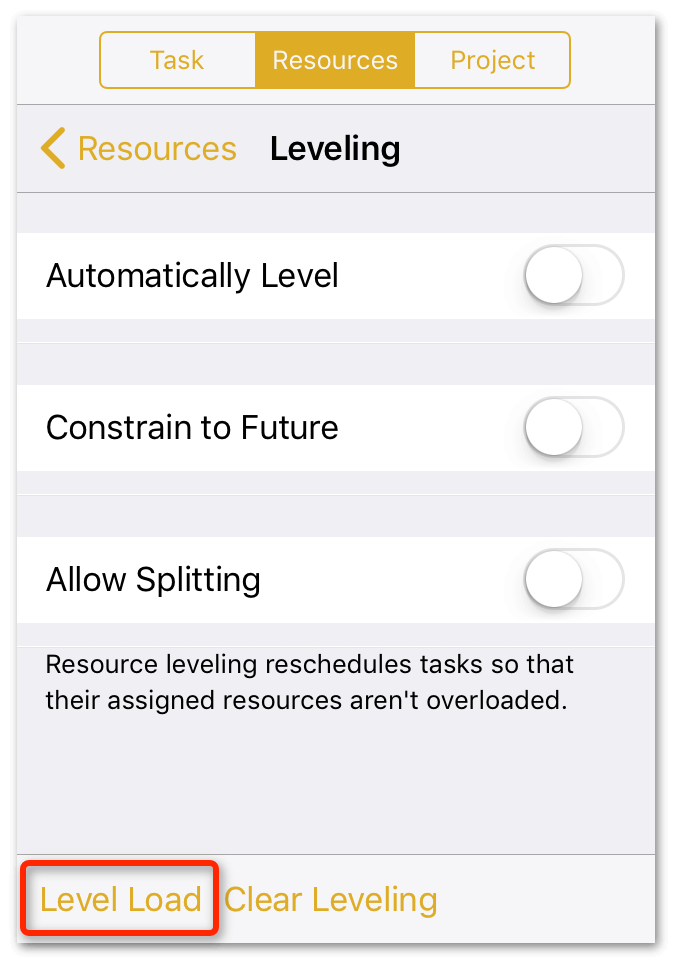
Rescheduling Tasks
If a task falls behind schedule, and all other work has been accounted for manually, you can use the Reschedule tool to advance tasks with incomplete work to the beginning of the next workday:
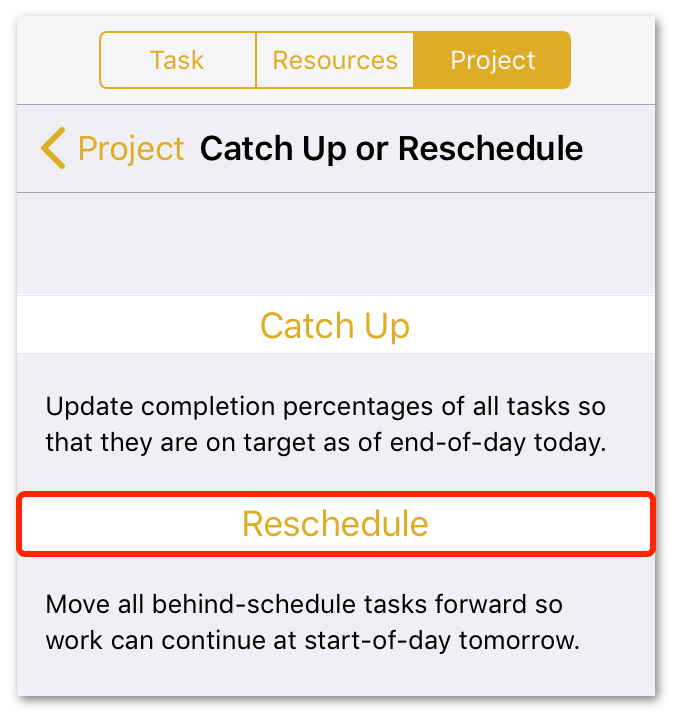
If a task is partially complete, rescheduling splits the task and leaves the completed portion in its original position, advancing only the incomplete work.
Adding Schedule Constraints
There are four different scheduling Constraints that allow for flexibility in the schedule. In the Scheduling tab of the Task inspector, tap Constraints to see the following options:
- Start at earliest: Work on this task may start on or after the date specified.
- End at earliest: Work on this task may end on or after the date specified.
- Start at latest: Work on this task may start on—but not after—the date specified.
- End at latest: Work on this task may end on—but not after—the date specified.
For example:
- Tap to select the Render Pixel Sprites task.
- In the Task inspector, tap the Scheduling tab.
- Tap Constraints.
-
Tap Start at earliest and change the task’s start date to the following Monday.
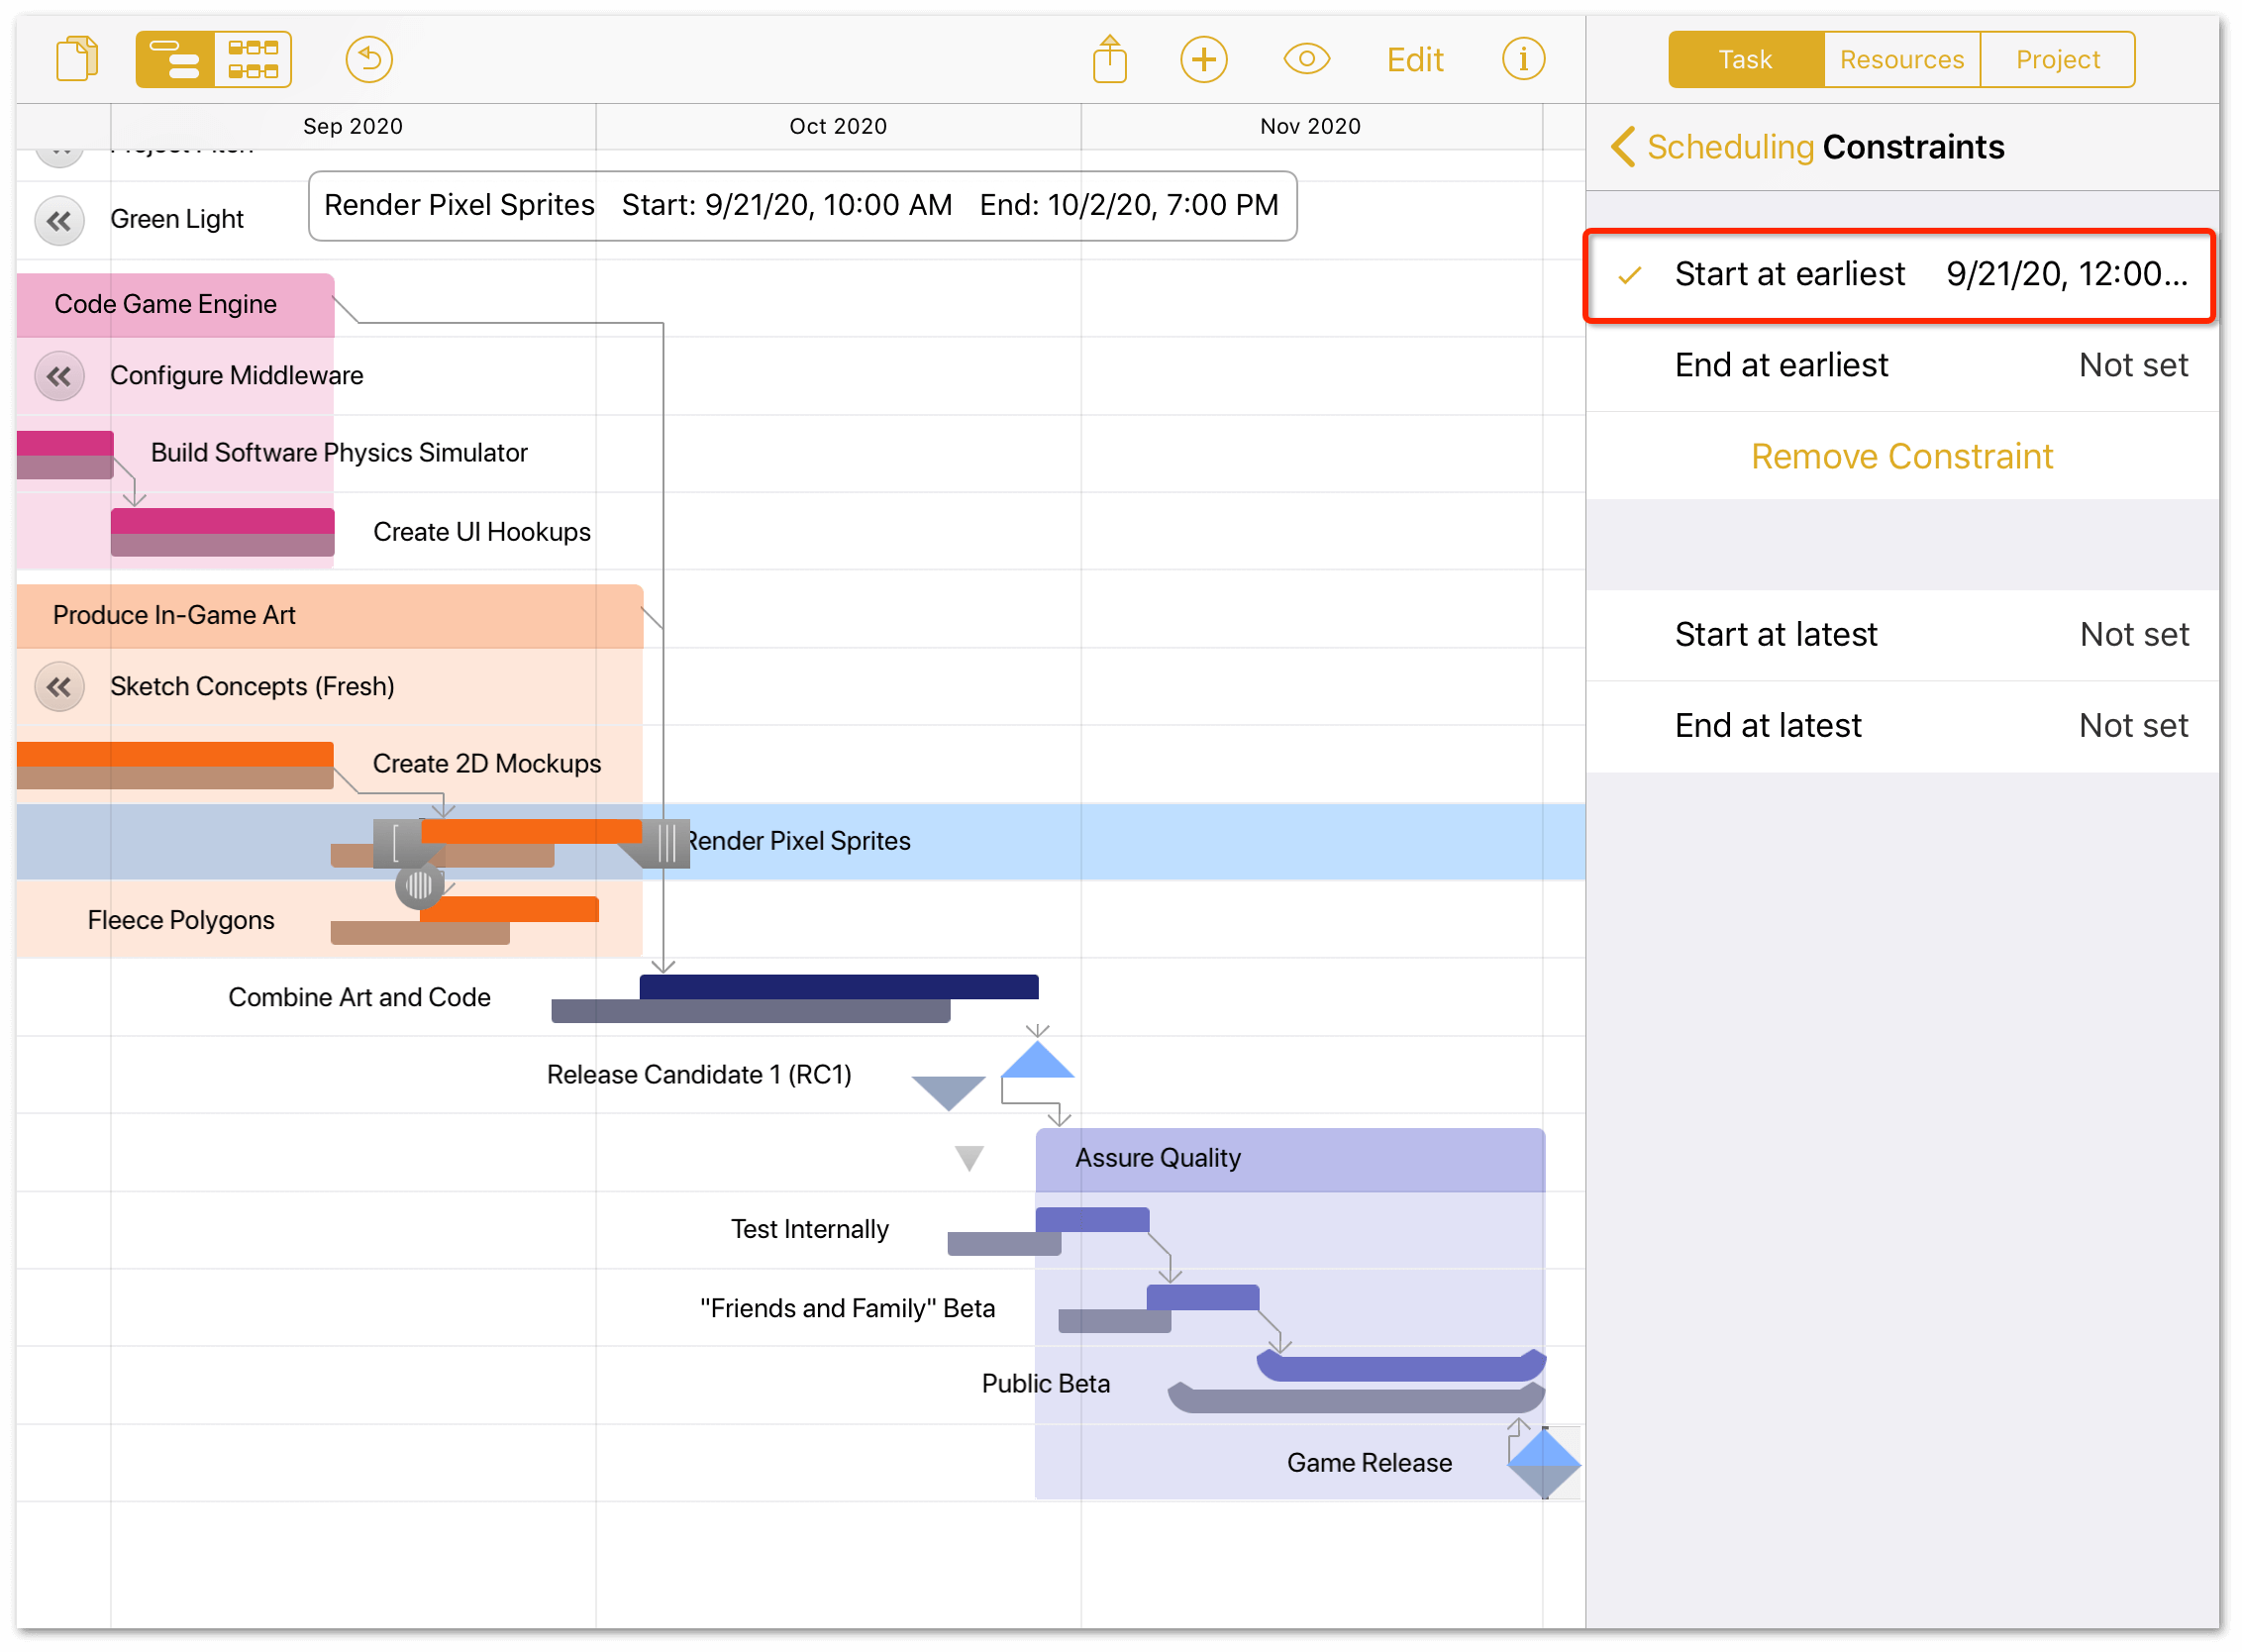
Changing this task’s start constraint causes a ripple effect through the remainder of the project, adjusting the timelines of future tasks, and possibly affecting resource assignments. Adjustments like this can cause violations (see the next section to appear in the timeline, which you’ll need to resolve to get your project back on track.
Resolving Violations
Occasionally situations will emerge that break the rules of logic you’ve set up for your project. When one of these occurs, OmniPlan flags the offending task with a warning symbol: ![]() .
.
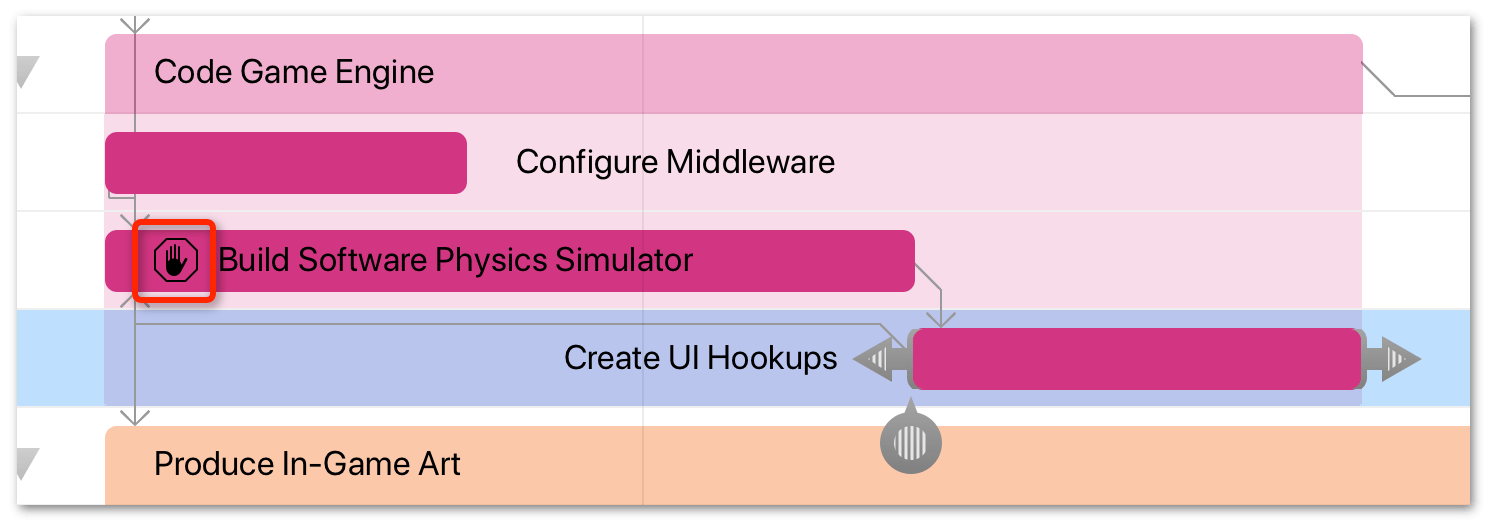
You’ll also notice that the button for the View menu in the toolbar takes on the warning symbol as well:  .
.
To see what’s causing the problem, do the following:
-
In the toolbar, tap
 :
: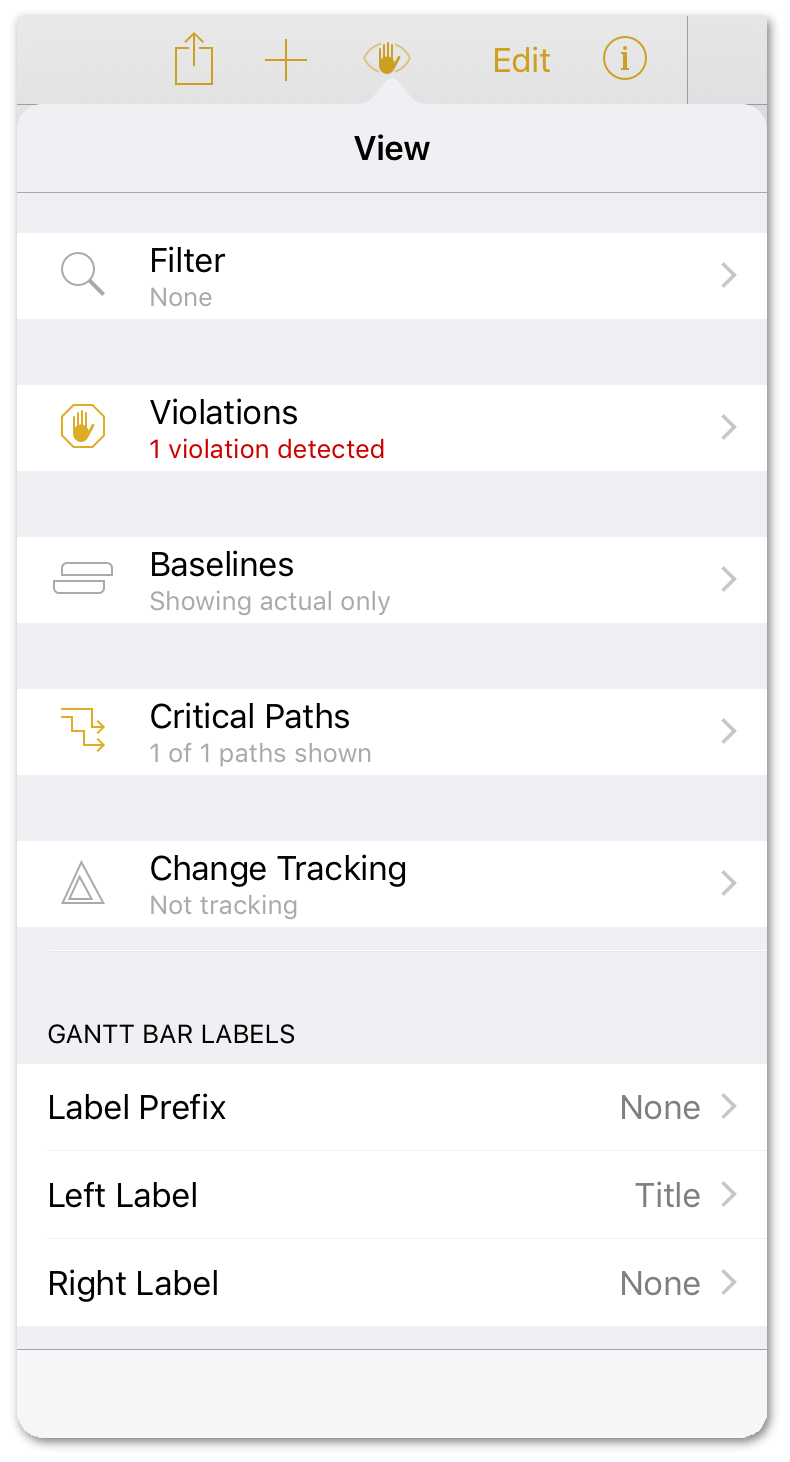
Notice that the Violations option is highlighted, showing you the number of violations detected.
-
Tap Violations in the View menu to see what’s causing the problem:

Here, you can see that there’s a task dependency that’s causing a loop. Let’s correct that.
-
Tap the violating task to see more details about, and how to resolve, the problem:
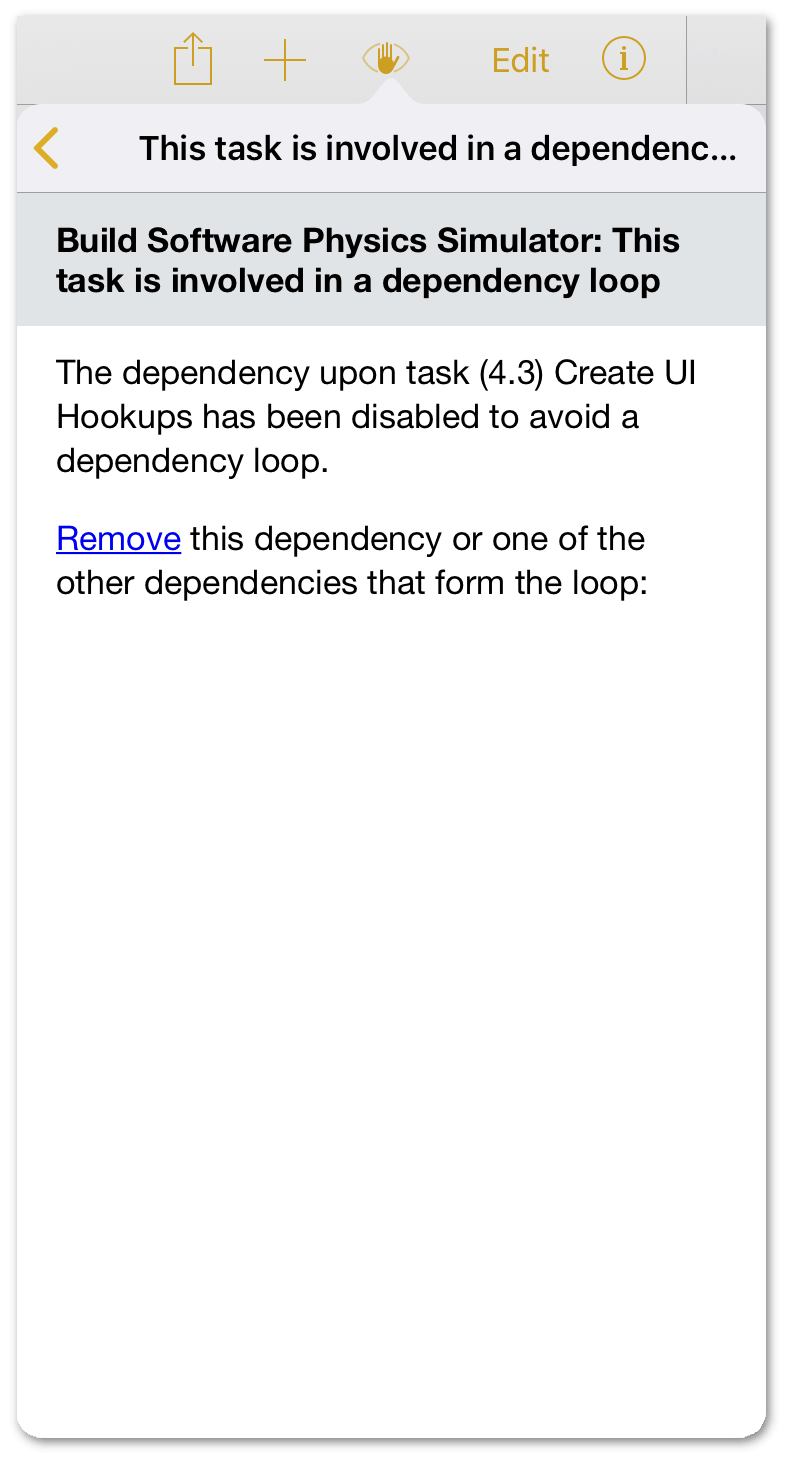
-
In the explanation for the problem, tap Remove to remove the dependency that’s causing the loop.
You can also tap ![]() next to the task to be taken right to the problem in the View menu.
next to the task to be taken right to the problem in the View menu.
Splitting Tasks
If you want a resource or team member to devote time to something other than the task they’re currently assigned to, splitting the task into parts around the “time out” period is a possible solution.
When you split a task, the task duration remains the same (in this case, 3w 3d), however, additional time is inserted to allow the Physics Simulator to be properly tested for bugs.
To split the Build Software Physics Simulator task, do the following:
- Tap to select the Build Software Physics Simulator task, and then tap the task a second time to reveal its contextual menu.
-
In the contextual menu, tap Split:
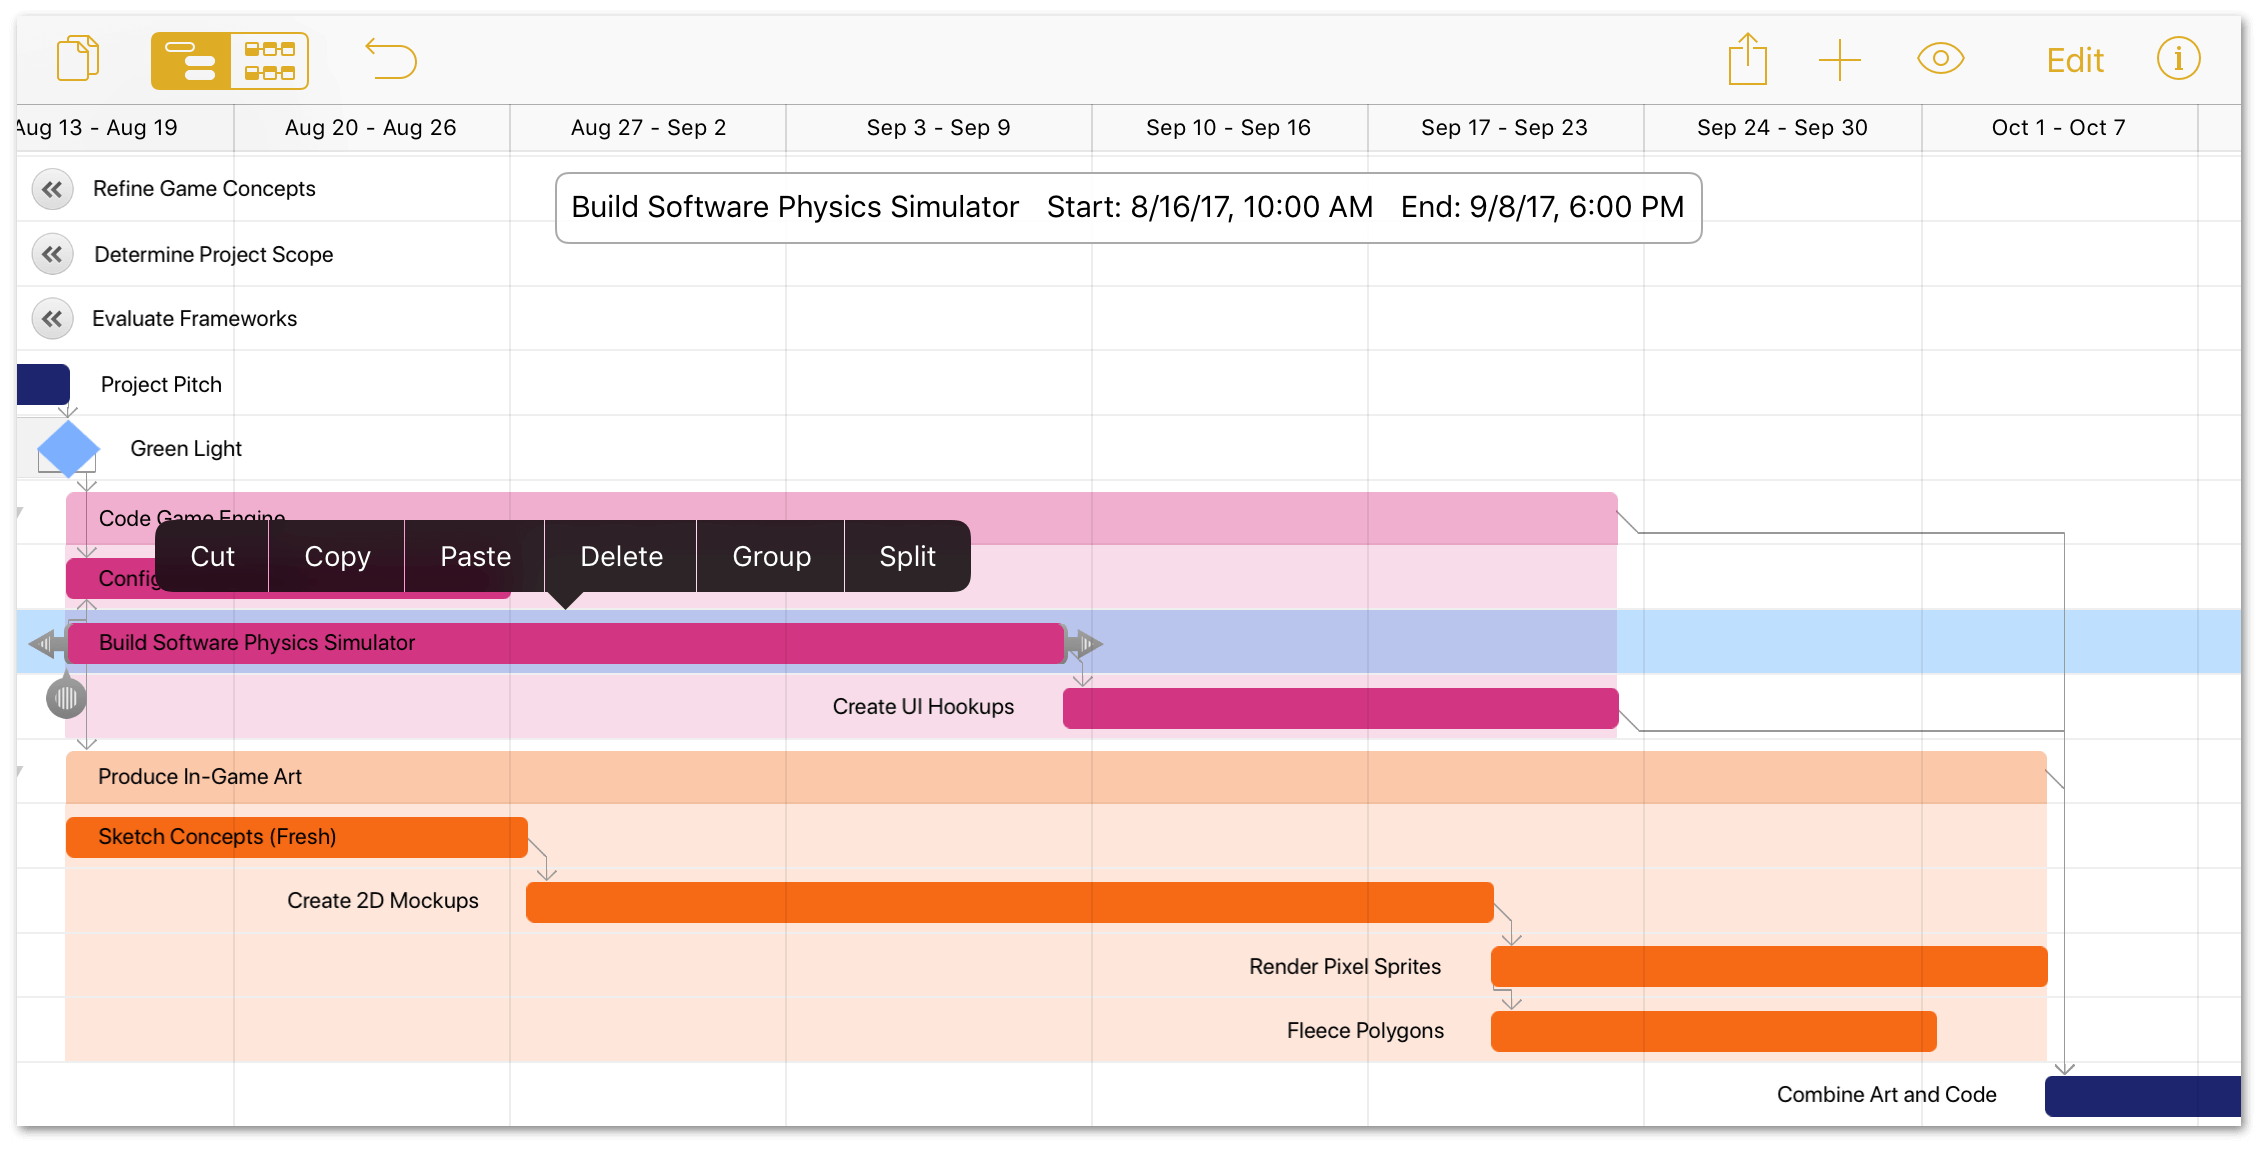
-
After tapping Split in the contextual menu, the Split Task menu appears:
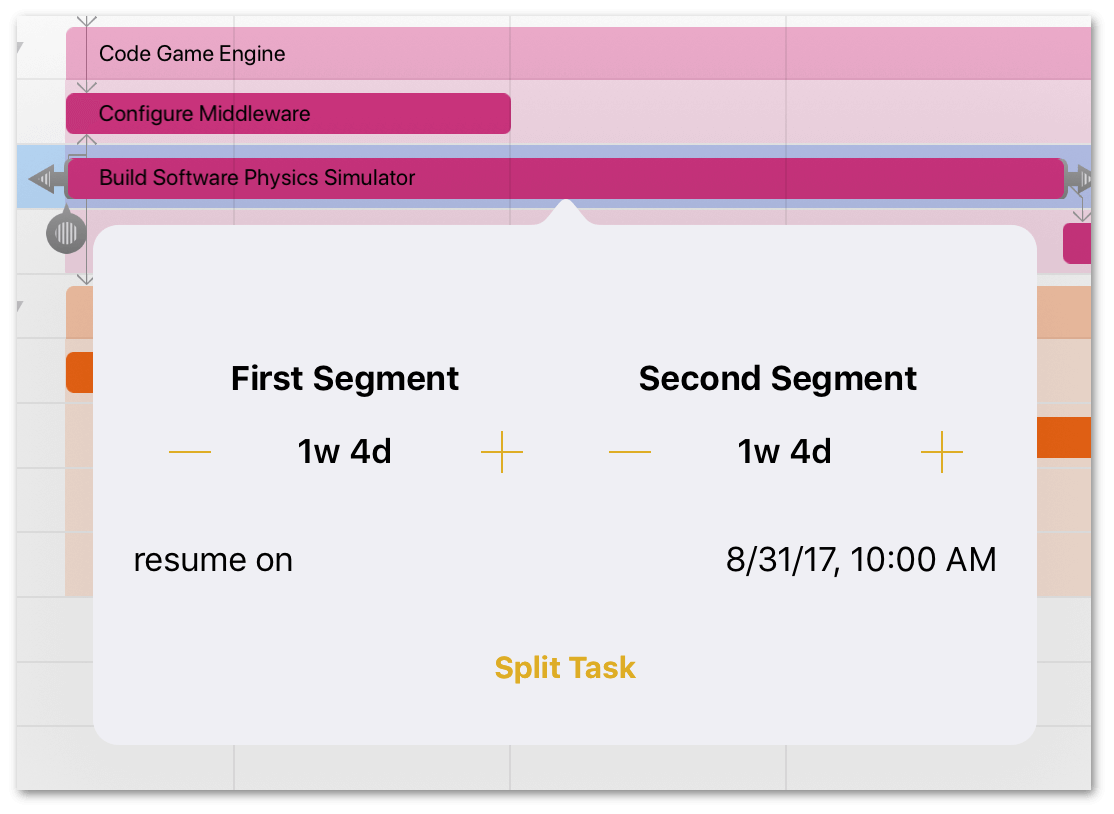
The selected task's duration is split into equal parts; however, you can change the duration for each segment:
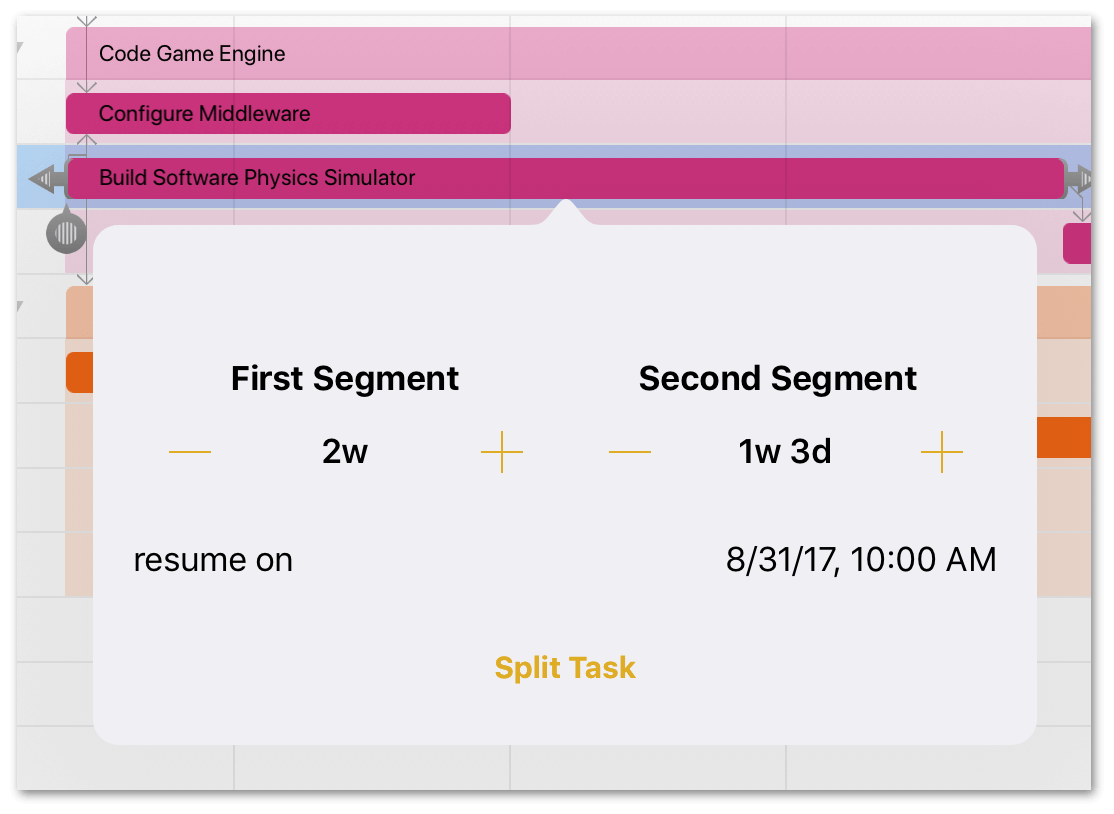
as well as specify a date when work on the second segment resumes:
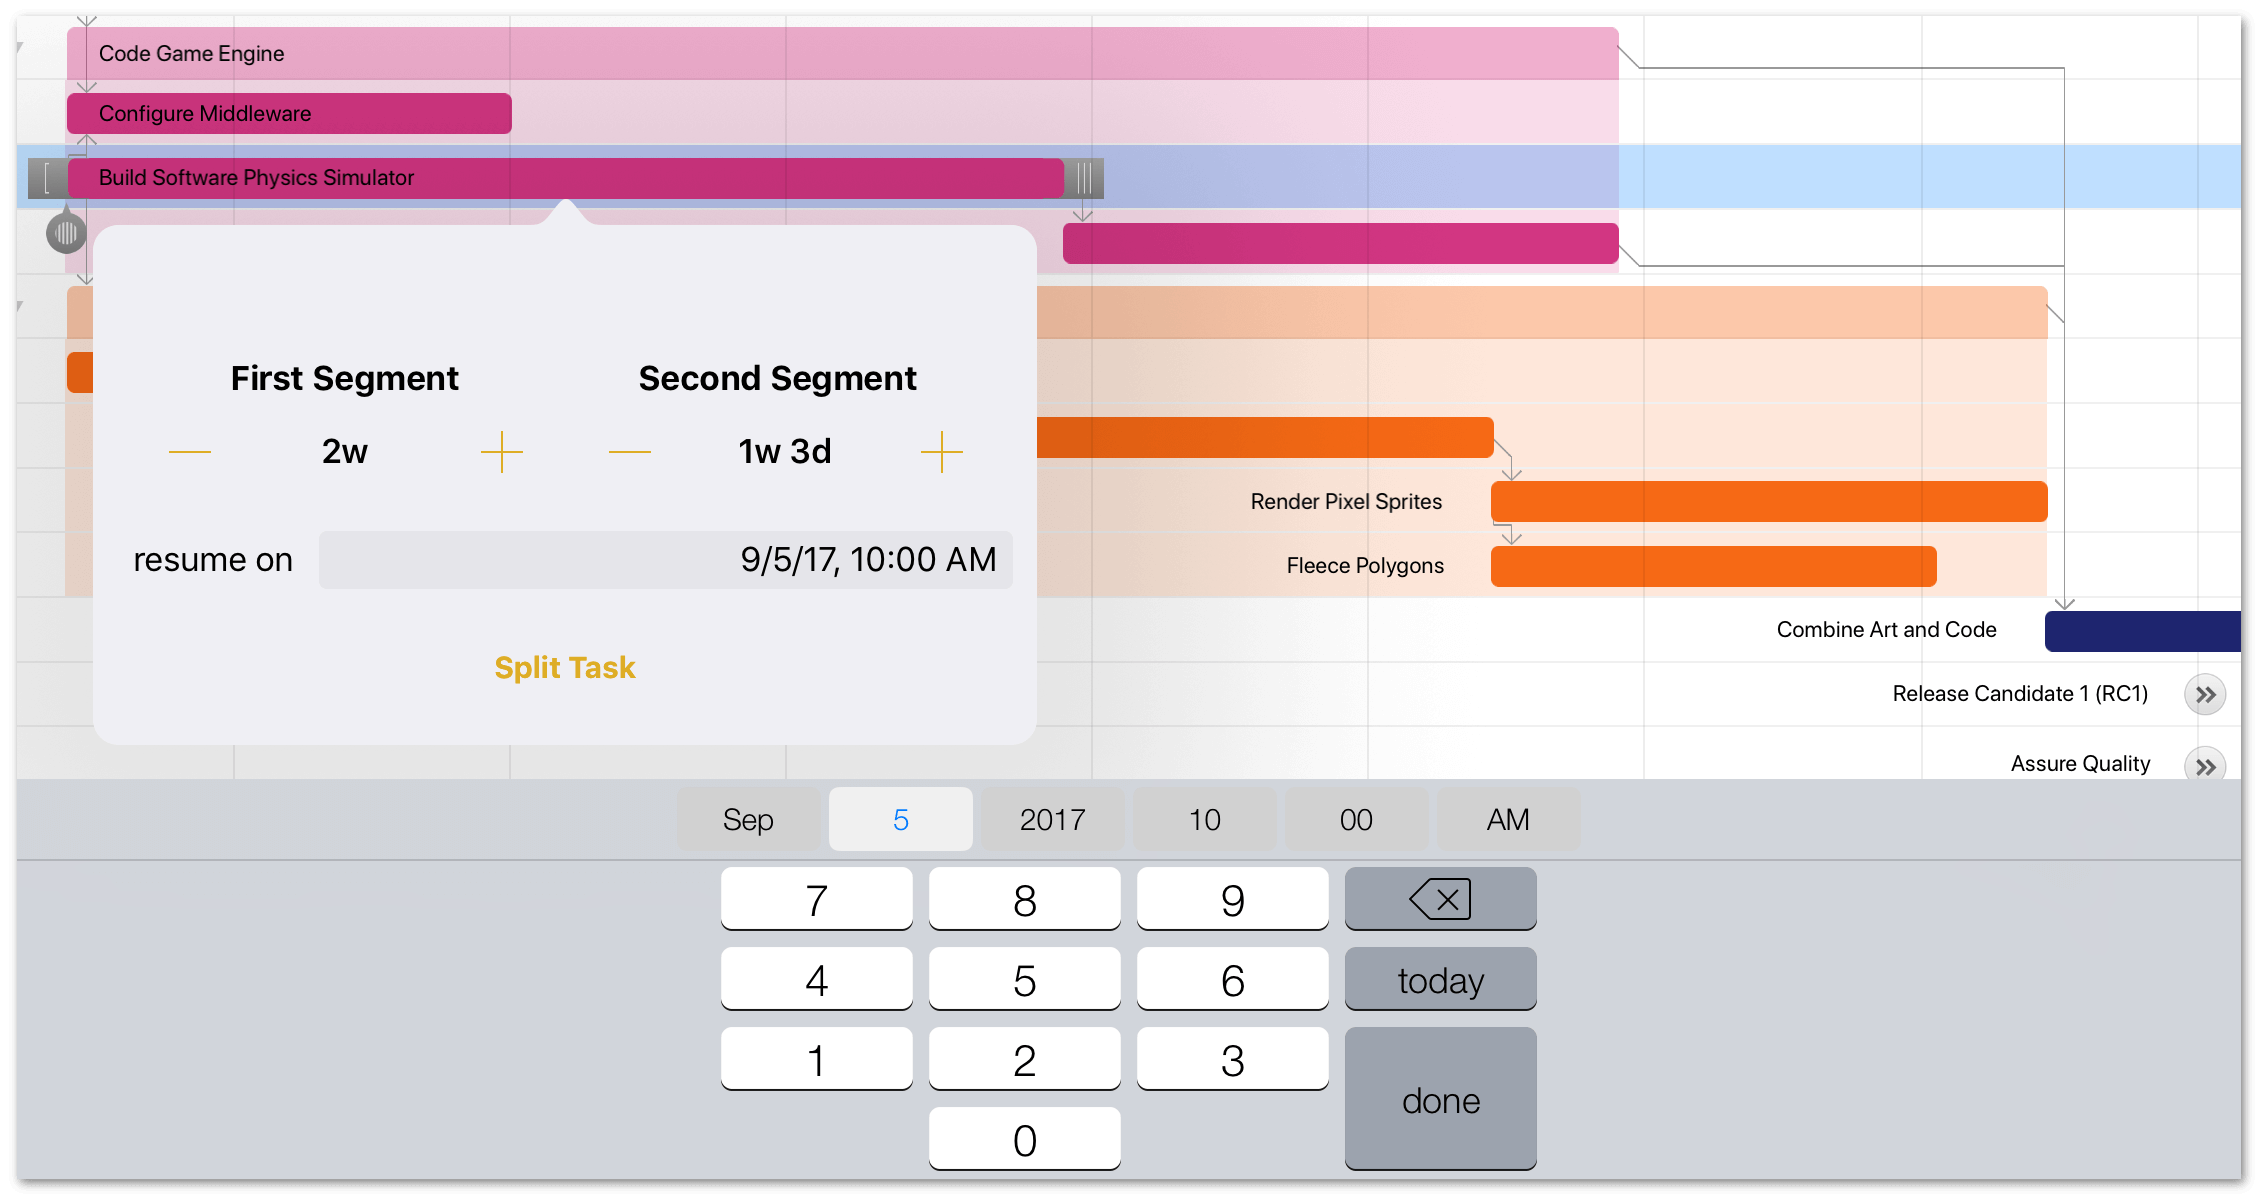
-
When you’ve set the durations for each segment, tap Split Task in the menu to split the task in two.
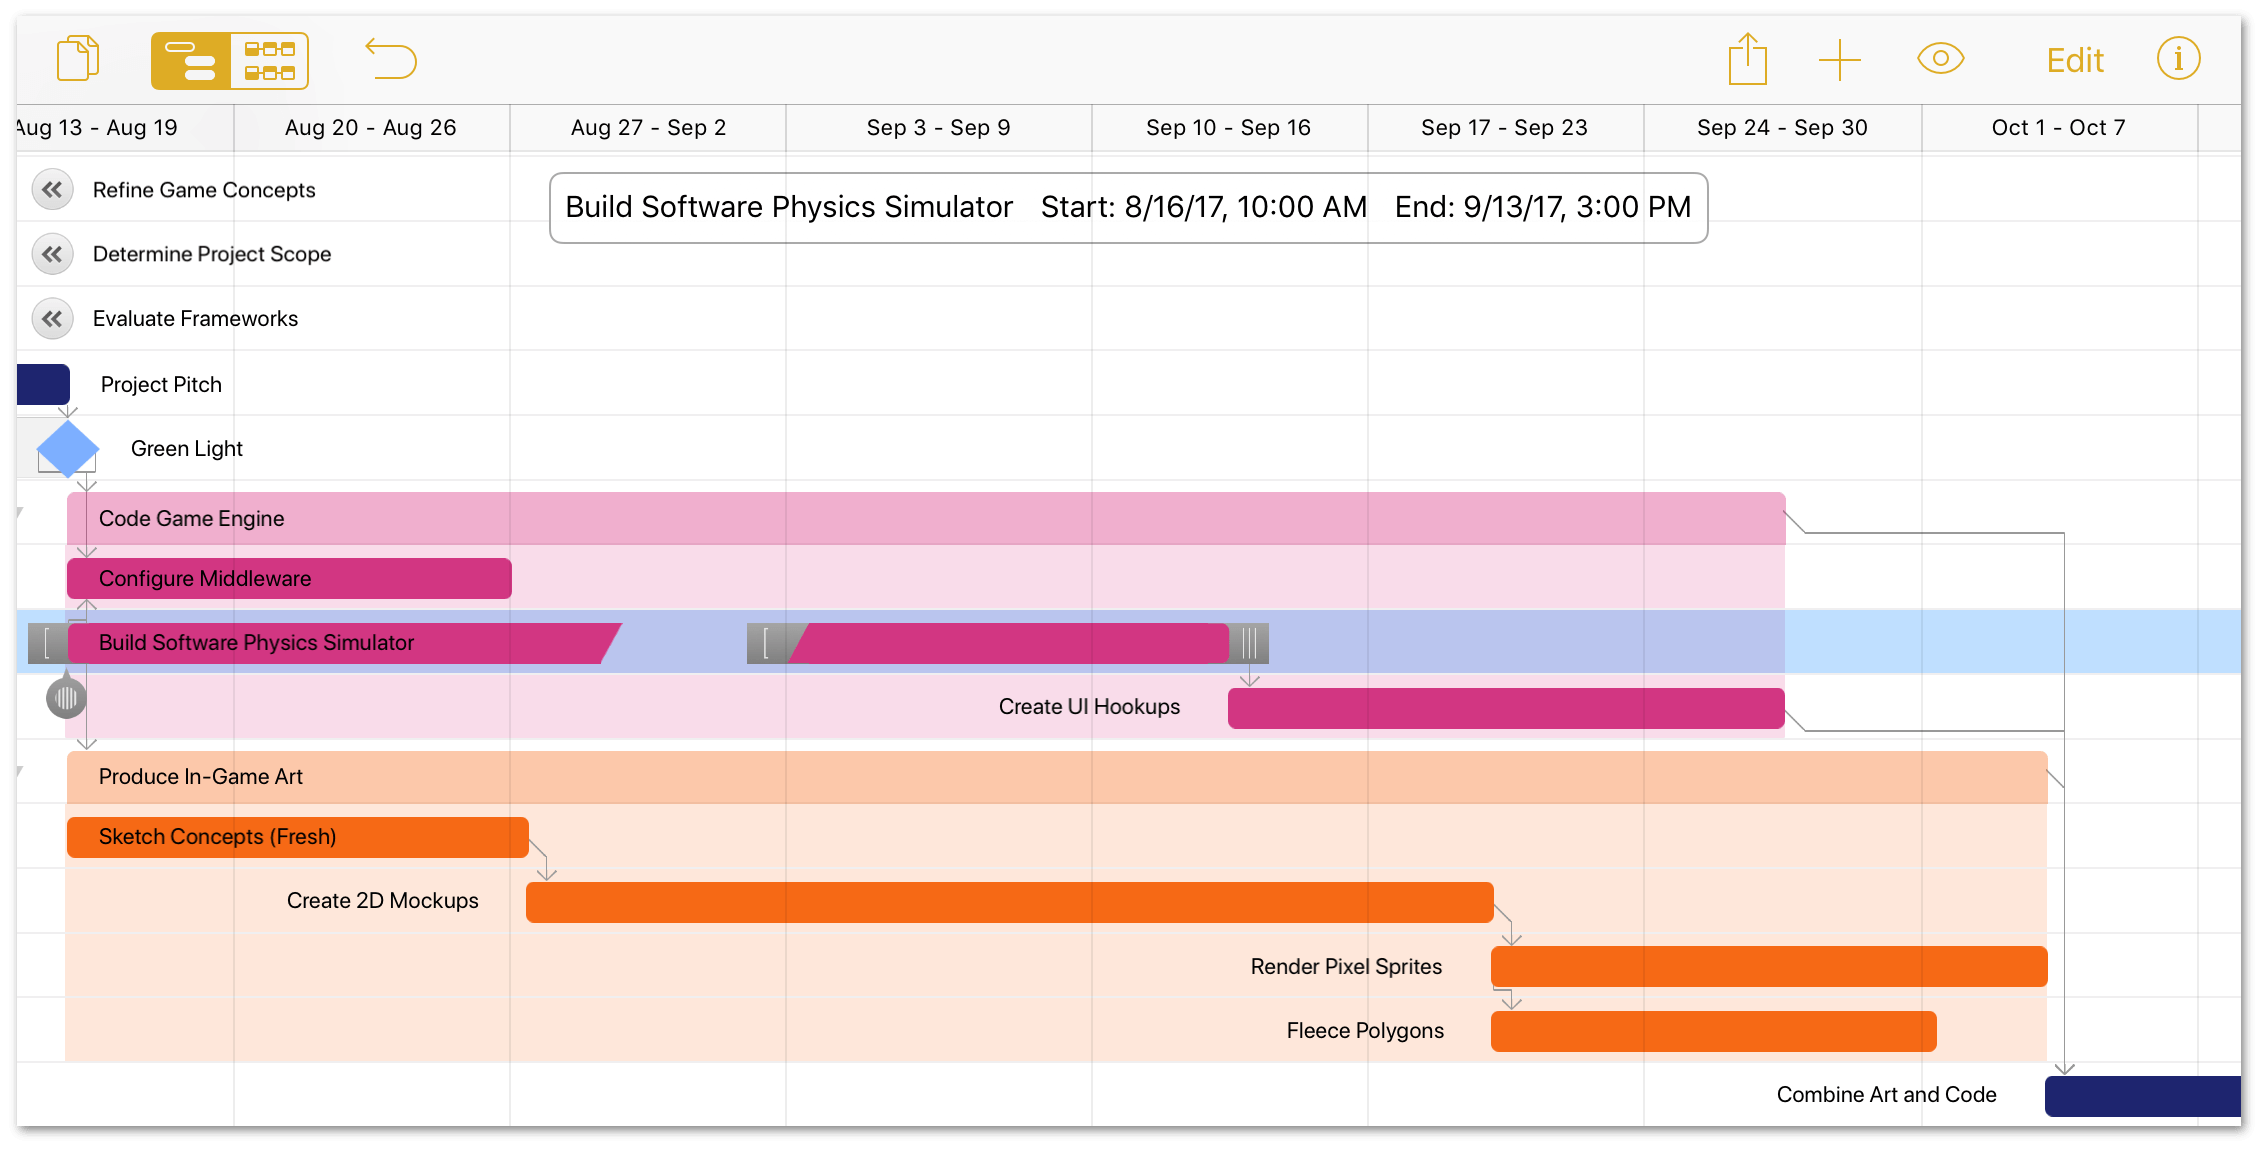
If you have Automatically Level turned on in the Resources inspector, the project should level on its own. If not, it's wise to level your project after splitting a task. Also, you may want to add another Baseline to the project here:
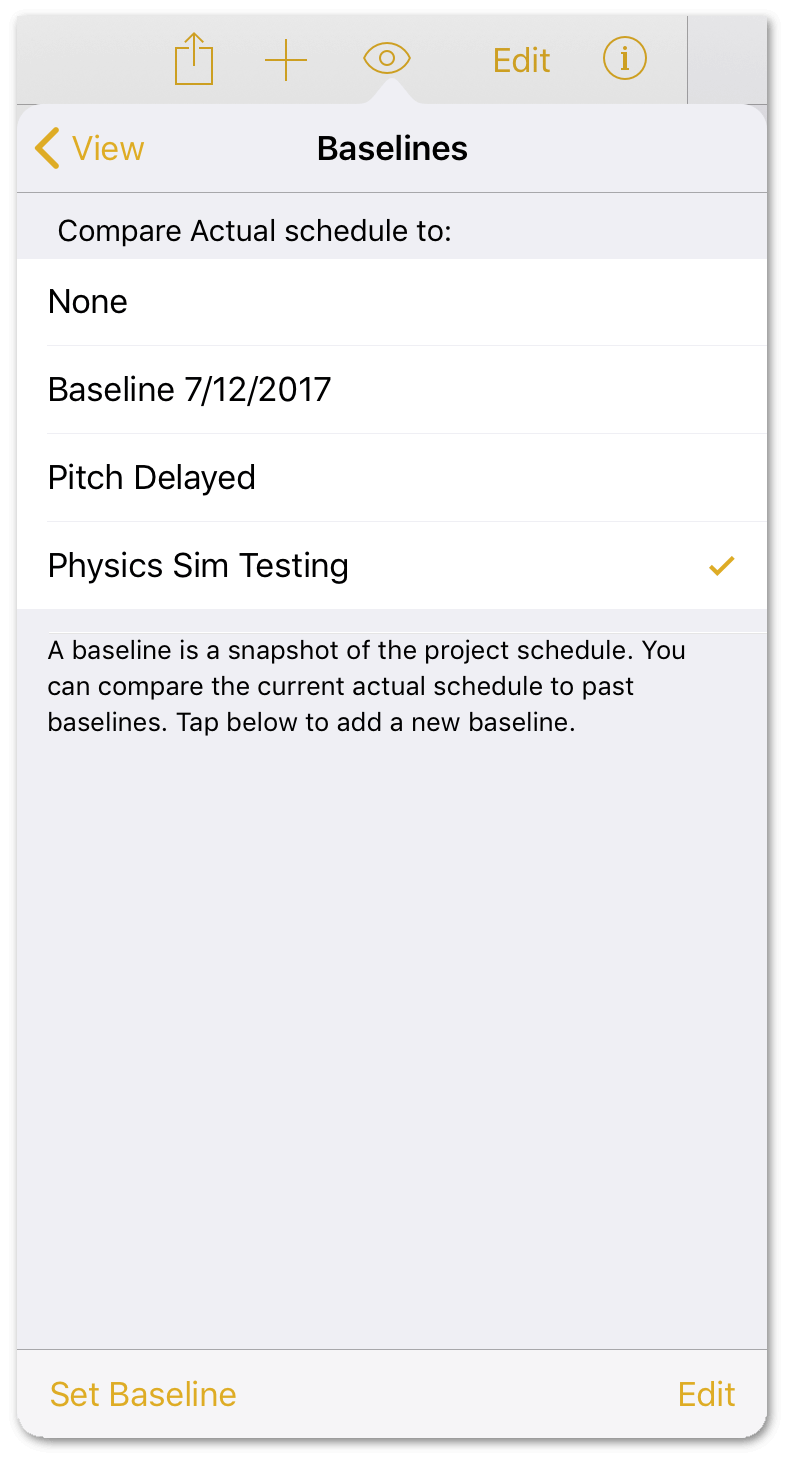
A split task may mysteriously re-merge after leveling. If this isn’t what you want, make sure that Allow Splitting is turned on in the Resources inspector’s Leveling submenu.
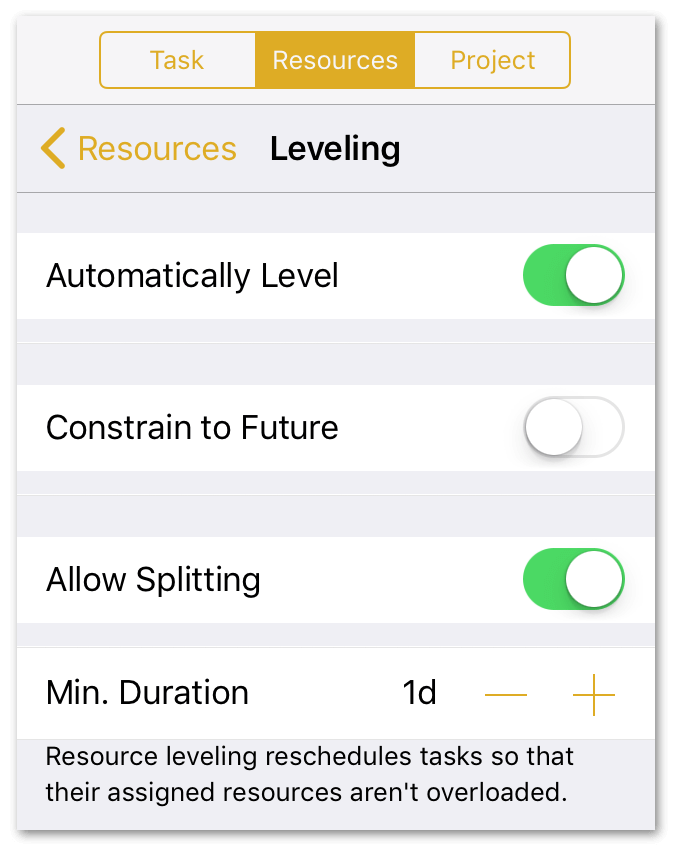
When you turn on Allow Splitting, you can also specify a minimum duration for the period of the split. The default is set to one day (1d); however, you can set this to a value that suits your projects’ needs.
Simulating Milestone Completion Estimates (PRO)
OmniPlan Pro includes tools for calculating the degree of certainty that a milestone will be complete by a given deadline, using Monte Carlo simulations based on estimations of the effort required to reach the goal. The results of these simulations can help identify where things might fall behind—or even be ahead of schedule.
To run a Monte Carlo simulation on your project, do the following:
- Open the Project inspector.
-
Tap Monte Carlo:
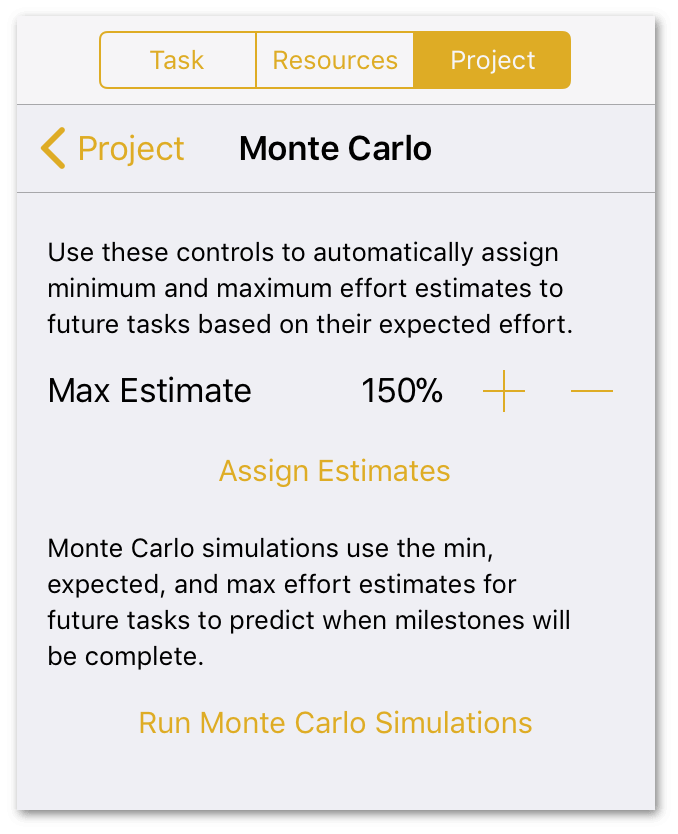
The level of certainty the simulation provides is determined by the amount of effort estimated as required for completion of the tasks within each milestone.
The Max Estimate percentage represents the expected range of deviation for the amount of effort that tasks within your project require. The default is 150%, indicating that a typical task in your project can be expected to require anywhere between 50% and 150% of its expected effort to complete. The average for that range is 100% effort.
You can raise or lower the Max Estimate percentage to 190% and 110%, respectively, depending on your level of confidence in your initial time estimates. Use a lower percentage if your confidence level is high; use a higher percentage if your initial time estimates were mere shots in the dark.
-
Tap Assign Estimates. OmniPlan quickly generates hundreds of random effort values for each task within the percentile range indicated. OmniPlan then takes the average result and applies it to each task to determine the likelihood that a given milestone will be completed on time.
-
Tap Run Monte Carlo Simulations. When the simulation is complete, each day that the milestone could be completed on is indicated by a striped vertical bar:

Each stripe in the bar represents 10% confidence that the milestone will be complete on that day. For example, 10 bars on a day means that, according to the simulation, a milestone is 100% likely to be completed on that day.
If you want to experiment with different Max Estimate values, tap Clear Previous Simulations, adjust the percentage value, and repeat Steps 3 and 4.
Collaborating on Projects with Publish & Subscribe (PRO)
On a large project where team members are spread across different teams, projects, or even time zones, you need the ability to provide access to a project plan. OmniPlan Pro makes multiuser collaboration possible by providing powerful Publish & Subscribe capabilities. Paired with a robust Change Tracking system, OmniPlan Pro makes it possible for everyone on your team to access and update project files with ease.
This chapter takes you through the process of setting up OmniPlan Pro—both as the project publisher and subscriber—so you can quickly get to work on your project.
Publish & Subscribe requires the upgrade to OmniPlan Pro. To see whether you have purchased and installed OmniPlan Pro on your device, check OmniPlan’s About box, accesible from the Gear menu on the Locations screen.
How Publish & Subscribe Works
Once set up, Publish and Subscribe works like an infinite loop. The Project Manager and the Resources assigned to the project are both capable of publishing and subscribing to everyone’s updates to the file. The key to making this work is the plan file itself, which resides on a Server Repository:
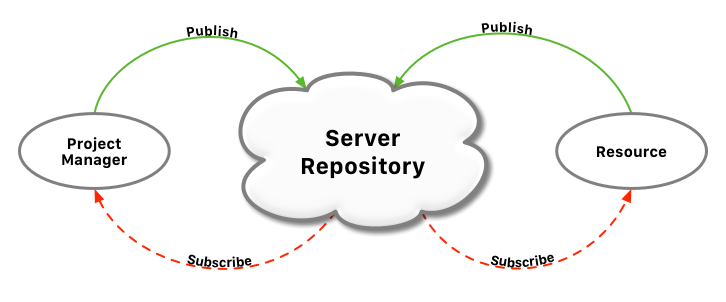
When you initially publish an OmniPlan file, a copy of your file gets pushed up to the designated Server Repository. The file on the server then becomes the “One Truth” to which everyone subscribes. The people (Resources) assigned to the project then subscribe to the file, which places a copy of the OmniPlan file in their On My [device] folder.
As people assigned to the project update their local file, they in turn publish those changes to the file on the Server Repository. The server then pushes those changes to everyone so their local file is always up to date.
Both the Project Manager and Resources use the View menu to receive and review changes which, when accepted, are published back up to the server.
Connecting OmniPlan to a Server Repository
With OmniPlan Pro installed, the App Menu in the document browser adds a Server Repositories item for setting up a shared server repository.
To create and connect to a server repository account, do the following:
-
From the App Menu, tap Server Repositories:
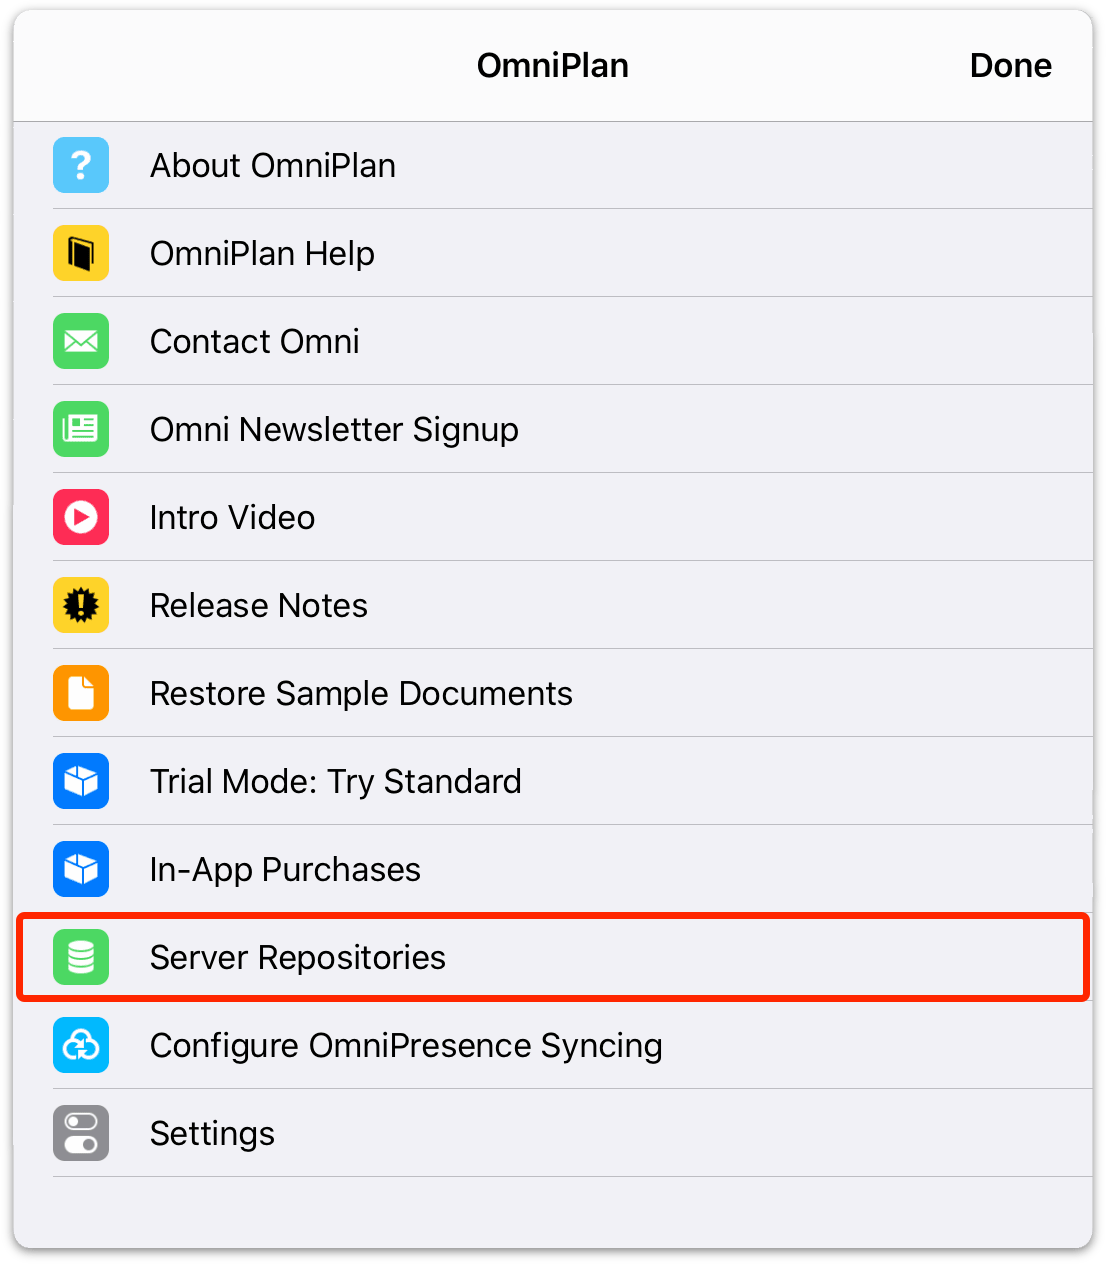
-
Next, choose the server that hosts your OmniPlan files. Tap Add Omni Sync Server Account if you are syncing files with Omni Sync Server, or tap Add WebDAV Account if you are self-hosting or using a third-party WebDAV server:
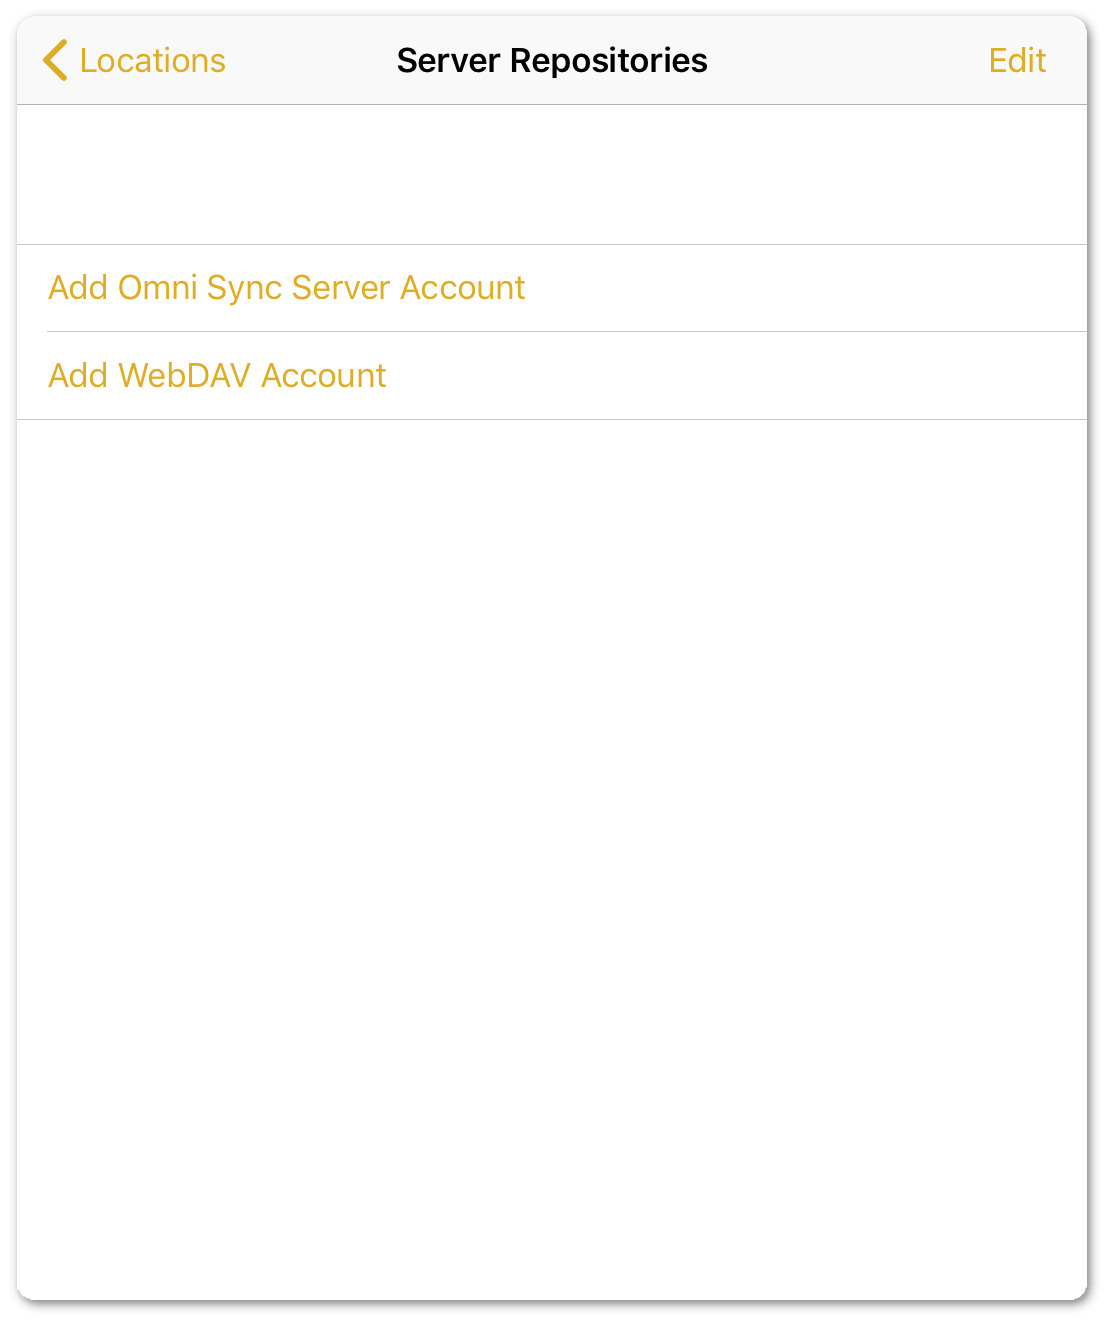
-
On the Server Details screen, enter the information to access your account:
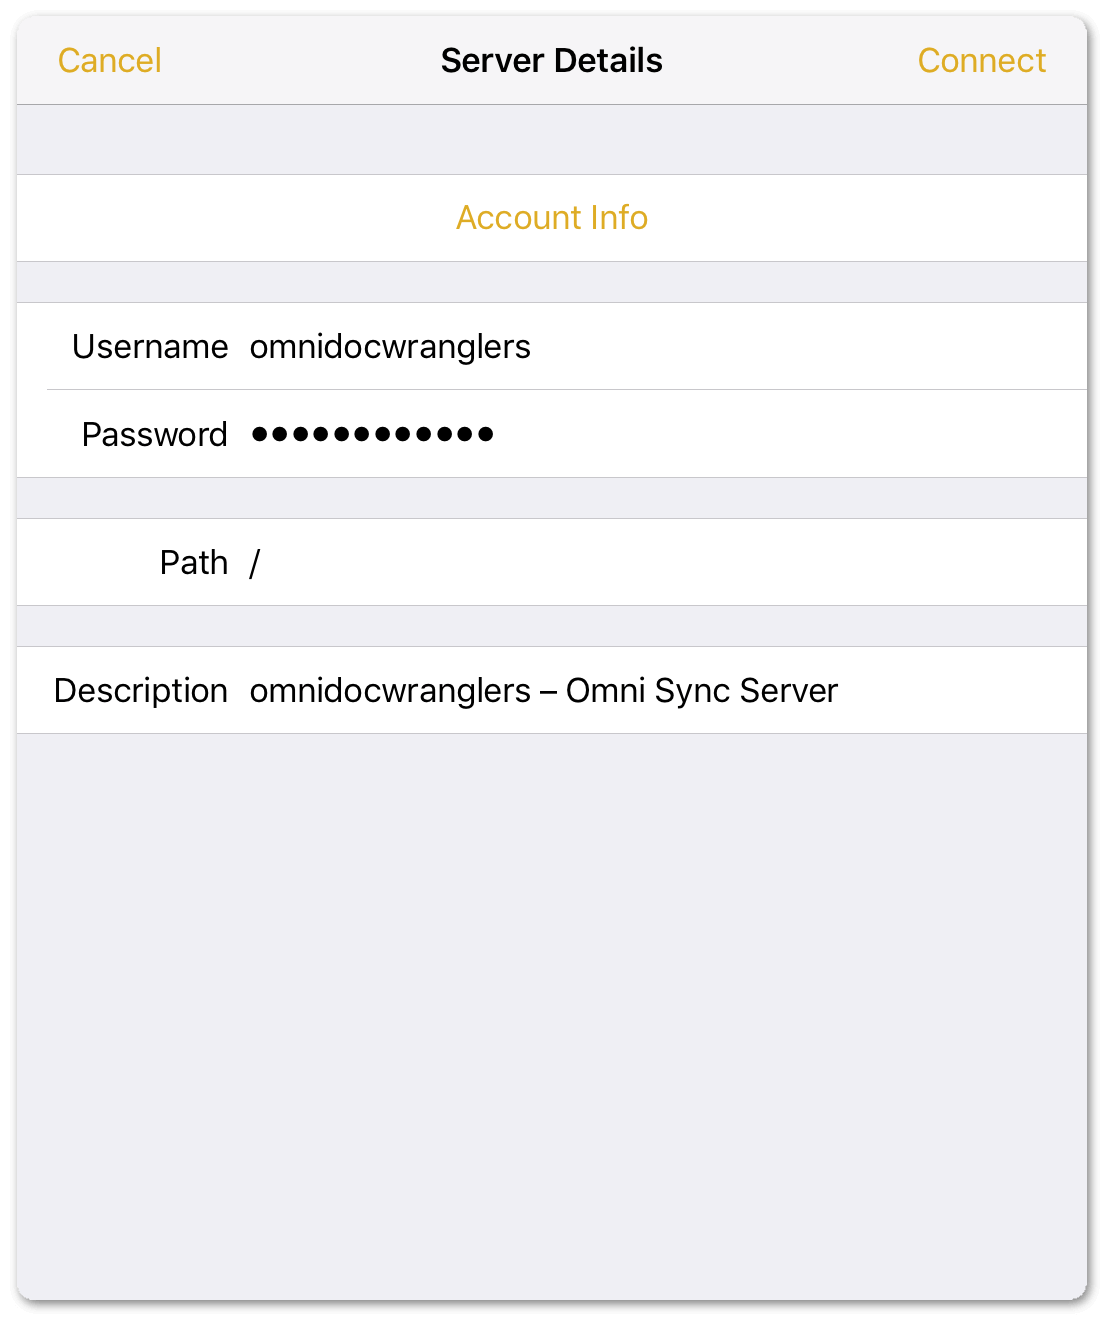
After entering your account information, tap Connect in the window’s upper-right corner. Using the information you provided, OmniPlan attempts to connect to the server, and displays a message letting you know that the connection was successful.
If you encounter an error at this point, re-enter your Username and Password, double-check the server address and any Path you may have provided and try again. (Leave the Path field blank if you are syncing via Omni Sync Server.)
If you continue to experience problems connecting, contact your server administrator. If you are syncing to Omni Sync Server, contact our Support Humans for assistance.
You are returned to the Server Repositories screen, which lists available sync server locations:
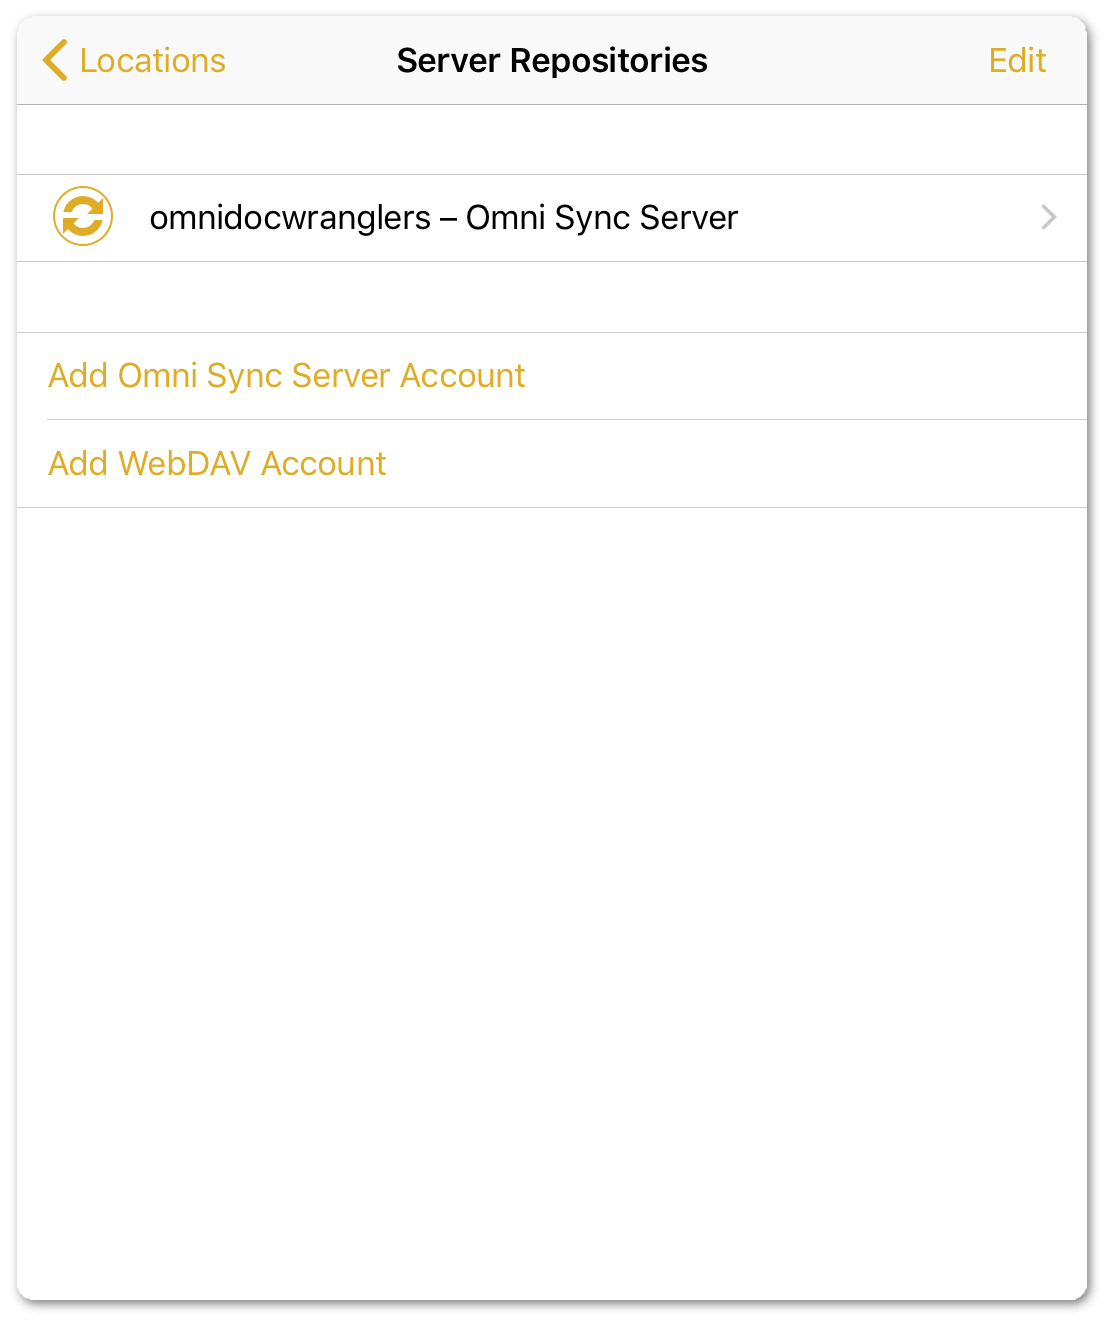
Next up: publishing your project.
Publishing an OmniPlan Project
To share an OmniPlan project, follow these steps:
- Open the OmniPlan project that you need to share.
- In the toolbar, tap
 to open the Inspectors.
 - Tap Project to view the Project inspector.
-
Tap Publish & Subscribe:
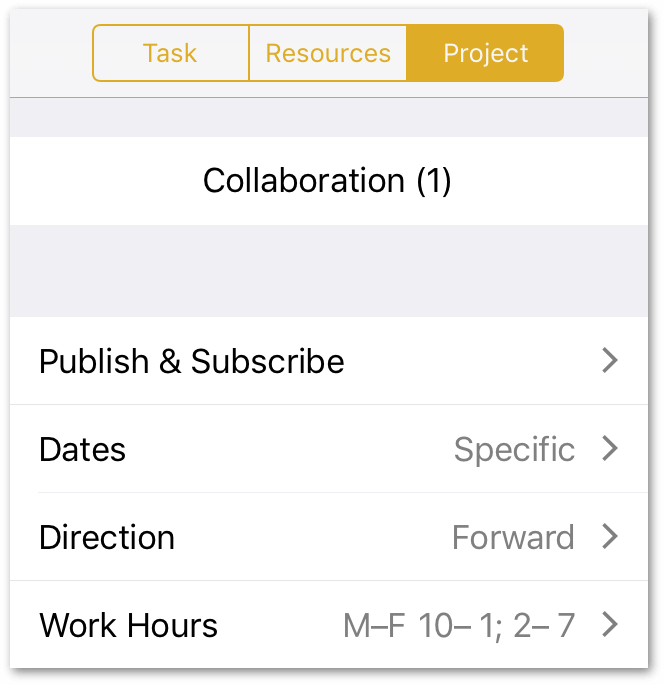
-
Turn on the Active switch to make the project available for publishing and subscribing:
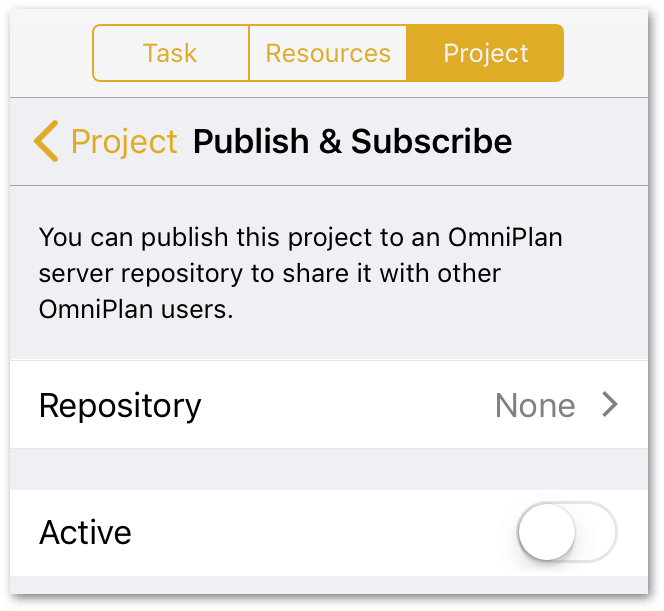
-
Choose the Repository to publish to, and then choose whether you want to Publish and/or Subscribe to resource loads by turning on or off their respective switches:
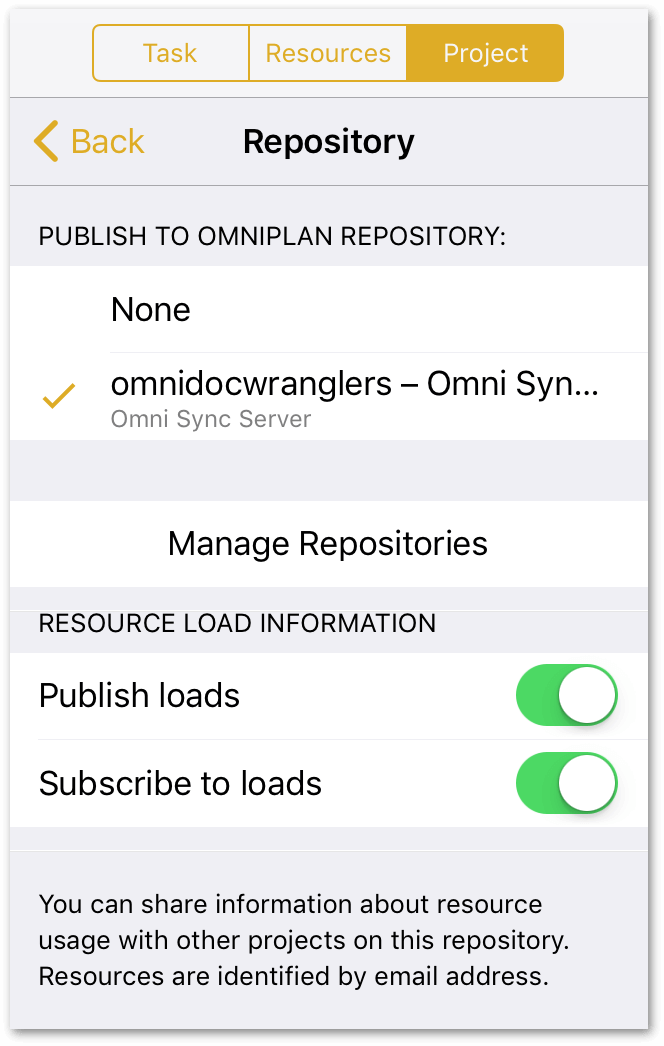
The key to balancing resource loads across projects is that individual resources be tagged and identified by a unique email address that is shared across all projects. This can be set in the Resource Info section of the Resource inspector.
-
Tap ❮ Back at the top of the inspector to return to the Publish & Subscribe pane of the inspector:
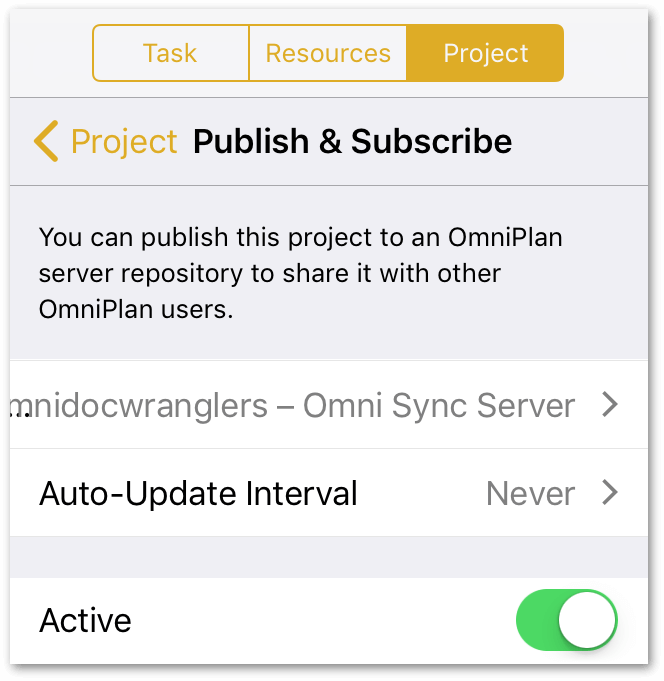
-
Tap Auto-Update Interval to set how frequently OmniPlan looks for updates to the synchronized file on the server:
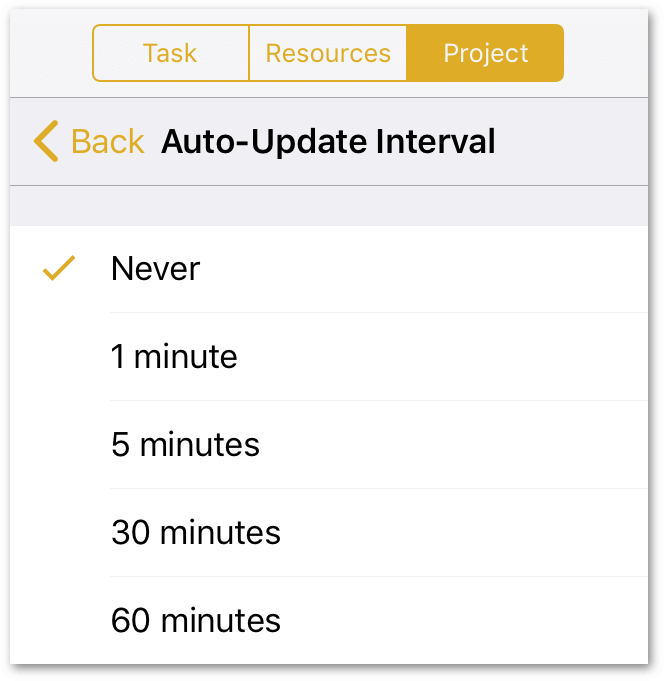
By default, this is set to Never, which allows you to manually check for updates in the Project inspector. Depending on how active your project is, however, you may consider choosing one of the available options (1, 5, 30, or 60 minute intervals).
After setting a frequency for the Auto-Update Interval, you are returned to the Publish & Subscribe pane of the inspector:
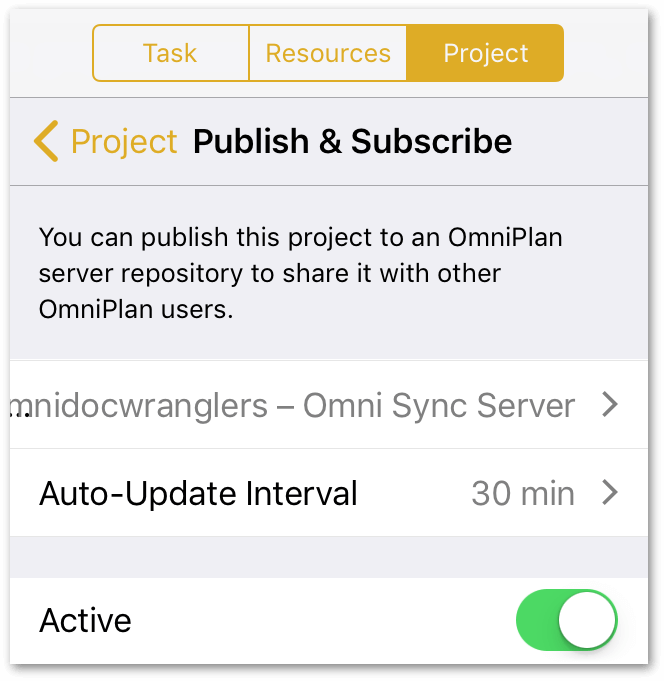
-
At the top of the Project inspector, tap ❮ Project to return to the main inspector pane:
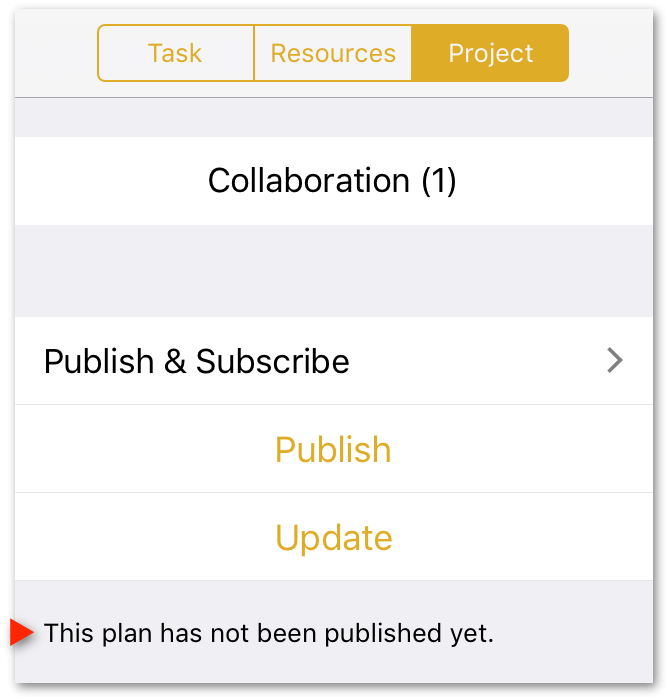
As of now, the project has yet to be published.
-
Tap Publish to publish the project file to the server repository:
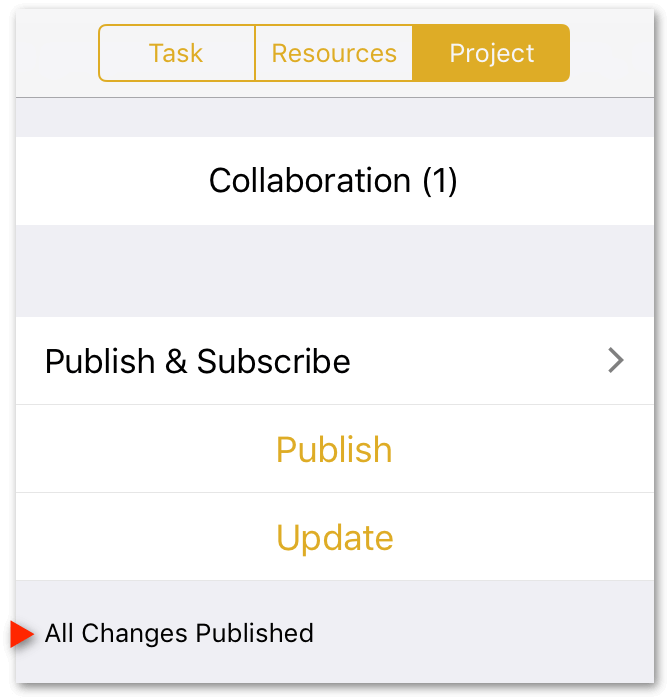
The Project inspector displays the message All Changes Published beneath the Publish and Update buttons.
Once published, OmniPlan updates the local copy of your project file based on the Auto-Update Interval, or whenever you tap the Update button.
Subscribing to an OmniPlan Project on iOS
To subscribe to an OmniPlan project on iOS, do the following:
-
Add the designated Server Repository to OmniPlan. See Connecting OmniPlan to a Server Repository, earlier in this chapter.
-
On the Locations screen, tap Server Repositories.
-
Tap the server that contains the project that you need to access:
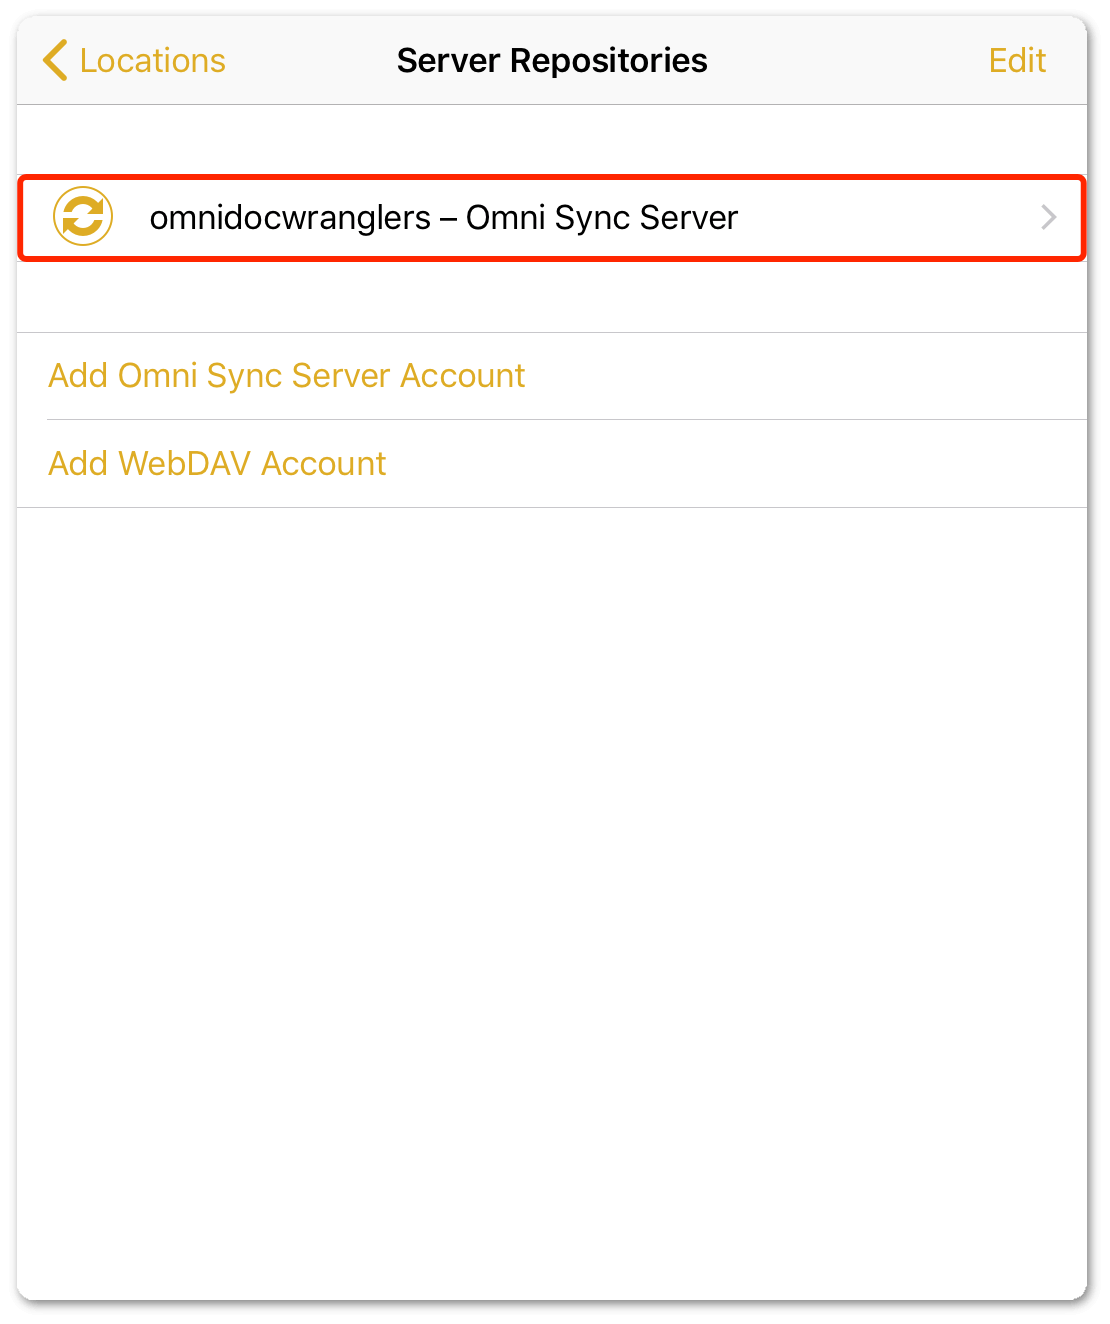
-
Tap the published file to subscribe to it:
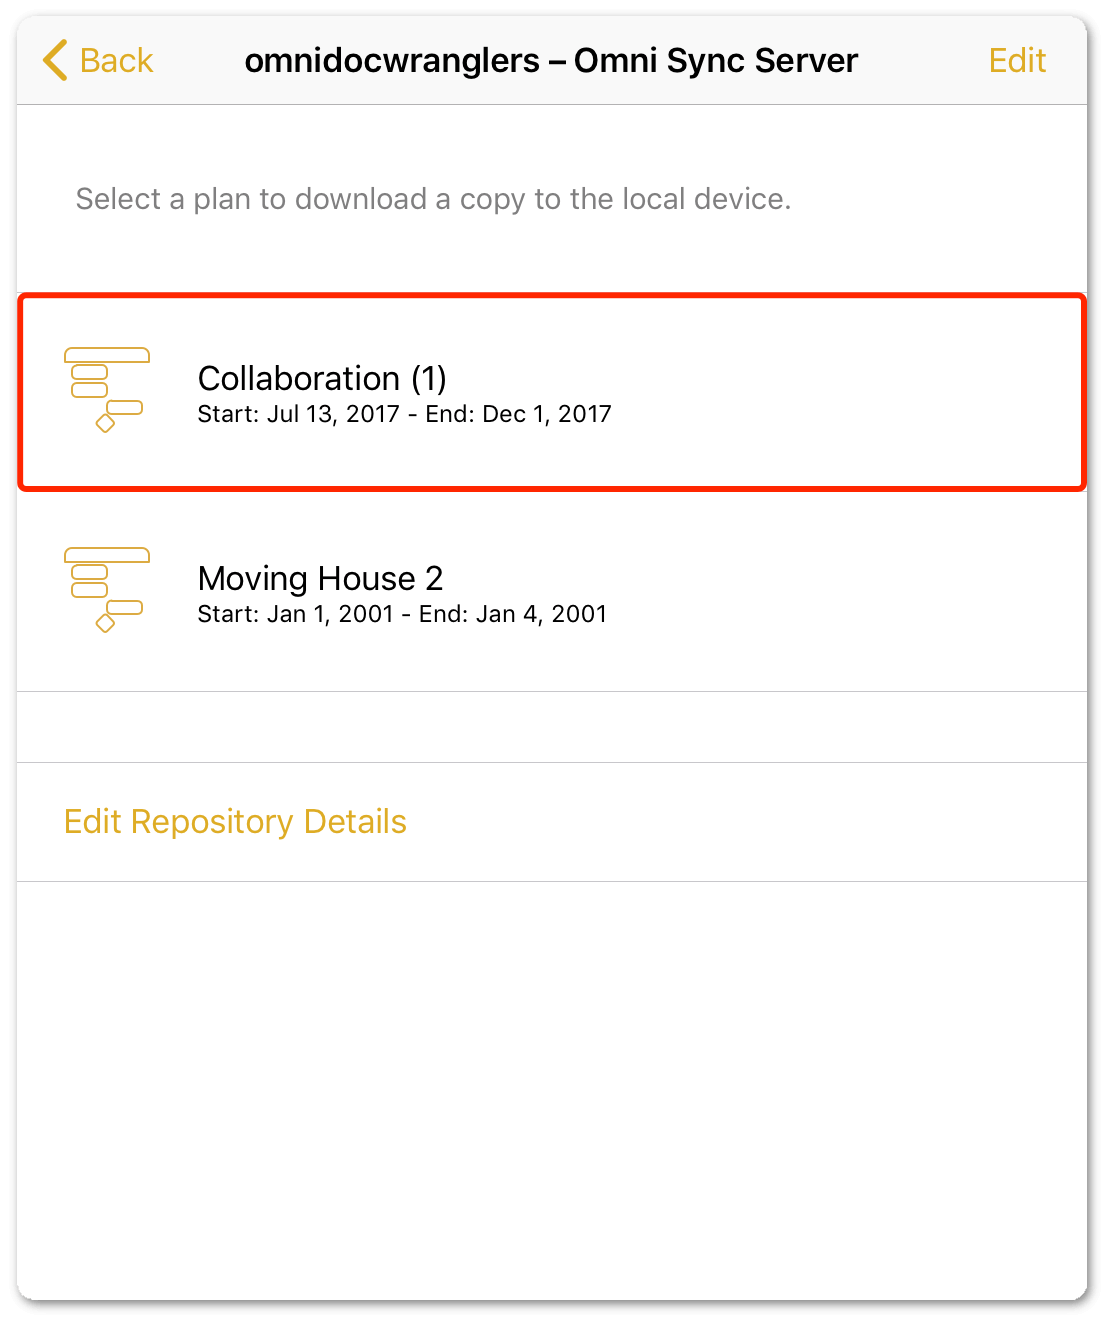
When you tap the file, OmniPlan saves a copy of it in the On My [device] folder (accessible via the Document Browser) on your device.
The OmniPlan file is available for editing just like any other OmniPlan project, with one important addition: it comes with its server repository settings pre-configured. The project is ready to publish its changes and receive updates from the server, and will by default publish changes to its resource loads and subscribe to those made in other projects on the server.
-
Tap to open the file.
You only need to run through the previous steps the first time you access the file on the Server Repository. Once the project file is saved to your On My [device] folder, just go there to open the project.
To ensure that your local copy of the project file is always up to date with the latest changes from other team members, we recommend that you follow these steps whenever you open your local copy:
- Get updates to the project: Tap
 to open the inspectors, tap the Project inspector tab, and then tap Update.
 - Accept or reject changes.
- Make your changes to the project file.
- Publish your changes: Tap the Project inspector tab, and then tap Publish.
Managing Server Repositories
Once you have an account set up and have begun publishing and subscribing to projects, you can manage your repository accounts and shared projects on the Server Repositories screen.
On the Locations screen:
- Tap Server Repositories.
-
Tap to select the repository containing the files you want to manage:
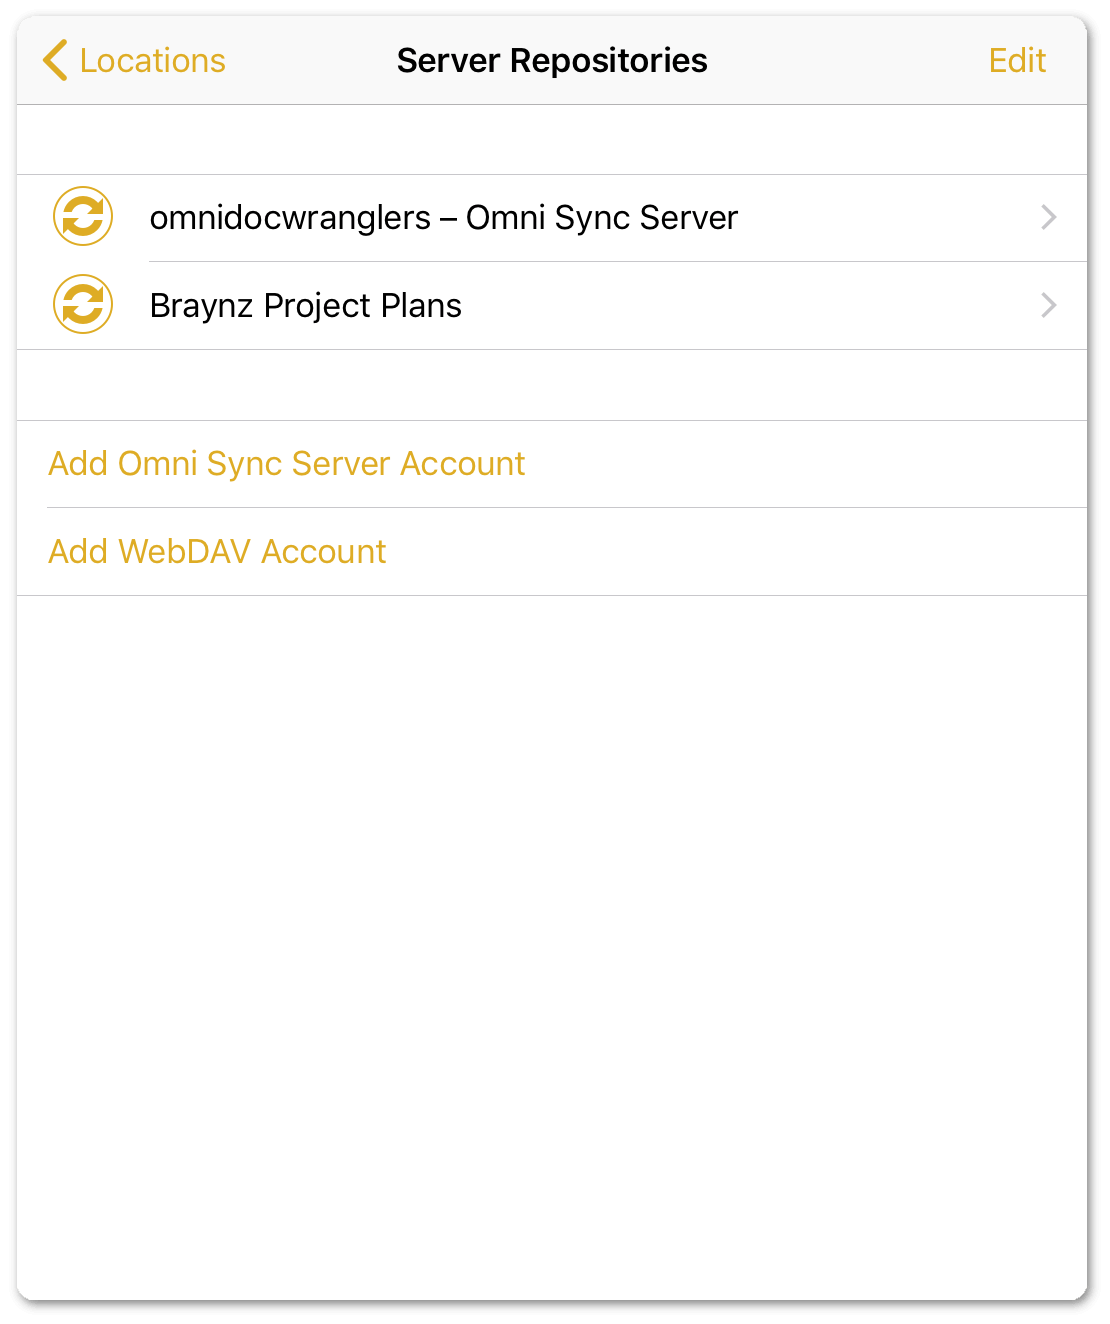
After tapping the applicable repository, the next screen you see contains a list of OmniPlan files on the server:
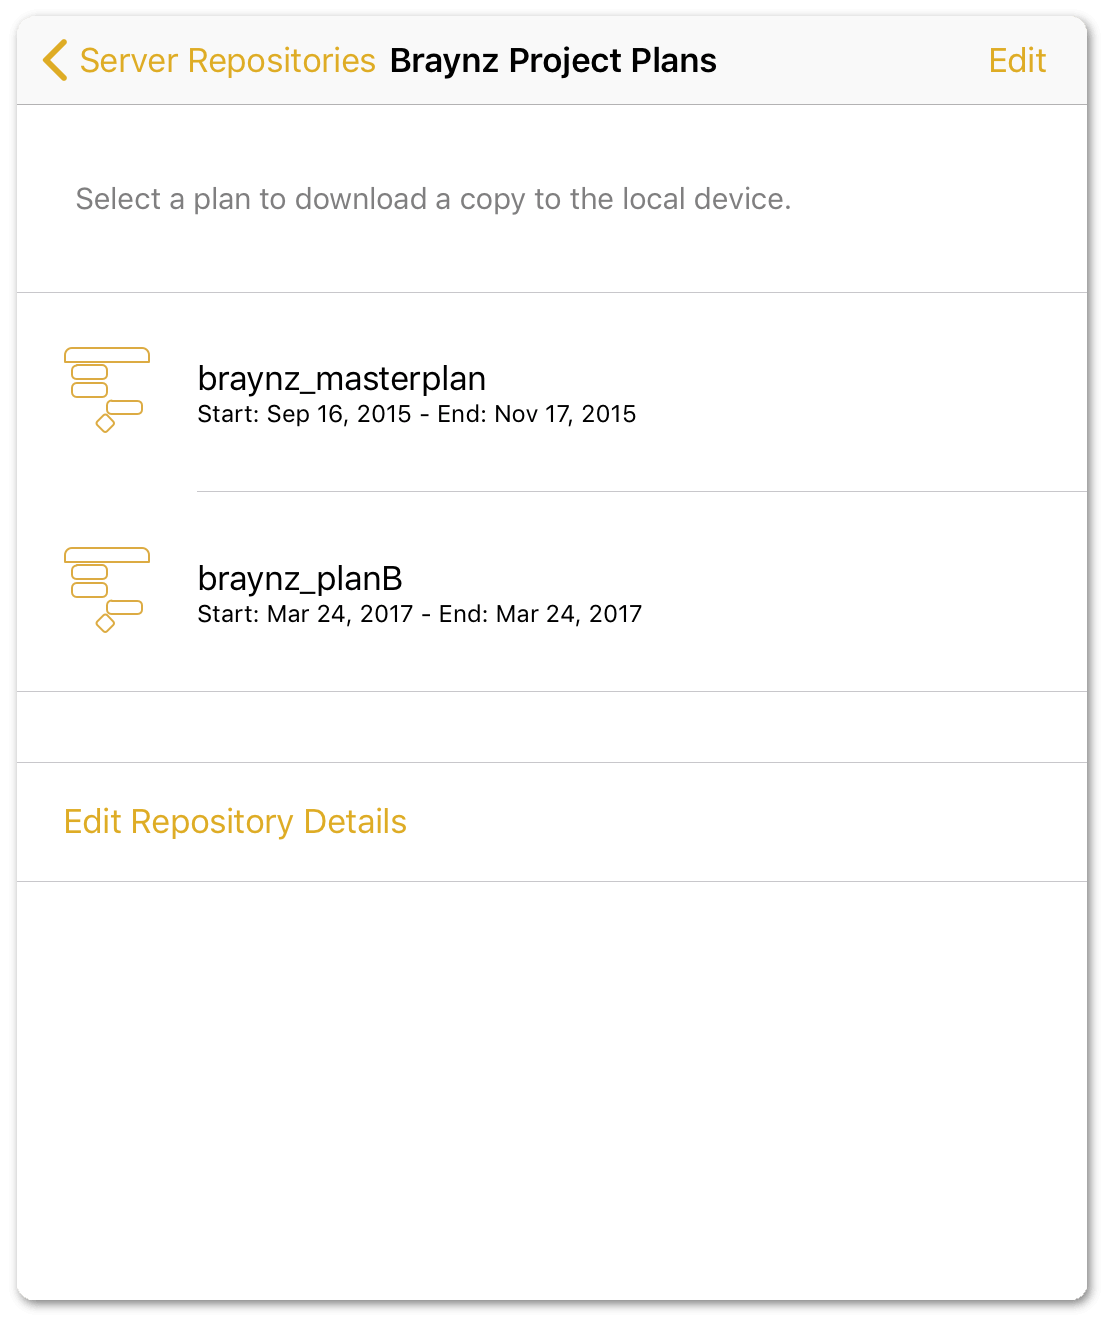
-
To delete a file from the server, you can either Edit and then tap the delete button (
 ):
):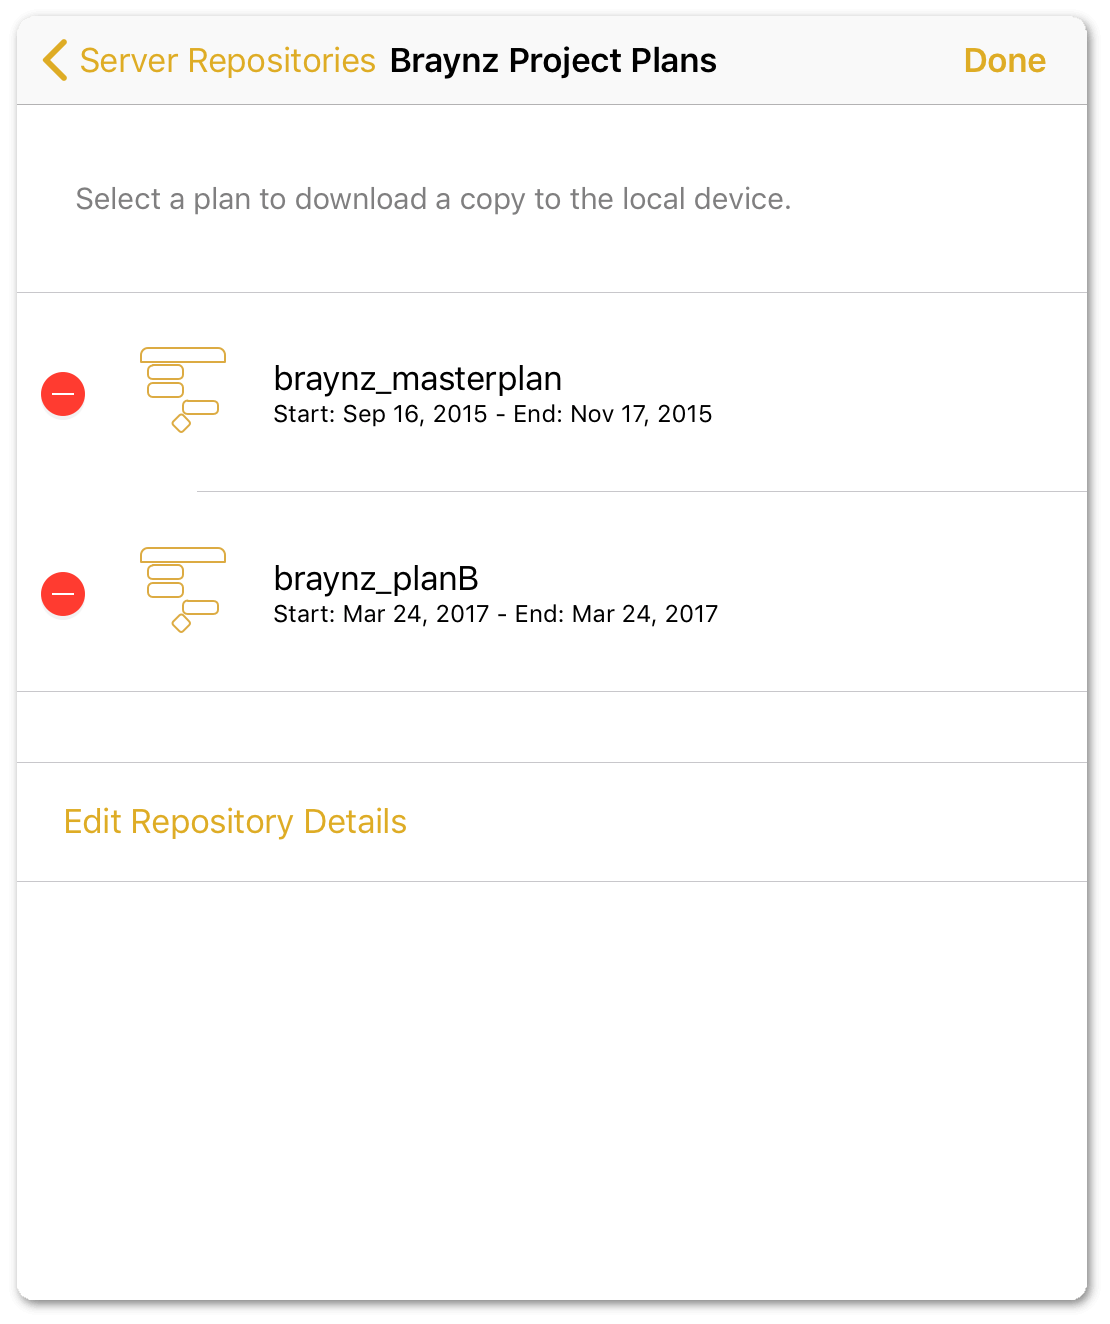
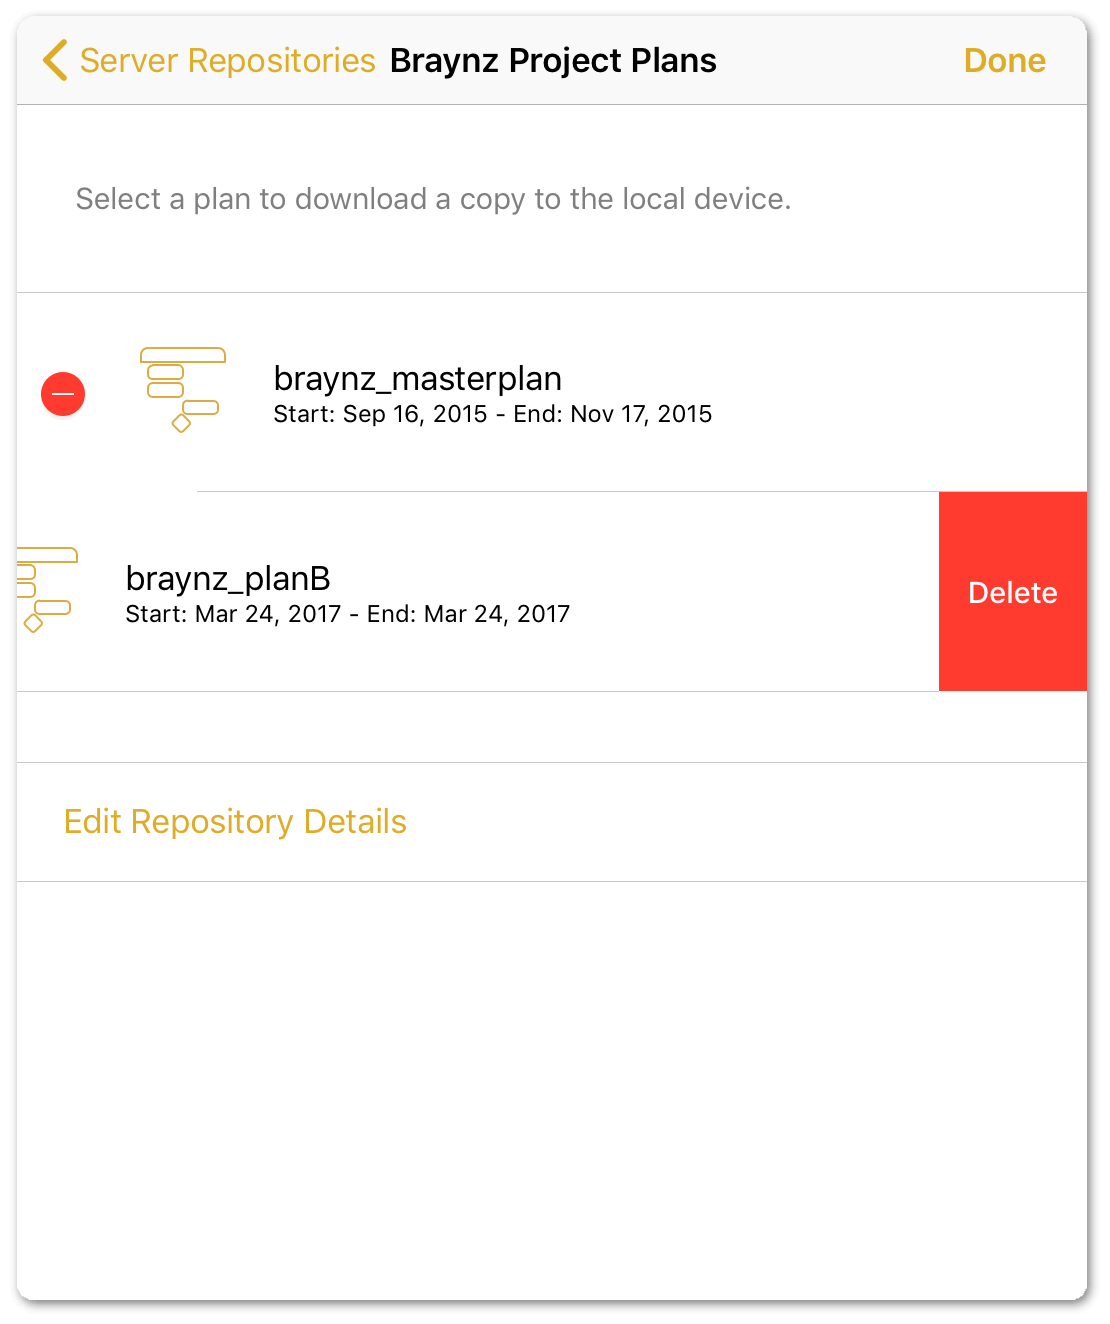
Or you can swipe left on a file and then tap Delete.
When you tap Delete, OmniPlan presents the following alert:
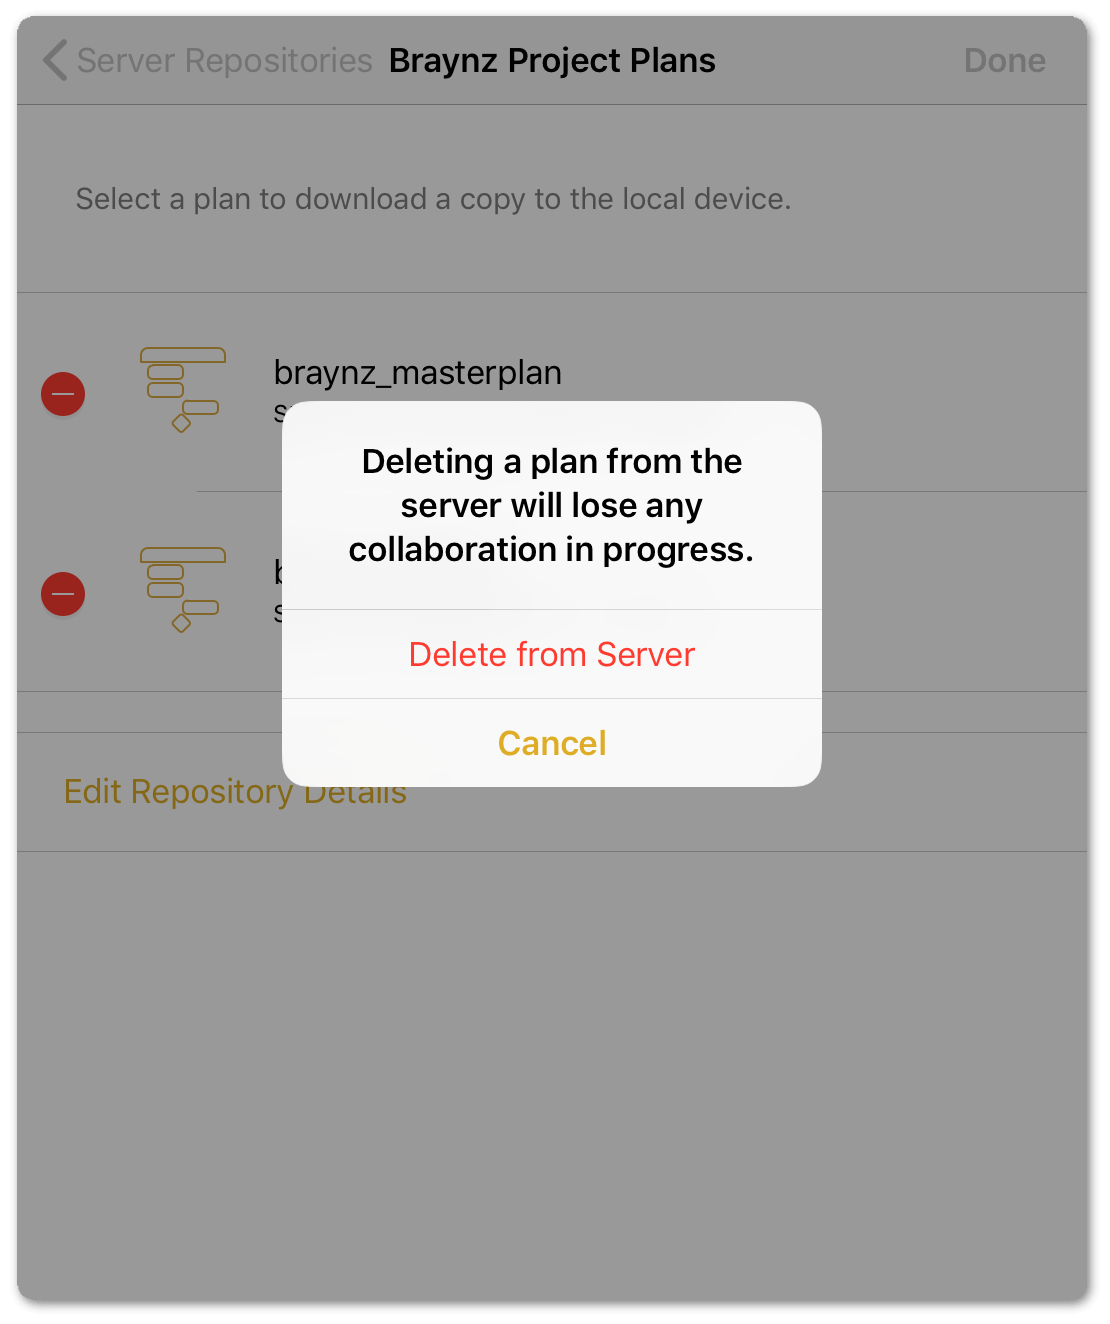
If you delete the file from the server, people who have subscribed to the plan file won’t be able to publish their changes. Meaning, everyone who has subscribed to the plan will be out of sync with each other’s changes. Everyone will still have a local copy of the plan file on their device or Mac; they just won’t be able to publish or subscribe to changes.
Part of the danger in sharing the server credentials is that anyone with access to the shared credentials could potentially delete a project file from the server.
If you are the project manager, be sure to let your team know that they should not delete a shared OmniPlan file from the server.
Change Tracking
You can use Change Tracking to track changes made to the shared project and accept or reject the changes of others.
To turn on Change Tracking, tap  in the toolbar, and then tap Change Tracking:
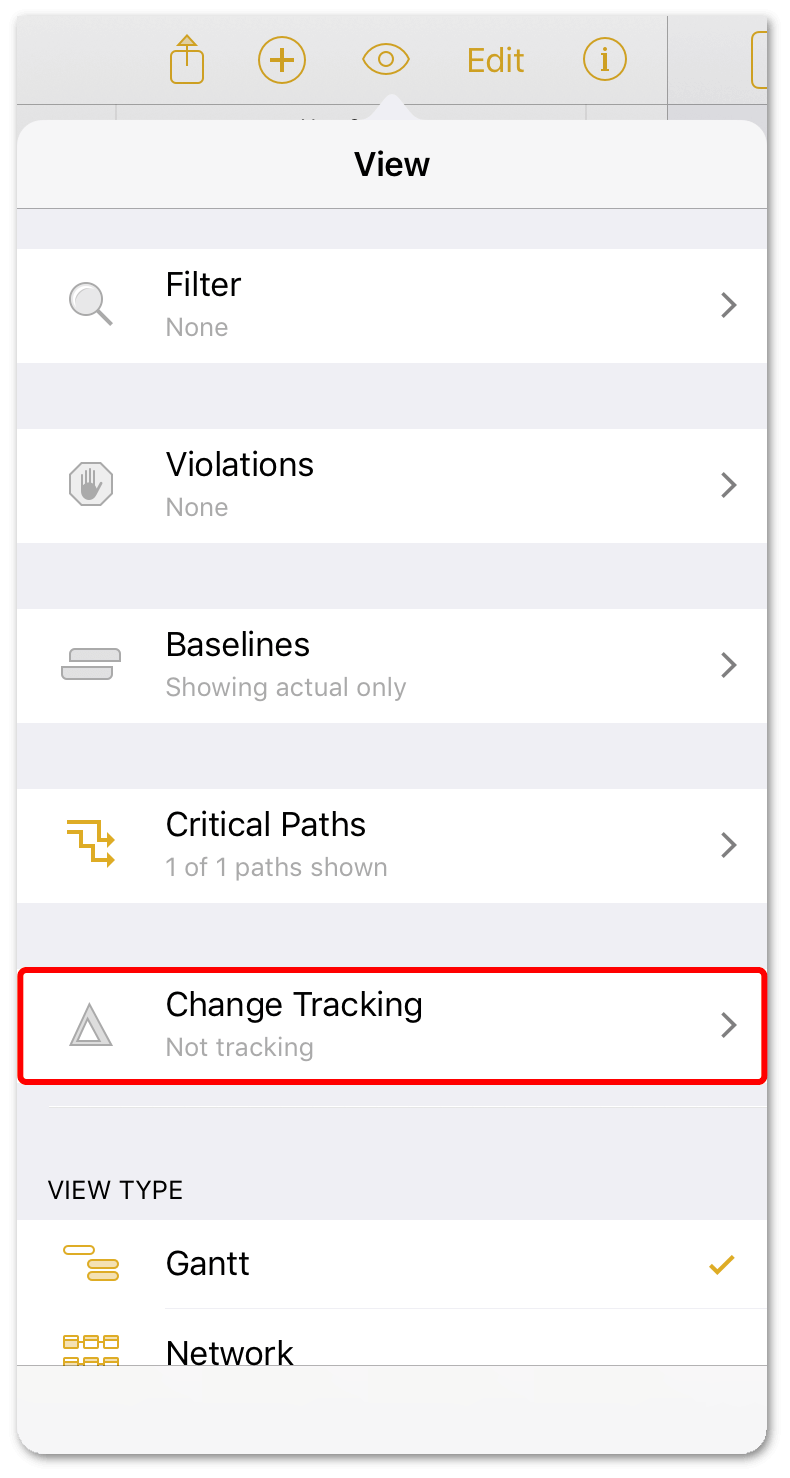
At the top of the Change Tracking pane, tap the switch to turn on Change Tracking for the shared project:
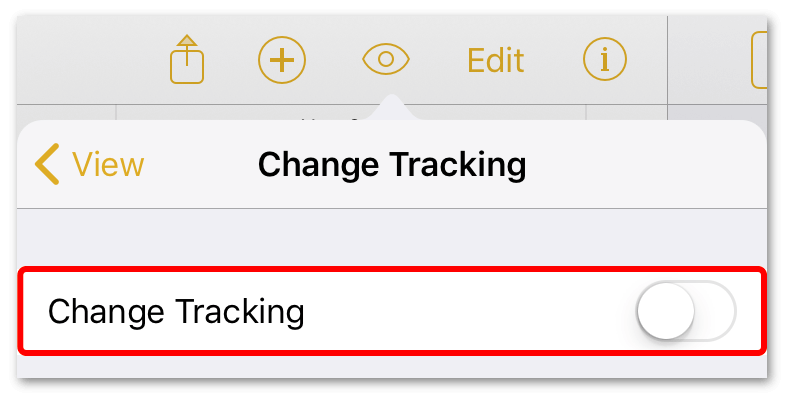
Whenever a change is made to the project (either locally or remotely), that change is logged in the Change Tracking pane of the View menu:
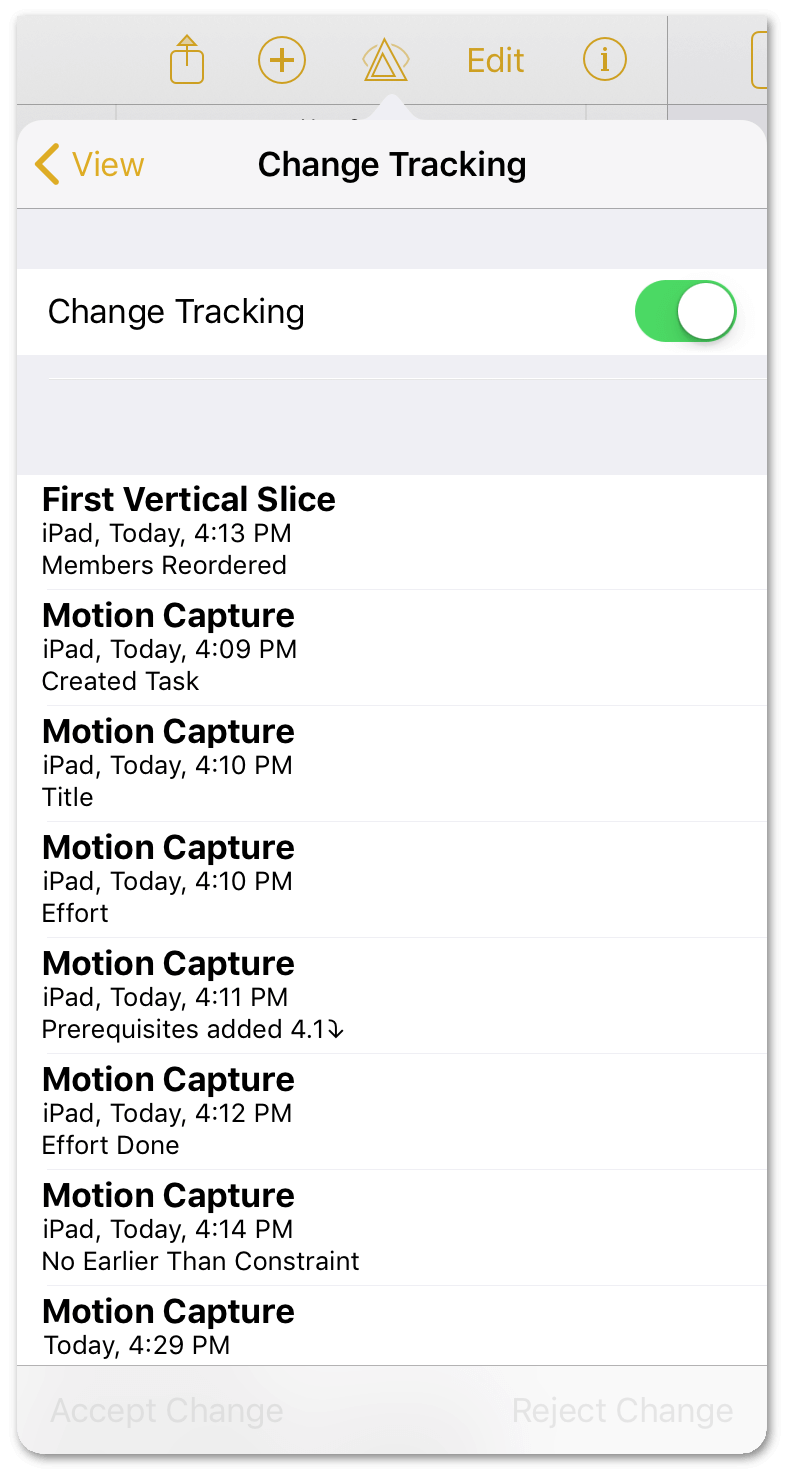
The Change Tracking screen displays a list of changes made since your last update to the project. Each change includes the relevant task name, the device responsible for the change, the date the change was made, and the nature of the change.
You can approve or reject changes individually by selecting each change and then tapping Accept Change or Reject Change, respectively. You can also approve or reject changes en masse by tapping either Select Local Changes or Select All Changes and tapping Accept Changes or Reject Changes, respectively:
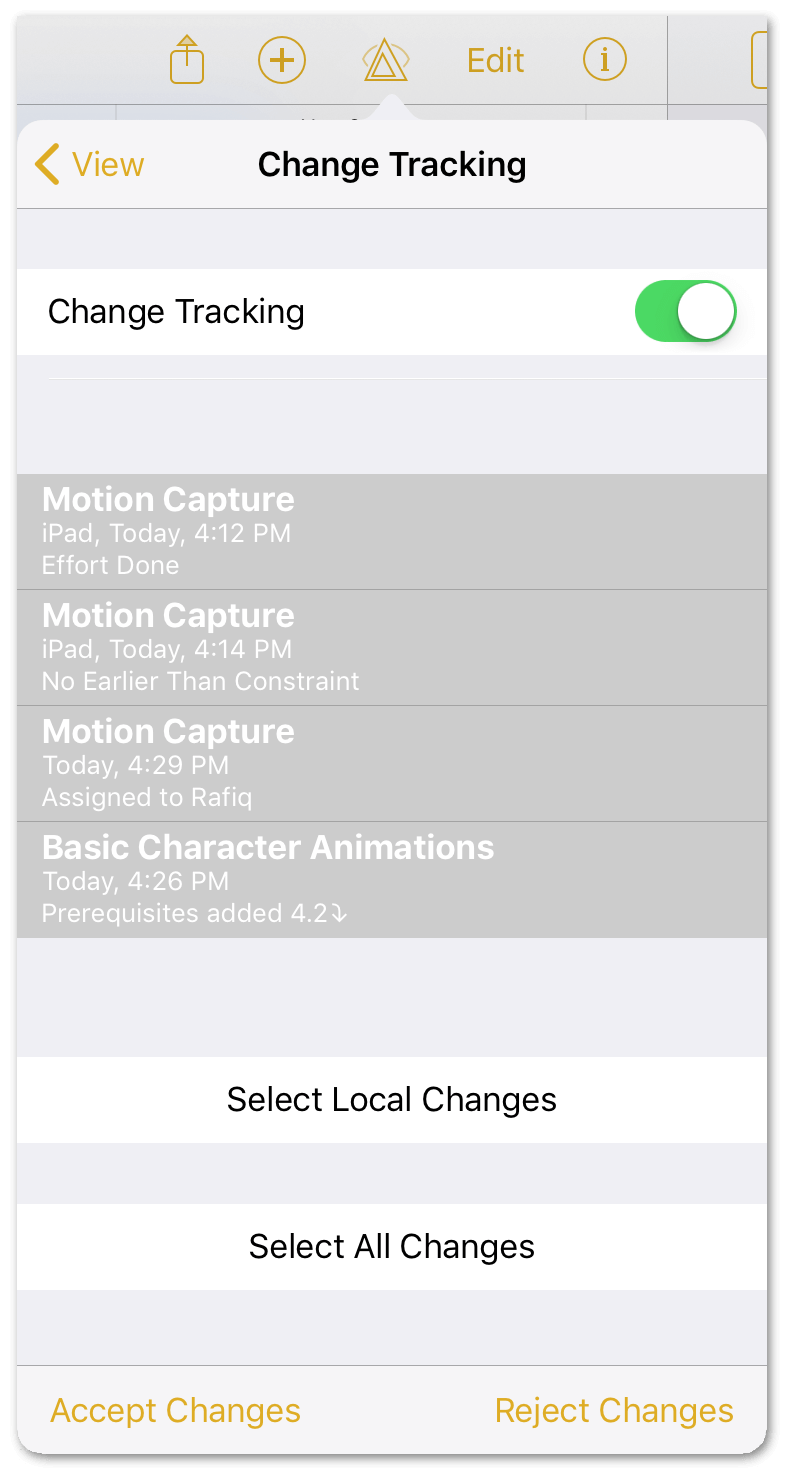
If complex interdependent changes have been made to the project, it may not be possible to move back and forth between change states with perfect fidelity. Be sure to double-check the project after accepting or rejecting a large number of changes.
Keyboard Shortcuts
If you’re using OmniPlan for iOS with an external keyboard connected to your device, you can take advantage of the app’s built in keyboard shortcuts for many common tasks.
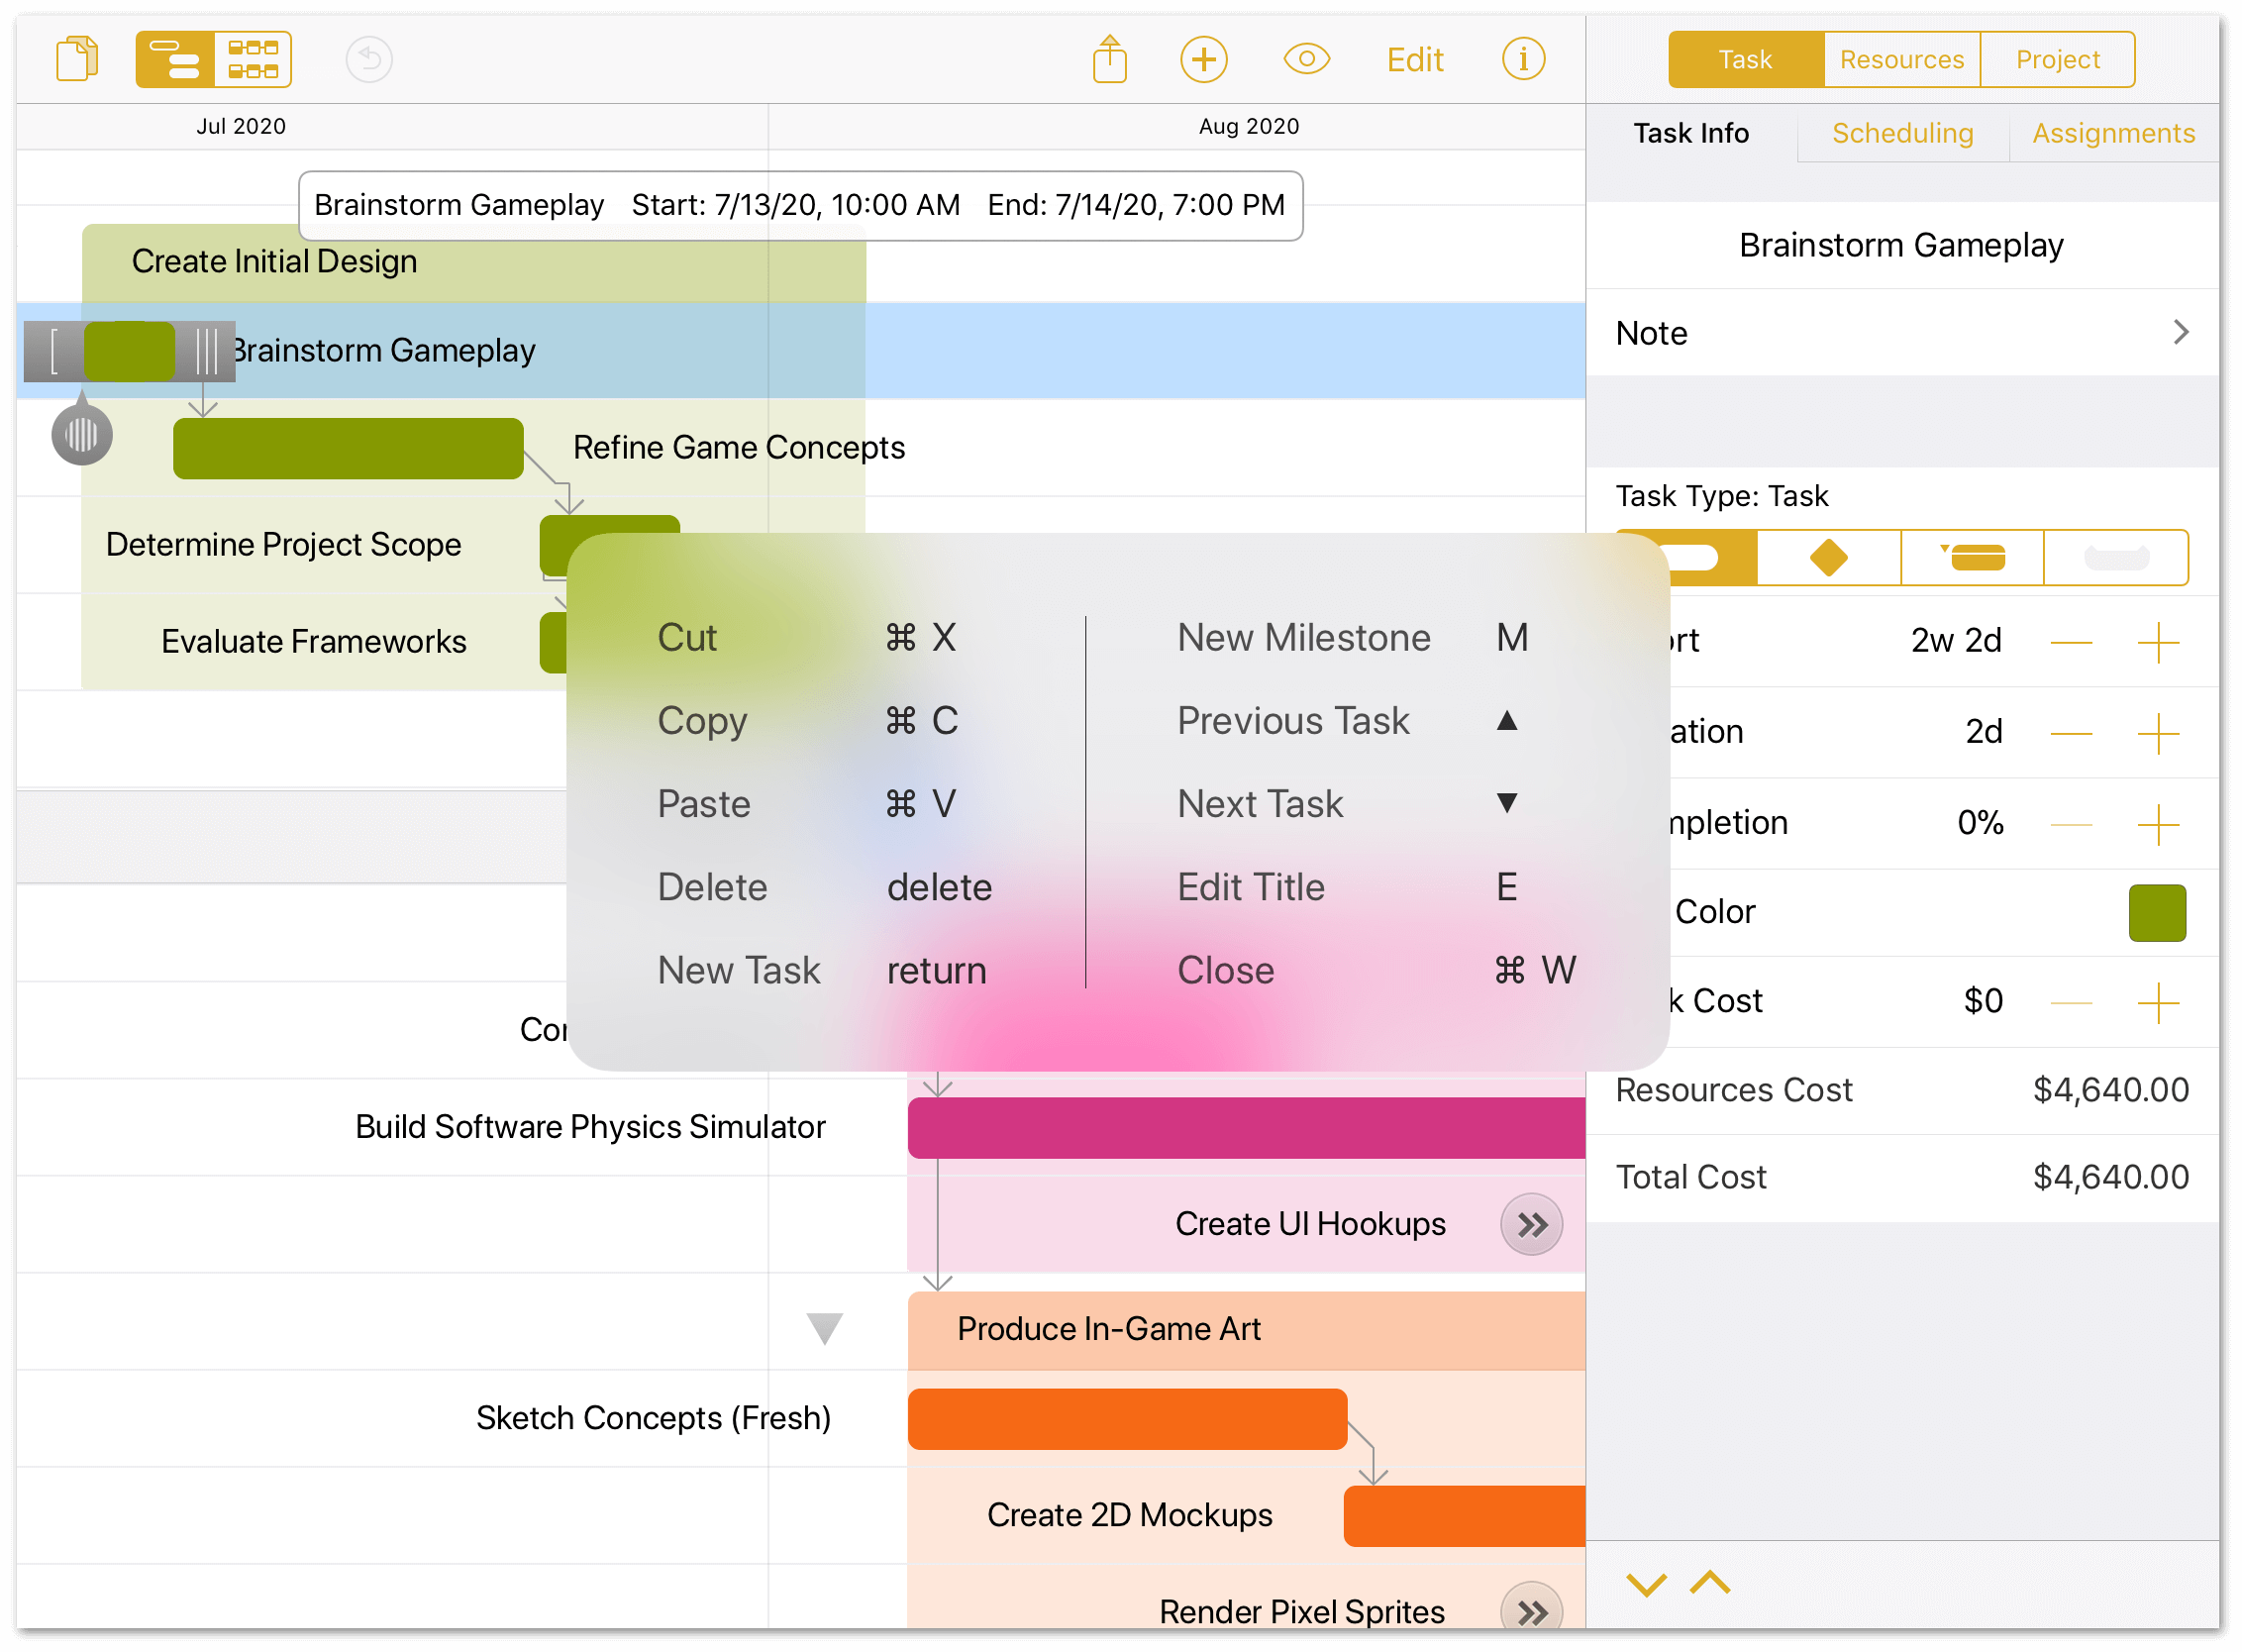
Anywhere in the app, press and hold the Command (⌘) key on your connected keyboard to view a list of available shortcuts. There are some shortcuts that work no matter where you are, while others are specific to your current view. Some locations may have more than one overlay screen’s-worth of shortcuts available; in that case, browse between pages by swiping left or right with the Command key held down.
The keyboard shortcuts listed in this chapter are available in OmniPlan for iOS on all devices. However, only iPad offers the reference overlay.
Universal Shortcuts
The following shortcuts are available anywhere in OmniPlan.
- Undo (Command-Z)
- Revert the most recent action taken.
- Redo (Shift-Command-Z)
- Reinstate an action that was just reverted. Note that redo works best immediately after undoing something; if you switch views or take additional actions redo may not be available.
- Cut (Command-X)
- Remove the selected text or item(s) and copy them for pasting elsewhere.
- Copy (Command-C)
- Copy the selected text or item(s) for pasting elsewhere.
- Paste (Command-V)
- Insert copied text or item(s) at the selected location.
- Delete (delete)
- Delete the currently selected item(s). In the document browser this moves local documents to the trash; in the project editor this removes tasks from the Gantt chart.
Document Shortcuts
The following shortcuts are available when working with files in the document browser, or are used to return from an open document to the document browser.
- New Document (Command-N)
- Create a new OmniPlan document in the current location in the document browser.
- Close Document (Command-W)
- Close the project editor for the current document, saving changes, and return to the document browser.
Project Editor Shortcuts
The following shortcuts are available when working with tasks in the project editor, either in the Gantt chart or Network Diagram. Alternate shortcuts are listed for when editing text in-line.
- New Task (return)
- Create a new task in the project editor’s Gantt chart or Network Diagram.
- New Milestone (M or Shift-Command-M)
- Create a new milestone in the project editor’s Gantt chart or Network Diagram.
- Expand Group (right arrow or Command-right arrow)
- Expand the contents of a currently selected group.
- Collapse Group (left arrow or Command-left arrow)
- Collapse the contents of a currently selected group.
- Previous Task (up arrow or Command-up arrow)
- Move to the task above the current task in the Gantt chart.
- Next Task (down arrow or Command-down arrow)
- Move to the task below the current task in the Gantt chart.
- Edit Title (E or Command-E)
- Edit the title of the currently selected task.
Getting Help
When you’re in need of help—whether you’re puzzled by the Gantt chart, having trouble syncing, or experiencing another issue with OmniPlan—it’s good to know that the Support Humans at The Omni Group are available to lend you a hand.
Release Notes
For a detailed, comprehensive summary of the latest changes to OmniPlan, tap ![]() while in the Document Browser and choose
while in the Document Browser and choose  Release Notes. This is a good first place to check if something is behaving in a way you didn’t expect.
Finding Help Online
The OmniPlan Support Site provides a wealth of information, including this manual, and Support articles, which go into finer detail on working with OmniPlan.
Similarly, the OmniPlan product page is always a good place to find the latest information about features and updates to OmniPlan.
Videos
In addition to the online help, we also provide a series of online videos for OmniPlan. These videos range in topics from available features in the latest version of OmniPlan to tutorial videos to help you level up in your OmniPlan skills.
Email Support
If you’re stuck, if you have a good idea for the next version of OmniPlan, or if you just want to let us know how we’re doing, go ahead and send us an email. In the Document Browser toolbar, tap ![]() and choose
and choose  Contact Omni to queue up an email message addressed to us, or just send us an email with your thoughts. We take support pretty seriously, so you can expect a prompt response actually typed by human hands.
Phone Support
We understand that sometimes you just can’t wait for an email response when you’re knee-deep in a document and you’re stuck or something isn’t working quite right. We get that. When this happens, you can call our Support Humans at 800-315-OMNI or 206-523-4152. Our Support Humans are available Monday-Friday, from 10 a.m. to 5 p.m. Pacific Time (-0700 GMT).
Online Forums
Omni maintains online forums for all of our products, which are available to everyone. Come share your questions and ideas with other users, share OmniPlan files to show off how you’re using OmniPlan for a particular project, and seek help from the OmniPlan community.
Glossary
The following is a list of terms specific to OmniPlan or project management that you’ll encounter throughout this manual, defined and listed in alphabetical order for easy reference.
- Actual schedule
- The actual schedule, in contrast to a baseline schedule, represents the way a project turns out in real life. Before a baseline is set for a project, the baseline and actual schedules are the same. After a baseline is set, further editing changes the actual schedule only.
- Assignment
- Assigning a resource to a task means that the resource is expected to be actively busy with that task throughout its duration. Assignment amounts are expressed as the percentage of the resource’s time being spent on the task.
- Baseline schedule
- A baseline schedule, in contrast to the actual schedule, is the way a project is planned to proceed. At the moment a baseline is set for a project, the baseline and actual schedules are the same. After the baseline is set, further editing changes the actual schedule only. As a project progresses, multiple baseline schedules can be set to provide updated benchmarks for comparison.
- Child
- A task nested hierarchically within a task group (the group becomes that task’s parent). This is terminology common to outlining software.
- Cost
- A task or a resource can have a monetary cost. The total cost of a task is the sum of the task cost and the costs of the resources assigned to it. A resource can have a per-use cost and a per-hour cost.
- Critical path
- A critical path is a series of dependent tasks which, if any of their durations change, will cause the whole project’s duration to change.
- Dependency
- The relationship by which one task must start or finish before another task can start or finish. For example, the task "Buy paint" must finish before the task "Paint fence" can begin.
- Drag & Drop
- Introduced with iOS 11, Drag & Drop is a system-level function that’s integrated with OmniPlan and other apps on iOS. You can drag into OmniPlan from system apps, such as Mail or Files, reorder tasks in OmniPlan’s Project Editor, as well as drag tasks to and from other Omni apps.
- Duration
- Duration, in contrast to effort, is how long a task takes to complete in actual working time (that is, not including off-time). For example, a task which takes 4 hours of effort, and is assigned to 2 resources, has a duration of 2 hours. When you assign resources to a task, the duration or effort may change.
- Efficiency
- The measure of how much work a resource can get done in a certain amount of time. Efficiency can affect duration and effort: 100% efficiency means the resource can contribute 1 hour of effort for every hour of work; 50% efficiency means it can contribute 1 hour of effort for every 2 hours of work; and so on.
- Effort
- Effort, in contrast to duration, is how much work time a task takes to complete, considering all of the resources assigned to it. For example, a task which has a duration of 4 hours, and has 2 resources assigned to it, has an effort of 8 hours. When you assign resources to a task, the duration or effort may change.
- Equipment
- Equipment is a type of resource. It represents some kind of reusable asset, such as some special computer hardware. It can also be useful to consider things like meeting rooms to be equipment, if you need to balance their use between different tasks. For equipment resources, units represent the percentage of the resource that is available. Equipment can have Efficiency, Cost per Use, and Cost per Hour values.
- Gantt Chart
- The Gantt chart is a chronological representation of the project. Each task is represented by a bar, corresponding to a row in the outline, and possibly connected to other tasks by lines representing dependencies.
- Group
- Items in the Gantt chart or Network Diagram can be grouped together hierarchically. In the Gantt chart, a task group appears as a bracket enclosing its members from above. In the Network Diagram, the bracket appears to the left and right of its members.
- Level
- Leveling a project, or leveling resources, means automatically rearranging the project to make sure the resources are being used as efficiently as possible. This prevents a resource from being assigned at more than 100% of its available capacity at any time, and finds the best order for resources to work on tasks in order to complete them as quickly as possible.
- Material
- Material is a type of resource, representing consumable supplies. For material resources, Units represents the number of the resource that is being used throughout the project. This value updates as the resource is assigned to more tasks. Material resources can have Cost per Use and Cost per Hour values.
- Milestone
- A milestone is a task with no duration and no effort whose purpose is to mark some important point in the timeline of a project.
- Parent
- A task group exists at a level of hierarchy above its member tasks, and is considered their "parent". The tasks within a parent group are known as its "children".
- Resource
- Resources are the people and things needed to get a project done. Resources are listed in the Resources Inspector, and can be assigned to tasks. The three types of resources are Staff, Material, and Equipment.
- Resource load / Resource allocation
- A resource’s load is the amount of effort it is assigned to do at various times throughout the project. If a resource is assigned at more than 100% of its availability all at once, it is said to be overloaded or overutilized. Resource leveling tries to alleviate overload of resources.
- Staff
- Staff is a type of resource, representing people who work on the project. Staff units are measured as percentages. A person who is fully available to the project has a unit value of 100%; someone who is spending part of their working hours on other projects would have lower available units; note that this is not the same as having fewer working hours or being less efficient. Staff can have Address, Efficiency, Cost per Use, and Cost per Hour values.
- T day
- The first day of a project that has an undetermined start date. Until the start date is set, all dates are represented by an amount of time after T day, such as T+2w 1d.
- Task
- An item of work that needs to be done for the project to progress, represented by a corresponding task bar in the Gantt chart or node in network view.
- Units
- Units measure amounts of resources in various contexts. For a staff resource, the units value is a percentage representing how much of the person’s time is available to be assigned to tasks. Equipment resources are similar to staff in that units represent the percentage of the equipment’s effort that is devoted to the project. For material resources, the units value is a number representing a physical quantity.
- Violation
- A violation is a problem in the project that represents an untenable logical contradiction in the arrangement of its constituent tasks. Tasks that start before the project start date, tasks that don’t have enough time to complete before their dependent tasks need to start, and dependencies that cause a task to be prerequisite to itself are all examples of violations.

