The Document Toolbar
The document toolbar is located above the main view when you are working in an OmniPlan document. The document toolbar contains controls specific to the document you are editing, from choosing the current view to opening and closing the inspectors.


It also contains the View Menu, which offers customized display options for data in the main document view.
From left to right, the controls in OmniPlan's document toolbar are as follows:
Document Browser 
Tap to close the current document and return to its folder in the document browser.
View Switcher 
Tap the segmented control  to switch between the Outline, Gantt, and Network views.
View 
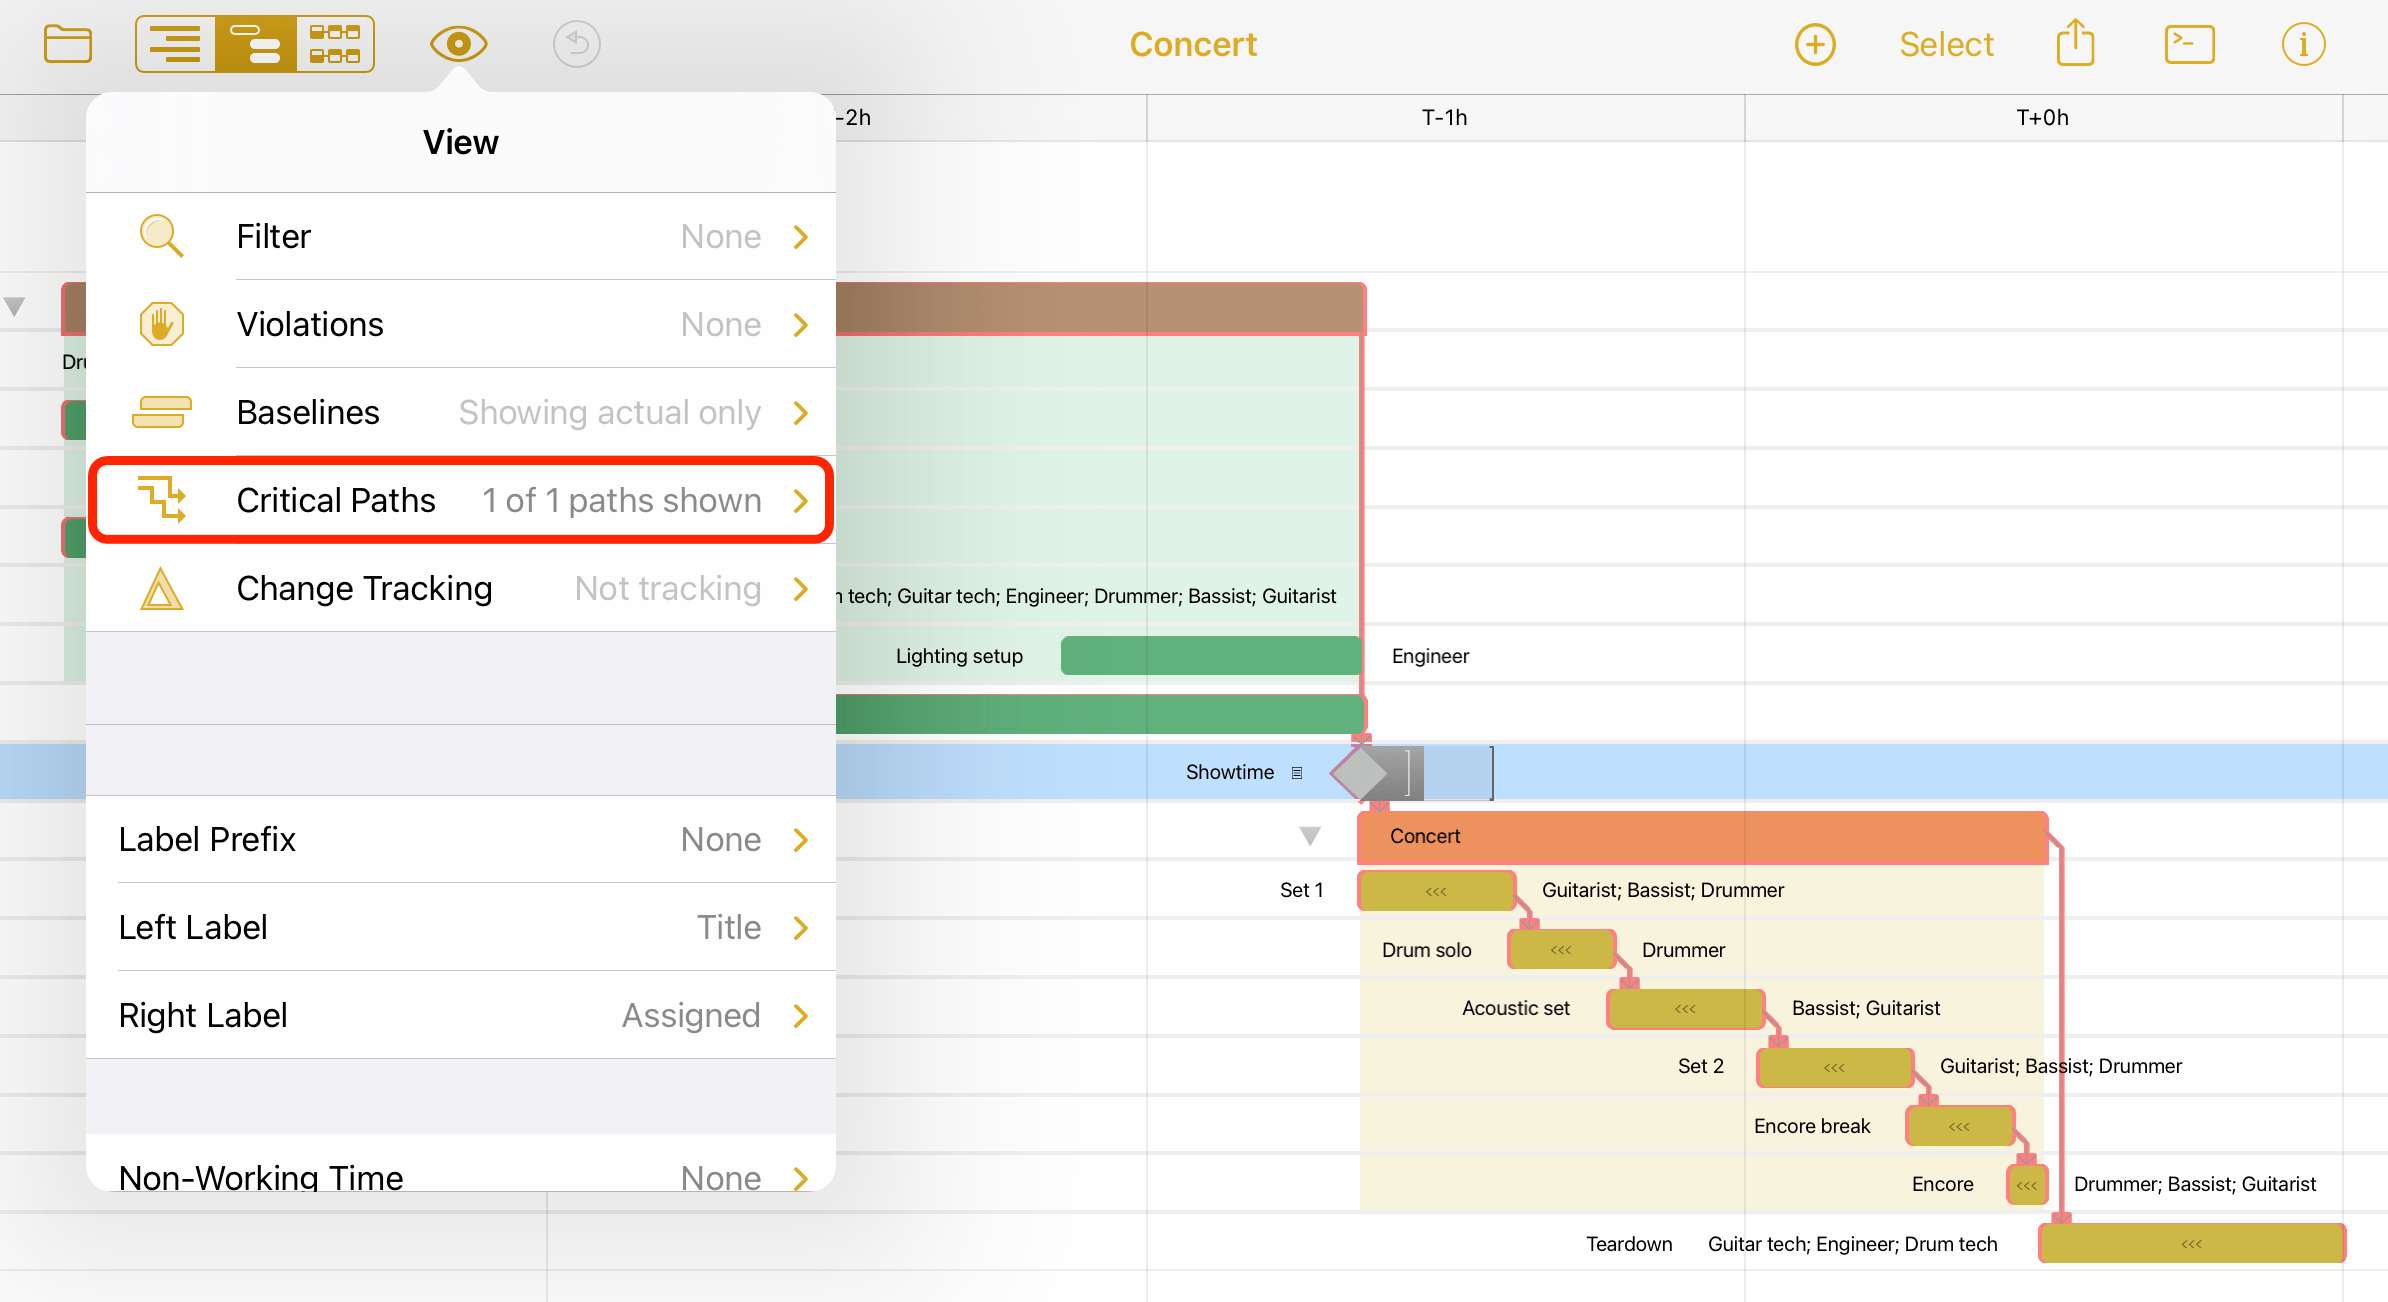
Tap to open the View Menu, where you can set a project filter, turn on change tracking, check for violations, and show baselines and critical paths.
Undo/Redo 
Tap to Undo the previous change to your document. Touch and hold to reveal a pop-up menu with the option to Redo.
Document Title
The document title is displayed at the center of the document toolbar. Tap the title text to edit it.
New Item 
Tap to add a new task to the project. Touch and hold to add a new task, milestone, or group from the popover menu that appears.
With a task selected, choose Set Task Default from the popover to designate it as the default for new tasks added to the project. New tasks are added as copies of the default task, along with pre-filled name, duration, and resource assignments.
Select
Tap to enter Selection Mode and reveal the editing controls along the bottom of the screen.
Share 
Tap to open the Share dialog, with options for exporting, sharing, copying, and printing the document. These are the same options that are available when sharing from the document browser.
Automation (Pro) 
With OmniPlan Pro, use the Automation Menu to run and manage Omni Automation Plug-Ins, and access features for developing your own.
The Automation menu contains the following commands:
-
Automation Console—Opens the Automation Console, a command line interface specifically for creating and running Omni Automation scripts. Only used if you intend to develop Plug-Ins yourself.
-
Automation API Reference—Learn more about what you can do with Omni Automation in OmniPlan by viewing the available classes along with their constructors, functions, and properties.
-
Configure Plug-Ins—Opens the Plug-Ins screen, where you can view and manage installed Plug-Ins and add linked folders.
-
Actions—A list of the available Omni Automation actions provided by any installed Plug-Ins. If no Plug-Ins are installed this section does not appear.
If you are interested in developing Plug-Ins yourself, see the Omni Automation website for documentation related to this feature.
If you are interested in using Plug-Ins created by others, see Installing Plug-Ins for more information. Sample Plug-Ins are available for download here.
Inspectors 
Tap to open or close the inspectors:
-
Task Inspector: Available when a task or group is selected, use the Task Inspector to customize various aspects of the task using the tabs, Task Info, Scheduling, and Assignments.
-
Resources Inspector: Use the Resources Inspector to create and edit resources (staff, equipment, materials, and groups), and to modify their calendars of working hours.
-
Project Inspector: Use the Project Inspector to set the structure and parameters for your project.
The View Menu
The View Menu contains tools for customizing how data is displayed in the main view, with a particular emphasis on tracking project progress.
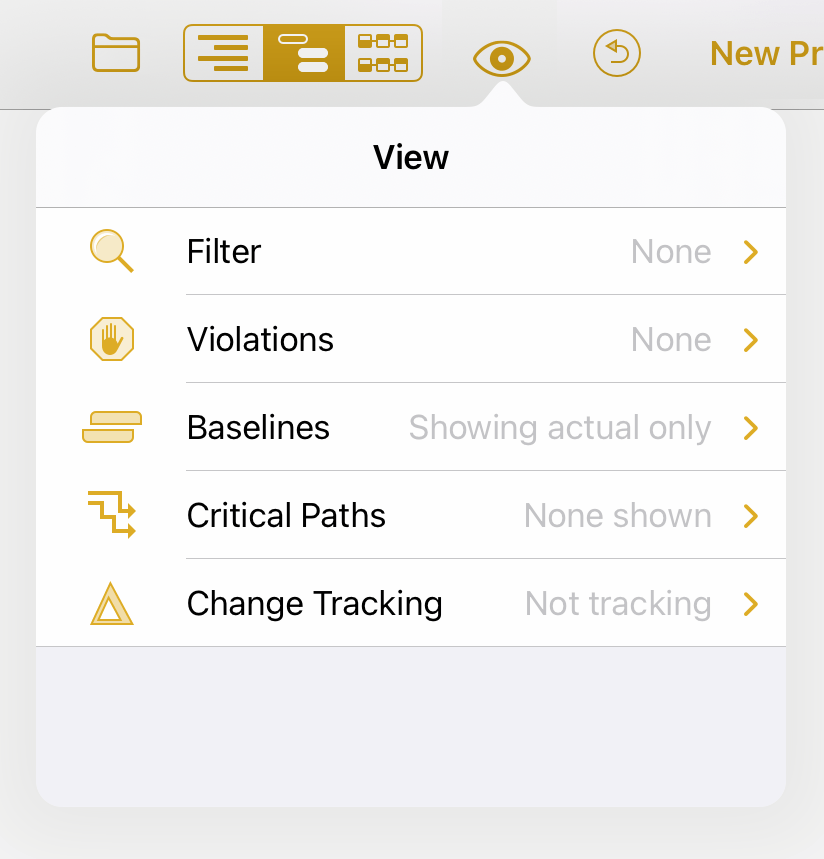
-
Filter—Apply a filter to the current view that limits which tasks are visible. Choosing a filtering parameter here doesn’t affect the hidden items beyond removing them from view. See Using Filters for more information.
-
Violations—When a logical contradiction arises in your project, such as a result of an impossible dependency relationship or a scheduling change that violates date restrictions you’ve set up, you’ll see details on the problem here along with a suggested solution to resolve it. See Resolving Violations for more information.
-
Baselines—A baseline is a snapshot of project’s state of affairs against which the actual schedule can be compared. Set a baseline with Set Baseline in the bottom toolbar, and choose which you’d like to compare against the actual schedule from the list. Tap Edit to remove baselines with the deletion switches next to their names.
-
Critical Paths—Choose which critical paths you would like to display, including critical paths to each milestone and the overall project. Tap a milestone to edit details of its critical path display: choose whether or not resource constraints are considered in charting the path, pick a color for the path line, and set an amount of slack OmniPlan considers built in to tasks for purposes of considering them part of the critical path to that milestone.
-
Change Tracking (Pro)—If you are publishing your project to a shared server repository with multiple contributors, enable change tracking to view and approve changes made to the project by yourself and others. Select changes in the list and tap Accept Change or Reject Change at the bottom to approve or deny them. Learn more about change tracking in the Multi-User Collaboration chapter.
The following additional options are available in the View menu when in Gantt View:
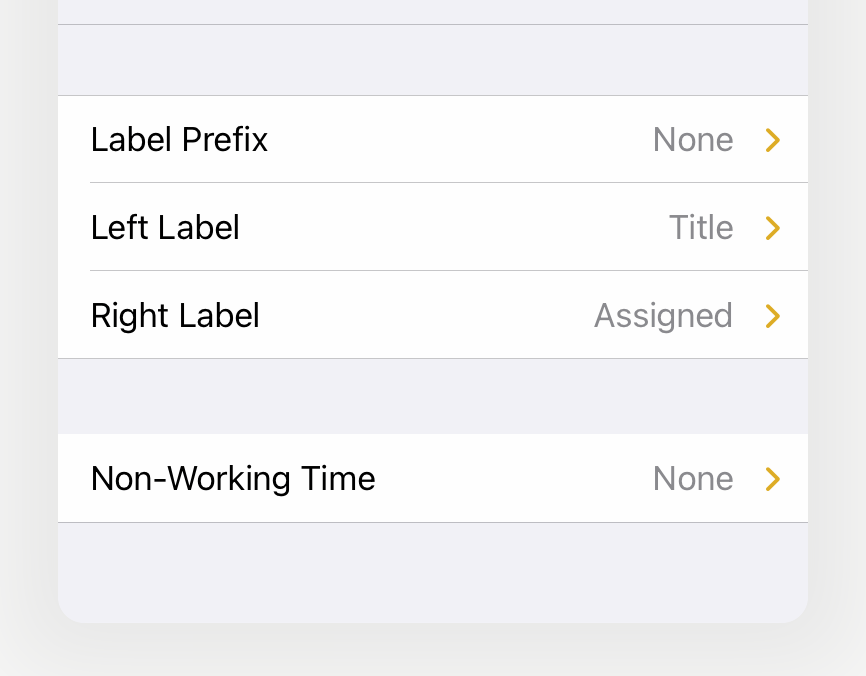
-
Label Prefix—Choose whether to include a numerical prefix before the label on each line of the Gantt chart. Options include Hierarchical Numbering, Flat Numbering, and Unique ID.
-
Left Label, Right Label—Determine which task attributes are displayed alongside each task in the Gantt chart, on the left side and right side of the task bar respectively.
-
Non-Working Time—Add shading to date columns in the Gantt chart that correspond to time where no work is scheduled (based on schedule settings in the Project inspector). Options include Holidays, Holidays & Weekends, and All Hours.
Using Filters
When you want to focus on a specific aspect of your project, you can view a subset of its tasks by applying filters for specific criteria.
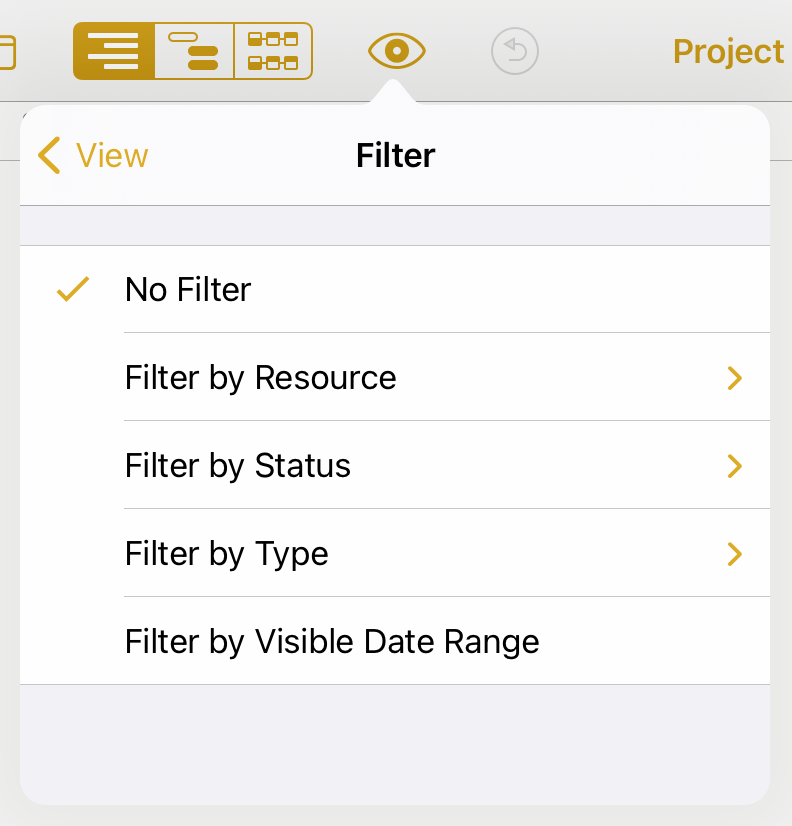
Choose Filter from the View menu. A submenu appears with the following options:
- No Filter—Removes any filters currently applied, restoring all tasks in the project to view.
- Filter by Resource—Filters the project to show only tasks with a specific resource (or group of resources) assigned.
- Filter by Status—Filters the project to show tasks that meet a specific scheduled completion status or progress criterion.
- Filter by Type—Filters the project to show tasks of a specific task type.
- Filter by Visible Date Range—Filters the project to show tasks that are currently visible in the span of dates in the view.
Filters can be displayed either as a Flat List of Matches (the filter excludes task groups) or with Group Hierarchy included. Filters are mutually exclusive, so only one criterion can be applied at a time.
When your filter is set, any tasks which match your criteria remain in the outline, while the rest of the project is hidden away. You can work with the project normally while it is filtered, but you can only edit the visible tasks. A magnifying glass icon appears on the View menu button in the toolbar for as long as the project is being filtered.
Filter Notes
-
Any tasks created while a filter is in place will not have the filter applied to them, so they will appear in the task outline (regardless of whether the filter would hide or show them) until the filter is refreshed or reapplied.
-
If you export or print a project while a filter is on, the filter is ignored and the project is exported or printed with its full list of tasks.
Using Baselines
Once you have finished setting up a project and you are ready to start implementing it, you can set a baseline schedule. The baseline represents the original intentions of the project, for comparison with the actual schedule. The actual schedule, by contrast, is the way a project turns out in real life. Before the baseline is set for a project, the baseline and actual schedules are the same. After the baseline is set, further changes affect the actual schedule only.
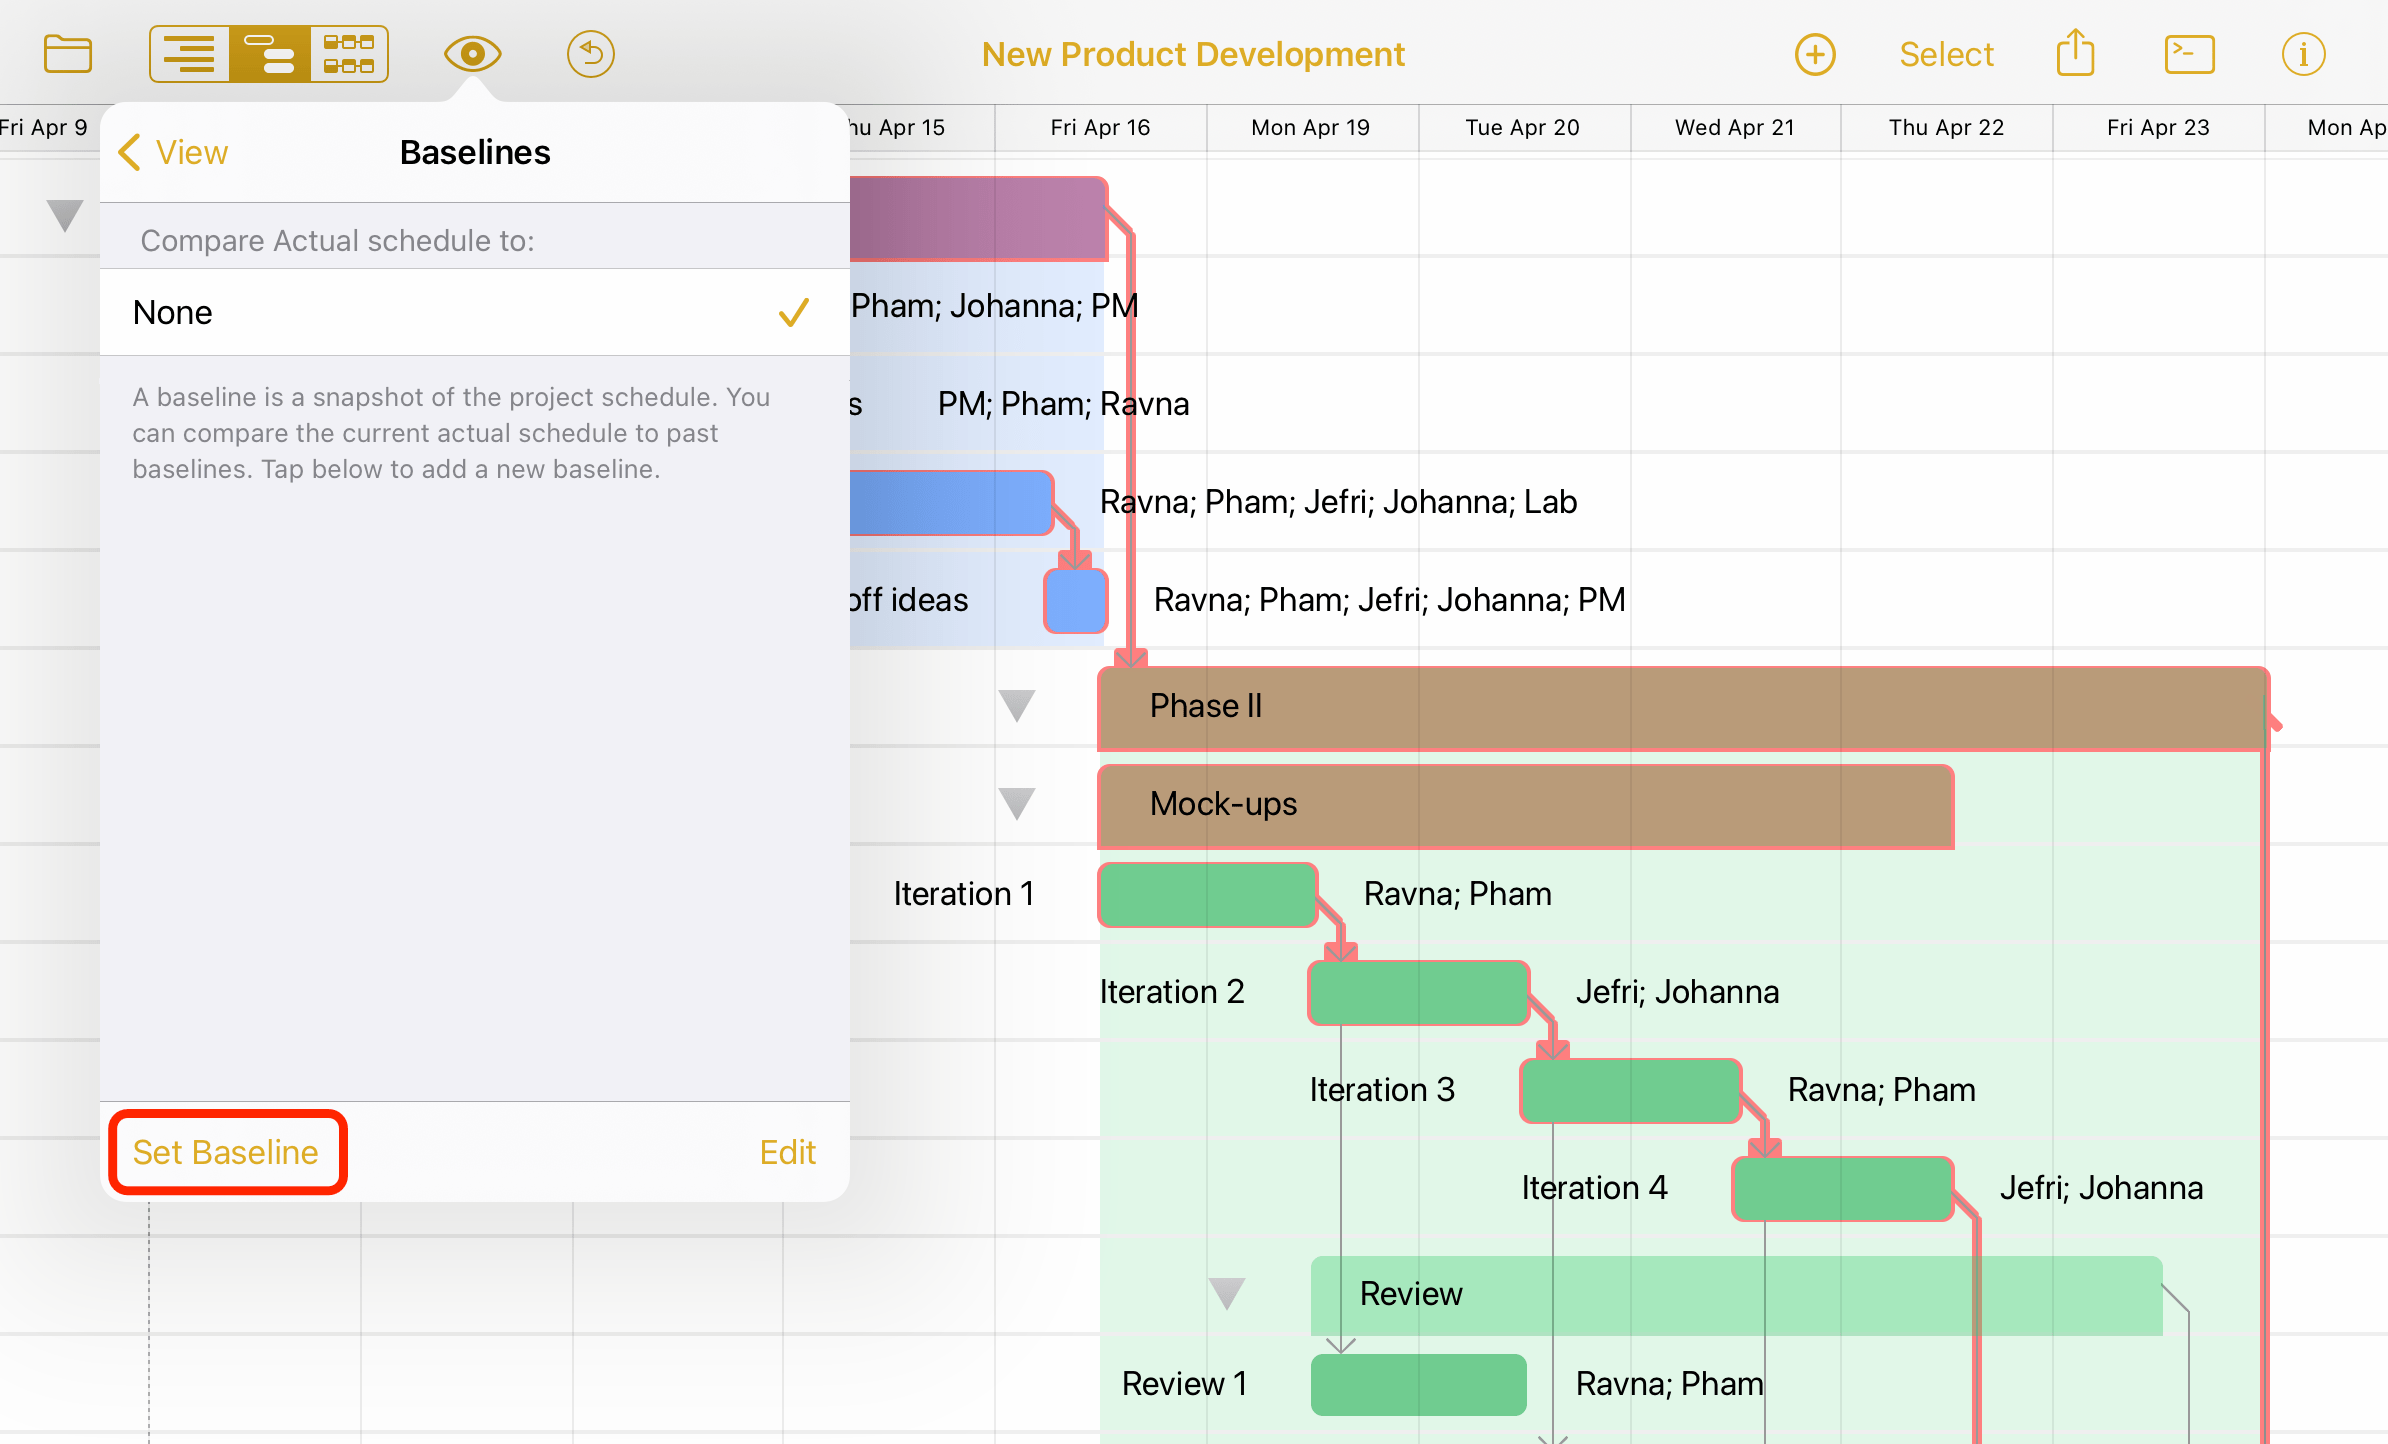
To set a baseline, tap Baselines in the View Menu and choose Set Baseline. You’ll be prompted with a field to name the baseline; the default name is today’s date.
After choosing Set Baseline, the baseline schedule is set and any further changes to the project are applied to the actual schedule instead.
Choose one of the baselines in the list to see it the actual schedules together, so you can compare them.
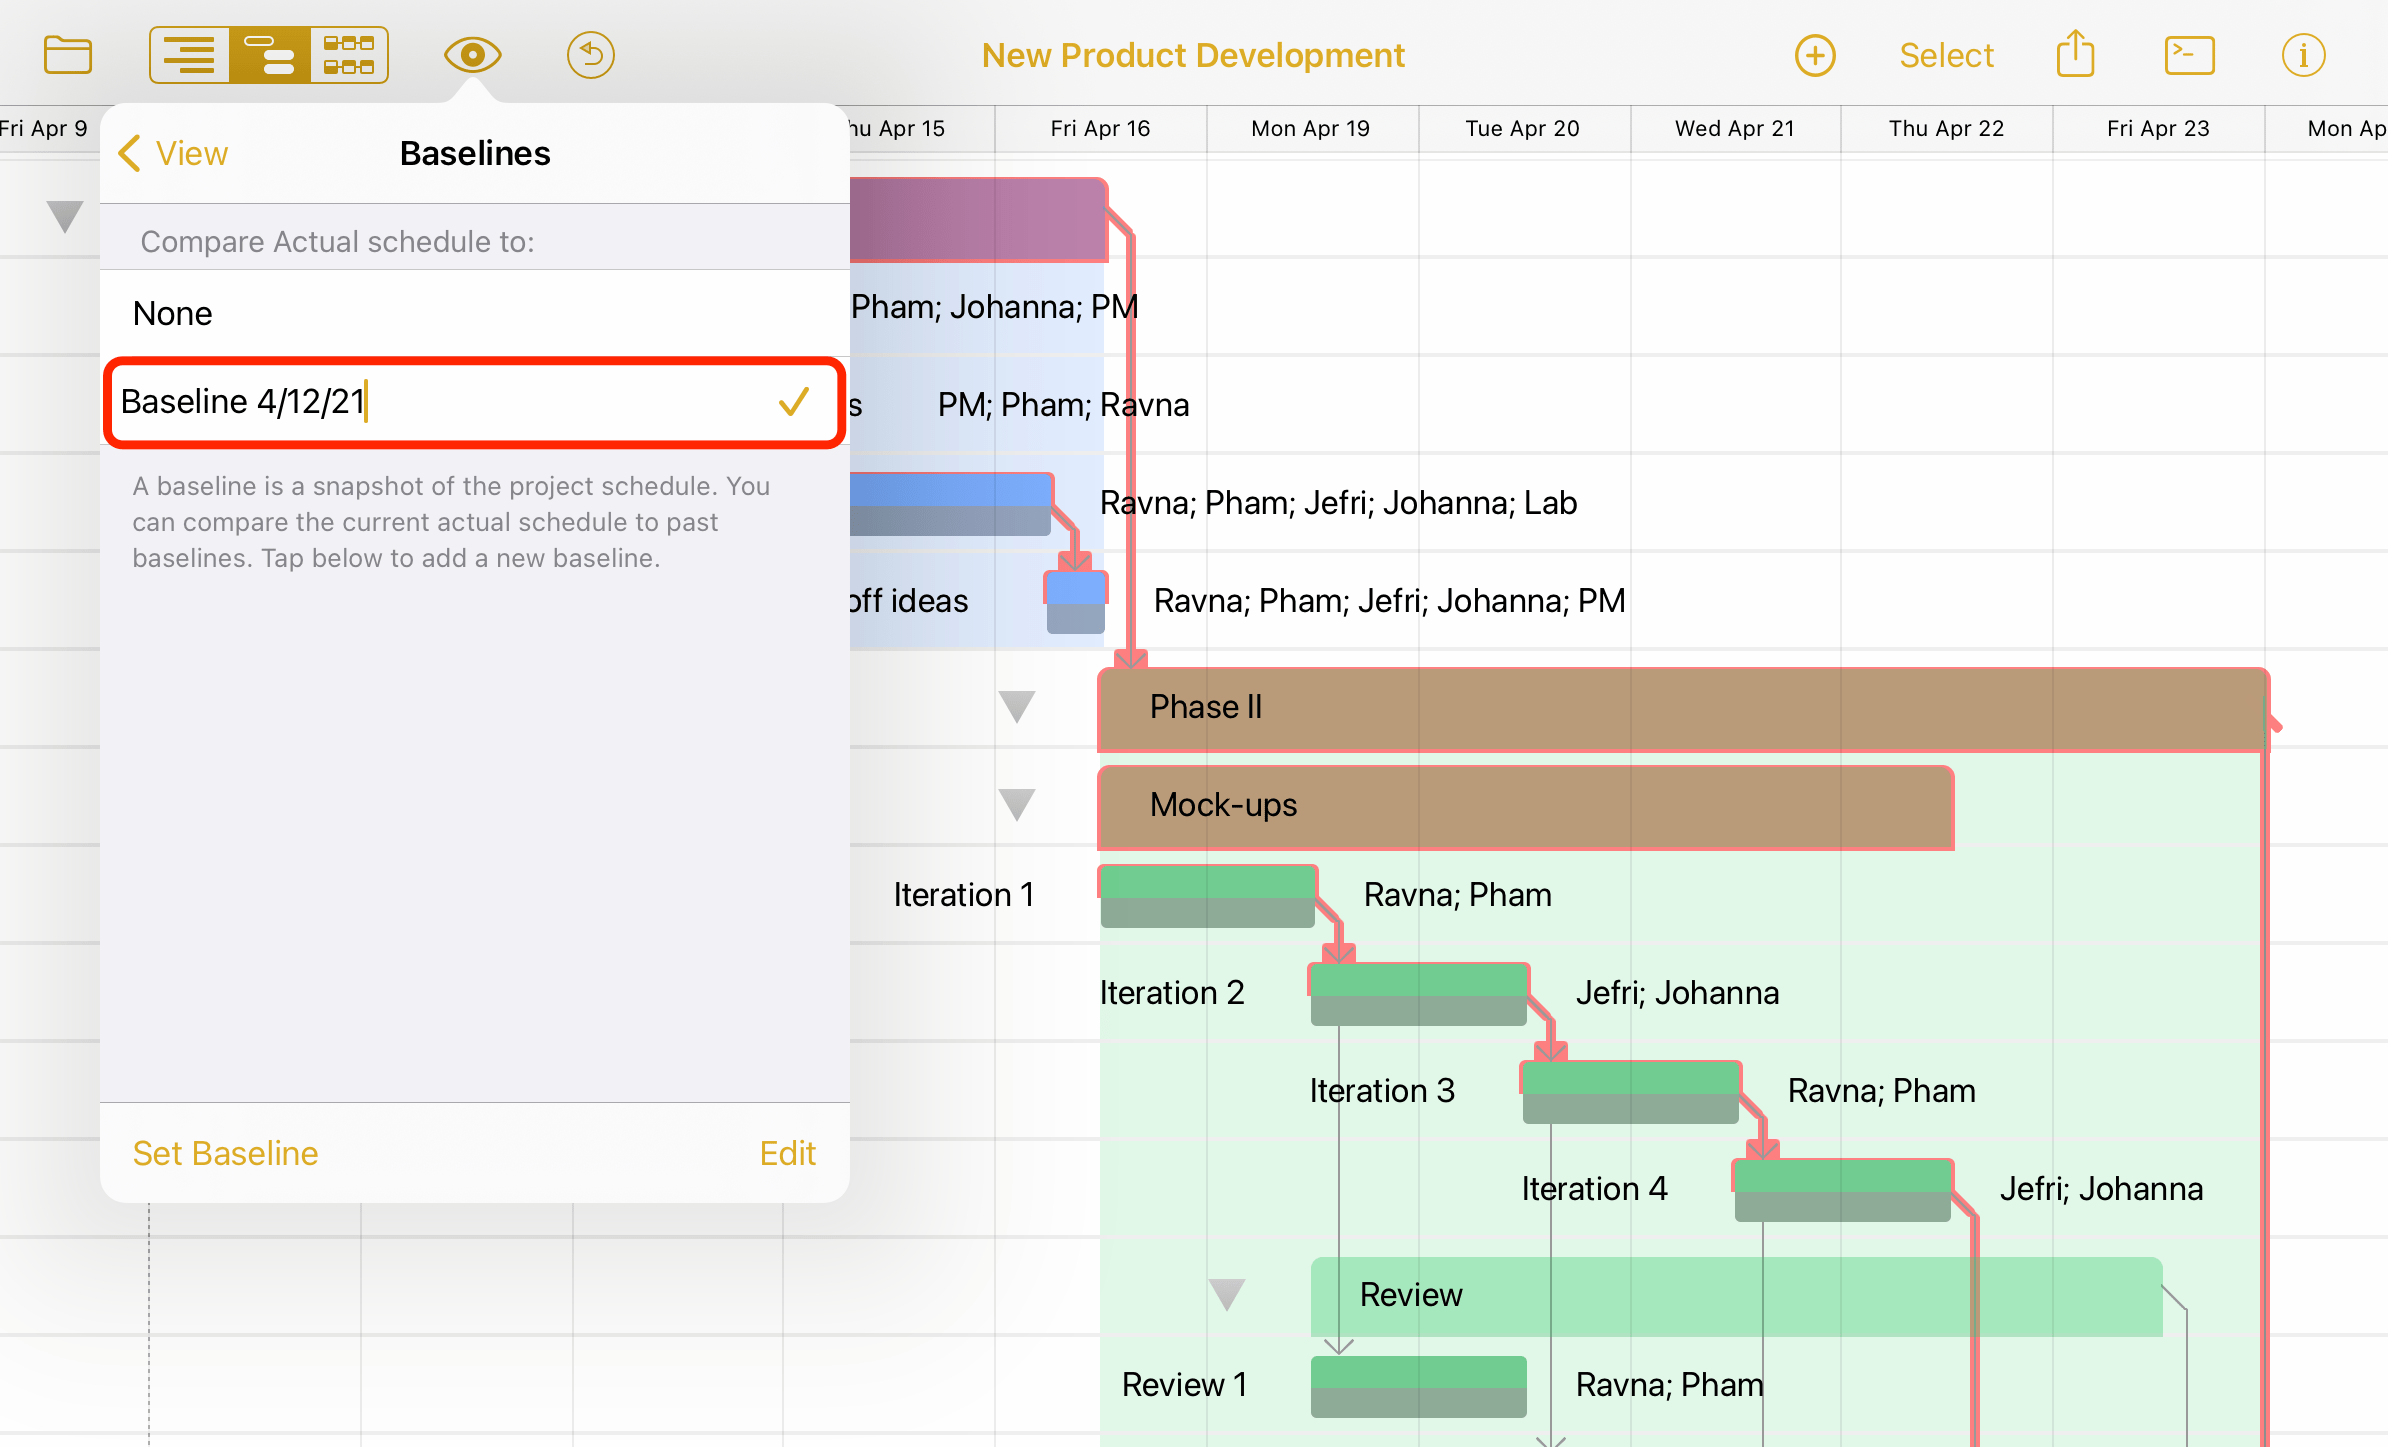
OmniPlan 4 supports as many baselines as you want—so at any given point in the project, you can take a snapshot that sets a new standard from which the actual project can proceed.
Tap Edit in the Baselines menu to remove any baselines you no longer need.
Using Critical Paths
Looking at a project or milestone’s critical path is a great way to get a feel for the tasks involved that are most important to on-time completion of the goal. Identifying tasks that are part of the critical path (and vice versa) helps prioritize work to ensure that deadlines are met.
To manage which critical paths are shown, choose Critical Paths in the View Menu.
In the Critical Paths menu, you can edit properties of existing paths (the default Overall Project, for example), or add paths to display by selecting the destination milestone and choosing New Path for [Milestone].
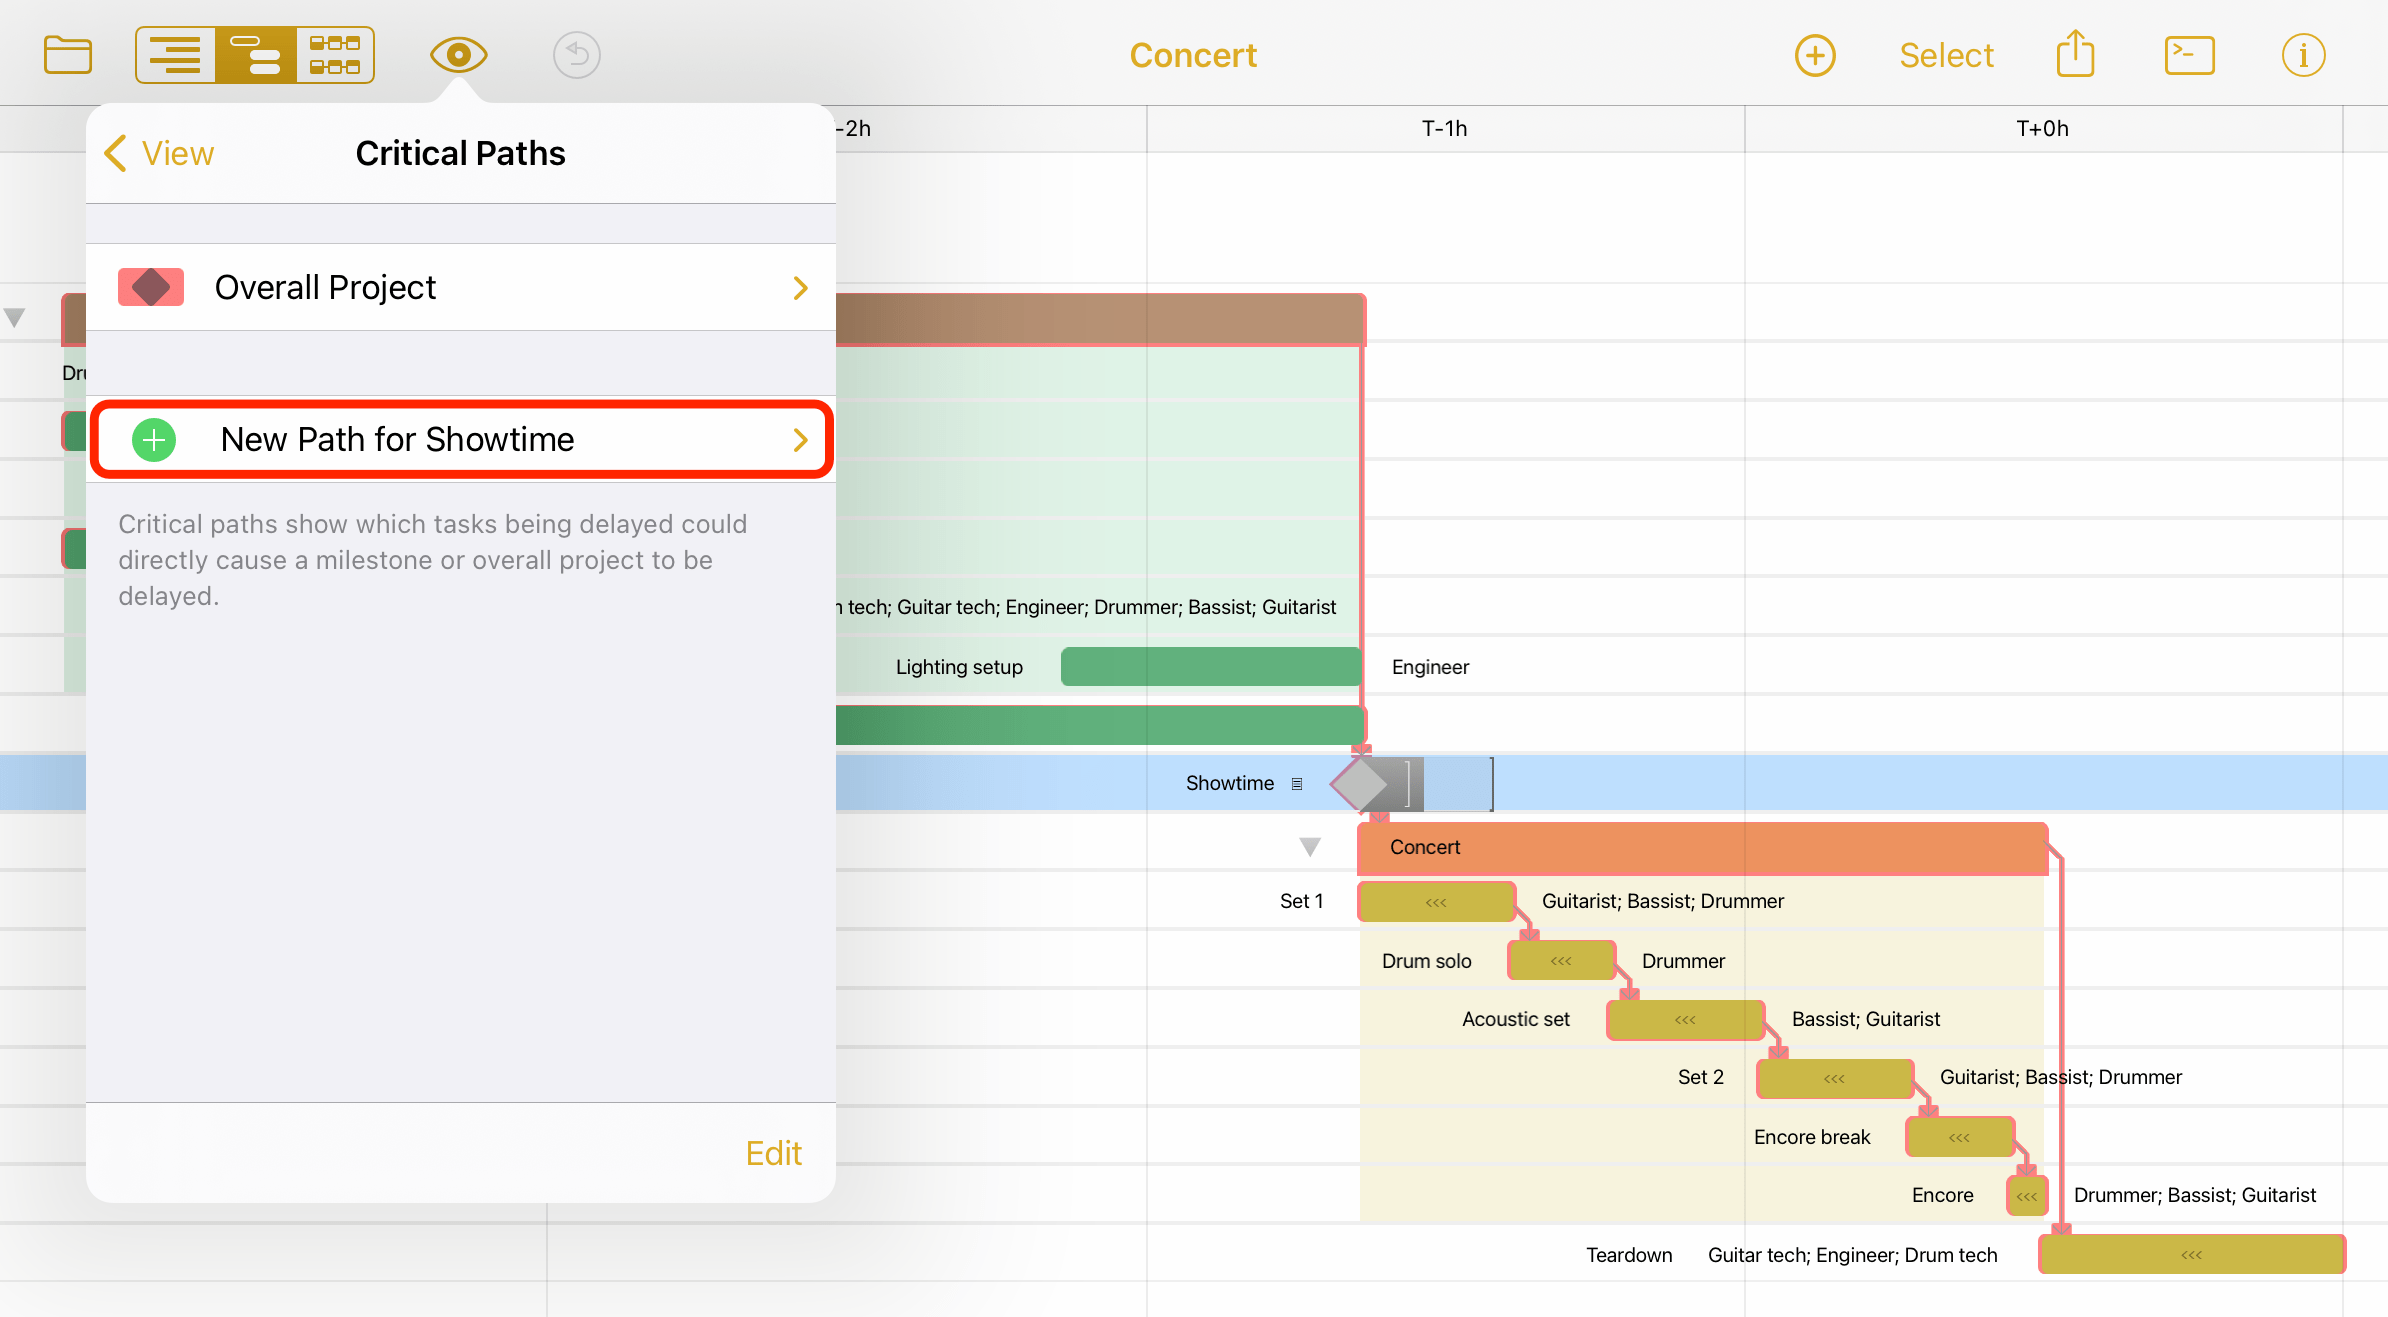
Once created (or when editing an existing critical path), the following options are available:
-
Critical Paths—Return to the Critical Paths menu.
-
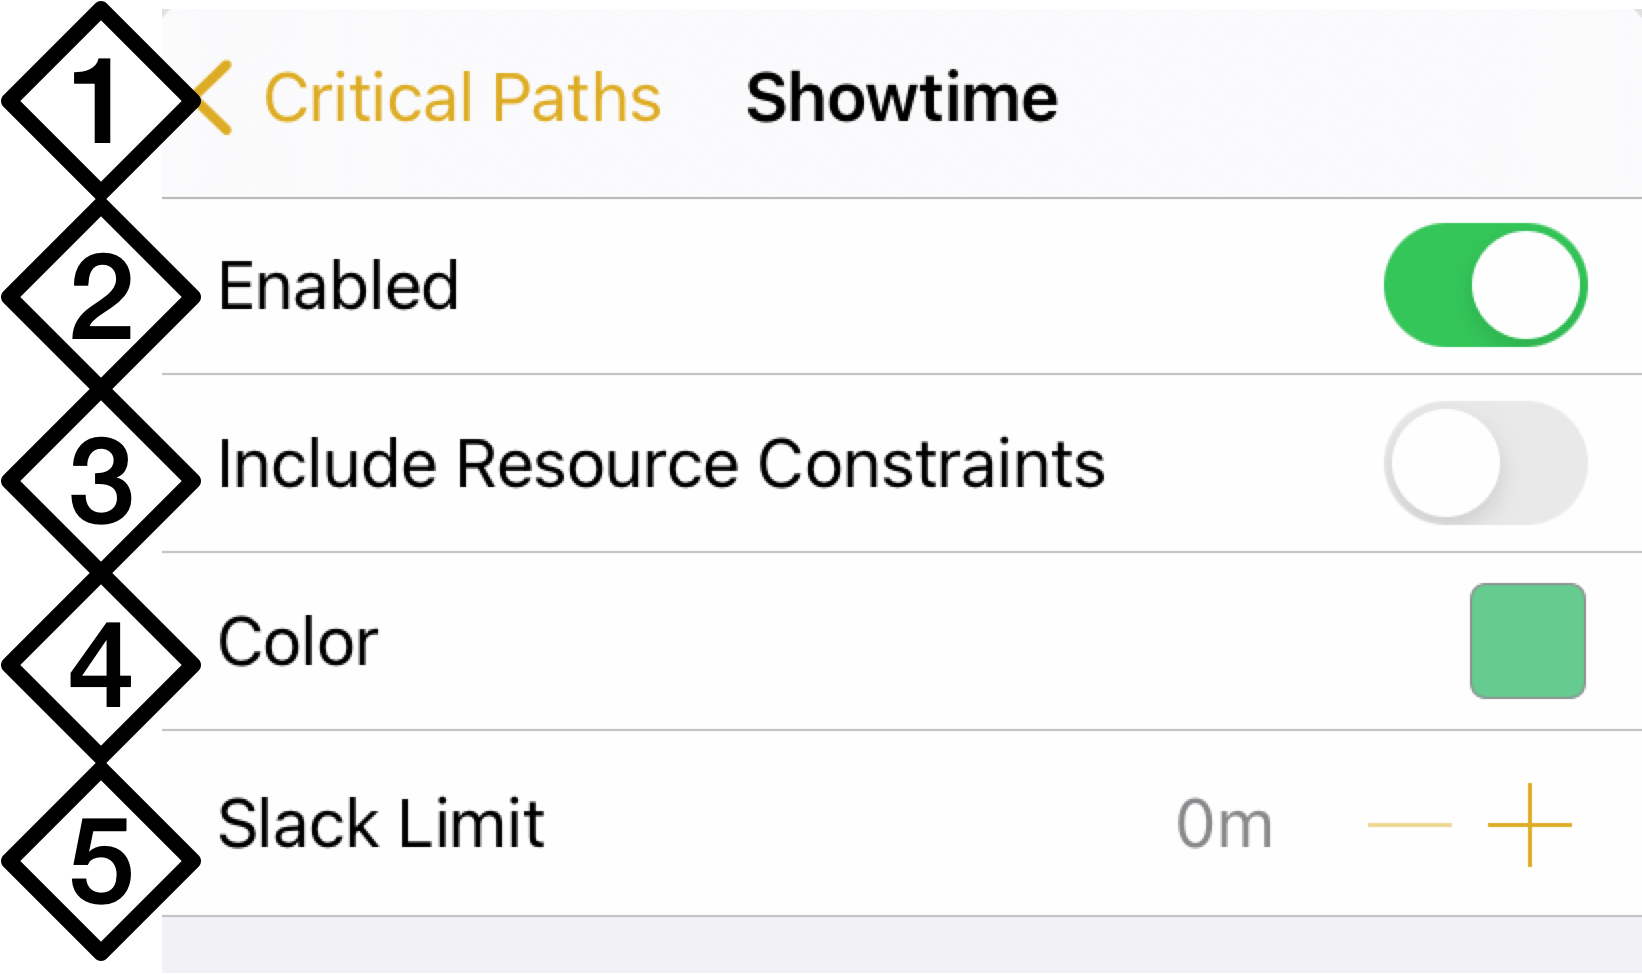
Enabled—Select to turn on display of the milestone’s critical path.
-
Include Resource Constraints—Select to have the milestone’s critical path take into account not only the dependencies between tasks and the slack limit, but also whether the necessary resources are available to complete tasks that are otherwise independent.
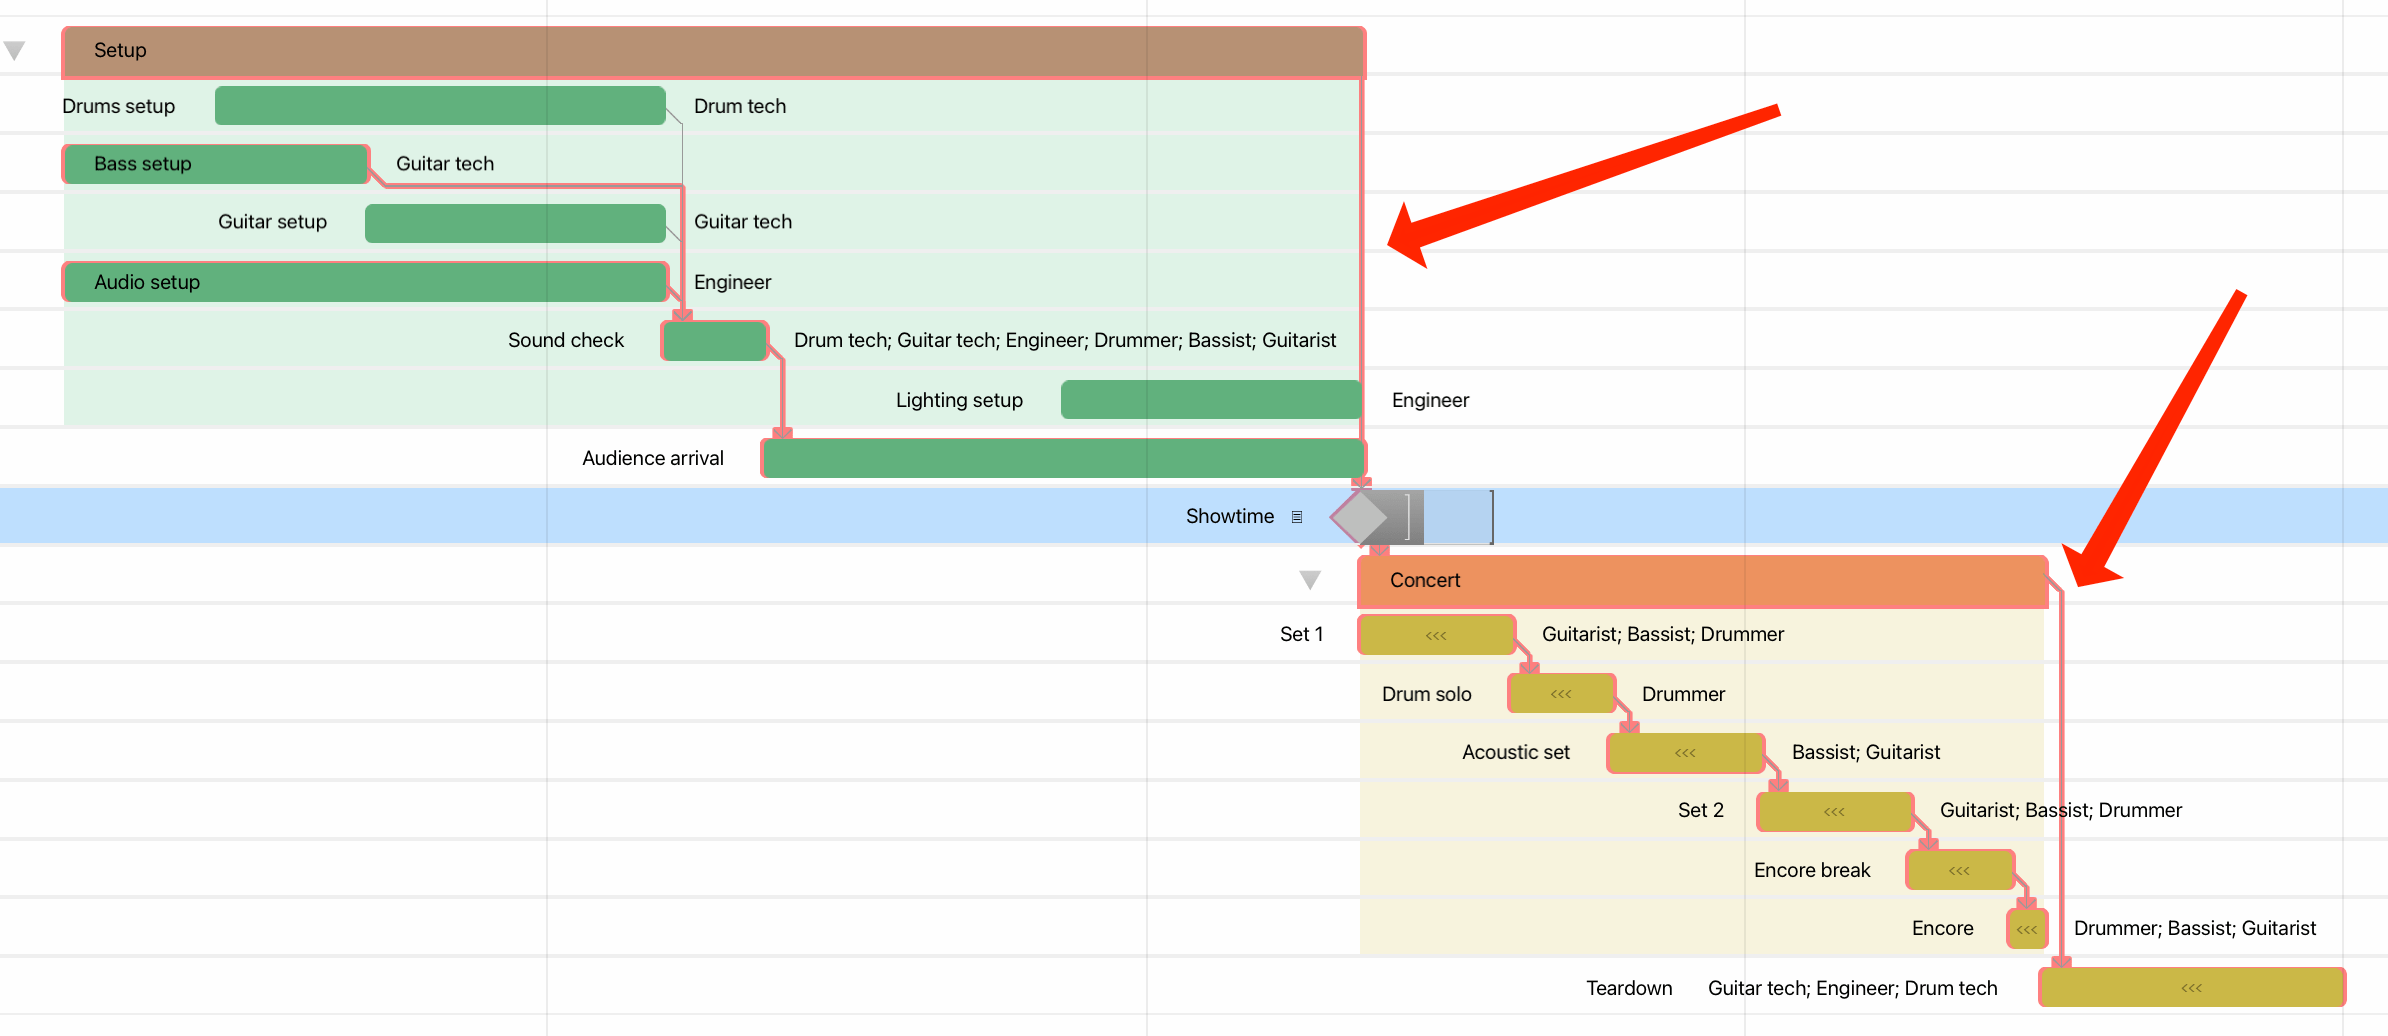
The clearest way to see how this works is to create a project with two independent tasks, and assign the same resource to both of them. Level the project, and you’ll see the second task move to follow the first. At this point, showing the critical path will only highlight the second task (1). Choosing to consider resource availability will highlight both (2), illustrating that while the second task doesn’t rely on the first to begin, it’s constrained by the resource required to complete it.
-
Color—Use this color picker to choose a color for the highlight used when the milestone’s critical path is displayed. Tasks in views that show the critical path will be highlighted with this color when they are part of the milestone’s critical path.
-
Slack Limit—This value determines how closely a task can come to pushing a milestone back before it is considered part of the critical path. Increasing the time value here broadens the scope of critical paths to potentially include more tasks. In other words—the higher the value, the less comfortable a time cushion between tasks will feel.