The Resources Inspector
The Resources inspector holds tools for configuring resources, including descriptive details, scheduling, cost, and information about their task assignments, as well as controls for leveling resource loads.

At the top of the Resource inspector are controls for leveling your project's resource loads, along with a list of the resources contributing to the project. Individual resources can have their details configured as described in the Resource Info section later in this chapter.
Leveling
The Resource inspector's Leveling section contains controls for determining how resources are allocated when the project is leveled.
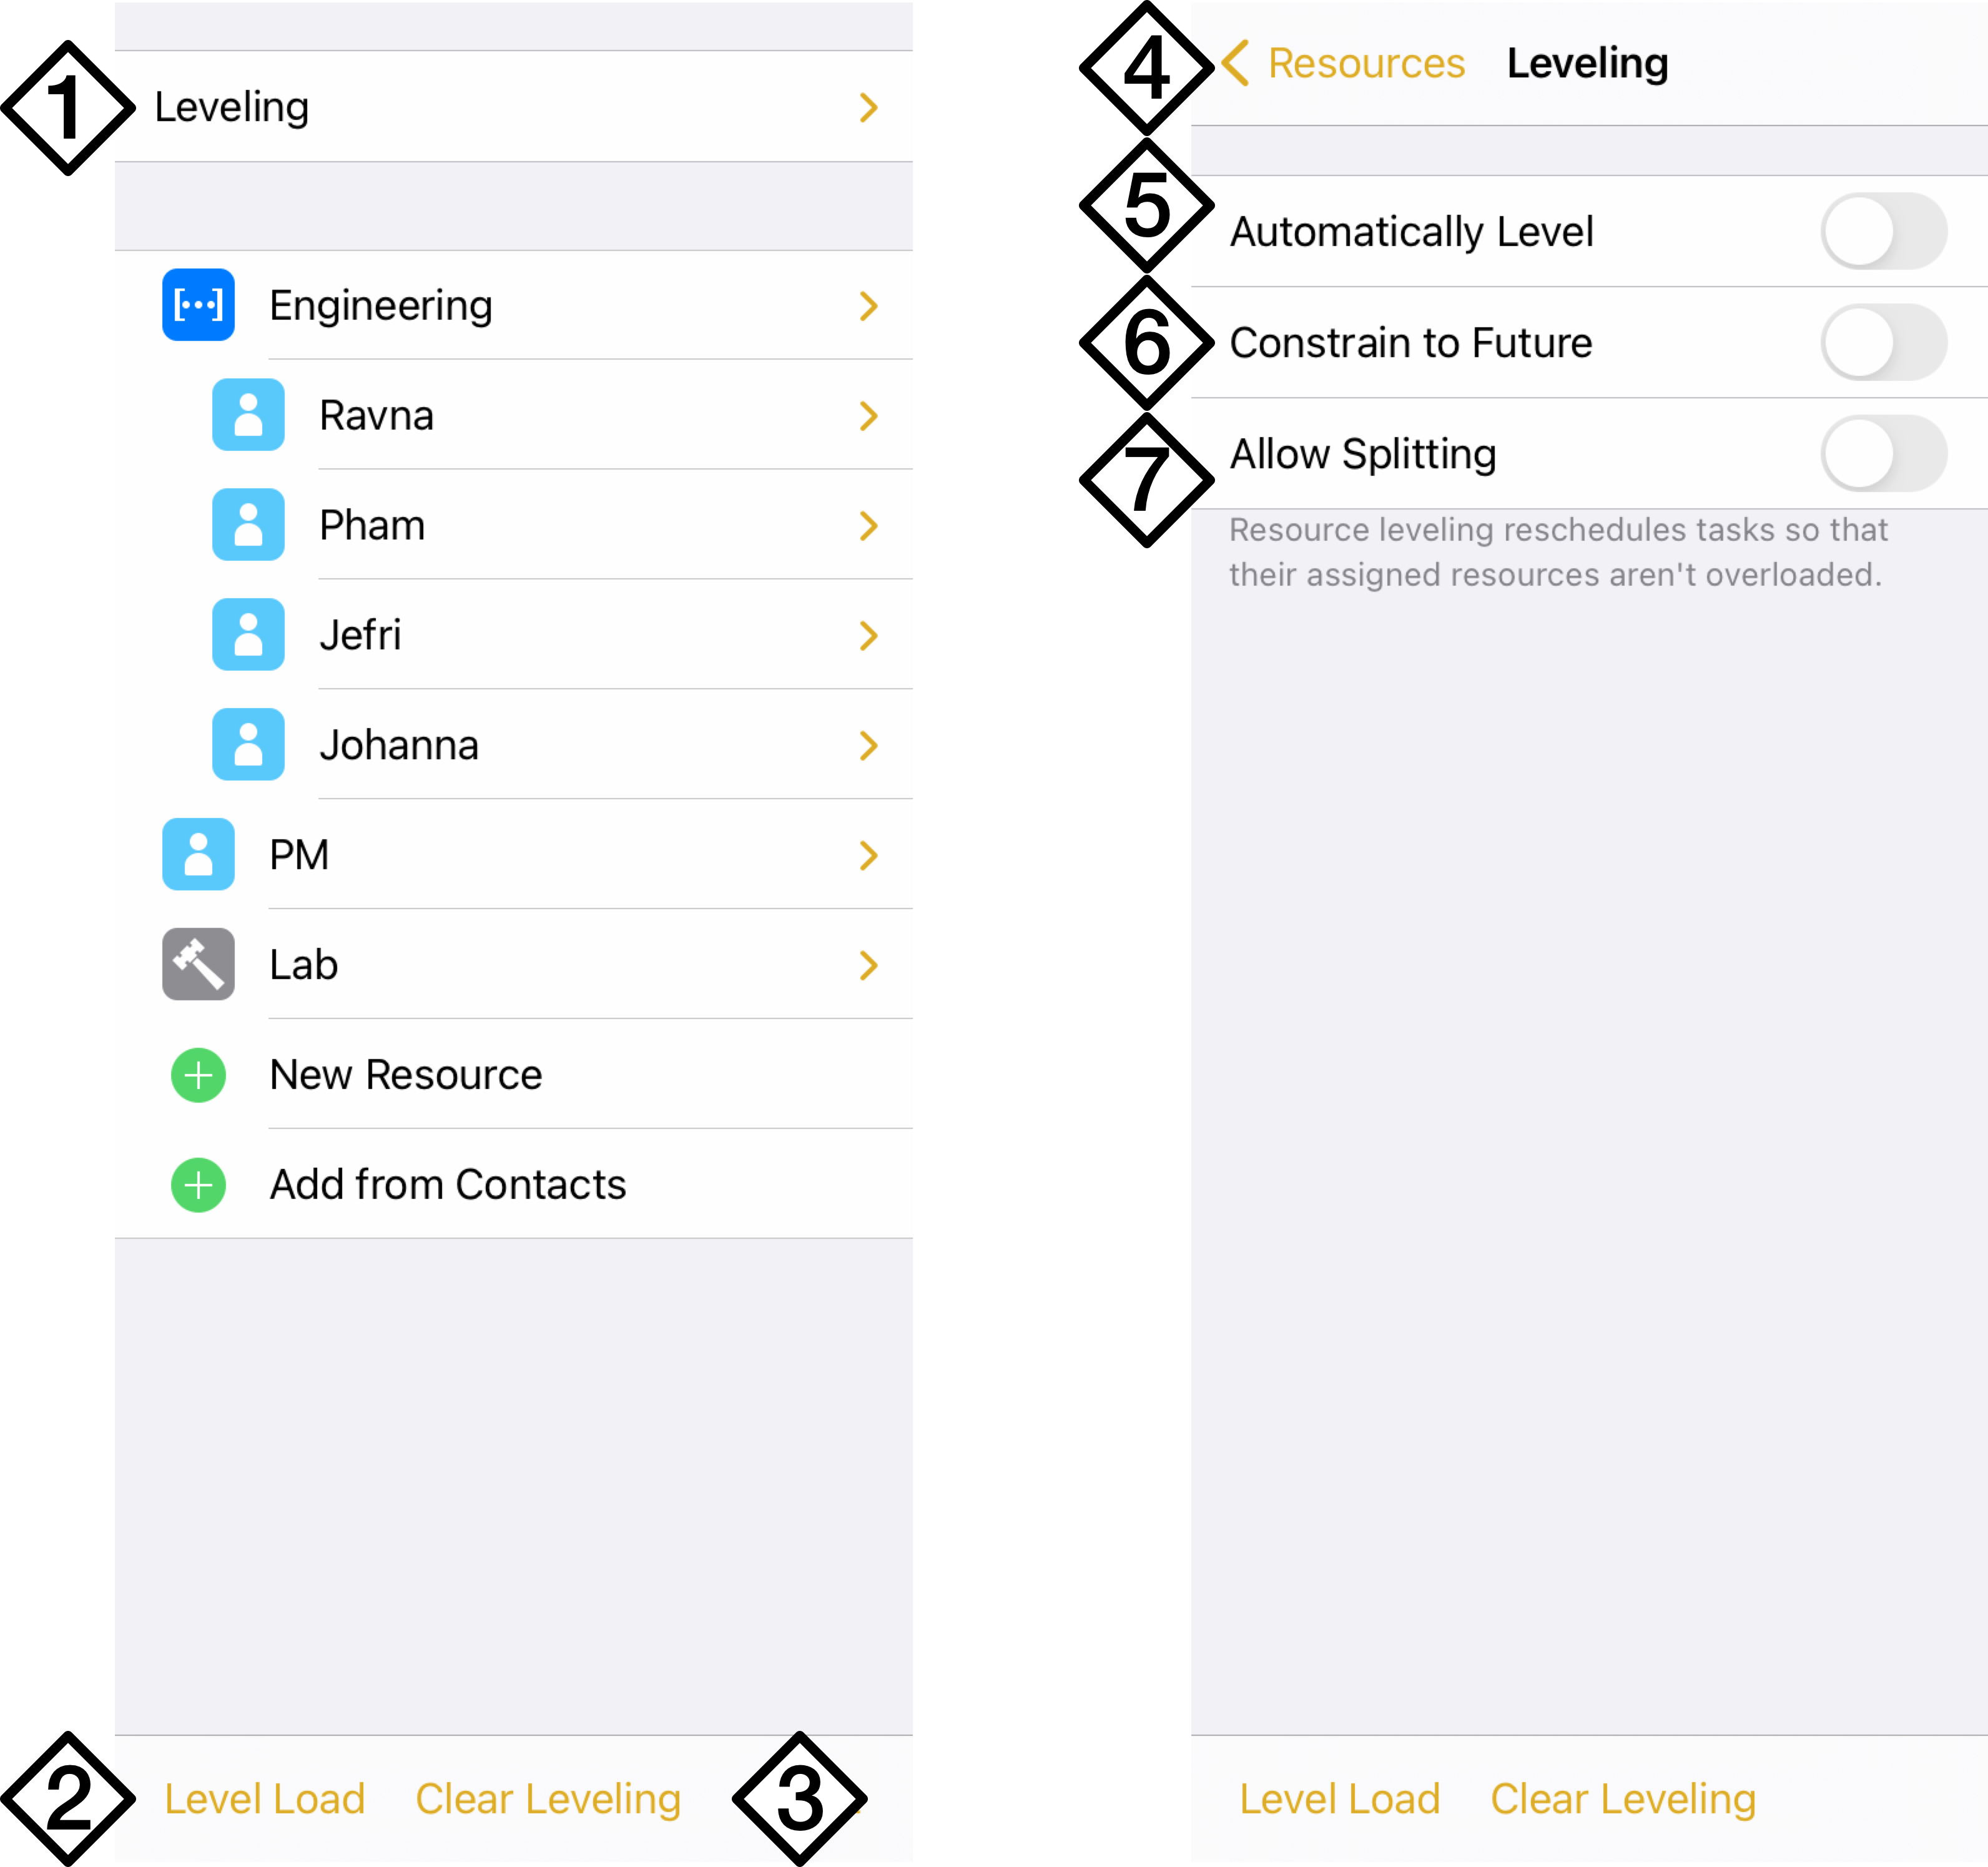
- Leveling—Tap to open the Leveling controls section.
- Level Load—Reschedule tasks and change resource loads to most efficiently complete your project based on all the other parameters you’ve set up for individual tasks, resources, and the project as a whole.
- Clear Leveling—Remove leveling optimization.
- Resources—Return to the top level of the Resources inspector.
- Automatically Level—Choose whether to automatically level resource loads across the project whenever a change is made.
- Constrain to Future—Choose whether leveling affects only the schedules of tasks in the future (from the current date), or past tasks as well.
- Allow Splitting—Choose whether tasks can be split as part of the leveling process. If this is turned on, a Min. Duration row appears for setting the minimum time span that can be created as part of either side of the split.
Resource List
The Resource List contains all resources currently assigned to the project, along with tools for adding and removing them.
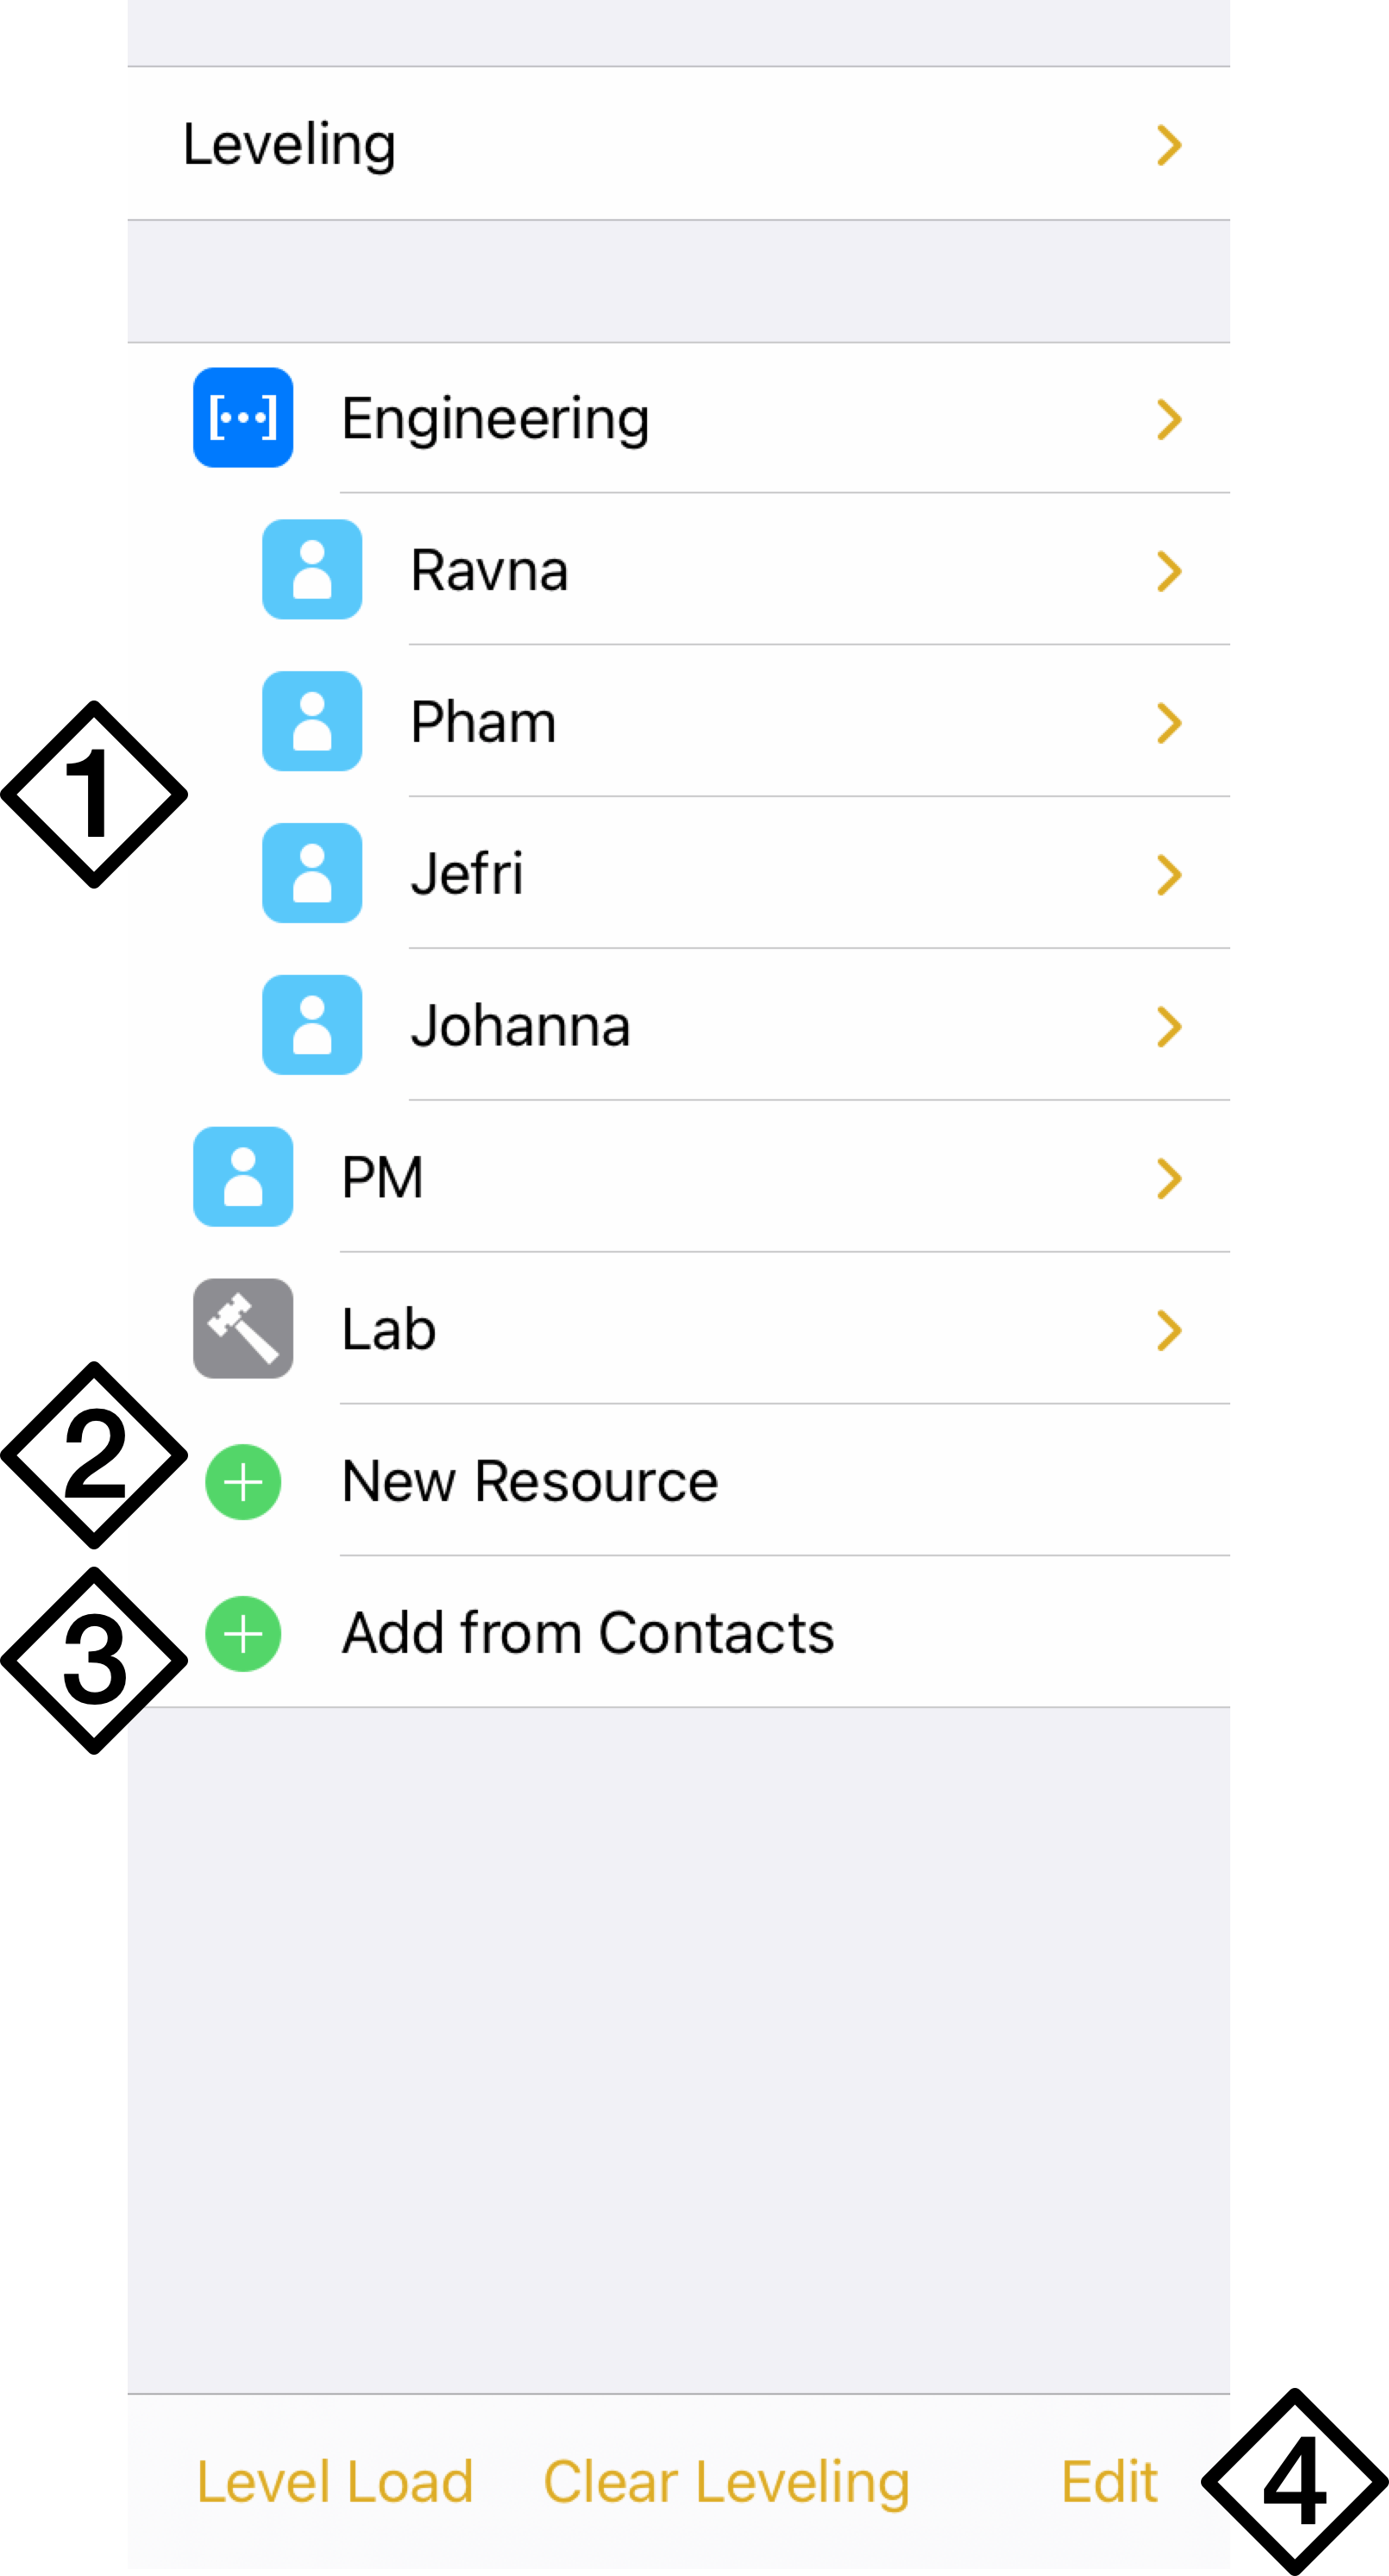
- Resource List—A list of all resources assigned to the project, badged with icons according to their resource type. If a resource is part of a group, it is displayed inside that group.
- New Resource—Add a new resource to the project and customize its details.
- Add from Contacts—Grant OmniPlan access to your Contacts list to add resources to your project directly from there.
- Edit—Switch to Edit mode, where resources can be removed with the deletion switch
 next to their names, and reorganized—including movement between resource groups—with their reordering handles.
Resource Info
Tap a resource in the Resource List to view and customize its detailed information, described in the two sections below.
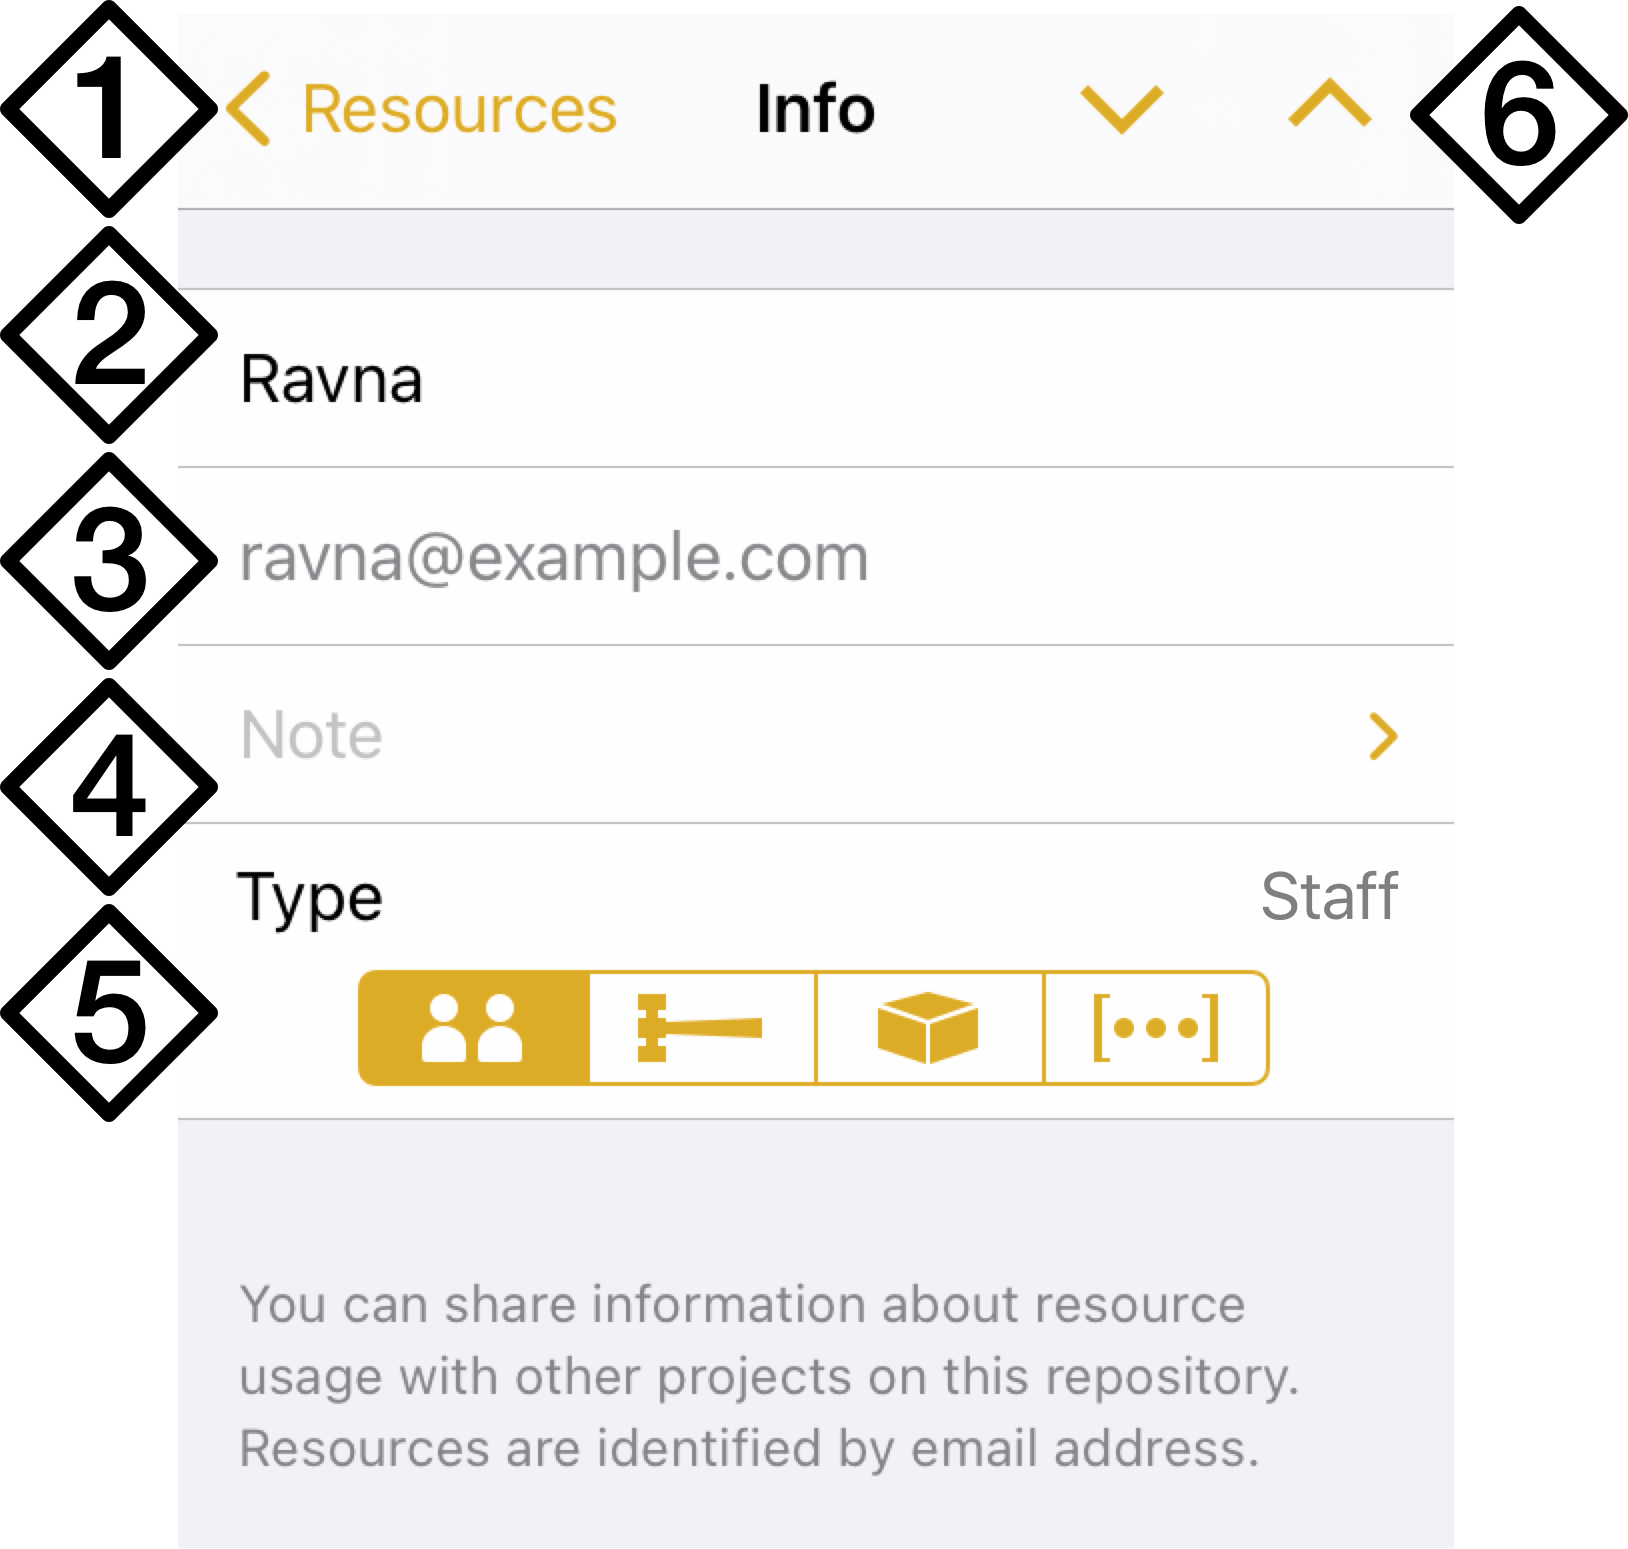
- Resources—Return to the top level of the Resources inspector.
- Name—Edit the resource name.
- Email—For staff resources, add their email address here. This also serves as a staff member's unique identifier when balancing resource loads across projects.
- Note—Add notes related to the resource.
- Type—Choose the resource's type.
- Next, Previous—Use the up and down arrows to navigate between resources in the list.

- Start Date, End Date—If a resource is only available to the project for a certain time, enter the dates when its availability begins and ends here.
- Normal Hours—By default a resource's normal hours are the same as those of the project. Use this calendar to note any differences from the project schedule that a resource may have.
- Custom Hours—By default a resource's custom hours are the same as those of the project. Use this calendar to note any differences from the project schedule that a resource may have.
- Units—The amount of a tool or staff member’s time dedicated to the project (relative to their full time schedule) is expressed by the resource’s Units value. For materials, Units describes the quantity of material used (based on the number of tasks the resource is assigned to) instead.
- Efficiency—The amount of effort-per-time a resource contributes to tasks to which it is assigned.
- Bar Color—The color of the resource's bar when showing resource loads in Gantt View.
- Cost/Use, Total Uses—The monetary cost incurred each time the resource is assigned to a task, and the total number of tasks to which it is assigned.
- Cost/Hour, Total Hours, Total Cost—The monetary cost of each hour of effort assigned ot the resource, the sum of the effort of all tasks the resource is assigned to, and the combined cost of all uses and all hours for this resource.
- Show Resource Load—Toggle display of the resource's assignment load in the Resource Loads section at the top of Gantt View.
Resource Types
The following four types of resources can be added to your OmniPlan project.
Staff 
Staff represents people who work on the project. Staff units are measured as percentages. A person who is fully available to the project has a units value of 100%; someone who is spending part of their working hours on other projects would have lower available units. Note that this is not the same as having fewer working hours or being less efficient; these values can be edited by tapping the individual resource.
If you are collaborating with multiple users across projects, a staff member’s email address serves as their unique identifier for purposes of leveling resources loads.
Equipment 
Equipment represents some kind of reusable asset, such as special computer hardware. It can be useful to consider things like meeting rooms to be “equipment,” if you need to balance their use between different tasks. For equipment resources, Units means how many of the resource are available. The number of available units can affect resource leveling.
Material 
Material represents consumable supplies. For material resources, Units means how many of the resource are being used throughout the project. This value updates as the resource is assigned to more tasks.
Group 
A Group is a way to organize several resources together. As such, groups lack some characteristics of individual resources. Others, such as Efficiency and Cost, represent the average of the individual resources that form the group. If these values are changed for the group they are changed for each resource within the group as well, overwriting any existing values.
When a resource group is created, it is initially empty; to add resources to the group, create them and move them inside the group by tapping Edit in the Resource List.